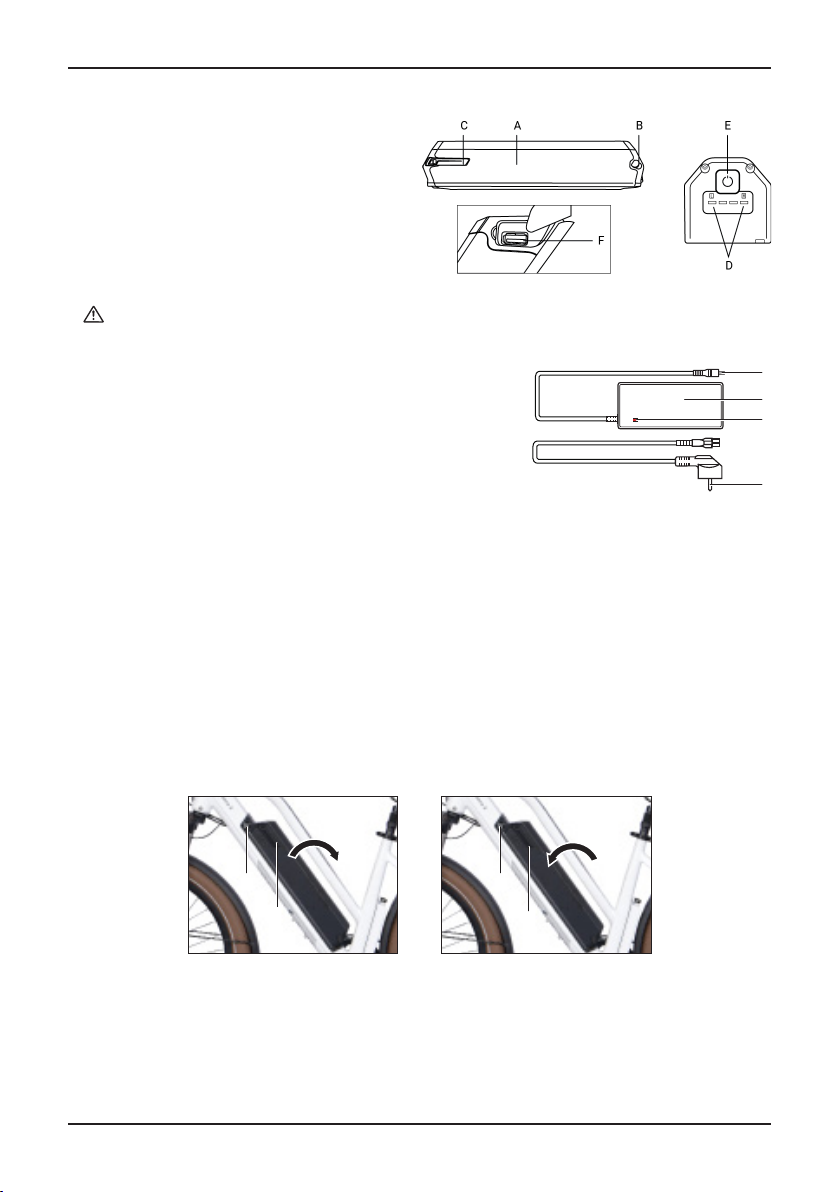
1.General Introduction
1.1 Welcome
Thank you for purchasing a Magnum electric bike and welcome to the Magnum Bikes family of e-bike
enthusiasts. We encourage you to join our Facebook group “Magnum Bikes Community” which you can
place for Magnum riders to ask questions, have discussions, share recommendations and experiences and
connect with other Magnum Bike enthusiasts.
1.2 Use of Manual
We encourage you to read this manual thoroughly before you take your new E-bike for a ride. It is important
not to overlook the safety instructions and explanations of both traditional and non-traditional bike parts,
as this will offer you a general understanding of your new E-bike. This manual is designed to help you get
the most out of your E-bike, and so we have attempted to answer as many of your potential questions as
possible. Please take a moment to read through the various sections before you get in the saddle.
1.3 Service and Technical Support
This manual is intended as a general overview of your new E-bike, and is therefore not an extensive refer-
ence. For technical support, including information about service, maintenance and repairs, please consult
your local Magnum dealer or our customer support team. You can visit our website (www.magnumbikes.
*Disclaimer
Because it is impossible to anticipate every situation or condition which can occur while riding, this manual
makes no representations about the safe use of bicycles under all conditions. There are risks associated
with the use of any bicycle which cannot be predicted or avoided, and which are the sole responsibility
of the rider. You should keep this manual along with any other documents that were included with your
bicycle. All content in this manual is subject to change without notice. Magnum Bikes makes every effort to
ensure accuracy of its documentation and assumes no responsibility of liability if any errors or inaccuracies
appear within. Assembly and initial adjustments of your Magnum e-bike requires special tools and skills. It
is recommended that this be done by a trained bicycle mechanic if possible.
General
01