Getting Started with FeverWarn
FeverWarn Models FW1100A and FW1100B
Table of Contents
Safety Precautions................................................................................................................................2
Unpacking the Boxes............................................................................................................................2
Overview ................................................................................................................................................3
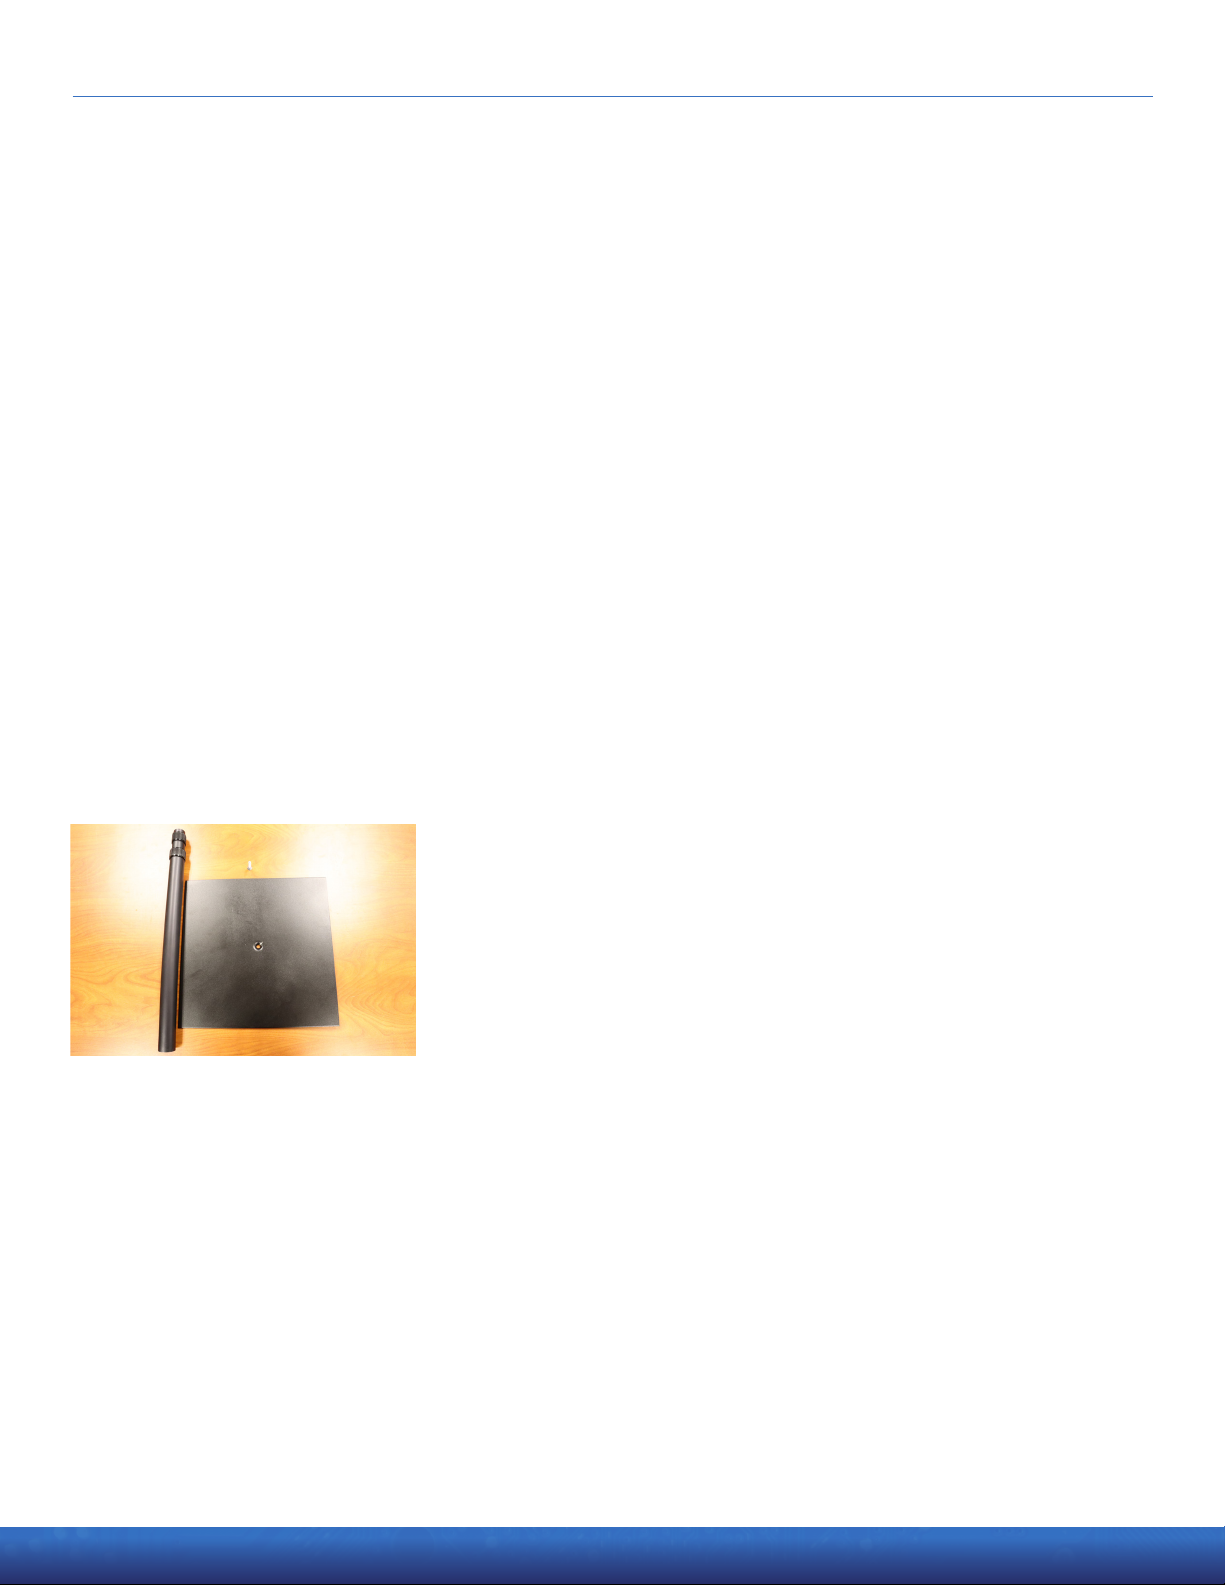
Components Inside the FeverWarn Stand Box ...............................................................................3
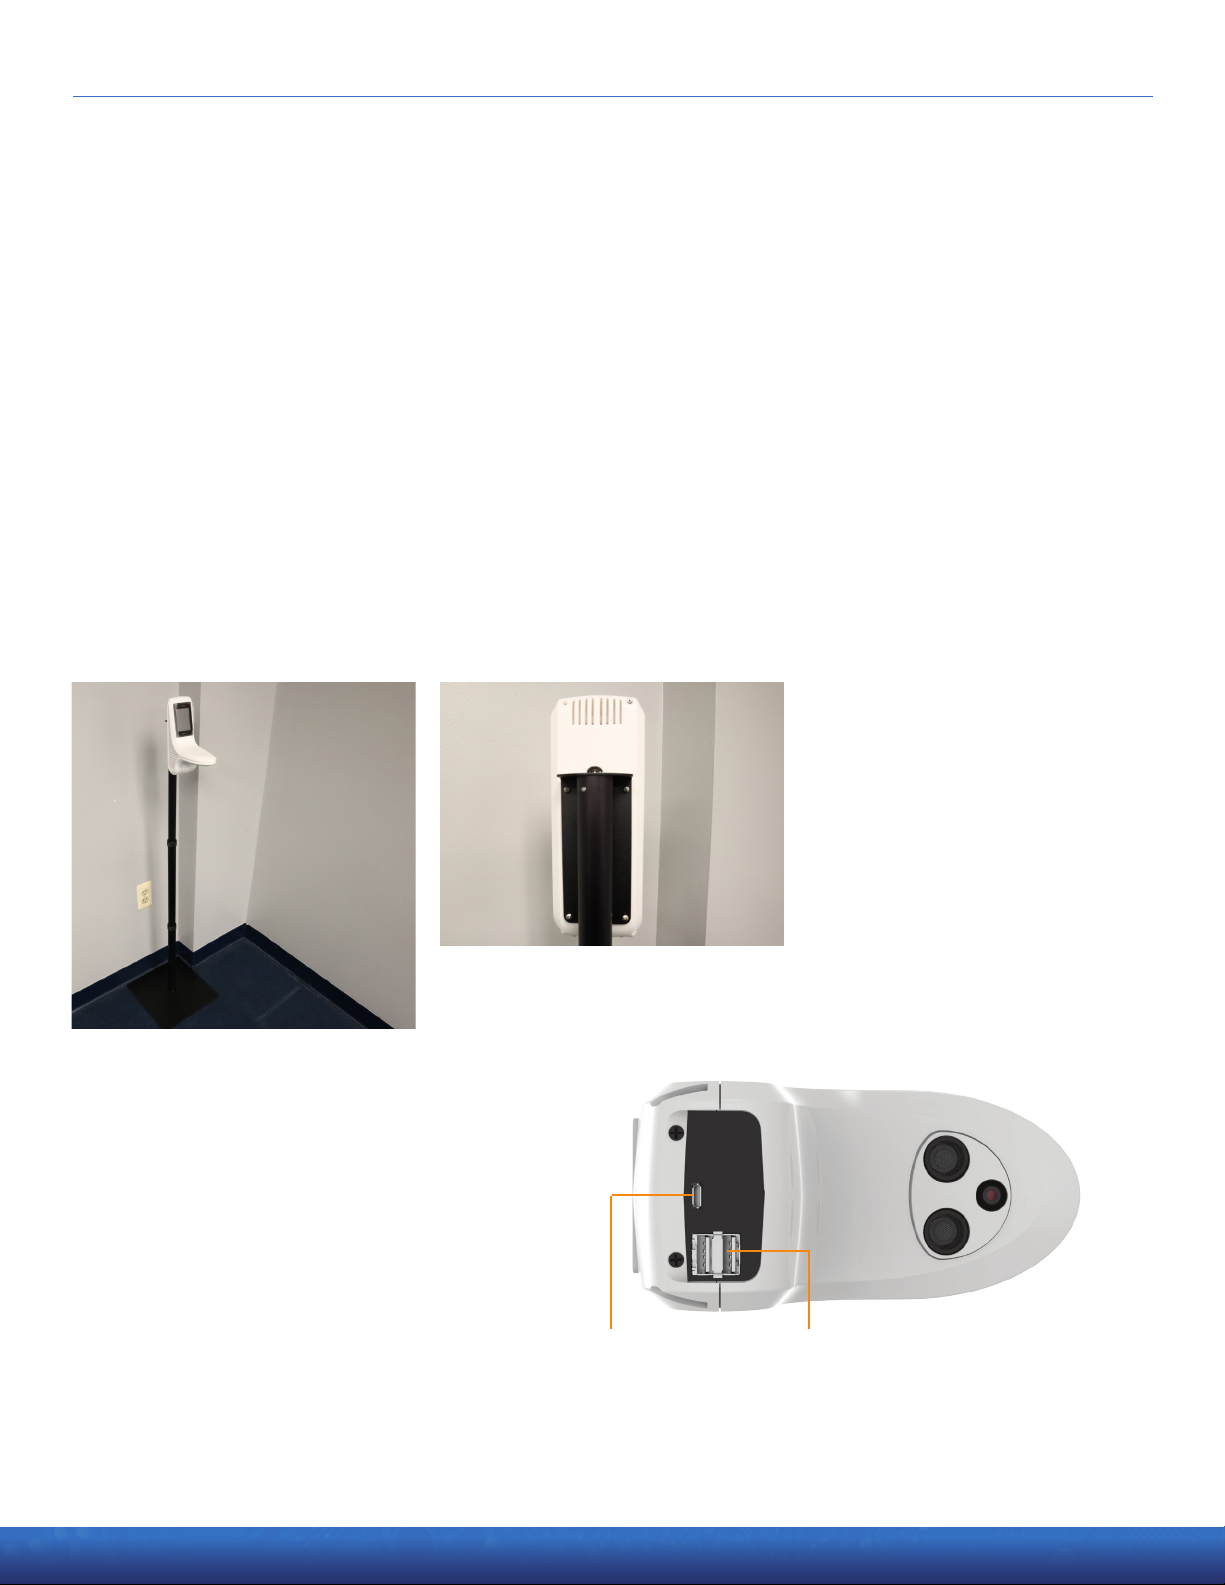
Connecting the FeverWarn Unit to the Optional Stand.................................................................4
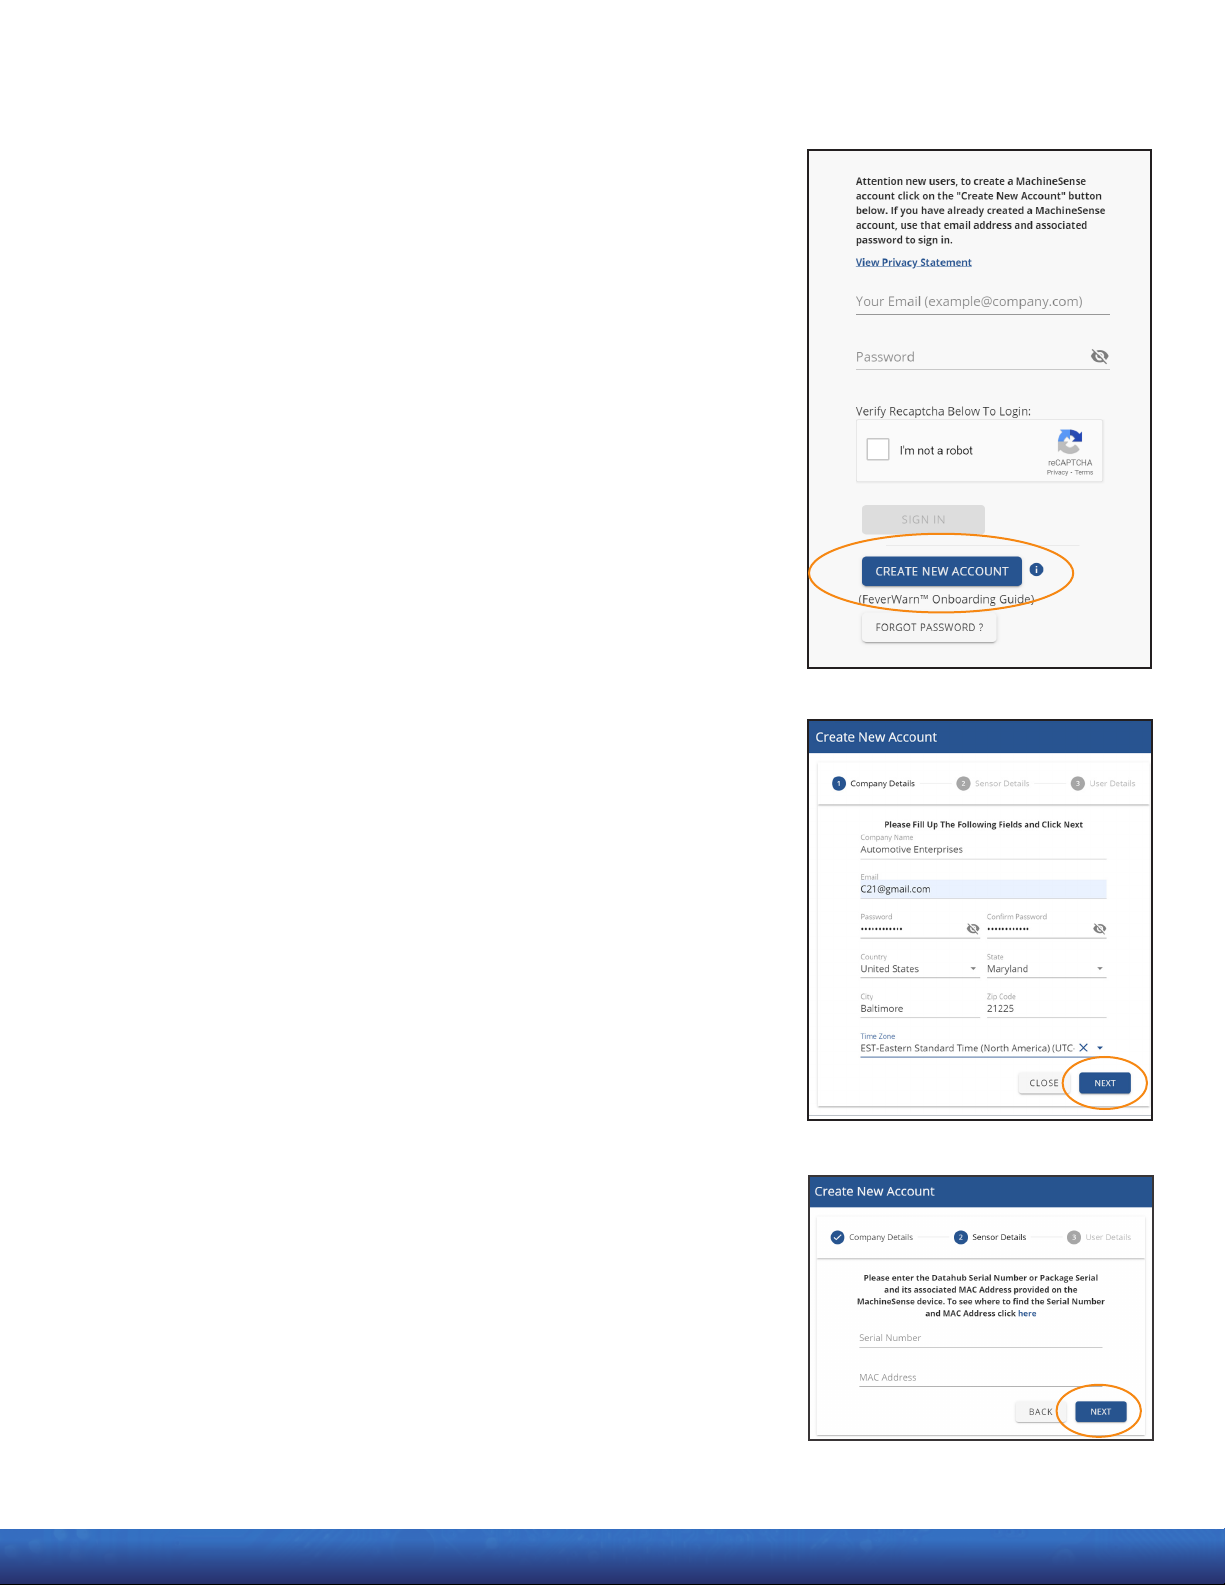
Creating a MachineSense Crystalball Account for Your FeverWarn Scanner
(Model FW1100B only) .........................................................................................................................6
Initial Testing..........................................................................................................................................8
Installing the FeverWarn App .............................................................................................................9
Using the FeverWarn App:
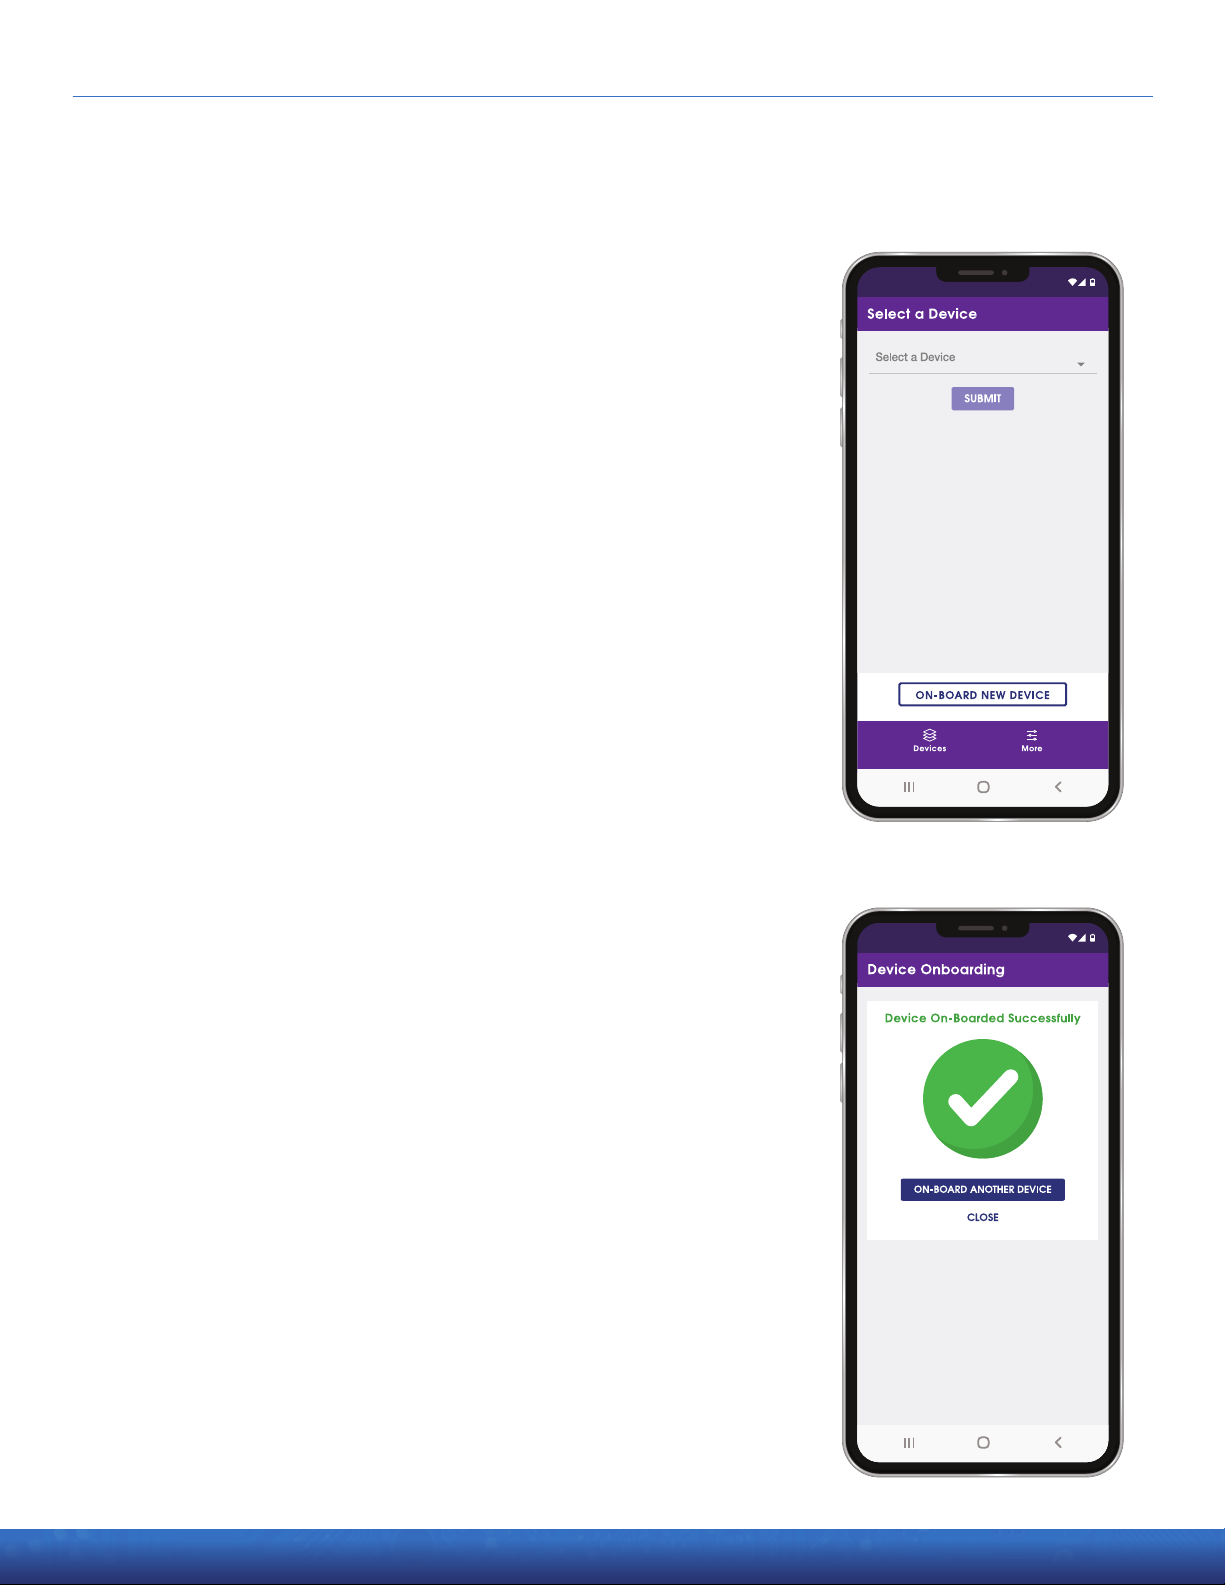
Connecting to a Device ...........................................................................................................11
Scans and Reports...................................................................................................................12
Downloading Reports .............................................................................................................13
Device Settings.........................................................................................................................14
Calibration.................................................................................................................................15
Edit Temperature Threshold..................................................................................................18
Edit Alarm Based on Temperature Type..............................................................................19
Edit Display Settings................................................................................................................19
Edit Messages to Display ........................................................................................................20
Adjust Scanner Volume...........................................................................................................20
Network Connectivity (1100B Model only)..........................................................................21
Device Support........................................................................................................................ 22
Installation .......................................................................................................................................... 23
Recommendations for Accurate Scanning.....................................................................................24
Customizing Your Crystalball Account........................................................................................... 25
Final Words ..........................................................................................................................................27
Contact Customer Support...............................................................................................................27