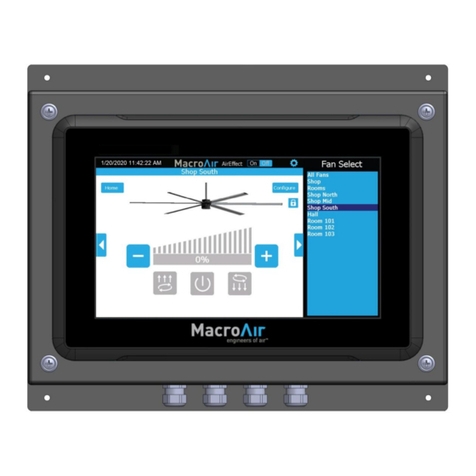
MacroAir Technologies Controller 4 User manual

Operation Manual
Controller 4


1 Table of Contents
© 2020 MacroAir Technologies Toll Free: 866 668 3247 Fax: 909 890 2313 www.macroairfans.com
Controller 4 Operation Manual 90-30027-00 Rev A-01 Date: 032720
Introduction
Network Installation
Configuration and Operation
Information
Caution & Safety, Electrical Guidelines..........................2
Hazard of Electrical Shock, Installation and Service,
Fan Network Ordering....................................................4
Controller Dimensions....................................................5
Network Wiring Requirements, Daisy Chain..................6
Network Wiring Configurations .....................................7
Network Excess Cable.....................................................8
AVD 370 RJ45 Wiring Instructions..................................9
T-Splice Connection Method for ADV 370 Fans...........10
Fan Wiring Instructions ................................................12
Mixed Network Wiring Instructions.............................13
Temp/Humidity Sensor Installation (Optional) ...........14
Controller 4 Screen Setup ............................................15
Screen Flow ..................................................................16
Home Screen ................................................................17
Temperature/Humidity Setpoint Screen......................18
Fan Select Screen..........................................................19
Fan Address Screen ......................................................20
Motor Calibration Screen.............................................21
Fan Diameter Screen ....................................................22
Mkey Screen (Certain Fan Models) ..............................23
Warranty .................................................................24
Technical Support.....................................................25

2 Introduction
© 2020 MacroAir Technologies Toll Free: 866 668 3247 Fax: 909 890 2313 www.macroairfans.com
Controller 4 Operation Manual 90-30027-00 Rev A-01 Date: 032720
Caution and Safety
This appliance can be used by children aged from eight (8) years and above and persons with
reduced physical, sensory, or mental capabilities or lack of experience and knowledge if they
have been given supervision or instruction concerning use of the appliance in a safe way and
understand the hazards involved.
Children shall not play with the appliance. Cleaning and user maintenance shall not be made by
children without supervision.
⚠ATTENTION: Safety. READ AND SAVE THE ENTIRE MANUAL BEFORE OPERATING THE FAN.
Ensure that all safety procedures and instructions are followed during the installation, operation
and servicing of the fan. Failure to apply these safety practices could result in death or serious
injury. If you do not understand the instructions, please call our Technical department for
guidance.
⚠CAUTION:Non-Compliance. The fan installation should follow the recommendations
outlined in this manual. MacroAir is not responsible for any injury or damage to persons or
property because of ‘not complying’with the recommendations outlined in the manual.
Electrical Guidelines
⚠WARNING: Electrical Damage. Improper electrical installation can cause damage to the fan
and interfere with other electronic equipment. In addition to standard electrical safety
considerations, please observe the following:
•MacroAir Cables. The wiring from the control panel to the fan MUST be MacroAir
supplied shielded cable. CAT5e to be MacroAir supplied twisted, stranded, and shielded
or greater.
•Electrical Interference. Separate incoming power and motor control cables by a
minimum of six (6) inches.
•Individual Fan Wiring. Run wiring for each fan separately.
•Multiple Fans. Do not attempt to control multiple fans from one (1) fan control panel.
•ALWAYS GROUND PROPERLY. Connect the supplied cable glands to each end of the
motor cable and tighten them securely at both the fan motor and control panel ends.
Connect the ground bar in the control panel to ground at the main breaker and test.
•Read. Please refer to the installation instructions for more information.
⚠ATTENTION: Qualified Technicians. All fan controls should only be installed by qualified
technicians familiar with the requirements of the National Electrical Code (NEC) and local codes.
Refer to appropriate portions of this manual for other important requirements. Failure to follow
these guidelines will void the manufacturer’s warranty.

3 Introduction
© 2020 MacroAir Technologies Toll Free: 866 668 3247 Fax: 909 890 2313 www.macroairfans.com
Controller 4 Operation Manual 90-30027-00 Rev A-01 Date: 032720
Electrical Guidelines cont.
⚠ATTENTION: Factory Configured. All electrical controls are configured at the factory and are
ready to use. No user adjustments are available. Follow the included wiring schematics and
installation instructions when installing this device to ensure proper operation. Do not make any
changes to any part of the motor control panel without first consulting MacroAir.
⚠ATTENTION: Code Compliance. Installation is to be in accordance with the NEC, ANDSI/NFPA
70-1999 and local codes.
Hazard of Electrical Shock, Explosion, or Arc Flash:
⚠ATTENTION: Read. Read and understand this manual before installing or operating a fan unit.
Installation, adjustment, repair, and maintenance must be performed by qualified personnel.
⚠ATTENTION: Code Compliance. The user is responsible for compliance with all international
and National Electrical Code requirements with respect to grounding of all equipment.
⚠WARNING: Do Not Touch. Many of the parts of this unit operate at line voltage. DO NOT
TOUCH.
⚠WARNING: Covers. Install all covers before applying power or starting and stopping the unit.
Installation and Service
⚠WARNING: Damage. Do not operate or install any fans or fan accessories that appear to be
damaged.
⚠WARNING: Death and Injury. Failure to follow this instruction can result in death, serious
injury, or equipment damage.
⚠WARNING: Disconnect Power. If the fan does not operate properly using the procedures in
this manual, BE CERTAIN TO REMOVE ALL POWER TO THE UNIT and contact our Technical
Department for further assistance.
⚠CAUTION: Moving Parts. Keep all body parts clear of moving parts at all times.
⚠ATTENTION: Qualified Technicians. All electrical troubleshooting and repair must be done by
a qualified technician and meet all applicable codes.

4 Introduction
© 2020 MacroAir Technologies Toll Free: 866 668 3247 Fax: 909 890 2313 www.macroairfans.com
Controller 4 Operation Manual 90-30027-00 Rev A-01 Date: 032720
Fan Network Ordering
Type of controller: Controller 4, which can network up to 4 fans.
MacroAir customizes fans to operate in a network by:
•Addressing the fans.
•Providing bean crimps for T-splices (AVD 370).
•Supplying an additional 15ft [4.57m] piece of CAT5e (AVD 370).
•Modifying the panel enclosure (AVD3, 550, 780, Y and X Series Fans).
•Modifying the wiring on the VFD (AVD3, 550, 780, Y and X Series Fans).
Note: If you did not order your fans for a network, please contact Technical Support for
assistance with networking your fans. Also, when installing new fans in an existing mixed
network, contact Technical Support.

5 Introduction
© 2020 MacroAir Technologies Toll Free: 866 668 3247 Fax: 909 890 2313 www.macroairfans.com
Controller 4 Operation Manual 90-30027-00 Rev A-01 Date: 032720
Controller Dimensions
LCD SCREEN
ENCLOSURE

6 Network Installation
© 2020 MacroAir Technologies Toll Free: 866 668 3247 Fax: 909 890 2313 www.macroairfans.com
Controller 4 Operation Manual 90-30027-00 Rev A-01 Date: 032720
Network Wiring Requirements:
•Use stranded CAT5e or higher shielded cable.
•Minimum 24AWH (0.5mm) cross section.
•Ground the shielding and drain wire at only one point of the cable run.
•Route wires as far away as possible from high voltage AC cables, fluorescent lights, arc
welders, and other equipment that transmits EMI (electromagnetic interference).
•Do not run CAT5e in conduit with high voltage AC cables.
•Do not exceed 400ft [122m] of CAT5e between each fan in the network.
Daisy Chain
Network MacroAir fans must be connected in one single line, referred to in this document as a
“daisy chain”. The characteristics of a proper daisy chain are: one beginning (Controller 4) and
one end (last fan or control panel).
If the fans are not connected in
one line/chain, there will be a
degradation of the communication
signal and the network may not
function as intended (fans in the
network may not operate).
Each fan has a unique address,
which is noted on a sticker on the
fan itself (AVD 370) or control
panel (AVD3, 550, 780, Y and X
Series Fans). It is important to
mount the fans in the correct
order.

7 Network Installation
© 2020 MacroAir Technologies Toll Free: 866 668 3247 Fax: 909 890 2313 www.macroairfans.com
Controller 4 Operation Manual 90-30027-00 Rev A-01 Date: 032720
Network Wiring Configurations
Improper Wiring Configuration
End of Line x3 End of Line x8
Proper Wiring Configuration
ONE End of Line

8 Network Installation
© 2020 MacroAir Technologies Toll Free: 866 668 3247 Fax: 909 890 2313 www.macroairfans.com
Controller 4 Operation Manual 90-30027-00 Rev A-01 Date: 032720
Network Wiring Configurations cont.
Excess Cable at Connection Point
With noise being emitted throughout a typical industrial/commercial environment, extra cable
should not be coiled up as the coil itself will create noise/interference in the communication
signal. There should be no more than 2ft [0.6m] of excess cable at each connection point.
If more than 2ft [0.6m] of cable is needed for future relocation of the fan, run the cable up
toward the ceiling and back down in a horseshoe shape.
ALWAYS AVOID SHARP BENDS OF THE CABLE.

9 Network Installation
© 2020 MacroAir Technologies Toll Free: 866 668 3247 Fax: 909 890 2313 www.macroairfans.com
Controller 4 Operation Manual 90-30027-00 Rev A-01 Date: 032720
AVD 370 RJ45 Wiring Instructions
AVD 370 fans with RJ45 ports on the board are wired in T-splices. Each T-splice will consist of 3
CAT5e cables. A properly wired T-splice network is shown below:
Typical T-Splice of CAT5e Network Cable

10 Network Installation
© 2020 MacroAir Technologies Toll Free: 866 668 3247 Fax: 909 890 2313 www.macroairfans.com
Controller 4 Operation Manual 90-30027-00 Rev A-01 Date: 032720
T-Splice Connection Method for AVD 370 Fans
1. Take the incoming CAT5e from the
network, the 15ft [4.57m] CAT5e whip
from the fan, and the CAT5e going to
the rest of the network. Give some slack
(no more than 2ft / 0.6m) on each
CAT5e to strip the wires and splice them
together. Run the slack up towards the
ceiling and back down in a horseshoe
shape.
DO NOT roll the excess slack into a circle or coil because this creates a place for the
network to pick up noise on the lines.
2. Strip jacketing off the three CAT5e
cables and separate each color wire
leaving approximately 2in [5cm] of each
wire exposed including the drain/shield
wire.
3. Strip approximately 1/2in [1.3 cm] off
each color wire leaving the bare copper
exposed.
4. Twist the 3 wires of same color from
each CAT5e together.

11 Network Installation
© 2020 MacroAir Technologies Toll Free: 866 668 3247 Fax: 909 890 2313 www.macroairfans.com
Controller 4 Operation Manual 90-30027-00 Rev A-01 Date: 032720
T-Splice Connection Method for AVD 370 Fans cont.
5. Place a gel filled bean crimp onto the end
of the three (3) wires and use a small
crimper or pliers to crimp the bean tight
on the wires.
6. Double check that the three (3) drain
wire/bare wires are also crimped together
as this is what continues the shielding
throughout the network. The shielding
and drain wire MUST be connected to
Earth Ground at only one point of the
cable run.
7. Repeat steps 3-5 for all the wires.
8. Once all the wires are crimped, carefully
twist the wires up. Then fold them back
and tape them up with electrical tape to
clean up your wiring.

12 Network Installation
© 2020 MacroAir Technologies Toll Free: 866 668 3247 Fax: 909 890 2313 www.macroairfans.com
Controller 4 Operation Manual 90-30027-00 Rev A-01 Date: 032720
Fan Wiring Instructions
AVD3, 550, 780, Y and X Series fans are wired in a daisy chain with one CAT5e from the
touchscreen/previous fan into an RJ45 port on the control panel, and one CAT5e going to the
next fan from the second RJ45 port on the panel. The internal panel wiring does not need to be
modified for communications.
A properly wired daisy chain network will have the CAT5e network ran per the below illustration.

13 Network Installation
© 2020 MacroAir Technologies Toll Free: 866 668 3247 Fax: 909 890 2313 www.macroairfans.com
Controller 4 Operation Manual 90-30027-00 Rev A-01 Date: 032720
Mixed Network Wiring Instructions
Networks utilizing different types of connections, will wire each fan according to the preceding
wiring instructions in the manual. Below is an example of wiring for a mixed network:
Note: When installing new fans in an existing mixed network, contact Technical Support for
assistance with networking your fans.

14 Network Installation
© 2020 MacroAir Technologies Toll Free: 866 668 3247 Fax: 909 890 2313 www.macroairfans.com
Controller 4 Operation Manual 90-30027-00 Rev A-01 Date: 032720
Temperature/Humidity Sensor Installation (Optional)
Black (From Power Supply)...................... Common
PINOUT: Black/White (From Power Supply) ......... 24VDC+
Blue (From Cat5E)..................................... Net+
Blue/White (From Cat5E)......................... Net-
Mounting: Ceiling or Floor Mounting
1. When mounting the temperature/humidity sensor at the
ceiling, mount at least 1ft [0.3 m] below the ceiling in the
same room where the fan/fans are placed. When mounting
the temperature/humidity sensor at the floor, mount the
sensor within 6ft [1.8m] of the ground in the room where the
fan/fans are placed. Use caution when placing the sensor
making sure not to place it where there is any contact with
direct sunlight. Each sensor has small mounting holes for
attachment with screws.
2. Once the sensor has been placed it can be wired into the network. Use the provided
110/120V power supply to power the temperature/humidity sensor and the blue,
blue/white, and brown wires from the CAT5e cable for communication. If there is enough
slack in the cable you can run the wiring directly in and out at the same point on the sensor.
3. Please refer to the wiring diagram. See pages 10-11 of this manual for proper stripping and
bean crimping of wires.

15 Configuration and Operation
© 2020 MacroAir Technologies Toll Free: 866 668 3247 Fax: 909 890 2313 www.macroairfans.com
Controller 4 Operation Manual 90-30027-00 Rev A-01 Date: 032720
Controller 4 Screen Setup
The touchscreen may require additional setup before operating the fans. Please refer to the
steps below to properly configure your controller.
1. Power on the fans. The screen will illuminate as soon as power is supplied.
2. The screen will search for fans and take you to the home screen once the scan is
complete.
3. AVD 370 and Y series fans do not require further setup. If you only have these fans on the
network, set a speed and direction using the buttons on the home screen. Y series fans
will operate normally. AVD 370 fans will spin in reverse at a preset speed, automatically
determine the blade length and resume operation at the speed and direction command.
4. AVD3, 550, 780, and X series fans REQUIRE the blade size to be programmed in order to
function correctly. The blade size is set via the “Fan Diameter”screen. Once the size is
programmed into every AVD3, 550, 780, and X series fan on the network, the fans can be
operated normally.

16 Configuration and Operation
© 2020 MacroAir Technologies Toll Free: 866 668 3247 Fax: 909 890 2313 www.macroairfans.com
Controller 4 Operation Manual 90-30027-00 Rev A-01 Date: 032720
Screen Flow
Settings Screens: .
Home Screen Setpoint Fan Select Fan Address Motor Calibration Fan Diameter
Fault Code Run Hours
Record Screens
Home Screen .........................Page 17
Temp/Humidity Setpoint .....Page 18
Fan Select ..............................Page 19
Fan Address ..........................Page 20
Motor Calibration .................Page 21
Fan Diameter ........................Page 22
Mkey .....................................Page 23

17 Configuration and Operation
© 2020 MacroAir Technologies Toll Free: 866 668 3247 Fax: 909 890 2313 www.macroairfans.com
Controller 4 Operation Manual 90-30027-00 Rev A-01 Date: 032720
Home Screen
The home screen allows control of all connected fans. Selecting a speed and direction will run the
selected fan(s). The fans will not run unless speed AND direction commands are given.
Mode (M or A icon): “M”indicates Manual mode; “A”indicates Auto mode (which only displays
when the Temperature/Humidity sensor is present in the network).
Settings (gear icon): Accesses the Fan Select page, from which the settings page can then be
accessed.
A, 1, 2, 3, 4: Clicking this button will toggle between “A”and the individually numbered fans.
“A”indicates control of all the fans on the network. Numbers 1, 2, 3, 4 …etc. indicates individual
control of the fan selected.
Reverse: Issues a reverse command to all fans or the individual fan selected.
Power: Turns off the selected fan(s).
Forward: Issues a forward command to all fans or the individual fan selected.
Down (minus): Adjusts the fan speed down by 5%.
Speed: Displays the current setting of the last commanded speed (displayed as a percentage).
Up (plus):Adjusts the fan speed up by 5%.
Right Arrow: Navigates to the fault code screen.

18 Configuration and Operation
© 2020 MacroAir Technologies Toll Free: 866 668 3247 Fax: 909 890 2313 www.macroairfans.com
Controller 4 Operation Manual 90-30027-00 Rev A-01 Date: 032720
Temperature/Humidity Setpoint
Only if ordered with the Temperature/Humidity Sensor:
The Setpoint screen allows you to select the method of control for your fans, as well as the
desired temperature or humidity setpoint if the optional sensor is installed.
Set Point: Displays the temperature or humidity threshold. The plus adjusts the threshold
higher; the minus adjusts the threshold lower.
Mode Selection: Allows you to choose between manual mode, temperature mode and humidity
mode. Manual mode allows you to control the fan from the home screen. Temperature mode
runs the fan according to the speed and direction set on the home screen once the measured
temperature is greater or less than the set point temperature (depending on mode selected).
Humidity mode runs the fan according to the speed and direction set on the home screen once
the measured humidity is greater than the set point.
Temperature Reading: Displays the ambient temperature. Will read “BAD TEMP READING”if
there is no sensor connected.
Humidity Reading: Displays the ambient humidity. Will read “BAD HUMID READING”if there is
no sensor connected.
Left Arrow: Navigates to the Home Screen.
Change Units: Changes the Temperature Reading and Set Point between Fahrenheit and Celsius.
Right Arrow: Navigates to the Fan Select screen.
Other manuals for Controller 4
1
Table of contents
Other MacroAir Technologies Controllers manuals
Popular Controllers manuals by other brands

Weir
Weir Hopkinsons Fig 9052 Standard Operating & Maintenance Instructions

Johnson Controls
Johnson Controls Hitachi C4IRK01 Operation manual

Titanium
Titanium SLEA Series manual

Uwatec
Uwatec SCUBAPRO D400 2nd STAGE Maintenance Procedure Instructions

Siemens
Siemens RWF40 Series user manual

Omega
Omega Linkr MOBILE Quick install guide

Gardena
Gardena Select 1891 Operator's manual

Smartgen
Smartgen HAT530N user manual

Mitsubishi Electric
Mitsubishi Electric MELSEC-Q QnPHCPU Programming manual

LOVATO ELECTRIC
LOVATO ELECTRIC DCRL3 instruction manual

Danfoss
Danfoss EKC 223 user guide

FUTABA
FUTABA MC601C Multipurpose Edition instruction manual