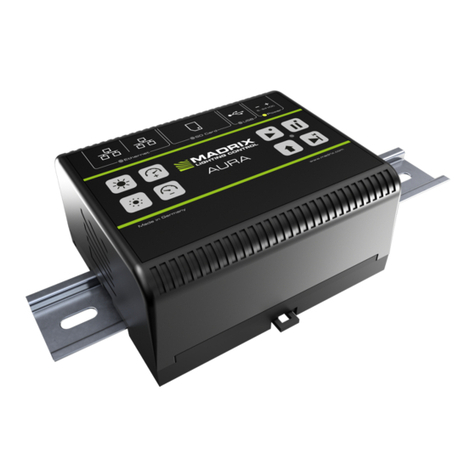
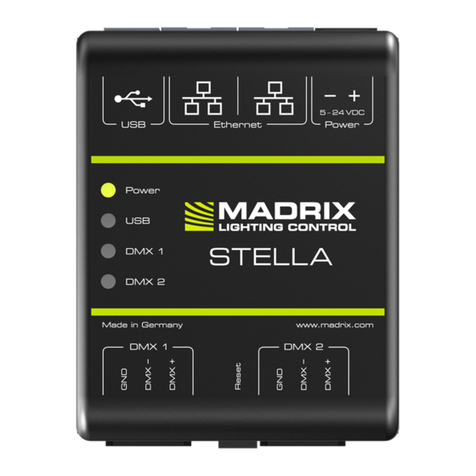
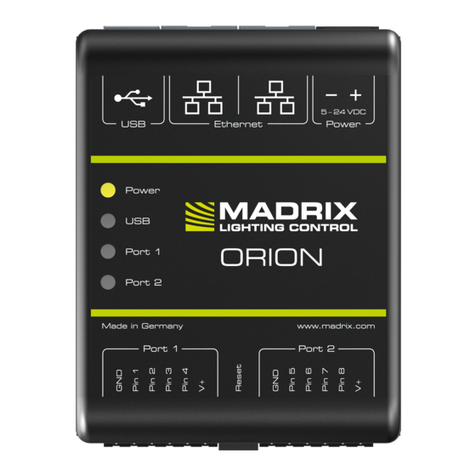
MADRIX Nebula User manual

© 2022 inoage GmbH
MADRIX NEBULA User Manual
Date: March 2022
[Hardware User Guide]

//2
Table Of Contents
www.madrix.com
Table Of Contents
Part 1 Overview 3
. . . . . . . . . . . . . . . . . . . . . . . . . . . . . . . . . . . . . . . . . . . . . . . . . . . . . . . . . . . . . . . . . . . 41 Introduction
. . . . . . . . . . . . . . . . . . . . . . . . . . . . . . . . . . . . . . . . . . . . . . . . . . . . . . . . . . . . . . . . . . . 52 Hardware Features
Part 2 Device Configuration 17
. . . . . . . . . . . . . . . . . . . . . . . . . . . . . . . . . . . . . . . . . . . . . . . . . . . . . . . . . . . . . . . . . . . 181 Web Configuration [Ethernet]
Part 3 Using MADRIX 5 Software 28
. . . . . . . . . . . . . . . . . . . . . . . . . . . . . . . . . . . . . . . . . . . . . . . . . . . . . . . . . . . . . . . . . . . 301 Output [Art-Net]
. . . . . . . . . . . . . . . . . . . . . . . . . . . . . . . . . . . . . . . . . . . . . . . . . . . . . . . . . . . . . . . . . . . 412 Output [sACN]
. . . . . . . . . . . . . . . . . . . . . . . . . . . . . . . . . . . . . . . . . . . . . . . . . . . . . . . . . . . . . . . . . . . 483 Output [USB]
Part 4 Technical Support 53
. . . . . . . . . . . . . . . . . . . . . . . . . . . . . . . . . . . . . . . . . . . . . . . . . . . . . . . . . . . . . . . . . . . 541 Firmware Updates
. . . . . . . . . . . . . . . . . . . . . . . . . . . . . . . . . . . . . . . . . . . . . . . . . . . . . . . . . . . . . . . . . . . 602 Troubleshooting
Part 5 General 62
. . . . . . . . . . . . . . . . . . . . . . . . . . . . . . . . . . . . . . . . . . . . . . . . . . . . . . . . . . . . . . . . . . . 631 Glossary
. . . . . . . . . . . . . . . . . . . . . . . . . . . . . . . . . . . . . . . . . . . . . . . . . . . . . . . . . . . . . . . . . . . 682 PC Power Management
. . . . . . . . . . . . . . . . . . . . . . . . . . . . . . . . . . . . . . . . . . . . . . . . . . . . . . . . . . . . . . . . . . . 723 Tips [Microsoft Windows / Networks / USB]
. . . . . . . . . . . . . . . . . . . . . . . . . . . . . . . . . . . . . . . . . . . . . . . . . . . . . . . . . . . . . . . . . . . 874 Web Links
Part 6 Legal 88
. . . . . . . . . . . . . . . . . . . . . . . . . . . . . . . . . . . . . . . . . . . . . . . . . . . . . . . . . . . . . . . . . . . 891 Imprint And Copyright

1//PART
Overview

[Part 1] Overview
//4
www.madrix.com
MADRIX NEBULAUser Manual
1Overview
Topics Of This Chapter
§
Introduction
§
Hardware Features
1.1 Introduction
This topic includes:
§
MADRIX NEBULA
MADRIX NEBULA
MADRIX NEBULA is a versatile interface to directly control a wide range of digital LEDs.
The MADRIX NEBULA directly connects to your LED pixels. This advanced SPI decoder receives control data over
Ethernet network or USB and is built to provide excellent image quality.

[Part 1] Overview
//5
www.madrix.com
MADRIX NEBULAUser Manual
1.2 Hardware Features
This topic includes:
§
Using A 3rd-Party Controller
§
Supported LEDs
§
Putting The Device Into Operation
§
LED Status Codes
§
Automatic HTP Merging
§
Daisy-Chain Support
§
Reset To Factory Default Settings
§
Initiate Poll
Using A 3rd-Party Controller
MADRIX NEBULA is a standard network node. Because of this, you can use the device with applications, consoles,
desks, or controllers that are compatible with Art-Net or Streaming ACN [sACN] to distribute data via Ethernet
network.
Supported LEDs
MADRIX NEBULA supports the following LEDs [as of July 2021]:
§
APA101
§
APA102
§
APA104
§
APA106
§
GS8206
§
GS8207
§
TLC5973
§
TLS3001
§
TLS3008
§
TM1804
§
TM1809
§
TM1812

[Part 1] Overview
//6
www.madrix.com
MADRIX NEBULAUser Manual
§
GS8208
§
GW6201
§
GW6205
§
LPD1882S
§
LPD6803
§
LPD8806
§
MBI6024
§
MBI6120
§
MY9291
§
P9883
§
SJ1221
§
SK6112
§
SK6805
§
SK6812
§
SK6813
§
SK6822
§
SK9816
§
SK9822
§
SK9826
§
SM16703
§
SM16716
§
TM1814
§
TM1829
§
UCS1903
§
UCS2903
§
UCS2904
§
UCS512B3
§
UCS8904
§
UCS9812S
§
WS2801
§
WS2803
§
WS2811
§
WS2811S
§
WS2812
§
WS2812B
§
WS2813
§
WS2815
§
WS2818
§
WS2822S
§
WS2822S Addressing
The protocols above currently have the following frequencies implemented and available [as of March 2022 with
firmware 3.2]:
Protocol
Frequency
Special Remarks
§
APA101
§
24 MHz
§
12 MHz
§
8 MHz
§
4 MHz
§
2 MHz
§
1 MHz
§
APA102
§
24 MHz
§
12 MHz
§
8 MHz

[Part 1] Overview
//7
www.madrix.com
MADRIX NEBULAUser Manual
§
4 MHz
§
2 MHz
§
1 MHz
§
APA104
§
800 kHz
§
585 kHz
§
APA106
§
585 kHz
§
GS8206
§
800 kHz
§
GS8207
§
800 kHz
·
GS8208
§
800 kHz
§
GW6201
§
800 kHz
§
GW6205
§
800 kHz
§
400 kHz
§
LPD1882S
§
1 MHz
§
LPD6803
§
12 MHz
§
8 MHz
§
4 MHz
§
2 MHz
§
1 MHz
§
LPD8806
§
12 MHz
§
8 MHz
§
4 MHz
§
2 MHz
§
1 MHz
§
MBI6024
§
24 MHz
§
12 MHz
§
8 MHz
§
4 MHz
§
2 MHz
§
1 MHz
§
MBI6120
§
1.2 MHz
§
800 kHz
§
400 kHz
§
1.2 MHz
§
800 kHz
§
400 kHz
§
1.2 MHz
§
Limit 66 %
§
Limit 66 %
§
Limit 66 %
§
Limit 33 %

[Part 1] Overview
//8
www.madrix.com
MADRIX NEBULAUser Manual
§
800 kHz
§
400 kHz
§
Limit 33 %
§
Limit 33 %
§
MY9291
§
16 Bit
§
8 Bit
§
P9883
§
800 kHz
§
SJ1221
§
800 kHz
§
800 kHz
§
800 kHz
§
800 kHz
§
800 kHz
§
100 %
§
75 %
§
50 %
§
25 %
§
MIN
§
SK6112
§
800 kHz
§
SK6805
§
800 kHz
§
SK6812
§
800 kHz
§
SK6813
§
800 kHz
§
SK6822
§
800 kHz
§
SK9816
§
800 kHz
§
800 kHz
§
800 kHz
§
800 kHz
§
800 kHz
§
100 %
§
75 %
§
50 %
§
25 %
§
MIN
§
SK9822
§
24 MHz
§
12 MHz
§
8 MHz
§
4 MHz
§
2 MHz
§
1 MHz
§
SK9826
§
24 MHz
§
12 MHz
§
8 MHz
§
4 MHz
§
2 MHz
§
1 MHz
§
SM16703
§
800 kHz
§
SM16716
§
24 MHz
§
12 MHz
§
8 MHz

[Part 1] Overview
//9
www.madrix.com
MADRIX NEBULAUser Manual
§
4 MHz
§
2 MHz
§
1 MHz
§
TLC5973
§
3 MHz
§
2 MHz
§
1 MHz
§
800 kHz
§
400 kHz
§
TLS3001
§
2 MHz
§
1 MHz
§
800 kHz
§
400 kHz
§
2 MHz
§
1 MHz
§
800 kHz
§
400 kHz
§
Linear
§
Linear
§
Linear
§
Linear
§
Quadratic
§
Quadratic
§
Quadratic
§
Quadratic
§
TLS3008
§
1 MHz
§
800 kHz
§
400 kHz
§
TM1804
§
800 kHz
§
400 kHz
§
TM1809
§
800 kHz
§
TM1812
§
800 kHz
§
TM1814
§
800 kHz
§
800 kHz
§
800 kHz
§
800 kHz
§
800 kHz
§
100 %
§
75 %
§
50 %
§
25 %
§
MIN
§
TM1829
§
1.6 MHz
§
1.6 MHz
§
1.6 MHz
§
1.6 MHz
§
1.6 MHz
§
800 kHz
§
800 kHz
§
800 kHz
§
800 kHz
§
800 kHz
§
100 %
§
75 %
§
50 %
§
25 %
§
MIN
§
100 %
§
75 %
§
50 %
§
25 %
§
MIN

[Part 1] Overview
//10
www.madrix.com
MADRIX NEBULAUser Manual
§
UCS1903
§
800 kHz
§
400 kHz
§
UCS2903
§
800 kHz
§
400 kHz
§
UCS2904
§
800 kHz
§
UCS512B3
§
750 kHz
§
500 kHz
§
250 kHz
§
UCS8904
§
800 kHz
§
800 kHz
§
16 Bit
§
UCS9812S
§
1.1 MHz
§
100 %
§
75 %
§
50 %
§
25 %
§
MIN
§
WS2801
§
24 MHz
§
12 MHz
§
8 MHz
§
4 MHz
§
2 MHz
§
1 MHz
§
WS2803
§
24 MHz
§
12 MHz
§
8 MHz
§
4 MHz
§
2 MHz
§
1 MHz
§
WS2811
§
800 kHz
§
400 kHz
§
WS2811S
§
800 kHz
§
400 kHz
§
WS2812
§
800 kHz
§
WS2812B
§
800 kHz
§
WS2813
§
800 kHz
§
WS2815
§
800 kHz

[Part 1] Overview
//11
www.madrix.com
MADRIX NEBULAUser Manual
§
WS2818
§
800 kHz
§
WS2822S
§
750 kHz
§
500 kHz
§
250 kHz
§
250 kHz
§
Addressing
Putting The Device Into Operation
1] Connecting Your LEDs
Please see the MADRIX NEBULA Technical Manual & Quick Start Guide on how to connect your LEDs to
MADRIX NEBULA.
»help.madrix.com
2] Connecting To Power And Data
Please see the MADRIX NEBULA Technical Manual & Quick Start Guide on how to connect to power and
data.
»help.madrix.com
3] Setting The Output Protocol
In order to put MADRIX NEBULA fully into operation, it is necessary to set the correct output protocol
according to the LEDs you have connected.
Learn more:
§
Configuration Using A Web Browser

[Part 1] Overview
//13
www.madrix.com
MADRIX NEBULAUser Manual
LED Status Codes
The following tables describe the LED status codes of the device.
STATUS
STATUS LED POWER
Powered off
Power not connected. > The device has no power.
Permanently green
Connected to power. > The power is on.
Blinking green
Bootloader activated. > Reset the device to factory default settings.
STATUS
STATUS LED USB
Powered off
USB not connected.
Red +
blinking green
Communicating over USB.
> Sending or receiving data over USB. The USB port works.
Fading between
red +green
Connected to USB; Drivers installed correctly.
> No data is sent over USB.
Orange
Connected to USB; No drivers installed.
> Reinstall software and drivers or try a different USB port.
STATUS
STATUS LED PORT 1
STATUS LED PORT 2
Powered off
No data is sent.
No data is sent.
Blinking green
Sending data to Port 1.
> The output port works.
Sending data to Port 2.
> The output port works.
STATUS
STATUS LEDS ETHERNET PORTS
Green off
10 MBit/s connected.
Green on
100 MBit/s connected.
Orange on
Network connected.
Orange blinking
Sending or receiving data. > The Ethernet port works.

[Part 1] Overview
//14
www.madrix.com
MADRIX NEBULAUser Manual
Automatic HTP Merging
Overview
§
MADRIX NEBULA features automatic HTP merging from 2 Ethernet sources.
[Usually, the first source will be MADRIX 5. The second source could be a console, for example.]
§
Data from both source will be merged together and sent out as 1 signal. This happens across all 8 output ports
and by using the HTP principle.
§
HTP - Is the acronym for Highest Takes Precedence. Data from both sources will be compared for each
individual channel. The higher value wins per channel.
§
Sources can be:
- 1x Art-Net + 1x Art-Net
- 1x Art-Net + 1x sACN
- 1x sACN + 1x sACN
Configuration And Recommendations When Merging Art-Net
1] Correctly set up and enable Art-Net for each source.
2] Make sure to activate ArtSync for Art-Net in MADRIX 5. Learn more Sync Mode
3] Make sure that MADRIX 5 has a lower IP address compared to the second source.
[E.g., 2.0.0.1 compared to 2.0.0.20]
4] Always use Unicast Mode in MADRIX 5 to directly send data to the correct IP addresses of your MADRIX
NEBULA devices.
[It is not recommend to have any of the two sources or any other source in the network to send data via Broadcast
Mode.]
Daisy-Chain Support
§
MADRIX NEBULA features 2 separate Ethernet network ports in its second generation [hardware revision/model:
NEBULA V1.2]. Either one is fully functionally for IN and OUT and can be used for the data connection without
using a separate network switch or router.

[Part 1] Overview
//15
www.madrix.com
MADRIX NEBULAUser Manual
§
We recommend to connect a maximum of 40 units after one another in a row, when using Art-Net in Unicast
Mode or Streaming ACN Multicast at a max. data rate of 50 FPS / 20 ms without any additional devices in the
network.
§
In the MADRIX 5 Software, we highly recommend to activate ArtSync for excellent image quality.
Reset To Factory Default Settings
In rare cases you might need to do a reset to factory default settings, for example to reset to the device to its default
IP address as shown on the side of the device:
Reset Via Reset Button
§
1] Disconnect all connections from the device [power, data, LEDs].
§
2] Use a suitable tool to press the reset button [between Port 1 and Port 2].
§
3] Continue to press the reset button and supply power again over 'Power' or USB.
§
4] Continue to press the reset button and wait until all status LEDs of the device flash repeatedly or wait 10
seconds.
[Simply repeat these steps should the process fail.]
Reset Via Ethernet [Web Configuration]
§
1] Connect MADRIX NEBULA to power.
[Please see safety instructions in the MADRIX NEBULA Technical Manual & Quick Start Guide!]
§
2] Connect MADRIX NEBULA and your computer to the same Ethernet network.
§
3] Assign correct network settings for your computer in the operating system.
[Recommended default settings: IP address 10.0.0.1 / Subnet mask 255.0.0.0]
§
4] Open your web browser and enter the IP address of MADRIX NEBULA. The built-in web configuration tool will
be launched.
[You can find the default IP address on the side of the device.]
§
5] Click Reset
Learn more »Web Configuration [Ethernet]

[Part 1] Overview
//16
www.madrix.com
MADRIX NEBULAUser Manual
Initiate Poll
During normal operation, quickly pressing the Reset button sends an Art-Net PollReply and a MADRIX PollReply for
device discovery to the network.

2//PART
Device Configuration

[Part 2] Device Configuration
//18
www.madrix.com
MADRIX NEBULAUser Manual
2Device Configuration
This topic includes:
§
Overview
§
Topics Of This Chapter
Overview
§
Web Configuration: The built-in web configuration is the main way of configuring your devices. By using a
standard web browser, you gain quick access to all device settings.
Topics Of This Chapter
§
Web Configuration [Ethernet]
2.1 Web Configuration [Ethernet]
This topic includes:
§
Configuration Using A Web Browser
When connected to Ethernet network, you can easily configure MADRIX NEBULA using the built-in web configuration
page.
You have 2 options to access the web interface. Both, NEBULA and your computer, need to be in the same network.
A] Using a standard web browser:
§
Connect MADRIX NEBULA and your computer to the same network.

[Part 2] Device Configuration
//19
www.madrix.com
MADRIX NEBULAUser Manual
§
Assign correct network settings for your PC in the Windows operating system.
[Recommended default settings: IP address 10.0.0.1 / Subnet mask 255.0.0.0]
[Please note: Your devices and the sender, such as the PC that runs MADRIX 5, need to have the same subnet
mask!]
§
Open your web browser and enter the IP address of MADRIX NEBULA.
[You can find the default IP address on the back side of the device.]
§
The web configuration page will be launched. Now, you have access to various information and settings.
B] Using the MADRIX 5 Software:
§
Connect MADRIX NEBULA and your computer to the same network.
§
Assign correct network settings for your PC in the Windows operating system.
[Recommended default settings: IP address 10.0.0.1 / Subnet mask 255.0.0.0]
[Please note: Your devices and the sender, such as the PC that runs MADRIX 5, need to have the same subnet
mask!]
§
Go to the menu Tools > MADRIX Device Configuration...
[Keyboard shortcut: Ctrl+Alt+L]
§
Select your MADRIX NEBULA device in the list.
§
Click
§
Your default web browser will open and the web configuration page will be launched. Now, you have access to
various information and settings.

[Part 2] Device Configuration
//20
www.madrix.com
MADRIX NEBULAUser Manual
Other manuals for Nebula
3
Table of contents
Other MADRIX Controllers manuals
Popular Controllers manuals by other brands

Hobby Model Technology
Hobby Model Technology DS600 quick start guide

INTERSPIRO
INTERSPIRO RS4 user manual

Honeywell
Honeywell IAQ Poin user manual

Echelon
Echelon Excel 50 installation instructions

ASO Safety Solutions
ASO Safety Solutions SK 35 operating manual

Allen-Bradley
Allen-Bradley powerflex 700 installation instructions

maxon motor
maxon motor ESCON 70/10 Hardware reference

Dell
Dell PowerEdge RAID Controller S100 user guide

Lynx
Lynx RCT 5023-G Reference manual

National Instruments
National Instruments NI cRIO-9022 User manual and specifications

Universal Devices
Universal Devices ISY-26 user guide

salmson
salmson EC-Drain 2x4,0 Installation and starting instructions