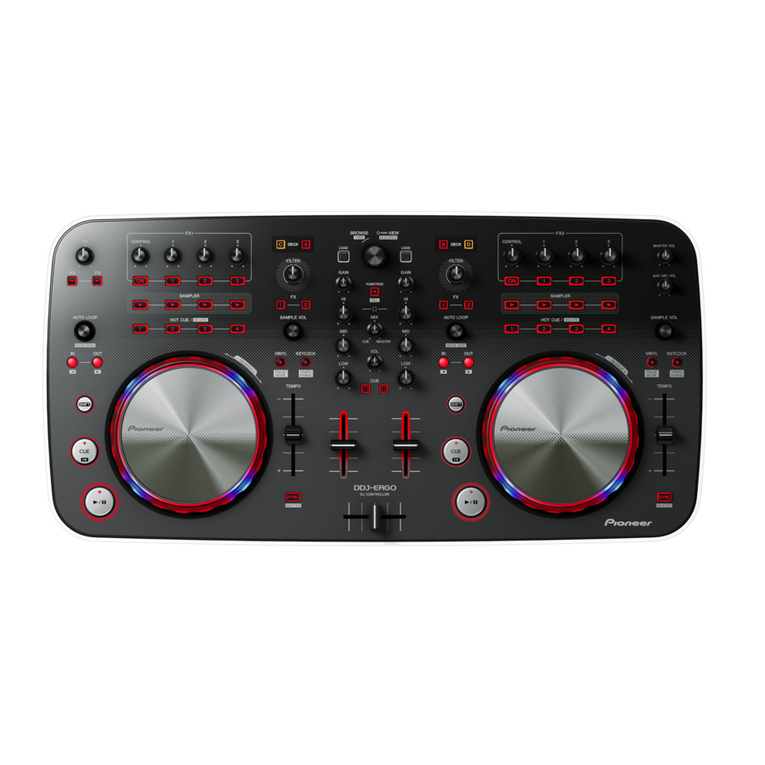
Pioneer DDJ-RB User manual

ORDER NO.
2016
2016 Printed in Japan
DDJ-RB
RRV4650
DJ Controller
DDJ-RB
THIS MANUAL IS APPLICABLE TO THE FOLLOWING MODEL(S) AND TYPE(S).
THIS SERVICE MANUAL SHOULD BE USED TOGETHER WITH THE FOLLOWING MANUAL(S).
Model Type Power Requirement Remarks
DDJ-RB SXJ DC 5 V (USB bus power only)
DDJ-RB XJCN DC 5 V (USB bus power only)
Model Order No. Remarks
DDJ-RB RRV4651 SCHEMATIC DIAGRAM, PCB CONNECTION DIAGRAM, PCB PARTS LIST
K-ZZZ APR.

2DDJ-RB
12 3 4
A
B
C
D
E
F
12 3 4
SAFETY INFORMATION
WARNING
This product may contain a chemical known to the State of California to cause cancer, or birth defects or other reproductive
harm.
Health & Safety Code Section 25249.6 - Proposition 65
This service manual is intended for qualified service technicians; it is not meant for the casual do-it-
yourselfer. Qualified technicians have the necessary test equipment and tools, and have been trained
to properly and safely repair complex products such as those covered by this manual.
Improperly performed repairs can adversely affect the safety and reliability of the product and may
void the warranty. If you are not qualified to perform the repair of this product properly and safely, you
should not risk trying to do so and refer the repair to a qualified service technician.

3
DDJ-RB
56 7 8
56 7 8
A
B
C
D
E
F
CONTENTS
SAFETY INFORMATION.......................................................................................................................................................... 2
1. SERVICE PRECAUTIONS.................................................................................................................................................... 4
1.1 NOTES ON SOLDERING ............................................................................................................................................... 4
1.2 NOTES ON PARTS REPLACEMENT............................................................................................................................. 4
1.3 SERVICE NOTICE.......................................................................................................................................................... 4
2. SPECIFICATIONS................................................................................................................................................................. 5
3. BASIC ITEMS FOR SERVICE .............................................................................................................................................. 5
3.1 CHECK POINTS AFTER SERVICING ........................................................................................................................... 5
3.2 JIGS LIST ....................................................................................................................................................................... 6
3.3 PCB LOCATIONS ........................................................................................................................................................... 6
4. BLOCK DIAGRAM ................................................................................................................................................................ 7
4.1 OVERALL CONNECTION DIAGRAM............................................................................................................................. 7
4.2 OVERALL BLOCK DIAGRAM......................................................................................................................................... 8
4.3 POWER BLOCK DIAGRAM ........................................................................................................................................... 9
5. DIAGNOSIS ........................................................................................................................................................................ 10
5.1 POWER ON SEQUENCE............................................................................................................................................. 10
5.2 TROUBLESHOOTING.................................................................................................................................................. 11
5.3 MONITORING OF POWER SUPPLY AND VOLTAGE.................................................................................................. 18
5.4 ABOUT POWER-SAVING MODE................................................................................................................................. 19
5.5 OPERATION CHECK WITH rekordbox ........................................................................................................................ 20
6. SERVICE MODE ................................................................................................................................................................. 23
6.1 TEST MODE................................................................................................................................................................. 23
7. DISASSEMBLY ................................................................................................................................................................... 35
8. EACH SETTING AND ADJUSTMENT ................................................................................................................................ 42
8.1 NECESSARY ITEMS TO BE NOTED........................................................................................................................... 42
8.2 UPDATING OF THE FIRMWARE ................................................................................................................................. 43
8.3 ITEMS FOR WHICH USER SETTINGS ARE AVAILABLE........................................................................................... 45
9. EXPLODED VIEWS AND PARTS LIST............................................................................................................................... 46
9.1 PACKING SECTION ..................................................................................................................................................... 46
9.2 EXTERIOR SECTION .................................................................................................................................................. 47

4DDJ-RB
12 3 4
A
B
C
D
E
F
12 3 4
1. SERVICE PRECAUTIONS
1.1 NOTES ON SOLDERING
1.2 NOTES ON PARTS REPLACEMENT
1.3 SERVICE NOTICE
• For environmental protection, lead-free solder is used on the printed circuit boards mounted in this unit.
Be sure to use lead-free solder and a soldering iron that can meet specifications for use with lead-free solders for repairs
accompanied by reworking of soldering.
Do NOT use a soldering iron whose tip temperature cannot be controlled.
TOSHIBA logo mark
74VHC4051AFTTC74HC4051AFT
IC printing information
Part No.
(or abbreviation code)
Lot No.
VHC
4051A
H
4 0 5 1
C
TOSHIBA logo mark
Part No.
(or abbreviation code)
Lot No.
Lubrication during Reassembly of the Jog Dial
When reassembling the Jog dial after replacing the Jog dial or control panel, be sure to apply grease to the shaft and shaft
bearing of the Jog dial.
For details on how to lubricate, see "Procedure for applying grease during reassembly of the Jog dial" in "7. DISASSEMBLY."
Be sure to use the specified grease.
Parts that require simultaneous replacement
Two photointerrupters are provided for detection of Jog dial rotations.
When replacement of photointerrupters is required because of abnormalities in detected waveforms, etc., be sure to replace
both photointerrupters at the same time.
Corresponding Part No.: RPI-579N1
Parts that require simultaneous replacement: PC1201 and PC1202 (DCK1B ASSY, DCK2B ASSY)
After replacement, be sure to perform the procedure described in "2-2 Judging the quality of mounting and connection of the
photointerrupter" in "6. SERVICE MODE."
Mass production early, the following parts (IC711, IC712 (MAIN Assy)) may have temporarily implement an alternate parts.
If it was alternate parts when replacing the following parts, please replace in pairs to the corresponding part from alternate parts.
Alternate Part No.: 74HC4051AFT
Corresponding Part No.: TC74HC4051AFT
Parts that require simultaneous replacement: IC711, IC712 (MAIN Assy)
Monitoring of power supply and voltage
This unit always monitors for power supply and voltage.
After an error is detected, this unit will shut itself off immediately and all indicators are turned off.
After the unit shuts itself off because of an error, the defective point may produce heat, which may be dangerous.
Therefore, disconnect the USB cable and wait for a while before turning the unit back on.
Repair the unit according to the diagnostic procedures described in “5.3 MONITORING OF POWER SUPPLY AND VOLTAGE.”
Demo Mode
This unit will automatically enter demo mode if it is left unoperated for 10 minutes in normal operation mode.
To cancel this mode, operate any control or button of this unit.
The default setting of time to switch to the demo mode is 10 minutes.
To disable demo mode, change the setting in the settings of utilities mode (For details, refer to the operating instructions).
MXR Assy
Cross fader PCB (jumper connection) of MXR Assy is not service parts.
If necessary to order the MXR Assy.

5
DDJ-RB
56 7 8
56 7 8
A
B
C
D
E
F
2. SPECIFICATIONS
3. BASIC ITEMS FOR SERVICE
3.1 CHECK POINTS AFTER SERVICING
General – Main Unit
Power supply........................................................................ DC 5 V
Rated current....................................................................... 500 mA
Main unit weight..........................................................2.1 kg (4.6 lb)
Max. dimensions......482.6 mm (W) × 58.5 mm (H) × 272.4 mm (D)
(19.0 in. (W) × 2.3 in. (H) × 10.7 in. (D))
Tolerable operating temperature .............................+5 °C to +35 °C
Tolerable operating humidity ...........5 % to 85 % (no condensation)
Audio Section
Sampling rate .....................................................................44.1 kHz
D/A converter......................................................................... 24 bits
Rated output level
MASTER OUT....................................................... 2.1 Vrms/10
Frequency characteristic
USB ..................................................................... 20 Hz to 20 kHz
S/N ratio (rated output, A-WEIGHTED)
USB ................................................................................... 103 dB
MIC...................................................................................... 65 dB
Total harmonic distortion
USB ..................................................................................0.005 %
Input impedance
MIC.........................................................................3 k or higher
Output impedance
MASTER.................................................................... 1 k or less
PHONES ................................................................... 10 or less
Input / Output terminals
MIC input terminal
1/4” TS jack ........................................................................... 1 set
MASTER output terminal
RCA pin jack.......................................................................... 1 set
PHONES output terminal
3.5 mm stereo mini jack......................................................... 1 set
USB terminal
B type .................................................................................... 1 set
• USB cable
(DDE1128)
• Operating Instructions (Quick Start Guide)
(SXJ: DRH1368)
(XJCN: DRH1370)
• Warranty (for some regions)
The included warranty is for the European region.
— For the North American region, the corresponding information is
provided on the last page of both the English and French
versionsof the “Operating Instructions (Quick Start Guide)”.
— For the Japanese region, the corresponding information is
provided on the last page of the Japanese version of the
“Operating Instructions (Quick Start Guide)”.
• License key card for “rekordbox dj”
(DXA2304)
Accessories
Distortion
Noise
Volume too low
Volume too high
Volume fluctuating
Sound interrupted
See the table below for the items to be checked regarding audio.
No. Procedures
Item to be checked regarding audio
Check points
1 Check the firmware version. The firmware version must be the latest one.
If it is not the latest one, be sure to update it.
Items to be checked after servicing
6 Check the appearance of the product. No scratches or dirt on its appearance after receiving it for service.
To keep the product quality after servicing, confirm recommended check points shown below.
2 Confirm that the customer complaint has been resolved.
If the problem pointed out by the customer occurs with a specific
source or operation, such as PC input, MIC input, Fader, or VOL,
input that specific source then perform that specific operation for
checking.
The symptoms in question must not be reproduced.
There must be no abnormality in audio signals or operations.
4 Check the analog audio output.
Connect this unit with a PC with the DJ application (rekordbox DJ)
installed, via USB, then play back audio.
There must be no errors, such as noise, in audio signals and
operations of the MASTER/HEADPHONES outputs.
5 Check the analog audio input.
Input an audio signal via MIC.
There must be no abnormality in audio signals or operations.
3 Check operations of the operating elements.
Enter Service mode.
There must be no errors in operations of each button, the jog dial,
LEDs, VOL, fader control, and rotary encoder.

6DDJ-RB
12 3 4
A
B
C
D
E
F
12 3 4
3.2 JIGS LIST
3.3 PCB LOCATIONS
Lubricants and Glues List
Name Part No. Remarks
Jigs List
Jig Name Part No. Purpose of use / Remarks
USB cable GGP1193 for PC connection
Grease GEM1100
See "7. DISASSEMBLY."
1..MAIN ASSY DWX3907
NSP 1..DCK1 ASSY DWM2625
2..DCK1B ASSY DWX3908
2..HPJK ASSY DWX3912
NSP 1..DCK2 ASSY DWM2626
2..DCK2B ASSY DWX3910
1..MXR ASSY DWX3911
Mark No. Description Part No.
LIST OF ASSEMBLIES
• Bottom view
HPJK ASSY
B
DCK1B ASSY
C
DCK2B ASSY
D
MXR ASSY
E
MAIN ASSY
A

7
DDJ-RB
56 7 8
56 7 8
A
B
C
D
E
F
4. BLOCK DIAGRAM
4.1 OVERALL CONNECTION DIAGRAM
VKN2097-A
CN103
1GND_AD
2AD_CH1_ISO_H
3AD_CH2_ISO_L
4AD_CH1_TRIM
5AD_CH2_FLTR
6AD_MSTR_LV
7AD_CH2_ISO_M
8AD_HP_LV
9AD_CH2_ISO_H
10 AD_CH1_ISO_L
11 AD_CH2_TRIM
12 AD_CH1_ISO_M
13 AD_CRFD
14 GND_AD
15 AD_CH2_FD
16 GND_AD
17 AD_CH1_FD
18 V+3R3_AD
19 AD_CH1_FLTR
20 V+3R3_AD
21 V+3R3_AD
22 GND_D
23 LED_6
24 GND_D
25 LED_7
26 GND_D
27 LED_8
28 BROWSE_ENC1
29 LED_5
30 BROWSE_ENC0
31 GRID0
32 GND_D
33 GRID1
34 KEY_5
35 GRID2
36 KEY_6
37 GRID3
38 GND_LED
39 V+5_LED
51048-0700
JH101
1GND_F6
2GND_F6
3GND_AH
4A_MUTE_DD
5H_AMP_R
6GND_AH
7H_AMP_L
VKN2097-A
CN2001
1
GND_AD
2
AD_CH1_ISO_H
3
AD_CH2_ISO_L
4
AD_CH1_TRIM
5
AD_CH2_FLTR
6
AD_MSTR_LV
7
AD_CH2_ISO_M
8
AD_HP_LV
9
AD_CH2_ISO_H
10
AD_CH1_ISO_L
11
AD_CH2_TRIM
12
AD_CH1_ISO_M
13
AD_CRFD
14
GND_AD
15
AD_CH2_FD
16
GND_AD
17
AD_CH1_FD
18
V+3R3_AD
19
AD_CH1_FLTR
20
V+3R3_AD
21
V+3R3_AD
22
GND_D
23
LED_6
24
GND_D
25
LED_7
26
GND_D
27
LED_8
28
BROWSE_ENC1
29
LED_5
30
BROWSE_ENC0
31
GRID0
32
GND_D
33
GRID1
34
KEY_5
35
GRID2
36
KEY_6
37
GRID3
38
GND_LED
39
V+5_LED
VKN2097-A
CN101
1V+5_LED
2GND_LED
3GND_LED
4LED_0
5GRID_0
6LED_1
7GRID_1
8LED_2
9GRID_2
10 LED_3
11 GRID_3
12 LED_4
13 LED_ON
14 GND_D
15 LED_BEAT_L
16 KEY_4
17 LED_BEAT_R
18 KEY_3
19 GND_D
20 KEY_2
21 GND_D
22 KEY_1
23 GND_D
24 KEY_0
25 GND_D
26 JOG_DIAL_1
27 FX_ON
28 JOG_DIAL_0
29 FX_BEAT_L
30 V+3R3_D
31 FX_BEAT_R
32 JOG_TCH
33 GND_D
34 GND_D
35 GND_AD
36 AD_TEMPO_1
37 AD_FXLV
38 AD_TEMPO_0
39 V+3R3_AD
VKN2097-A
CN102
1V+3R3_AD
2AD_TEMPO_0
3AD_FXLV
4AD_TEMPO_1
5GND_AD
6GND_D
7GND_D
8JOG_TCH
9FX_BEAT_R
10 V+3R3_D
11 FX_BEAT_L
12 JOG_DIAL_0
13 FX_ON
14 JOG_DIAL_1
15 GND_D
16 KEY_7
17 GND_D
18 KEY_8
19 GND_D
20 KEY_9
21 GND_D
22 KEY_10
23 LED_BEAT_R
24 KEY_11
25 LED_BEAT_L
26 GND_D
27 LED_ON
28 LED_13
29 GRID_3
30 LED_12
31 GRID_2
32 LED_11
33 GRID_1
34 LED_10
35 GRID_0
36 LED_9
37 GND_LED
38 GND_LED
39 V+5_LED
VKN2097-A
CN1001
1V+3R3_AD
2AD_TEMPO_0
3AD_FXLV
4AD_TEMPO_1
5GND_AD
6GND_D
7GND_D
8JOG_TCH
9FX_BEAT_R
10
V+3R3_D
11FX_BEAT_L
12JOG_DIAL_0
13FX_ON
14
JOG_DIAL_1
15GND_D
16
KEY_0
17GND_D
18KEY_1
19GND_D
20KEY_2
21GND_D
22
KEY_3
23
LED_BEAT_R
24
KEY_4
25LED_BEAT_L
26
GND_D
27LED_ON
28LED_4
29GRID_3
30LED_3
31GRID_2
32LED_2
33GRID_1
34LED_1
35GRID_0
36LED_0
37GND_LED
38GND_LED
39V+5_LED
52147-0710
CN2601
1 GND_F6
2 GND_F6
3 GND_AH
4 A_MUTE_DD
5 H_AMP_R
6 GND_AH
7 H_AMP_L
VKN2097-A
CN1001
1
V+3R3_AD
2
AD_TEMPO_0
3
AD_FXLV
4
AD_TEMPO_1
5
GND_AD
6
GND_D
7
GND_D
8
JOG_TCH
9
FX_BEAT_R
10
V+3R3_D
11
FX_BEAT_L
12
JOG_DIAL_0
13
FX_ON
14
JOG_DIAL_1
15
GND_D
16
KEY_0
17
GND_D
18
KEY_1
19
GND_D
20
KEY_2
21
GND_D
22
KEY_3
23
LED_BEAT_R
24
KEY_4
25
LED_BEAT_L
26
GND_D
27
LED_ON
28
LED_4
29
GRID_3
30
LED_3
31
GRID_2
32
LED_2
33
GRID_1
34
LED_1
35
GRID_0
36
LED_0
37
GND_LED
38
GND_LED
39
V+5_LED
AKF7002-A
KN1201
1
AKF7002-A
KN1201
1
USB JACK
MASTER
MIC JACK
MIC VR LR
HP MINI JACK
39P FFC
DDD1771-A
SAME FACE
L = 150 mm
WHITE
7P JUMPER WIRE
JP101
D20PDY0730E
L = 300mm
LIGHT BLUE
USB CABLE
To PC
DDE1128-A
JA701
DKN1653-A JA702
AKB7181-A
JA2601
XKN3017-B
JA101
DKN1237-A
VR701
DCS1111-A
39P FFC
DDD1772-A
REVERSE FACE
L = 190 mm
WHITE
39P FFC
DDD1772-A
REVERSE FACE
L = 190 mm
WHITE
DIP VERTICAL
DIP VERTICAL
DIP VERTICAL
DIP VERTICAL
DIP VERTICAL
DIP VERTICAL
DIP BOARD IN
DIP VERTICAL
CROSS FADER BLOCK
TO JOG PLATE TO JOG PLATE
GND_FP1
GND_FP1
GND_FP1
GND_FP1
GND_FP1
GND_FP1
GND_FP1
GND_FP1
V+3R3_AD
GND_AD
GND_AD
V+3R3_AD
AD_CRFD AD_CRFD
MIC LEVEL MIC MASTER
USB-Btype
Cross fader PCB (jumper connection) of MXR Assy is not service parts.
If necessary to order the MXR Assy.
MAIN ASSY (DWX3907)
A
A A
1/4 - 4/4
MXR ASSY (DWX3911)
E
E E
1/3 - 3/3
DCK1B ASSY (DWX3908)
C
C C
1/3 - 3/3
DCK2B ASSY (DWX3910)
D
D D
1/3 - 3/3
HPJK ASSY
(DWX3912)
B
4. BLOCK DIAGRAM

8DDJ-RB
12 3 4
A
B
C
D
E
F
12 3 4
4.2 OVERALL BLOCK DIAGRAM
JA101 V+VBUS
V+VBUS
uCOM POWER
IC409 IC202
IC205
Q203
V+VBUS V+5_D
IC207 IC204
V+7
V-6 IC210
IC211
IC408
IC410 IC209
IC706
IC701
X404
IC407
X401
IC703
MASTER OUT
IC705
MIC IN IC702(2/1) IC702(2/2)
IC708
IC1201 IC1201
PC1202
PC1201
PC1202
PC1201
R5S72670P144FP
MAIN uCom
FLASH
DYW****-/J*
(MX25L1633EM2I-10G)
CSS1760-
48 MHz X’tal
AK4387ET
MASTER DAC
AK4387ET
HP DAC
NJM4580MD
AMP/Filter
ADDA_BCK
M_DAC_DATA
MUTE
XIN
XOUT
USB_X1
USB_X2
SSITxD
ADDA_MCLK AUDIO_XOUT
DAC_CDTI, DAC_CCLK
for USB
FAULT_DET
Audio Serial Control
VOLTAGE
DETECTION
CIRCUIT
USB-B
*Note on DYW****
The “****” part of the part number changes each time the firmware is updated.
JACK
S-1172B1C-US
3.3 V 1.25 V Reg.
S-80942CNMC-G9C
Reset IC
BH3547F
HP AMP
(6dB)
AUDIO_X1
GPIO
GPIO PWR_ON
H_DAC_BCK
H_DAC_LRCK
H_DAC_DATA
CS/SSIWS
SCLK/SSISCK
MOSI/SSIDATA
MISO
WP
MM3411A33N
5 V 3.3 V Reg.
LED POWER
VOLTAGE
DETECT
(V+VBUS)
V_DET
DYW****-/J*
(PIC10F206-I/P)
Touch uCom
HP miniJACK
RPI-579N1
PHOTO
INTERRUPTER
A/D
RPI-579N1
PHOTO
INTERRUPTER
JOG_DIAL1_0
JOG_DIAL1_1
JOG_TCH1
KEY/LED MATRIX IN/OUT
VR
/
1
/
1
S-80927CNMC-G8X
Reset IC
/
1
/
1
JOG
Touch
JTAG
IRQ
TCLK TCLK
TCLK
xRST
TC74HC4051AFT
MUX VR
/
1
/
1
/
1
DSS1202-
22.5792 MHz
Xtal
for AUDIO 44.1 KHz
/
1
Mute
drive
A_MUTE
HP_AMP_MUTE
HP_MUTE
/
1
/
1
GPIO
GPIO
GPIO
MUTE
NJM4565MD
AMP NJM4565MD
AMP
JOG_2JOG_1
TEMPO_1_0
TEMPO_1_1
TC74HC4051AFT
MUX
FX2 LEVEL
CROSS FADER
AUDIO_X2
/
8
JTAG
TCLK
GPIO
GPIO
IRQ
IRQ
IRQ
MIC IN
PHONES JACK MIC VOL
VBUS
5V
FET SW
PWR_ON2
DYW****-/J*
(PIC10F206-I/P)
Touch uCom
RPI-579N1
PHOTO
INTERRUPTER
RPI-579N1
PHOTO
INTERRUPTER
JOG_DIAL2_0
JOG_TCH2
/
1
/
1
JOG
Touch
JOG_DIAL2_1
IRQ
LED LED
Tr.Buf. Tr.Buf.
/5/4
/5
KEY
GPIO GPIO GPIO GPIO
/5
/5
GPIO
Tr.Buf.Tr.Buf.
KEY
No Mount
FX1 LEVEL
/
7
/
7
/
1
GPIO
/
3
MUTE
MUTEMUTE
MASTER OUT
RCA PIN
Mute
drive
TC74VHC08FK
HPAMP_BIAS
FLASH_I2S_SEL
FLASH_CS_EN
GPIO
DISCHARGE
CIRCUIT
XIN
XOUT
GPIO
/
1
/
1
/
1
/
1
MUX_SW_A, MUX_SW_B, MUX_SW_C
AD_MUX_0
AD_MUX_1
LED_0/1/2/3/4
KEY_0/1/2/3/4
GRID_0/1/2/3
LED_9/10/11/12/13
KEY_7/8/9/10/11
TC7SH126FU
74VHC4051AFT
MUX
VR
/
1
AD_MUX_2
AK5358AET
MIC ADC
/
1
AUDIO POWER
NJM2392M
5 V 7 V, -6 V DDC.
KEY, JOG POWER
MM3411A33N
5 V 3.3 V Reg.
ADC, DAC POWER
MM1856A50N
7 V 5 V Reg.
HP AMP POWER
MM1856A50N
7 V 5 V Reg.
AMP POWER
CH1 TRIM
CH1 HI
CH1 MID
CH1 LOW
CH1 FILTER
CH1 FADER
MASTER VOL
VR
/
2
BROWSE_ENC0, BROWSE_ENC1
GPIO
GPIO
GPIO
Rotary
Encorder
CH2 TRIM
CH2 HI
CH2 MID
CH2 LOW
CH2 FILTER
CH2 FADER
HP VOL
VR TEMPO_2_0
TEMPO_2_1
/ 1
/ 1
/1
Tr.Buf.
KEY
LED
KEY_5/6
Tr.Buf.
LED_5/6/7/8
/
2
/
4
V_DET_AD
/1 /1
AD_FX1_LV
AD_FX1_LV
AD_CRFD
AD_FX2_LV
IRQ
GRID_0/1/2
ADAT_MIC
SSISCK
SSIRxD
ADDA_MCLK
MIC_ADC
ADDA_LRCK SSIWS
M_DAC_CS
ADDA_XRST
GPIO
GPIO
H_DAC_CS
GPIO
GPIO
/
1
IC711
IC712
IC713
68
46
69
MAIN ASSY
A
HPJK ASSY
B
MXR ASSY
E
DCK2B ASSY
D
DCK1B ASSY
C
1
3
2
5
3
2
3
5
1
7
62
4
1
65
6
1
123
131
121
115
117 119
161
158
160
159
166
169
171
165
118
116
104
124
125
129
127
10
11
3
6
1
2 4 5
10
10121113
11
876
137
173
111
136
2743
4
4
151
150
155
168
154 139
134
133
113
138
135
109
176
167
142
140
4
2
26
24
15
14
13
36
34
25
23
16 28 4
4
4
3
83
96
63
64
95
9997
85
87
81
80
82
2220
3
5
5
3
9 10 11
9
10
11
9
3
10
11
1312 14 15
1 2 4
1312 14 15
15 14
13
1 2 4
105
108
107
1
3
1
4
1
6
1
1
2
43
37
145144
174
19

9
DDJ-RB
56 7 8
56 7 8
A
B
C
D
E
F
4.3 POWER BLOCK DIAGRAM
USB-B JACK
JA101
MASTER OUT JACK
JA702
MIC JACK
JA701
5 V 3.3 V
REGULATOR
for UCOM
IC202
L408
UCOM
IC406
V+1R25_SH V+1R25_SHD
V+1R25_SHA
V+3R3_SHD
V+3R3_AD
V+3R3_SH
2.7 V RESET
IC409
FLASH ROM
IC408
V+3R3_D V+3R3_D
PWR_ON
V+3R3_AD
V+5_LED V+5_LED
5V 7V & -6V
DC-DC
CONVERTER
IC207
7V 5V
REGULATOR
for DAC
IC204
7V 5V
REGULATOR
for HP POWER
IC210
R252
R219
HEADPHONES DAC
IC701
MASTER DAC
IC703
V+5_A
V+5_HP HEADPHONES
AMP
IC706
V+7
V-6
MUTE
DRIVE
AUDIO AMP & LPF
IC705
V+7_A
V-6_A
3.3 V 1.25 V
REGULATOR
for UCOM
IC205
5 V 3.3 V
REGULATOR
IC211
5 V FET SW
Q203
USB CABLE
PC
5 V/500 mA
V+VBUS
VOLTAGE
DETECT
(V+VBUS)
V_DET_AD
5 V
DISCHARGE
KEY
LED DRIVE LED
R1001
JOG TOUCH
IC1201
JOG ROTATION
PC1201/PC1202
TEMPO SLIDER/FX_VOL
VR1203/VR1201
CR FADER
VR2215
V+3R3_AD
V+3R3_D
V+5_LED
V+VBUS
VOLTAGE DETECTION CIRCUIT
V+3R3_D OVER
V+7 UNDER
V-6 UNDER
V+5_A UNDER/OVER
V+5_HP UNDER/OVER
FAULT_DET
V+1R25_PLL
L402
L404
MULTI PLEXER
IC711/IC712/IC713
V+3R3_AD
V+5_D
SBD
D210
P101
I2S BUFFER
IC407
PWR_ON2
INVERTER
IC410
R572
R571
V+VBUS
L406
MUTE
Q705/Q706
HP_MUTE_DD
A_MUTE_DD
MUTE
Q707/Q708
REGULATOR
L
OTHER
FILTER, COIL, BEADS
PICP
DC-DC CONVERTER
IC PROTECTOR
RRESISTOR
V+5_D
V+3R3_SHD
L403
7 V
DISCHARGE
MIC ADC
IC708
MIC AMP
IC702
KEY
LED DRIVE LED
R1001
JOG TOUCH
IC1201
JOG ROTATION
PC1201/PC1202
TEMPO SLIDER/FX_VOL
VR1203/VR1201
V+3R3_AD
V+3R3_D
V+5_LED
KEY
LED DRIVE LED
R2001
VR
VR2201 to VR2215
V+3R3_AD
V+5_LED
ROTARY ENCODER
S2204
CH_FADER
VR2213/VR2214
ICP
STBY
ICP
STBY
VOLTAGE
DETECT
RESET IC (4.2 V) V_DET
R564
V+3R3_SHA
R
STBY
MUTE
Q2601/Q2602
KEY DRIVE
R
PU
V+3R3_SHD
R
PU
HP Mini JACK
JA2601
DCK1B ASSY
C
MAIN ASSY
A
DCK2B ASSY
D
MXR ASSY
E
HPJK ASSY
B
4 5 5
15
1
3
5
15 6
8
8
4
1
51
1
6
15
21
76
75 86 88
45
33 71 78
14
15
8
4
25
8
102 114 130
110 17 29 40 57 66 98
162 170110 120 126 141 152
16
2
2
3
3

10 DDJ-RB
12 3 4
A
B
C
D
E
F
12 3 4
5. DIAGNOSIS
5.1 POWER ON SEQUENCE
Operation clock setting: 144 MHz
Power ON
Yes
No
Mute: ON
Update mode
Utility setting mode
Starting opening indication
Service mode 1
Version check mode
Check mode of the buttons,
knobs, etc.
Factory reset mode
Voltage value display mode
Voltage value fluctuation
range check mode
Power failure monitoring
Power voltage monitoring
Detection of change in
operating elements
USB transmission
(sending operating element
information, MIDI/HID)
USB reception
(reception and indication of
LED display data)
Audio control
Service mode 2
Measurement mode of the
load of JOG dial
Photo interrupter
check mode
Peripheral device power: ON
Loading the program from
FLASH to RAM
Start-up
Start-up of each task
Initial settings of related port
Related register/
RAM returns to a default
Generation of tasks Start-up
*In the order of
start-up
*To normal main
loop processing
Update
mode ?
Operation mode
judgment
Start-up of real time OS
Oscillation of
peripheral module clock starts
Power supply control task
LED control task
KEY input control task
AD input control task
LED/KEY scan control task
JOG input control task
USB control task
DMA control task
Serial FLASH control task
DAC control task
Audio control task
MIDI control task
Service mode control task
System control task
ENCODER control task
Illumination control task
Demo mode control task
Customized setting mode
Normal mode

11
DDJ-RB
56 7 8
56 7 8
A
B
C
D
E
F
5.2 TROUBLESHOOTING
In this section, causes of failure, diagnostics points, and corrective measures can be searched for according to symptoms.
For the relationship of each power-supply and signal system, see “4.3 POWER BLOCK DIAGRAM.”
If software of the product is updated before performing diagnostics, check that software updating has been performed properly
before proceeding to diagnostics.
If software updating has not been performed properly, update the software, following the instructions in
“8.2 UPDATING OF THE FIRMWARE.”
The waveform numbers and voltage confirmation-point numbers described in this section correspond to the numbers on the
circuit diagrams and PCB diagrams.
Be sure to check the failure points, as well as check for failure in their peripheral circuits.
1 Failure in the
power system (1)
MAIN Assy Check that the voltage of the direct pin of
USB jack (JA101) is in the range of
4.75–5.25 V.
If the voltage is outside the range of 4.75–5.25 V,
failure in the USB-bus power, USB cable and
USB jack (JA101).
4.3 POWER BLOCK
DIAGRAM
5.3 MONITORING
OF POWER SUPPLY
AND VOLTAGE
2 Failure in USB-
bus power
MAIN Assy Check that the V+VBUS voltage is lower
than that of the direct pin of USB jack
(JA101) by approximately 0.1 to 0.2 V.
If the voltage is 0 V, the wire for the IC protector
(P101) may be broken.
4.3 POWER BLOCK
DIAGRAM
3 Power failure in
the UCOM
MAIN Assy If V+3R3_SH is abnormal
(2.7 V or less)
If the normal voltage of V+3R3_SH is not restored,
IC202 or a part that is connected to V+3R3_SH on
the MAIN Assy may be defective, or connection may be poor.
4.3 POWER BLOCK
DIAGRAM
In a case where the unit is not started after the USB cable is connected and the unit is turned ON (all LED are not lit)
4 Power failure in
the UCOM
MAIN Assy If the V+3R3_SH voltage is normal,
check that Q203 (5V FET SW) is
functioning properly.
If the PWR_ON signal is "L," V+5D, V+5_LED will not
be output, because Q203 is not turned ON.
The error-detection circuit may have been activated.
Go to [5].
If the PWR_ON signal is "H," the error-detection
circuit is not activated. Check the voltages of all
power ICs. If they are normal, see "[1-2] Failure in
the microcomputer system."
4.3 POWER BLOCK
DIAGRAM
1 ——— Service mode Identify a failure point. After a failure point is identified, see the section
referenced in this manual.
6. SERVICE MODE
1 Disconnection,
breakage, or
loose connection
of internal cables
Cables Check that all the cables are securely
connected. Check that there is no
breakage in the cables.
Securely connect a cable if it is not connected.
If a cable is broken, replace it.
Note: If an FFC cable is disconnected, be careful of
the orientation of the contacts when reconnecting it,
referring to the printed guide on the board.
4.1 OVERALL
WIRING DIAGRAM
No. Cause Diagnostics Point Item to be Checked Corrective Action Reference
[0] Prior Confirmation
[0-1] Checking in Service Mode
[0] Prior Confirmation
[1] Failure in Startup (Failure in power-on)
[2] Display (LED indicators)
[3] Operations (Buttons / Volumes / Faders / Sliders / Jog dial
[4] USB connection
[5] AUDIO OUT
[6] AUDIO IN
[7] Basic Operation Check of the MAIN UCOM
[0-2] Checking Internal Cables
Contents
[1] Failure in Startup (Failure in power-on)
[1-1] Failure in the power system

12 DDJ-RB
12 3 4
A
B
C
D
E
F
12 3 4
[1-2] Failure in the microcomputer system
1 Defective LED,
Defective LED
signal line
Periphery of the
abnormal LED
Check the difference in electrical potentials
between the positive and negative
electrodes of the LED that does not light
(normally, it must be within approx. 3.2 V:
blue, 2.2 V: others).
If the difference is outside the normal range, the
signal lines at the periphery of the corresponding
LED, resistors, or the LED itself may be defective.
10.13 WAVEFORMS
S,./
1 Defective LED
signal line,
Defective
UCOM
MAIN Assy Check the output signal of UCOM (IC406). If the output signal is abnormal, the UCOM
(IC406) and LED signal line may be defective.
10.13 WAVEFORMS
S,./
2 Defective LED Periphery of the
abnormal LED
Check the connections of the LED then
check the forward voltage (approx. 3.2 V:
blue, 2.2 V: others) between both ends of
the LED.
If the signal waveform is abnormal, the LED
may be defective.
10.13 WAVEFORMS
S,./
3
Defective transistor
for LED drive
DCK1 Assy,
DCK2 Assy,
MXR Assy
Check the transistors for LED drive. If the signal waveform is abnormal, the transistor
may be defective.
10.13 WAVEFORMS
S,./
No. Cause Diagnostics Point Item to be Checked Corrective Action Reference
6 Power failure (2)
Identification of
defective power
system
MAIN Assy Deactivate the voltage monitoring circuit
then check the section with improper
voltage.
The voltage monitoring circuit can be deactivated by
removing R267 (0 ) on the FAULT_DET.
See the notes in “
5.3 MONITORING
OF POWER SUPPLY AND VOLTAGE
”
before proceeding to further diagnostics.
To identify the section with improper voltage, check
the voltage at each point on the MAIN Assy.
4.3 POWER BLOCK
DIAGRAM
5.3 MONITORING
OF POWER SUPPLY
AND VOLTAGE
1 Power failure in
the UCOM
MAIN Assy Check the power terminal of the
UCOM (IC406).
Check the power and voltage are normal.
Check the power line and the parts, such as coils
(beads), resistors, and capacitors.
If no problem was found with the parts, power line,
and conduction between the power supply and
GND, the UCOM (IC406) may be defective.
10.13 WAVEFORMS
PQR
2 UCOM
Reset circuit
error
MAIN Assy Check the Reset terminal (pin 46) of the
UCOM (IC406).
In normal operation the voltage of the Reset
terminal (Pin 46) is high. If it is low, check if the
voltage at V+3R3_SH or V+3R3_SHD is 2.7 V
or less. Check the reset line, resistors,
capacitors, and the Reset IC (IC1001).
10.13 WAVEFORMS
PQR
3 UCOM
X'tal error
MAIN Assy Check the oscillation waveforms of the
X'tal (X404).
If the oscillation waveforms are abnormal, check the
resistor on the oscillation-signal line, the capacitor,
and X'tal (X404). If nothing is wrong with these
parts, the UCOM (IC406) may be defective.
10.13 WAVEFORMS
PQR
4 UCOM
startup error
MAIN Assy After startup, check the lighting statuses of
the LEDs.
(For example, although some of the LEDs
light properly, the unit is not started up
properly.)
Reload the program via USB
(8.2 UPDATING OF THE FIRMWARE).
If the normal status is not recovered after
all above steps are performed,
the UCOM (IC406) may be defective.
8.2 UPDATING OF
THE FIRMWARE
5 Power failure in
the UCOM
MAIN Assy Check if the error-detection circuit has
been activated.
If the FAULT_DET signal is "L," the error-detection
circuit has been activated. Go to [6].
If the FAULT_DET signal is "H," the error-detection
circuit is not activated. Check the voltages of all power
ICs. If they are normal, see "[1-2] Failure in the
microcomputer system."
4.3 POWER BLOCK
DIAGRAM
No. Cause Diagnostics Point Item to be Checked Corrective Action Reference
[2] Display (LED indicators)
[2-1] Any one of the LEDs does not light.
[2-2] Several LEDs do not light or abnormal light

13
DDJ-RB
56 7 8
56 7 8
A
B
C
D
E
F
[3] Operations (Buttons / Volumes / Faders / Sliders / Jog dial)
[3-2] The buttons are disabled except performance pads
Operation of all operating elements can be confirmed in Service mode.
[3-1] The performance pads (8 large square pads on each of Decks 1 and 2) do not function.
[3-3] Rotary selector not controllable
1
Loose connection
/defective parts
DCK1 Assy,
DCK2 Assy,
MXR Assy
Check that the signal lines (AD_****)
between the VRs/faders/sliders, multiplexer
(IC711, IC712, IC713) and UCOM (IC406)
are all right.
10.13 WAVEFORMS
YZ!"#$
No. Cause Diagnostics Point Item to be Checked Corrective Action Reference
1
Loose connection
/defective parts
DCK1 Assy
DCK2 Assy
MXR Assy
Periphery of the
abnormal button
Check that the signal line from the
corresponding switch to the transistor at
the switching-detection section up to the
UCOM (IC406) is all right.
When the matrix key is pressed :
Normally, repeat High/Low in grid cycle when
a performance pad is ON, and High (approx.
3.3 V) when it is OFF. If it is not, the performance
pad is defective, or signal line, FFC, or
connector may be in failure.
When the direct key (FX ON/OFF button, FX
BEAT setup buttons) is pressed :
Normally, the logic is Low (approx. 0 V) when
a performance pad is ON, and High
(approx. 3.3 V) when it is OFF. If it is not, the
performance pad is defective, or signal line,
FFC, or connector may be in failure.
If other switches that are connected to the same
signal line operate normally, the corresponding
switch or the diode on the signal line for the
corresponding switch may be defective. If other
switches do not operate either, a transistor in the
switching-detection section or its peripheral
circuits may be defective.
10.13 WAVEFORMS
SWX
2 Defective UCOM
(IC406)
MAIN Assy If the symptom persists after the above
corrections.
The UCOM (IC406) may be defective. [7] Basic Operation
Check of the UCOM
2
Defective UCOM
(IC406)
MAIN Assy If the symptom persists after the above
corrections.
The UCOM (IC406) may be defective. [7] Basic Operation
Check of the UCOM
1
Loose connection
/defective parts
DCK1 Assy
DCK2 Assy
Periphery of the
abnormal button
Check that the port logic of the
UCOM (IC406) that is connected
to a performance pad changes when the
pad is operated.
When the matrix key is pressed :
Normally, repeat High/Low in grid cycle when
a performance pad is ON, and High (approx.
3.3 V) when it is OFF. If it is not, the performance
pad is defective, or signal line, FFC, or
connector may be in failure.
10.13 WAVEFORMS
SWX
2 Defective UCOM
(IC406)
MAIN Assy If the symptom persists after the above
corrections.
The UCOM (IC406) may be defective. [7] Basic Operation
Check of the UCOM
1 Defective
BROWSE
MXR Assy Check that the signal lines
(ENC_BRWS_0/1) are normal during
rotation of the rotary selector.
If the signals are not normal, signal line, resistor,
the rotary selector may be defective.
10.13 WAVEFORMS
%&
No. Cause Diagnostics Point Item to be Checked Corrective Action Reference
[3-4] Volumes, Faders or sliders not controllable
If the signals are not normal, signal line, resistor,
capacitor may be defective.

14 DDJ-RB
12 3 4
A
B
C
D
E
F
12 3 4
[3-5] Abnormalities regarding the Jog dial
After the Jog dial Assy is disassembled then reassembled, be sure to check that the load value for the Jog dial is within the
specified range. Refer to the "6.1 SERVICE MODE_2-1: Measurement mode of the load of Jog dial".
10 Improper
assembly of the
Jog dial
Resistance to turning the Jog dial is too strong. (The load value for the Jog dial is outside the specified range.
Jog dial Assy Check that the load value for the Jog dial
is within the specified range, referring to
“Measuring method” in “6.1 SERVICE
MODE_2-1: Measurement mode of the
load of Jog dial.”
If the load value is outside the specified range,
perform manual running-in rotations of the Jog
dial.
See "Procedure for applying grease during
reassembly of the jog dial" in "7. DISASSEMBLY."
6.1 SERVICE MODE
7. DISASSEMBLY
3
Defective UCOM
(IC406)
MAIN Assy If the symptom persists after the above
corrections.
The UCOM (IC406) may be defective. [7] Basic Operation
Check of the UCOM
1
Loose connection
/defective parts
Turning of the Jog dial is not detected.
DCK1 Assy,
DCK2 Assy
Check the JOG_DIAL1_0/1_1 and
JOG_DIAL2_0/2_1 waveforms while the
Jogdial is rotated.
If either waveform is abnormal, the photo
interrupters (PC1201 and PC1202) may be
defective.
10.13 WAVEFORMS
P*+
4
Loose connection
/defective parts
Touching of the jog dial is not detected, or touching is detected although the jog dial is not touched.
DCK1 Assy,
DCK2 Assy
Check the signal level of Pin 4 of
IC1201.
The signal is "H" while the jog dial is not touched
and becomes "L" when it is touched. If it is not,
go to [5].
If it is, go to [8].
10.13 WAVEFORMS
'(
10.13 WAVEFORMS
'(
6
Loose connection
/defective parts
DCK1 Assy,
DCK2 Assy
Check the connection between Plate
(DAH3113) and IC1201.
As the surface of the Plate is coated,
a conduction check must be performed on
the plate surface facing the jog dial
(DNK6638) through their gap.
Possible causes are poor connection between
the aluminum plate of the jog dial and the
KN1201 metal fittings for grounding, or
poor connection or a defective part in the circuits
between the KN1201 and IC1201.
———
7
Loose connection
/defective parts
DCK1 Assy,
DCK2 Assy
Check connections between KN1201
and IC1201.
Poor connection or a defective part in the circuits
between the KN1201 and IC1201.
———
8
Loose connection
/defective parts
DCK1 Assy,
DCK2 Assy
Check connections between IC1201 and
UCOM (IC406).
If the connection is properly made, the UCOM
(IC406) may be defective.
———
5
Loose connection
/defective parts
DCK1 Assy,
DCK2 Assy
Check the signal of Pin 3 of
IC1201 (Test land "Freq").
The signal produces a pulse waveform in the
frequency range of 900 to 1300 kHz while the jog dial
is not touched and a pulse waveform in the frequency
range of 400 to 700 kHz while it is touched.
If so, IC1201 may be defective. If the signal produces
a pulse waveform in the frequency range of 900 to
1300 kHz regardless of the jog dial's being touched
or not, go to [6].
For other abnormalities, go to [7].
2
Defective JOG1/2
photo interrupter
DCK1 Assy,
DCK2 Assy
Check that the phases of the
JOG_DIAL1_0/1_1
and
JOG_DIAL2_0/2_1
waveforms are identical
to those described in "2-2: Photo Interrupter
check mode" in "6.1 SERVICE MODE" when
the jog dial is turned.
10.13 WAVEFORMS
P*+
No. Cause Diagnostics Point Item to be Checked Corrective Action Reference
9 Improper
assembly of the
Jog dial
The Jog dial turns too freely. (The load value for the Jog dial is outside the specified range.)
Jog dial Assy Check that the load value for the Jog dial
is within the specified range, referring to
“Measuring method” in “6.1 SERVICE
MODE_2-1: Measurement mode of the
load of Jog dial.”
If the load value is outside the specified range,
detach the jog dial then reapply grease.
See "Procedure for applying grease during
reassembly of the jog dial" in "7. DISASSEMBLY."
6.1 SERVICE MODE
7. DISASSEMBLY
If the waveforms are normal but the phases are
not correct, the photointerrupters (PC1201 and
PC1202) may be mounted improperly.
2
Loose connection
/defective parts
DCK1 Assy,
DCK2 Assy,
MXR Assy
Check the voltage at each signal line
when the corresponding VR is turned or
the corresponding fader/slider is moved.
10.13 WAVEFORMS
YZ!"#$
3
Defective UCOM
(IC406)
MAIN Assy If the symptom persists after the above
corrections.
The UCOM (IC406) may be defective. [7] Basic Operation
Check of the UCOM
If the voltage of the signal line does not change
between 3.3 V and 0 V when the VRs, faders, or
sliders are operated, the corresponding operating
element, signal line,
multiplexer
(IC711, IC712,
IC713),
FFC, connector, resistance, or capacitor
may be defective.
If the voltage of the AD_TEMPO1/2_1 signal line is
not 1.65 V, or if the voltage of the
AD_TEMPO1/2_0
signal line does not change between 3.3 V and 0 V
when the tempo slider is moved, the tempo slider,
signal line,
multiplexer
(IC711, IC712, IC713),
FFC, connector, or capacitor may be in failure.

15
DDJ-RB
56 7 8
56 7 8
A
B
C
D
E
F
4
Loose connection
/defective parts
MAIN Assy Check the digital input signals to DAC
(IC703) for MASTER OUT.
• MCLK: pin 1
• BCLK: pin 2
• DATA: pin 3
• LRCK: pin 4
• XRST: pin 5
If any of those signals is abnormal, connection
of the corresponding signal line may be loose or
the resistor, capacitor or UCOM (IC406)
may be defective.
If all signals are normal, the DAC (IC701) and its
peripheral circuitry do not function properly.
10.13 WAVEFORMS
tuvwx
5
Mute signal
Loose connection
/defective parts
MAIN Assy Identify the point where the audio signal is
interrupted on the line from pins 10 and 11
of IC703 (DAC for MASTER OUT) to the
jacks (JA702).
The audio signal may be interrupted by a loose
connection of the signal line or by a defective
resistor, capacitor, transistor, OP amps (IC705)
or jacks.
10.13 WAVEFORMS
yz
2 ———
Mute signal
Loose connection
/defective parts
MAIN Assy Check the level of the MUTE audio
muting signal.
Normally, the A_MUTE_DD signal must be low
(Approx. -6 V, muting canceled). When it is high
(Approx. 3.3 V), muting is activated and no sound
is output. The MUTE signal becomes high,
possibly because connection of the
corresponding signal line is loose or the Muting
circuit (Q709) or Muting Drive circuit (Q710, Q711
Q713, etc.) is defective.
3 ———
Mute signal
Loose connection
/defective parts
MAIN Assy Check the level of the A_MUTE audio
muting signal.
Normally, the A_MUTE_DD signal must be low
(Approx. 0 V, muting canceled). When it is high
(Approx. 3.3 V), muting is activated and no
sound is output. The A_MUTE_DD signal becomes
high, possibly because connection of the signal
line is loose or the transistor (Q709) or UCOM
(IC406) is defective.
0
Wrong input setting
of the application
installed on the PC
Input setting of the
application installed
on the PC
Check that the input setting of the
application installed on the PC is
appropriate.
The PC will not recognize the unit if the input
setting of the application installed on the PC is
inappropriate.
Operating instructions
1 ——— MAIN Assy Check that an audio signal is output from
DAC (IC703 pin 10, 11) for MASTER OUT.
If MASTER connector outputs, go to [2], [3].
If MASTER connector does not output,
go to [4].
10.13 WAVEFORMS
twx
0
Wrong input setting
of the application
installed on the PC
Input setting of the
application installed
on the PC
Check that the input setting of the
application installed on the PC is
appropriate.
The PC will not recognize the unit if the input
setting of the application installed on the PC is
inappropriate.
Operating instructions
1 Failure in startup MAIN Assy Check the lighting statuses of the LEDs
during startup.
If no LED lights, see [1] Failure in Startup. [1] Failure in Startup
2 Defective UCOM MAIN Assy Check the communication waveforms of
the USB_DP/DN lines.
If the unit is connected to a PC via the USB cable,
communication will be performed through the USB
DP/DN lines. If communication cannot be
performed, check the USB cable, connectors,
internal cables, resistors, capacitors, and filters.
If nothing is wrong with them, UCOM (IC406) is
defective.
Check the items listed in “[1-2] Failure in
the microcomputer system”.
[1-2] Failure in the
microcomputer
system
10.13 WAVEFORMS
ij
No. Cause Diagnostics Point Item to be Checked Corrective Action Reference
[5] AUDIO OUT
[5-1] MASTER OUT is not output.
[4] USB connection
[4-1] The unit cannot be recognized by the PC when connected to the PC via USB connection.

16 DDJ-RB
12 3 4
A
B
C
D
E
F
12 3 4
5
10.13 WAVEFORMS
tuvwx
10.13 WAVEFORMS
tuv
Loose connection
/defective parts
MAIN Assy Check the digital input signals to DAC
(IC701) for HP.
• MCLK: pin 1
• BCLK: pin 2
• DATA: pin 3
• LRCK: pin 4
• XRST: pin 5
If any of those signals is abnormal, connection
of the corresponding signal line may be loose or
the resistor, capacitor, UCOM (IC406) may be
defective. If all signals are normal, the DAC
(IC701) and its peripheral circuitry do not
function properly.
6 ———
Loose connection
/defective parts
HPJK Assy Identify the point where the audio signal is
interrupted on the line from JH101 to the
jacks (JA2601).
If audio signals is abnormal, connection of the
corresponding signal line may be loose or the
resistor, capacitor, jack terminal may be
defective.
Before checking through the table below, check if the settings of the PC application are correct.
0
Wrong input setting
of the application
installed on the PC
Input setting of the
application installed
on the PC
Check that the input setting of the
application installed on the PC is
appropriate.
The PC will not recognize the unit if the input
setting of the application installed on the PC is
inappropriate.
Operating instructions
1
Loose connection
/defective parts
MAIN Assy Check the audio signal (HP_L/R), using
pins 5 and 7 of the JH101 on the MAIN
Assy.
If no audio signal is output, the MAIN Assy may
be defective. Go to [2].
If an audio signal is output, connection between
the HPJK and MAIN Assys may be loose,
connections inside the HPJK Assy may be loose,
or these Assys may be defective. Go to [6].
10.13 WAVEFORMS
AB
3
Loose connection
/defective parts
MAIN Assy Check the audio input signal, using
pins 3 and 5 of the HP AMP (IC706).
Check the audio output signal, using
pins 1 and 7 of the HP AMP (IC706).
If the output signal is normal, connection of the
audio signal between HP AMP IC706 and
JH101 may be loose.
If the input signal is abnormal, connection of the
audio input signal line may be loose or the
resistor or capacitor may be defective.
If the input signal is normal but the output signal
is abnormal, go to [4].
———
2 ——— MAIN Assy Check the audio output signal, using
pins 10 and 11 of the HP DAC (IC701).
If an audio signal is output, go to [3].
If an audio signal is not output, go to [5].
———
Check if the MASTER OUT signal is normal, then if it is, check through this article.
1
Loose connection
/defective parts
MAIN Assy Check the audio signal (MIC_IN), using
JA701 on MAIN Assy.
If no signal is output, the MIC jack or MIC cable
may be defective. If an signal is output,
connection of the corresponding signal line
may be loose or the resistor, capacitor,
OP amp, MIC volume ADC (IC708) may be defective.
———
2
Loose connection
/defective parts
MAIN Assy Check the audio signal (MIC_ADC) on
MAIN Assy.
If no signal is output, connection of the
corresponding signal line may be loose or the
resistor, capacitor, OP amp, MIC volume, jack
terminal may be defective.If an signal is output,
the ADC (IC708) and its peripheral circuitry may
be defective.
———
3
Loose connection
/defective parts
MAIN Assy Check the digital input signals to ADC
(IC708) for MIC.
• MCLK: pin 11
• BCLK: pin 12
• DATA: pin 9
• LRCK: pin 10
• XRST: pin 5
If any of those signals is abnormal, connection
of the corresponding signal line may be loose or
the resistor, capacitor, UCOM (IC406) may be
defective. If all signals are normal, the ADC
(IC708) and its peripheral circuitry do not
function properly.
No. Cause Diagnostics Point Item to be Checked Corrective Action Reference
4 ———
Mute signal
Loose connection
/defective parts
MAIN Assy Check the level of the muting signal
(IC706 pin 2) for HP AMP.
Normally, the muting signal must be high
(Approx. 3.3 V, muting canceled). When it is low
(Approx. 0 V), muting is activated and no sound
is output. The signal line may be defective.
If the muting signal is high and normal, possibly
HP AMP is defective.
[5-2] The HEAD PHONE signal is not output.
[6] AUDIO IN
[6-1] The MIC INPUT signal is not output

17
DDJ-RB
56 7 8
56 7 8
A
B
C
D
E
F
1 Failure in LED
lighting
DCK1 Assy
DCK2 Assy
MXR Assy
In each mode where the abnormal LED
should be lit, check the GRID signals
(GRID_0 to GRID_3) relating to the
abnormal LED between the UCOM and
the transistor for driving the corresponding
LED.
If the waveform is abnormal, connection of the
GRID signal line may be loose or the resistor,
capacitor, or transistor may be defective.
If nothing is wrong with these parts, the UCOM
(IC406) may be defective.
10.13 WAVEFORMS
STUV
4 Failure in button
operation
DCK1 Assy
DCK2 Assy
MXR Assy
When pressing the abnormal button, check
the GRID signal (GRID_0 to GRID_3)
corresponding to the abnormal key
between the UCOM and the switch
for the corresponding key (S****).
If the waveform is abnormal, connection of the
KEY-detection signal line may be loose or the
resistor, capacitor, or transistor may be defective.
If nothing is wrong with these parts, the
UCOM (IC406) may be defective.
10.13 WAVEFORMS
STUV
7
Failure in operation
of the
performance pad,
volume,
tempo slider, fader,
rotary selector, or
Jog dial (touching
and rotating)
DCK1 Assy
DCK2 Assy
MXR Assy
MAIN Assy
Check the waveform of each input signal
to the UCOM (IC406) when you operate
the abnormal operating element.
If the waveform is abnormal, connection of the
corresponding signal line may be loose or the
resistor, capacitor, or transistor may be defective.
If nothing is wrong with these parts, the
UCOM (IC406) may be defective.
10.13 WAVEFORMS
PYZ!"#$
%&'*+
5 DCK1 Assy
DCK2 Assy
MXR Assy
MAIN Assy
When pressing the abnormal button, check
the KEY detection signal between the
abnormal key and the transistor for key
detection.
If the waveform is abnormal, connection of the
KEY-detection signal line may be loose or the
switch, transistor, or diode may be defective.
10.13 WAVEFORMS
SWX
6 DCK1 Assy
DCK2 Assy
MXR Assy
MAIN Assy
When pressing the abnormal button, check
the KEY-detection signal (KEY_0 to
KEY_11) corresponding to the abnormal
key between the transistor for key detection
and the UCOM.
If the waveform is abnormal, connection of the
KEY-detection signal line may be loose or the
resistor, capacitor, or transistor may be defective.
If nothing is wrong with these parts, the
UCOM (IC406) may be defective.
10.13 WAVEFORMS
SWX
2 DCK1 Assy
DCK2 Assy
MXR Assy
In each mode where the abnormal LED
should be lit, check the LED-driving signal
between the transistor for driving the
corresponding LED and the abnormal LED.
If the waveform is abnormal, connection of the
LED-driving signal line may be loose or the
resistor, transistor, or diode may be defective.
10.13 WAVEFORMS
S,./
3 DCK1 Assy
DCK2 Assy
MXR Assyy
In each mode where the abnormal LED
should be lit, check the LED-control signal
(LED_0 to LED_13) corresponding to the
abnormal LED between the transistor for
driving the corresponding LED and the
UCOM.
If the waveform is abnormal, connection of the
LED-control signal line may be loose or the
resistor, capacitor, or transistor may be defective.
If nothing is wrong with these parts, the
UCOM (IC406) may be defective.
10.13 WAVEFORMS
S,./
No. Cause Diagnostics Point Item to be Checked Corrective Action Reference
[7] Basic Operation Check of the MAIN UCOM
Note: First, check if the voltage at each section is OK.
Operation checking of all operating elements and LEDs can be performed in Service mode. With regard to operation
checking of LED lighting, besides lighting of each LED, check that all LEDs can be simultaneously lit or unlit.

18 DDJ-RB
12 3 4
A
B
C
D
E
F
12 3 4
5.3 MONITORING OF POWER SUPPLY AND VOLTAGE
The MAIN uCOM (IC406) of this unit always monitors for power and voltage failure of the unit and will shut the unit
off immediately after an error is detected.
• Content to be monitored
Power supply voltage drop and power supply voltage rise generated by short-circuiting between any power-supply IC and
GND or excess current inside the MAIN Assy
Power to be monitored: V+5_A, V+5_HP, V+7, V-6, V+3R3_D
• MAIN UCOM Detection terminal and its terminal voltage
TP terminal near the R267 of MAIN Assy or IC406 (MAIN UCOM) pin 107 FAULT_DET.
Normal: Approximately 3.3 V
Abnormal: 0 V
• Timing of monitoring start
500 ms after the unit is turned ON
• Timing upon judgment as a failure
50 msec after an error is detected
• LED indication when an error is generated
All LEDs are unlit.
• Restoration method
If the unit shuts itself down because an error is detected, perform diagnosis, disconnect the USB cable,
wait for a while and then connect the USB cable on again.
• Diagnostic procedure
1Disconnect the USB cable.
2Remove R267 from the MAIN Assy. Note: This step will disable power monitoring.
3Reconnect the USB cable.
4As the unit is turned on in a normal way, check each voltage in this state.
Note: Because power will be forcibly supplied even if any voltage is abnormal, if abnormal voltage continues, the
defective point may produce heat, which may be dangerous. Therefore, during diagnosis, be sure to disconnect
the USB cable several seconds after they are connected so that forcible powering will not continue.
5If the voltage of any power IC is abnormal, the circuit that uses that power or the power IC itself may be defective.
6Repair the defective part then check that the power and voltage of the repaired part becomes normal.
7Return R267 to its original position on the MAIN Assy.
Note: This step will enable power monitoring.
The circuit of this unit monitors for power and voltage failure from USB bus power and will shut the unit off
immediately after an error is detected.
• Content to be monitored
Power supply voltage failure from the USB bus power
Power to be monitored: V+VBUS
• MAIN UCOM Detection terminal and its terminal voltage
TP terminal of V_DET signal of MAIN Assy or IC406 (MAIN UCOM) pin 108 V_DET.
Normal: HI (3.3 V)
Abnormal (V+VBUS 4.2 V or less ) : LOW (0 V)
• Timing of monitoring start
120 ms after the unit is turned ON
• Timing upon judgment as a failure
570 us after an error is detected
• LED indication when an error is generated
All LEDs are unlit.
• Restoration method
If the unit shuts itself down because an error is detected, perform diagnosis, disconnect the USB cable,
wait for a while and then connect the USB cable on again.
• Diagnostic procedure
1Check the V+VBUS power, connect the USB cable.
2If the voltage is abnormal, the circuit that uses that power or the power IC itself may be defective.

19
DDJ-RB
56 7 8
56 7 8
A
B
C
D
E
F
5.4 ABOUT POWER-SAVING MODE
This product always monitors voltage drop of the VBUS power (power to be supplied via a USB cable), which may be caused
by connection of a peripheral device that is not covered under warranty or an erroneous operation. If an abnormality is
detected, the product will limit the maximum output level of the headphone so that it can operate in a lower
power-consumption mode.
If an abnormality is generated, check the connected headphones and computer.
Drop in power voltage in the MAIN Assy to be supplied via a USB cable
Power voltages to be monitored: V+VBUS
• Content to be monitored
TP terminal near the R295 of MAIN Assy or
IC713 (MUX IC) pin 13 V_DET_AD input terminal.
Normal: Approximately 2.3 V to 2.6 V
Abnormal: < 2.3 V
• Microcomputer Detection terminal and its terminal voltage
500 ms after the unit is turned ON
• Timing of monitoring start
50 msec after an error is detected
• Timing upon judgment as a failure
V+VBUS: 4.2–4.5 V
The maximum output level of the headphone is suppressed to approximately 15%.
If normal power voltage is recovered, the suppressed maximum output level of the headphone will return to its original level.
• Headphone level when an error is generated
1Check if headphones with impedance outside the range of the guaranteed specifications (impedance 32 ohms or less)
are connected.
2Check if a monaural plug is connected to the Headphones connector.
3The connected computer may not be able to supply enough USB power (may not meet USB standards).
• Items to be checked

20 DDJ-RB
12 3 4
A
B
C
D
E
F
12 3 4
5.5 OPERATION CHECK WITH rekordbox
[Installation of rekordbox]
[Connections]
A brief explanation of how to install rekordbox on a PC is given below.
For details, refer to the operating instructions of the software.
If the OS of the computer to be used is Windows, install the driver software that enables audio output from the computer
beforehand.
The operating environment of the computer required for installation of rekordbox is shown below.
For the latest version of the rekordbox software, access rekordbox.com and download the software from there.
For downloading, registration of a user account at rekordbox is required.
Unzip the downloaded file, then double-click the unzipped file to launch the installer.
Read the terms of the license agreement carefully, and if you agree, select [Agree], then click [Next](Mac OS X: Continue).
After installation is completed, the Installation Completed screen will be displayed. Click on [Finish](Mac OS X: Close) to quit
the rekordbox installer.
• Be sure to use rekordbox Version 4.1.1 or later, because the prior versions of rekordbox do not support the DDJ-RB.
•
Activation using a license key is required to use PERFORMANCE mode for enabling the DJ performance function of rekordbox.
• For the latest information on the required operating environment and compatibility as well as to acquire the latest operating
system, see “Software Info” of “DDJ-RB” on the “Pioneer DJ” site and “System Requirements” of “rekordbox.com” below.
http://pioneerdj.com/support/ http://rekordbox.com/
• Use the latest version/service pack of the operating system.
[Operating procedures]
1Connect headphone to the [PHONES] terminals.
2Connect powered speakers, a power amplifier,
components, etc., to the [MASTER] terminals.
3Turn on the computer’ s power.
4Connect this unit to your computer via a USB cable.
5Turn on the power of the devices connected to the
output terminals (powered speakers, power amplifier,
components, etc.).
Minimum operating environment
Supported operating systems CPU and required memory
Mac OS X: 10.11/10.10/10.9
Intel®processor Core™ i3/i5/i7, Intel®
processor Core™ 2 Duo
4 GB or more of RAM
Windows: Windows 10/Windows 8.1/
Windows 7 (latest service pack)
Intel®processor Core™ i3/i5/i7, Intel®
processor Core™ 2 Duo
4 GB or more of RAM
Others
USB port A USB 2.0 port is required to connect the computer with this
unit.
Display resolution Resolution of 1280 x 768 or greater
Internet connection An Internet connection is required for registering the rekordbox
user account and downloading the software.
2
5
4
1
Speakers with a built-in
amplifier,
powered speakers, etc.
Computer
USB
cable (supplied)
Other manuals for DDJ-RB
2
Table of contents
Other Pioneer Controllers manuals

Pioneer
Pioneer AXM-P7650 User manual

Pioneer
Pioneer DDJ-SP1 User manual

Pioneer
Pioneer “Serato DJ” DDJ-ERGO User manual

Pioneer
Pioneer DDJ-ERGOlimited User manual

Pioneer
Pioneer 9537EU User manual

Pioneer
Pioneer ADSA1 User manual

Pioneer
Pioneer DDJ-ERGO-v User manual

Pioneer
Pioneer DDJ-ERGO User instructions

Pioneer
Pioneer KJR-12BP-F User manual

Pioneer
Pioneer SEP C1 - Software Entertainment Controller Assembly instructions