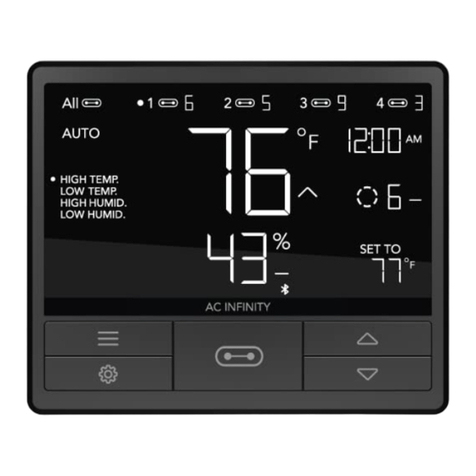
AC Infinity SMART OUTLET User manual

SMART OUTLET
ENVIROMENTAL CONTROLLED
USER MANUAL


3
WELCOME
Thank you for choosing AC Infinity. We are committed to product quality and friendly customer service.
If you have any questions or suggestions, please don’t hesitate to contact us. Visit www.acinfinity.com
and click contact for our contact information.
EMAIL
support@acinfinity.com
WEB
www.acinfinity.com
LOCATION
Los Angeles, CA

4
PRODUCT
CONTROLLER 75
CONTROLLER 76
MODEL
CTR75A
CTR76A
UPC-A
819137022508
819137021525
MANUAL CODE SOT2107X1

5
MANUAL INDEX
Compatibility ..................................................................................
Manual Index .................................................................................
Key Features .................................................................................
Product Contents ...........................................................................
Powering and Setup........................................................................
Programming .................................................................................
Other Settings ................................................................................
Download the App .........................................................................
Add a Device .................................................................................
App Programming...........................................................................
App Settings...................................................................................
Other AC Infinity Products .............................................................
Warranty ........................................................................................
Page 4
Page 5
Page 6
Page 7
Page 8
Page 11
Page 23
Page 24
Page 25
Page 27
Page 37
Page 38
Page 39

6
KEY FEATURES
ACTIVE MONITORING
LED display shows key data
like outlet power status,
temperature, humidity, trends,
clock, and countdowns.
WALL MOUNTING
Black powder-coated finish,
fire-resistant casing with key-
hole hanger for easy mounting
on any hook or screw.
SMART CONTROLLER
Features automation controls
that power devices based on
temperature, humidity, timers,
and schedules.
DUAL OUTLETS
Built with a detached electrical
socket module that allows for
powering and controlling two
devices at the same time.
SENSOR PROBE
Corded probe made of
stainless steel to ensure
precise temperature and
humidity readings.
EXTRA CORD LENGTH
Extended cord length of 144
inches (12 feet) for ease of
management and flexible
mounting options.
NOTE: Illustration above only shows CONTROLLER 76.

7
PRODUCT CONTENTS
WALL HANG
CONTROLLER
(x1)
WALL-HANG
WOOD SCREWS
(x2)
SENSOR
PROBE
(x1)
WIRE
TIE
(x1)
CABLE TIE
MOUNT
(x1)
DESKTOP
CONTROLLER
(x1)
WALL-HANG
WOOD SCREWS
(x2)
SENSOR
PROBE
(x1)
WIRE
TIE
(x1)
CABLE TIE
MOUNT
(x1)

8
POWERING AND SETUP
STEP 1
Plug the sensor probe into the 3.5mm port
located at the bottom side of your controller.
STEP 2
Insert the power plug into a wall outlet to power
your controller.

9
POWERING AND SETUP
STEP 3
Position the corded sensor probe and secure it
by using the included zip ties and tie mounts.
STEP 4
Locate a spot free of obstruction and secure the
anchor into your wall. Twist the wood screw into
the anchor.

10
POWERING AND SETUP
STEP 6
Plug your device (not included) into one of the
two sockets to power it with your controller.
STEP 5
Hang your controller by the screw using the
hole located on its backside.

11
1. MODE BUTTON
Cycles through each of the controller’s mode: OFF, ON, AUTO (4 triggers), TIMER TO ON, TIMER
TO OFF, CYCLE (On and Off), and SCHEDULE (On and Off).
3. SETTING BUTTON
Cycles through each of the controller’s settings: DISPLAY BRIGHTNESS, °F/ °C, CLOCK,
CALIBRATION (Temperature and Humidity), and BUFFER (Temperature and Humidity).
2. UP/DOWN BUTTONS
Adjusts the value of your current mode. The up button increases and down button decreases the
setting. Hold both to reset values to OFF or 0.
4. OUTLET STATUS
Displays the outlet controller’s power status, indicating whether or not electricity is being fed to your
device. ON will display if your devices are being powered and OFF will display if your devices are
not being powered.
ON
TO
ON
TIMER TO
PM
123
5
6
7
8
9
10
411
PROGRAMMING
CONTROLLER 76

12
5. PROBE TEMPERATURE
Current temperature the probe is detecting. Displays “--“ if no probe is plugged in. Includes a trend
indicator that signals a rise, fall or no change in temperature within the last hour.
9. CURRENT TIME
Displays the current time. The internal battery sustains the clock so it does not default to 00:00 if
power is cut off. See page 22 to learn how to set the clock time.
7. CONTROLLER MODE
Displays the controller’s current mode. Pressing the mode button cycles through the available
modes.
10. COUNTDOWN
Displays the countdown of the TIMER TO ON, TIMER TO OFF, CYCLE, or SCHEDULE modes.TO
ON shows the amount of time left before your devices power on. TO OFF shows the amount of time
left before your devices power off.
11. USER SETTING
Displays the value of your current mode. Use the up and down buttons to adjust the value.
8. STATUS ICONS
Flashes or displays the alert icons of the controller. The icons include TIMER ALERT and DISPLAY
LOCK.
6. PROBE HUMIDITY
Current humidity the probe is detecting. Displays “--“ if no probe is plugged in. Includes a trend
indicator that signals a rise, fall or no change in humidity within the last hour.
PROGRAMMING

13
1. POWER BUTTON
Cycles through each of the controller’s mode: OFF, ON, AUTO (4 triggers), TIMER TO ON, TIMER
TO OFF, CYCLE (On and Off), and SCHEDULE (On and Off).
PROGRAMMING
CONTROLLER 75
2. MODE BUTTON
Cycles through each of the controller’s mode: OFF, ON, AUTO (4 triggers), TIMER TO ON, TIMER
TO OFF, CYCLE (On and Off), and SCHEDULE (On and Off).
3. SETTING BUTTON
Cycles through each of the controller’s settings: DISPLAY BRIGHTNESS, °F/ °C, CLOCK,
CALIBRATION (Temperature and Humidity), and BUFFER (Temperature and Humidity).
4. UP/DOWN BUTTONS
Adjusts the value of your current mode. The up button increases and down button decreases the
setting. Hold both to reset values to OFF or 0.
ON
TO
ON
TIMER TO
PM
123
6
7
8
9
10
11
4
512

14
6. PROBE TEMPERATURE
Current temperature the probe is detecting. Displays “--“ if no probe is plugged in. Includes a trend
indicator that signals a rise, fall or no change in temperature within the last hour.
7. PROBE HUMIDITY
Current humidity the probe is detecting. Displays “--“ if no probe is plugged in. Includes a trend
indicator that signals a rise, fall or no change in humidity within the last hour.
PROGRAMMING
5. OUTLET STATUS
Displays the outlet controller’s power status, indicating whether or not electricity is being fed to your
device. ON will display if your devices are being powered and OFF will display if your devices are
not being powered.
8. CONTROLLER MODE
Displays the controller’s current mode. Pressing the mode button cycles through the available
modes.
9. STATUS ICONS
Flashes or displays the alert icons of the controller. The icons include TIMER ALERT and DISPLAY
LOCK.
10. CURRENT TIME
Displays the current time. The internal battery sustains the clock so it does not default to 00:00 if
power is cut off. See page 22 to learn how to set the clock time.
11. COUNTDOWN
Displays the countdown of the TIMER TO ON, TIMER TO OFF, CYCLE, or SCHEDULE modes.TO
ON shows the amount of time left before your devices power on. TO OFF shows the amount of time
left before your devices power off.
12. USER SETTING
Displays the value of your current mode. Use the up and down buttons to adjust the value.

15
CONTROLLER MODES
Pressing the mode button will cycle through the controller’s available programming modes: OFF,
ON, AUTO (4 triggers), TIMER TO ON, TIMER TO OFF, CYCLE (On and Off), and SCHEDULE (On
and Off).
ON MODE
Your device will stay on regardless of temperature,
humidity, or time-based triggers.
OFF MODE
Your device will remain off regardless of
temperature, humidity, or time-based triggers.
Jump back to OFF Mode anytime by holding the
MODE button while in other modes or settings.
PM
OFF
ON
PM
PROGRAMMING
(BOTH CONTROLLERS)

16
AUTO MODE (HIGH TEMPERATURE TRIGGER)
Pressing the up or down button sets the high
temperature trigger. Your device will turn on if the
probe’s reading meets or exceeds this threshold.
If the probe’s reading falls below this trigger point,
your device will turn off. This shut off point can
be adjusted using the buffer setting as shown on
page 23.
You may also set this trigger below the low
temperature trigger to create a specific range, in
which your device will only be on when it’s within
this range.
AUTO MODE (LOW TEMPERATURE TRIGGER)
Pressing the up or down button sets the low
temperature trigger. Your device will turn on if the
probe’s reading meets or falls below this threshold.
If the probe’s reading rises above this trigger point,
your device will turn off. This shut off point can
be adjusted using the buffer setting as shown on
page 23.
You may also set this trigger above the high
temperature trigger to create a specific range, in
which your device will only be on when it’s within
this range.
Note that this trigger can activate as long
as you are in AUTO Mode, even if you are
viewing a different trigger within AUTO Mode.
PM
Note that this trigger can activate as long
as you are in AUTO Mode, even if you are
viewing a different trigger within AUTO Mode.
PM
PROGRAMMING

17
AUTO MODE (LOW HUMIDITY TRIGGER)
Pressing the up or down button sets the low
humidity trigger.Your device will turn on if the
probe’s reading meets or falls below this threshold.
If the probe’s reading rises above this trigger point,
your device will turn off. This shut off point can be
adjusted using the buffer setting as shown on page
23.
You may also set this trigger above the high
humidity trigger to create a specific range, in which
your device will only be on when it’s within this
range.
AUTO MODE (HIGH HUMIDITY TRIGGER)
Pressing the up or down button sets the high
humidity trigger.Your device will turn on if the
probe’s reading meets or exceeds this threshold.
If the probe’s reading falls below this trigger point,
your device will turn off. This shut off point can be
adjusted using the buffer setting as shown on page
23.
You may also set this trigger below the low humidity
trigger to create a specific range, in which your
device will only be on when it’s within this range. Note that this trigger can activate as long
as you are in AUTO Mode, even if you are
viewing a different trigger within AUTO Mode.
PM
Note that this trigger can activate as long
as you are in AUTO Mode, even if you are
viewing a different trigger within AUTO Mode.
PM
PROGRAMMING

18
TIMER TO OFF MODE
Pressing the up or down button sets a countdown
time. During the countdown, your device will be set
to ON. Once the timer ends, your device will trigger
to turn off.
The countdown will begin if no buttons are pressed for
5 seconds. The time left on the countdown is shown
on the lower right corner of the display above the
setting. Leaving the timer mode while the countdown
is running will pause it until you return to this mode.
TIMER TO ON MODE
Pressing the up or down button sets a countdown
time. During the countdown, your device will be set
to OFF. Once the timer ends, your device will trigger
to turn on.
The countdown will begin if no buttons are pressed for
5 seconds. The time left on the countdown is shown
on the lower right corner of the display above the
setting. Leaving the timer mode while the countdown
is running will pause it until you return to this mode.
ON
TO
ON
TIMER TO
PM
OFF
TO
OFF
TIMER TO
PM
PROGRAMMING

19
CYCLE MODE (ON AND OFF)
Sets an ON duration and an OFF duration for
your device to cycle through continuously. Press
the up or down button to set a countdown for
your device to turn on. Then press the mode
button and use the up or down button to set a
countdown for your device to turn off.
The countdown will begin if no buttons are
pressed for 5 seconds. Leaving the CYCLE mode
while the countdown is running will pause it until
you return to this mode.
ON
PM
TO
OFF
CYCLE
OFF
PROGRAMMING
TO
ON
OFF
PM
CYCLE
TO
ON
ON

20
SCHEDULE MODE (ON AND OFF)
Sets an ON clock-time and an OFF clock-time
schedule for your device to follow daily. Press the
up or down button to set a clock time for your device
to turn on. Then press the mode button and use the
up or down button to set a clock time for your device
to turn off. Refer to page 22 to learn how to set the
controller’s clock time.
The countdown will begin if no buttons are pressed
for 5 seconds. The time left on the countdown before
the next ON or OFF phase is shown on the lower
right corner of the display above the setting. Your
device will not follow this schedule if you leave this
mode. If you re-enter the schedule mode, it will
continue to follow the latest schedule you have set.
ON
PM
OFF
SCHEDULE
PM
TO
ON
PROGRAMMING
ON
PM
TO
OFF
OFF
SCHEDULE
PM
Table of contents
Other AC Infinity Controllers manuals

AC Infinity
AC Infinity CONTROLLER 79 User manual

AC Infinity
AC Infinity THERMAL TRIGGER User manual
AC Infinity
AC Infinity CONTROLLER 69 User manual

AC Infinity
AC Infinity CONTROLLER 69 PRO User manual

AC Infinity
AC Infinity CONTROLLER 63 User manual

AC Infinity
AC Infinity CTR69X User manual

AC Infinity
AC Infinity AC-CTC7 User manual
AC Infinity
AC Infinity CONTROLLER 69 User manual

AC Infinity
AC Infinity CONTROLLER 67 User manual
AC Infinity
AC Infinity AC-CRA5 User manual