MagicBuds ONE User manual

MagicBuds ONE WIRELESS STEREO HEADSET
USER MANUAL

1
FIT
Try each eartip (four different size), the correct seal
in your ear ensures rich bass response.
1.
1 x USB Charging Cable
6 x Ear Buds(two are equipped on the headset)
6 x Ear Hooks(two are equipped on the headset)
1 x MagicBuds ONE
Wireless Stereo Headset
1 x Travel Pouch
EN

2
2.
3.
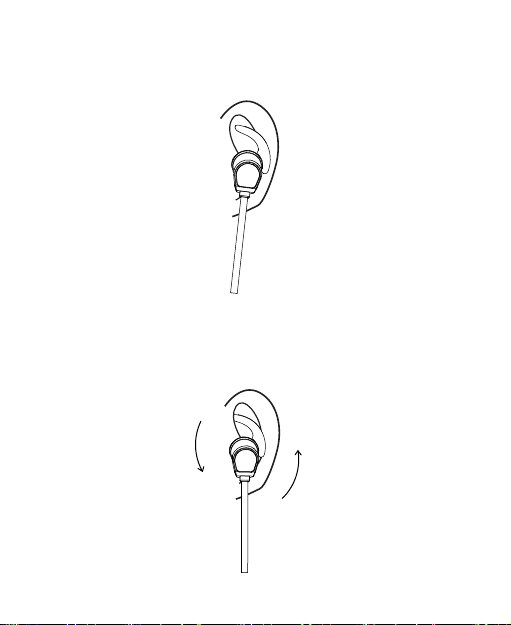
Put the earbuds into your ear,please noted the L ( left
side ) or R ( right side ) mark on earphones.
Adjust the earbuds and ear-hooks until fit with your
ears , if the size of earbuds and ear-hooks does not
fit with your ears,try other sizes.

3
BASIC OPERATIONS
Volume + / Next
Volume - / Previous
Multifunction Button
Microphone
LED Indicator
Micro USB Charging Port

4
LED INDICATOR
LED indicator Status of headset
Red and blue light blinks
alternately Pairing mode
Blue light blinks once
every 4 seconds Connected to the device
Red light blinks Low battery
When charging, Led is Red The battery is charging
When charging, Led is Blue The battery is full
GET PAIRED
You must first bring the headset into pairing mode
when to pair with other Bluetooth®device.
1) Take the headset next to your Bluetooth®device
(within 3 feet);
1.

5
2) Press and hold the Multifunction Button for
approximately 5 seconds until the LED indicator
flashes red and blue alternately. Now the headset is
in pairing mode;
3) Find the “MagicBuds ONE ” in the search results
on your Phone. Tap on the name to connect. Once
connected, only the blue LED will remain on.
Note:
If required a PIN code for pairing, please try“0000”
or “8888” (4 zero or 4 eight)
The Bluetooth®headset can remember previous
paired devices. If you have previously paired the
headset with a device, simply turn on your device
and the headset (by pressing the multifunction
button for 1 second), they will connect automatically
with no need to go into pairing mode.

6
Button Control
Power on
Press and hold the Multifunction Button for 2
second.
Power off
Press and hold the Multifunction Button for 3second.
Play next/previous
Press and hold the Volume +/- Button for 2 second
to skip.
Volume +/-
Press volume + or volume – button.
Play/Pause
Press Multifunction Button.
Answer or Hang up
Press the Multifunction Button once to answer or hang
up phone call.
Refuse phone call
Hold and press the Multifunction Button for 1 second
to refuse phone call.
Redial
Hold and press the Multifunction Button for 2 second
to redial the last number.

7
Reset
Press and hold the Volume +/- Button at the same time
until the LED Indicator flashes purple 3 times.
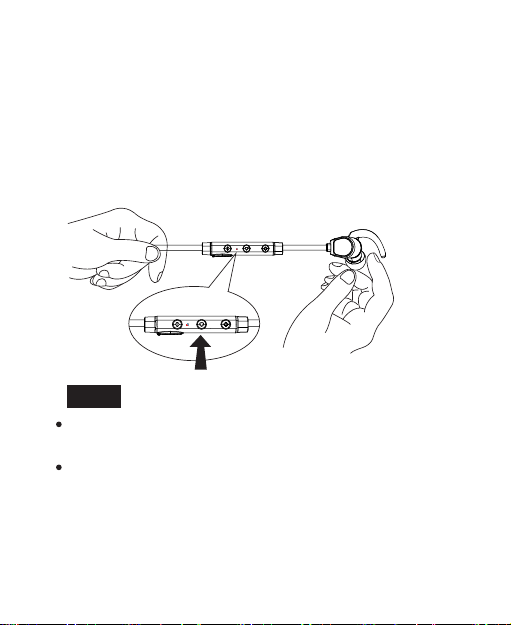
CHARGING
Connect the USB Port to a active computer USB
port or USB charging adater.
1.
The headset is charging automatic when the
indicator light lit red.
2.
The indicator light lit Blue when the headset is fully
charged.
3.

8
SPECIFICATIONS
Weight 15g /0.53 oz
Bluetooth Version Bluetooth V4.1
Support Bluetooth File HEP/HSP/A2DP/AVRCP
Charging Time About 1.5 hours
Talking Time Up to 5 hours
Music Time Up to 5 hours
Operate Distance 10 meters / 33 feet
Charging Input DC 5.0V/500mA
SAFETY PRECAUTIONS
Caution
Do not raise the volume before performing an
operation.

9
Warning
Do not leave the headset in a location accessible
to an infant or child.
Do not use intensive chemical products or detergent
to clean the headset.
Do not leave the headset in hot, humid or cold
location.
Do not attempt to disassemble, repair or modify
the headset.
Due to the isolating characteristics of these
headphones do not use while driving, riding a bike
or where vehicular traffic is present, or in any other
activity where failure to hear surrounding sounds
could be dangerous. Use of these headphones at
excessive volumes may cause permanent hearing
damage. Always turn the volume down before use.
Take caution in regards to inserting objects into ear
canal, use at own risk.
Stop using the headset if you notice unusual odor,
noise or smoke from it.
Do not use the headset or use it only as directed in
airplanes or other locations where use of the
Bluetooth device is restricted.

10
PASSEN
Probieren Sie jeden Dartip (vier verschiedene
Größe), die richtige Dichtung In deinem Ohr sorgt
für reiche Basswiedergabe.
1.
1 x USB Ladekabel
6 x Ohrknospen (zwei sind am Headset ausgestattet)
Ohrhaken (zwei sind am Headset ausgestattet)
1 x MagicBuds ONE
Wireless Stereo Headset
1 x Reisebeutel
DE

11
2.
3.
Setzen Sie die Ohrhörer in Ihr Ohr, beachten Sie bitte
die L (linke Seite) oder R (rechte Seite) Mark auf
Kopfhörer.
Passen Sie die Ohrhörer und Ohrbügel an, bis sie mit
den Ohren passen, wenn die Größe der Ohrhörer
und Ohrbügel nicht mit den Ohren passt, versuchen
Sie es mit anderen Größen.

12
GRUNDOPERATIONEN
Volumen + / Weiter
Volumen - / Zurück
Multifunktionsknopf
Mikrofon
LED-Anzeige
Micro USB Ladeanschluss

13
LED-ANZEIGE
LED-Anzeige Status des Headsets
Das rote und blaue Licht
blinkt abwechselnd Pairing-Modus
Blaues Licht blinkt einmal
alle 4 Sekunden Verbunden mit dem Gerät
Rotes Licht blinkt Niedriger Batteriestatus
Beim Aufladen ist Led rot Die Batterie wird
aufgeladen
Beim Aufladen ist Led blau Die Batterie ist voll
ERHALTEN SIE PAAR
Sie müssen zuerst das Headset in den Pairing-Mo-
dus bringen, wenn Sie mit einem anderen
Bluetooth®-Gerät koppeln.
1) Nehmen Sie das Headset neben Ihrem Bluetooth®
Gerät (innerhalb von 3 Fuß);
1.

14
2) Halten Sie die Multifunktionstaste ca. 5 Sekunden
lang gedrückt, bis die LED-Anzeige abwechselnd rot
und blau blinkt. Jetzt ist das Headset im Paarungs-
modus;
3) Finde die "MagicBuds ONE" in den Suchergebnis-
sen auf deinem Telefon. Tippen Sie auf den zu
verbindenden Namen. Einmal angeschlossen, bleibt
nur die blaue LED eingeschaltet.
Note:
Wenn nötig ein PIN-Code für die Paarung, bitte
versuchen Sie "0000" oder "8888" (4 null oder 4 acht)
Das Bluetooth®Headset kann sich an vorherige
gekoppelte Geräte erinnern. Wenn Sie das Headset
vorher mit einem Gerät gekoppelt haben, schalten Sie
einfach Ihr Gerät und das Headset ein (indem Sie die
Multifunktionstaste für 1 Sekunde drücken), werden
sie automatisch mit der Notwendigkeit in den
Paarungsmodus wechseln.

15
Tastensteuerung
Ein
Halten Sie die Multifunktionstaste für 2 Sekunden
gedrückt.
Ausschalten
Halten Sie die Multifunktionstaste für 3 Sekunden
gedrückt.
Nächste / vorherige spielen
Halten Sie die Lautstärke +/- Taste für 2 Sekunden
gedrückt, um zu überspringen.
Volumen +/-
Drücken Sie die Lautstärke + oder die Lautstärketaste.
Spielpause
Drücken Sie die Multifunktions-Taste.
Antwort oder auflegen
Drücken Sie einmal die Multifunktions-Taste, um den
Anruf zu beantworten oder aufzulegen.
Anruf verweigern
Halten Sie und drücken Sie die Multifunktions-Taste für
1 Sekunde, um den Anruf zu verweigern.
Wahlwiederholung
Halten Sie die Multifunktions-Taste 2 Sekunden lang
gedrückt, um die letzte Nummer erneut zu wählen.

16
Aufzutragen
Verbinden Sie den USB-Port mit einem USB-Port
oder einem USB-Ladeadapter.
1.
Das Headset wird automatisch geladen, wenn die
Kontrollleuchte rot leuchtet.
2.
Die Kontrollleuchte leuchtet blau, wenn das
Headset voll aufgeladen ist.
3.
Zurücksetzen
Halten Sie gleichzeitig die Lautstärke +/- Taste
gedrückt, bis die LED-Anzeige dreimal lila blinkt.

17
SPEZIFIKATIONEN
Gewicht 15g /0.53 oz
Bluetooth Version Bluetooth V4.1
Unterstützung
Bluetooth-Datei HEP/HSP/A2DP/AVRCP
Ladezeit Ungefähr 1.5 Stunden
Sprechende Zeit Bis zu 5 Stunden
Musikzeit Bis zu 5 Stunden
Distanz betreiben 10 Meter / 33 Fuß
Ladungseingang DC 5,0V / 500mA

18
SICHERHEITSVORKEHRUNGEN
Vorsicht
Warnung
Heben Sie die Lautstärke nicht an, bevor Sie eine
Operation ausführen.
Verlassen Sie das Headset nicht an einem Ort, der
einem Kind oder einem Kind zugänglich ist.
Verwenden Sie keine intensiven chemischen
Produkte oder Reinigungsmittel, um das Headset zu
reinigen.
Verlassen Sie das Headset nicht heiß, feucht oder
kalt.
Versuchen Sie nicht, das Headset zu zerlegen, zu
reparieren oder zu modifizieren.
Stoppen Sie mit dem Headset, wenn Sie ungewöhn-
liche Gerüche, Lärm oder Rauch aus ihm bemerken.
Benutzen Sie das Headset nicht oder verwenden Sie
es nur so, wie es in Flugzeugen oder an anderen
Orten gedacht ist, wo die Verwendung des
Bluetooth-Geräts eingeschränkt ist.
This manual suits for next models
1
Table of contents
Languages: