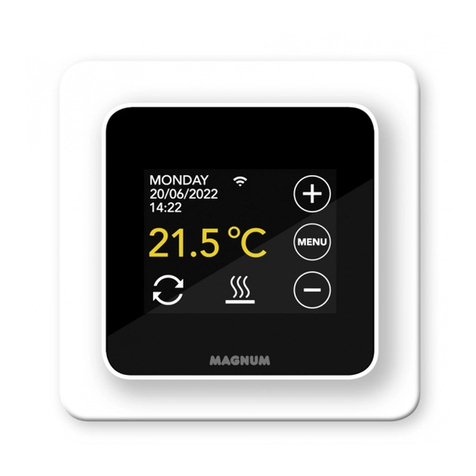
Magnum Heating MAGNUM Foil User manual

MAGNUM Foil
Installatievoorschriften | Installation manual

2
Geachte relatie,
Gefeliciteerd met de aanschaf van dit MAGNUM product. De MAGNUM Foil is gefabriceerd
met hoogwaardige en duurzame materialen. Om te garanderen dat uw product optimaal
werkt zijn er enkele aandachtspunten, deze zijn beschreven in de installatievoorschiften.
Alleen bij juiste montage volgens deze voorschriften kunnen wij u de volledige garantie
geven. Lees voor montage deze voorschriften goed door, en zorg voor het juiste
gereedschap en materialen. U dient de elektrische installatie uit te laten voeren door een
erkend installateur volgens de huidige normen.
Mocht u nog vragen hebben of wenst u meer informatie, dan kunt u van maandag t/m
vrijdag van 08.00 tot 17.00 uur bellen met de Supportline; 0900 - 911 0 911
of kijk, voor meer info en andere producten, op onze website; www.magnumheating.nl
© MAGNUM Heating B.V. / Aan deze voorschriften kunnen geen rechten worden ontleend.
1. Controle
Controleer de inhoud van de verpakking
voordat U aan de slag gaat. Een compleet
systeem bestaat uit:
• MAGNUM Foil
• MAGNUM MRC WiFi thermostaat met
vloersensor
• aansluitdraad Zwart/Blauw
• Benodigde Krimp connectoren
• Druk verdeel - Krimp tang
• Isolatie/PVC tape
• PP tape
• Flexibele sensor buis
• Installatie voorschriften.
Overige benodigdheden:
• Dampwerende folie (polyethyleen 0,1mm)
• MAGNUM Isofoam 6mm Polystyreen (PS)
Isolatie
• Opbouwrand thermostaat. (indien de
thermostaat niet wordt ingebouwd in een
inbouwdoos)
Nederlands

3
2. Aandachtspunten
1. MAGNUM Foil verwarmingsfolie mag
alleen worden toegepast in droge ruimtes.
2. MAGNUM Foil verwarmingsfolie kan
alleen toegepast worden als bijverwarming.
Er dient dus altijd een andere verwarmings-
bron met voldoende capaciteit aanwezig te
zijn die gelijktijdig kan functioneren.
3. De omgevingstemperatuur in de ruimtes
waar de verwarmingsfolie verwerkt wordt
dient boven 5°C te zijn.
4. De verwarmingsfolie dient te allen tijde
geïnstalleerd te worden in combinatie met
een aardlekschakelaar.
5. De verwarmingsfolie dient geplaatst te
worden op 6 mm polystyreen isolatie.
6. Boven op de verwarmingsfolie dient een
dampwerende folie (0,1 mm) aangebracht
te worden alvorens de (houten) vloerdelen
worden geplaatst.
7. De verwarmingsfolie mag NIET
geplaatst worden onder vaste meubelen
zoals (keuken)kasten, wasmachines etc.
om oververhitting oververhitting en/of
beschadiging te voorkomen.
8. De verwarmingsfolie dient op voldoende
afstand geplaatst te worden van andere
hittebronnen zoals verwarmingsradiatoren,
schoorsteenpijpen etc.
9. De vloer welke op de verwarmingsfolie
wordt geplaatst dient een minimale dikte te
hebben van 5mm, maar mag geen warmte-
weerstandswaarde hebben van meer dan
0,17 m² K/W.
10. Dikke vloerkleden of andere isolerende
materialen mogen niet op het verwarmde
gedeelte van de vloer geplaatst worden.
11. De thermostaat dient in combinatie met
de bijgeleverde vloersensor geïnstalleerd te
worden.
12. De maximale elektrische stroom per
folieelement is 5 Ampère (is max. 15
strekkende meter folie bij 120 W/m²).
13. De bijgeleverde thermostaat kan
maximaal 16A schakelen. Bij grotere
geïnstalleerde vermogens welke via
één thermostaat geregeld dienen te
worden dient schakeling via een relais te
geschieden.
14. De vloertemperatuur wordt geregeld
via de thermostaat, die via een vloersensor
de vloertemperatuur op een maximum
temperatuur begrenst van 28°C.
15. De verwarmingsfolies dienen
aangesloten te worden met dubbel
geïsoleerde bijgeleverde voedingsdraad.
Bevestigen van de connector aan de
folie: zorg er voor dat de connector goed
stevig aan de voedingsdraad is geklemd.
Knijp de connector altijd 2 maal (boven-
en onderzijde). Attentie: Bij een enkele
voedingsdraad (laatste connectie) altijd de
kerndraad dubbelvouwen!
16. De aansluiting van de verwarmingsfolie
mag alleen geschieden met de bijgeleverde
zwarte isolatietape.
Waarschuwing: de parket-, laminaat- of
houten vloerdelen dienen een minimale
dikte van 5 mm en een maximale dikte van
22mm te hebben. Neem bij afwijkende
diktes contact op met uw leverancier voor
advies.
3. Garantie
Alleen bij juiste montage volgens deze
voorschriften kunnen wij u de volledige
garantie geven. MAGNUM Foil is een
onderhoudsvrij vloerverwarmingsysteem
met een garantie van 10 jaar op de
elektrotechnische werking van de
verwarmingsfolie en 2 jaar op de
thermostaat en vloersensor.
Nederlands

4
4. Belangrijke aandachtspunten
Waarschuwing! MAGNUM Foil
verwarmingsfolie dient aangesloten
te worden op 230V. Installatie dient te
geschieden door een erkend elektro
installateur. De elektrische installatie
dient volgens geldende richtlijnen te
worden uitgevoerd. Vul na de installatie
de controlekaart in teken het legschema
of maak er een foto van. Hang deze kaart
vervolgens in de meterkast.
Het totale vermogen van de
verwarmingsfolie mag het aansluit-
vermogen van de thermostaat niet
overschrijden (max. 16A). Bij grotere
vermogens dient schakeling via een relais
te geschieden. De aansluiting dient correct
te worden uitgevoerd conform lokale
regulering. De aansluitsnoeren mogen niet
direct tegen de verwarmingsfolie komen
te liggen. De folie dient aangesloten te
worden via een aardlek met een maximale
weerstand van 30mA.
5. Planning van de installatie
Voordat begonnen wordt met het leggen
van de folie dient eerst een legschema
gemaakt te worden. Bepaal waar de
thermostaat geplaatst moet worden. De
thermostaat dient niet in direct zonlicht
geplaatst te worden. Plaats de thermostaat
indien mogelijk zo dicht mogelijk bij
de te verwarmen vloer. Voor optimaal
gebruiksgemak kan de thermostaat het
beste op ca 1,5 meter hoogte worden
bevestigd.
Bepaal hoe de bedrading moet komen
te liggen (voorkom direct contact van de
voedingsdraad met de verwarmingsfolie).
Bepaal het legschema van de
verwarmingsfolie. Folies dienen naast elkaar
gelegd te worden en mogen elkaar NIET
overlappen. De verwarmingsfolie dient een
zo groot mogelijk gedeelte van de vloer te
beleggen.
12
Nederlands

5
6. Installatie procedure
1. zorg er voor dat de vloer schoon en
stofvrij is. Indien er nog linoleum ligt dient
deze voor de plaatsing van de warmtefolie
verwijderd te worden. (foto 1)
2. Frees een sleuf uit de wand vanuit de
thermostaat met een bocht de vloer in. De
sleuf dient gefreesd te worden tot het
midden van een strook verwarmingsfolie, ca
50 cm van de wand. (foto 3)
3. Plaats de vloersensor in de flexibele buis.
Het uiteinde is zichtbaar aan het einde van
de flexibele buis, maar steekt er NIET uit!
Plaatsing sensor is te midden van een strook
warmtefolie. Zie afbeeldingen op pagina 10
& 11.
4. Dop het uiteinde van de flexibele buis
af met het bijgeleverde rode dopje (of met
tape).
5. Plaats de flexibele buis met een vloeiende
bocht in de uitgefreesde sleuf in de vloer
en wand, of sluit deze aan op de positie van
de kabelgoot indien de thermostaat wordt
opgebouwd.
6. Controleer de oppervlakte van de vloer.
Voor goed contact en om beschadigingen
te voorkomen dient deze mooi vlak te zijn.
Maximale afwijking +/- 1 mm per meter.
7. Indien er oneffenheden in de vloer
zijn, nivelleer deze dan (bijvoorbeeld met
egalisatie).
8. Vul de sleuf waarin de flexibele buis ligt
op met vulmateriaal (tegellijm, egalisatie
oid).
9. Zorg er voor dat de vloeroppervlakte
schoon, droog, stof en vetvrij is.
10. Plaats de MAGNUM Isofoam vloerisolatie.
Deze moet de hele vloeroppervlakte
bedekken!
Tape de hoeken vast met de bijgeleverde
PP tape om schuiven van de isolatie te
voorkomen. Laat ca 30 mm ruimte over voor
de voedingsdraden. Zorg er voor dat de
vloer schoon is en dat er geen scherpe
voorwerpen in contact kunnen komen met
of kunnen vallen op de verwarmingsfolie
gedurende de installatie. Plan de
werkzaamheden dusdanig dat het niet
nodig is om over of op de folie te
stappen. (foto 2 & 3)
3
4 5
Nederlands

6
11. Rol de verwarmingsfolie uit.
12. Het koper kan zowel aan de boven- als
onderzijde komen te liggen. Zorg er voor
dat de folie volledig vlak en zonder hoeken
of vouwen komt te liggen.
13. Knip de folie alleen langs de perforatie.
(foto 4)
14. Bedek de openliggende koperen
einden, waar geen aansluitdraden worden
aangesloten, met een stukje zwarte isolatie
tape van 50 x 50 mm
15. Rol volgend stuk folie parallel naast het
eerste.
16. Plak de folie-elementen op de isolatie
om verschuiven gedurende de verdere
installatie te voorkomen. (foto 5)
7. Aansluiten van de bedrading
Als de totale vloeroppervlakte belegd is met
verwarmingsfolie kunnen de
voedingsdraden worden aangesloten. U
dient aan de zijde waar geen aansluitdraden
worden aangesloten alle koperen geleiders
af te plakken met stukjes PVC tape. (foto 13)
Bescherm de verwarmingsfolie met
overgebleven MAGNUM Isofoam PS isolatie
tijdens het werken met connectors.
Om de krimpconnectie te beschermen:
Snijd een strookje van 3x6 cm uit de
isofoam net boven de aansluiting. (foto
6) Plak een stukje zwarte isolatie tape
aan de onderzijde van de PS isolatie.
De krimpconnectie mag niet boven de
oppervlakte uitsteken om een goed contact
tussen de verwarmingsfolie en de (houten)
vloer te garanderen.
6
7
8
9
LET OP!
Bij enkele voedingsdraad de kerndraad dubbelvouwen
LET OP!
Altijd 1x langs boven en
1x langs onder knijpen!
Nederlands

7
Indien een dunnere isolatie wordt toegepast
(niet aanbevolen!) dient ruimte in de
ondervloer gemaakt te worden voor de
krimpconnector. Strip ca 6 mm isolatie van
het einde van de voedingsdraad, vouw
de kerndraad om en schuif deze in de
connector. (foto 7)
Bevestigen van bedrading aan de connector
Klem de connector vast mbv de
drukverdeelkrimptang (foto 8). Attentie: Bij
een enkele voedingsdraad (1e connectie)
altijd de kerndraad dubbelvouwen! Knijp
altijd aan beide zijden (boven en onder) van
de connector de bedrading vast (foto 9).
Test of de bedrading goed contact maakt
en goed vast zit aan de connector. Zorg er
tevens voor dat de voedingsdraden lang
genoeg zijn.
Bevestigen van de connector aan de folie
Plaats de connector over de koperen
geleider op de verwarmingsfolie. Knijp de
connector met de hand dicht (foto 10). Knijp
vervolgens de connector vast met behulp
van de drukverdeelkrimptang. Houd deze
onder een hoek van 45° tov beide kanten
(foto 11 & 12).
Verbind de verwarmingsfolies parallel met
de voedingskabels. Zie de legschema’s op
pagina 10 en 11.
Isoleer de krimpconnectors
Knip 2 stukjes zwarte isolatie tape van 50 x
50 mm Plak deze aan beide zijdes over de
krimpconnectors (foto 14).
LET OP! De tape moet minimaal 5 mm
over het uiteinde van de krimpconnector
bevestigd worden!
10
11
12
13
LET OP!
Altijd 1x links en 1x rechts knijpen!
LET OP!
Altijd 1x links en 1x rechts knijpen!
LET OP!
Uiteinden altijd afplakken
met zwarte isolatie tape
45o
45o
Nederlands

8
8. Testen van de installatie
1. Alle verwarmingsfolies dienen
aangesloten te zijn gedurende het testen!
2. Meet de totale weerstandswaarde van de
verwarmingsfolies en noteer deze waarde
op de check/controlekaart.
3. Bereken het werkelijke vermogen
(Wattage) met de volgende formule:
vermogen (230V X 230V) = 52900 gedeeld
door de gemeten weerstandswaarde.
Noteer deze waarde op de check/
controlekaart.
4. Meet de totale lengte van de
verwarmingsfolie en bereken het totaal
geïnstalleerde vermogen met de formule: tot.
Geïnstalleerde vermogen = totale lengte
x geïnstalleerde vermogen in W/m (zoals
vermeld op de folie). Noteer deze waarde op
de check/controlekaart.
5. Maak een schets op de middenpagina en
neem, bij voorkeur, een foto van de installatie.
9. Bedekken van de Foil
1. Bedek de verwarmingsfolie met
dampwerende PE folie met een minimale
dikte van 0,1 mm (foto 15). De folie dient
minimaal 200mm uit te steken over de folie.
Indien noodzakelijk kunnen meerdere lagen
gebruikt worden om de totale oppervlakte
van de folie te bedekken.
2.Plaats de vloerdelen (parket, hout of
laminaat) volgens instructies van de
fabrikant (foto 16 & 17). Draag geen zwaar
en of vuil schoeisel ter voorkoming van
beschadiging van de folie. Bescherm de
folie, met stukken overgebleven MAGNUM
Isofoam PS isolatie tijdens het bevestigen
van de vloerdelen.
3. Meet de totale weerstandswaarde van de
verwarmingsfolies en noteer deze waarde
op de check/controlekaart in het midden
van deze voorschriften. Hang deze check
controlekaart in de meterkast)
14 16
15 17
Nederlands

9
10. Aansluiten thermostaat
Voor gebruik en programmeren van
de thermostaat verwijzen wij u naar
de instructies zoals bijgevoegd bij de
thermostaat.
Aansluiting dient door een erkend
installateur te worden uitgevoerd
overeenkomstig de NEN 1010 voorschriften.
Voor montage of demontage van de
thermostaat altijd de elektriciteit in de
meterkast uitschakelen. De MRC thermostaat
is te monteren in een enkelvoudige
inbouwdoos 50 mm diep, volgens standaard
DIN formaten. Controleer of de stroom is
afgesloten.
HEATING (N)* Aansluitdraad
verwarmingskabel
N Stroomtoevoer (Neutraal)
L Stroomtoevoer (Fase)
HEATING (L)* Aansluitdraad
verwarmingskabel
FLOOR SENSOR Aansluiting vloersensor
* Bij het aansluiten van de voedingskabel
van de Mat (HEATING) is de volgorde N of L
niet van belang.
AARDE: Zowel de aarde van de
verwarmingskabel als de aarde van de
stroomtoevoer buiten de thermostaat
om verbinden m.b.v. de meegeleverde
kroonsteen.
11. Ingebruikname systeem
Kies tijdens het opstartmenu van de
thermostaat “houten vloeren”. Deze
functie zorgt dat de vloer nooit een hogere
temperatuur dan 28oC bereikt.
Nederlands

10
Direct floor heating film for dry locations - Read instructions before installation - IPX1 - 100 Watt/m2 - MAX 5 Amps.
.
.
.
.

11
WATCH OUT! UNDERNEATH THE
WOODEN FLOORING IS A 230 VOLT
HEATING FOIL SYSTEM! NEVER DRILL OR
SCREW INTO THE FLOOR!
SEE SCHEDULE/PICTURE FOR THE POSITION OF THE FOIL.
Control measurements:
Type foil which is installed: MAGNUM Foil _______ W/m2
Total length foil installed: _______ Meter
Measured resistant value total installaon _______ Ohm
Control Check calculaon:
(W/m2 x 0.6 x meter-length = total Was system)
______W/m2x 0.6 x _____ meter-length = ________Wa
Dierence ~ max. 5 %
(52900 : Ohm = total Was system)
52900 : _______ Ohm = ________Wa
Installed by: date:
Keep this control / check card in the meter cupboard in a visible place!
LET OP! ONDER DE HOUTEN VLOER IS EEN
230 VOLT VLOERVERWARMINGSFOLIE
AANGEBRACHT! NOOIT BOREN OF
SCHROEVEN IN VLOER!
ZIE TEKENING/FOTO VOOR DE POSITIE VAN DE FOLIE.
Controlemetingen:
Type folie geïnstalleerd: MAGNUM Foil ________W/m²
Totale lengte folie geïnstalleerd: ________Mtr.
Gemeten weerstandswaarde totale installae: ________Ohm
Controle berekening:
(W/m² x 0.6 x meterlengte = totaal waage systeem)
_____W/m² x 0.6 x ______meterlengte =________Wa
Verschil ~ max. 5%
(52900 : Ohm = totaal waage systeem)
52900 : ______Ohm =________Wa
Geïnstalleerd door: datum:
Deze controlekaart bewaren op een zichtbare plaats in de meterkast!

12
Schedule or pictures of the installaon
Schets of foto’s van installae

13
Schedule or pictures of the installaon
Schets of foto’s van installae

14
WATCH OUT! UNDERNEATH THE
WOODEN FLOORING IS A 230 VOLT
HEATING FOIL SYSTEM! NEVER DRILL OR
SCREW INTO THE FLOOR!
SEE SCHEDULE/PICTURE FOR THE POSITION OF THE FOIL.
Control measurements:
Type foil which is installed: MAGNUM Foil _______ W/m2
Total length foil installed: _______ Meter
Measured resistant value total installaon _______ Ohm
Control Check calculaon:
(W/m2 x 0.6 x meter-length = total Was system)
______W/m2x 0.6 x _____ meter-length = ________Wa
Dierence ~ max. 5 %
(52900 : Ohm = total Was system)
52900 : _______ Ohm = ________Wa
Installed by: date:
Keep this control / check card in the meter cupboard in a visible place!
LET OP! ONDER DE HOUTEN VLOER IS EEN
230 VOLT VLOERVERWARMINGSFOLIE
AANGEBRACHT! NOOIT BOREN OF
SCHROEVEN IN VLOER!
ZIE TEKENING/FOTO VOOR DE POSITIE VAN DE FOLIE.
Controlemetingen:
Type folie geïnstalleerd: MAGNUM Foil ________W/m²
Totale lengte folie geïnstalleerd: ________Mtr.
Gemeten weerstandswaarde totale installae: ________Ohm
Controle berekening:
(W/m² x 0.6 x meterlengte = totaal waage systeem)
_____W/m² x 0.6 x ______meterlengte =________Wa
Verschil ~ max. 5%
(52900 : Ohm = totaal waage systeem)
52900 : ______Ohm =________Wa
Geïnstalleerd door: datum:
Deze controlekaart bewaren op een zichtbare plaats in de meterkast!

15
Direct floor heating film for dry locations - Read instructions before installation - IPX1 - 100 Watt/m2 - MAX 5 Amps.
.
.
.
.

16
English
Dear Customer,
Congratulations on the purchase of this MAGNUM product. The Magnum Foil is
manufactured from high quality, durable materials. To guarantee that your product
functions optimally there are a few points of attention which are described in the Installation
Instructions. We can only offer you the full guarantee if the Foil is correctly installed in
accordance with the Installation Instructions. Carefully read the instructions prior to
installation, do not forget the yellow centre page when doing so, and ensure that you have
the correct tools and materials. The electrical installation must be carried out by a qualified
electrician in accordance with IEE Regulations.
Visit our website for your local MAGNUM supplier, technical helpdesk or more information
and other products at: www.magnumheating.com
© MAGNUM Heating B.V. / All rights reserved
1. Checklist
Check the contents of the box before
starting. A complete set consists of:
• MAGNUM Foil
• MAGNUM MRC WiFi thermostat with floor
sensor
• Connection wire black/blue
• Crimp Connections
• Crimp Tool
• Insulation, PVC tape
• PP tape
• Flexible sensor tube
• Installation guide
Also required:
• Age resistant Polyethylene film 0.2 mm
• MAGNUM Isofoam 6mm Polystyrene (PS)
insulation
• Back box for thermostat

17
English
2. Points of interest
Please read the instructions carefully before
starting installation!
1. MAGNUM Foil heating foil may only be
installed in dry places, IPX1
2. Magnum Foil heating foil may only be
used as sub heating. There should always
be another heating element with sufficient
capacity that can be used at the same time.
Keep windows and doors closed during
heating periods.
3. The ambient temperature where the
Foil is installed should be above 5 degrees
Celsius.
4. The heating foil should always be installed
together with an RCD.
5. The heating foil should be placed on 6mm
(minimum) polystyrene insulation.
6. A 0.1 mm age resistant PE film should be
placed over the heating foil before installing
the laminate flooring.
7. The heating foil must not be placed under
fixed furnishing such as wardrobes, inner-
walls, kitchen units etc, as this will cause
overheating.
8. The heating film should be separated
from other heat sources like lights and
chimneys. The distance should be at least
30 cm.
9. The floor covering must have a minimum
thickness of at least 5mm, but must not
have higher thermal resistance than 0.17 W/
m²K.
10. Thick rugs or other insulating materials
should never be placed on a floor with
electrical heating.
11. The thermostat needs to have the floor
sensor properly installed to work.
12. The maximum current distributed
through each length of heating foil is 5 A.
13. The Magnum thermostat can switch up
to 16 A. When switching above 16 Amps a
Contactor must be used.
14. The temperature in the room is
controlled with a room thermostat and the
floor sensor protects the floor from getting
hotter than 28 degrees Celsius for maximum
safety and comfort.
15. The heating foils should be connected
with
a double insulated cable (supplied).
16. Please visually check the Foil for creasing
or folding that may of happened during
transit. Any such damaged areas must
be discarded.
17. The heating foils can only be fixed with
the tape that is included in the installation
kit.
18. Warning: The parquet, laminate, or
wooden flooring must have a minimum
thickness of 5mm and a maximum thickness
of 22 mm. When there is another thickness
or any doubt whether the wood can be
used in combination with floor heating,
please contact the manufacturer of your
wooden flooring.
3. Guarantee
Installation must be carried out by an
approved fully qualified electrician. Only
installation fitted in accordance with this
manual will give you 10 years guarantee
on the electro technical use of the Foil and
2 years on the thermostat and the floor
sensor.

18
4. Important points of interest
WARNING:
The MAGNUM heating foil requires a 230V
supply and the installation must be carried
out by a qualified electrician. The electrical
installation should be carried out in
accordance with the national regulations.
The rating of the heating foil must comply
with the rating of the thermostat, the
circuit breaker and if needed the contactor.
Good wiring practice must be observed.
Installation must comply with current
building and wiring regulations.Connection
cables must not come in contact with the
heating foil.
The heating foil must be installed together
with a Residual Current Device (RCD) with a
maximum breaking current of 30mA.
5. Installation Planning
Before installing the heating foil, make a
sketch or drawing of the installation.
Plan where the thermostat should be
placed. The thermostat should not be placed
in direct sunlight. It must be convenient for
the user and near to the electrical supply, at
a height of 1.2 m approx.
Plan where the wiring and the connection to
the electrical supply should be placed.
Plan the layout for each heating foil panel.
The heating foil must be placed side by side
with no gaps.
The heating foil must cover as much oor
area as possible.
1
English

19
6. Installation procedure
1. Make sure the oor is clean and free from
dust. (Pic. 1)
2. Cut a track in the wall and the oor for the
thermostat & oor sensor, make a smooth
bend at oor level for the sensor conduit.
The track for the conduit must be 50cm from
the wall (Pic. 3).
3. Push the oor sensor into the conduit.
The tip should be visible at the end of the
conduit, but it may not stick out. Place the
sensor in the middle of the heating foil.
(Page 10 and 11)
4. Cover the end of the conduit with the small
grey cap, which is supplied with the system.
5. Install the exible conduit with a smooth
bend at the oor level.
6. Check the surface of the oor. To prevent
damage it is important that the surface is at
and clean. The maximum height dierence
that is permitted is +/- 1 mm.
7. If the oor is uneven then it is highly
recommended that the oor is levelled
using a suitable self levelling compound.
8. Fill up the track in the wall & oor with
suitable ller.
9. Make sure the surface is clean, dry and
free from grease.
10. Lay the MAGNUM Isofoam oor insulation,
it must cover the whole surface (Pic. 2).
11. Tape all joints to prevent any movement
between the panels. Leave a 30 mm gap
for cables along the edge where the
connections will be made.
2
3
4
5
English

20
Make sure that the surface is clean and that
no sharp objects can come into contact with
or drop down onto the heating foil during
the installation. Plan your work in a way
that you don’t have to step directly on the
heating foil.
12. Roll out the heating foil along the edge
of the room. The copper can face either up
or down. Make sure that the heating lm is
completely at without any creases.
13. Cut the foil only along the perforation.
14. Cover the blind copper ends with a 50 x
50 mm PVC tape.
15. Roll out the heating foil parallel to the
rst panel, they must not overlap.
16. Tape the foils to the insulation to avoid
movements during the oor installation and
service.
7. Connect the wires
Once the total oor surface is covered with
the heating foil, the wires can be connected.
On the side where no connections are
made, tape all the copper conductors with
pieces of PVC tape (Pic. 13). Protect the
heating foil with left over MAGNUM Isofoam
PS insulation while you are working with
connections.
To protect the crimp connection
Make a 3x6 cm cut-out in the Isofoam just
below the connection point (Pic. 6). Put a
piece of PVC tape on the backside of the
PS insulation. The crimp connection must
not protrude above the surface of the PS
Insulation to guarantee a good contact
between the heating foil and the (wooden)
oor. Cut o 6mm of PVC insulation at
the end of the cable, if only one cable is
connected, fold the cable to t into the
connector crimp (Pic. 7).
English
6
7
8
9
ATTENTION!
Always fold the cable double
in case of single cable!
ATTENTION!
Always tighten the wires to the
connector on both sides.
Table of contents
Languages:
Other Magnum Heating Thermostat manuals
Popular Thermostat manuals by other brands

Honeywell
Honeywell VisionPRO Wi-Fi TH8320WF user guide

Honeywell
Honeywell TRADELINE T8400C Product data

White Rodgers
White Rodgers 1F78 user manual

Honeywell
Honeywell Tradeline T8611M installation instructions

Clare Controls
Clare Controls Honeywell Lyric Series Release notes

ICM Controls
ICM Controls FS1500L Installation, operation & application guide