Page 9
FLUID EXCHANGE (4,8,12,16,20 LITERS)
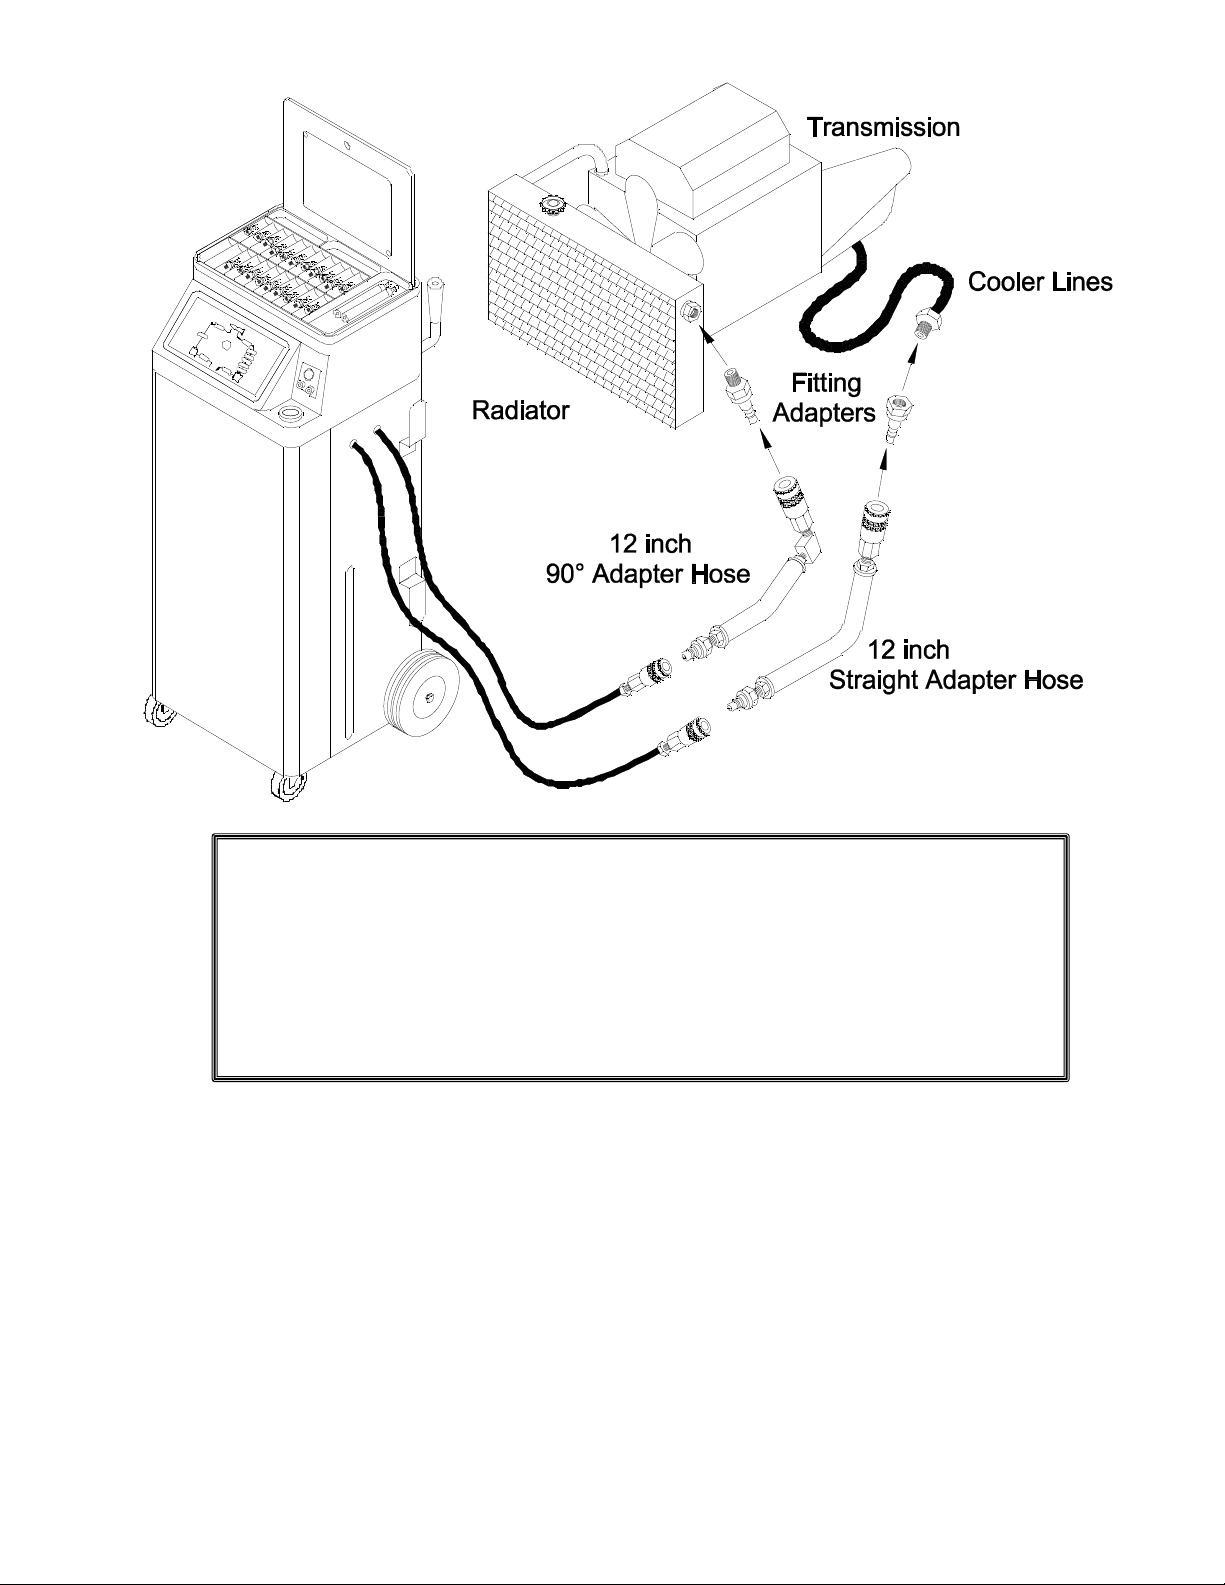
1. Vehicle engine is running and the ATX-2 Plus is connected as previously described, READY light is
illu inated.
2. Deter ine vehicle trans ission fluid capacity fro the vehicle operator or service anual.
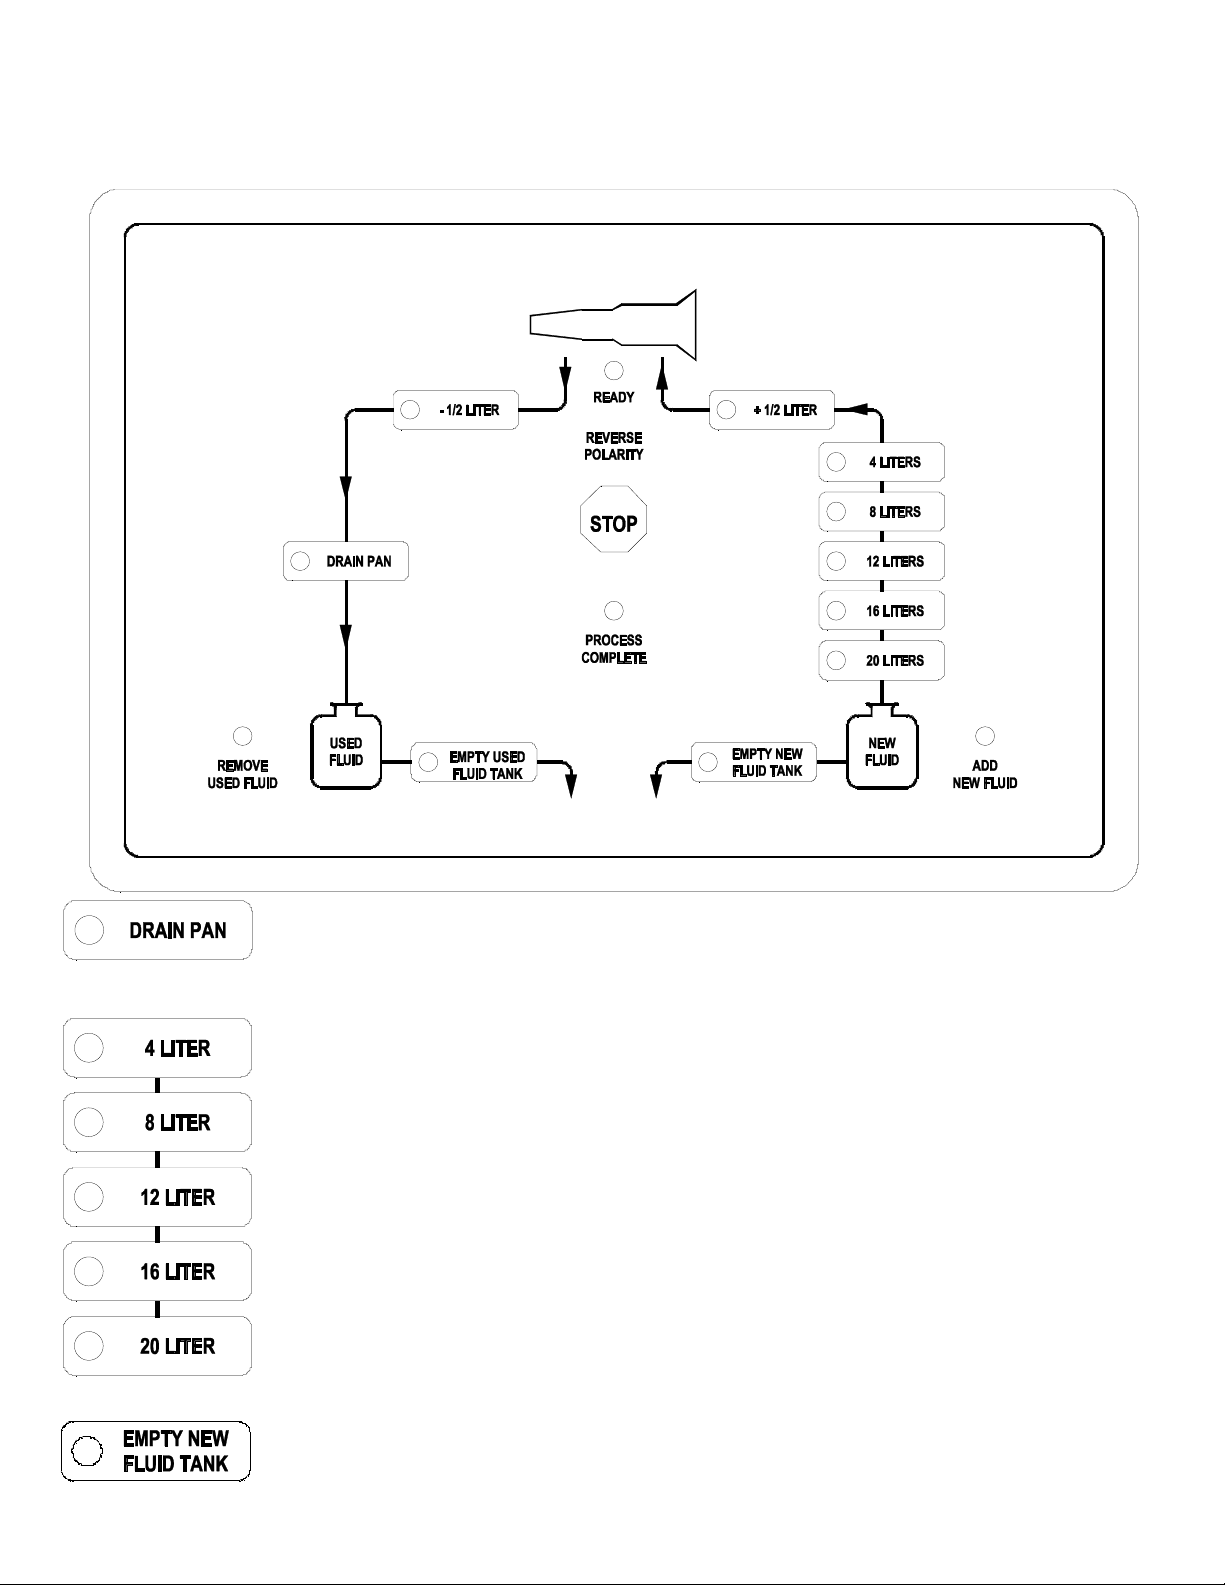
3. Press the corresponding LITER button; always round up (for exa ple if vehicle capacity is 6.5 liters an 8
liter exchange would be selected).
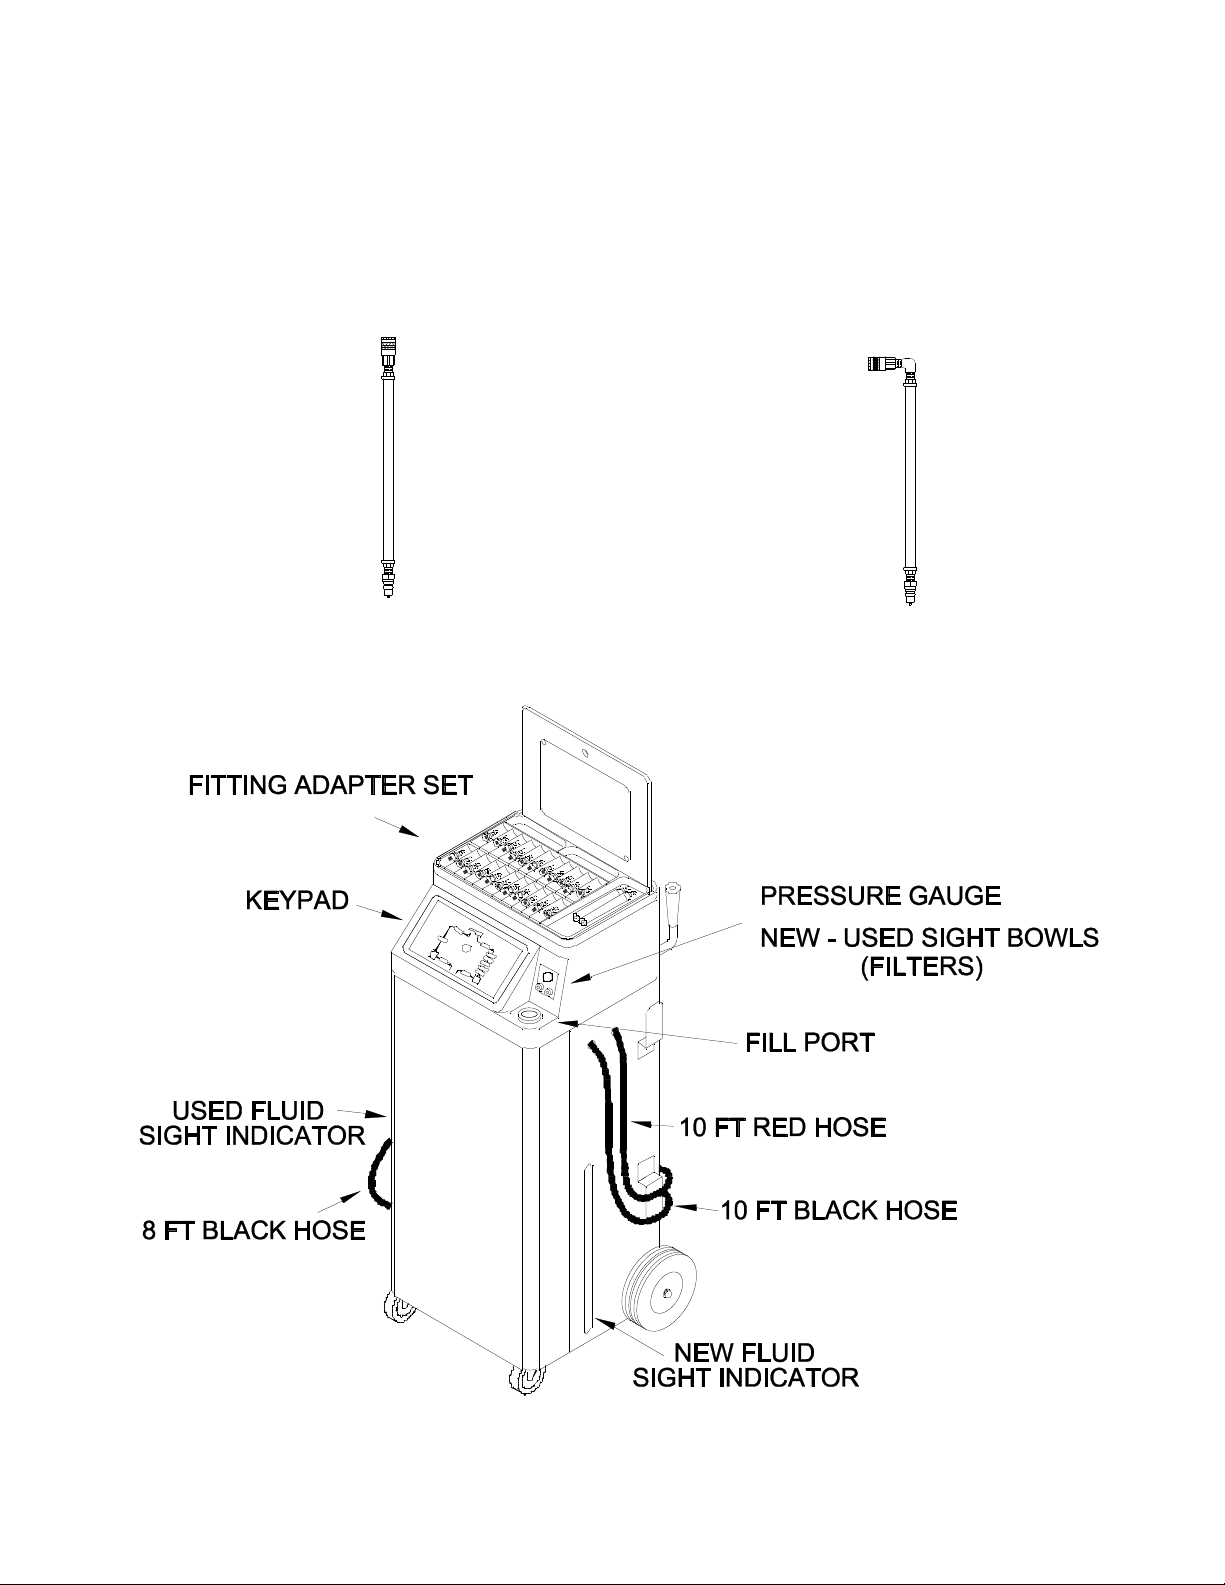
4. The change of fluid can be onitored through ATX-2 Plus Old-New Sight Bowls. These bowls display the
new bright red fluid leaving ATX-2 Plus and the dirty brown to black fluid co ing fro vehicle
trans ission syste . The color of the used should beco e al ost equal to the new as exchange ends.
The liquid levels can be viewed through Level Indicators on either side of ATX-2 Plus (left side for used,
right side for new).
5. When exchange of trans ission fluid is co plete, ATX-2 Plus will auto atically switch to the bypass
loop, the buzzer will sound continuously and PROCESS COMPLETE light will stay illu inated until STOP
button is pressed.
6. Check trans ission dip stick for level. Use +1/2, -1/2 LITER buttons as required to correct fluid level.
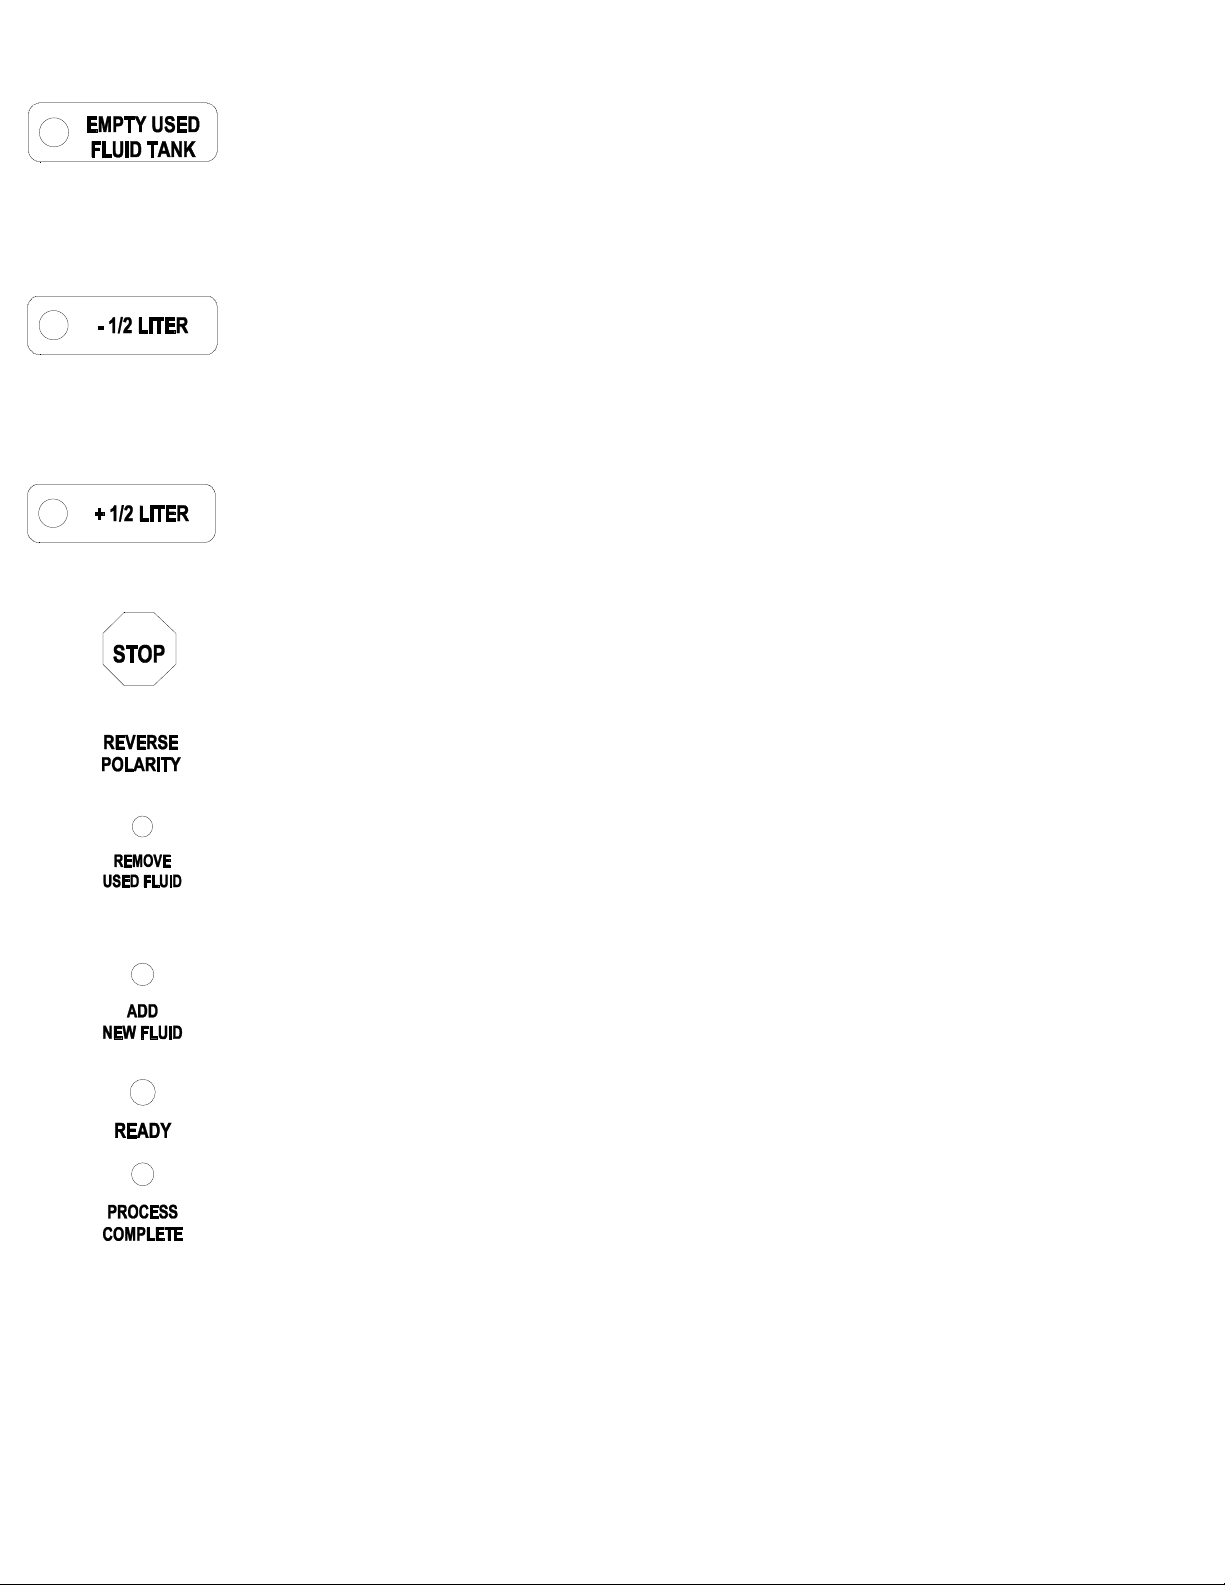
-1/2 LITER
1. Vehicle engine is running and the ATX-2 Plus is connected as previously described, READY light is
illu inated.
2. Check trans ission dip stick. Press the -1/2 LITER button to lower the fluid level if the trans ission
syste is overfilled.
3. When process is co plete the buzzer will sound continuously and the PROCESS COMPLETE light will
stay illu inated until the STOP button is pressed.
4. Check trans ission dip stick for appropriate level.
+1/2 LITER
1. Vehicle engine is running and the ATX-2 Plus is connected as previously described, READY light is
illu inated.
2. Check trans ission dip stick. Press the +1/2 LITER button to raise the fluid level if the trans ission
syste is under filled.
3. When process is co plete the buzzer will sound continuously and the PROCESS COMPLETE light will
stay illu inated until the STOP button is pressed.
4. Check trans ission dip stick for appropriate level.
Servicing Vehicles with Transmission Thermostats
Common for For vehicles
With the vehicle engine running, the READY light will illu inate but the service will not
proceed if the
trans ission fluid is cold.
The fluid inside the trans ission ust be heated to approxi ately 180F. The ost efficient way to do this is to
put the vehicle in reverse. Setting the e ergency brake, using a pedal depressor, or putting blocks behind the
rear wheels can be done to help secure the vehicle. MAHLE reco ends that the vehicle is not left unattended
while in gear.
The service ay start with very little or no flow. The service will co ence, and take approxi ately 15 inutes
to co plete.