Maiman Electronics MBL1500A
8
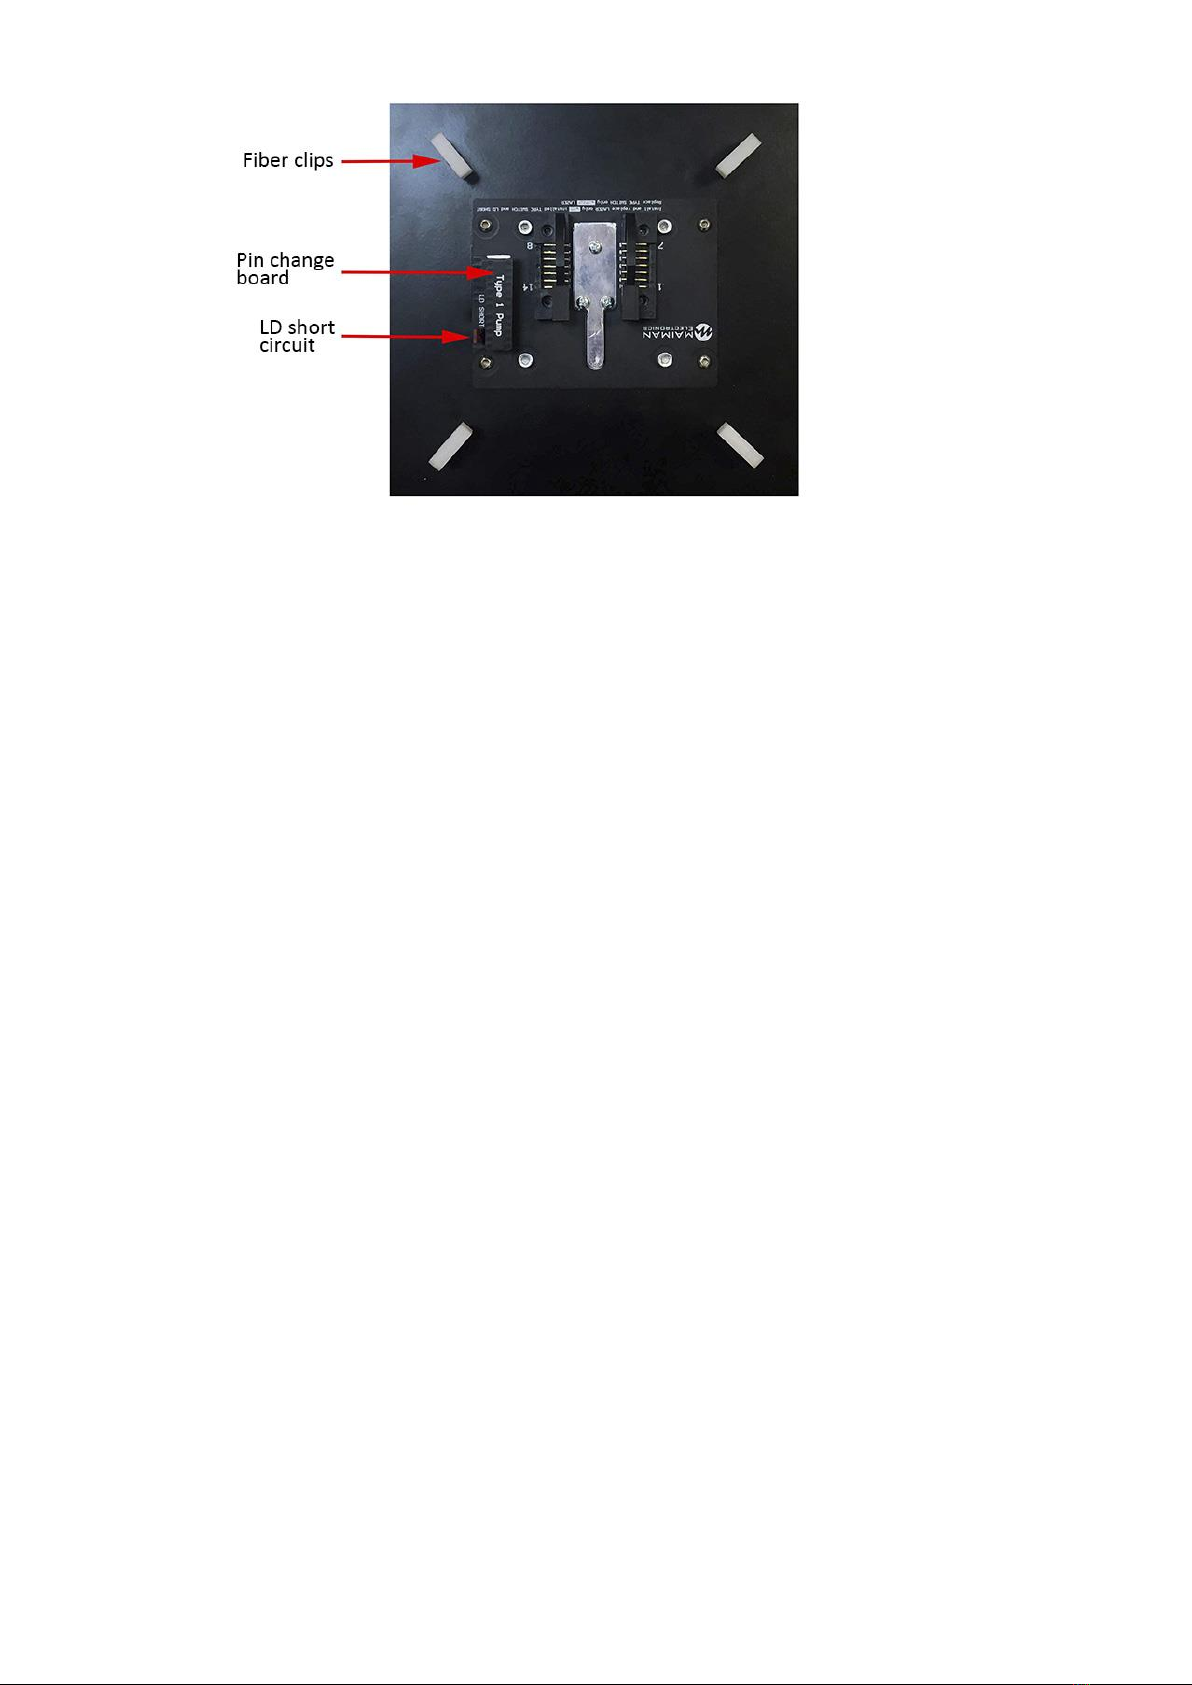
Fig. 7 –LD seat for type 1 Butterfly 14-pin
All works on the installation of the laser diode are performed with the MBL1500A power off!
Replacement of the pin change board is allowed only without the installed laser diode!
Laser diode installation is made only when the short circuit and the pin change board are
installed!
Laser diode installation
Remove the 4 screws on the top cover, 2 each left and right, and remove the cover;
1. Determine the required pinout type in accordance with the description on the LD. Install the
pin change board in the LD seat (Figure 7). Please note that the position of the pin change
board key (white stripe) must correspond to the position of the LD seat key;
2. Open fiber clips;
3. Apply thermal grease to the aluminum plate of the LD seat and install the LD;
4. Place the fiber and close the clips;
5. After installing LD remove the short circuit;
How to get started14.
When you turn on the MBL1500A without the installed LD, the operation and information on the
screen will be incorrect!
1. Unpack the MBL1500A;
2. Connect the LD (paragraph 13. LD connection);
3. Connect the power cord. Plug the power cord into the outlet;
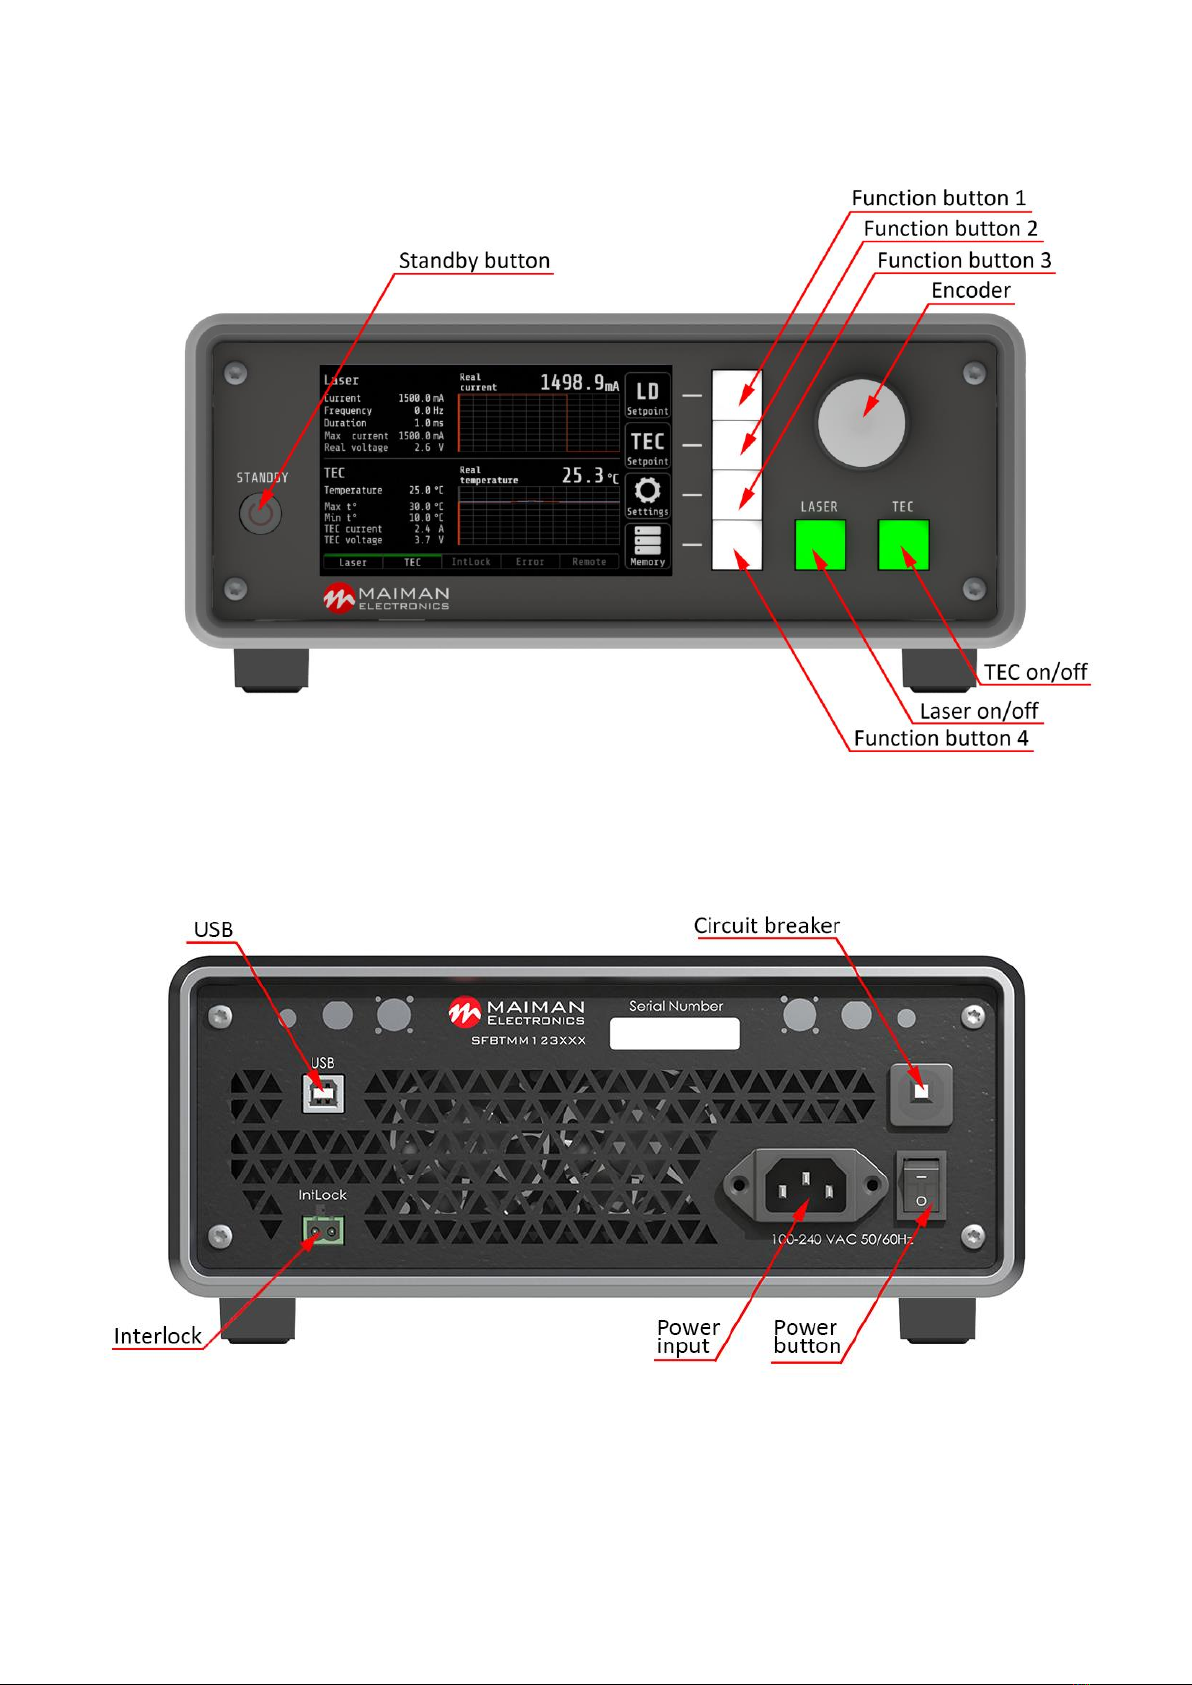
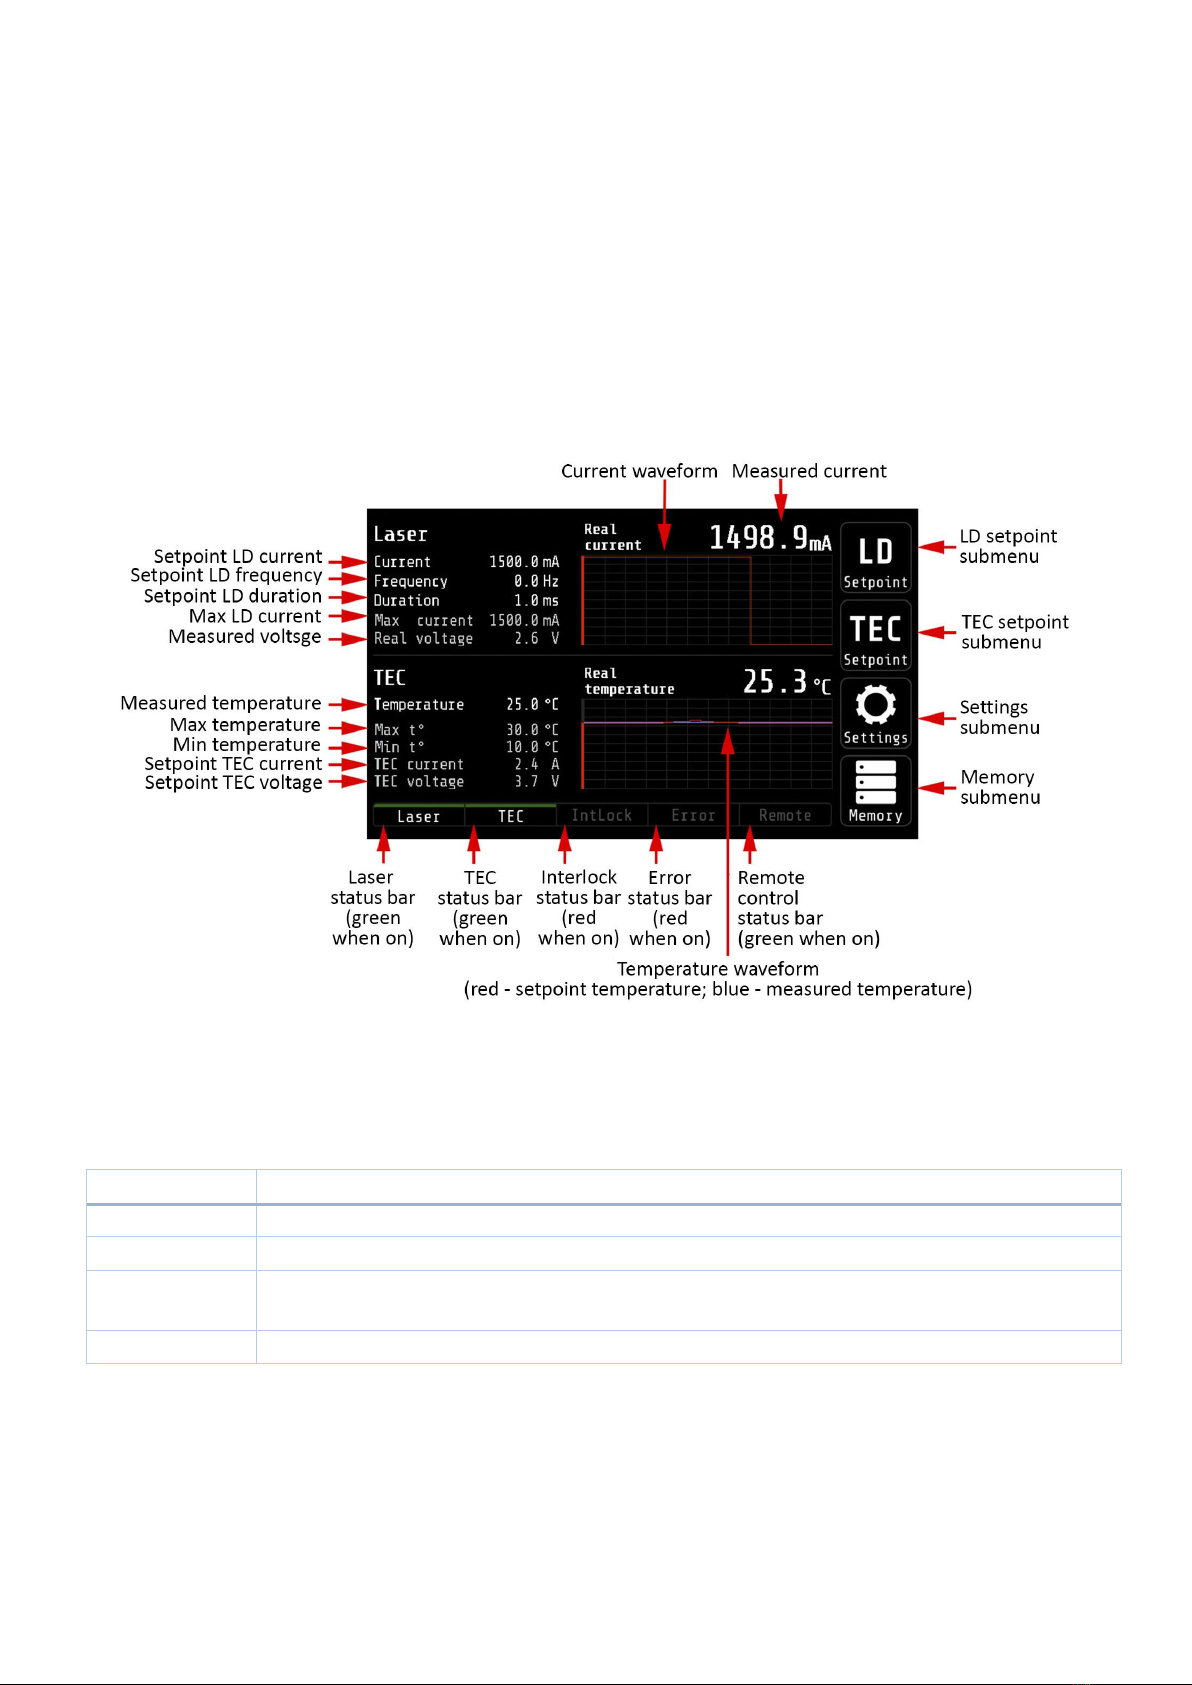
4. Check the Interlock connection. The Interlock status bar should not be highlighted in red
(paragraph 15.1 The Main screen);
5. Press the power button on the back panel;
6. Press the Standby button. A splash screen will appear. The Main screen loads. The function
buttons should be white. Buttons Laser and TEC should be red;
7. Set the required parameters and settings (paragraph 15. Screen description);
8. To turn on, press the Laser and TEC buttons. The buttons will light up in green. Status bars
Current LD and TEC will light up in green. If you turn on LD without TEC, the TEC button will flash. If you