1. Tools for assembly:
General tools you may need for the assembling this strength
equipment:
Electric screwdrivers
Hexagon wrench sets
Wrench sets and adjustable wrenches
Rubber Hammer
Lubricant
2. Insert bolts into the frame as illustrated in the drawing of each
of the steps.
3. Hand-tighten the bolts and nuts during assembly. Tighten all
the hardware once the entire unit has been completely assembled.
4. With the proper assistance, the right tools, and strictly following
the assembly steps, and given enough time.
5. Thoroughly read each step before proceeding to assemble the
parts of that step.
6.To help make it easier for you to assemble the device, we have
noted the required hardware in the every steps.
7. When the equipment is fully assembled check all the functions
for correct operation. Consult the manual if you experience any
issues, or for further help please contact our service department.
Please read all instructions carefully before assembling or
operating this product.
This workout equipment is designed and built for optimum safety.
However, certain precautions apply whenever you operate this
exercise equipment. Be sure to read the entire manual before
assembling and operating this equipment. Also, note the following
safety instructions:
1. Two people are recommended for the installation of this product instead
of one.
2. If you feel dizzy, or other abnormal sensations at any time while operating
this device, please stop using the product or exercise and contact your
physician as soon as possible.
3. Make sure your equipment is correctly assembled before you use it. Be
sure all the screws, nuts, and bolts are tightened prior to use.
4. If this equipment or parts are damaged, do not use it again to exercise.
5. Please do not eat within one hour before using the machine.
6. This product should be placed on a flat surface when using. A mat or
other covering material on the ground is recommended.
7. Keep children and pets away from this equipment at all times.
8. It is recommended to wear tight training clothes, tie your hair up,
preferably in a pill, and remove your jewelry when using this product to
avoid unexpected hazards.
9. It is recommended that novice or teenagers should be accompanied by a
trainer or parents to use our products, and children under 12 years old are
not recommended to use this fitness equipment.
10. The users of this product should keep their weight within 220bl/100kg.
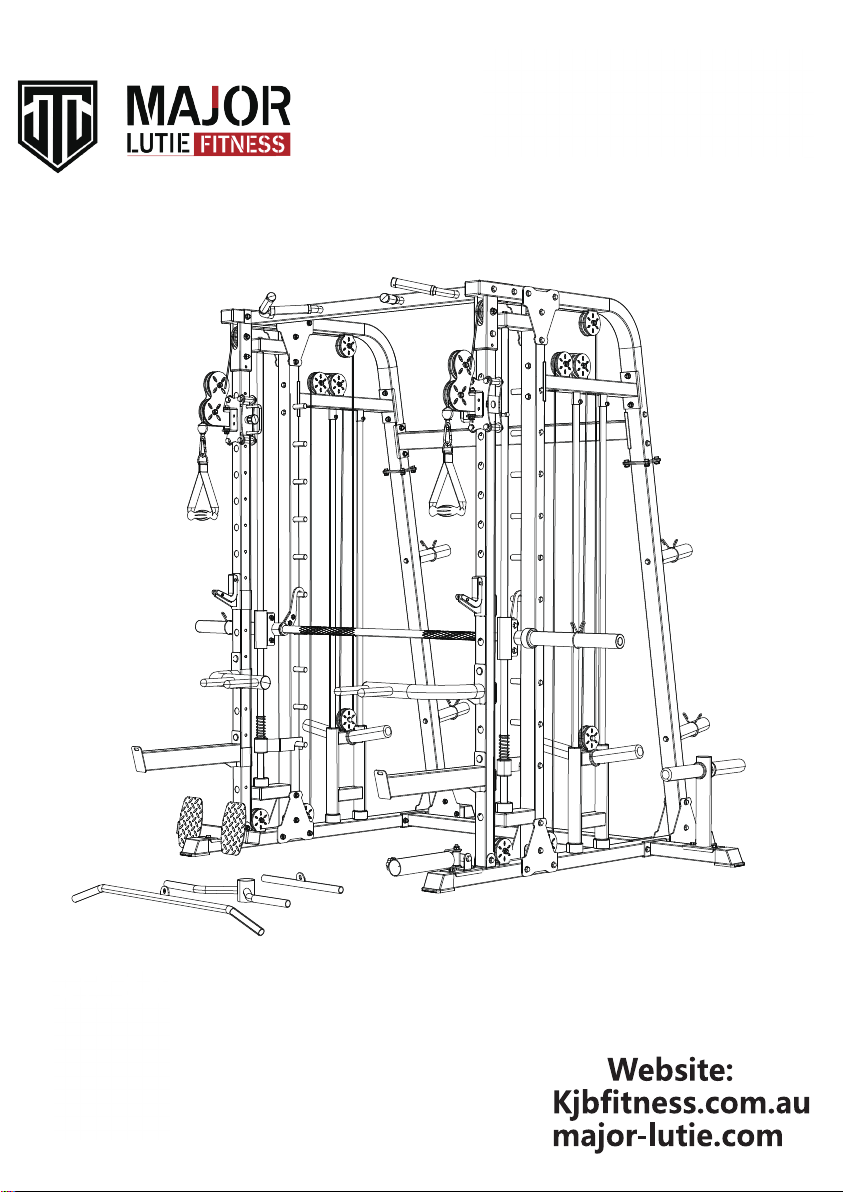
PREPARATION