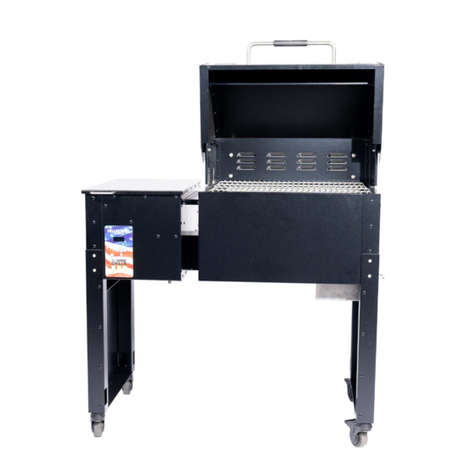
Mak Grills EP-429-2G User manual

MAK GRILLS
Owner’s Manual
Pellet BBQ Smoker-Grill
Model EP-429-2G
GENERAL
Superior Wood
Pellet BBQ
Smoker-Grills
Superior Wood
Pellet BBQ
Smoker-Grills

MAK GRILLS
Owner’s Manual
Pellet BBQ Smoker-Grill
Model EP-429-2G
Welcome to the MAK GRILLS family! We appreciate your purchase of our
quality, American-made products, proudly built in Dallas, Oregon. MAK
GRILLS is proud to be an American company that makes every effort to
purchase products locally.
If you have any questions concerning the assembly or operation of your
MAK GRILL, please call us at (503) 623-1234. You may also reach us via
be found on our website, www.makgrills.com
Please record the following information here for future reference:
Grill Serial number (back left side of the pellet hopper) _______________
Inspected by:_____________________________ Date: _____________
Date Purchased:__________ Purchased From: ____________________
Please keep your sales receipt in a safe place for reference if needed.
NOTICE!
PLEASE READ THIS ENTIRE MANUAL BEFORE
ASSEMBLING OR USING YOUR MAK GRILL!
The MAK GRILL was designed for
Any other use may cause serious injury and will
void any and all warranties. Do not operate this grill in the
vicinity of any liquid combustibles such as gasoline or use any
such items inside the unit. Maintain a clearance of at least (20)
twenty inches around this grill at all times. Only touch handles
with the understanding that the unit will be HOT during
operation. In case of fire or other emergency, unplug the unit
from the power source. Before removing electronics panel or
the Pellet Boss Control Board for servicing or any other
reason, disconnect unit from power source.
RESIDENTIAL OUTDOOR
USE ONLY!

TABLE OF CONTENTS
PACKAGE CONTENTS
BBQ PARTS LIST
DIAGRAM Page 6
Page 13
Page 3
Page 3
BBQ
ASSEMBLY INSTRUCTIONS Page 7
Page 11
OPERATING INSTRUCTIONS Page 15
MAINTAINING YOUR GRILL Page 22
TROUBLE SHOOTING & REPAIR Page 23
GRILL WARRANTY Page 26
BASIC MAK GRILL RECIPES Page 29
READ THIS BEFORE USING!
QUICK CHANGE GREASE PAN SYSTEM
Superior Wood Pellet BBQ Smoker-Grills
2

PACKAGE CONTENTS
There will be some assembly required with your grill. All necessary
hardware and tools needed for proper assembly are included. Make sure
you have each of the items listed below before starting assembly. Refer
to the BARBECUE PARTS LIST to identify the individual components of
your grill.
PLEASE NOTE: The approximate assembly time for this grill is
between 60-90 minutes.
9
Ash clean-out door (1)
BBQ PARTS LIST
DESCRIPTION / QUANTITY
ITEM
Main body of pellet grill (1)
Front legs (2) with locking casters
Rear legs (2) With non-locking casters
1
2
3
4
5
6
7
8
Bottom shelf (1)
Warmer/Smoker Box (1)
Back splash (1)
Side cover handles (2)
Grill lid handle (1)
3

4
DESCRIPTION / QUANTITY
ITEM
17
18
19
20
21
Split cooking grates (2)
Warmer/Smoker Box Grate (1)
Warmer/Smoker Box grease tray (1)
Tool hanger (1)
Tool pack (1)
16
FlameZone™ pan (1)
22
23
Owner’s manual (1)
Meat probe (1)
10
Grease bucket (1)
11
12
13
Heat diffuser (1)
14
Grease shield
Grease tray frame (1)
FlameZone™ covers (2)
15
FlameZone™ cover tool (1)

DESCRIPTION / QUANTITY
ITEM
5
Hardware:
¼” x 1/2” long screw (40) use 5/32 hex wrench
1/4” lock washer (36)
1/4” x 5/8” flat washer (5)
#6 x 3/8” long screw (4) use 3/32 hex wrench
#6 lock washer (4)
24
25
26
27
28
¼ - 20 nuts (12)
29
Optional Accessories:
«
«
«
«
«
«
Meat Probe
Upper Grill Grate
Half Upper Grill Grate
Griddle
Searing Grate
Remote Boss Wireless Control
«
«
«
«
«
Grill Cover
Rib Rack
Pellets
Pellet Bucket
Grill Scrubber
Note:
Accessories not manufactured by MAK GRILLS, or made
for MAK GRILLS may end up causing damage to your grill.
When purchasing an accessory make sure that it does not
interfere or restrict the airflow within the grill. If you have
any questions, please contact us.

6
BBQ DIAGRAM

7
ASSEMBLY INSTRUCTIONS
NOTE: The assembly of the 2 Star General Grill requires (2) two people.
Before you begin the assembly process, take the outer cardboard
surrounding the grill from the pallet, flatten it and use that to place the
barbecue onto during assembly. Remove all parts and components from
the grill and pallet and place them in an area that allows you to get to them,
but does not interfere with the assembly process. Lay unit on its back on
the cardboard. Install screws part way in each step, but don't tighten them
until all screws have been started.
STEP 1
front and rear legsInstall (rear legs have 4 holes) using 4 each (16
total), ¼” x ½” screws, lock washers and 2 each¼-20nuts. Note:
Casters are attached to legs.
Step1-1 Step1-2
Step 2
STEP 2
bottom shelfInstall using 8 each
¼” x ½” screws and lock washers.

8
STEP 4
back splashInstall using 6 each
¼” x ½” screws and lock washers.
Step 4
STEP 3
Warmer/Smoker box
(Step 3-1) With the assistance of one other person, install the
by tilting it into position, resting the box on the
hanging hem bracket. (Step 3-2) Secure the box to the barbecue body
using the ¼” x ½” screws, lock washers and nuts.
Step 3 Step 3
STEP 5
ash clean-out door
Install 1 each ¼” x ½” screw into
the part way
so that the end of the screw is
pointed up towards the bottom of
the grill. Slide door into the slots
located on the underside of the
barbecue cooking chamber then
tighten the screw.
Step 5

9
STEP 7
Install Pellet Hopper and
Warmer/Smoker box lid handles
using 2 each (4 total) #6 x 3/8”
screws and lock washers.
(Note: Handles should be installed
only on the front side of the lid. The
2 screw holes on the back of the
lids are not used).
Step 7
STEP 8
grill lid handleInstall the using 2
each 1/4” x 1/2” long screws, 1/4”
lock washer, and 1/4” x 5/8” flat
washer. Make sure flat washer is
against the inside surface of the
lid.
Step 8
STEP 6
Place the Warmer/Smoker box
grease tray and grate into the
bottom of the Warmer/Smoker box.
Step 6

10
STEP 11
Position the heat diffuser over the firepot, making sure that the letter “F:”
is facing the front of the grill.
STEP 12
Place the Quick Change Grease
Pan frame into the barbecue body.
Make sure that the frame sits
securely and level on the lip which
runs along the inside of the
barbecue body. The grease drain lip
needs to be placed over the top of
the grease shield to ensure proper
grease drainage.
Step 12
STEP 13
STEP 14
STEP 15
STEP 16
Once the frame has been installed, you may select either the Blank
Grease Pan for low n' slow barbecuing and smoking, or the FlameZone™
pan for hot and fast grilling.
Set the cooking grids into place.
Hang the grease bucket onto the grease drain, located on the lower right
hand side of the barbecue body. The grease drain is under the
warmer/smoker box.
Remove all plastic film covering the stainless steel.
STEP 9
tool hookInstall using 3 each
1/4” x 1/2” long screws and 1/4” x
5/8” flat washers.
STEP 10
Place the grease shield into
position, making sure the bottom
clip is facing towards the firepot, and
that the lip overlaps the flange on
both sides of the grease drain.
Step 9 Step 10

11
Start Up and Seasoning Procedures.
Make sure all items are installed properly.
Start up procedure.
Shut down procedure.
NOTE: Always wait at least (10) ten minutes after the grill has
completely shut-down before placing the cover back on the grill.
Never place a cover on a hot grill.
Changing Pellets:
1) Fill hopper with hardwood barbecue pellets.
2) Plug grill power cord into electrical outlet or power source.
3) Press the ON/OFF button once. Display will light up
4) Press the STAR button in the center of the arrow buttons one
time. The word SMOKE will flash. Use the Up or Down arrow
buttons to adjust the grill temperature to 450 degrees. Press the
STAR button on time to set the grill temperature. Season grill for
one-half hour at 450 degrees.
5) Once “seasoned”, you may adjust the SETPOINT temperature to
any desired setting and start cooking on your MAK GRILL.
Press the power button once. The Pellet Boss™ will automatically go
into cool-down mode, and may run for up to (20) twenty minutes before
the grill completely shuts off.
1. Press the power button to turn off the grill. Allow the grill to cool
completely.
2. Place a bucket under the pellet hopper dump door.
3. Turn the bezel counter-clockwise and open the door to allow the
pellets to flow out of the pellet hopper.
4. Once the hopper has emptied of pellets, close the door and turn
the bezel clock-wise to secure the door.
5. Fill the hopper with the new variety of pellets.
6. Run the grill on HIGH for (5) five minutes to allow the pellets to
reach the firepot.
READ THIS BEFORE USING YOUR GRILL!
Warning this unit will get extremely hot!
Only touch handles while operating.

12
Most barbecue recipes suggest cooking meats at temperatures
between 200 to 250 degrees until they reach the correct internal
temperature. It is highly recommended that you use a meat probe to
accurately determine your internal meat temperature.
The Warmer/Smoker box is designed to keep cooked foods at a safe
serving temperature. In order to do this, the SETPOINT temperature
on the Pellet Boss™ needs to be set above 300 degrees. The interior
of the Warmer/Smoker box will attain a temperature of approximately
170-180 degrees. You may also cold smoke cheese, nuts, brined fish
or meats using the SMOKE setting on the Pellet Boss™. The cold
smoke temperature will be approximately 70-80 degrees when the
SETPOINT setting is on SMOKE.
Burgers, steaks, veggies,etc. can be cooked quickly on HIGH using
the FlameZone® pan. You can also fry foods on your MAK GRILL
using the optional GRIDDLE. Remember, the hotter the cooking
temperature, the faster food will cook, and the less smoke flavor you
will get in the food being cooked. You may smoke foods in the main
cooking chamber using the SMOKE and lower cooking temperatures.

13
QUICK CHANGE GREASE PAN SYSTEM
COMPONENTS
TIPS
There are three main components to the grease pan system:
1) Outer frame, which sits on the metal lip which is on the inside
perimeter of the main barbecue body.
2) The FlameZone® insert pan-for use when doing high
temperature grilling.
3) The Blank insert pan-for use when you want to cook in-directly
(barbecuing or smoking).
The frame should be placed on the lip which runs around the inside
perimeter of the main barbecue grill body. Position the right hand lip of
the pan so that it slopes down to the right over the grease drain or
grease shield in the grill. This will ensure that grease and drippings will
run out of the grill into the grease bucket.
Once the frame is properly positioned inside the grill, you can place
either the full FlameZone® or Blank grease pan insert inside the grease
pan frame.
Wrapping the grease pan inserts in foil will help make cleaning easier.
If you do this on the FlameZone® pan, make sure to puncture holes
in the foil on the raised dimples on the pan to ensure that grilling
temperatures are reached.
If you wrap the grease pans with foil, make sure that the foil is
positioned so that it does not block heat or smoke coming through
the slots on the sides of the frame, or under the tray sides.
Always wait until the grill is completely cold before attempting to
remove the grease pans or frame, otherwise you may suffer serious
burns.
Keep the heat/smoke slots clean and clear of food debris or other
obstructions. For best results, do this on a regular basis.
INSTALLING THE GREASE PAN SYSTEM
NOTE: Make sure when placing the pans inside the
frame that the letter “F” (for front) is facing the FRONT of the grill.
This will ensure correct placement of the pan.
4
4
4
4

14
4
4
4
4
Hot, soapy water can be used for general cleaning. For heavy-duty
cleaning, it is advisable that you use a degreaser and a stiff brush to
help remove food particles, grease and smoke.
After washing, let the components dry before placing them back into
the grill.
CARE AND CLEANING STAINLESS STEEL
In order to keep your stainless steel looking like new, we strongly
recommend:
For more difficult cleaning situations, use only a red or pink scrubbie.
ALWAYS follow the grain of the stainless steel. When cleaning the
exterior stainless surface of your grill, be sure to rub only in the
direction of the grain finish lines. Finish by wiping down the cleaned
area with a damp, soft cloth. Wipe dry using a soft towel or cloth.
If your barbecue body becomes stained with grease, sauce or food
drippings; wait until the grill is completely cold before attempting to
clean it. Try using mild detergent and hot water first. Otherwise, use a
degreaser to help dissolve the grease and drippings. After cleaning,
wipe the area with a damp cloth and then dry with a soft towel or cloth.

PELLET BOSS
OPERATING INSTRUCTIONS
ON/OFF BUTTON
FUSE HOLDER
STAR BUTTON
This button is on the left-hand side of
the Pellet Boss ® control faceplate. To
turn the grill on or off, press the button
once. When first turned on, the grill will
begin the ignition cycle. SMOKE will be
displayed. The igniter will begin to heat
up to ignite the pellets in the firepot.
The fuse protects the circuit board from
component failure. The fuse is located
on the backside of the Pellet Boss ®
controller. To access the fuse, we
recommend removing the (6) six
screws which attach the Pellet Boss®
to the pellet hopper body. There is a
plastic cover over the fuse, which will
need to be removed in order to examine or replace the fuse. Always use a
2.0 amp fuse.
The Star button is used to activate different functions and screens. The
STAR button acts in the same manner as the ENTER key on a computer
keyboard. Pressing the STAR button selects or sets a particular function
or temperature.
Press the STAR button to activate or change or accept changes made to
any Pellet Boss® function. Example: To change the grill SETPOINT
temperature, press the STAR button. (The screen will flash). Use the UP
or DOWN arrow buttons to select your desired cooking temperature.
When the cooking temperature you want is displayed on the screen, push
the STAR button once to lock-in that cooking temperature.
15

ARROW BUTTONS
TEMPERATURE/MEAT PROBE INPUTS
There are four arrow buttons: LEFT, RIGHT, UP and DOWN. Use the
UP, DOWN, LEFT or RIGHT ARROW buttons to scroll through screens
or adjust settings up or down. To change screens or move from one
function to another, use the LEFT or RIGHT arrow button. Pressing the
RIGHT button will advance the screen forward. Press the LEFT button to
go back. To move from screen to screen, press either button once.
Example: You want to set a MEAT PROBE alarm for 150F. Press the
RIGHT Arrow button to advance the screen to Probe 1. Now press the
STAR button. The word OFF will flash. Use the UP or DOWN ARROW
button until you reach 150F. Now press the STAR button to accept that
meat probe alert temperature.
To lock any screen, press and hold the UP arrow button for
approximately (3) three seconds. A lock icon will appear in the upper
left-hand corner of the display screen. To un-lock, simply press any
button one time.
You may use up to (3) three Temperature/Meat Probes to monitor the
internal temperature of the food you are cooking. Put the probe plug into
any of the (3) three Temperature/Meat Probe
inputs. Run the probe through the “mouse hole”
on the front left side of the grill opening and
insert the probe end into your food. The internal
temperature of the food will be displayed as
probe number 1, 2 or 3, depending on which
input you plugged the probe into.
16

PELLET BOSS®
SCREEN DISPLAY DESCRIPTIONS &SETTINGS
Screen Display - SET POINT
Description:
Settings:
Screen Display- GRILL TEMP
Description: actual temperature
Settings:
Screen Display- PROBE 1
Description:
Settings:
Probes 2 &3- Description and Settings are the same as Probe 1.
Shows the temperature setting for the main cooking
chamber. Note: When you first turn on the grill, the default SETPOINT
temperature is SMOKE.
The setpoint temperature can be changed in (5) five degree
increments from 200 degrees up to 450 degrees. The SMOKE setting will
produce temperatures of 170F to 180F. On HIGH, the grill will cook
above 450 degrees. To change the temperature setting for the grill, press
the STAR button. The temperature will flash. Use the UP or DOWN
arrow buttons to select your desired cooking temperature. Once the
temperature you want is displayed, press the STAR button once. The
temperature will stop flashing and the grill will adjust to the new cooking
temperature.
Shows the inside the grill. NOTE:
When the grill is first turned on, it will activate the ignition mode. The
Pellet Boss® screen will display IGNITING.
There are no user settings for this screen. To change the grill
cooking temperature, follow the instructions above.
Displays the internal temperature of the food the
Temperature/Meat Probe is inserted into.
To add a setpoint alarm for the probe, press the RIGHT arrow
button until you reach PROBE 1 on the screen. Press the STAR button.
The word OFF will flash. Use the UP or DOWN arrow button to adjust the
setting from OFF to 225 degrees. Press the STAR button again. Now
the grill will alarm when the probe reaches that selected temperature.
NOTE: The temperature probes have a range of 32 to 225 degrees. If the
probe temperature is below 32 degrees, the screen will display “LOW”. If
the probe is not plugged in correctly, the screen will display “CHECK”.
Above 225 degrees, the probe display screen will display “HIGH”.
To ensure proper operation of the temperature/meat probes, never
expose the meat probe inputs to moisture, dust or dirt. Otherwise the
probes may not function correctly. If water has entered a probe jack, try
drying it out using a can of computer air.
17

NOTE: For best results, prevent twisting the probe cable, exposing it to high heat or
direct flame, or immersing them in water. To clean, wipe the probe with a damp cloth
with mild detergent. The probes should only be used to monitor internal meat
temperatures, not your grill's cooking temperature. Store probes in a dry place away
from water or moisture.
Screen Display-TIMER
Description:
Settings:
Screen Display-ELAPSED TIMER
Description:
Settings:
Screen Display-USER PROGRAM
Description:
The TIMER can be set to count down and alarm when it
reaches zero. It will reset to zero whenever the grill is turned off.
Press and hold the STAR button for 3 seconds. The MINUTES
will flash. Using the UP or DOWN arrow buttons, set the minutes from 01
to 59. To set HOURS, press the LEFT or RIGHT arrow button. The
HOURS will now flash. To set hours, use the UP or DOWN arrow buttons
to select the number of hours you want. Once the hours and minutes are
set, press the STAR button to lock in. Press the STAR button once more
to activate or pause the timer.
When the timer reaches zero, an alarm will sound and the display screen
will flash until any button on the control panel is depressed. When the grill
is turned off, all alarms will reset to OFF. Press and hold the STAR button
for (3) three seconds to reset the timer back to zero.
The Elapsed Timer keeps track of the total amount of
cooking time. When activated, the timer counts-up both hours and
minutes. The timer will reset to zero whenever the grill is turned off.
Press the STAR button to start the Elapsed Timer. Press the
STAR button again to stop the timer. To reset to zero, press and hold the
STAR button for (3) seconds.
There are (3) three User Programs available for use. Set-up
and operation of each User Program will be the same. Each program
allows you to make up to (5) five cooking steps, which will automatically
change from one step to the next based on either time or meat probe
temperature. Note: You can only use (1) one User Program at a time.
Once a program is set, it will remain until you change it.
To set up any USER PROGRAM, use the Left or Right ARROW buttons
to select USER PROGRAM 1, 2 or 3.
Press the STAR button---the word OFF will flash.
Use the Up or Down ARROW buttons to reach SETUP.
Press the STAR button again. The screen will now display STRT 1.1
SET:SMKE. Use the UP or DOWN arrow buttons to select your desired
starting temperature.
?
?
?
?
18

SCREEN LOCK
ACTIVE SCREEN SCROLL
Description:
Settings:
Description:
Settings:
Allows you to stop the display screens from scrolling from
function to function, letting you display only one screen.
Use the LEFT or RIGHT ARROW buttons to reach the screen
you want displayed. Press the UP button until the LOCK icon appears in
the upper left-hand corner of the display screen. To resume screen
scrolling function, press any button.
The screen will scroll through all ACTIVE SCREENS
(screens for functions that are in use) when left un-locked and un-
touched.
There are no settings for this feature.
?
?
?
?
?
?
?
?
?
?
Press the STAR key to accept your starting cooking temperature.
The screen will now display END 1.1. SET: NONE. Use the ARROW
buttons for NONE, TIME or MEAT PROBE 1, 2 or 3. If you have
selected a MEAT PROBE, you will need to select a temperature for the
probe to reach in order for the program to go to the 1.2 setting in the
program.
If TIME is selected, the TIMER screen will appear. Set timer by following
the directions for TIMER.
Once you have selected a MEAT PROBE Temperature, or TIME, press
the STAR button once.
The display will now show 1.2 SET: SMKE. The word SMKE will be
flashing. Go through all of the same steps for settings 1.1. Do this for
steps 1.3, 1.4 and 1.5 if so desired.
To END the program, set END to NONE.
Once the program has been set-up the screen will display OFF.
To start the program, use the ARROW buttons to reach USER 1, 2 or 3.
Press the STAR button once. Use the UP or DOWN arrow buttons to
START, press the STAR button to accept. The program will begin to
run.
To STOP any USER PROGRAM, press the STAR button, choose a
different USER PROGRAM, select OFF or change the temperature.
To restart any USER PROGRAM, select START and press the STAR
button once.
FOR USER PROGRAMS2&3—Follow the above steps to program.
Descriptions are the same as USER 1.
7
19
Other manuals for EP-429-2G
3
Table of contents
Other Mak Grills Grill manuals

