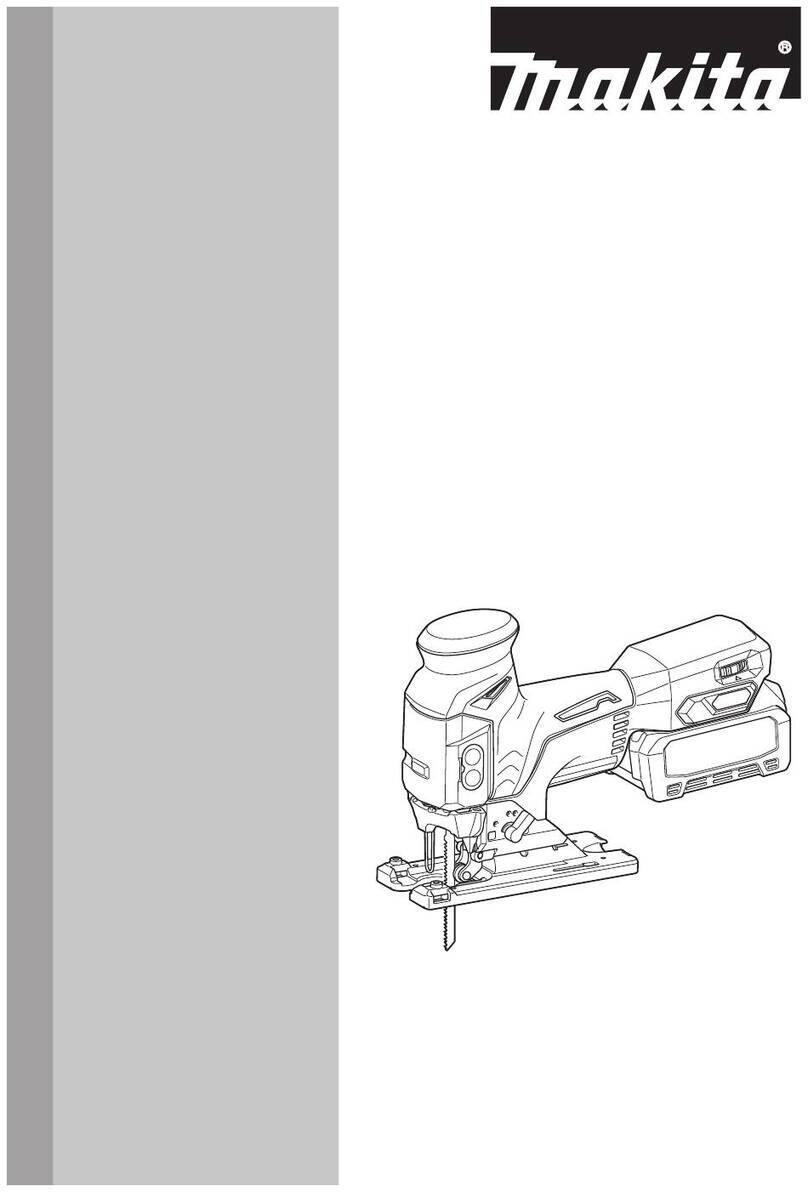
Makita JV001G User manual

JV001G
EN Cordless Jig Saw INSTRUCTION MANUAL 6
RU Аккумуляторный Лобзик РУКОВОДСТВО ПО
ЭКСПЛУАТАЦИИ 15
KK Аккумуляторлы қыл ара ПАЙДАЛАНУ ЖӨНІНДЕГІ
НҰСҚАУЛЫҚ 27

2
1
2
3
Fig.1
1
2
Fig.2
1
Fig.3
21
Fig.4
1
2
Fig.5
1
Fig.6
2
1
Fig.7

3
1
3
4
2
Fig.8
1
2
3
Fig.9
1
2
Fig.10
1
2
Fig.11
2
1
Fig.12
1
2
Fig.13
1
Fig.14

4
1
2
Fig.15
1
2
Fig.16
Fig.17
3
1
2
Fig.18
1
2
3
6
5
4
Fig.19
3
1
2
Fig.20
Fig.21
Fig.22

5
Fig.23
1
Fig.24
4
2
1
3
Fig.25
1
Fig.26
1
2
3
4
5
Fig.27
1
2
3
Fig.28
1
2
3
Fig.29

6ENGLISH
ENGLISH (Original instructions)
SPECIFICATIONS
Model: JV001G
Length of stroke 26 mm
Strokes per minute 800 - 3,500 min-1
Blade type B type
Max. cutting capacities Wood 135 mm
Mild steel 10 mm
Aluminum 20 mm
Overall length (with BL4025) 283 mm
Rated voltage D.C. 36 V - 40 V max
Net weight 2.6 - 2.9 kg
• Duetoourcontinuingprogramofresearchanddevelopment,thespecicationshereinaresubjecttochange
without notice.
• Specicationsmaydierfromcountrytocountry.
• Theweightmaydierdependingontheattachment(s),includingthebatterycartridge.Thelightestandheavi-
estcombinations,accordingtoEPTA-Procedure01/2014,areshowninthetable.
Applicable battery cartridge and charger
Battery cartridge BL4020/BL4025/BL4040
Charger DC40RA/DC40RB/DC40RC
•
Someofthebatterycartridgesandchargerslistedabovemaynotbeavailabledependingonyourregionofresidence.
WARNING: Only use the battery cartridges and chargers listed above.Useofanyotherbatterycartridges
andchargersmaycauseinjuryand/orre.
Symbols
Thefollowingsshowthesymbolswhichmaybeused
for the equipment. Be sure that you understand their
meaningbeforeuse.
Read instruction manual.
Wear safety glasses.
Ni-MH
Li-ion
OnlyforEUcountries
Due to the presence of hazardous com-
ponents in the equipment, waste electrical
and electronic equipment, accumulators
andbatteriesmayhaveanegativeimpact
on the environment and human health.
Do not dispose of electrical and electronic
appliancesorbatterieswithhouseholdwaste!
InaccordancewiththeEuropeanDirectiveon
waste electrical and electronic equipment and on
accumulatorsandbatteriesandwasteaccumu-
latorsandbatteries,aswellastheiradaptationto
nationallaw,wasteelectricalequipment,batteries
andaccumulatorsshouldbestoredseparately
and delivered to a separate collection point for
municipal waste, operating in accordance with the
regulations on environmental protection.
Thisisindicatedbythesymbolofthecrossed-
outwheeledbinplacedontheequipment.
Intended use
The tool is intended for the sawing of wood, plastic and
metal materials.
Noise
The typical A-weighted noise level determined accord-
ingtoEN62841-2-11:
Sound pressure level (LpA):87dB(A)
Sound power level (LWA):98dB(A)
Uncertainty(K):3dB(A)
NOTE: The declared noise emission value(s) has
beenmeasuredinaccordancewithastandardtest
methodandmaybeusedforcomparingonetoolwith
another.
NOTE: The declared noise emission value(s)
mayalsobeusedinapreliminaryassessmentof
exposure.

7ENGLISH
WARNING: Wear ear protection.
WARNING:
The noise emission during actual
use of the power tool can dier from the declared
value(s) depending on the ways in which the tool is
used especially what kind of workpiece is processed.
WARNING:
Be sure to identify safety measures
to protect the operator that are based on an estima-
tion of exposure in the actual conditions of use (tak-
ing account of all parts of the operating cycle such
as the times when the tool is switched o and when
it is running idle in addition to the trigger time).
Vibration
Thevibrationtotalvalue(tri-axialvectorsum)deter-
minedaccordingtoEN62841-2-11:
Workmode:cuttingboards
Vibrationemission(ah,B):4.6m/s2
Uncertainty(K):2.5m/s2
Workmode:cuttingsheetmetal
Vibrationemission(ah,M):4.8m/s2
Uncertainty(K):1.5m/s2
NOTE:Thedeclaredvibrationtotalvalue(s)hasbeen
measured in accordance with a standard test method
andmaybeusedforcomparingonetoolwithanother.
NOTE:Thedeclaredvibrationtotalvalue(s)mayalso
beusedinapreliminaryassessmentofexposure.
WARNING:
The vibration emission during actual
use of the power tool can dier from the declared val-
ue(s) depending on the ways in which the tool is used
especially what kind of workpiece is processed.
WARNING:
Be sure to identify safety measures
to protect the operator that are based on an estima-
tion of exposure in the actual conditions of use (tak-
ing account of all parts of the operating cycle such
as the times when the tool is switched o and when
it is running idle in addition to the trigger time).
Declarations of Conformity
For European countries only
The Declarations of conformity are included in Annex A
to this instruction manual.
SAFETY WARNINGS
General power tool safety warnings
WARNING Read all safety warnings, instructions,
illustrations and specications provided with this
power tool.Failuretofollowallinstructionslistedbelow
mayresultinelectricshock,reand/orseriousinjury.
Save all warnings and instruc-
tions for future reference.
The term "power tool" in the warnings refers to your
mains-operated(corded)powertoolorbattery-operated
(cordless) power tool.
Work area safety
1. Keep work area clean and well lit. Cluttered or
dark areas invite accidents.
2. Do not operate power tools in explosive atmo-
spheres, such as in the presence of ammable
liquids, gases or dust.Powertoolscreatesparks
which may ignite the dust or fumes.
3. Keep children and bystanders away while
operating a power tool. Distractions can cause
you to lose control.
Electrical safety
1. Power tool plugs must match the outlet. Never
modify the plug in any way. Do not use any
adapter plugs with earthed (grounded) power
tools. Unmodiedplugsandmatchingoutletswill
reduce risk of electric shock.
2. Avoid body contact with earthed or grounded
surfaces, such as pipes, radiators, ranges and
refrigerators. There is an increased risk of elec-
tricshockifyourbodyisearthedorgrounded.
3. Do not expose power tools to rain or wet con-
ditions. Water entering a power tool will increase
the risk of electric shock.
4. Do not abuse the cord. Never use the cord for
carrying, pulling or unplugging the power tool.
Keep cord away from heat, oil, sharp edges
or moving parts. Damaged or entangled cords
increase the risk of electric shock.
5. When operating a power tool outdoors, use an
extension cord suitable for outdoor use. Use of
acordsuitableforoutdoorusereducestheriskof
electric shock.
6. If operating a power tool in a damp location
is unavoidable, use a residual current device
(RCD) protected supply. Use of an RCD reduces
the risk of electric shock.
7. Power tools can produce electromagnetic
elds (EMF) that are not harmful to the user.
However, users of pacemakers and other similar
medical devices should contact the maker of their
deviceand/ordoctorforadvicebeforeoperating
this power tool.
Personal safety
1. Stay alert, watch what you are doing and use
common sense when operating a power tool.
Do not use a power tool while you are tired or
under the inuence of drugs, alcohol or med-
ication. A moment of inattention while operating
powertoolsmayresultinseriouspersonalinjury.
2. Use personal protective equipment. Always
wear eye protection.Protectiveequipmentsuch
as a dust mask, non-skid safety shoes, hard hat or
hearing protection used for appropriate conditions
willreducepersonalinjuries.
3. Prevent unintentional starting. Ensure the
switch is in the o-position before connecting
to power source and/or battery pack, picking
up or carrying the tool. Carrying power tools with
yourngerontheswitchorenergisingpowertools
that have the switch on invites accidents.
4. Remove any adjusting key or wrench before
turning the power tool on. A wrench or a key left
attached to a rotating part of the power tool may
resultinpersonalinjury.

8ENGLISH
5. Do not overreach. Keep proper footing and
balance at all times.Thisenablesbettercontrol
of the power tool in unexpected situations.
6. Dress properly. Do not wear loose clothing or
jewellery. Keep your hair and clothing away
from moving parts.Looseclothes,jewelleryor
longhaircanbecaughtinmovingparts.
7. If devices are provided for the connection of
dust extraction and collection facilities, ensure
these are connected and properly used. Use of
dust collection can reduce dust-related hazards.
8.
Do not let familiarity gained from frequent use
of tools allow you to become complacent and
ignore tool safety principles. A careless action can
causesevereinjurywithinafractionofasecond.
9.
Always wear protective goggles to protect your eyes
from injury when using power tools. The goggles
must comply with ANSI Z87.1 in the USA, EN 166 in
Europe, or AS/NZS 1336 in Australia/New Zealand. In
Australia/New Zealand, it is legally required to wear
a face shield to protect your face, too.
It is an employer's responsibility to enforce
the use of appropriate safety protective equip-
ments by the tool operators and by other per-
sons in the immediate working area.
Power tool use and care
1. Do not force the power tool. Use the correct
power tool for your application. The correct
powertoolwilldothejobbetterandsaferatthe
rate for which it was designed.
2.
Do not use the power tool if the switch does not turn
it on and o.Anypowertoolthatcannotbecontrolled
withtheswitchisdangerousandmustberepaired.
3. Disconnect the plug from the power source
and/or remove the battery pack, if detachable,
from the power tool before making any adjust-
ments, changing accessories, or storing power
tools. Such preventive safety measures reduce
the risk of starting the power tool accidentally.
4.
Store idle power tools out of the reach of children and
do not allow persons unfamiliar with the power tool
or these instructions to operate the power tool.Power
tools are dangerous in the hands of untrained users.
5. Maintain power tools and accessories. Check
for misalignment or binding of moving parts,
breakage of parts and any other condition that
may aect the power tool’s operation. If dam-
aged, have the power tool repaired before use.
Manyaccidentsarecausedbypoorlymaintained
power tools.
6. Keep cutting tools sharp and clean.Properly
maintained cutting tools with sharp cutting edges
arelesslikelytobindandareeasiertocontrol.
7. Use the power tool, accessories and tool bits
etc. in accordance with these instructions, tak-
ing into account the working conditions and
the work to be performed. Use of the power tool
foroperationsdierentfromthoseintendedcould
result in a hazardous situation.
8. Keep handles and grasping surfaces dry,
clean and free from oil and grease. Slippery
handles and grasping surfaces do not allow for
safe handling and control of the tool in unexpected
situations.
9. When using the tool, do not wear cloth work
gloves which may be entangled. The entangle-
ment of cloth work gloves in the moving parts may
resultinpersonalinjury.
Battery tool use and care
1. Recharge only with the charger specied by
the manufacturer.Achargerthatissuitablefor
onetypeofbatterypackmaycreateariskofre
whenusedwithanotherbatterypack.
2. Use power tools only with specically desig-
nated battery packs.Useofanyotherbattery
packsmaycreateariskofinjuryandre.
3. When battery pack is not in use, keep it away
from other metal objects, like paper clips,
coins, keys, nails, screws or other small metal
objects, that can make a connection from one
terminal to another.Shortingthebatterytermi-
nalstogethermaycauseburnsorare.
4. Under abusive conditions, liquid may be
ejected from the battery; avoid contact. If con-
tact accidentally occurs, ush with water. If
liquid contacts eyes, additionally seek medical
help.Liquidejectedfromthebatterymaycause
irritationorburns.
5. Do not use a battery pack or tool that is dam-
aged or modied.Damagedormodiedbatteries
mayexhibitunpredictablebehaviourresultingin
re,explosionorriskofinjury.
6. Do not expose a battery pack or tool to re or
excessive temperature.Exposuretoreortem-
peratureabove130°Cmaycauseexplosion.
7. Follow all charging instructions and do not
charge the battery pack or tool outside the
temperature range specied in the instruc-
tions. Charging improperly or at temperatures
outsidethespeciedrangemaydamagethe
batteryandincreasetheriskofre.
Service
1. Have your power tool serviced by a qualied
repair person using only identical replacement
parts. This will ensure that the safety of the power
tool is maintained.
2. Never service damaged battery packs. Service
ofbatterypacksshouldonlybeperformedbythe
manufacturer or authorized service providers.
3. Follow instruction for lubricating and chang-
ing accessories.

9ENGLISH
Cordless jig saw safety warnings
1. Hold the power tool by insulated gripping
surfaces, when performing an operation where
the cutting accessory may contact hidden wir-
ing. Cutting accessory contacting a “live” wire may
make exposed metal parts of the power tool “live”
and could give the operator an electric shock.
2.
Use clamps or another practical way to secure
and support the workpiece to a stable platform.
Holdingtheworkpiecebyhandoragainstyourbody
leavesitunstableandmayleadtolossofcontrol.
3.
Always use safety glasses or goggles. Ordinary
eye or sun glasses are NOT safety glasses.
4. Avoid cutting nails. Inspect workpiece for any
nails and remove them before operation.
5. Do not cut oversize workpiece.
6. Check for the proper clearance around the
workpiece before cutting so that the jig saw
blade will not strike the oor, workbench, etc.
7. Hold the tool rmly.
8. Make sure the jig saw blade is not contacting
the workpiece before the switch is turned on.
9. Keep hands away from moving parts.
10. Do not leave the tool running. Operate the tool
only when hand-held.
11. Always switch o and wait for the jig saw blade
to come to a complete stop before removing
the jig saw blade from the workpiece.
12. Do not touch the jig saw blade or the work-
piece immediately after operation; they may be
extremely hot and could burn your skin.
13.
Do not operate the tool at no-load unnecessarily.
14. Some material contains chemicals which may
be toxic. Take caution to prevent dust inhala-
tion and skin contact. Follow material supplier
safety data.
15. Always use the correct dust mask/respirator
for the material and application you are work-
ing with.
SAVE THESE INSTRUCTIONS.
WARNING: DO NOT let comfort or familiarity
with product (gained from repeated use) replace
strict adherence to safety rules for the subject
product. MISUSE or failure to follow the safety
rules stated in this instruction manual may cause
serious personal injury.
Important safety instructions for
battery cartridge
1. Before using battery cartridge, read all instruc-
tions and cautionary markings on (1) battery
charger, (2) battery, and (3) product using
battery.
2. Do not disassemble or tamper with the battery
cartridge.Itmayresultinare,excessiveheat,
or explosion.
3. If operating time has become excessively
shorter, stop operating immediately. It may
result in a risk of overheating, possible burns
and even an explosion.
4.
If electrolyte gets into your eyes, rinse them out
with clear water and seek medical attention right
away. It may result in loss of your eyesight.
5. Do not short the battery cartridge:
(1) Do not touch the terminals with any con-
ductive material.
(2) Avoid storing battery cartridge in a con-
tainer with other metal objects such as
nails, coins, etc.
(3) Do not expose battery cartridge to water
or rain.
A battery short can cause a large current ow, over-
heating, possible burns and even a breakdown.
6. Do not store and use the tool and battery car-
tridge in locations where the temperature may
reach or exceed 50 °C (122 °F).
7. Do not incinerate the battery cartridge even if
it is severely damaged or is completely worn
out. The battery cartridge can explode in a re.
8. Do not nail, cut, crush, throw, drop the battery
cartridge, or hit against a hard object to the
battery cartridge. Such conduct may result in a
re,excessiveheat,orexplosion.
9. Do not use a damaged battery.
10.
The contained lithium-ion batteries are subject to
the Dangerous Goods Legislation requirements.
Forcommercialtransportse.g.bythirdparties,
forwarding agents, special requirement on pack-
agingandlabelingmustbeobserved.
Forpreparationoftheitembeingshipped,consult-
ing an expert for hazardous material is required.
Pleasealsoobservepossiblymoredetailed
national regulations.
Tapeormaskoopencontactsandpackupthe
batteryinsuchamannerthatitcannotmove
around in the packaging.
11. When disposing the battery cartridge, remove
it from the tool and dispose of it in a safe
place. Follow your local regulations relating to
disposal of battery.
12. Use the batteries only with the products
specied by Makita.Installingthebatteriesto
non-compliantproductsmayresultinare,exces-
sive heat, explosion, or leak of electrolyte.
13. If the tool is not used for a long period of time,
the battery must be removed from the tool.
14. During and after use, the battery cartridge may
take on heat which can cause burns or low
temperature burns. Pay attention to the han-
dling of hot battery cartridges.
15.
Do not touch the terminal of the tool immediately
after use as it may get hot enough to cause burns.
16. Do not allow chips, dust, or soil stuck into the
terminals, holes, and grooves of the battery
cartridge.Itmaycauseheating,catchingre,
burstandmalfunctionofthetoolorbatterycar-
tridge,resultinginburnsorpersonalinjury.
17. Unless the tool supports the use near
high-voltage electrical power lines, do not use
the battery cartridge near a high-voltage elec-
trical power lines. It may result in a malfunction
orbreakdownofthetoolorbatterycartridge.
18. Keep the battery away from children.
SAVE THESE INSTRUCTIONS.
10 ENGLISH
CAUTION: Only use genuine Makita batteries.

Useofnon-genuineMakitabatteries,orbatteriesthat
havebeenaltered,mayresultinthebatterybursting
causingres,personalinjuryanddamage.Itwill
also void the Makita warranty for the Makita tool and
charger.
Tips for maintaining maximum
battery life
1. Charge the battery cartridge before completely
discharged. Always stop tool operation and
charge the battery cartridge when you notice
less tool power.
2.
Never recharge a fully charged battery cartridge.
Overcharging shortens the battery service life.
3.
Charge the battery cartridge with room tempera-
ture at 10 °C - 40 °C (50 °F - 104 °F). Let a hot
battery cartridge cool down before charging it.
4. When not using the battery cartridge, remove
it from the tool or the charger.
5. Charge the battery cartridge if you do not use
it for a long period (more than six months).
FUNCTIONAL
DESCRIPTION
CAUTION: Always be sure that the tool is
switched o and the battery cartridge is removed
before adjusting or checking function on the tool.
Installing or removing battery
cartridge
CAUTION: Always switch o the tool before
installing or removing of the battery cartridge.
CAUTION: Hold the tool and the battery car-
tridge rmly when installing or removing battery
cartridge.Failuretoholdthetoolandthebattery
cartridgermlymaycausethemtoslipoyourhands
andresultindamagetothetoolandbatterycartridge
andapersonalinjury.
►Fig.1: 1. Red indicator 2. Button 3. Battery cartridge
Toremovethebatterycartridge,slideitfromthetool
whileslidingthebuttononthefrontofthecartridge.
Toinstallthebatterycartridge,alignthetongueonthe
batterycartridgewiththegrooveinthehousingandslip
it into place. Insert it all the way until it locks in place
with a little click. If you can see the red indicator as
showninthegure,itisnotlockedcompletely.
CAUTION: Always install the battery cartridge
fully until the red indicator cannot be seen. If not,
itmayaccidentallyfalloutofthetool,causinginjuryto
you or someone around you.
CAUTION: Do not install the battery cartridge
forcibly. If the cartridge does not slide in easily, it is
notbeinginsertedcorrectly.
Indicating the remaining battery
capacity
Pressthecheckbuttononthebatterycartridgetoindi-
catetheremainingbatterycapacity.Theindicatorlamps
light up for a few seconds.
►Fig.2: 1. Indicator lamps 2.Checkbutton
Indicator lamps Remaining
capacity
Lighted O Blinking
75%to100%
50%to75%
25%to50%
0%to25%
Charge the
battery.
Thebattery
may have
malfunctioned.
NOTE: Depending on the conditions of use and the
ambienttemperature,theindicationmaydierslightly
from the actual capacity.
NOTE:Therst(farleft)indicatorlampwillblinkwhen
thebatteryprotectionsystemworks.
Tool / battery protection system
Thetoolisequippedwithatool/batteryprotectionsys-
tem.Thissystemautomaticallycutsopowertothe
motortoextendtoolandbatterylife.Thetoolwillauto-
maticallystopduringoperationifthetoolorbatteryis
placedunderoneofthefollowingconditions:
Overload protection
Whenthebatteryisoperatedinamannerthatcauses
ittodrawanabnormallyhighcurrent,thetoolautomat-
ically stops without any indication. In this situation, turn
thetooloandstoptheapplicationthatcausedthetool
tobecomeoverloaded.Thenturnthetoolontorestart.
Overheat protection
Whenthetoolorbatteryisoverheated,thetoolstops
automaticallyandthelampblinks.Inthiscase,letthe
toolandbatterycoolbeforeturningthetoolonagain.
Overdischarge protection
Whenthebatterycapacityisnotenough,thetoolstops
automatically.Inthiscase,removethebatteryfromthe
toolandchargethebattery.

11 ENGLISH
Protections against other causes
Protectionsystemisalsodesignedforothercauses
that could damage the tool and allows the tool to stop
automatically. Take all the following steps to clear the
causes,whenthetoolhasbeenbroughttoatemporary
halt or stop in operation.
1. Turnthetoolo,andthenturnitonagainto
restart.
2. Chargethebattery(ies)orreplaceit/themwith
rechargedbattery(ies).
3. Letthetoolandbattery(ies)cooldown.
Ifnoimprovementcanbefoundbyrestoringprotection
system, then contact your local Makita Service Center.
Selecting the cutting action
Thistoolcanbeoperatedwithanorbitalorastraight
line(upanddown)cuttingaction.Theorbitalcutting
actionthruststhejigsawbladeforwardandincreases
cutting speed.
►Fig.3: 1. Cutting action changing lever
To change the cutting action, turn the cutting action
changing lever to the desired cutting action position.
Refertothetabletoselecttheappropriatecutting
action.
Position Cutting action Applications
0Straight line cutting
action
For cutting mild
steel, stainless
steel and plastics.
For clean cuts in
wood and plywood.
ISmallorbital
cutting action
For cutting mild
steel, aluminum
and hard wood.
II Mediumorbital
cutting action
For cutting wood
and plywood.
For fast cutting in
aluminum and mild
steel.
III Largeorbital
cutting action
For fast cutting in
wood and plywood.
Lighting up the front lamp
CAUTION: Do not look in the light or see the
source of light directly.
Pressthelockswitchtoturnonthelamp.Pressthelock
switchagaintoturnothelamp.
►Fig.4: 1. Lock switch 2. Lamp
NOTICE: When the tool is overheated, the lamp
blinks. Cool down the tool fully before operating
the tool again.
NOTE:Useadryclothtowipethedirtothelensof
the lamp. Be careful not to scratch the lens of lamp, or
it may lower the illumination.
Switch action
To turn on the tool, press the lock switch. The tool turns
intothestandbymode.Tostartthetool,presstheON/
standbyswitchinthestandbymode.Tostopthetool,
presstheON/standbyswitchagain.Thetoolturnsinto
thestandbymode.Toturnothetool,pressthelock
switchinthestandbymode.
►Fig.5: 1. Lock switch 2.ON/standbyswitch
NOTE: If the tool is left for 10 seconds without any
operationinthestandbymode,thetoolautomatically
turnsoandthelampgoeso.
NOTE:Youcanalsostopandturnothetoolby
pressing the lock switch while the tool is operating.
Todecreasesthebrightnessofthelamp,pressand
holdthelockswitchwhenturningintothestandby
mode.About1secondafteryoustartpressingthelock
switch,thebrightnessofthelampwillstarttodecrease,
so release the lock switch when you reach the desired
brightness.Itturnsthetoolintostandbymode,too.
About3secondsafteryoustartpressingthelock
switch,thebrightnessofthelampwillbeminimizedand
thebrightnesswillnotchangeafterthat.
NOTE:Thebrightnessofthelampcannotbeadjusted
whilethetoolisinstandbymode.Turnothetoolto
decreasethebrightnessofthelamp.
NOTE:Thereisnomemoryfunctionforthebright-
nessofthelamp.Ifyouturnthelampoandthenturn
iton,thebrightnessofthelampwillbemaximized
each time.
Speed adjusting dial
►Fig.6: 1.Speedadjustingdial
Thetoolspeedcanbeadjustedbyturningthespeed
adjustingdial.Youcangetthehighestspeedat6and
the lowest speed at 1.
Refertothetabletoselecttheproperspeedforthe
workpiecetobecut.However,theappropriatespeed
maydierwiththetypeorthicknessoftheworkpiece.In
general, higher speeds will allow you to cut workpieces
fasterbuttheservicelifeofthejigsawbladewillbe
reduced.
Workpiece Number
Wood 4 - 6
Mild steel 3 - 6
Stainless steel 3 - 4
Aluminum 3 - 6
Plastics 1 - 4
NOTICE: The speed adjusting dial can be turned
only as far as 6 and back to 1. Do not force it past
6 or 1, or the speed adjusting function may no
longer work.

12 ENGLISH
Electronic function
The tool is equipped with the electronic functions for
easy operation.
Soft start
The soft-start function minimizes start-up shock, and
makes the tool start smoothly.
Constant speed control
Electronicspeedcontrolforobtainingconstantspeed.
Possibletogetnenish,becausetherotatingspeedis
kept constant even under load condition.
Soft no-load rotation
Whenthespeedadjustingdialissetto"3"orhigher,
the tool automatically reduces the speed at no-load to
reducethevibrationandalignthejigsawbladewith
the cutting line easily. Once the tool starts cutting the
workpiece, the tool speed increase and reach the pre-
set speed.
NOTE: When the temperature is low, this function
maynotbeavailable.Thisfunctionalsomaynotbe
availabledependingonthetypeofthematerial.
NOTE: If the speed does not decrease after cutting
theworkpiece,turnothetoolandthenturnonit
again.
Disabling or enabling the soft no-load
rotation function
Todisableorenablethesoftno-loadrotationfunction,
followthestepsbelow.
1. Makesurethatthetoolisturnedo.
2. Setthespeedadjustingdialto"1".
3. Pressthelockswitchtoturnonthetool.
4. Turnthespeedadjustingdialto"6",andthensetit
backto"1".
Thelampblinkstwicewhenthesoftno-loadrotation
functionisdisabledorenabled.Toenableordisablethis
function again, perform the same procedure again.
NOTE:Ifthesoftno-loadrotationfunctionisdisabled,
thelampblinkstwicewhenthetoolisturnedon.
NOTE:Youcanalsodisableorenablethesoft
no-loadrotationfunctionbychangingthespeed
adjustingdialto"6"-"1"-"6".
Electric brake
Thistoolisequippedwithanelectricbrake.Ifthetool
consistently fails to quickly stop after the switch trigger
is released, have the tool serviced at a Makita service
center.
ASSEMBLY
CAUTION: Always be sure that the tool is
switched o and the battery cartridge is removed
before carrying out any work on the tool.
Installing or removing jig saw blade
CAUTION: Always clean out all chips or for-
eign matter adhering to the jig saw blade and/or
blade holder.Failuretodosomaycauseinsucient
tighteningofthejigsawblade,resultinginaserious
personalinjury.
CAUTION: Do not touch the jig saw blade or
the workpiece immediately after operation. They
maybeextremelyhotandcouldburnyourskin.
CAUTION: Always secure the jig saw blade
rmly.Insucienttighteningofthejigsawblademay
causethebladebreakageorseriouspersonalinjury.
CAUTION: When you remove the jig saw
blade, be careful not to hurt your ngers with the
top of the jig saw blade or the tips of workpiece.
Beforeinstallingthejigsawblade,makesurethatthe
jigsawbladeclampleverisinthereleasedposition.
Toinstallthejigsawblade,insertthejigsawblade
(teethfacingforward)intothejigsawbladeholderuntil
itlatches.Thejigsawbladeclamplevermovestothe
xedpositionbyitselfandthejigsawbladeislocked.
Makesurethatthebackedgeofthejigsawbladets
intotheroller.Pullthejigsawbladelightlytomakesure
thatthejigsawbladedoesnotfalloduringoperation.
►Fig.7: 1.Jigsawbladeclamplever(xedposition)
2.Jigsawbladeclamplever(released
position)
►Fig.8: 1.Jigsawbladeholder2.Jigsawblade
clamp lever (released position) 3. Jig saw
blade4. Roller
CAUTION: Do not open the tool opener exces-
sively, or it may cause tool damage.
Toremovethejigsawblade,openthetoolopener
forwardasfarasitwillgo.Thisallowsthejigsawblade
tobereleased.
►Fig.9: 1.Jigsawbladeholder2. Tool opener 3. Jig
sawblade
NOTE:Incasethatitisdiculttoremovethejigsaw
blade:
Turn the cutting action changing lever to the position
"III" and slightly switch on the tool several times so
thatthejigsawbladeholdermovestothebottom.
Makesurethejigsawbladeclampleverisinthexed
position when switch on the tool.
Removethebatterycartridgefromthetoolbefore
installingorremovingthejigsawblade.
NOTE:Occasionallylubricatetheroller.

13 ENGLISH
Hex wrench storage
When not in use, store the hex wrench as shown in the
guretokeepitfrombeinglost.
►Fig.10: 1. Base 2. Hex wrench
Cover plate
Use the cover plate when cutting decorative veneers,
plastics, etc. It protects sensitive or delicate surfaces
fromdamage.Fititonthebottomofthetoolbase.
►Fig.11: 1. Cover plate 2. Base
Anti-splintering device
CAUTION: The anti-splintering device cannot
be used when making bevel cuts.
For splinter-free cuts, the anti-splintering device can
beused.Toinstalltheanti-splinteringdevice,movethe
toolbaseallthewayforwardandtitfromthebottom
oftoolbase.
When you use the cover plate, install the anti-splintering
device onto the cover plate.
►Fig.12: 1. Base 2. Anti-splintering device
Dust extraction
Optional accessory
The dust nozzle is recommended to perform clean
cutting operations.
To attach the dust nozzle on the tool, insert the hook of
dustnozzleintotheholeinthebase.
►Fig.13: 1. Dust nozzle 2. Base
To secure the dust nozzle, tighten the clamp screw at
thefrontofthedustnozzle.Thedustnozzlecanbe
installedoneitherleftorrightsideofthebase.
►Fig.14: 1. Clamp screw
Then connect a Makita vacuum cleaner to the dust
nozzle.
►Fig.15: 1. Dust nozzle 2. Hose for vacuum cleaner
OPERATION
CAUTION: Always hold the base ush with
the workpiece.Failuretodosomaycausejigsaw
bladebreakage,resultinginaseriousinjury.
CAUTION: Advance the tool very slowly when
cutting curves or scrolling. Forcing the tool may
causeaslantedcuttingsurfaceandjigsawblade
breakage.
Turnthetoolonwithoutthejigsawblademakingany
contactandwaituntilthejigsawbladeattainsfull
speed.Thenrestthebaseatontheworkpieceand
gently move the tool forward along the previously
marked cutting line.
►Fig.16: 1. Cutting line 2. Base
Bevel cutting
CAUTION: Always be sure that the tool is
switched o and the battery cartridge is removed
before tilting the base.
Withthebasetilted,youcanmakebevelcutsatany
anglebetween0°and45°(leftorright).
►Fig.17
Totiltthebase,loosentheboltonthebottomofthebase
withthehexwrench.Movethebasesothattheboltis
positionedinthecenterofthebevelslotinthebase.
►Fig.18: 1. Hex wrench 2. Bolt 3. Base
Tiltthebaseuntilthedesiredbevelangleisobtained.The
V-notchofthegearhousingindicatesthebevelangleby
graduations.Thentightentheboltrmlytosecurethebase.
►Fig.19: 1. Bevel slot 2. Base 3. Bolt 4. Graduations
5. V-notch 6. Gear housing
Front ush cuts
Loosentheboltonthebottomofthebasewiththe
hexwrenchandslidethebaseallthewayback.Then
tightenthebolttosecurethebase.
►Fig.20: 1. Hex wrench 2. Bolt 3. Base
Cutouts
Cutoutscanbemadewitheitheroftwomethods:
“Boringastartinghole”or“Plungecutting”.
Boring a starting hole
For internal cutouts without a lead-in cut from an edge,
pre-drill a starting hole 12 mm or more in diameter.
Insertthejigsawbladeintothisholetostartyourcut.
►Fig.21
Plunge cutting
Youneednotboreastartingholeormakealead-incut
if you carefully do as follows.
►Fig.22
1.
Tiltthetooluponthefrontedgeofthebasewiththejig
sawbladepointpositionedjustabovetheworkpiecesurface.
2. Apply pressure to the tool so that the front edge of
thebasewillnotmovewhenyouswitchonthetooland
gentlylowerthebackendofthetoolslowly.
3.
Asthejigsawbladepiercestheworkpiece,slowly
lowerthebaseofthetooldownontotheworkpiecesurface.
4. Complete the cut in the normal manner.
Finishing edges
Totrimedgesormakedimensionaladjustments,runthe
jigsawbladelightlyalongthecutedges.
►Fig.23
Metal cutting
Alwaysuseasuitablecoolant(cuttingoil)whencuttingmetal.
Failuretodosowillcausesignicantjigsawbladewear.Theunder-
sideoftheworkpiececanbegreasedinsteadofusingacoolant.

14 ENGLISH
Rip fence
Optional accessory
CAUTION: Always be sure that the tool is
switched o and the battery cartridge is removed
before installing or removing accessories.
Straight cuts
When repeatedly cutting widths of 160 mm or less, use
of the rip fence will assure fast, clean, straight cuts.
►Fig.24: 1. Rip fence (Guide rule)
To install, insert the rip fence into the rectangular hole
onthesideofthebasewiththefenceguidefacing
down. Slide the rip fence to the desired cutting width
position,thentightenthebolttosecureit.
►Fig.25: 1. Hex wrench 2. Bolt 3. Fence guide 4. Rip
fence (Guide rule)
Circular cuts
Whencuttingcirclesorarcsof170mmorlessinradius,
install the rip fence as follows.
►Fig.26: 1. Rip fence (Guide rule)
CAUTION: Do not touch the tip of the circular
guide pin. The sharp tip of the circular guide pin can
causeinjury.
1. Insert the rip fence into the rectangular hole on the
sideofthebasewiththefenceguidefacingup.
2. Insert the circular guide pin through either of the
twoholesonthefenceguide.Screwthethreadedknob
onto the circular guide pin to secure the circular guide
pin.
►Fig.27: 1.Threadedknob2. Fence guide 3. Rip
fence (Guide rule) 4. Circular guide pin
5. Bolt
3. Slide the rip fence to the desired cutting radius,
andtightenthebolttosecureitinplace.
NOTE:AlwaysusejigsawbladesNo.B-17,B-18,
B-26orB-27whencuttingcirclesorarcs.
Guide rail adapter set
Optional accessory
When cutting parallel and uniform width or cutting
straight, the use of the guide rail and the guide rail
adapter will assure the production of fast and clean
cuts. To install the guide rail adapter, insert the rule
barintothesquareholeofthebaseasfarasitgoes.
Securetheboltwiththehexwrenchsecurely.
►Fig.28: 1. Hex wrench 2.Rulebar3. Bolt
Inserttherulebarintothesquareholeoftheguiderail
adapter,andsecurethescrewrmly.Placetheguide
rail adapter on the guide rail.
►Fig.29: 1. Guide rail adapter 2. Guide rail 3. Screw
NOTICE:AlwaysusejigsawbladesNo.B-8,B-13,
B-16,B-17or58whenusingtheguiderailandthe
guide rail adapter.
MAINTENANCE
CAUTION: Always be sure that the tool is
switched o and the battery cartridge is removed
before attempting to perform inspection or
maintenance.
NOTICE: Never use gasoline, benzine, thinner,
alcohol or the like. Discoloration, deformation or
cracks may result.
TomaintainproductSAFETYandRELIABILITY,
repairs,anyothermaintenanceoradjustmentshould
beperformedbyMakitaAuthorizedorFactoryService
Centers, always using Makita replacement parts.
OPTIONAL
ACCESSORIES
CAUTION: These accessories or attachments
are recommended for use with your Makita tool
specied in this manual. The use of any other
accessories or attachments might present a risk of
injurytopersons.Onlyuseaccessoryorattachment
for its stated purpose.
If you need any assistance for more details regard-
ing these accessories, ask your local Makita Service
Center.
• Jigsawblades
• Hex wrench 4
• Rip fence (guide rule) set
• Guide rail adapter set
• Guide rail set
• Anti-splintering device
• Cover plate
• Dust nozzle assy
• Makitagenuinebatteryandcharger
NOTE:Someitemsinthelistmaybeincludedinthe
tool package as standard accessories. They may
dierfromcountrytocountry.

15 РУССКИЙ
РУССКИЙ (Оригинальные инструкции)
ТЕХНИЧЕСКИЕ ХАРАКТЕРИСТИКИ
Модель: JV001G
Длинахода 26мм
Ходоввминуту 800-3500мин-1
Типпильногополотна ТипВ
Макс.производительность
резки
Дерево 135мм
Мягкаясталь 10мм
Алюминий 20мм
Общаядлина(сBL4025) 283мм
Номинальноенапряжение 36В–40Впост.токамакс.
Массанетто 2,6-2,9кг
• Благодарянашейпостояннодействующейпрограммеисследованийиразработокуказанныездесь
техническиехарактеристикимогутбытьизмененыбезпредварительногоуведомления.
• Техническиехарактеристикимогутразличатьсявзависимостиотстраны.
• Массаможетотличатьсявзависимостиотдополнительногооборудования.Обратитевнимание,что
блокаккумуляторатакжесчитаетсядополнительнымоборудованием.Втаблицепредставленыкомбина-
цииснаибольшиминаименьшимвесомвсоответствииспроцедуройEPTA01/2014.
Подходящий блок аккумулятора и зарядное устройство
Блокаккумулятора BL4020/BL4025/BL4040
Зарядноеустройство DC40RA/DC40RB/DC40RC
• Взависимостиотрегионапроживаниянекоторыеблокиаккумуляторовизарядныеустройства,перечис-
ленныевыше,могутбытьнедоступны.
ОСТОРОЖНО: Используйте только перечисленные выше блоки аккумуляторов и зарядные
устройства.Использованиедругихблоковаккумуляторовизарядныхустройствможетпривестиктравме
и/илипожару.
Символы
Нижеприведенысимволы,которыемогутисполь-
зоватьсядляобозначенияоборудования.Перед
использованиемубедитесьвтом,чтовыпонимаете
ихзначение.
Прочитайтеруководствопо
эксплуатации.
Надевайтезащитныеочки.
Ni-MH
Li-ion
ТолькодлястранЕС
Всвязисналичиемвоборудовании
опасныхкомпонентовотходыэлектри-
ческогоиэлектронногооборудования,
аккумуляторыибатареимогутоказы-
ватьнегативноевлияниенаокружаю-
щуюсредуиздоровьечеловека.
Невыбрасывайтеэлектрическиеиэлек-
тронныеустройстваилибатареивместе
сбытовымиотходами!
ВсоответствиисдирективойЕСпо
отходамэлектрическогоиэлектрон-
ногооборудования,поаккумуляторам,
батареямиотходамаккумуляторови
батарей,атакжевсоответствиисее
адаптациейкнациональномузаконода-
тельству,отходыэлектрическогообору-
дования,батареииаккумуляторысле-
дуетхранитьотдельноидоставлятьна
пунктраздельногосборакоммунальных
отходов,работающийссоблюдением
правилохраныокружающейсреды.
Этообозначеносимволомввидепере-
черкнутогомусорногоконтейнерана
колесах,нанесеннымнаоборудование.
Назначение
Данныйинструментпредназначендляраспилива-
ниядревесных,пластмассовыхиметаллических
материалов.

16 РУССКИЙ
Шум
Типичныйуровеньвзвешенногозвуковогодавления
(A),измеренныйвсоответствиисEN62841-2-11:
Уровеньзвуковогодавления(LpA):87дБ(A)
Уровеньзвуковоймощности(LWA):98дБ(A)
Погрешность(K):3дБ(A)
ПРИМЕЧАНИЕ:Заявленноезначениераспро-
страненияшумаизмереновсоответствиисо
стандартнойметодикойиспытанийиможетбыть
использованодлясравненияинструментов.
ПРИМЕЧАНИЕ:Заявленноезначениераспро-
страненияшумаможнотакжеиспользоватьдля
предварительныхоценоквоздействия.
ОСТОРОЖНО: Используйте средства
защиты слуха.
ОСТОРОЖНО:
Распространение шума во
время фактического использования электроинстру-
мента может отличаться от заявленного значения в
зависимости от способа применения инструмента и
в особенности от типа обрабатываемой детали.
ОСТОРОЖНО:
Обязательно определите
меры безопасности для защиты оператора,
основанные на оценке воздействия в реальных
условиях использования (с учетом всех этапов
рабочего цикла, таких как выключение инстру-
мента, работа без нагрузки и включение).
Вибрация
Суммарноезначениевибрации(суммавекторов
потремосям),определенноевсоответствиис
EN62841-2-11:
Рабочийрежим:резкапанелей
Распространениевибрации(ah,B):4,6м/с2
Погрешность(K):2,5м/с2
Рабочийрежим:резкалистовогометалла
Распространениевибрации(ah,M):4,8м/с2
Погрешность(K):1,5м/с2
ПРИМЕЧАНИЕ:Заявленноеобщеезначениерас-
пространениявибрацииизмереновсоответствии
состандартнойметодикойиспытанийиможет
бытьиспользованодлясравненияинструментов.
ПРИМЕЧАНИЕ:Заявленноеобщеезначение
распространениявибрацииможнотакжеисполь-
зоватьдляпредварительныхоценоквоздействия.
ОСТОРОЖНО: Распространение вибра-
ции во время фактического использования
электроинструмента может отличаться от заяв-
ленного значения в зависимости от способа
применения инструмента и в особенности от
типа обрабатываемой детали.
ОСТОРОЖНО: Обязательно определите
меры безопасности для защиты оператора,
основанные на оценке воздействия в реаль-
ных условиях использования (с учетом всех
этапов рабочего цикла, таких как выклю-
чение инструмента, работа без нагрузки и
включение).
Декларации о соответствии
Только для европейских стран
ДекларацииосоответствиивключенывПриложение
Aкнастоящемуруководствупоэксплуатации.
МЕРЫ БЕЗОПАСНОСТИ
Общие рекомендации по
технике безопасности для
электроинструментов
ОСТОРОЖНО Ознакомьтесь со всеми
инструкциями по технике безопасности, указа-
ниями, иллюстрациями и техническими характе-
ристиками, прилагаемыми к данному электроин-
струменту.Несоблюдениевсехприведенныхдалее
инструкцийможетпривестикпоражениюэлектриче-
скимтоком,возгораниюи/илитяжелымтравмам.
Сохраните брошюру с инструк-
циями и рекомендациями для
дальнейшего использования.
Термин"электроинструмент"впредупреждениях
относитсяковсемуинструменту,работающему
отсети(спроводом)илинааккумуляторах(без
провода).
Безопасность в месте выполнения работ
1. Рабочее место должно быть чистым и
хорошо освещенным.Захламлениеиплохое
освещениемогутстатьпричинойнесчастных
случаев.
2. Не пользуйтесь электроинструментом во
взрывоопасной атмосфере, например в
присутствии легко воспламеняющихся жид-
костей, газов или пыли.Приработеэлектро-
инструментавозникаютискры,которыемогут
привестиквоспламенениюпылиилигазов.
3. При работе с электроинструментом не
допускайте детей или посторонних к месту
выполнения работ.Неотвлекайтесьвовремя
работы,таккакэтоприведеткпотереконтроля
надэлектроинструментом.
Электробезопасность
1. Вилка электроинструмента должна соот-
ветствовать сетевой розетке. Запрещается
вносить какие-либо изменения в конструк-
цию вилки. Для электроинструмента с
заземлением запрещается использовать
переходники. Розеткиивилки,неподвергав-
шиесяизменениям,снижаютрискпоражения
электрическимтоком.
2. Избегайте контакта участков тела с зазем-
ленными поверхностями, такими как трубы,
радиаторы, батареи отопления и холо-
дильники.Приконтактетеласзаземленными
предметамиувеличиваетсярискпоражения
электрическимтоком.

17 РУССКИЙ
3. Не подвергайте электроинструмент воздей-
ствию дождя или влаги.Попаданиеводыв
электроинструментповышаетрискпоражения
электрическимтоком.
4. Аккуратно обращайтесь со шнуром пита-
ния. Запрещается использовать шнур
питания для переноски, перемещения или
извлечения вилки из розетки. Располагайте
шнур на расстоянии от источников тепла,
масла, острых краев и движущихся деталей.
Поврежденныеилизапутанныесетевыешнуры
увеличиваютрискпораженияэлектрическим
током.
5. При использовании электроинструмента
вне помещения используйте удлинитель,
подходящий для этих целей.Использование
соответствующегошнураснижаетрискпораже-
нияэлектрическимтоком.
6. Если электроинструмент приходится экс-
плуатировать в сыром месте, используйте
линию электропитания, которая защищена
устройством, срабатывающим от остаточ-
ного тока (RCD).ИспользованиеRCDснижает
рискпораженияэлектротоком.
7. Электроинструмент может создавать
электромагнитные поля (EMF), которые не
представляют опасности для пользователя.
Однакопользователямскардиостимулято-
рамиидругимианалогичнымимедицинскими
устройствамиследуетобратитьсякпроизво-
дителюустройстваи/иливрачупередначалом
эксплуатацииинструмента.
Личная безопасность
1. При использовании электроинструмента
будьте бдительны, следите за тем, что
вы делаете, и руководствуйтесь здравым
смыслом. Не пользуйтесь электроинстру-
ментом, если вы устали, находитесь под
воздействием наркотиков, алкоголя или
лекарственных препаратов.Дажемгновен-
наяневнимательностьприиспользовании
электроинструментаможетпривестиксерьез-
нойтравме.
2. Используйте индивидуальные средства
защиты. Всегда надевайте защитные очки.
Такиесредстваиндивидуальнойзащиты,как
маскаотпыли,защитнаянескользящаяобувь,
каскаилинаушники,используемыевсоответ-
ствующихусловиях,позволяютснизитьриск
получениятравмы.
3. Не допускайте случайного запуска. Прежде
чем подсоединять инструмент к источнику
питания и/или аккумуляторной батарее,
поднимать или переносить инструмент,
убедитесь, что переключатель находится в
выключенном положении.Переноскаэлек-
троинструментаспальцемнавыключателеили
подачапитаниянаинструментсвключенным
выключателемможетпривестикнесчастному
случаю.
4. Перед включением электроинструмента
снимите с него все регулировочные инстру-
менты и гаечные ключи.Гаечныйилирегу-
лировочныйключ,оставшийсязакрепленным
навращающейсядетали,можетпривестик
травме.
5. При эксплуатации устройства не тянитесь.
Всегда сохраняйте устойчивое положение
и равновесие.Этопозволитлучшеуправлять
электроинструментомвнепредвиденных
ситуациях.
6. Одевайтесь соответствующим образом. Не
надевайте свободную одежду или украше-
ния. Ваши волосы и одежда должны всегда
находиться на расстоянии от движущихся
деталей.Свободнаяодежда,украшенияили
длинныеволосымогутпопастьвдвижущиеся
деталиустройства.
7. Если электроинструмент оборудован
системой удаления и сбора пыли, убеди-
тесь, что она подключена и используется
соответствующим образом.Использование
пылесборникаснижаетвероятностьвозникно-
вениярисков,связанныхспылью.
8. Не переоценивайте свои возможности и
не пренебрегайте правилами техники без-
опасности, даже если вы часто работаете
с инструментом.Небрежноеобращениес
инструментомможетстатьпричинойсерьезной
травмызадолисекунды.
9. Во время работы с электроинструментом
всегда надевайте защитные очки. Очки
должны соответствовать ANSI Z87.1 для
США, EN 166 для Европы, или AS/NZS
1336 для Австралии и Новой Зеландии. В
Австралии и Новой Зеландии оператор
также обязан носить защитную маску.
Ответственность за использование средств
защиты операторами и другим персона-
лом вблизи рабочей зоны возлагается на
работодателя.
Эксплуатация и обслуживание
электроинструмента
1. Не прилагайте излишних усилий к элек-
троинструменту. Используйте инструмент,
соответствующий выполняемой вами
работе.Правильноподобранныйэлектроин-
струментпозволитвыполнитьработулучшеи
безопаснееспроизводительностью,накото-
руюонрассчитан.
2. Не пользуйтесь электроинструментом с
неисправным выключателем.Любойэлек-
троинструментснеисправнымвыключателем
опасенидолженбытьотремонтирован.

18 РУССКИЙ
3. Перед выполнением регулировок, сменой
принадлежностей или хранением элек-
троинструмента всегда отключайте его от
источника питания и/или от аккумулятора
или снимайте аккумулятор, если он явля-
ется съемным.Такиепревентивныемеры
предосторожностиснижаютрискслучайного
включенияэлектроинструмента.
4. Храните электроинструменты в местах,
недоступных для детей, и не позво-
ляйте лицам, не знакомым с работой
такого инструмента или не прочитавшим
данные инструкции, пользоваться им.
Электроинструментопасенврукахнеопытных
пользователей.
5. Поддерживайте электроинструмент и
дополнительные принадлежности в надле-
жащем состоянии. Убедитесь в соосности,
отсутствии деформаций движущихся узлов,
поломок каких-либо деталей или других
дефектов, которые могут повлиять на
работу электроинструмента. Если инстру-
мент поврежден, отремонтируйте его перед
использованием.Большоечислонесчастных
случаевпроисходитиз-заплохогоуходаза
электроинструментом.
6. Режущий инструмент всегда должен быть
острым и чистым.Соответствующееобра-
щениесрежущиминструментом,имеющим
острыережущиекромки,делаетегоменее
подверженнымдеформациям,чтопозволяет
лучшеуправлятьим.
7. Используйте электроинструмент, принад-
лежности, приспособления и насадки в
соответствии с данными инструкциями
и в целях, для которых он предназначен,
учитывая при этом условия и вид выпол-
няемой работы.Использованиеэлектроин-
струментанепоназначениюможетпривестик
возникновениюопаснойситуации.
8. Рукоятки инструмента и специальные изо-
лированные поверхности всегда должны
быть сухими и чистыми и не содержать
следов масла или смазки.Скользкиеруко-
яткииспециальныеповерхностипрепятствуют
соблюдениюрекомендацийпотехникебезо-
пасностивэкстренныхситуациях.
9. При использовании инструмента не наде-
вайте рабочие перчатки, ткань которых
инструмент может затянуть.Затягивание
тканирабочихперчатоквдвижущиесячасти
инструментаможетпривестиктравме.
Эксплуатация и обслуживание электроинстру-
мента, работающего на аккумуляторах
1. Заряжайте аккумулятор только зарядным
устройством, указанным изготовителем.
Зарядноеустройство,подходящеедляодного
типааккумуляторов,можетпривестикпожару
приегоиспользованиисдругимаккумулятор-
нымблоком.
2. Используйте электроинструмент только с
указанными аккумуляторными блоками.
Использованиедругихаккумуляторныхблоков
можетпривестиктравмеилипожару.
3. Когда аккумуляторный блок не использу-
ется, храните его отдельно от металличе-
ских предметов, таких как скрепки, монеты,
ключи, гвозди, шурупы или другие неболь-
шие металлические предметы, которые
могут привести к закорачиванию контак-
тов аккумуляторного блока между собой.
Короткоезамыканиемеждуконтактамиаккуму-
ляторногоблокаможетпривестикожогамили
пожару.
4.
При неправильном обращении из аккуму-
ляторного блока может потечь жидкость.
Избегайте контакта с ней. В случае контакта
с кожей промойте место контакта обильным
количеством воды. В случае попадания в
глаза обратитесь к врачу.Жидкостьизаккуму-
лятораможетвызватьраздражениеилиожоги.
5. Не используйте поврежденные или моди-
фицированные инструменты и аккумуля-
торные блоки.Поврежденныеилимодифи-
цированныеаккумуляторымогутработать
некорректно,чтоможетпривестикпожару,
взрывуилитравмированию.
6. Не подвергайте аккумуляторный блок или
инструмент воздействию огня или высокой
температуры.Воздействиеогняилитемпера-
турывыше130°Cможетпривестиквзрыву.
7. Следуйте всем инструкциям по зарядке и
не заряжайте аккумуляторный блок или
инструмент при температурных условиях,
выходящих за пределы диапазона, указан-
ного в инструкции.Зарядканенадлежащим
образомилипритемпературныхусловиях,
выходящихзапределыуказанногодиапазона,
можетпривестикповреждениюбатареии
повыситьрискпожара.
Сервисное обслуживание
1. Сервисное обслуживание электроинстру-
мента должно проводиться только квали-
фицированным специалистом по ремонту
и только с использованием идентичных
запасных частей.Этопозволитобеспечить
безопасностьэлектроинструмента.
2. Запрещается обслуживать поврежденные
аккумуляторные блоки.Обслуживание
аккумуляторныхблоковдолженосуществлять
толькопроизводительилиавторизованные
поставщикиуслуг.
3. Следуйте инструкциям по смазке и замене
принадлежностей.
Правила техники безопасности
при эксплуатации
аккумуляторного лобзика
1. Если при выполнении работ существует
риск контакта режущего инструмента
со скрытой электропроводкой, держите
электроинструмент за специально предна-
значенные изолированные поверхности.
Контактспроводомподнапряжениемприведет
ктому,чтометаллическиедеталиинструмента
такжебудутподнапряжением.Этоможетстать
причинойпораженияоператораэлектрическим
током.

19 РУССКИЙ
2. Для фиксации разрезаемой детали на устой-
чивой поверхности используйте зажимы
или другие соответствующие приспосо-
бления.Никогданедержитераспиливаемые
деталиврукахинеприжимайтеихктелу,так
какэтонеобеспечитустойчивогоположения
деталииможетпривестикпотереконтролянад
инструментом.
3. Обязательно надевайте защитные очки
или защитную маску для лица. Обычные
или солнцезащитные очки НЕ ЯВЛЯЮТСЯ
защитными очками.
4. Избегайте попадания режущего инстру-
мента на гвозди. Перед пилением осмотрите
деталь и убедитесь в отсутствии гвоздей.
5. Не распиливайте детали, превышающие
допустимый размер.
6. Убедитесь в наличии свободного простран-
ства вокруг распиливаемой детали, чтобы
полотно ножовочной пилы не уперлось в
пол, верстак и т. п.
7. Крепко держите инструмент.
8. Перед включением убедитесь в том, что
полотно ножовочной пилы не касается
обрабатываемой детали.
9. Руки должны находиться на расстоянии от
движущихся деталей.
10. Не оставляйте работающий инструмент без
присмотра. Включайте инструмент только
тогда, когда он находится в руках.
11. Перед извлечением полотна ножовочной
пилы из обрабатываемой детали обяза-
тельно выключайте инструмент и дожидай-
тесь полного прекращения его движения.
12. Не прикасайтесь к полотну ножовочной
пилы или обрабатываемой детали сразу
после работы: они могут быть очень горя-
чими и обжечь кожу.
13. Без необходимости не эксплуатируйте
инструмент без нагрузки.
14. Некоторые материалы могут содержать
токсичные химические вещества. Примите
соответствующие меры предосторожности,
чтобы избежать вдыхания или контакта с
кожей таких веществ. Соблюдайте требо-
вания, указанные в паспорте безопасности
материала.
15. Обязательно используйте соответствую-
щую пылезащитную маску/респиратор для
защиты дыхательных путей от пыли разре-
заемых материалов.
СОХРАНИТЕ ДАННЫЕ
ИНСТРУКЦИИ.
ОСТОРОЖНО: НЕ ДОПУСКАЙТЕ, чтобы
удобство или опыт эксплуатации данного
устройства (полученный от многократного
использования) доминировали над строгим
соблюдением правил техники безопасно-
сти при обращении с этим устройством.
НЕПРАВИЛЬНОЕ ИСПОЛЬЗОВАНИЕ инстру-
мента или несоблюдение правил техники без-
опасности, указанных в данном руководстве,
может привести к тяжелой травме.
Важные правила техники безопасности
для работы с аккумуляторным блоком
1.
Перед использованием аккумуляторного блока
прочитайте все инструкции и предупреждаю-
щие надписи на (1) зарядном устройстве, (2)
аккумуляторном блоке и (3) инструменте, рабо-
тающем от аккумуляторного блока.
2. Не разбирайте блок аккумулятора и не
меняйте его конструкцию.Этоможетприве-
стикпожару,перегревуиливзрыву.
3. Если время работы аккумуляторного блока
значительно сократилось, немедленно пре-
кратите работу. В противном случае, может
возникнуть перегрев блока, что приведет к
ожогам и даже к взрыву.
4. В случае попадания электролита в глаза
промойте их обильным количеством чистой
воды и немедленно обратитесь к врачу. Это
может привести к потере зрения.
5. Не замыкайте контакты аккумуляторного
блока между собой:
(1)
Не прикасайтесь к контактам каки-
ми-либо токопроводящими предметами.
(2) Не храните аккумуляторный блок в кон-
тейнере вместе с другими металличе-
скими предметами, такими как гвозди,
монеты и т. п.
(3) Не допускайте попадания на аккумуля-
торный блок воды или дождя.
Замыкание контактов аккумуляторного
блока между собой может привести к воз-
никновению большого тока, перегреву,
возможным ожогам и даже поломке блока.
6.
Не храните и не используйте инструмент и акку-
муляторный блок в местах, где температура
может достигать или превышать 50 °C (122 °F).
7. Не бросайте аккумуляторный блок в огонь,
даже если он сильно поврежден или пол-
ностью вышел из строя. Аккумуляторный
блок может взорваться под действием огня.
8.
Запрещено вбивать гвозди в блок аккумулятора,
резать, ломать, бросать, ронять блок аккумуля-
тора или ударять его твердым предметом.Это
можетпривестикпожару,перегревуиливзрыву.
9. Не используйте поврежденный аккумуля-
торный блок.
10.
Входящие в комплект литий-ионные аккумуляторы
должны эксплуатироваться в соответствии с требо-
ваниями законодательства об опасных товарах.
Прикоммерческойтранспортировке,например,третьей
сторонойилиэкспедитором,необходимонанестина
упаковкуспециальныепредупрежденияимаркировку.
Впроцессеподготовкиустройствакотправкеобя-
зательнопроконсультируйтесьсоспециалистомпо
опаснымматериалам.Такжесоблюдайтеместные
требованияинормы.Онимогутбытьстроже.
Закройтеилизакрепитеразомкнутыеконтактыиупакуйте
аккумулятортак,чтобыоннеперемещалсяпоупаковке.
11. Для утилизации блока аккумулятора извле-
ките его из инструмента и утилизируйте
безопасным способом. Выполняйте требо-
вания местного законодательства по утили-
зации аккумуляторного блока.

20 РУССКИЙ
12. Используйте аккумуляторы только с про-
дукцией, указанной Makita.Установкаакку-
муляторовнапродукцию,несоответствующую
требованиям,можетпривестикпожару,пере-
греву,взрывуилиутечкеэлектролита.
13. Если инструментом не будут пользоваться
в течение длительного периода времени,
извлеките аккумулятор из инструмента.
14. Во время и после использования блок
аккумулятора может нагреваться, что может
стать причиной ожогов или низкотемпе-
ратурных ожогов. Будьте осторожны при
обращении с горячим блоком аккумулятора.
15.
Не прикасайтесь к контактам инструмента сразу
после использования, поскольку они могут быть
достаточно горячими, чтобы вызвать ожоги.
16.
Не допускайте налипания на контакты, отвер-
стия и пазы блока аккумулятора опилок, пыли
или земли.Этоможетстатьпричинойперегрева,
возгорания,взрываилинеисправностиинстру-
ментаилиблокааккумулятора,чтоможетприве-
стикожогамилитравмам.
17.
Если инструмент не рассчитан на использова-
ние вблизи высоковольтных линий электро-
передач, не используйте блок аккумулятора
вблизи высоковольтных линий электропе-
редач.Этоможетпривестикнеисправности,
поломкеинструментаилиблокааккумулятора.
18. Храните аккумулятор в недоступном для
детей месте.
СОХРАНИТЕ ДАННЫЕ
ИНСТРУКЦИИ.
ВНИМАНИЕ: Используйте только фир-
менные аккумуляторные батареи Makita.
Использованиеаккумуляторныхбатарей,непро-
изведенныхMakita,илибатарей,которыебыли
подвергнутымодификациям,можетпривестик
взрывуаккумулятора,пожару,травмамиповреж-
дениюимущества.Этотакжеавтоматическианну-
лируетгарантиюMakitaнаинструментизарядное
устройствоMakita.
Советы по обеспечению мак-
симального срока службы
аккумулятора
1.
Заряжайте блок аккумуляторов перед его полной
разрядкой. Обязательно прекратите работу с
инструментом и зарядите блок аккумуляторов, если
вы заметили снижение мощности инструмента.
2. Никогда не подзаряжайте полностью заря-
женный блок аккумуляторов. Перезарядка
сокращает срок службы аккумулятора.
3.
Заряжайте блок аккумуляторов при комнатной
температуре в 10 - 40 °C (50 - 104 °F). Перед зарядкой
горячего блока аккумуляторов дайте ему остыть.
4. Если блок аккумулятора не используется,
извлеките его из инструмента или заряд-
ного устройства.
5. Зарядите ионно-литиевый аккумулятор-
ный блок, если вы не будете пользоваться
инструментом длительное время (более
шести месяцев).
ОПИСАНИЕ РАБОТЫ
ВНИМАНИЕ: Перед регулировкой или
проверкой функций инструмента обязательно
убедитесь, что он выключен и его аккумуля-
торный блок снят.
Установка или снятие блока
аккумуляторов
ВНИМАНИЕ: Обязательно выключайте
инструмент перед установкой и извлечением
аккумуляторного блока.
ВНИМАНИЕ: При установке и извлечении
аккумуляторного блока крепко удерживайте
инструмент и аккумуляторный блок.Еслине
соблюдатьэтотребование,онимогутвысколь-
знутьизрук,чтоприведеткповреждениюинстру-
мента,аккумуляторногоблокаитравмированию
оператора.
►Рис.1: 1.Красныйиндикатор2.Кнопка3.Блок
аккумулятора
Дляснятияаккумуляторногоблоканажмитекнопку
налицевойсторонеиизвлекитеблок.
Дляустановкиблокааккумуляторасовместите
выступблокааккумулятораспазомвкорпусеи
задвиньтеегонаместо.Устанавливайтеблокдо
упора,чтобыонзафиксировалсяснебольшим
щелчком.Есливывидитекрасныйиндикатор,
какпоказанонарисунке,оннезафиксирован
полностью.
ВНИМАНИЕ: Обязательно устанавливайте
блок аккумулятора до конца, чтобы красный
индикатор не был виден.Впротивномслучае
блокаккумулятораможетвыпастьизинструмента
инанеститравмувамилидругимлюдям.
ВНИМАНИЕ: Не прилагайте чрезмерных
усилий при установке аккумуляторного блока.
Еслиблокнедвигаетсясвободно,значитонвстав-
леннеправильно.
Индикация оставшегося заряда
аккумулятора
Нажмитекнопкупроверкинааккумуляторномблоке
дляпроверкизаряда.Индикаторызагорятсяна
несколькосекунд.
►Рис.2: 1.Индикаторы2.Кнопкапроверки
Other manuals for JV001G
5
Table of contents
Languages:
Other Makita Cordless Saw manuals

Makita
Makita HS004G User manual

Makita
Makita DSS611Z User manual

Makita
Makita JV100D User manual

Makita
Makita BJR181ZK User manual

Makita
Makita DHS710ZJ User manual

Makita
Makita 4390D User manual

Makita
Makita DSS500 User manual

Makita
Makita DHS661RGJ User manual

Makita
Makita DHS901 User manual

Makita
Makita DJR188 User manual

Makita
Makita DSS610RTJ User manual

Makita
Makita HS301D User manual

Makita
Makita HS003G User manual

Makita
Makita DJR183RT1J User manual

Makita
Makita RS001GM101 User manual

Makita
Makita XSH01Z User manual

Makita
Makita DJV184RFJ User manual

Makita
Makita DHS630RFJ User manual

Makita
Makita JR103D User manual

Makita
Makita SD100D User manual