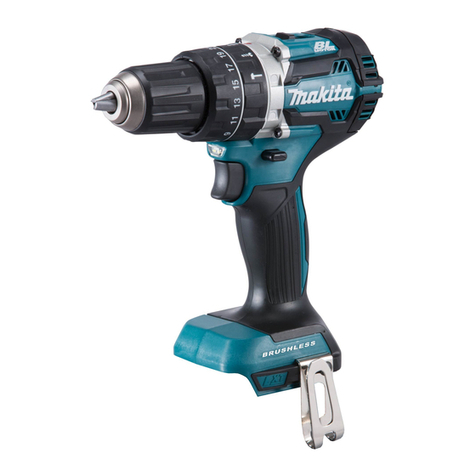
Makita XT447T User manual

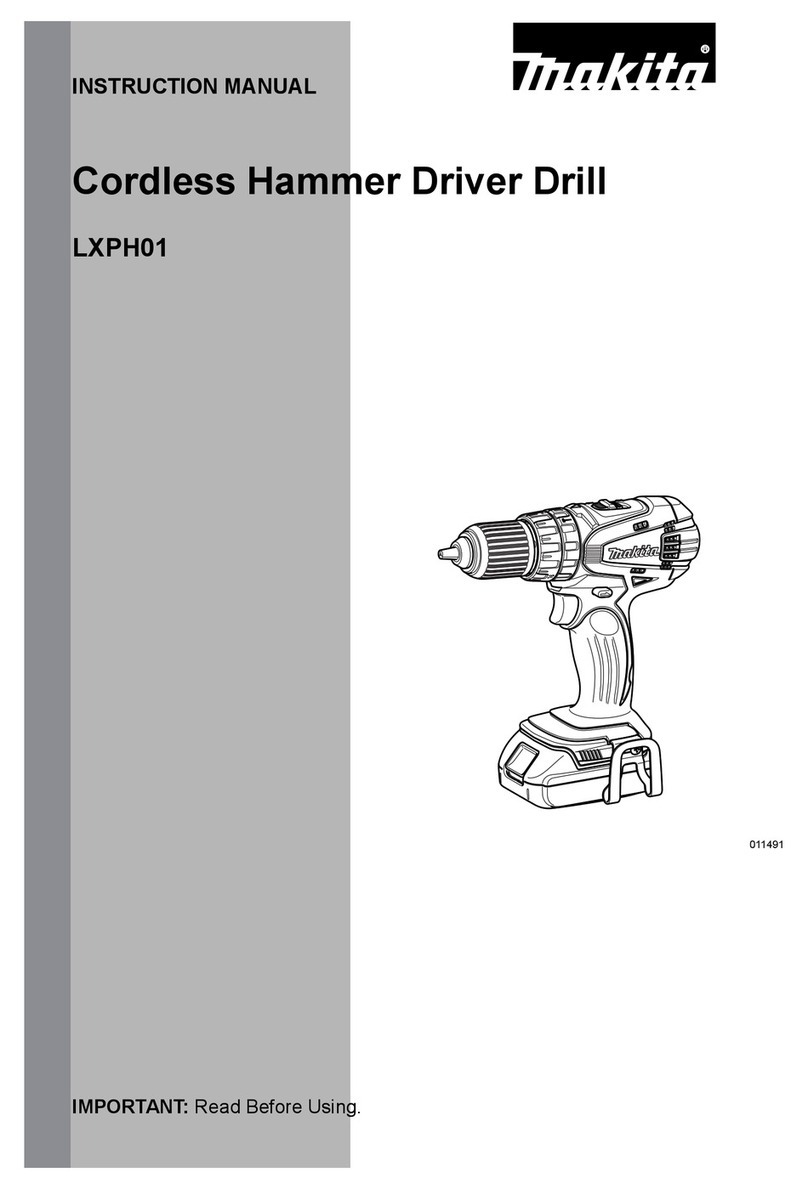
INSTRUCTION MANUAL
MANUAL DE INSTRUCCIONES
Cordless Hammer Driver Drill
Rotomartillo Atornillador
Inalámbrico
XPH12
IMPORTANT: Read Before Using.
IMPORTANTE: Lea antes de usar.

2ENGLISH
ENGLISH (Original instructions)
SPECIFICATIONS
Model: XPH12
Drilling capacities Masonry 13 mm (1/2")
Steel 13 mm (1/2")
Wood 38 mm (1/1/2")
Fastening capacities Wood screw 10 mm x 90 mm (3/8" x 3-1/2")
Machine screw M6 (1/4")
No load speed (RPM) High (2) 0 - 2,000 /min
Low (1) 0 - 500 /min
Blows per minute High (2) 0 - 30,000 /min
Low (1) 0 - 7,500 /min
Overall length 182 mm (7-1/8")
Rated voltage D.C. 18 V
Standard battery cartridge BL1815N, BL1820B BL1830, BL1830B, BL1840B,
BL1850B, BL1860B
Net weight 1.6 kg (3.5 lbs) 1.8 kg (4.0 lbs)
• Duetoourcontinuingprogramofresearchanddevelopment,thespecicationshereinaresubjecttochange
without notice.
• Specicationsandbatterycartridgemaydifferfromcountrytocountry.
• Weight,withbatterycartridge,accordingtoEPTA-Procedure01/2003
General power tool safety warnings
WARNING: Read all safety warnings and
all instructions. Failure to follow the warnings and
instructionsmayresultinelectricshock,reand/or
seriousinjury.
Save all warnings and instruc-
tions for future reference.
Theterm"powertool"inthewarningsreferstoyour
mains-operated (corded) power tool or battery-operated
(cordless) power tool.
Work area safety
1. Keep work area clean and well lit. Cluttered or
dark areas invite accidents.
2. Do not operate power tools in explosive atmo-
spheres, such as in the presence of ammable
liquids, gases or dust. Power tools create sparks
which may ignite the dust or fumes.
3. Keep children and bystanders away while
operating a power tool. Distractions can cause
you to lose control.
Electrical Safety
1. Power tool plugs must match the outlet. Never
modify the plug in any way. Do not use any
adapter plugs with earthed (grounded) power
tools. Unmodiedplugsandmatchingoutletswill
reduce risk of electric shock.
2. Avoid body contact with earthed or grounded
surfaces such as pipes, radiators, ranges and
refrigerators.Thereisanincreasedriskofelec-
tric shock if your body is earthed or grounded.
3. Do not expose power tools to rain or wet con-
ditions. Water entering a power tool will increase
the risk of electric shock.
4. Do not abuse the cord. Never use the cord for
carrying, pulling or unplugging the power tool.
Keep cord away from heat, oil, sharp edges
or moving parts. Damaged or entangled cords
increase the risk of electric shock.
5. When operating a power tool outdoors, use an
extension cord suitable for outdoor use. Use of
a cord suitable for outdoor use reduces the risk of
electric shock.
6. If operating a power tool in a damp location is
unavoidable, use a ground fault circuit inter-
rupter (GFCI) protected supply. Use of a GFCI
reduces the risk of electric shock.
Personal Safety
1. Stay alert, watch what you are doing and use
common sense when operating a power tool.
Do not use a power tool while you are tired or
under the inuence of drugs, alcohol or med-
ication.Amomentofinattentionwhileoperating
powertoolsmayresultinseriouspersonalinjury.
2. Use personal protective equipment. Always
wear eye protection. Protective equipment such
as dust mask, non-skid safety shoes, hard hat, or
hearing protection used for appropriate conditions
willreducepersonalinjuries.
3. Prevent unintentional starting. Ensure the
switch is in the off-position before connecting
to power source and/or battery pack, picking
up or carrying the tool. Carrying power tools with
yourngerontheswitchorenergisingpowertools
that have the switch on invites accidents.

3ENGLISH
4. Remove any adjusting key or wrench before
turning the power tool on.Awrenchorakeyleft
attached to a rotating part of the power tool may
resultinpersonalinjury.
5. Do not overreach. Keep proper footing and
balance at all times.Thisenablesbettercontrol
of the power tool in unexpected situations.
6. Dress properly. Do not wear loose clothing or
jewellery. Keep your hair, clothing, and gloves
away from moving parts.Looseclothes,jewel-
lery or long hair can be caught in moving parts.
7. If devices are provided for the connection of
dust extraction and collection facilities, ensure
these are connected and properly used. Use of
dust collection can reduce dust-related hazards.
Power tool use and care
1. Do not force the power tool. Use the correct
power tool for your application.Thecorrect
powertoolwilldothejobbetterandsaferatthe
rate for which it was designed.
2. Do not use the power tool if the switch does
not turn it on and off.Anypowertoolthatcannot
be controlled with the switch is dangerous and
must be repaired.
3. Disconnect the plug from the power source
and/or the battery pack from the power tool
before making any adjustments, changing
accessories, or storing power tools. Such pre-
ventive safety measures reduce the risk of starting
the power tool accidentally.
4. Store idle power tools out of the reach of chil-
dren and do not allow persons unfamiliar with
the power tool or these instructions to operate
the power tool. Power tools are dangerous in the
hands of untrained users.
5. Maintain power tools. Check for misalignment
or binding of moving parts, breakage of parts
and any other condition that may affect the
power tool’s operation. If damaged, have the
power tool repaired before use. Many accidents
are caused by poorly maintained power tools.
6. Keep cutting tools sharp and clean. Properly
maintained cutting tools with sharp cutting edges
are less likely to bind and are easier to control.
7. Use the power tool, accessories and tool bits
etc. in accordance with these instructions, tak-
ing into account the working conditions and
the work to be performed. Use of the power tool
for operations different from those intended could
result in a hazardous situation.
Battery tool use and care
1. Recharge only with the charger specied by
the manufacturer.Achargerthatissuitablefor
onetypeofbatterypackmaycreateariskofre
when used with another battery pack.
2. Use power tools only with specically desig-
nated battery packs. Use of any other battery
packsmaycreateariskofinjuryandre.
3. When battery pack is not in use, keep it away
from other metal objects, like paper clips,
coins, keys, nails, screws or other small metal
objects, that can make a connection from one
terminal to another. Shorting the battery termi-
nalstogethermaycauseburnsorare.
4. Under abusive conditions, liquid may be
ejected from the battery; avoid contact. If con-
tact accidentally occurs, ush with water. If
liquid contacts eyes, additionally seek medical
help.Liquidejectedfromthebatterymaycause
irritation or burns.
Service
1. Have your power tool serviced by a qualied
repair person using only identical replacement
parts.Thiswillensurethatthesafetyofthepower
tool is maintained.
2. Follow instruction for lubricating and chang-
ing accessories.
3. Keep handles dry, clean and free from oil and
grease.
Cordless hammer driver drill safety
warnings
1. Wear ear protectors when impact drilling.
Exposuretonoisecancausehearingloss.
2. Use auxiliary handle(s), if supplied with the
tool.Lossofcontrolcancausepersonalinjury.
3. Hold power tool by insulated gripping sur-
faces, when performing an operation where
the cutting accessory may contact hidden
wiring. Cutting accessory contacting a "live"
wire may make exposed metal parts of the power
tool "live" and could give the operator an electric
shock.
4. Hold power tool by insulated gripping sur-
faces, when performing an operation where
the fastener may contact hidden wiring.
Fasteners contacting a "live" wire may make
exposed metal parts of the power tool "live" and
could give the operator an electric shock.
5. Always be sure you have a rm footing. Be
sure no one is below when using the tool in
high locations.
6. Hold the tool rmly.
7. Keep hands away from rotating parts.
8. Do not leave the tool running. Operate the tool
only when hand-held.
9. Do not touch the bit or the workpiece immedi-
ately after operation; they may be extremely
hot and could burn your skin.
10. Some material contains chemicals which may
be toxic. Take caution to prevent dust inhala-
tion and skin contact. Follow material supplier
safety data.
SAVE THESE INSTRUCTIONS.
WARNING: DO NOT let comfort or familiarity
with product (gained from repeated use) replace
strict adherence to safety rules for the subject
product. MISUSE or failure to follow the safety
rules stated in this instruction manual may cause
serious personal injury.
4ENGLISH
Symbols
Thefollowingsshowthesymbolsusedfortool.
volts
direct current
no load speed
revolutions or reciprocation per minute
number of blow
Important safety instructions for
battery cartridge
1.
Before using battery cartridge, read all instruc-
tions and cautionary markings on (1) battery
charger, (2) battery, and (3) product using battery.
2. Do not disassemble battery cartridge.
3. If operating time has become excessively
shorter, stop operating immediately. It may
result in a risk of overheating, possible burns
and even an explosion.
4.
If electrolyte gets into your eyes, rinse them out
with clear water and seek medical attention right
away. It may result in loss of your eyesight.
5. Do not short the battery cartridge:
(1) Do not touch the terminals with any con-
ductive material.
(2) Avoid storing battery cartridge in a con-
tainer with other metal objects such as
nails, coins, etc.
(3) Do not expose battery cartridge to water
or rain.
A battery short can cause a large current
ow, overheating, possible burns and even a
breakdown.
6. Do not store the tool and battery cartridge in
locations where the temperature may reach or
exceed 50 °C (122 °F).
7. Do not incinerate the battery cartridge even if
it is severely damaged or is completely worn
out. The battery cartridge can explode in a re.
8. Be careful not to drop or strike battery.
9. Do not use a damaged battery.
10. The contained lithium-ion batteries are subject
to the Dangerous Goods Legislation require-
ments.
For commercial transports e.g. by third parties,
forwarding agents, special requirement on pack-
aging and labeling must be observed.
For preparation of the item being shipped, consult-
ing an expert for hazardous material is required.
Please also observe possibly more detailed
national regulations.
Tapeormaskoffopencontactsandpackupthe
battery in such a manner that it cannot move
around in the packaging.
11. Follow your local regulations relating to dis-
posal of battery.
SAVE THESE INSTRUCTIONS.
CAUTION:
Only use genuine Makita batteries.
Use of non-genuine Makita batteries, or batteries that
have been altered, may result in the battery bursting
causingres,personalinjuryanddamage.Itwillalso
void the Makita warranty for the Makita tool and charger.
Tips for maintaining maximum
battery life
1. Charge the battery cartridge before completely
discharged. Always stop tool operation and
charge the battery cartridge when you notice
less tool power.
2. Never recharge a fully charged battery car-
tridge. Overcharging shortens the battery
service life.
3.
Charge the battery cartridge with room tempera-
ture at 10 °C - 40 °C (50 °F - 104 °F). Let a hot
battery cartridge cool down before charging it.
4. Charge the battery cartridge if you do not use
it for a long period (more than six months).
FUNCTIONAL
DESCRIPTION
CAUTION: Always be sure that the tool is
switched off and the battery cartridge is removed
before adjusting or checking function on the tool.
Installing or removing battery
cartridge
CAUTION: Always switch off the tool before
installing or removing of the battery cartridge.
CAUTION: Hold the tool and the battery car-
tridge rmly when installing or removing battery
cartridge. Failure to hold the tool and the battery
cartridgermlymaycausethemtoslipoffyourhands
and result in damage to the tool and battery cartridge
andapersonalinjury.
1
2
3
►1. Red indicator 2. Button 3. Battery cartridge

5ENGLISH
Toremovethebatterycartridge,slideitfromthetool
while sliding the button on the front of the cartridge.
Toinstallthebatterycartridge,alignthetongueonthe
battery cartridge with the groove in the housing and slip
it into place. Insert it all the way until it locks in place
with a little click. If you can see the red indicator on the
upper side of the button, it is not locked completely.
CAUTION: Always install the battery cartridge
fully until the red indicator cannot be seen. If not,
itmayaccidentallyfalloutofthetool,causinginjuryto
you or someone around you.
CAUTION: Do not install the battery cartridge
forcibly. If the cartridge does not slide in easily, it is
not being inserted correctly.
Indicating the remaining battery
capacity
Only for battery cartridges with "B" at the end of the
model number
1
2
►1. Indicator lamps 2. Check button
Press the check button on the battery cartridge to indi-
catetheremainingbatterycapacity.Theindicatorlamps
light up for few seconds.
Indicator lamps Remaining
capacity
Lighted Off Blinking
75% to 100%
50% to 75%
25% to 50%
0% to 25%
Charge the
battery.
Thebattery
may have
malfunctioned.
NOTE: Depending on the conditions of use and the
ambient temperature, the indication may differ slightly
from the actual capacity.
Tool / battery protection system
Thetoolisequippedwithatool/batteryprotectionsys-
tem.Thissystemautomaticallycutsoffpowertothe
motortoextendtoolandbatterylife.Thetoolwillauto-
matically stop during operation if the tool or battery is
placed under one of the following conditions:
Overload protection
When the tool/battery is operated in a manner that
causes it to draw an abnormally high current, the tool
automatically stops without any indication. In this sit-
uation, turn the tool off and stop the application that
causedthetooltobecomeoverloaded.Thenturnthe
tool on to restart.
Overheat protection
When the tool/battery is overheated, the tool stops
automatically. In this situation, let the tool/battery cool
before turning the tool on again.
Overdischarge protection
When the battery capacity is not enough, the tool stops
automatically. In this case, remove the battery from the
tool and charge the battery.
NOTE: Overheat protection (for battery) will work only
with batteries with star marking.
1
►1. Star marking

6ENGLISH
Switch action
1
►1. Switch trigger
CAUTION: Before installing the battery car-
tridge into the tool, always check to see that the
switch trigger actuates properly and returns to
the "OFF" position when released.
Tostartthetool,simplypulltheswitchtrigger.Tool
speed is increased by increasing pressure on the switch
trigger. Release the switch trigger to stop.
NOTE:Thetoolautomaticallystopsifyoukeeppull-
ing the switch trigger for about 6 minutes.
Electric brake
Thistoolisequippedwithanelectricbrake.Ifthetool
consistently fails to quickly stop after the switch trigger
is released, have the tool serviced at a Makita service
center.
Lighting up the front lamp
1
►1. Lamp
CAUTION: Do not look in the light or see the
source of light directly.
Pulltheswitchtriggertolightupthelamp.Thelamp
keeps on lighting while the switch trigger is being pulled.
Thelampgoesoutapproximately10secondsafter
releasing the switch trigger.
NOTE: When the tool is overheated, the tool stops
automaticallyandthelampstartsashing.Inthis
case,releasetheswitchtrigger.Thelampturnsoffin
one minute.
NOTE: Use a dry cloth to wipe the dirt off the lens of
the lamp. Be careful not to scratch the lens of lamp, or
it may lower the illumination.
Reversing switch action
1
AB
►1. Reversing switch lever
CAUTION: Always check the direction of
rotation before operation.
CAUTION: Use the reversing switch only after
the tool comes to a complete stop. Changing the
direction of rotation before the tool stops may dam-
age the tool.
CAUTION: When not operating the tool,
always set the reversing switch lever to the neu-
tral position.
Thistoolhasareversingswitchtochangethedirection
of rotation. Depress the reversing switch lever from the
AsideforclockwiserotationorfromtheBsideforcoun-
terclockwise rotation.
When the reversing switch lever is in the neutral posi-
tion, the switch trigger cannot be pulled.
Speed change
1
►1. Speed change lever

7ENGLISH
CAUTION: Always set the speed change lever
fully to the correct position. If you operate the
tool with the speed change lever positioned halfway
between the "1" side and "2" side, the tool may be
damaged.
CAUTION: Do not use the speed change lever
while the tool is running.Thetoolmaybedamaged.
Displayed
Number
Speed Torque Applicable
operation
1Low High Heavy load-
ing operation
2High Low Light loading
operation
Tochangethespeed,switchoffthetoolrst.Pushthe
speed change lever to display "2" for high speed or "1" for
low speed but high torque. Be sure that the speed change
lever is set to the correct position before operation.
If the tool speed is coming down extremely during the
operation with display "2", push the lever to display "1"
and restart the operation.
Selecting the action mode
CAUTION: Always set the ring correctly to
your desired mode mark. If you operate the tool
with the ring positioned halfway between the
mode marks, the tool may be damaged.
CAUTION: When you change the position
from " " to other modes, it may be a little dif-
culty to slide the action mode changing ring. In
this case, switch on and run the tool for a second
at the " " position, then stop the tool and slide
the ring to your desired position.
1
2
4
3
►1.Actionmodechangingring2.Adjustingring
3. Graduation 4.Arrow
Thistoolhasthreeactionmodes.
• Drilling mode (rotation only)
• Hammer drilling mode (rotation with
hammering)
• Screwdriving mode (rotation with clutch)
Selectonemodesuitableforyourwork.Turnthe
action mode changing ring and align the mark that you
selected with the arrow on the tool body.
Adjusting the fastening torque
1
2
4
3
►1.Actionmodechangingring2.Adjustingring
3. Graduation 4.Arrow
Thefasteningtorquecanbeadjustedin21levelsby
turningtheadjustingring.Alignthegraduationswiththe
arrow on the tool body. You can get the minimum fas-
tening torque at 1 and maximum torque at 21.
Before actual operation, drive a trial screw into your
material or a piece of duplicate material to determine
which torque level is required for a particular applica-
tion.Thefollowingshowstheroughguideoftherela-
tionship between the screw size and graduation.
Graduation 12345678910 11 12 13 14 15 16 17 18 19 20 21
Machine screw M4 M5 M6
Wood
screw
Soft wood
(e.g. pine)
–ɸ3.5 x 22 ɸ4.1x 38 –
Hard wood
(e.g. lauan)
–ɸ3.5 x 22 ɸ4.1x 38 –

8ENGLISH
ASSEMBLY
CAUTION: Always be sure that the tool is
switched off and the battery cartridge is removed
before carrying out any work on the tool.
Installing or removing driver bit/
drill bit
Optional accessory
1
3
2
►1. Sleeve 2. Close 3. Open
Turnthesleevecounterclockwisetoopenthechuck
jaws.Placethedriverbit/drillbitinthechuckasfar
asitwillgo.Turnthesleeveclockwisetotightenthe
chuck.Toremovethedriverbit/drillbit,turnthesleeve
counterclockwise.
Installing hook
1
3
2
►1. Groove 2. Hook 3. Screw
Thehookisconvenientfortemporarilyhangingthetool.
Thiscanbeinstalledoneithersideofthetool.Toinstall
the hook, insert it into a groove in the tool housing on
eithersideandthensecureitwithascrew.Toremove,
loosen the screw and then take it out.
Installing driver bit holder
Optional accessory
1
2
►1. Driver bit holder 2. Driver bit
Fit the driver bit holder into the protrusion at the tool foot
on either right or left side and secure it with a screw.
When not using the driver bit, keep it in the driver bit
holders. Driver bits 45 mm-long (1-3/4") can be kept
there.
OPERATION
CAUTION: Always insert the battery cartridge
all the way until it locks in place. If you can see the
red indicator on the upper side of the button, it is not
locked completely. Insert it fully until the red indicator
cannot be seen. If not, it may accidentally fall out of
thetool,causinginjurytoyouorsomeonearound
you.
CAUTION: When the speed comes down
extremely, reduce the load or stop the tool to
avoid the tool damage.
Holdthetoolrmlywithonehandonthegripandthe
other hand on the bottom of the battery cartridge to
control the twisting action.

9ENGLISH
Screwdriving operation
CAUTION: Adjust the adjusting ring to the
proper torque level for your work.
CAUTION: Make sure that the driver bit is
inserted straight in the screw head, or the screw
and/or driver bit may be damaged.
First, turn the action mode changing ring so that the
arrow on the tool body points to the marking.
Place the point of the driver bit in the screw head and
apply pressure to the tool. Start the tool slowly and then
increase the speed gradually. Release the switch trigger
as soon as the clutch cuts in.
NOTE: When driving wood screw, pre-drill a pilot hole
2/3 the diameter of the screw. It makes driving easier
and prevents splitting of the workpiece.
Hammer drilling operation
CAUTION: There is a tremendous and sud-
den twisting force exerted on the tool/drill bit
at the time of hole breakthrough, when the hole
becomes clogged with chips and particles, or
when striking reinforcing rods embedded in the
concrete.
First, turn the action mode changing ring so that the
arrow on the tool body points to the marking.The
adjustingringcanbealignedinanytorquelevelsfor
this operation.
Be sure to use a tungsten-carbide tipped drill bit.
Position the drill bit at the desired location for the hole,
then pull the switch trigger. Do not force the tool. Light
pressure gives best results. Keep the tool in position
and prevent it from slipping away from the hole.
Do not apply more pressure when the hole becomes
clogged with chips or particles. Instead, run the tool at
an idle, then remove the drill bit partially from the hole.
By repeating this several times, the hole will be cleaned
out and normal drilling may be resumed.
Blow-out bulb
Optional accessory
1
►1. Blow-out bulb
Afterdrillingthehole,usetheblow-outbulbtocleanthe
dust out of the hole.
Drilling operation
First, turn the action mode changing ring so that the
arrow points to the marking.Thenproceedas
follows.
Drilling in wood
When drilling in wood, the best results are obtained
withwooddrillsequippedwithaguidescrew.Theguide
screw makes drilling easier by pulling the drill bit into
the workpiece.
Drilling in metal
Topreventthedrillbitfromslippingwhenstartinga
hole, make an indentation with a center-punch and
hammer at the point to be drilled. Place the point of the
drill bit in the indentation and start drilling.
Useacuttinglubricantwhendrillingmetals.Theexcep-
tions are iron and brass which should be drilled dry.
CAUTION: Pressing excessively on the tool
will not speed up the drilling. In fact, this excessive
pressure will only serve to damage the tip of your drill
bit, decrease the tool performance and shorten the
service life of the tool.
CAUTION: Hold the tool rmly and exert care
when the drill bit begins to break through the
workpiece.Thereisatremendousforceexertedon
the tool/drill bit at the time of hole break through.
CAUTION: A stuck drill bit can be removed
simply by setting the reversing switch to reverse
rotation in order to back out. However, the tool
may back out abruptly if you do not hold it rmly.
CAUTION: Always secure workpieces in a
vise or similar hold-down device.
CAUTION: If the tool is operated continuously
until the battery cartridge has discharged, allow
the tool to rest for 15 minutes before proceeding
with a fresh battery.
MAINTENANCE
CAUTION: Always be sure that the tool is
switched off and the battery cartridge is removed
before attempting to perform inspection or
maintenance.
NOTICE: Never use gasoline, benzine, thinner,
alcohol or the like. Discoloration, deformation or
cracks may result.
TomaintainproductSAFETYandRELIABILITY,
repairs,anyothermaintenanceoradjustmentshould
beperformedbyMakitaAuthorizedorFactoryService
Centers, always using Makita replacement parts.

10 ENGLISH
OPTIONAL
ACCESSORIES
CAUTION: These accessories or attachments
are recommended for use with your Makita tool
specied in this manual.Theuseofanyother
accessories or attachments might present a risk of
injurytopersons.Onlyuseaccessoryorattachment
for its stated purpose.
If you need any assistance for more details regarding
these accessories, ask your local Makita Service Center.
• Drillbits
• Driverbits
• Tungsten-carbidetippeddrillbit
• Blow-outbulb
• Driverbitholder
• Hook
• Makitagenuinebatteryandcharger
NOTE: Some items in the list may be included in the
toolpackageasstandardaccessories.Theymay
differ from country to country.
MAKITA LIMITED ONE YEAR
WARRANTY
Warranty Policy
EveryMakitatoolisthoroughlyinspectedandtested
before leaving the factory. It is warranted to be free of
defects from workmanship and materials for the period
ofONEYEARfromthedateoforiginalpurchase.
Should any trouble develop during this one year period,
returntheCOMPLETEtool,freightprepaid,toone
ofMakita’sFactoryorAuthorizedServiceCenters.If
inspection shows the trouble is caused by defective
workmanship or material, Makita will repair (or at our
option, replace) without charge.
ThisWarrantydoesnotapplywhere:
• repairshavebeenmadeorattemptedbyothers:
• repairsarerequiredbecauseofnormalwearand
tear:
• thetoolhasbeenabused,misusedorimproperly
maintained:
• alterationshavebeenmadetothetool.
INNOEVENTSHALLMAKITABELIABLEFORANY
INDIRECT,INCIDENTALORCONSEQUENTIAL
DAMAGESFROMTHESALEORUSEOFTHE
PRODUCT.THISDISCLAIMERAPPLIESBOTHDURING
ANDAFTERTHETERMOFTHISWARRANTY.
MAKITADISCLAIMSLIABILITYFORANYIMPLIED
WARRANTIES,INCLUDINGIMPLIEDWARRANTIES
OF"MERCHANTABILITY"AND"FITNESSFORA
SPECIFICPURPOSE,"AFTERTHEONEYEARTERM
OFTHISWARRANTY.
ThisWarrantygivesyouspeciclegalrights,andyou
may also have other rights which vary from state to state.
Some states do not allow the exclusion or limitation of
incidental or consequential damages, so the above lim-
itation or exclusion may not apply to you. Some states do
not allow limitation on how long an implied warranty lasts,
so the above limitation may not apply to you.

11 ESPAÑOL
ESPAÑOL (Instrucciones originales)
ESPECIFICACIONES
Modelo: XPH12
Capacidades de taladrado Mampostería 13 mm (1/2")
Acero 13 mm (1/2")
Madera 38 mm (1/1/2")
Capacidadesdejación Tornilloparamadera 10 mm x 90 mm (3/8" x 3-1/2")
Tornillodemáquina 6 mm (1/4")
Velocidad sin carga (RPM) Alta(2) 0 - 2 000 r/min
Baja(1) 0 - 500 r/min
Golpes por minuto Alto(2) 0 - 30 000 gpm
Bajo(1) 0 - 7 500 gpm
Longitud total 182 mm (7-1/8")
Tensiónnominal 18 V c.c.
Cartuchodebateríaestándar BL1815N, BL1820B BL1830, BL1830B, BL1840B,
BL1850B, BL1860B
Peso neto 1,6 kg (3,5 lbs) 1,8 kg (4,0 lbs)
• Debidoanuestrocontinuoprogramadeinvestigaciónydesarrollo,lasespecicacionesaquíincluidasestán
sujetasacambiosinprevioaviso.
• Lasespecicacionesyelcartuchodebateríapuedenvariardepaísapaís.
• PesodeacuerdoalprocedimientodeEPTA-01/2003incluyendoelcartuchodebatería
Advertencias generales de
seguridad para herramientas
eléctricas
ADVERTENCIA: Lea todas las advertencias
de seguridad e instrucciones. Elnoseguirlas
advertencias e instrucciones indicadas puede ocasio-
nar una descarga eléctrica, un incendio y/o lesiones
graves.
Conserve todas las advertencias
e instrucciones como referencia
en el futuro.
Enlasadvertencias,eltérmino“herramientaeléctrica”
sereereasuherramientaeléctricadefuncionamiento
conconexiónalaredeléctrica(concableadoeléctrico)
o herramienta eléctrica de funcionamiento a batería
(inalámbrica).
Seguridad en el área de trabajo
1. Mantenga el área de trabajo limpia y bien ilu-
minada.Lasáreasoscurasodesordenadasson
propensas a accidentes.
2. No utilice las herramientas eléctricas en
atmósferas explosivas, tal como en la presen-
cia de líquidos, gases o polvo inamables. Las
herramientas eléctricas crean chispas que pueden
prender fuego al polvo o los humos.
3. Mantenga a los niños y curiosos alejados
mientras utiliza una herramienta eléctrica. Las
distracciones le pueden hacer perder el control.
Seguridad eléctrica
1.
Las clavijas de conexión de las herramientas
eléctricas deberán encajar perfectamente en la
toma de corriente. No modique nunca la clavija
de conexión de ninguna forma. No utilice ninguna
clavija adaptadora con herramientas eléctricas
que tengan conexión a tierra (puesta a tierra). La
utilizacióndeclavijasnomodicadasyqueencajen
perfectamenteenlatomadecorrientereduciráel
riesgo de que se produzca una descarga eléctrica.
2.
Evite tocar con el cuerpo supercies conecta-
das a tierra o puestas a tierra tales como tubos,
radiadores, cocinas y refrigeradores. Si su cuerpo
espuestoatierraoconectadoatierraexistiráun
mayor riesgo de que sufra una descarga eléctrica.
3. No exponga las herramientas eléctricas a la
lluvia ni a condiciones húmedas. La entrada de
aguaenunaherramientaeléctricaaumentaráel
riesgo de que se produzca una descarga eléctrica.
4. No maltrate el cable. Nunca utilice el cable
para transportar, jalar o desconectar la herra-
mienta eléctrica. Mantenga el cable alejado del
calor, aceite, objetos cortantes o piezas móvi-
les. Los cables dañados o enredados aumentan
el riesgo de sufrir una descarga eléctrica.
5.
Cuando utilice una herramienta eléctrica en
exteriores, utilice un cable de extensión apro-
piado para uso en exteriores.Lautilizacióndeun
cableapropiadoparausoenexterioresreduciráel
riesgo de que se produzca una descarga eléctrica.
6. Si no es posible evitar usar una herramienta
eléctrica en condiciones húmedas, utilice un
alimentador protegido con interruptor de cir-
cuito de falla a tierra (ICFT).ElusodeunICFT
reduce el riesgo de descarga eléctrica.

12 ESPAÑOL
Seguridad personal
1. Manténgase alerta, preste atención a lo que
está haciendo y utilice su sentido común
cuando opere una herramienta eléctrica. No
utilice una herramienta eléctrica cuando esté
cansado o bajo la inuencia de drogas, alco-
hol o medicamentos.Unmomentodedistracción
mientras opera las herramientas eléctricas puede
terminarenunalesióngrave.
2. Use equipo de protección personal. Póngase
siempre protección para los ojos.Elequipo
protectortalcomomáscaracontraelpolvo,zapa-
tos de seguridad antiderrapantes, casco rígido y
protecciónparaoídosutilizadoenlascondiciones
apropiadasreduciráelriesgodelesiones.
3.
Impida el encendido accidental. Asegúrese de
que el interruptor esté en la posición de apa-
gado antes de conectar a la alimentación eléc-
trica y/o de colocar el cartucho de batería, así
como al levantar o cargar la herramienta. Cargar
las herramientas eléctricas con su dedo en el inte-
rruptor o enchufarlas con el interruptor encendido
hace que los accidentes sean comunes.
4. Retire cualquier llave de ajuste o llave de
apriete antes de encender la herramienta. Una
llavedeajusteollavedeaprietequehayasido
dejadapuestaenunapartegiratoriadelaherra-
mientaeléctricapuedeocasionaralgunalesión.
5.
No utilice la herramienta donde no alcance.
Mantenga los pies sobre suelo rme y el equilibrio
en todo momento.Estopermiteunmejorcontrolde
la herramienta eléctrica en situaciones inesperadas.
6.
Use vestimenta apropiada. No use ropas suel-
tas ni joyas. Mantenga el cabello, la ropa y los
guantes alejados de las piezas móviles. Las
prendasdevestirholgadas,lasjoyasyelcabello
sueltopodríanengancharseenlaspiezasmóviles.
7.
Si dispone de dispositivos para la conexión de
equipos de extracción y recolección de polvo,
asegúrese de conectarlos y utilizarlos debida-
mente.Hacerusodelarecoleccióndepolvopuede
reducir los riesgos relacionados con el polvo.
Mantenimiento y uso de la herramienta eléctrica
1. No fuerce la herramienta eléctrica. Utilice la
herramienta eléctrica correcta para su aplica-
ción.Laherramientaeléctricaadecuadaharáun
mejortrabajoydeformamásseguraalaveloci-
dad para la que ha sido fabricada.
2. No utilice la herramienta eléctrica si el inte-
rruptor no la enciende y apaga. Cualquier
herramienta eléctrica que no pueda ser contro-
lada con el interruptor es peligrosa y debe ser
reemplazada.
3. Desconecte la clavija de la fuente de energía
y/o la batería de la herramienta eléctrica antes
de realizar ajustes, cambiar accesorios o guar-
dar las herramientas eléctricas. Dichas medidas
de seguridad preventivas reducen el riesgo de
que la herramienta se inicie accidentalmente.
4. Guarde la herramienta eléctrica que no use
fuera del alcance de los niños y no permita
que las personas que no están familiarizadas
con ella o con las instrucciones la operen. Las
herramientas eléctricas son peligrosas en manos
de personas que no saben operarlas.
5. Realice el mantenimiento a las herramientas
eléctricas. Compruebe que no haya partes
móviles desalineadas o estancadas, piezas
rotas y cualquier otra condición que pueda
afectar al funcionamiento de la herramienta
eléctrica. Si la herramienta eléctrica está
dañada, haga que se la reparen antes de
utilizarla. Muchos accidentes son ocasionados
por herramientas eléctricas con mantenimiento
inadecuado.
6. Mantenga las herramientas de corte limpias
y losas. Si recibe un mantenimiento adecuado
ytienelosbordesalados,esprobablequela
herramientaseatasquemenosyseamásfácil
controlarla.
7. Utilice la herramienta eléctrica, los accesorios
y las brocas de acuerdo con estas instruccio-
nes, considerando las condiciones laborales
y el trabajo a realizar. Si utiliza la herramienta
eléctrica para realizar operaciones distintas de
lasindicadas,podrápresentarseunasituación
peligrosa.
Uso y cuidado de la herramienta a batería
1. Recargue sólo con el cargador especicado
por el fabricante. Un cargador que es adecuado
para un solo tipo de batería puede generar riesgo
de incendio al ser utilizado con otra batería.
2. Utilice las herramientas eléctricas solamente
con las baterías designadas especícamente
para ellas.Lautilizacióndecualquierotrabatería
puede crear un riesgo de lesiones o incendio.
3. Cuando no se esté usando la batería, mantén-
gala alejada de otros objetos metálicos, como
sujetapapeles (clips), monedas, llaves, clavos,
tornillos u otros objetos pequeños de metal
los cuales pueden actuar creando una cone-
xión entre las terminales de la batería. Originar
un cortocircuito en las terminales puede causar
quemaduras o incendios.
4. En condiciones abusivas, podrá escapar
líquido de la batería; evite tocarlo. Si lo toca
accidentalmente, enjuague con agua. Si hay
contacto del líquido con los ojos, busque asis-
tencia médica. Puede que el líquido expulsado
delabateríacauseirritaciónoquemaduras.
Servicio
1. Haga que una persona calicada repare la
herramienta eléctrica utilizando sólo piezas de
repuesto idénticas.Estoaseguraqueseman-
tenga la seguridad de la herramienta eléctrica.
2. Siga las instrucciones para la lubricación y
cambio de accesorios.
3. Mantenga las agarraderas secas, limpias y sin
aceite o grasa.
Advertencias de seguridad para el
rotomartillo atornillador inalámbrico
1. Utilice protectores de oídos al usar el taladro
de percusión.Laexposiciónalruidopuedepro-
ducir pérdida auditiva.
2. Utilice los mango(s) auxiliare(s) que se sumi-
nistren con la herramienta. La pérdida de con-
trol puede ocasionar lesiones.

13 ESPAÑOL
3. Sujete la herramienta eléctrica por las super-
cies de agarre aisladas al realizar una ope-
ración en la que el accesorio de corte pueda
estar en contacto con cables ocultos. Si el
accesorio de corte entra en contacto con un cable
concorriente,laspiezasmetálicasexpuestasde
laherramientaeléctricasecargarántambiénde
corrienteyeloperariopodrárecibirunadescarga
eléctrica.
4. Sujete la herramienta eléctrica por las super-
cies de agarre aisladas al realizar una ope-
ración en la que el sujetador pueda entrar en
contacto con cables ocultos.Sielsujetador
entra en contacto con un cable con corriente, las
piezasmetálicasexpuestasdelaherramienta
eléctricasecargarántambiéndecorrienteyel
operario puede recibir una descarga.
5. Asegúrese siempre de que pisa sobre suelo
rme. Asegúrese de que no haya nadie debajo
cuando utilice la herramienta en lugares altos.
6. Sujete la herramienta con rmeza.
7. Mantenga las manos alejadas de las piezas
giratorias.
8. No deje la herramienta funcionando. Ponga la
herramienta en marcha únicamente cuando la
tenga con usted.
9. No toque la broca o la pieza de trabajo inme-
diatamente después de utilizarla; podrían estar
muy calientes y producirle quemaduras de
piel.
10. Algunos materiales contienen sustancias
químicas que pueden ser tóxicas. Evite inhalar
polvo y que éste entre en contacto con la piel.
Consulte la hoja de seguridad de materiales
del proveedor.
GUARDE ESTAS
INSTRUCCIONES.
ADVERTENCIA: NO DEJE que la comodidad
o familiaridad con el producto (a base de utilizarlo
repetidamente) evite que siga estrictamente las
normas de seguridad para dicho producto. El
USO INCORRECTO o el no seguir las normas de
seguridad indicadas en este manual de instruc-
ciones puede ocasionar lesiones graves.
Símbolos
Acontinuaciónsemuestranlossímbolosutilizados
para la herramienta.
volts o voltios
corriente directa o continua
velocidad sin carga
revoluciones o alternaciones por minuto,
frecuenciaderotación
número de percusiones
Instrucciones importantes de
seguridad para el cartucho de
batería
1.
Antes de utilizar el cartucho de batería, lea todas
las instrucciones e indicaciones de precaución
en el (1) el cargador de batería, (2) la batería, y
(3) el producto con el que se utiliza la batería.
2. No desarme el cartucho de batería.
3. Si el tiempo de operación se ha acortado en
exceso, deje de operar de inmediato. Podría
correrse el riesgo de sobrecalentamiento,
posibles quemaduras e incluso explosión.
4. En caso de que ingresen electrolitos en sus
ojos, enjuáguelos bien con agua limpia y con-
sulte de inmediato a un médico. Esto podría
ocasionar pérdida de visión.
5. Evite cortocircuitar el cartucho de batería:
(1) No toque las terminales con ningún mate-
rial conductor.
(2) Evite guardar el cartucho de batería en un
cajón junto con otros objetos metálicos,
tales como clavos, monedas, etc.
(3) No exponga el cartucho de batería al
agua o la lluvia.
Un cortocircuito en la batería puede causar un ujo
grande de corriente, sobrecalentamiento, posibles
quemaduras e incluso una descompostura.
6. No guarde la herramienta ni el cartucho de
batería en lugares donde la temperatura pueda
alcanzar o exceder los 50°C (122°F).
7. Nunca incinere el cartucho de batería incluso
en el caso de que esté dañado seriamente o
ya no sirva en absoluto. El cartucho de batería
puede explotar si se tira al fuego.
8.
Tenga cuidado de no dejar caer ni golpear la batería.
9. No use una batería dañada.
10. Las baterías de ión de litio están sujetas a los
requisitos reglamentarios en materia de bie-
nes peligrosos.
Paraeltrasportecomercial,porej.,mediante
terceros o agentes de transporte, se deben tomar
en cuenta los requisitos especiales relativos al
empaque y el etiquetado.
Para efectuar los preparativos del artículo que se
va a enviar, se requiere consultar a un experto en
materiales peligrosos. Si es posible, consulte ade-
másotrasregulacionesnacionalesmásdetalladas.
Pegue o cubra con cinta adhesiva los contactos
abiertos y empaque la batería de manera que ésta
no pueda moverse dentro del paquete.
11. Siga las regulaciones locales relacionadas al
desecho de las baterías.
GUARDE ESTAS
INSTRUCCIONES.
PRECAUCIÓN:
Utilice únicamente baterías
originales de Makita.Elusodebateríasnooriginales
de Makita, o de baterías alteradas, puede ocasionar que
las baterías exploten causando un incendio, lesiones
personalesydaños.Asimismo,estoinvalidarálagaran-
tía de Makita para la herramienta y el cargador Makita.

14 ESPAÑOL
Consejos para alargar al máximo
la vida útil de la batería
1. Cargue el cartucho de batería antes de que
se descargue completamente. Pare siem-
pre la operación y cargue el cartucho de
batería cuando note menos potencia en la
herramienta.
2. No cargue nunca un cartucho de batería que
esté completamente cargado. La sobrecarga
acortará la vida de servicio de la batería.
3. Cargue el cartucho de batería a una tempera-
tura ambiente de 10 °C - 40 °C (50 °F - 104 °F).
Si un cartucho de batería está caliente, déjelo
enfriar antes de cargarlo.
4. Cargue el cartucho de batería si no va a utili-
zarlo durante un período prolongado (más de
seis meses).
DESCRIPCIÓN DEL
FUNCIONAMIENTO
PRECAUCIÓN: Asegúrese siempre de que la
herramienta esté apagada y el cartucho de batería
haya sido extraído antes de realizar cualquier
ajuste o comprobación en la herramienta.
Instalación o extracción del
cartucho de batería
PRECAUCIÓN: Apague siempre la herra-
mienta antes de colocar o quitar el cartucho de
batería.
PRECAUCIÓN: Sujete la herramienta y el car-
tucho de la batería con rmeza al colocar o quitar
el cartucho de batería.Sinosesujetaconrmezala
herramienta y el cartucho de batería, puede ocasio-
nar que se resbalen de sus manos causando daños
a la herramienta y al cartucho de batería, así como
lesiones a la persona.
1
2
3
►1.Indicadorrojo2.Botón3. Cartucho de batería
Para quitar el cartucho de batería, deslícelo de la herra-
mientamientrasdeslizaelbotónsobrelapartedelan-
tera del cartucho.
Para colocar el cartucho de batería, alinee la lengüeta
sobre el cartucho de batería con la ranura en la carcasa
y deslice en su lugar. Inserte por completo hasta que
sejeensulugarconunpequeñoclic.Sipuedeverel
indicadorrojodelladosuperiordelbotón,estoindica
quenohaquedadojoporcompleto.
PRECAUCIÓN: Introduzca siempre com-
pletamente el cartucho de batería hasta que
el indicador rojo no pueda verse. Si no, podría
accidentalmente salirse de la herramienta y caer al
suelocausandounalesiónaustedoalguienasu
alrededor.
PRECAUCIÓN: No instale el cartucho de
batería a la fuerza. Si el cartucho no se desliza al
interiorfácilmente,sedebeaquenoestásiendo
insertado correctamente.
Indicación de la capacidad restante
de la batería
Sólo para cartuchos de batería con una “B” al nal
del número de modelo
1
2
►1. Luces indicadoras 2.Botóndevericación
Oprimaelbotóndevericaciónenelcartuchodela
batería para que indique la capacidad restante de la
batería.Laslucesindicadorasseiluminaránporalgu-
nos segundos.
Luces indicadoras Capacidad
restante
Iluminadas Apagadas Parpadeando
75% a 100%
50% a 75%
25% a 50%
0% a 25%
Cargar la
batería.
La batería
pudo haber
funcionado
mal.

15 ESPAÑOL
NOTA: Dependiendo de las condiciones de uso y
latemperaturaambiente,laindicaciónpodrádiferir
ligeramente de la capacidad real.
Sistema de protección para la
herramienta/batería
Laherramientaestáequipadaconunsistemadepro-
teccióndelaherramienta/batería.Estesistemacorta
enformaautomáticaelsuministrodeenergíaalmotor
para prolongar la vida útil de la herramienta y la batería.
Laherramientasedetendráautomáticamentedurante
laoperaciónsilaherramientaolabateríasesometena
una de las siguientes condiciones:
Protección contra sobrecarga
Cuando la herramienta/batería se esté utilizando de
una manera que cause que consuma una cantidad de
corrienteinusualmentealta,laherramientasedetendrá
automáticamentesinquehayaindicaciónalguna.En
este caso, apague la herramienta y detenga la aplica-
ciónquecausóquelaherramientasesobrecargara.
Luego encienda la herramienta para reiniciarla.
Protección contra
sobrecalentamiento
Cuando la herramienta/batería se sobrecaliente, la
herramientasedetendráautomáticamente.Eneste
caso, permita que la herramienta/batería se enfríe
antes de volver a encender la herramienta.
Protección en caso de
sobredescarga
Cuandolacapacidaddelabateríanoessuciente,la
herramientasedetieneautomáticamente.Enestecaso,
retirelabateríadelaherramientaycárguela.
NOTA:Laproteccióncontrasobrecalentamiento
(paralabatería)funcionaráúnicamenteconbaterías
con marca de estrella.
1
►1. Marca de estrella
Accionamiento del interruptor
1
►1. Gatillo interruptor
PRECAUCIÓN: Antes de insertar el cartucho
de batería en la herramienta, compruebe siem-
pre y cerciórese de que el gatillo interruptor se
acciona debidamente y que vuelve a la posición
“OFF” (apagado) cuando lo suelta.
Para poner en marcha la herramienta, simplemente
apriete el gatillo interruptor. La velocidad de la herra-
mientaaumentaincrementandolapresiónenelgatillo.
Para detenerla, suelte el gatillo.
NOTA:Laherramientasedetieneautomáticamente
sicontinúajalandoelgatillointerruptoralrededorde
6 minutos.
Freno eléctrico
Laherramientaestáequipadaconunfrenoeléctrico.Si
la herramienta falla constantemente en detenerse tras
soltar el gatillo interruptor, lleve la herramienta a mante-
nimiento a un centro de servicio Makita.
Iluminación de la luz delantera
1
►1. Luz
PRECAUCIÓN: No mire a la luz ni vea a la
fuente de luz directamente.
Jale el gatillo interruptor para encender la luz. La luz
continúailuminándosemientrasseestájalandoel
gatillo interruptor. La luz se apaga aproximadamente 10
segundos tras haber liberado el gatillo interruptor.

16 ESPAÑOL
NOTA: Cuando la herramienta se sobrecaliente, ésta
sedetendráautomáticamenteylalámparacomen-
zaráadestellar.Enestecaso,suelteelgatillointe-
rruptor.Lalámparaseapagaráenunminuto.
NOTA:
Utilice un paño seco para quitar la suciedad de
lalentedelalámpara.Tengacuidadodenorayarlalente
delalámparayaquelailuminaciónpodríadisminuir.
Accionamiento del conmutador de
inversión de giro
1
AB
►1.Palancadelinterruptordeinversión
PRECAUCIÓN: Conrme siempre la direc-
ción de rotación antes de la operación.
PRECAUCIÓN: Utilice el conmutador de
inversión solamente después de que la herra-
mienta haya parado completamente. Si cambia
ladirecciónderotaciónantesdequelaherramienta
haya parado podría dañarla.
PRECAUCIÓN: Cuando no esté utilizando la
herramienta, ponga siempre la palanca del con-
mutador de inversión en la posición neutral.
Estaherramientatieneunconmutadordeinversiónpara
cambiarladirecciónderotación.Presionelapalancadel
conmutadordeinversióndesdeelladoAparaunarotación
ensentidodelasmanecillasdelrelojodesdeelladoB,para
unarotaciónensentidoinversoaldelasmanecillasdelreloj.
Cuandolapalancadelconmutadordeinversiónestéenla
posiciónneutral,nosepodrájalarelgatilloconmutador.
Cambio de velocidad
1
►1. Palanca de cambio de velocidad
PRECAUCIÓN: Coloque siempre la palanca
de cambio de velocidad exactamente en la posi-
ción correcta. Si usted utiliza la herramienta con la
palanca de cambio de velocidad puesta a medias
entrelaposición“1”y“2”,laherramientapuede
dañarse.
PRECAUCIÓN: No utilice la palanca de cam-
bio de velocidad mientras la herramienta está en
marcha. La herramienta puede dañarse.
Número
desplegado
Velocidad Torsión Operación
aplicable
1Baja Alta Operaciónde
carga pesada
2Alta Baja Operaciónde
carga ligera
Para cambiar la velocidad, apague primero la herra-
mienta. Presione la palanca de cambio de velocidad
paradesplegar“2”paravelocidadaltao“1”paraveloci-
dadbajaperoaltatorsión.Asegúresedequelapalanca
decambiodevelocidadestéenlaposicióncorrecta
antesdelaoperación.
Si la velocidad de la herramienta desciende extrema-
damentedurantelaoperaciónconel“2”desplegado,
presionelapalancaparadesplegar“1”yreiniciela
operación.
Selección del modo de
accionamiento
PRECAUCIÓN: Ponga siempre el anillo
correctamente en la marca del modo que desee.
Si utiliza la herramienta con el anillo puesto a
medias entre las marcas de modo, la herramienta
podrá dañarse.
PRECAUCIÓN: Cuando cambie de posición
de “ ” a otros modos, puede resultar algo
difícil deslizar el anillo de cambio de modo de
accionamiento. En este caso, encienda y ponga a
funcionar la herramienta durante un segundo en
la posición “ ”, luego detenga la herramienta y
deslice el anillo a la posición deseada.
1
2
4
3
►1.Anillodecambiodemododeaccionamiento
2.Anillodeajuste3.Graduación4. Flecha

17 ESPAÑOL
Estaherramientacuentacontresmodosde
accionamiento.
• Mododetaladrado(rotaciónsolamente)
• Mododetaladradoymartilleo(rotacióncon
percusión)
• Mododeatornillado(rotaciónconembrague)
Seleccioneelmodoapropiadoparaeltrabajoen
cuestión.Gireelanillodecambiodemododeacciona-
miento y alinee la marca que haya seleccionado con la
echaenelcuerpodelaherramienta.
Ajuste de la torsión de apriete
1
2
4
3
►1.Anillodecambiodemododeaccionamiento
2.Anillodeajuste3.Graduación4. Flecha
Latorsióndeaprietepuedeajustarseen21niveles
girandoelanillodeajuste.Alineelasgraduacionescon
laechaenelcuerpodelaherramienta.Puedeconse-
guirunajacióndetorsiónmínimaen1yunatorsión
máximaen21.
Antesdelaoperaciónreal,coloqueuntornillode
prueba en el material o algún duplicado del material
paradeterminarquéniveldetorsiónserequierepara
laaplicaciónparticular.Acontinuaciónsemuestrauna
ideageneraldelarelaciónentreeltamañodeltornilloy
lagraduación.
Graduación 12345678910 11 12 13 14 15 16 17 18 19 20 21
Tornillodemáquina 4 mm 5 mm 6 mm
Tornillo
para
madera
Madera
blanda
(Ej.pino)
–ɸ3,5 mm x 22 mm ɸ4,1 mmx 38 mm –
Madera
dura
(Ej.lauan)
–ɸ3,5 mm x 22 mm ɸ4,1 mmx 38 mm –
MONTAJE
PRECAUCIÓN: Asegúrese siempre de que la
herramienta esté apagada y el cartucho de batería
haya sido extraído antes de realizar cualquier
trabajo en la misma.
Instalación o extracción de la punta
de destornillador/broca de taladro
Accesorio opcional
1
3
2
►1. Mandril 2. Cerrar 3.Abrir
Gire el mandril en sentido inverso al de las manecillas del
relojparaabrirlasgarrasdelaprensadesujeción.Inserte
la punta de destornillador/broca de taladro completamente
enlaprensadesujeción.Gireelmandrilensentidodelas
manecillasdelrelojparaapretarlaprensadesujeción.Para
extraer la punta de destornillador/broca de taladro, gire el
mandrilensentidoinversoaldelasmanecillasdelreloj.

18 ESPAÑOL
Instalación del gancho
1
3
2
►1. Ranura 2. Gancho 3.Tornillo
Elganchoresultaútilparacolgartemporalmentela
herramienta. Se puede instalar en cualquiera de los
lados de la herramienta. Para instalar el gancho, insér-
telo en una ranura de la carcasa de la herramienta de
cualquieradelosladosydespuéssujételoconuntorni-
llo.Paraquitarlo,aojeeltornilloydespuéssáquelo.
Instalación del portabrocas
Accesorio opcional
1
2
►1. Portabrocas 2. Punta de destornillador
Coloque el portabrocas en la protuberancia en la base
de la herramienta o ya sea del lado derecho o izquierdo
y asegúrelo con un tornillo.
Cuando no utilice la punta de destornillador, mantén-
gala dentro del portabrocas. Las puntas de destornilla-
dor de 45 mm de largo (1-3/4") se pueden guardar ahí.
OPERACIÓN
PRECAUCIÓN: Siempre inserte completa-
mente el cartucho de batería hasta que quede
asegurado en su lugar. Si puede ver el indicador
rojodelladosuperiordelbotón,estoindicaqueno
ha quedado completamente asegurado. Insértelo
porcompletohastaqueelindicadorrojonopueda
verse. De lo contrario, podría salirse accidentalmente
de la herramienta y ocasionarle lesiones a usted o a
alguien a su alrededor.
PRECAUCIÓN: Cuando la velocidad baje
demasiado, reduzca la carga o detenga la herra-
mienta para evitar daños en ésta.
Sujetermementelaherramientaconunamanoenla
agarradera y otra en la parte inferior del cartucho de
bateríaparacontrolarlaaccióndetorsión.
Operación de atornillado
PRECAUCIÓN: Coloque el anillo de ajuste en
el nivel de torsión apropiado para su trabajo.
PRECAUCIÓN: Asegúrese de que la punta
de destornillador se inserte exactamente en la
cabeza del tornillo, de lo contrario el tornillo y/o la
punta de destornillador pueden dañarse.
Enprimerlugar,gireelanillodecambiodemodode
accionamientodeformaquelaechaquehayenel
cuerpo de la herramienta apunte a la marca.
Coloque la punta de la punta de destornillador sobre la
cabezadeltornilloyapliquepresiónenlaherramienta.
Haga funcionar la herramienta lentamente y después
aumente la velocidad gradualmente. Suelte el gatillo
interruptor en cuanto el embrague patine.
NOTA: Cuando atornille en madera, taladre primero
unoriciode2/3deldiámetrodeltornillo.Estofacilita
laoperaciónyevitaquelapiezadetrabajoserompa
en dos.

19 ESPAÑOL
Operación de taladrado con
percusión
PRECAUCIÓN: En el momento de comenzar
a penetrar, cuando se atasca el agujero con viru-
tas y partículas, o cuando se topa contra varillas
de refuerzo de hormigón armado, se ejerce una
tremenda y repentina fuerza de torsión sobre la
herramienta/broca.
Enprimerlugar,gireelanillodecambiodemodode
accionamientodeformaquelaechaquehayenel
cuerpo de la herramienta apunte a la marca.El
anillodeajustepuedeestaralineadoencualquiernivel
detorsiónparaestaoperación.
Asegúresedeutilizarunabrocaconpuntadecarburo
de tungsteno.
Coloquelabrocadondedeseehacerelagujero,des-
puésjaleelgatillointerruptor.Nofuercelaherramienta.
Losmejoresresultadosseobtienenconunaligera
presión.Mantengalaherramientaenposiciónyevite
quesedesliceysesalgadelagujero.
Noapliquemáspresióncuandoelagujeroseatore
convirutasypartículas.Ensulugar,hagafuncionarla
herramientasinpresión,despuéssaqueparcialmente
labrocadelagujero.Repitiendoestovariasveces,se
limpiaráelagujeroysepodráreanudareltaladrado
normal.
Soplador
Accesorio opcional
1
►1. Soplador
Despuésdetaladrarelagujero,utiliceelsopladorpara
limpiarelpolvodelagujero.
Operación de taladrado
Primero, gire el anillo de cambio de modo de accio-
namientodetalformaquelaechaapuntehaciala
marca . Después proceda como sigue.
Taladrado en madera
Cuandotaladreenmadera,podráobtenermejores
resultados si utiliza brocas para madera equipadas
conuntornilloguía.Eltornilloguíafacilitaeltaladrado
jalandolabrocadetaladrohaciaelinteriordelapieza
detrabajo.
Taladrado en metal
Para evitar que la broca de taladro resbale una vez que
comienceahacereloricio,hagaunsurcoconpunzón
y un martillo en el punto a taladrar. Coloque la punta
de la broca de taladro en el surco y comience a taladrar.
Utilice un lubricante para corte cuando taladre metales.
Salvoenelcasodehierroybronce,loscualesdeberán
ser taladrados en seco.
PRECAUCIÓN: Ejercer una presión excesiva
sobre la herramienta no hará que consiga taladrar
más rápido.Dehecho,unapresiónexcesivasólo
lograrádañarlapuntadelabrocadetaladro,reducir
el desempeño y acortar la vida útil de la herramienta.
PRECAUCIÓN: Sujete rmemente la herra-
mienta y tenga cuidado cuando la broca de tala-
dro comience a penetrar en la pieza de trabajo. La
fuerzaejercidaenlaherramienta/brocadetaladroal
momentodelapenetraciónesenorme.
PRECAUCIÓN: Para extraer una broca de
taladro atorada, basta simplemente con ajustar el
interruptor de inversión en rotación inversa para
hacerla retroceder. Sin embargo, la herramienta
puede retroceder bruscamente si no la sujeta con
rmeza.
PRECAUCIÓN: Asegure siempre las piezas
de trabajo con un tornillo de banco o dispositivo
de sujeción similar.
PRECAUCIÓN: Si utiliza la herramienta de
forma continua hasta que el cartucho de batería
se descargue, deje descansar la herramienta
durante 15 minutos antes de proceder con una
batería llena.
MANTENIMIENTO
PRECAUCIÓN: Asegúrese siempre de que la
herramienta esté apagada y el cartucho de batería
extraído antes de intentar realizar una inspección
o mantenimiento.
AVISO: Nunca use gasolina, bencina, diluyente
(tíner), alcohol o sustancias similares. Puede que
esto ocasione grietas o descoloramiento.
ParamantenerlaSEGURIDADyFIABILIDADdelpro-
ducto, las reparaciones, y cualquier otra tarea de man-
tenimientooajustedeberánserrealizadasencentros
deservicioautorizadosodefábricaMakita,empleando
siempre repuestos Makita.

20 ESPAÑOL
ACCESORIOS
OPCIONALES
PRECAUCIÓN: Estos accesorios o aditamen-
tos están recomendados para utilizarse con su
herramienta Makita especicada en este manual.
Elempleodecualquierotroaccesoriooaditamento
puede conllevar el riesgo de lesiones personales.
Utilice los accesorios o aditamentos solamente para
sunestablecido.
Sinecesitacualquierayudaparamásdetallesen
relaciónconestosaccesorios,pregunteasucentrode
servicio local Makita.
• Brocasdetaladro
• Puntasdedestornillador
• Brocaconpuntadecarburodetungsteno
• Soplador
• Portabrocas
• Gancho
• BateríaycargadororiginalesdeMakita
NOTA:Algunosdelosartículosenlalistapueden
incluirse en el paquete de la herramienta como acce-
soriosestándar.Éstospuedenvariardepaísapaís.
GARANTÍA LIMITADA DE UN AÑO
DE MAKITA
Ésta Garantía no aplica para México
Política de garantía
Cada herramienta Makita es inspeccionada y probada
exhaustivamenteantesdesalirdelafábrica.Segaran-
tizaqueestálibrededefectosdemanodeobraymate-
rialesporelperíododeUNAÑOapartirdelafechaori-
ginal de compra. Si durante este período de un año se
desarrollara algún problema, devuelva la herramienta
COMPLETA,conelenvíoprepagado,auncentrode
servicioautorizadoodefábricaMakita.Silainspección
muestra que el problema ha sido a causa de un defecto
demanodeobraomaterial,Makitaharálareparación
(oasudiscreción,elreemplazo)sinningúncargo.
Estagarantíanoaplicacuando:
• lasreparacionessehayanhechoointentado
hacer por otros;
• serequieranreparacionesdebidoaldesgaste
normal;
• laherramientahayasidomaltratada,recibido
un mal uso o haya recibido un mantenimiento
inapropiado;
• sehayanhechomodicacionesalaherramienta.
ENNINGÚNCASOMAKITASEHARÁ
RESPONSABLEDENINGÚNDAÑOINDIRECTO,
INCIDENTAL,ODERIVADODELAVENTAO
USODELPRODUCTO.ESTEDESCARGODE
RESPONSABILIDADAPLICADURANTEYDESPUÉS
DELPLAZODEESTAGARANTÍA.
MAKITARENUNCIAALARESPONSABILIDADPOR
CUALQUIERGARANTÍAIMPLÍCITA,INCLUYENDO
GARANTÍASDE“COMERCIABILIDAD”Y“ADECUACIÓN
PARAUNPROPÓSITOESPECÍFICO”,DESPUÉSDEL
PLAZODEUNAÑODEESTAGARANTÍA.
Estagarantíaleconcedederechoslegalesespecícos
yustedpodrátenertambiénotrosderechosquevarían
deunestadoaotro.Algunosestadosnopermitenla
exclusiónolimitacióndedañosincidentalesocon-
secuentes,porloquelalimitaciónoexclusiónarriba
mencionadapodríanoaplicarparausted.Algunos
estadosnopermitenlalimitaciónsobreladuraciónde
unagarantíaimplícita,porloquelalimitaciónarriba
mencionada podría no aplicar para usted.
This manual suits for next models
1
Table of contents
Languages:
Other Makita Drill manuals

Makita
Makita 6302 User manual

Makita
Makita 6310 User manual

Makita
Makita maktec MT813 Manual

Makita
Makita DDF343 User manual

Makita
Makita DHP485SFJ User manual

Makita
Makita DDF459 User manual

Makita
Makita HP2030 User manual

Makita
Makita BDF444 User manual

Makita
Makita HP1640 User manual

Makita
Makita HP1640 User manual

Makita
Makita DA3010 User manual

Makita
Makita HP333D User manual

Makita
Makita XFD10 User manual

Makita
Makita 6203DWAE User manual

Makita
Makita 2-SPEED HAMMER 8401 User manual

Makita
Makita DHP459 User manual

Makita
Makita DBM131 User manual

Makita
Makita 6013B User manual

Makita
Makita BHP444 User manual

Makita
Makita BDF451 Quick start guide