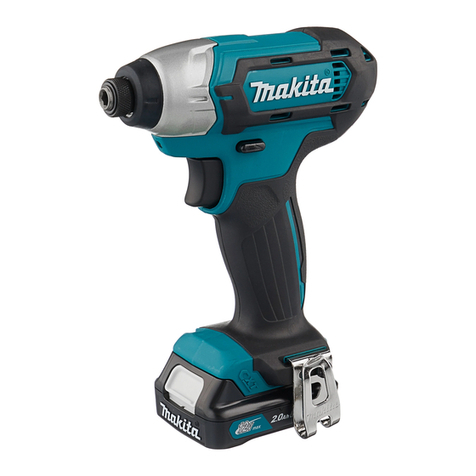
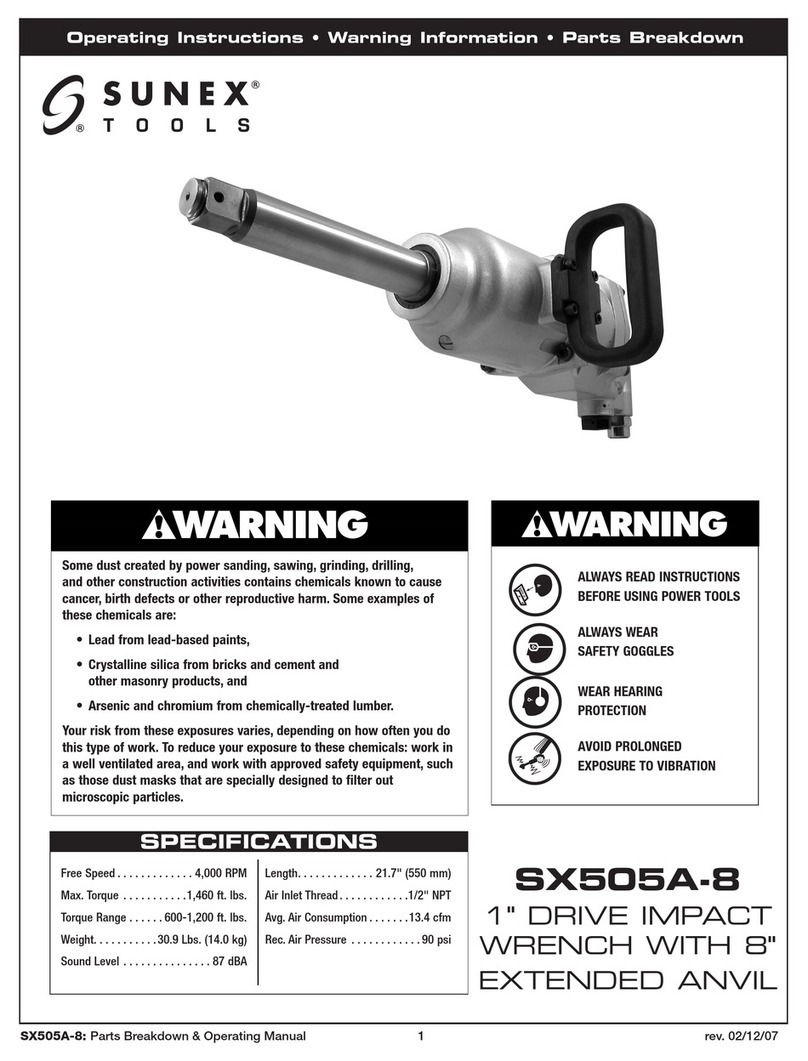
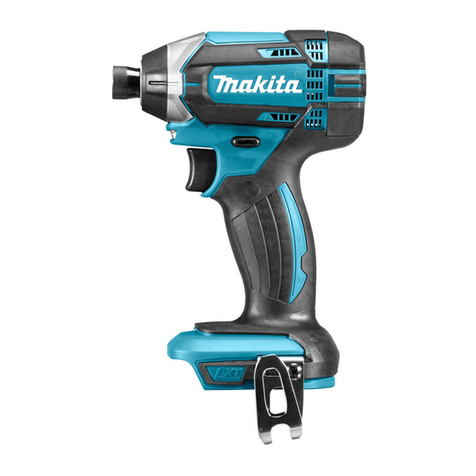
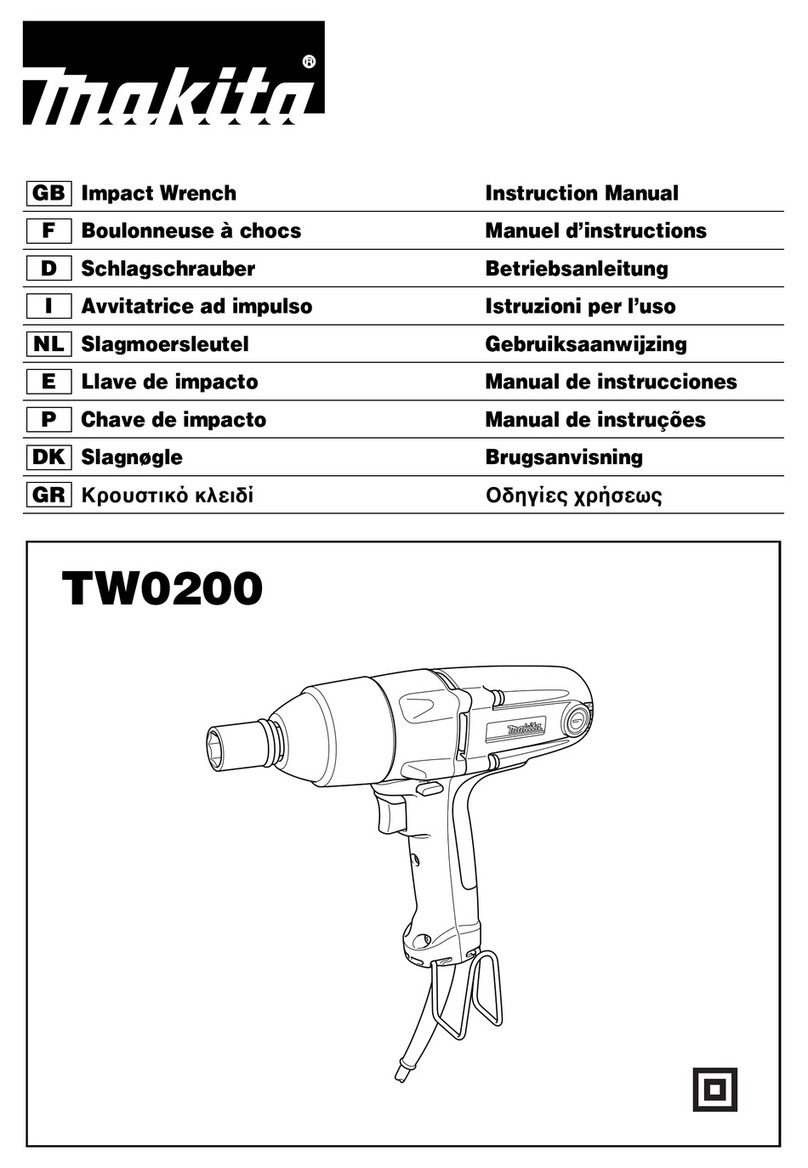
Makita TD126D User manual

TD126D
TD127D
EN Cordless Impact Driver INSTRUCTION MANUAL 4
SL Akumulatorski udarni vijačnik NAVODILO ZA UPORABO 9
SQ Vidhosës me goditje me
bateri MANUALI I PËRDORIMIT 14
BG Акумулаторен ударен
винтоверт
РЪКОВОДСТВО ЗА
ЕКСПЛОАТАЦИЯ 19
HR Akumulatorski udarni zavrtač PRIRUČNIK S UPUTAMA 25
МК Безжичен ударен одвртувач УПАТСТВО ЗА УПОТРЕБА 30
RO Maşină de înşurubat cu
impact cu acumulator MANUAL DE INSTRUCŢIUNI 35
SR Бежични ударни одвртач УПУТСТВО ЗА УПОТРЕБУ 40
RU Аккумуляторный ударный
шуруповерт
РУКОВОДСТВО ПО
ЭКСПЛУАТАЦИИ 45
UK Бездротовий ударний
шуруповерт
ІНСТРУКЦІЯ З
ЕКСПЛУАТАЦІЇ 51

1
2
3
1
1
1
AB
12
12
3
12
3
Fig.1
Fig.2
Fig.3
Fig.4
Fig.5
Fig.6
Fig.7
Fig.8
2

1
Fig.9
Fig.10
3

4ENGLISH
ENGLISH (Original instructions)
SPECIFICATIONS
Model TD126D TD127D
Capacities Machine screw 4 mm - 8 mm
Standard bolt 5 mm - 14 mm
High tensile bolt 5 mm - 12 mm
No load speed (min-1)0 - 2,400 0 - 2,300
Impacts per minute 0 - 3,000
Overall length 173 mm
Net weight 1.4 kg 1.5 kg
Rated voltage D.C. 14.4 V D.C. 18 V
• Duetoourcontinuingprogramofresearchanddevelopment,thespecicationshereinaresubjecttochange
without notice.
• Specicationsmaydifferfromcountrytocountry.
• Theweightmaydifferdependingontheattachment(s),includingthebatterycartridge.Thelightestandheavi-
est combination, according to EPTA-Procedure 01/2014, are shown in the table.
Applicable battery cartridge and charger
Batterycartridge D.C.14.4 V Model BL1413G / BL1415G
D.C.18 V Model BL1813G / BL1815G
Charger DC18WA
• Someofthebatterycartridgesandchargerslistedabovemaynotbeavailabledependingonyourregionof
residence.
WARNING: Only use the battery cartridges and chargers listed above.Useofanyotherbatterycartridges
andchargersmaycauseinjuryand/orre.
Intended use
The tool is intended for screw driving in wood, metal
and plastic.
Noise
ThetypicalA-weightednoiseleveldeterminedaccord-
ing to EN62841:
Model TD126D
Sound pressure level (LpA) : 92 dB (A)
Sound power level (LWA) : 103 dB (A)
Uncertainty(K):3dB(A)
Model TD127D
Sound pressure level (LpA) : 93 dB (A)
Sound power level (LWA) : 104 dB (A)
Uncertainty(K):3dB(A)
Wear ear protection
Vibration
The vibration total value (tri-axial vector sum) deter-
mined according to EN62841:
Model TD126D
Work mode : impact tightening of fasteners of the
maximumcapacityofthetool
Vibration emission (ah) : 9.5 m/s2
Uncertainty(K):2.0m/s2
Model TD127D
Work mode : impact tightening of fasteners of the
maximumcapacityofthetool
Vibration emission (ah) : 8.5 m/s2
Uncertainty(K):2.0m/s2
NOTE: The declared vibration emission value has
been measured in accordance with the standard test
methodandmaybeusedforcomparingonetoolwith
another.
NOTE: The declared vibration emission value
mayalsobeusedinapreliminaryassessmentof
exposure.
WARNING: The vibration emission during actual
use of the power tool can differ from the declared
emissionvaluedependingonthewaysinwhichthe
tool is used.
WARNING:Besuretoidentifysafetymeasures
to protect the operator that are based on an estima-
tion of exposure in the actual conditions of use (taking
accountofallpartsoftheoperatingcyclesuchas
the times when the tool is switched off and when it is
running idle in addition to the trigger time).
EC Declaration of Conformity
For European countries only
TheECdeclarationofconformityisincludedasAnnexA
to this instruction manual.

5ENGLISH
General power tool safety warnings
WARNING: Read all safety warnings, instruc-
tions, illustrations and specications provided
with this power tool. Failure to follow all instructions
listedbelowmayresultinelectricshock,reand/or
seriousinjury.
Save all warnings and instruc-
tions for future reference.
Theterm"powertool"inthewarningsreferstoyour
mains-operated(corded)powertoolorbattery-operated
(cordless) power tool.
Cordless impact driver safety
warnings
1. Hold the power tool by insulated gripping
surfaces, when performing an operation
where the fastener may contact hidden wiring.
Fastenerscontactinga"live"wiremaymake
exposed metal parts of the power tool "live" and
could give the operator an electric shock.
2. Always be sure you have a rm footing.
Be sure no one is below when using the tool in
high locations.
3. Hold the tool rmly.
4. Wear ear protectors.
5. Do not touch the bit or the workpiece immedi-
ately after operation. They may be extremely
hot and could burn your skin.
6. Keep hands away from rotating parts.
7. Use auxiliary handle(s), if supplied with the
tool.Lossofcontrolcancausepersonalinjury.
8. Hold the power tool by insulated gripping
surfaces, when performing an operation where
the cutting accessory may contact hidden
wiring.Cuttingaccessorycontactinga"live"
wiremaymakeexposedmetalpartsofthepower
tool "live" and could give the operator an electric
shock.
SAVE THESE INSTRUCTIONS.
WARNING: DO NOT let comfort or familiarity
with product (gained from repeated use) replace
strict adherence to safety rules for the subject
product.
MISUSE or failure to follow the safety rules stated
in this instruction manual may cause serious
personal injury.
Important safety instructions for
battery cartridge
1.
Before using battery cartridge, read all instruc-
tions and cautionary markings on (1) battery char-
ger, (2) battery, and (3) product using battery.
2. Do not disassemble battery cartridge.
3. If operating time has become excessively
shorter, stop operating immediately. It may
result in a risk of overheating, possible burns
and even an explosion.
4. If electrolyte gets into your eyes, rinse them
out with clear water and seek medical atten-
tion right away. It may result in loss of your
eyesight.
5. Do not short the battery cartridge:
(1) Do not touch the terminals with any con-
ductive material.
(2) Avoid storing battery cartridge in a con-
tainer with other metal objects such as
nails, coins, etc.
(3) Do not expose battery cartridge to water
or rain.
A battery short can cause a large current
ow, overheating, possible burns and even a
breakdown.
6. Do not store the tool and battery cartridge in
locations where the temperature may reach or
exceed 50 °C (122 °F).
7. Do not incinerate the battery cartridge even if
it is severely damaged or is completely worn
out. The battery cartridge can explode in a re.
8. Be careful not to drop or strike battery.
9. Do not use a damaged battery.
10.
The contained lithium-ion batteries are subject to
the Dangerous Goods Legislation requirements.
Forcommercialtransportse.g.bythirdparties,
forwarding agents, special requirement on pack-
aging and labeling must be observed.
For preparation of the item being shipped, consult-
ing an expert for hazardous material is required.
Pleasealsoobservepossiblymoredetailed
national regulations.
Tape or mask off open contacts and pack up the
batteryinsuchamannerthatitcannotmove
around in the packaging.
11. Follow your local regulations relating to dis-
posal of battery.
12. Use the batteries only with the products
specied by Makita. Installing the batteries to
non-compliantproductsmayresultinare,exces-
siveheat,explosion,orleakofelectrolyte.
SAVE THESE INSTRUCTIONS.
CAUTION: Only use genuine Makita batteries.
Use of non-genuine Makita batteries, or batteries that
havebeenaltered,mayresultinthebatterybursting
causingres,personalinjuryanddamage.Itwill
alsovoidtheMakitawarrantyfortheMakitatooland
charger.
Tips for maintaining maximum
battery life
1. Charge the battery cartridge before completely
discharged. Always stop tool operation and
charge the battery cartridge when you notice
less tool power.
2. Never recharge a fully charged battery car-
tridge. Overcharging shortens the battery
service life.
3. Charge the battery cartridge with room tem-
perature at 10 °C - 40 °C (50 °F - 104 °F). Let
a hot battery cartridge cool down before
charging it.

6ENGLISH
FUNCTIONAL
DESCRIPTION
CAUTION:
• Alwaysbesurethatthetoolisswitchedoffand
thebatterycartridgeisremovedbeforeadjust-
ing or checking function on the tool.
Installing or removing battery
cartridge
►Fig.1: 1. Red indicator 2. Button 3.Batterycartridge
CAUTION:
• Alwaysswitchoffthetoolbeforeinstallingor
removingofthebatterycartridge.
• Hold the tool and the battery cartridge rmly
when installing or removing battery car-
tridge.Failuretoholdthetoolandthebattery
cartridgermlymaycausethemtoslipoffyour
hands and result in damage to the tool and
batterycartridgeandapersonalinjury.
Toremovethebatterycartridge,slideitfromthetool
while sliding the button on the front of the cartridge.
Toinstallthebatterycartridge,alignthetongueonthe
batterycartridgewiththegrooveinthehousingandslip
itintoplace.Insertitallthewayuntilitlocksinplace
withalittleclick.Ifyoucanseetheredindicatoronthe
uppersideofthebutton,itisnotlockedcompletely.
CAUTION:
• Alwaysinstallthebatterycartridgefullyuntilthe
redindicatorcannotbeseen.Ifnot,itmayacci-
dentallyfalloutofthetool,causinginjurytoyou
orsomeonearoundyou.
• Donotinstallthebatterycartridgeforcibly.Ifthe
cartridgedoesnotslideineasily,itisnotbeing
insertedcorrectly.
Battery protection system
Thetoolisequippedwithabatteryprotectionsystem.
Thissystemautomaticallycutsoffpowertothemotorto
extendbatterylife.
Thetoolwillautomaticallystopduringoperationifthetooland/
orbatteryareplacedunderoneofthefollowingconditions:
• Overloaded:
The tool is operated in a manner that causes
ittodrawanabnormallyhighcurrent.
In this situation, release the switch trigger on
the tool and stop the application that caused
the tool to become overloaded. Then pull the
switch trigger again to restart.
Ifthetooldoesnotstart,thebatteryisover-
heated.Inthissituation,letthebatterycool
before pulling the switch trigger again.
• Lowbatteryvoltage:
Theremainingbatterycapacityistoolow
andthetoolwillnotoperate.Ifyoupullthe
switch trigger, the motor runs again but stops
soon. In this situation, remove and recharge
thebattery.
Switch action
►Fig.2: 1. Switch trigger
CAUTION:
• Beforeinsertingthebatterycartridgeintothe
tool,alwayschecktoseethattheswitchtrigger
actuatesproperlyandreturnstothe"OFF"
position when released.
Tostartthetool,simplypulltheswitchtrigger.Tool
speedisincreasedbyincreasingpressureontheswitch
trigger. Release the switch trigger to stop.
Lighting up the lamp
CAUTION:
• Do not look in the light or see the source of light
directly.
►Fig.3: 1. Lamp
Pull the switch trigger to light up the lamp. The lamp
keeps on lighting while the switch trigger is being
pulled.Thelampgoesoutjustaftertheswitchtriggeris
released.
NOTE:
• Useadryclothtowipethedirtoffthelensof
lamp. Be careful not to scratch the lens of lamp,
oritmaylowertheillumination.
Reversing switch action
►Fig.4: 1. Reversing switch lever
This tool has a reversing switch to change the direction
of rotation. Depress the reversing switch lever from the
A side for clockwise rotation or from the B side for coun-
terclockwise rotation.
When the reversing switch lever is in the neutral posi-
tion, the switch trigger cannot be pulled.
CAUTION:
• Alwayscheckthedirectionofrotationbefore
operation.
• Usethereversingswitchonlyafterthetool
comes to a complete stop. Changing the direc-
tionofrotationbeforethetoolstopsmaydam-
age the tool.
• Whennotoperatingthetool,alwayssetthe
reversing switch lever to the neutral position.

7ENGLISH
ASSEMBLY
CAUTION:
• Alwaysbesurethatthetoolisswitchedoffand
thebatterycartridgeisremovedbeforecarrying
outanyworkonthetool.
Installing or removing driver bit or
socket bit
►Fig.5
Useonlybitsthathasinsertingportionshowninthe
gure.
For tool with shallow bit hole
A=12 mm
B=9 mm
Use only these type of bit. Follow the
procedure (1).
(Note) Bit-piece is not necessary.
For tool with deep bit hole
To install these types of bits, follow
the procedure (1).
To install these types of bits, follow
the procedure (2).
(Note) Bit-piece is necessary for
installing the bit.
A=17 mm
B=14 mm
A=12 mm
B=9 mm
Procedure (1)
►Fig.6: 1. Bit 2. Sleeve
To install the bit, pull the sleeve in the direction of the
arrow and insert the bit into the sleeve as far as it will
go. Then release the sleeve to secure the bit.
Procedure (2)
In addition to the procedure(1) above, insert the bit-
piece into the sleeve with its pointed end facing in.
►Fig.7: 1. Bit 2. Bit-piece 3. Sleeve
To remove the bit, pull the sleeve in the direction of the
arrow and pull the bit out.
NOTE:
• If the bit is not inserted deep enough into the
sleeve, the sleeve will not return to its original
position and the bit will not be secured. In this
case,tryre-insertingthebitaccordingtothe
instructions above.
• Afterinsertingthebit,makesurethatitisrmly
secured. If it comes out, do not use it.
Hook (Optional accessory)
►Fig.8: 1. Groove 2. Hook 3. Screw
Thehookisconvenientfortemporarilyhangingthetool.
This can be installed on either side of the tool.
To install the hook, insert it into a groove in the tool
housing on either side and then secure it with a screw.
To remove, loosen the screw and then take it out.
OPERATION
►Fig.9
CAUTION:
• Donotcovervents,oritmaycauseoverheating
and damage to the tool.
►Fig.10: 1. Vent
Theproperfasteningtorquemaydifferdependingupon
the kind or size of the screw/bolt, the material of the
workpiece to be fastened, etc. The relation between fas-
teningtorqueandfasteningtimeisshowninthegures.
Standard bolt
N m
(kgf.cm)
(S)
Fastening time
Fastening torque
Proper fastening torque
.
High tensile bolt
N m
(kgf.cm)
(S)
Fastening time
Fastening torque
Proper fastening torque
.
Holdthetoolrmlyandplacethepointofthedriverbit
inthescrewhead.Applyforwardpressuretothetoolto
the extent that the bit will not slip off the screw and turn
the tool on to start operation.

8ENGLISH
NOTE:
• Use the proper bit for the head of the screw/bolt
thatyouwishtouse.
• WhenfasteningM8orsmallerscrew,carefully
adjustpressureontheswitchtriggersothatthe
screw is not damaged.
• Hold the tool pointed straight at the screw.
• Iftheimpactforceistoostrongyoutighten
the screw for a time longer than shown in the
gures,thescreworthepointofthedriverbit
maybeoverstressed,stripped,damaged,etc.
Beforestartingyourjob,alwaysperformatest
operation to determine the proper fastening time
foryourscrew.
Thefasteningtorqueisaffectedbyawidevarietyof
factorsincludingthefollowing.Afterfastening,always
check the torque with a torque wrench.
1. Whenthebatterycartridgeisdischargedalmost
completely,voltagewilldropandthefastening
torque will be reduced.
2. Driver bit or socket bit
Failure to use the correct size driver bit or socket
bit will cause a reduction in the fastening torque.
3. Bolt
• Eventhoughthetorquecoefcientandthe
class of bolt are the same, the proper fasten-
ing torque will differ according to the diame-
ter of bolt.
• Even though the diameters of bolts are the
same, the proper fastening torque will differ
accordingtothetorquecoefcient,theclass
of bolt and the bolt length.
4. The manner of holding the tool or the material
of driving position to be fastened will affect the
torque.
5. Operating the tool at low speed will cause a reduc-
tion in the fastening torque.
MAINTENANCE
CAUTION:
• Alwaysbesurethatthetoolisswitchedoffand
thebatterycartridgeisremovedbeforeattempt-
ing to perform inspection or maintenance except
for the following troubleshooting related to the
light.
• Never use gasoline, benzine, thinner, alcohol
or the like. Discoloration, deformation or cracks
mayresult.
To maintain product SAFETY and RELIABILITY, repairs,
anyothermaintenanceoradjustmentshouldbeper-
formedbyMakitaAuthorizedServiceCenters,always
using Makita replacement parts.
OPTIONAL
ACCESSORIES
CAUTION:
• These accessories or attachments are recom-
mendedforusewithyourMakitatoolspecied
inthismanual.Theuseofanyotheraccessories
orattachmentsmightpresentariskofinjuryto
persons.Onlyuseaccessoryorattachmentfor
its stated purpose.
Ifyouneedanyassistanceformoredetailsregard-
ingtheseaccessories,askyourlocalMakitaService
Center.
• Screw bits
• Socket bits
• Plasticcarryingcase
• Makitagenuinebatteryandcharger
• Bit-piece
• Drill bits with1/4"
• Drillchuckassembly
• Hook
NOTE:
• Someitemsinthelistmaybeincludedinthe
toolpackageasstandardaccessories.They
maydifferfromcountrytocountry.

9SLOVENŠČINA
SLOVENŠČINA (Originalna navodila)
TEHNIČNI PODATKI
Model TD126D TD127D
Zmogljivosti Strojnivijak 4 mm - 8 mm
Standardnivijak 5 mm - 14 mm
Visokonateznivijak 5 mm - 12 mm
Hitrost brez obremenitve (min-1)0 - 2.400 0 - 2.300
Udarci na minuto 0 - 3.000
Celotnadolžina 173 mm
Netoteža 1,4 kg 1,5 kg
Nazivna napetost D.C. 14,4 V D.C. 18 V
• Kernenehnoopravljamoraziskaveinrazvijamosvojeizdelke,selahkotehničnipodatkivtemdokumentu
spremenijobrezobvestila.
• Tehničnipodatkiselahkorazlikujejooddržavedodržave.
• Težaselahkorazlikujegledenapriključke,vključnozakumulatorskobaterijo.Najlažjainnajtežjakombinacijav
skladu s postopkom EPTA 01/2014 sta prikazani v preglednici.
Uporabna akumulatorska baterija in polnilnik
Baterijskivložek Model D.C. 14,4 V BL1413G / BL1415G
Model D.C. 18 V BL1813G / BL1815G
Polnilnik DC18WA
• Nekaterezgorajnavedeneakumulatorskebaterijeinpolnilnikimordavvašidržaviprebivališčanisonavoljo.
OPOZORILO: Uporabljajte le zgoraj navedene akumulatorske baterije in polnilnike. Uporaba drugih
akumulatorskihbaterijinpolnilnikovlahkopovzročitelesnepoškodbein/alipožar.
Namen uporabe
Orodjejenamenjenozavijačenjevles,kovinoin
plastiko.
Hrup
Tipični,zAocenjenivrednostihrupagledenaEN62841:
Model TD126D
Ravenzvočnegatlaka(LpA): 92 dB (A)
Ravenzvočnemoči(LWA): 103 dB (A)
Odstopanje(K):3dB(A)
Model TD127D
Ravenzvočnegatlaka(LpA): 93 dB (A)
Ravenzvočnemoči(LWA): 104 dB (A)
Odstopanje(K):3dB(A)
Uporabljajte zaščito za sluh
Vibracije
Skupnevrednostivibracij(vektorskavsotatrehosi)po
EN62841:
Model TD126D
Delovninačin:udarnoprivijanjepritrjevalnikovz
največjozmogljivostjoorodja
Oddajanjetresljajev(ah): 9,5 m/s2
Odstopanje(K):2,0m/s2
Model TD127D
Delovninačin:udarnoprivijanjepritrjevalnikovz
največjozmogljivostjoorodja
Oddajanjetresljajev(ah): 8,5 m/s2
Odstopanje(K):2,0m/s2
OPOMBA:Navedenavrednostoddajanjavibracij
jebilaizmerjenavskladusstandardnimimetodami
testiranjainselahkouporabljazaprimerjavoorodij.
OPOMBA:Navedenavrednostoddajanjavibra-
cijselahkouporabljatudipripredhodnioceni
izpostavljenosti.
OPOZORILO:Oddajanjevibracijmeddejansko
uporaboelektričnegaorodjaselahkorazlikujeod
navedenevrednostioddajanja,odvisnoodnačina
uporabeorodja.
OPOZORILO:Upravljavecmorazalastnozaš-
čitopoznativarnostneukrepe,kitemeljijonaoceni
izpostavljenostivdejanskihpogojihuporabe(upošte-
vajočcelotendelovniprocesvtrenutkih,kojeorodje
izključenoinkodelujevprostemtekuzdodatkom
časasprožitve).
Izjava o skladnosti ES
Samo za evropske države
IzjavaESoskladnostijevključenavdodatkuA,kije
priložentemnavodilomzauporabo.

10 SLOVENŠČINA
Splošna varnostna opozorila za
električno orodje
OPOZORILO:
Preberite vsa varnostna opozo-
rila in navodila s slikami in tehničnimi podatki, ki so
dobavljeni skupaj z električnim orodjem. Ob neupo-
števanjuspodajnavedenihnavodilobstajanevarnost
električnegaudara,požarain/alihudihtelesnihpoškodb.
Shranite vsa opozorila in navo-
dila za poznejšo uporabo.
Izraz„električnoorodje“vopozorilihsenanašanavašeelektrično
orodje(skablom)alibaterijskoelektričnoorodje(brezkabla).
Varnostna opozorila za brezžični
udarni vijačnik
1. Če obstaja nevarnost, da bi s pritrjevalnikom
prerezali skrito električno napeljavo, držite ele-
ktrično orodje na izoliranih držalnih površinah.
Obstikuzvodnikipodnapetostjodobijonapetost
vsineizoliranikovinskidelielektričnegaorodja,
zaradičesarlahkopridedoelektričnegaudara.
2. Vedno zagotovite, da imate trden oprijem na
podlagi, kjer stojite.
Kadar uporabljate orodje na višini, se prepri-
čajte, da spodaj ni nikogar.
3. Trdno držite orodje.
4. Uporabljajte zaščito za sluh.
5. Takoj po končani obdelavi se ne dotikajte
nastavka ali obdelovanca. Lahko sta zelo
vroča in povzročita opekline kože.
6. Ne približujte rok vrtečim se delom.
7.
Uporabite pomožne ročaje, če so dobavljeni z orod-
jem.Izgubanadzoralahkopovzročipoškodbeoseb.
8. Če obstaja nevarnost, da bi z rezilnim orodjem
prerezali skrito električno napeljavo, držite ele-
ktrično orodje na izoliranih držalnih površinah.
Obstikuzvodnikipodnapetostjodobijonapetost
vsineizoliranikovinskidelielektričnegaorodja,
zaradičesarlahkouporabnikutrpielektričniudar.
SHRANITE TA NAVODILA.
OPOZORILO:
NE dovolite, da bi zaradi udobnej-
šega dela ali znanja o uporabi izdelka (pridobljenega
z večkratno uporabo) opustili strogo upoštevanje
varnostnih zahtev v okviru pravilne uporabe orodja.
ZLORABA ali neupoštevanje varnostnih zahtev v teh navo-
dilih za uporabo lahko povzroči resne telesne poškodbe.
Pomembna varnostna navodila za
akumulatorsko baterijo
1. Pred uporabo baterijskega vložka preberite
vsa navodila in opozorilne oznake na (1) pol-
nilniku akumulatorja, (2) akumulatorju in (3)
izdelku, ki uporablja akumulator.
2. Ne razstavljajte baterijskega vložka.
3. Če se je čas delovanja občutno skrajšal, takoj
prenehajte uporabljati orodje. V nasprotnem
primeru lahko pride do pregretja, morebitnih
opeklin in celo eksplozije.
4. Če pride elektrolit v stik z očmi, jih sperite s
čisto vodo in takoj poiščite zdravniško pomoč.
Posledica je lahko izguba vida.
5. Ne povzročite kratkega stika baterijskega
vložka:
(1) Ne dotikajte se priključkov s kakršnim
koli prevodnim materialom.
(2) Izogibajte se shranjevanju baterijskega
vložka v vsebniku z drugimi kovinskimi
predmeti kot so žeblji, kovanci itn.
(3) Ne izpostavljajte baterijskega vložka vodi
ali dežju.
Kratek stik akumulatorja lahko povzroči velik
električni tok, pregrevanje, morebitne opekline
in celo okvaro.
6. Ne shranjujte orodja in baterijskega vložka
na mestih, kjer lahko temperatura doseže ali
preseže 50 °C.
7. Ne sežigajte baterijskega vložka, tudi če je
hudo poškodovan ali v celoti izpraznjen.
Baterijski vložek lahko v ognju eksplodira.
8. Poskrbite, da akumulator ne bo izpostavljen
padcem ali udarcem.
9. Ne uporabljajte poškodovanih akumulatorjev.
10. Priložene litij-ionske baterije ustrezajo zahte-
vam zakonodaje v zvezi z nevarnim blagom.
Zakomercialneprevoze,npr.tiste,kijihopravljajo
tretjestrankeincarinskiposredniki,jetrebaupoštevati
posebnezahtevevzvezizembalažoinoznačevanjem.
Medpostopkompripravenaodpremoizdelkaseje
trebaposvetovatisstrokovnjakomzanevarnesnovi.Pri
temupoštevajtetudipodrobnejšenacionalnepredpise.
Odprtestikeoblepitezlepilnimtrakomalijihdru-
gačezaščitite,baterijopazapakirajtetako,dasev
embalažinemorepremikati.
11. Upoštevajte lokalne uredbe glede odlaganja
akumulatorja.
12. Baterije uporabljajte le z izdelki, ki jih določi
Makita.Čenamestitebaterijevneskladneizdelke,
lahkopridedopožara,pregrevanja,eksplozijeali
puščanjaelektrolita.
SHRANITE TA NAVODILA.
POZOR:
Uporabljajte le originalne baterije
Makita.ČeuporabljateneoriginalnebaterijeMakitaali
baterije,kisobilespremenjene,lahkopridedoeksplo-
zijebaterijeinposledičnodopožara,telesnihpoškodb
alimaterialneškode.Stakšnouporabobostetudiraz-
veljaviligarancijoMakitazaorodjeinpolnilnikMakita.
Nasveti za ohranjanje največje
zmogljivosti akumulatorja
1. Napolnite baterijski vložek, preden se v celoti
izprazni. Ko opazite, da ima orodje manjšo
moč, vedno ustavite delovanje orodja in napol-
nite baterijski vložek.
2. Nikoli znova ne polnite popolnoma napol-
njenega baterijskega vložka. Prenapolnjenje
skrajša življenjsko dobo akumulatorja.
3. Baterijski vložek s sobno temperaturo pol-
nite pri temperaturi okolja od 10 °C do 40 °C.
Počakajte, da se vroč baterijski vložek pred
polnjenjem ohladi.
11 SLOVENŠČINA
OPIS DELOVANJA
POZOR:
• Predvsakonastavitvijoalipregledomdelovanja
orodjaseprepričajte,dajeletoizključenoinda
jeakumulatorskabaterijaodstranjena.
Nameščanje ali odstranjevanje
akumulatorske baterije
►Sl.1: 1.Rdečiindikator2. Gumb 3.Baterijskivložek
POZOR:
• Vednoizklopiteorodje,predennamestiteali
odstraniteakumulatorskobaterijo.
• Kadar nameščate ali odstranjujete akumula-
torsko baterijo, trdno držite orodje in akumu-
latorsko baterijo.Čeorodjainakumulatorske
baterijenedržitetrdno,selahkozgodi,davam
zdrsnetaizrok,posledicapajepoškodbaorodja
inakumulatorskebaterijetertelesnapoškodba.
Zaodstranitevakumulatorskebaterijeizorodjajo
premakniteizorodja,obtempapremaknitegumbna
sprednjistraniakumulatorskebaterije.
Privstavljanjuakumulatorskebaterijeporavnajtejezi-
čeknaakumulatorskibaterijizutoromnaohišjuinga
potisnitevležišče.Akumulatorskobaterijovstavitedo
konca,daserazločnozaskoči.Čeviditerdečiindikator
nazgornjistranigumba,tanipopolnomazaklenjen.
POZOR:
• Vednonamestiteakumulatorskobaterijo,tako
dardečiindikatornivečviden.Četegane
upoštevate,lahkoakumulatornepričakovano
izpadeizorodjainpoškodujevasaliosebev
neposrednibližini.
• Nenameščajteakumulatorskebaterijessilo.Če
seakumulatorskabaterijanezaskočizlahka,ni
pravilnovstavljena.
Sistem za zaščito akumulatorja
Orodjejeopremljenossistemomzazaščitoakumula-
torja.Sistemsamodejnoprekinenapajanjemotorja,da
sepodaljšaživljenjskadobaakumulatorja.
Orodjesebosamodejnozaustavilomeddelovanjem,
čestaorodjein/alibaterijazamenjanapodnaslednjimi
pogoji:
• Preobremenjeno:
Orodjedelujenanačin,kipovzroča,da
povlečenenormalnovisoktok.
Vtakemprimerusprostitesprožilnostikalo
naorodjuingaprenehajteuporabljatina
način,zaradikateregajeprišlodopreobre-
menitve.Natoznovapovlecitesprožilno
stikalo,dagazaženete.
Česeorodjenezažene,jeakumulator
pregret. V tem primeru pustite, da se aku-
mulator ohladi, preden znova pritisnete
sprožilnostikalo.
• Nizkanapetostakumulatorja:
Napolnjenostakumulatorjajeprenizka,zato
orodjenedeluje.Čepovlečetesprožilno
stikalo,semotorzažene,vendarsekmalu
ustavi. V tem primeru akumulator odstranite
in ga napolnite.
Delovanje stikala
►Sl.2: 1.Sprožilnostikalo
POZOR:
• Predenvstaviteakumulatorskobaterijovorodje
sevednoprepričajte,dajestikalobrezhibno
indasevračavpoložajzaizklop(OFF),koga
spustite.
Zazagonorodjapovlecitesprožilnostikalo.Hitrost
orodjasepovečazapovečanitlaknasprožilnemsti-
kalu.Zaizkloporodjaspustitesprožilnostikalo.
Prižiganje lučke
POZOR:
• Neglejteneposrednovlučkoalivirsvetlobe.
►Sl.3: 1. Svetilka
Povlecitesprožilnostikalozavkloplučke.Lučkasveti,
doklerjepritisnjenosprožilnostikalo.Lučkaugasne,ko
spustitesprožilnostikalo.
OPOMBA:
• Umazanijonasteklulučkeobrišitessuhokrpo.
Pazite,daneopraskatesteklalučke,kerpraske
občutnozmanjšajosvetilnost.
Stikalo za preklop smeri vrtenja
►Sl.4: 1.Preklopnaročicazaobratnosmer
Toorodjejeopremljenospreklopnikomzaspremembo
smerivrtenja.Ročicopreklopnikasmerivrtenjapritisnite
vsmeriAzavrtenjevsmeriurinegakazalcainvsmeri
Bzavrtenjevobratnismeriurinegakazalca.
Kojepreklopnostikalovnevtralnempoložaju,seglav-
nega stikala ne da premakniti.
POZOR:
• Predobratovanjemvednopreveritesmer
vrtenja.
• Stikalozaspreminjanjesmerivrtenjauporabite
šele,kosestrojpopolnomaustavi.Česmer
vrtenjaspremenite,predensestrojustavi,seta
lahkopoškoduje.
• Koorodjaneuporabljate,vednopotisnite
preklopnostikalovnevtralenpoložaj.

12 SLOVENŠČINA
MONTAŽA
POZOR:
• Predvsakoizvedbodelanaorodjuseprepri-
čajte,dajeletoizključenoindajeakumulator-
skabaterijaodstranjena.
Nameščanje ali odstranjevanje
vijačnega ali natičnega nastavka
►Sl.5
Uporabljajtesamonastavkestakšnimuvajalnimdelom,
kotjeprikazanonasliki.
Za orodje s plitvo odprtino za
nastavke
A=12 mm
B=9 mm
Uporabljajte samo te vrste nastavkov.
Sledite postopku (1).
(Opomba) Nastavek ni potreben.
Za orodje z globoko odprtino za
nastavke
Za namestitev teh nastavkov
sledite postopku (1).
Za namestitev teh nastavkov sledite
postopku (2).
(Opomba) Za namestitev nastavka je
potreben del nastavka.
A=17 mm
B=14 mm
A=12 mm
B=9 mm
Postopek (1)
►Sl.6: 1. Nastavek 2.Vložek
Zanamestitevnastavkapovlecitestročnicovsmeripuš-
čiceinporinitevanjonastavekdokonca.Natoizpustite
stročnicointakoksirajtenastavek.
Postopek (2)
Dodatnokpostopku(1)zgoraj,vstaviteizenačevalno
konicovstročnicoskoničastimdelomobrnjenim
navznoter.
►Sl.7: 1. Nastavek 2.Izenačevalnakonica3.Vložek
Zaodstranitevnastavkapovlecitestročnicovsmeri
puščiceinnastavekizvlecite.
OPOMBA:
• Čenastavekvstročniconivstavljendovoljglo-
boko,sestročnicanebovrnilavprvotnipoložaj
innastaveknebopravilnoblokiranvsvojem
ležišču.Vtemprimeruposkušajtenastavek
vstavitiznovakotjeopisanozgoraj.
• Konamestitenastavek,seprepričajte,alije
trdnoprivit.Čegalahkoizvlečete,nezačnitez
vijačenjem.
Kavelj (dodatna oprema)
►Sl.8: 1. Utor 2.Kljuka3.Vijak
Kaveljjepriročenpripomočekzazačasnoobešanje
stroja.Namestitegalahkonakaterokolistranstroja.
Kaveljvstavitevutornalevialidesnistraniohišjastroja
ingaprivijtezvijakom.Dagaodstranite,odvijtevijakin
ga izvlecite.
DELOVANJE
►Sl.9
POZOR:
• Nepokrivajteprezračevalnihodprtin,sajboto
povzročilopregrevanjeinpoškodbeorodja.
►Sl.10: 1. Izpuh
Optimalenzateznimomentjemeddrugimodvisenod
velikostiintrdnostivijakatermaterialov,kijihspajamoz
vijačnimizvezami.Zvezomedzateznimmomentomin
časomprivijanjakažejoslike.
Standardni vijak
N m
(kgf.cm)
(S)
Čas pritrjevanja
Pritrdilni moment
Pravilni pritrdilni moment
.
1,02,0 3,0
80
(816)
60
(612)
40
(408)
20
(204)
Visokonatezni vijak
N m
(kgf.cm)
(S)
Čas pritrjevanja
Pritrdilni moment
Pravilni pritrdilni moment
.
1,02,0 3,0
100
(1.020)
80
(816)
60
(612)
40
(408)
20
(204)
Trdnoprimiteorodjeinnastavitekonicovijačnega
nastavkanaglavovijaka.Pritisniteorodjedotemere,
danastaveknemorezdrsnitizvijaka,tervklopiteorodje
zazačetekdela.

13 SLOVENŠČINA
OPOMBA:
• Uporabitepravilninastavekzaglavovijaka/
zatiča,kigaželiteuporabiti.
• PrizategovanjuvijakovdimenzijeM8oz.manj-
šihprevidnoprilagoditepritisknasprožilno
stikalo,danepoškodujetevijaka.
• Orodjedržitenaravnostnavijak.
• Čejeudarnasilaprevelikainobprekoračitvi
časaprivijanja,kijenavedenvtabeli,lahkovijak
alinastavekpreobremenitealipoškodujete.
Optimalenčasprivijanjabostenajlažjedoločili
spredhodnimposkusnimvijačenjem.Danebi
poškodovalinastavkaalivijaka,opraviteposku-
snovijačenje.
Napritrdilnimomentvplivavelikorazličnihdejavnikov,
vključnoznaslednjimi.Poprivijanjuvednopreverite
navorzmomentnimključem.
1. Kadarseakumulatorizprazni,seznižanapetostin
s tem tudi zatezni moment.
2. Vijačnialinatičninastavek
Uporabavijačnegaalinatičneganastavka
napačnedimenzijepovzročizmanjšanjezate-
znega momenta.
3. Vijak
• Čepravstakoličniknavorainvrstavijaka
enaka, se bo pravilni pritrdilni moment razli-
kovalgledenapremervijaka.
• Čepravsopremerivijakovenaki,sebo
pravilni pritrdilni moment razlikoval glede na
količniknavora,vrstoindolžinovijaka.
4. Načindržanjaorodjaalipoložajmateriala,kiga
boste pritrdili, bo vplival na navor.
5. Zateznimomentsezmanjšatudivprimeru,če
vijakprivijateznizkimštevilomvrtljajev.
VZDRŽEVANJE
POZOR:
• Predenselotitepregledovanjaalivzdrževanja
orodja,razenvprimeruodpravljanjanapak,ki
sopovezanezlučko,sevednoprepričajte,ali
jeorodjeizklopljenoinakumulatorskabaterija
odstranjena.
• Nikolineuporabljajtebencina,razredčila,alko-
holaalipodobnega.Vtemprimeruseorodje
lahko razbarva, deformira, lahko pa tudi nasta-
nejorazpoke.
VARNOinZANESLJIVOdelovanjetegaizdelkabo
zagotovljenole,čebostepopravila,vzdrževanjein
nastavitveprepustilipooblaščenemuservisuzaorodja
Makita,kivgrajujeizključnooriginalnenadomestne
dele.
DODATNI PRIBOR
POZOR:
• Tadodatnipriboralipripomočkisopredvideni
zauporabozorodjemMakita,kijeopisanov
teh navodilih za uporabo. Pri uporabi drugega
priboraalipripomočkovobstajanevarnosttele-
snihpoškodb.Dodatnipriboralipripomočke
uporabljajtesamozanavedeninamen.
Zavečinformacijododatnempriboruinopremise
obrnitenanajbližjipooblaščeniMakitaservis.
• Vijačninastavki
• Vtičninastavki
• Plastičenkovčekzaprenašanje
• Originalna akumulator in polnilnik Makita
• Nastavek
• Vrtalni nastavki z 1/4"
• Nadomestna vrtalna glava
• Kavelj
OPOMBA:
• Nekateri predmeti na seznamu so lahko pri-
loženiorodjukotstandardnipribor.Lahkose
razlikujeoddržavedodržave.

14 ALBANIAN
ALBANIAN (Udhëzimet origjinale)
SPECIFIKIMET
Modeli TD126D TD127D
Kapacitetet Vida e makinerisë 4 mm - 8 mm
Bulon standard 5 mm - 14 mm
Bulon për shtrëngim të fortë 5 mm - 12 mm
Shpejtësiapangarkesë(min-1)0 - 2400 0 - 2300
Goditjenëminutë 0 - 3000
Gjatësiaepërgjithshme 173 mm
Pesha neto 1,4 kg 1,5 kg
Tensioni nominal DC 14,4 V DC 18 V
• Përshkaktëprogramittonëtëvazhdueshëmtëkërkim-zhvillimit,specikimetqëjepenkëtumundtë
ndryshojnëpadhënënjoftim.
• Specikimetmundtëndryshojnënganjërishtetnëtjetrin.
• Peshamundtëndryshojënëvarësitëaksesorit(ëve),përfshirëkutinëebaterisë.Kombinimimëilehtëdhemë
i rëndë, sipas Procedurës EPTA 01/2014, tregohet në tabelë.
Kutia e aplikueshme e baterisë dhe karikuesi
Kutiaebaterisë Modeli D.C.14,4 V BL1413G / BL1415G
Modeli D.C.18 V BL1813G / BL1815G
Karikuesi DC18WA
• Disaprejkutivetëbaterivedhekarikuesvetërendituramëlartmundtëmosjenëtëdisponueshmenëvarësitë
zonëskujubanoni.
PARALAJMËRIM: Përdorni vetëm kutitë e baterisë dhe karikuesit e listuar më lart. Përdorimi i
karikuesvedhekutivetëtjeratëbaterisëmundtëshkaktojëlëndimdhe/osezjarr.
Përdorimi i synuar
Pajisjaështësynuarpërvendosjenevidavenëdru,
metal dhe plastikë.
Zhurma
Niveli tipik i zhurmës A, i matur sipas EN62841:
Modeli TD126D
Niveli i presionit të zërit (LpA): 92 dB (A)
Niveli i fuqisë së zërit (LWA): 103 dB (A)
Pasiguria(K):3dB(A)
Modeli TD127D
Niveli i presionit të zërit (LpA): 93 dB (A)
Niveli i fuqisë së zërit (LWA): 104 dB (A)
Pasiguria(K):3dB(A)
Mbani mbrojtëse për veshët
Dridhjet
Vleratotaleedridhjeve(shumaevektoritmetreakse)
përcaktohet sipas EN62841:
Modeli TD126D
Regjimiipunës:shtrëngimimegoditjei
mbërthyesvemekapacitetinmaksimaltëpajisjes
Emetimiidridhjeve(ah): 9,5 m/s2
Pasiguria(K):2,0m/s2
Modeli TD127D
Regjimiipunës:shtrëngimimegoditjei
mbërthyesvemekapacitetinmaksimaltëpajisjes
Emetimiidridhjeve(ah): 8,5 m/s2
Pasiguria(K):2,0m/s2
SHËNIM:Vleraedeklaruareemetimevetëdridhjeve
është matur sipas metodës standarde të testimit dhe
mundtëpërdoretpërtëkrahasuarnjëvegëlmenjë
tjetër.
SHËNIM:Vleraedeklaruareemetimevetëdridhjeve
mundtëpërdoretpërnjëvlerësimparapraktë
ekspozimit.
PARALAJMËRIM:Emetimetedridhjeve
gjatëpërdorimitaktualtëveglëselektrikemundtë
ndryshojnëngavleratedeklaruaratëemetimevenë
varësitëmënyravesesipërdoretvegla.
PARALAJMËRIM:Sigurohuniqëtëidentikoni
masatesigurisëpërmbrojtjenepërdoruesit,që
bazohennëvlerësimineekspozimitndajkushteve
aktualetëpërdorimit(dukemarrëparasyshtëgjitha
pjesëteciklittëfunksionimitsiatokurveglaështë
ekurdhepunonpaprerë,ashtuedhekohëne
përdorimit).
Deklarata e konformitetit me KE-në
Vetëm për shtetet evropiane
DeklarataekonformitetitmeKE-nëpërfshihetsi
ShtojcaAnëkëtëmanualpërdorimi.

15 ALBANIAN
Paralajmërimet e përgjithshme për
sigurinë e veglës
PARALAJMËRIM
:Lexoni të gjitha
paralajmërimet për sigurinë, udhëzimet, ilustrimet dhe
specikimet e dhëna me këtë vegël elektrike.Mosndjekja
etëgjithaudhëzimevetërendituramëposhtëmundtë
shkaktojëgoditjeelektrike,zjarrdhe/oselëndimtërëndë.
Ruajini të gjitha paralajmërimet
dhe udhëzimet për të ardhmen.
Termi“vegëlelektrike”nëparalajmërimeireferohet
veglës elektrike që përdoret e lidhur në prizë (me
kordon) ose veglës së përdorur me bateri (pa kordon).
Paralajmërime për sigurinë e
trapanit me goditje me bateri
1.
Mbajeni pajisjen elektrike te sipërfaqet e izoluara
kapëse kur të jeni duke kryer një veprim në të cilin
mbërthyesi mund të kontaktojë me tela të fshehur.
Nësembërthyesitprekinnjëtelmerrymëatëherë
pjesëtmetaliketëpajisjeselektrikeelektrizohendhe
mundt’ijapinpunëtoritgoditjeelektrike.
2. Gjithmonë sigurohuni që të keni bazament të
fortë qëndrimi.
Sigurohuni që të mos ketë njeri poshtë ndërkohë
që e përdorni pajisjen në vende të larta.
3. Mbajeni veglën fort.
4. Mbani mbrojtëse për veshët.
5.
Mos e prekni punton apo materialin e punës
menjëherë pas kryerjes së punës. Ato mund të jenë
jashtëzakonisht të nxehta dhe mund t’ju djegin lëkurën.
6. Mbajini duart larg pjesëve rrotulluese.
7. Përdorni dorezën(at) ndihmëse nëse jepen
bashkë me pajisjen.Humbjaekontrollitmundtë
shkaktojëdëmtimepersonale.
8. Mbajeni pajisjen elektrike te sipërfaqet e
izoluara kur të jeni duke kryer një veprim në të
cilin aksesori prerës mund të kontaktojë me
tela të fshehur.Nëseaksesoriprerëspreknjë
telmerrymë,atëherëpjesëtmetaliketëveglës
elektrikeelektrizohendhemundt‘ishkaktojnë
përdoruesitgoditjeelektrike.
RUAJINI KËTO UDHËZIME.
PARALAJMËRIM:
MOS lejoni që njohja ose
familjarizimi me produktin (të tuara nga përdorimi
i shpeshtë) të zëvendësojnë zbatimin me përpikëri
të rregullave të sigurisë për produktin në fjalë.
KEQPËRDORIMI ose mosndjekja e rregullave të
sigurisë të dhëna në këtë manual përdorimi mund
të shkaktojnë dëmtime të rënda personale.
Udhëzime të rëndësishme rreth
sigurisë për kutinë e baterisë
1. Përpara se ta përdorni kutinë e baterisë, lexoni
të gjitha udhëzimet dhe shënimet e masave
parandaluese te (1) ngarkuesi i baterisë, (2)
bateria dhe (3) produkti që përdor baterinë.
2. Mos e hiqni kutinë e baterisë.
3. Nëse koha e përdorimit është shkurtuar jashtë
mase, ndalojeni punën menjëherë. Kjo mund
të rezultojë në rrezik mbinxehjeje, djegie të
mundshme, madje edhe shpërthim.
4. Nëse ju futen elektrolite në sy, shpëlajini
sytë me ujë të pastër dhe kërkoni ndihmë
mjekësore menjëherë. Kjo gjë mund të
rezultojë në humbje të shikimit.
5.
Mos bëni lidhje të shkurtër me kutinë e baterisë:
(1) Mos i prekni terminalet me materiale
përcjellëse.
(2) Shmangni ruajtjen e kutisë së baterisë
në një kuti me objekte të tjera metalike, si
gozhdë, monedha etj.
(3) Mos e ekspozoni kutinë e baterisë në ujë
ose shi.
Qarku i shkurtër i baterisë mund të shkaktojë
qarkullim të madh të rrymës elektrike, mbinxehje,
djegie të mundshme dhe madje prishje.
6.
Mos e ruani pajisjen dhe kutinë e baterisë në vende
ku temperatura mund të arrijë ose tejkalojë 50 °C.
7.
Mos e digjni kutinë e baterisë, edhe nëse është
shumë e dëmtuar ose është konsumuar plotësisht.
Kutia e baterisë mund të shpërthejë në zjarr.
8.
Bëni kujdes që të mos e rrëzoni ose ta godisni baterinë.
9. Mos përdorni bateri të dëmtuar.
10.
Bateritë e përfshira të litiumit, u nënshtrohen
kërkesave të legjislacionit për mallrat e rrezikshme.
Për transport tregtar p.sh. nga palë të treta,
agjentëtëndërmjetëm,duhettëndiqenkërkesa
specikembipaketimindheetiketimin.
Përpërgatitjeneartikullitpërtransport,ështëi
nevojshëmkonsultimiinjëekspertipërmateriale
tërrezikshme.Julutemi,ndiqnigjithashtu
rregulloretmegjasëmëtëdetajuaravendore.
Mbulonimengjitëseosemaskonikontaktete
zhveshuradhepaketojenibaterinënëmënyrëtë
tillë që të mos lëvizë në paketim.
11.
Zbatoni rregulloret lokale rreth asgjësimit të baterisë.
12.
Përdorini bateritë vetëm me produktet e
specikuara nga Makita. Instalimi i baterive në
produktetëpapajtueshmemundtërezultojënëzjarr,
nxehtësitëlartë,shpërthimoserrjedhjetëelektroliteve.
RUAJINI KËTO UDHËZIME.
KUJDES:
Përdorni vetëm bateri origjinale
Makita.Përdorimiibaterivejo-origjinaleMakitaose
bateriveqëmundtëjenëmodikuar,mundtërezultojë
nëmarrjenakëtëbaterisë,lëndimepersonaleapo
dëmtime.Kjodotëanulojëgjithashtuedhegarancinë
e Makita-s për veglën e Makita-s dhe ngarkuesin.
Këshilla për të ruajtur jetëgjatësinë
maksimale të baterisë
1.
Ngarkojeni baterinë përpara se të shkarkohet
plotësisht. Gjithmonë ndaloni punën me pajisjen dhe
ngarkoni baterinë kur vëreni ulje të fuqisë së pajisjes.
2. Asnjëherë mos e ringarkoni baterinë e
ngarkuar plotësisht. Mbingarkimi shkurton
jetëgjatësinë e shërbimit të baterisë.
3. Ngarkojeni baterinë në temperaturën e dhomës
në 10 °C - 40 °C. Lëreni kutinë e nxehtë të
baterisë të ftohet përpara se ta ngarkoni atë.

16 ALBANIAN
PËRSHKRIMI I PUNËS
KUJDES:
• Sigurohunigjithmonëqëveglatëjetëekur
dhekutiaebaterisëtëjetëhequrpërparaseta
rregulloni apo t'i kontrolloni funksionet e veglës.
Instalimi ose heqja e kutisë së
baterisë
►Fig.1: 1. Treguesi i kuq 2. Butoni 3.Kutiaebaterisë
KUJDES:
• Fikenigjithmonëveglënpërparasetëinstaloni
ose hiqni kutinë e baterisë.
• Mbajeni fort veglën dhe kutinë e baterisë
kur vendosni ose hiqni kutinë e baterisë.
Mosmbajtjaforteveglësdhekutisësëbaterisë
mundtëbëjëqëatot'jurrëshqasinngaduart
dhetësjellëdëmtimineveglësdhetëkutisësë
baterisë, si dhe lëndimin e personit.
Për të hequr kutinë e baterisë, rrëshqiteni atë nga vegla
ndërsarrëshqisnibutoninnëpjesënepërparmetë
kutisë së baterisë.
Përtëvendosurkutinëebaterisë,bashkërenditnigjuhëzën
e kutisë së baterisë me kanalin e folesë dhe rrëshqiteni
për ta futur. Futeni deri në fund, derisa të kërcasë dhe të
bllokohet në vend. Nëse shikoni treguesin e kuq në anën e
sipërmetëbutonit,ajonukështëbllokuarplotësisht.
KUJDES:
• Vendosenigjithnjëplotësishtkutinëebaterisë
derisatreguesiikuqtëmosduket.Nësejo,ajo
mundtëbjerëaksidentalishtngavegladukeju
lënduarjuosepersonatpranë.
• Mos e vendosni me forcë kutinë e baterisë.
Nësekutianukrrëshqetmelehtësibrenda,ajo
nuk është futur siç duhet.
Sistemi i mbrojtjes së baterisë
Veglaështëepajisurmenjësistempërmbrojtjene
baterisë.Kysistemndërpretautomatikishtenergjinënë
motorpërtëzgjaturjetëgjatësinëebaterisë.
Vegladotëndalojëautomatikishtgjatëpunësnëse
vegladhe/osebateriajanëvendosursipasnjëprej
kushteve të mëposhtme:
• I mbingarkuar:
Veglapërdoretnënjëmënyrëqëebënatë
tëmarrërrymëtëlartëanormale.
Nësendodhkjo,lëshonikëmbëzëneçelësit
në vegël dhe ndaloni përdorimin që shkaktoi
mbingarkesëneveglës.Pastajtërhiqni
përsëri këmbëzën e çelësit për ta rindezur.
Nëse vegla nuk ndizet, bateria është mbinxehur.
Nësendodhkjo,lërenibaterinëtëftohetpërpara
se ta tërhiqni sërish këmbëzën e çelësit.
• Tension i ulët i baterisë:
Kapacitetiimbeturibaterisëështëshumë
i ulët dhe vegla nuk punon. Nëse tërhiqni
këmbëzën e çelësit, motori ndizet sërish,
porketshpejt.Nëkëtësituatë,hiqnidhe
ngarkoni baterinë.
Veprimi i ndërrimit
►Fig.2: 1.Këmbëzaeçelësit
KUJDES:
• Përpara se ta vendosni kutinë e baterisë në
vegël,kontrollonigjithmonëpërtëparënëse
çelësi është në pozicionin e duhur dhe nëse
kthehetnëpozicionin"OFF"(kur)kurlëshohet.
Përtandezurveglën,thjeshttërhiqniçelësin.
Shpejtësiaeveglësrritetdukerriturpresioninnëçelës.
Lëshoni çelësin për ta ndaluar.
Ndezja e llambës
KUJDES:
• Mos e shikoni direkt dritën ose burimin e dritës.
►Fig.3: 1. Llamba
Tërhiqni çelësin për të ndezur llambën. Llamba vazhdon
tëndriçojëgjatëtërheqjessëkëmbëzëssëçelësit.
Llambaketpakpasikëmbëzaeçelësitlëshohet.
SHËNIM:
• Përdorninjëleckëtëthatëpërtëfshirë
papastërtitëngalentetellambës.Bënikujdes
tëmosgërvishtnilentetellambës,oseajodotë
ulë ndriçimin.
Çelësi i ndryshimit të veprimit
►Fig.4: 1.Levapërndryshiminelëvizjesnëanëne
kundërt
Veglakanjëçelësndryshimipërtëndryshuardrejtimin
errotullimit.Shtypnilevëneçelësittëndryshimitnga
anaApërrrotulliminnëdrejtiminorarosengaanaBpër
rrotulliminnëdrejtiminkundërorar.
Kurlevaeçelësittëndryshimitështënëpozicionin
neutral, çelësi nuk mund të tërhiqet.
KUJDES:
• Kontrollonigjithmonëdrejtiminerrotullimit
përpara përdorimit.
• Përdorniçelësinendryshimitvetëmpasivegla
tëndalojëplotësisht.Ndryshimiidrejtimittë
rrotullimitpërparasetëndalojëveglamundtë
dëmtojëveglën.
• Kurnukepërdorniveglën,vendosenigjithmonë
levëneçelësittëndryshimitnëpozicionin
neutral.

17 ALBANIAN
MONTIMI
KUJDES:
• Sigurohunigjithmonëqëveglatëjetëekur
dhekutiaebaterisëtëjetëhequrpërparasetë
kryenindonjëpunënëvegël.
Instalimi ose heqja e majës së
kaçavidës ose majës së çelësit
►Fig.5
Përdornivetëmpuntoqëkanëpjesënqëmundtëfutet
siçtregohetnëgurë.
Për vegël me vrimë të cekët të puntos
A=12 mm
B=9 mm
Përdorni vetëm këtë lloj puntoje.
Ndiqni procedurën (1).
(Shënim) Maja nuk nevojitet.
Për vegël me vrimë të thellë të puntos
Për të instaluar këto lloje puntosh,
ndiqni procedurën (1).
Për të instaluar këto lloje puntosh,
ndiqni procedurën (2).
(Shënim) Maja nevojitet për
vendosjen e puntos.
A=17 mm
B=14 mm
A=12 mm
B=9 mm
Procedura (1)
►Fig.6: 1. Punto 2. Bokulla
Përtainstaluarmajën,tërhiqnibokullënnëdrejtimin
eshigjetësdhefusnimajënnëbokullderinëfund.Më
paslëshojeniatëpërtasiguruarmajën.
Procedura (2)
Pas procedurës (1) më lart, fusni përshtatësin e puntos
nëbokullmemajënemprehurtëdrejtuarngabrenda.
►Fig.7: 1. Punto 2.Pjesëepuntos3. Bokulla
Përtahequrpunton,tërhiqnibokullënnëdrejtimtë
shigjetësdhetërhiqenipuntonjashtë.
SHËNIM:
• Nësemajanukfutetaqthellësaduhetnë
bokull,ajonukdotëkthehetnëpozicionin
llestardhemajanukdotëjetëesigurt.Në
këtërast,përpiqunitëfusnisërishmajënsipas
udhëzimeve të mësipërme.
• Pas instalimit të puntos, sigurohuni që është
siguruarfort.Nëseajodel,mosepërdornipër
sëdyti.
Grepi (aksesor shtesë)
►Fig.8: 1. Brazda 2. Grepi 3. Vida
Grepi shërben për ta varur veglën përkohësisht. Grepi
mund të montohet në cilëndo anë të veglës.
Përtëinstaluargrepin,futeninënjëkanalnëfolenëe
veglësnënjërënanëdhemëpassigurojeniatëmenjë
vidë.Përtahequr,lirojenividëndhemëpasnxirreni.
PËRDORIMI
►Fig.9
KUJDES:
• Mosimbulonivrimateventilimit,sepsekjo
mundtëshkaktojëmbinxehjeosemundtë
dëmtojëveglën.
►Fig.10: 1.Burimiiajrimit
Forcaepërshtatshmeeshtrëngimitmundtëndryshojënë
varësitëllojitosepërmasëssëvidës/bulonit,materialii
punësqëdotështrëngohetetj.Lidhjandërmjetforcëssë
shtrëngimitdhekohëssështrëngimittregohetnëgura.
Bulon standard
N.m.
(kgf.cm)
(S)
Koha e shtrëngimit
Forca e shtrëngimit
Forca e duhur e shtrëngimit
1,02,0 3,0
80
(816)
60
(612)
40
(408)
20
(204)
Bulon për shtrëngim të fortë
N.m.
(kgf.cm)
(S)
Koha e shtrëngimit
Forca e shtrëngimit
Forca e duhur e shtrëngimit
1,02,0 3,0
100
(1020)
80
(816)
60
(612)
40
(408)
20
(204)
Mbajeniveglënpaelëvizurdhevendosnimajëne
kaçavidësnëkokënevidës.Ushtronipresionshtytës
mbivegëlderinëmasënqëmajatëmosrrëshqasënga
vida dhe ndizni veglën për të nisur punën.

18 ALBANIAN
SHËNIM:
• Përdornimajëneduhurpërkokënevidës/
bulonit që dëshironi të përdorni.
• GjatështrëngimittëvidësM8osevidavemëtë
vogla,rregullonimekujdesforcëneushtruar
mbikëmbëzëneçelësit,nëmënyrëqëvidatë
mos dëmtohet.
• Mbajeniveglëntëdrejtuarmirëdrejtvidës.
• Nëseforcaegoditjesështëshumëemadhe,ju
eshtrëngonividënpërnjëkohëmëtëgjatënga
satregohetnëgura,vidaosemajaekaçavidës
mundtështrembërohet,hiqet,dëmtohet,etj.
Përparasetënisnipunën,kryenigjithmonënjë
testim për të përcaktuar kohën e përshtatshme
tështrëngimitpërvidëntuaj.
Forca shtrënguese ndikohet nga disa faktorë përfshirë
simëposhtë.Passhtrëngimit,kontrollonigjithmonë
rrotullimin me çelës me shtrëngim.
1. Nëse bateria shkarkohet gati plotësisht,
tensionidotëbjerëdheforcashtrënguesedotë
zvogëlohet.
2. Majaekaçavidësdheçelësit
Mospërdorimiimajëssëkaçavidësoseçelësit
mepërmasatesaktadotëshkaktojënjëuljenë
forcën shtrënguese.
3. Buloni
• Megjithësekoecientiishtrëngimitdhe
kategoriaebulonitjanëtënjëjta,forcae
duhureshtrëngimitdotëndryshojënëvarësi
të diametrit të bulonit.
• Megjithësediametratebulonavejanëtë
njëjta,forcaeshtrëngimitdotëndryshojënë
varësitëkoecientittëforcëssështrëngimit,
kategorisëdhegjatësisësëbulonit.
4. Mënyraembajtjessëveglësosematerialittë
pozicionitqëdotështrëngohetdotëndikojnënë
forcën e shtrëngimit.
5. Përdorimiiveglësmeshpejtësitëulëtdotë
reduktojëforcënshtrënguese.
MIRËMBAJTJA
KUJDES:
• Sigurohunigjithmonëqëveglatëjetëkurdhe
tëjetëhequrkutiaebaterisëpërparasetë
kryeniinspektiminapomirëmbajtjen,përveç
rregullimittëdefektevetëmëposhtmenëlidhje
me dritën.
• Mos përdorni kurrë benzinë, benzinë pastrimi,
hollues,alkooldhetëngjashme.Mundtë
shkaktoniçngjyrosje,deformimeosekrisje.
PërtëruajturSIGURINËdheQËNDRUESHMËRINË,
riparimetdheçdomirëmbajtjeaporregullimtjetërduhen
kryerngaqendrateautorizuaratëshërbimittëMakita-s,
dukepërdorurgjithnjëpjesëkëmbimitëMakita-s.
AKSESORË OPSIONALË
KUJDES:
• Këtaaksesorëoseshtojcarekomandohen
për përdorim me veglën Makita të përcaktuar
në këtë manual. Përdorimi i aksesorëve apo
shtojcavetëtjerandryshengakëtomundtë
përbëjërreziklëndimi.Aksesorëtoseshtojcat
përdorinivetëmpërqëlliminetyretëpërcaktuar.
Nësekeninevojëpërmëshumëtëdhënanëlidhje
meaksesorët,pyesniqendrënvendoretëshërbimittë
Makita-s.
• Majaevidës
• Punto formë çelësi
• Kutiambajtëseplastike
• BateridhengarkuesorigjinalMakita
• Përshtatësi i puntos
• Punto shpimi me 1/4"
• Grupi i mandrinës së shpimit
• Grepi
SHËNIM:
• Disaartikujtëlistësmundtëpërfshihennë
paketën e veglës si aksesorë standardë. Ato
mundtëndryshojnënganjërishtetnëtjetrin.

19 БЪЛГАРСКИ
БЪЛГАРСКИ (Превод на оригиналните инструкции)
СПЕЦИФИКАЦИИ
Модел TD126D TD127D
Техническивъзможности Машиненвинт 4мм-8мм
Стандартенболт 5мм-14мм
Усиленболт 5мм-12мм
Оборотибезтовар(мин-1)0 - 2 400 0 - 2 300
Ударавминута 0 - 3 000
Общадължина 173мм
Нетотегло 1.4кг 1.5кг
Номиналнонапрежение Постояннонапрежение14.4V Постояннонапрежение18V
• Порадинашатанепрекъснатанаучно-развойнадейностпосоченитетукспецификациимогатдабъдат
промененибезпредизвестие.
• Спецификациитеможедасаразличнивразличнитедържави.
• Теглотоможедасеразличававзависимостотпринадлежността(ите),включителноакумулаторната
батерия.Най-лекатаинай-тежкатакомбинациявсъответствиеспроцедуратанаEPTA01/2014сапока-
занивтаблицата.
Приложима акумулаторна батерия и зарядно устройство
Акумулаторнабатерия Моделзапостояннонапреже-
ние14,4V
BL1413G / BL1415G
Моделзапостояннонапре-
жение18V
BL1813G / BL1815G
Зарядноустройство DC18WA
• Някоиотакумулаторнитебатерииизаряднитеустройства,посоченипо-горе,можеданесаналичнив
зависимостотрегионанаместоживеене.
ПРЕДУПРЕЖДЕНИЕ: Използвайте само посочените по-горе акумулаторни батерии и зарядни
устройства.Използванетонадругиакумулаторнибатерииизарядниустройстваможедапричининараня-
ванеи/илипожар.
Предназначение
Инструментътепредназначензазавиваненавин-
товевдърво,металипластмаса.
Шум
Обичайнотосреднопретегленонивонашума,опре-
деленосъгласноEN62841:
Модел TD126D
Нивоназвуковоналягане(LpA): 92 dB (A)
Нивоназвуковамощност(LWA): 103 dB (A)
Коефициентнанеопределеност(K):3dB(A)
Модел TD127D
Нивоназвуковоналягане(LpA): 93 dB (A)
Нивоназвуковамощност(LWA): 104 dB (A)
Коефициентнанеопределеност(K):3dB(A)
Използвайте предпазни средства за слуха
Вибрации
Общатастойностнавибрациите(сумаоттриосови
вектора),определенасъгласноEN62841:
Модел TD126D
Работенрежим:ударнозатяганенакрепежи
домаксималниякапацитетнаинструмента
Нивонавибрациите(ah):9.5м/с2
Коефициентнанеопределеност(K):2.0м/с2
Модел TD127D
Работенрежим:ударнозатяганенакрепежи
домаксималниякапацитетнаинструмента
Нивонавибрациите(ah):8.5м/с2
Коефициентнанеопределеност(K):2.0м/с2
ЗАБЕЛЕЖКА:
Обявенотонивонавибрациитееизме-
реновсъответствиесъсстандартниметодизаизпитване
иможедасеизползвазасравняваненаинструменти.
ЗАБЕЛЕЖКА:Освентова,обявенотонивона
вибрациитеможедасеизползвазапредвари-
телнаоценканавреднотовъздействие.
ПРЕДУПРЕЖДЕНИЕ:Нивотонавибрациите
приработаселектрическияинструментможеда
серазличаваотобявенатастойноствзависимост
отначинанаизползваненаинструмента.
ПРЕДУПРЕЖДЕНИЕ:Задължителноопре-
делетепредпазнимеркизазащитанаоператора
възоснованаоценканарискавреалниработни
условия(катосевзематпредвидвсичкисъставни
частинаработнияцикъл,катонапримермомента
наизключваненаинструмента,работатанапра-
зенход,кактоивреметоназадействане).

20 БЪЛГАРСКИ
ЕО декларация за съответствие
Само за европейските страни
ЕОдекларациятазасъответствиеевключенакато
АнексAкъмтазиинструкциязаупотреба.
Общи предупреждения за
безопасност при работа с
електрически инструменти
ПРЕДУПРЕЖДЕНИЕ: Прочетете всички
предупреждения, инструкции, илюстрации и
спецификации за безопасността, предоставени
с този електрически инструмент.Принеспаз-
ваненаизброенитепо-долуинструкцииимаопас-
ностоттоковудар,пожари/илитежконараняване.
Запазете всички предупрежде-
ния и инструкции за справка в
бъдеще.
Терминът"електрическиинструмент"впредупреж-
дениятасеотнасязавашияинструмент(скабел
завключваневмрежата)илиработещнабатерии
(безжичен)електрическиинструмент.
Предупреждения за безопасна
работа с акумулаторен ударен
винтоверт
1. Дръжте електрическия инструмент за изо-
лираните и нехлъзгави повърхности, когато
има опасност закрепващият елемент да
допре в скрити кабели.Акозакрепващите
елементиседопратдопроводникподнапре-
жение,токътможедапреминепрезметалните
частинаинструментаида"удари"работещия.
2. Винаги осигурявайте добра опора за кра-
ката си.
Когато използвате инструмента на високи
места, се убедете, че отдолу няма никой.
3. Дръжте инструмента здраво.
4. Носете предпазни средства за слуха.
5. Не докосвайте накрайника или обработва-
ния детайл непосредствено след работа. Те
могат да бъдат много горещи и да изгорите
кожата си.
6. Дръжте ръцете си далеч от въртящите се
части.
7. Използвайте помощната дръжка(и), ако е
доставена с инструмента.Загубатанакон-
тролможедапричининараняване.
8. Дръжте електрическия инструмент за изо-
лираните и нехлъзгави повърхности, когато
има опасност режещият диск да допре в
скрити кабели.Акорежещиятдискдокосне
проводникподнапрежение,токътможедапре-
минепрезметалнитечастинаелектрическия
инструментида"удари"работещия.
ЗАПАЗЕТЕ НАСТОЯЩИТЕ
ИНСТРУКЦИИ.
ПРЕДУПРЕЖДЕНИЕ: НЕ позволявайте
комфорта от познаването на продукта (при-
добит при дългата му употреба) да замени
стриктното спазване на правилата за безопас-
ност за въпросния продукт.
НЕПРАВИЛНАТА УПОТРЕБА и неспазването на
правилата за безопасност, посочени в насто-
ящото ръководство за експлоатация, може да
доведе до тежки наранявания.
Важни инструкции за безопасност
за акумулаторната батерия
1. Преди да използвате акумулаторната бате-
рия, прочетете всички инструкции и преду-
предителни маркировки на (1) зарядното
устройство за батериите, (2) за батериите и
(3) за използващия батериите продукт.
2. Не разглобявайте акумулаторните батерии.
3. Ако мощността на машината намалее много,
веднага спрете да работите. Това може да
доведе до риск от прегряване, до възможни
изгаряния и даже до експлозии.
4. Ако в очите ви попадне електролит, изплак-
нете ги с чиста вода и веднага потърсете
лекарска помощ. Това може да доведе до
загуба на зрението ви.
5. Не давайте на късо акумулаторните
батерии:
(1) Не докосвайте клемите с проводими
материали.
(2) Избягвайте съхраняването на акумула-
торните батерии в контейнер с други
метални предмети като пирони, монети
и други подобни.
(3) Не излагайте акумулаторните батерии
на вода или дъжд.
Закъсяването на акумулаторна батерия
може да доведе до протичане на много
силен ток, до прегряване, до възможни изга-
ряния и даже до разпадане на батерията.
6.
Не съхранявайте инструмента и акумулатор-
ните батерии на места, където температурата
може да достигне или надмине 50 °C (122 °F).
7. Не изгаряйте акумулаторните батерии
даже и ако те са сериозно повредени или
напълно износени. Акумулаторната батерия
може да експлодира в огън.
8. Внимавайте да не изпускате или удряте
акумулаторната батерия.
9. Не използвайте повредени акумулаторни
батерии.
10. Съдържащите се литиево-йонни акумула-
торни батерии са обект на изискванията на
законодателството за опасни стоки.
Притърговскипревози,напр.оттретистрани,
спедитори,трябвадасеспазватспециални
изискваниязаопакованеиетикетиране.
Заподготовканаартикула,койтотрябвада
бъдеизпратен,енеобходимаконсултацияс
експертпоопаснитематериали.Моля,спаз-
вайтеиевентуалнопо-подробнитенационални
разпоредби.
Other manuals for TD126D
5
This manual suits for next models
4
Table of contents
Languages:
Other Makita Impact Driver manuals

Makita
Makita BTD144 User manual

Makita
Makita tw0200 User manual

Makita
Makita DTD134 User manual

Makita
Makita 6918DWD User manual

Makita
Makita 6952 User manual

Makita
Makita BTD144 User manual

Makita
Makita DTP141Z User manual

Makita
Makita DTW1001 User manual

Makita
Makita TD020D User manual

Makita
Makita XT281S User manual

Makita
Makita 6908D User manual

Makita
Makita 6991DWDE User manual

Makita
Makita TD003G User manual

Makita
Makita BTD200 User manual

Makita
Makita TD0101 Manual

Makita
Makita BTD133 User manual

Makita
Makita TW0350 User manual

Makita
Makita TD090D User manual

Makita
Makita TD090D User manual

Makita
Makita BTD141 Quick start guide