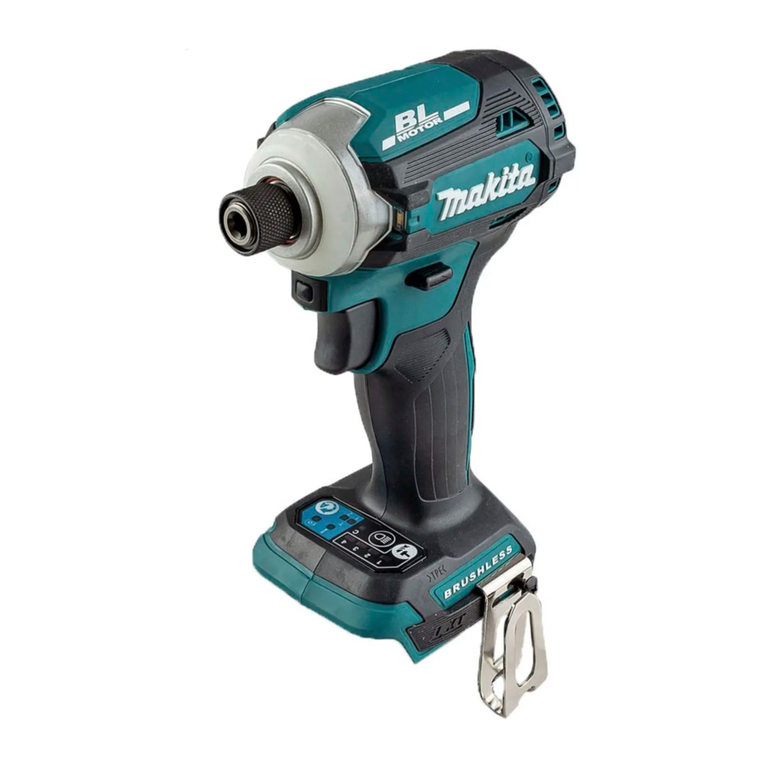
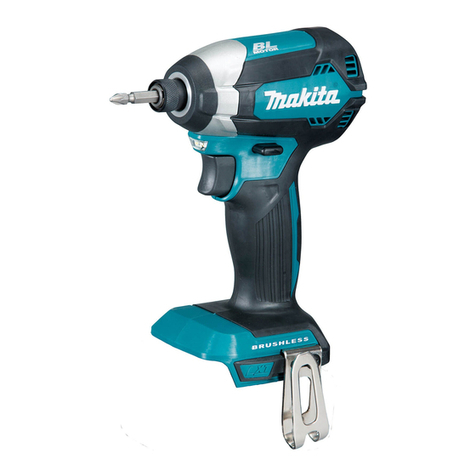
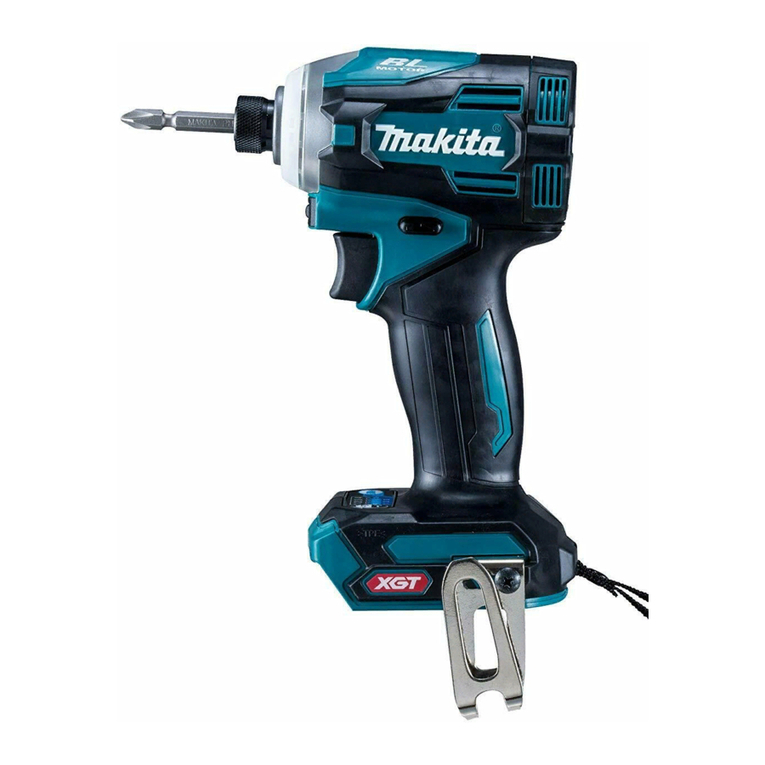
Makita DTD152Z User manual

DTD152
EN Cordless Impact Driver INSTRUCTION MANUAL 5
SL Akumulatorski udarni vijačnik NAVODILA ZA UPORABO 11
SQ Trapan me goditje me bateri MANUALI I PËRDORIMIT 17
BG Акумулаторен ударен
винтоверт
РЪКОВОДСТВО ЗА
ЕКСПЛОАТАЦИЯ 23
HR Akumulatorski udarni zavrtač PRIRUČNIK S UPUTAMA 30
МК Безжичен ударен одвртувач УПАТСТВО ЗА УПОТРЕБА 36
SR Бежични ударни одвртач УПУТСТВО ЗА УПОТРЕБУ 42
RO Maşină de înşurubat cu
impact cu acumulator MANUAL DE INSTRUCŢIUNI 48
UK Бездротовий ударний
шуруповерт
ІНСТРУКЦІЯ З
ЕКСПЛУАТАЦІЇ 54
RU Аккумуляторный ударный
шуруповерт
РУКОВОДСТВО ПО
ЭКСПЛУАТАЦИИ 61

3
1
2
Fig.1
1
Fig.2
1
2
Fig.3
1
Fig.4
1
Fig.5
1
AB
Fig.6
Fig.7
2
1
Fig.8
2

123
Fig.9
2
3
1
Fig.10
Fig.11
1
Fig.12
1
2
Fig.13
2
1
3
Fig.14
1
Fig.15
1
2
Fig.16
3

1
2
Fig.17
4

5ENGLISH
ENGLISH (Original instructions)
SPECIFICATIONS
Model: DTD152
Fastening capacities Machine screw 4 mm - 8 mm
Standard bolt 5 mm - 16 mm
High tensile bolt 5 mm - 12 mm
No load speed 0 - 2,900 min-1
Impacts per minute 0 - 3,500 min-1
Overall length 137 mm
Rated voltage D.C. 18 V
Battery cartridge BL1815, BL1815N, BL1820,
BL1820B
BL1830, BL1830B, BL1840,
BL1840B, BL1850, BL1850B,
BL1860B
Net weight 1.3 kg 1.5 kg
• Duetoourcontinuingprogramofresearchanddevelopment,thespecicationshereinaresubjecttochange
without notice.
• Specicationsandbatterycartridgemaydifferfromcountrytocountry.
• Weight, with battery cartridge, according to EPTA-Procedure 01/2003
Intended use
The tool is intended for screw driving in wood, metal
and plastic.
Noise
The typical A-weighted noise level determined accord-
ing to EN60745:
Sound pressure level (LpA) : 93 dB(A)
Sound power level (LWA) : 104 dB (A)
Uncertainty (K) : 3 dB(A)
WARNING: Wear ear protection.
Vibration
The vibration total value (tri-axial vector sum) deter-
mined according to EN60745:
Work mode: impact tightening of fasteners of the maxi-
mum capacity of the tool
Vibration emission (ah) : 10.5 m/s2
Uncertainty (K) : 1.5 m/s2
NOTE: The declared vibration emission value has
been measured in accordance with the standard test
method and may be used for comparing one tool with
another.
NOTE: The declared vibration emission value
may also be used in a preliminary assessment of
exposure.
WARNING: The vibration emission during actual
use of the power tool can differ from the declared
emission value depending on the ways in which the
tool is used.
WARNING: Be sure to identify safety measures
to protect the operator that are based on an estima-
tion of exposure in the actual conditions of use (taking
account of all parts of the operating cycle such as
the times when the tool is switched off and when it is
running idle in addition to the trigger time).
EC Declaration of Conformity
For European countries only
Makita declares that the following Machine(s):
Designation of Machine: Cordless Impact Driver
Model No./ Type: DTD152
Conforms to the following European Directives:
2006/42/EC
They are manufactured in accordance with the following
standard or standardized documents: EN60745
Thetechnicalleinaccordancewith2006/42/ECis
available from:
Makita, Jan-Baptist Vinkstraat 2, 3070, Belgium
18.3.2015
Yasushi Fukaya
Director
Makita, Jan-Baptist Vinkstraat 2, 3070, Belgium
General power tool safety warnings
WARNING: Read all safety warnings and
all instructions. Failure to follow the warnings and
instructionsmayresultinelectricshock,reand/or
seriousinjury.

6ENGLISH
Save all warnings and instruc-
tions for future reference.
The term "power tool" in the warnings refers to your
mains-operated (corded) power tool or battery-operated
(cordless) power tool.
Cordless impact driver safety
warnings
1. Hold power tool by insulated gripping sur-
faces, when performing an operation where
the fastener may contact hidden wiring.
Fasteners contacting a "live" wire may make
exposed metal parts of the power tool "live" and
could give the operator an electric shock.
2. Always be sure you have a rm footing.
Be sure no one is below when using the tool in
high locations.
3. Hold the tool rmly.
4. Wear ear protectors.
5. Do not touch the bit or the workpiece immedi-
ately after operation. They may be extremely
hot and could burn your skin.
6. Keep hands away from rotating parts.
SAVE THESE INSTRUCTIONS.
WARNING: DO NOT let comfort or familiarity
with product (gained from repeated use) replace
strict adherence to safety rules for the subject
product.
MISUSE or failure to follow the safety rules stated
in this instruction manual may cause serious
personal injury.
Important safety instructions for
battery cartridge
1. Before using battery cartridge, read all instruc-
tions and cautionary markings on (1) battery
charger, (2) battery, and (3) product using
battery.
2. Do not disassemble battery cartridge.
3. If operating time has become excessively
shorter, stop operating immediately. It may
result in a risk of overheating, possible burns
and even an explosion.
4. If electrolyte gets into your eyes, rinse them
out with clear water and seek medical atten-
tion right away. It may result in loss of your
eyesight.
5. Do not short the battery cartridge:
(1) Do not touch the terminals with any con-
ductive material.
(2) Avoid storing battery cartridge in a con-
tainer with other metal objects such as
nails, coins, etc.
(3) Do not expose battery cartridge to water
or rain.
A battery short can cause a large current
ow, overheating, possible burns and even a
breakdown.
6. Do not store the tool and battery cartridge in
locations where the temperature may reach or
exceed 50 °C (122 °F).
7. Do not incinerate the battery cartridge even if
it is severely damaged or is completely worn
out. The battery cartridge can explode in a re.
8. Be careful not to drop or strike battery.
9. Do not use a damaged battery.
10. The contained lithium-ion batteries are subject
to the Dangerous Goods Legislation require-
ments.
For commercial transports e.g. by third parties,
forwarding agents, special requirement on pack-
aging and labeling must be observed.
For preparation of the item being shipped, consult-
ing an expert for hazardous material is required.
Please also observe possibly more detailed
national regulations.
Tape or mask off open contacts and pack up the
battery in such a manner that it cannot move
around in the packaging.
11. Follow your local regulations relating to dis-
posal of battery.
SAVE THESE INSTRUCTIONS.
CAUTION: Only use genuine Makita batteries.
Use of non-genuine Makita batteries, or batteries that
have been altered, may result in the battery bursting
causingres,personalinjuryanddamage.Itwill
also void the Makita warranty for the Makita tool and
charger.
Tips for maintaining maximum
battery life
1. Charge the battery cartridge before completely
discharged. Always stop tool operation and
charge the battery cartridge when you notice
less tool power.
2. Never recharge a fully charged battery car-
tridge. Overcharging shortens the battery
service life.
3. Charge the battery cartridge with room tem-
perature at 10 °C - 40 °C (50 °F - 104 °F). Let
a hot battery cartridge cool down before
charging it.
4. Charge the battery cartridge if you do not use
it for a long period (more than six months).

7ENGLISH
FUNCTIONAL
DESCRIPTION
CAUTION: Always be sure that the tool is
switched off and the battery cartridge is removed
before adjusting or checking function on the tool.
Installing or removing battery
cartridge
CAUTION: Always switch off the tool before
installing or removing of the battery cartridge.
CAUTION: Hold the tool and the battery car-
tridge rmly when installing or removing battery
cartridge. Failure to hold the tool and the battery
cartridgermlymaycausethemtoslipoffyourhands
and result in damage to the tool and battery cartridge
andapersonalinjury.
►Fig.1: 1. Red indicator 2. Button 3. Battery cartridge
To remove the battery cartridge, slide it from the tool
while sliding the button on the front of the cartridge.
To install the battery cartridge, align the tongue on the
battery cartridge with the groove in the housing and slip
it into place. Insert it all the way until it locks in place
with a little click. If you can see the red indicator on the
upper side of the button, it is not locked completely.
CAUTION: Always install the battery cartridge
fully until the red indicator cannot be seen. If not,
itmayaccidentallyfalloutofthetool,causinginjuryto
you or someone around you.
CAUTION: Do not install the battery cartridge
forcibly. If the cartridge does not slide in easily, it is
not being inserted correctly.
Battery protection system
Lithium-ion battery with star marking
►Fig.2: 1. Star marking
Lithium-ion batteries with a star marking are equipped
with a protection system. This system automatically
cuts off power to the tool to extend battery life.
The tool will automatically stop during operation if the
tool and/or battery are placed under one of the following
conditions:
Overloaded:
The tool is operated in a manner that causes it to draw
an abnormally high current.
In this situation, turn the tool off and stop the application
that caused the tool to become overloaded. Then turn
the tool on to restart.
If the tool does not start, the battery is overheated. In
this situation, let the battery cool before turning the tool
on again.
Low battery voltage:
The remaining battery capacity is too low and the tool
will not operate. In this situation, remove and recharge
the battery.
Indicating the remaining battery
capacity
Only for battery cartridges with "B" at the end of the
model number
►Fig.3: 1. Indicator lamps 2. Check button
Press the check button on the battery cartridge to indi-
cate the remaining battery capacity. The indicator lamps
light up for few seconds.
Indicator lamps Remaining
capacity
Lighted Off Blinking
75% to 100%
50% to 75%
25% to 50%
0% to 25%
Charge the
battery.
The battery
may have
malfunctioned.
NOTE: Depending on the conditions of use and the
ambient temperature, the indication may differ slightly
from the actual capacity.
Switch action
►Fig.4: 1. Switch trigger
CAUTION: Before installing the battery car-
tridge into the tool, always check to see that the
switch trigger actuates properly and returns to
the "OFF" position when released.
To start the tool, simply pull the switch trigger. Tool
speed is increased by increasing pressure on the switch
trigger. Release the switch trigger to stop.
Lighting up the front lamp
►Fig.5: 1. Lamp
CAUTION: Do not look in the light or see the
source of light directly.
Pull the switch trigger to light up the lamp. The lamp
keeps on lighting while the switch trigger is being pulled.
The lamp goes out 10 -15 seconds after releasing the
trigger.
NOTE: Use a dry cloth to wipe the dirt off the lens of
the lamp. Be careful not to scratch the lens of lamp, or
it may lower the illumination.

8ENGLISH
Reversing switch action
►Fig.6: 1. Reversing switch lever
CAUTION: Always check the direction of
rotation before operation.
CAUTION: Use the reversing switch only after
the tool comes to a complete stop. Changing the
direction of rotation before the tool stops may dam-
age the tool.
CAUTION: When not operating the tool,
always set the reversing switch lever to the neu-
tral position.
This tool has a reversing switch to change the direction
of rotation. Depress the reversing switch lever from the
A side for clockwise rotation or from the B side for coun-
terclockwise rotation.
When the reversing switch lever is in the neutral posi-
tion, the switch trigger cannot be pulled.
ASSEMBLY
CAUTION: Always be sure that the tool is
switched off and the battery cartridge is removed
before carrying out any work on the tool.
Installing or removing driver bit/
socket bit
►Fig.7
Use only driver bit/socket bit that has inserting portion
showninthegure.Donotuseanyotherdriverbit/
socket bit.
For tool with shallow driver bit hole
A=12mm
B=9mm
Use only these type of driver
bit. Follow the procedure
1. (Note) Bit-piece is not
necessary.
For tool with deep driver bit hole
A=17mm
B=14mm
To install these types of driver
bits, follow the procedure 1.
A=12mm
B=9mm
To install these types of driver
bits, follow the procedure 2.
(Note) Bit-piece is necessary
for installing the bit.
Procedure 1
For tool without one-touch type sleeve
►Fig.8: 1. Driver bit 2. Sleeve
To install the driver bit, pull the sleeve in the direction of
the arrow and insert the driver bit into the sleeve as far
as it will go.
Then release the sleeve to secure the driver bit.
For tool with one-touch type sleeve
To install the driver bit, insert the driver bit into the
sleeve as far as it will go.
Procedure 2
In addition to Procedure 1, insert the bit-piece into the
sleeve with its pointed end facing in.
►Fig.9: 1. Driver bit 2. Bit-piece 3. Sleeve
To remove the driver bit, pull the sleeve in the direction
of the arrow and pull the driver bit out.
NOTE: If the driver bit is not inserted deep enough
into the sleeve, the sleeve will not return to its original
position and the driver bit will not be secured. In this
case, try re-inserting the bit according to the instruc-
tions above.
NOTE:Whenitisdifculttoinsertthedriverbit,pull
the sleeve and insert it into the sleeve as far as it will
go.
NOTE: After inserting the driver bit, make sure that it
isrmlysecured.Ifitcomesout,donotuseit.
Installing hook
►Fig.10: 1. Groove 2. Hook 3. Screw
The hook is convenient for temporarily hanging the tool.
This can be installed on either side of the tool. To install
the hook, insert it into a groove in the tool housing on
either side and then secure it with a screw. To remove,
loosen the screw and then take it out.
OPERATION
►Fig.11
The proper fastening torque may differ depending upon
the kind or size of the screw/bolt, the material of the
workpiece to be fastened, etc. The relation between fas-
teningtorqueandfasteningtimeisshowninthegures.
Proper fastening torque for standard bolt
120
100
80
60
40
20
M14
M12
M10
M8
N•m
2
1
(kgf•cm)
(1224)
(1020)
(816)
(612)
(408)
(204)
0
140
(1428)
123
M16
M16
M14
M12
M10
M8
1. Fastening time (second) 2. Fastening torque

9ENGLISH
Proper fastening torque for high tensile bolt
0
123
M12
M10
160
(1632)
140
(1428)
120
(1224)
100
(1020)
80
(816)
60
(612)
40
(408)
20
(204)
M8
M12
M10
M8
N•m
(kgf•cm)
2
1
1. Fastening time (second) 2. Fastening torque
Holdthetoolrmlyandplacethepointofthedriverbit
in the screw head. Apply forward pressure to the tool to
the extent that the bit will not slip off the screw and turn
the tool on to start operation.
NOTICE: If you use a spare battery to continue
the operation, rest the tool at least 15 min.
NOTE: Use the proper bit for the head of the screw/
bolt that you wish to use.
NOTE: When fastening M8 or smaller screw, carefully
adjustpressureontheswitchtriggersothatthescrew
is not damaged.
NOTE: Hold the tool pointed straight at the screw.
NOTE: If the impact force is too strong or you tighten
thescrewforatimelongerthanshowninthegures,
the screw or the point of the driver bit may be over-
stressed, stripped, damaged, etc. Before starting your
job,alwaysperformatestoperationtodeterminethe
proper fastening time for your screw.
The fastening torque is affected by a wide variety of
factors including the following. After fastening, always
check the torque with a torque wrench.
1. When the battery cartridge is discharged almost
completely, voltage will drop and the fastening
torque will be reduced.
2. Driver bit or socket bit
Failure to use the correct size driver bit or socket
bit will cause a reduction in the fastening torque.
3. Bolt
• Eventhoughthetorquecoefcientandthe
class of bolt are the same, the proper fasten-
ing torque will differ according to the diame-
ter of bolt.
• Even though the diameters of bolts are the
same, the proper fastening torque will differ
accordingtothetorquecoefcient,theclass
of bolt and the bolt length.
4. The manner of holding the tool or the material
of driving position to be fastened will affect the
torque.
5. Operating the tool at low speed will cause a reduc-
tion in the fastening torque.
MAINTENANCE
CAUTION: Always be sure that the tool is
switched off and the battery cartridge is removed
before attempting to perform inspection or
maintenance.
NOTICE: Never use gasoline, benzine, thinner,
alcohol or the like. Discoloration, deformation or
cracks may result.
Replacing carbon brushes
►Fig.12: 1. Limit mark
Check the carbon brushes regularly.
Replace them when they wear down to the limit mark.
Keep the carbon brushes clean and free to slip in the
holders. All carbon brushes should be replaced at the
same time. Use only identical carbon brushes.
1. Use a screwdriver to remove two screws then
remove the rear cover.
►Fig.13: 1. Rear cover 2. Screw
2. Raise the arm part of the spring and then place
it in the recessed part of the housing with a slotted bit
screwdriver of slender shaft or the like.
►Fig.14: 1. Recessed part 2. Spring 3. Arm
3. Use pliers to remove the carbon brush caps of
the carbon brushes. Take out the worn carbon brushes,
insert the new ones and replace the carbon brush caps
in reverse.
►Fig.15: 1. Carbon brush cap
4. Make sure to place the lead wire in opposite side
of the arm.
►Fig.16: 1. Lead wire 2. Carbon brush cap
5. Makesurethatthecarbonbrushcapshavetinto
the holes in brush holders securely.
►Fig.17: 1. Hole 2. Carbon brush cap
6. Reinstall the rear cover and tighten two screws
securely.
7. Insert the battery cartridge into the tool and break
in brushes by running tool with no load for about 1
minute.
8. Check the tool while running and electric brake
operation when releasing the switch trigger. If electric
brake is not working well, ask Makita Authorized or
Factory Service Centers for repair.
To maintain product SAFETY and RELIABILITY,
repairs,anyothermaintenanceoradjustmentshould
be performed by Makita Authorized or Factory Service
Centers, always using Makita replacement parts.


10 ENGLISH
OPTIONAL
ACCESSORIES
CAUTION: These accessories or attachments
are recommended for use with your Makita tool
specied in this manual. The use of any other
accessories or attachments might present a risk of
injurytopersons.Onlyuseaccessoryorattachment
for its stated purpose.
If you need any assistance for more details regard-
ing these accessories, ask your local Makita Service
Center.
• Driver bits
• Hook
• Plastic carrying case
• Makita genuine battery and charger
• Battery protector
NOTE: Some items in the list may be included in the
tool package as standard accessories. They may
differ from country to country.

11 SLOVENŠČINA
SLOVENŠČINA (Originalna navodila)
TEHNIČNI PODATKI
Model: DTD152
Zateznezmogljivosti Strojnivijak 4 mm - 8 mm
Standardnivijak 5 mm - 16 mm
Visokonateznivijak 5 mm - 12 mm
Hitrost brez obremenitve 0 - 2.900 min-1
Udarci na minuto 0 - 3.500 min-1
Celotnadolžina 137 mm
Nazivna napetost D.C. 18 V
Baterijskivložek BL1815, BL1815N, BL1820,
BL1820B
BL1830, BL1830B, BL1840,
BL1840B, BL1850, BL1850B,
BL1860B
Netoteža 1,3 kg 1,5 kg
• Kernenehnoopravljamoraziskaveinrazvijamosvojeizdelke,selahkotehničnipodatkivtemdokumentu
spremenijobrezobvestila.
• Tehničnipodatkiinbaterijskivložkiselahkorazlikujejogledenadržavouporabeizdelka.
• TežaskupajzbaterijskimvložkomvskladuspostopkomEPTA01/2003
Predvidena uporaba
Orodjejenamenjenozavijačenjevles,kovinoin
plastiko.
Hrup
ObičajnaA-ovrednotenaravenhrupavskladuz
EN60745:
Ravenzvočnegatlaka(LpA): 93 dB (A)
Ravenzvočnemoči(LWA): 104 dB (A)
Odstopanje(K):3dB(A)
OPOZORILO: Uporabljajte zaščito za sluh.
Vibracije
Skupnevrednostivibracij(vektorskavsotatrehosi)v
skladu z EN60745:
Delovninačin:udarnoprivijanjepritrjevalnikovznajve-
čjozmogljivostjoorodja
Emisijevibracij(ah): 10,5 m/s2
Odstopanje(K):1,5m/s2
OPOMBA:Navedenavrednostoddajanjavibracij
jebilaizmerjenavskladusstandardnimimetodami
testiranjainselahkouporabljazaprimerjavoorodij.
OPOMBA:Navedenavrednostoddajanjavibra-
cijselahkouporabljatudipripredhodnioceni
izpostavljenosti.
OPOZORILO:Oddajanjevibracijmeddejansko
uporaboelektričnegaorodjaselahkorazlikujeod
navedenevrednostioddajanja,odvisnoodnačina
uporabeorodja.
OPOZORILO:Upravljavecmorazalastnozaš-
čitopoznativarnostneukrepe,kitemeljijonaoceni
izpostavljenostivdejanskihpogojihuporabe(poleg
časaproženjajetrebaupoštevaticelotendelovni
cikel,vključnosčasom,kojeorodjeizklopljeno,in
časom,kodelujevprostemteku).
ES Izjava o skladnosti
Samo za evropske države
DružbaMakitaizjavlja,dasonaslednjiizdelki:
Oznakastroja:Akumulatorskiudarnivijačnik
Številka/tip modela: DTD152
skladniznaslednjimievropskimidirektivami:
2006/42/ES
Izdelanisovskladuznaslednjimstandardomalistan-
dardiziranimi dokumenti: EN60745
Tehničnadokumentacijavskladuzdirektivo2006/42/
ESjenavoljonanaslovu:
Makita,Jan-BaptistVinkstraat2,3070,Belgija
18.3.2015
Yasushi Fukaya
Direktor
Makita,Jan-BaptistVinkstraat2,3070,Belgija

12 SLOVENŠČINA
Splošna varnostna opozorila za
električno orodje
OPOZORILO: Preberite vsa varnostna opo-
zorila in navodila. Neupoštevanjeopozorilinnavodil
lahkoprivededoelektričnegaudara,požarain/ali
resnihtelesnihpoškodb.
Shranite vsa opozorila in navo-
dila za poznejšo uporabo.
Izraz„električnoorodje“vopozorilihsenanašanavaše
električnoorodje(skablom)alibaterijskoelektrično
orodje(brezkabla).
Varnostna opozorila za brezžični
udarni vijačnik
1. Če obstaja nevarnost, da bi s pritrjevalnikom
prerezali skrito električno napeljavo, držite ele-
ktrično orodje na izoliranih držalnih površinah.
Obstikuzvodnikipodnapetostjodobijonapetost
vsineizoliranikovinskidelielektričnegaorodja,
zaradičesarlahkopridedoelektričnegaudara.
2. Vedno zagotovite, da imate trden oprijem na
podlagi, kjer stojite.
Kadar uporabljate orodje na višini, se prepri-
čajte, da spodaj ni nikogar.
3. Trdno držite orodje.
4. Uporabljajte zaščito za sluh.
5. Takoj po končani obdelavi se ne dotikajte
nastavka ali obdelovanca. Lahko sta zelo
vroča in povzročita opekline kože.
6. Ne približujte rok vrtečim se delom.
SHRANITE TA NAVODILA.
OPOZORILO: NE dovolite, da bi zaradi udob-
nejšega dela ali znanja o uporabi izdelka (prido-
bljenega z večkratno uporabo) opustili strogo
upoštevanje varnostnih zahtev v okviru pravilne
uporabe orodja.
ZLORABA ali neupoštevanje varnostnih zahtev
v teh navodilih za uporabo lahko povzroči resne
telesne poškodbe.
Pomembna varnostna navodila za
akumulatorsko baterijo
1. Pred uporabo baterijskega vložka preberite
vsa navodila in opozorilne oznake na (1) pol-
nilniku akumulatorja, (2) akumulatorju in (3)
izdelku, ki uporablja akumulator.
2. Ne razstavljajte baterijskega vložka.
3. Če se je čas delovanja občutno skrajšal, takoj
prenehajte uporabljati orodje. V nasprotnem
primeru lahko pride do pregretja, morebitnih
opeklin in celo eksplozije.
4. Če pride elektrolit v stik z očmi, jih sperite s
čisto vodo in takoj poiščite zdravniško pomoč.
Posledica je lahko izguba vida.
5. Ne povzročite kratkega stika baterijskega
vložka:
(1) Ne dotikajte se priključkov s kakršnim
koli prevodnim materialom.
(2) Izogibajte se shranjevanju baterijskega
vložka v vsebniku z drugimi kovinskimi
predmeti kot so žeblji, kovanci itn.
(3) Ne izpostavljajte baterijskega vložka vodi
ali dežju.
Kratek stik akumulatorja lahko povzroči velik
električni tok, pregrevanje, morebitne opekline
in celo okvaro.
6. Ne shranjujte orodja in baterijskega vložka
na mestih, kjer lahko temperatura doseže ali
preseže 50 °C.
7. Ne sežigajte baterijskega vložka, tudi če je
hudo poškodovan ali v celoti izpraznjen.
Baterijski vložek lahko v ognju eksplodira.
8. Poskrbite, da akumulator ne bo izpostavljen
padcem ali udarcem.
9. Ne uporabljajte poškodovanih akumulatorjev.
10. Priložene litij-ionske baterije ustrezajo zahte-
vam zakonodaje v zvezi z nevarnim blagom.
Zakomercialneprevoze,npr.tiste,kijihopravljajo
tretjestrankeincarinskiposredniki,jetrebaupo-
števatiposebnezahtevevzvezizembalažoin
označevanjem.
Med postopkom priprave na odpremo izdelka se
jetrebaposvetovatisstrokovnjakomzanevarne
snovi.Pritemupoštevajtetudipodrobnejšenacio-
nalne predpise.
Odprtestikeoblepitezlepilnimtrakomalijihdru-
gačezaščitite,baterijopazapakirajtetako,dasev
embalažinemorepremikati.
11. Upoštevajte lokalne uredbe glede odlaganja
akumulatorja.
SHRANITE TA NAVODILA.
POZOR: Uporabljajte le originalne baterije
Makita.ČeuporabljateneoriginalnebaterijeMakita
alibaterije,kisobilespremenjene,lahkopridedo
eksplozijebaterijeinposledičnodopožara,telesnih
poškodbalimaterialneškode.Stakšnouporabo
bostetudirazveljaviligarancijoMakitazaorodjein
polnilnik Makita.
Nasveti za ohranjanje največje
zmogljivosti akumulatorja
1. Napolnite baterijski vložek, preden se v celoti
izprazni. Ko opazite, da ima orodje manjšo
moč, vedno ustavite delovanje orodja in napol-
nite baterijski vložek.
2. Nikoli znova ne polnite popolnoma napol-
njenega baterijskega vložka. Prenapolnjenje
skrajša življenjsko dobo akumulatorja.
3. Baterijski vložek s sobno temperaturo pol-
nite pri temperaturi okolja od 10 °C do 40 °C.
Počakajte, da se vroč baterijski vložek pred
polnjenjem ohladi.
4. Če baterijskega vložka ne uporabljate dalj časa
(več kot 6 mesecev), ga napolnite.

13 SLOVENŠČINA
OPIS DELOVANJA
POZOR: Pred nastavljanjem ali preizkusom
delovanja orodja se prepričajte, ali je orodje
izključeno in ali je akumulatorska baterija
odstranjena.
Nameščanje ali odstranjevanje
akumulatorske baterije
POZOR: Vedno izklopite orodje, preden name-
stite ali odstranite akumulatorsko baterijo.
POZOR: Kadar nameščate ali odstranjujete
akumulatorsko baterijo, trdno držite orodje in
akumulatorsko baterijo.Čeorodjainakumulatorske
baterijenedržitetrdno,selahkozgodi,davamzdr-
snetaizrok,posledicapajelahkopoškodbaorodjain
akumulatorskebaterijetertelesnapoškodba.
►Sl.1: 1.Rdečiindikator2. Gumb 3.Baterijskivložek
Čeželiteodstranitiakumulatorskobaterijo,jopotisnite
izorodja,pritempapomikajtegumbnasprednjistrani
vložka.
Akumulatorskobaterijovstavitetako,daporavnate
jezičeknabaterijizutoromnaohišjuinjopotisnetev
ležišče.Potisnitejodokonca,dasezaskoči.Čejerdeči
indikatornazgornjistranigumbaviden,pomeni,da
baterijaniustreznozaklenjena.
POZOR: Vedno namestite akumulatorsko
baterijo tako, da rdeči indikator ni več viden.Če
teganeupoštevate,lahkobaterijanepričakovano
padeizorodjainpoškodujevasaliosebevneposre-
dnibližini.
POZOR: Ne nameščajte akumulatorske bate-
rije s silo.Česeakumulatorskabaterijanezaskoči
zlahka,nipravilnovstavljena.
Sistem za zaščito akumulatorja
Litij-ionski akumulatorji z oznako zvezde
►Sl.2: 1. Oznaka zvezde
Litij-ionskiakumulatorjizoznakozvezdesoopremljeni
zzaščitnimsistemom.Sistemsamodejnoprekine
napajanjeorodja,dasepodaljšaživljenjskadoba
akumulatorja.
Orodjesebosamodejnozaustavilomeddelovanjem,
čestaorodjein/aliakumulatorzamenjanapodnasle-
dnjimipogoji:
Preobremenjeno:
Orodjedelujenanačin,zaradikateregaprihajado
neobičajnovisokegatoka.
Vtemprimeruizklopiteorodjeinprenehajteizvajati
delo,kijepovzročilopreobremenitevorodja.Natovklo-
piteorodjeingaznovazaženite.
Česeorodjenevklopi,jeakumulatorpregret.Vtem
primerupustite,daseakumulatorohladi,predenorodje
znova vklopite.
Nizka napetost akumulatorja:
Napolnjenostakumulatorjajeprenizka,zatoorodje
nedeluje.Vtemprimeruodstraniteinnapolnite
akumulator.
Prikazuje preostalo raven
napolnjenosti akumulatorja
Samo za baterijske vložke z znakom „B“ na koncu
številke modela
►Sl.3: 1.Indikatorskelučke2.Gumbzapreverjanje
Pritisnitegumbzapreverjanjenabaterijskemvložku,
dapreveriteravennapolnjenostiakumulatorja.
Indikatorskelučkenakratkozasvetijo.
Indikatorske lučke Prikaz pre-
ostale ravni
napolnjenosti
Sveti Ne sveti Utripa
od 75 % do
100 %
od 50 % do
75 %
od 25 % do
50 %
od 0 % do
25 %
Napolnite
akumulator.
Akumulator
jemorda
okvarjen.
OPOMBA:Odvisnoodpogojevuporabeinokoljske
temperatureseoznačbalahkonekolikorazlikujeod
dejanskenapolnjenosti.
Delovanje stikala
►Sl.4: 1.Sprožilnostikalo
POZOR: Preden vstavite akumulatorsko
baterijo v orodje, se vedno prepričajte, da stikalo
deluje brezhibno in se vrača v položaj za izklop
(OFF), ko ga spustite.
Zazagonorodjapovlecitesprožilnostikalo.Hitrost
orodjasepovečazapovečanitlaknasprožilnemsti-
kalu. Za izklop spustite stikalo.
Vklop sprednje lučke
►Sl.5: 1.Lučka
POZOR: Ne glejte neposredno v lučko ali vir
svetlobe.
Zavklopsvetilkepritisnitesprožilnostikalo.Lučkasveti,
doklerjepritisnjenosprožilnostikalo.Lučkaugasne10-
15sekundzatem,kospustitesprožilnostikalo.
OPOMBA:Uporabitesuhokrpo,daobrišeteumaza-
nijozlečelučke.Pazite,daneopraskatesteklalučke,
kerpraskeobčutnozmanjšajosvetilnost.

14 SLOVENŠČINA
Stikalo za preklop smeri vrtenja
►Sl.6: 1.Ročicazapreklopsmerivrtenja
POZOR: Pred obratovanjem vedno preverite
smer vrtenja.
POZOR: Stikalo za spreminjanje smeri vrtenja
uporabite šele, ko se stroj popolnoma ustavi.Če
smervrtenjaspremenite,predensestrojustavi,seta
lahkopoškoduje.
POZOR: Ko orodja ne uporabljate, vedno poti-
snite preklopno stikalo v nevtralen položaj.
Toorodjejeopremljenospreklopnikomzaspremembo
smerivrtenja.Ročicopreklopnikasmerivrtenjapritisnite
vsmeriAzavrtenjevsmeriurnegakazalcainvsmeriB
zavrtenjevobratnismeriurnegakazalca.
Kojepreklopnostikalovnevtralnempoložaju,seglav-
nega stikala ne da premakniti.
MONTAŽA
POZOR: Pred vsako izvedbo dela na orodju se
prepričajte, da je le to izključeno in da je akumula-
torska baterija odstranjena.
Nameščanje ali odstranjevanje
vijačnega ali natičnega nastavka
►Sl.7
Uporabljajtesamovijačnealinatičnenastavkezvstav-
nimdelom,kijeprikazannasliki.Neuporabljajtedrugih
vijačnih/natičnihnastavkov.
Za orodje s plitvo odprtino za vijačne nastavke
A=12 mm
B=9 mm
Uporabljajtesamoto
vrstovijačnihnastavkov.
Upoštevajtepostopek1.
(Opomba)Izenačevalna
konica ni potrebna.
Za orodje z globoko odprtino za vijačne nastavke
A=17 mm
B=14 mm
Privstavljanjutehvrstvijač-
nihnastavkovupoštevajte
postopek 1.
A=12 mm
B=9 mm
Privstavljanjutehvrstvijačnih
nastavkovupoštevajteposto-
pek 2. (Opomba) Za vsta-
vljanjenastavkajepotrebna
izenačevalnakonica.
Postopek 1
Za orodje brez stročnice na en dotik
►Sl.8: 1.Vijačninastavek2.Zaporniobroč
Zanamestitevvijačneganastavkapovlecitezaporni
obročvsmeripuščiceinvanjdokoncapotisnitenasta-
vek.
Spustitezaporniobroč,dasenastavekzaskoči.
Za orodje s stročnico na en dotik
Zanameščanjevijačneganastavkapovlecitestročnico
invstavitenastavekvstročnicodoomejila.
Postopek 2
Dodatno k postopku 1,vstaviteizenačevalnokonicov
stročnicoskoničastimdelomobrnjenimnavznoter.
►Sl.9: 1.Vijačninastavek2.Izenačevalnakonica
3.Zaporniobroč
Zaodstranitevvijačneganastavkapovlecitezaporni
obročvsmeripuščiceinizvlecitenastavek.
OPOMBA:Čevijačninastavekvobročnivstavljen
dovoljgloboko,setanebovrnilvprvotnipoložajin
nastaveknebopravilnozaskočen.Vtemprimeru
poskušajtenastavekvstavitiznova,kotjeopisano
zgoraj.
OPOMBA:Čejetežkovstavitivijačninastavek,
povlecitestročnicoinvstavitenastavekvstročnico
doomejila.
OPOMBA:Konamestitenastavek,seprepričajte,
alijetrdnozaskočen.Čegalahkoizvlečete,neupo-
rabljajteorodja.
Nameščanje kavlja
►Sl.10: 1. Vdolbina 2.Kavelj3.Vijak
Kaveljjepriročenpripomočekzazačasnoobešanje
stroja.Namestitegalahkonakaterokolistranstroja.
Kaveljvstavitevutornalevialidesnistraniohišjastroja
ingaprivijtezvijakom.Odstranitegatako,daodvijete
vijakingaizvlečete.
UPRAVLJANJE
►Sl.11
Danebipoškodovalivijačneganastavkaalivijaka,
opraviteposkusnovijačenje.Optimalenzateznimoment
jemeddrugimodvisenodvelikostiintrdnostivijakater
materialov,kijihspajamozvijačnimizvezami.
Ustrezen zatezni moment za standardni vijak
120
100
80
60
40
20
M14
M12
M10
M8
N•m
2
1
(kgf•cm)
(1224)
(1020)
(816)
(612)
(408)
(204)
0
140
(1428)
123
M16
M16
M14
M12
M10
M8
1.Časprivijanja(s)2. Zatezni moment

15 SLOVENŠČINA
Ustrezen zatezni moment za visoko natezni vijak
0
123
M12
M10
160
(1632)
140
(1428)
120
(1224)
100
(1020)
80
(816)
60
(612)
40
(408)
20
(204)
M8
M12
M10
M8
N•m
(kgf•cm)
2
1
1.Časprivijanja(s)2. Zatezni moment
Trdnoprimiteorodjeinnastavitekonicovijačnega
nastavkanaglavovijaka.Pritisniteorodjedotemere,
danastaveknemorezdrsnitizvijaka,tervklopiteorodje
zazačetekdela.
OBVESTILO: Če uporabljate nadomestni aku-
mulator za nadaljevanje, mora orodje počivati
vsaj 15 minut.
OPOMBA: Uporabite pravilni nastavek za glavo
vijaka/zatiča,kigaželiteuporabiti.
OPOMBA:PrizategovanjuvijakovvelikostiM8ali
manjšihprevidnoprilagoditepritisknasprožilno
stikalo,danepoškodujetevijaka.
OPOMBA:Orodjedržitenaravnostnavijak.
OPOMBA:Čejeudarnasilaprevelikaaličepre-
koračitečasprivijanja,kijenavedenvtabeli,lahko
vijakalinastavekpreobremenitealipoškodujete.
Optimalenčasprivijanjabostenajlažjedoločilispred-
hodnimposkusnimvijačenjem.Danebipoškodovali
nastavkaalivijaka,opraviteposkusnovijačenje.
Napritrdilnimomentvplivavelikorazličnihdejavnikov,
vključnoznaslednjimi.Poprivijanjuvednopreverite
navorzmomentnimključem.
1. Kadarseakumulatorizprazni,seznižanapetostin
s tem tudi zatezni moment.
2. Vijačnialinatičninastavek
Uporabavijačnegaalinatičneganastavka
napačnedimenzijepovzročizmanjšanjezate-
znega momenta.
3. Vijak
• Čepravstakoličniknavorainvrstavijaka
enaka, se bo pravilni zatezni moment razli-
kovalgledenapremervijaka.
• Čepravsopremerivijakovenaki,sebo
pravilni zatezni moment razlikoval glede na
količniknavora,vrstoindolžinovijaka.
4. Načindržanjaorodjaalipoložajmateriala,kiga
boste pritrdili, bo vplival na navor.
5. Zateznimomentsezmanjšatudivprimeru,če
vijakprivijateznizkimštevilomvrtljajev.
VZDRŽEVANJE
POZOR: Preden se lotite pregledovanja ali
vzdrževanja orodja, se vedno prepričajte, da
je orodje izklopljeno in akumulatorska baterija
odstranjena.
OBVESTILO: Nikoli ne uporabljajte bencina,
razredčila, alkohola ali podobnega sredstva. V
tem primeru se lahko orodje razbarva ali defor-
mira oziroma lahko nastanejo razpoke.
Menjava karbonskih krtačk
►Sl.12: 1.Mejnaoznačba
Karbonskikrtačkipreverjajteredno.
Kostaobrabljenidomejneoznačbe,juzamenjajte.
Karbonskikrtačkimoratabitičisti,dalahkoneovirano
zdrsnetavdržali.Vsekarbonskekrtačkemoratezame-
njatinaenkrat.Uporabljajteleenakikarbonskikrtački.
1. Zizvijačemodvijtevijaka,natoodstranitezadnji
pokrov.
►Sl.13: 1.Zadnjipokrov2.Vijak
2. Privzdigniteročicovzmetiinjozozkimnavadnim
izvijačemalipodobnimtankimpripomočkomvstavitev
utorvohišju.
►Sl.14: 1.Ugreznjenidel2. Vzmet 3. Roka
3. Skleščamiodstranitepokrovakarbonskihkrtačk.
Odstraniteizrabljenikrtački,vstavitenoviinnazaj
namestite pokrova v obratnem vrstnem redu.
►Sl.15: 1.Pokrovkarbonskekrtačke
4. Prepričajtese,alistenamestilivodilnožicona
nasprotnostranročice.
►Sl.16: 1.Vodilnažica2.Pokrovkarbonskekrtačke
5. Preverite,alisepokrovikarbonskihkrtačktrdno
prilegajovodprtinedržalazakrtačke.
►Sl.17: 1.Luknja2.Pokrovkarbonskekrtačke
6. Znovanamestitezadnjipokrovingatrdnopritrdite
zvijakoma.
7. Kozamenjatekrtački,vstaviteakumulatorsko
baterijovorodjeinpustitekrtačkidelovatibrezobreme-
nitvepribližno1minuto.
8. Meddelovanjempreveriteorodjeindelovanje
električnezavore,kosprostitesprožilnostikalo.Čeele-
ktričnazavoranedelujepravilno,seobrnitenapoobla-
ščenialitovarniškiservisnicenterMakitazapopravilo.
VARNOinZANESLJIVOdelovanjetegaizdelkabo
zagotovljenole,čebostepopravila,vzdrževanjein
nastavitveprepustilipooblaščenemuservisuzaorodja
Makitaalitovarniškemuosebju,kivgrajujeizključno
originalne nadomestne dele.

16 SLOVENŠČINA
DODATNA OPREMA
POZOR: Ta dodatni pribor ali pripomočki so
predvideni za uporabo z orodjem Makita, ki je
opisano v teh navodilih za uporabo. Pri uporabi
drugegapriboraalipripomočkovobstajanevarnost
telesnihpoškodb.Dodatnipriboralipripomočke
uporabljajtesamozanavedeninamen.
Zavečinformacijododatniopremiseobrnitenanaj-
bližjipooblaščeniserviszaorodjaMakita.
• Vijačninastavki
• Kavelj
• Plastičenkovčekzaprenašanje
• Originalna akumulator in polnilnik Makita
• Ščitnikakumulatorja
OPOMBA: Nekateri predmeti na seznamu so lahko
priloženiorodjukotstandardnadodatnaoprema.
Lahkoserazlikujejooddržavedodržave.

17 ALBANIAN
ALBANIAN (Udhëzimet origjinale)
SPECIFIKIMET
Modeli: DTD152
Kapacitetet shtrënguese Vidë makinerie 4 mm - 8 mm
Bulon standard 5 mm - 16 mm
Bulonrezistentnëtërheqje 5 mm - 12 mm
Shpejtësiapangarkesë 0 - 2 900 min-1
Goditjenëminutë 0 - 3 500 min-1
Gjatësiatotale 137 mm
Tensioni nominal D.C. 18 V
Kutia e baterisë BL1815, BL1815N, BL1820,
BL1820B
BL1830, BL1830B, BL1840,
BL1840B, BL1850, BL1850B,
BL1860B
Pesha neto 1,3 kg 1,5 kg
• Përshkaktëprogramittonëtëvazhdueshëmtëkërkim-zhvillimit,specikimetqëjepenkëtumundtë
ndryshojnëpadhënënjoftim.
• Specikimetdhekutiaebaterisëmundtëndryshojnësipasshtetit.
• Pesha, me kutinë e baterisë, sipas Procedurës EPTA 01/2003
Përdorimi i synuar
Pajisjaështësynuarpërvendosjenevidavenëdru,
metal dhe plastikë.
Zhurma
Niveli tipik i zhurmës A, i matur sipas EN60745:
Niveli i presionit të zhurmës (LpA) : 93 dB (A)
Niveli i fuqisë së zhurmës (LWA) : 104 dB (A)
Pasiguria (K): 3 dB (A)
PARALAJMËRIM: Mbani mbrojtëse për
veshët.
Dridhja
Vleratotaleedridhjeve(shumaevektoritmetreakse)
përcaktohet sipas EN60745:
Regjimiipunës:shtrëngimimegoditjeimbërthyesve
mekapacitetinmaksimaltëpajisjes
Emetimiidridhjeve(ah) : 10,5 m/s2
Pasiguria (K): 1,5 m/s2
SHËNIM:Vleraedeklaruareemetimevetëdridhjeve
është matur sipas metodës standarde të testimit dhe
mundtëpërdoretpërtëkrahasuarnjëvegëlmenjë
tjetër.
SHËNIM:Vleraedeklaruareemetimevetëdridhjeve
mundtëpërdoretpërnjëvlerësimparapraktë
ekspozimit.
PARALAJMËRIM:Emetimetedridhjeve
gjatëpërdorimitaktualtëveglëselektrikemundtë
ndryshojnëngavleratedeklaruaratëemetimevenë
varësi të mënyrave sesi përdoret vegla.
PARALAJMËRIM: Vërtetoni që masat e
sigurisëpërmbrojtjenepërdoruesitbazohennë
vlerësimineekspozimitndajkushteveaktualetë
përdorimit(dukemarrëparasyshtëgjithapjesëte
ciklittëfunksionimitsiatokurpajisjaështëekurdhe
punon pa prerë ashtu edhe kohën e përdorimit).
Deklarata e konformitetit me KE-në
Vetëm për shtetet evropiane
Makita deklaron që makineria(të) e mëposhtme:
Emërtimiimakinerisë:Trapanmegoditjemebateri
Nr.imodelit/Lloji:DTD152
PajtohetmeDirektivënEvropianetëmëposhtme:
2006/42/KE
Atojanëprodhuarkonformstandarditosedokumenteve
tëstandardizuarasivijon:EN60745
Skedari teknik konform direktivës 2006/42/KE
disponohet nga:
Makita,Jan-BaptistVinkstraat2,3070,Belgjikë
18.3.2015
Yasushi Fukaya
Drejtor
Makita,Jan-BaptistVinkstraat2,3070,Belgjikë

18 ALBANIAN
Paralajmërimet e përgjithshme për
sigurinë e veglës
PARALAJMËRIM: Lexoni të gjitha
paralajmërimet dhe udhëzimet për sigurinë.
Mosndjekjaeparalajmërimevedheudhëzimeve
mundtërezultojënëgoditjeelektrike,zjarrdhe/ose
lëndim serioz.
Ruajini të gjitha paralajmërimet
dhe udhëzimet për të ardhmen.
Termi“vegëlelektrike”nëparalajmërimeireferohet
veglës elektrike që përdoret e lidhur në prizë (me
kordon) ose veglës së përdorur me bateri (pa kordon).
Paralajmërime për sigurinë e
trapanit me goditje me bateri
1. Mbajeni pajisjen elektrike te sipërfaqet
e izoluara kapëse kur të jeni duke kryer
një veprim në të cilin mbërthyesi mund të
kontaktojë me tela të fshehur. Nëse mbërthyesit
prekinnjëtelmerrymëatëherëpjesëtmetaliketë
pajisjeselektrikeelektrizohendhemundt’ijapin
punëtoritgoditjeelektrike.
2. Gjithmonë sigurohuni që të keni bazament të
fortë qëndrimi.
Sigurohuni që të mos ketë njeri poshtë ndërkohë
që e përdorni pajisjen në vende të larta.
3. Mbajeni veglën fort.
4. Mbani mbrojtëse për veshët.
5.
Mos e prekni punton apo materialin e punës
menjëherë pas kryerjes së punës. Ato mund të jenë
jashtëzakonisht të nxehta dhe mund t’ju djegin lëkurën.
6. Mbajini duart larg pjesëve rrotulluese.
RUAJINI KËTO UDHËZIME.
PARALAJMËRIM: MOS lejoni që njohja
ose familjarizimi me produktin (të tuara nga
përdorimi i shpeshtë) të zëvendësojnë zbatimin
me përpikëri të rregullave të sigurisë për
produktin në fjalë.
KEQPËRDORIMI ose mosndjekja e rregullave të
sigurisë të dhëna në këtë manual përdorimi mund
të shkaktojnë dëmtime të rënda personale.
Udhëzime të rëndësishme rreth
sigurisë për kutinë e baterisë
1. Përpara se ta përdorni kutinë e baterisë, lexoni
të gjitha udhëzimet dhe shënimet e masave
parandaluese te (1) ngarkuesi i baterisë, (2)
bateria dhe (3) produkti që përdor baterinë.
2. Mos e hiqni kutinë e baterisë.
3. Nëse koha e përdorimit është shkurtuar jashtë
mase, ndalojeni punën menjëherë. Kjo mund
të rezultojë në rrezik mbinxehjeje, djegie të
mundshme, madje edhe shpërthim.
4. Nëse ju futen elektrolite në sy, shpëlajini
sytë me ujë të pastër dhe kërkoni ndihmë
mjekësore menjëherë. Kjo gjë mund të
rezultojë në humbje të shikimit.
5. Mos bëni lidhje të shkurtër me kutinë e
baterisë:
(1) Mos i prekni terminalet me materiale
përcjellëse.
(2) Shmangni ruajtjen e kutisë së baterisë
në një kuti me objekte të tjera metalike, si
gozhdë, monedha etj.
(3) Mos e ekspozoni kutinë e baterisë në ujë
ose shi.
Qarku i shkurtër i baterisë mund të shkaktojë
qarkullim të madh të rrymës elektrike,
mbinxehje, djegie të mundshme dhe madje
prishje.
6. Mos e ruani pajisjen dhe kutinë e baterisë
në vende ku temperatura mund të arrijë ose
tejkalojë 50 °C.
7. Mos e digjni kutinë e baterisë, edhe nëse
është shumë e dëmtuar ose është konsumuar
plotësisht. Kutia e baterisë mund të shpërthejë
në zjarr.
8. Bëni kujdes që të mos e rrëzoni ose ta godisni
baterinë.
9. Mos përdorni bateri të dëmtuar.
10. Bateritë e përfshira të litiumit, u nënshtrohen
kërkesave të legjislacionit për mallrat e
rrezikshme.
Për transport tregtar p.sh. nga palë të treta,
agjentëtëndërmjetëm,duhettëndiqenkërkesa
specikembipaketimindheetiketimin.
Përpërgatitjeneartikullitpërtransport,ështëi
nevojshëmkonsultimiinjëekspertipërmateriale
tërrezikshme.Julutemi,ndiqnigjithashtu
rregulloretmegjasëmëtëdetajuaravendore.
Mbulonimengjitëseosemaskonikontaktete
zhveshuradhepaketojenibaterinënëmënyrëtë
tillë që të mos lëvizë në paketim.
11. Zbatoni rregulloret lokale rreth asgjësimit të
baterisë.
RUAJINI KËTO UDHËZIME.
KUJDES: Përdorni vetëm bateri origjinale
Makita.Përdorimiibaterivejo-origjinaleMakita
osebateriveqëmundtëjenëmodikuar,mund
tërezultojënëmarrjenakëtëbaterisë,lëndime
personaleapodëmtime.Kjodotëanulojëgjithashtu
edhe garancinë e Makita-s për veglën e Makita-s dhe
ngarkuesin.
Këshilla për të ruajtur
jetëgjatësinë maksimale të
baterisë
1. Ngarkojeni baterinë përpara se të shkarkohet
plotësisht. Gjithmonë ndaloni punën me
pajisjen dhe ngarkoni baterinë kur vëreni ulje
të fuqisë së pajisjes.
2. Asnjëherë mos e ringarkoni baterinë e
ngarkuar plotësisht. Mbingarkimi shkurton
jetëgjatësinë e shërbimit të baterisë.
3. Ngarkojeni baterinë në temperaturën e dhomës
në 10 °C - 40 °C. Lëreni kutinë e nxehtë të
baterisë të ftohet përpara se ta ngarkoni atë.
4. Ngarkojeni baterinë nëse nuk e përdorni për
një kohë të gjatë (mbi gjashtë muaj).

19 ALBANIAN
PËRSHKRIMI I PUNËS
KUJDES: Sigurohuni gjithmonë që vegla
të jetë e kur dhe kutia e baterisë të jetë hequr
përpara se ta rregulloni apo t’i kontrolloni
funksionet e veglës.
Instalimi ose heqja e kutisë së
baterisë
KUJDES: Fikeni gjithmonë veglën përpara se
të instaloni ose hiqni kutinë e baterisë.
KUJDES: Mbajeni fort veglën dhe kutinë e
baterisë kur montoni ose hiqni kutinë e baterisë.
Mosmbajtjaforteveglësdheekutisësëbaterisë
mundtëbëjëqët’jurrëshqasinngaduartdhetë
shkaktojëdëmtimtëveglësdhetëkutisësëbaterisë,
si dhe lëndim personal.
►Fig.1: 1. Treguesi i kuq 2. Butoni 3. Kutia e baterisë
Për të hequr kutinë e baterisë, rrëshqiteni atë nga vegla
ndërsarrëshqisnibutoninnëpjesënepërparmetë
kutisë së baterisë.
Për të vendosur kutinë e baterisë, bashkërenditni
gjuhëzënekutisësëbaterisëmekanalinefolesëdhe
rrëshqiteni për ta futur. Futeni deri në fund, derisa
të kërcasë dhe të bllokohet në vend. Nëse shikoni
treguesinekuqnëanënesipërmetëbutonit,ajonuk
është e bllokuar plotësisht.
KUJDES: Vendoseni gjithnjë plotësisht kutinë
e baterisë derisa treguesi i kuq të mos duket. Në
tëkundërt,ajomundtëbjerëaksidentalishtngavegla
dukejulënduarjuveosepersoninpranëjush.
KUJDES: Mos e vendosni me forcë kutinë e
baterisë. Nëse kutia nuk hyn lehtë, nuk po e futni siç
duhet.
Sistemi i mbrojtjes së baterisë
Bateria me jone litiumi të shënuara me yll
►Fig.2: 1. Shënimi me yll
Bateritëelitiumittëshënuarameylljanëtëpajisurame
njësistemmbrojtjeje.Kysistemndërpretautomatikisht
energjinënëvegëlpërtëzgjaturjetëgjatësinëe
baterisë.
Vegladotëndalojëautomatikishtgjatëpunësnëse
vegladhe/osebateriajanëvendosursipasnjëprej
kushteve të mëposhtme:
I mbingarkuar:
Veglapërdoretnënjëmënyrëqëebënatëtëmarrë
rrymë të lartë anormale.
Nëkëtësituatë,keniveglëndhendalonipunënqë
shkaktoimbingarkesëneveglës.Pastajndizeniveglën
për ta rinisur.
Nëse vegla nuk ndizet, bateria është mbinxehur. Në
këtë situatë, lëreni baterinë të ftohet përpara se ta
ndizni sërish.
Tension i ulët i baterisë:
Kapaciteti i mbetur i baterisë është shumë i ulët dhe
veglanukdotëpunojë.Nëkëtësituatë,hiqnidhe
ngarkoni baterinë.
Treguesi i kapacitetit të mbetur të
baterive
Vetëm për kutitë e baterisë me “B” në fund të numrit
të modelit
►Fig.3: 1. Llambat treguese 2. Butoni i kontrollit
Shtypni butonin e kontrollit në kutinë e baterisë për
të treguar kapacitetin e mbetur të baterisë. Llambat
treguese ndizen për pak sekonda.
Llambat treguese Kapaciteti i
mbetur
Ndezur Fikur Duke pulsuar
75% deri
100%
50% deri 75%
25% deri 50%
0% deri 25%
Ngarkojeni
baterinë.
Llambushka
mund të ketë
keqfunksionuar.
SHËNIM: Në varësi të kushteve të përdorimit dhe
të temperaturës së ambientit, treguesi mund të
ndryshojëpaksangakapacitetiaktual.
Veprimi i ndërrimit
►Fig.4: 1. Çelësi
KUJDES: Përpara se ta vendosni kutinë e
baterisë në vegël, kontrolloni gjithmonë nëse
çelësi është në pozicionin e duhur dhe nëse
kthehet në pozicionin “OFF” (kur) kur lëshohet.
Përtandezurveglën,thjeshttërhiqnikëmbëzëne
çelësit.Shpejtësiaeveglësrritetmerritjenetrysnisë
në këmbëzën e çelësit. Lëshoni këmbëzën e çelësit për
takur.
Ndezja e llambës së përparme
►Fig.5: 1. Llamba
KUJDES: Mos e shikoni direkt dritën ose
burimin e dritës.
Tërhiqni çelësin për të ndezur llambën. Llamba
vazhdontëndriçojëgjatëtërheqjessëçelësit.Llamba
ket10-15sekondapasielëshonikëmbëzën.
SHËNIM:Përdorninjëleckëtëthatëpërtëfshirë
papastërtitëngalentetellambës.Bënikujdestëmos
gërvishtnilentetellambës,nëtëkundërtajodotëulë
ndriçimin.

20 ALBANIAN
Çelësi i ndryshimit të veprimit
►Fig.6: 1. Leva e ndryshimit të veprimit
KUJDES: Kontrolloni gjithmonë drejtimin e
rrotullimit përpara përdorimit.
KUJDES:
Përdorni çelësin e ndryshimit vetëm pasi
vegla të ndalojë plotësisht.Ndryshimiidrejtimittërrotullimit
përparasetëndalojëveglamundtëdëmtojëveglën.
KUJDES: Kur nuk e përdorni veglën,
vendoseni gjithmonë levën e çelësit të ndryshimit
në pozicionin neutral.
Veglakanjëçelësndryshimipërtëndryshuardrejtimin
e rrotullimit. Shtypni levën e çelësit të ndryshimit nga
anaApërrrotulliminnëdrejtiminorarosengaanaBpër
rrotulliminnëdrejtiminkundërorar.
Kur leva e çelësit të ndryshimit është në pozicionin
neutral, çelësi nuk mund të tërhiqet.
MONTIMI
KUJDES: Sigurohuni gjithmonë që vegla
të jetë e kur dhe kutia e baterisë të jetë hequr
përpara se të kryeni ndonjë punë në vegël.
Instalimi ose heqja e majës së
kaçavidës / majës së çelësit
►Fig.7
Përdornivetëmmajakaçavide/çelësiqëkanëpjesënqë
mundtëfutetsiçtregohetnëgurë.Mospërdorniasnjë
majëtjetërkaçavide/çelësi.
Për vegël me vrimë të cekët të majës së kaçavidës
A=12 mm
B=9 mm
Përdornivetëmkëtolloj
majashkaçavide.Ndiqni
procedurën 1. (Shënim)
Pjesaemajësnukështëe
nevojshme.
Për vegël me vrimë të thellë të majës së kaçavidës
A=17mm
B=14mm
Përtëinstaluarkëtolloj
majashkaçavide,ndiqni
procedurën 1.
A=12 mm
B=9 mm
Përtëinstaluarkëtolloje
majashkaçavide,ndiqni
procedurën2.(Shënim)Pjesa
emajësështëenevojshme
përinstaliminemajës.
Procedura 1
Për veglën pa bokull të tipit me një prekje
►Fig.8: 1.Majaekaçavidës2. Bokulla
Përtainstaluarmajënekaçavidës,tërhiqnibokullën
nëdrejtimineshigjetësdhefusnimajënnëbokullderi
në fund.
Mëpaslëshojenibokullënpërtasiguruarmajën.
Për veglën me bokull të tipit me një prekje
Përtëinstaluarmajëekaçavidës,futenimajënnë
bokullderinëpikënqëajomundtëarrijë.
Procedura 2
Pas Procedurës 1, fusni përshtatësin e puntos në
bokullmemajënemprehurtëdrejtuarngabrenda.
►Fig.9: 1.Majaekaçavidës2. Përshtatësi i puntos
3. Bokulla
Përtahequrmajënekaçavidës,tërhiqnibokullënnë
drejtimtëshigjetësdhetërhiqenimajënekaçavidës
jashtë.
SHËNIM:Nësemajaekaçavidësnukfutetaq
thellësaduhetnëbokull,ajonukdotëkthehetnë
pozicioninllestardhemajaekaçavidësnukdotë
jetëesigurt.Nëkëtërast,përpiqunitëfusnisërish
majënsipasudhëzimevetëmësipërme.
SHËNIM:Kurtakenitëvështirëtëfusnimajëne
kaçavidës,tërhiqnibokullëndhefusnimajënnë
bokull deri në fund.
SHËNIM:Pasinstalimittëmajëssëkaçavidës,
sigurohuniqëajoështësiguruarfort.Nëseajodel,
mos e përdorni për së dyti.
Vendosja e grepit
►Fig.10: 1. Ulluku 2. Grepi 3. Vida
Grepi shërben për ta varur veglën përkohësisht. Grepi
mund të montohet në cilëndo anë të veglës. Për të
instaluargrepin,futeninënjëkanalnëfolenëeveglës
nënjërënanëdhemëpassigurojeniatëmenjëvidë.
Përtahequr,lirojenividëndhemëpasnxirreni.
PËRDORIMI
►Fig.11
Forcaepërshtatshmeeshtrëngimitmundtëndryshojë
nëvarësitëllojitosepërmasëssëvidës/bulonit,të
materialittëpunësqëdotështrëngohetetj.Lidhja
ndërmjetforcëssështrëngimitdhekohëssështrëngimit
tregohetnëgura.
Forca e duhur e shtrëngimit për bulonin standard
120
100
80
60
40
20
M14
M12
M10
M8
N•m
2
1
(kgf•cm)
(1224)
(1020)
(816)
(612)
(408)
(204)
0
140
(1428)
123
M16
M16
M14
M12
M10
M8
1. Koha e shtrëngimit (sekonda) 2. Forca e shtrëngimit
This manual suits for next models
1
Table of contents
Languages:
Other Makita Impact Driver manuals

Makita
Makita DTD171RTJ User manual

Makita
Makita TW1000 User manual

Makita
Makita 6903VD User manual

Makita
Makita DTD170 User manual

Makita
Makita 6910 User manual

Makita
Makita TD111DSAE User manual

Makita
Makita TD111DZ User manual

Makita
Makita DTL060 User manual

Makita
Makita 6953 User manual

Makita
Makita BTD044 User manual

Makita
Makita TD111DSME User manual

Makita
Makita DTD137 User manual

Makita
Makita XT1501 User manual

Makita
Makita 6910 Quick start guide

Makita
Makita TL064D User manual

Makita
Makita DTP131 User manual

Makita
Makita DTD134 User manual

Makita
Makita DTD153RFJ User manual

Makita
Makita CT324 User manual

Makita
Makita BTD042 User manual