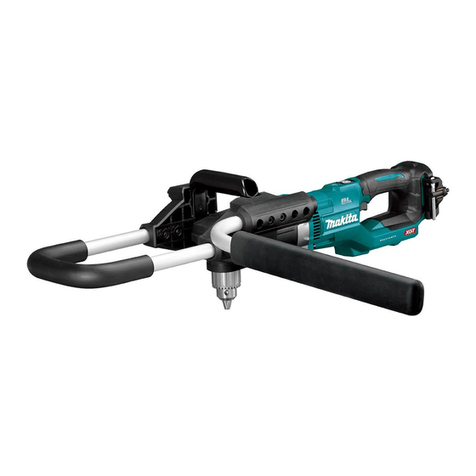
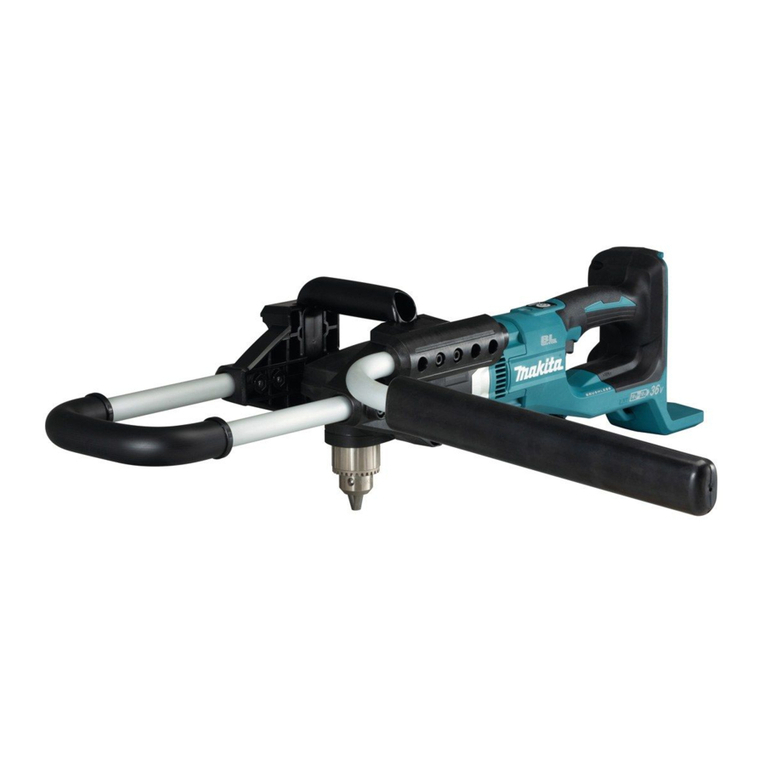
Makita DDG461 User manual

DDG461
EN Cordless Earth Auger INSTRUCTION MANUAL 5
FR MANUEL D’INSTRUCTIONS 12
DE Akku-Erdbohrer BETRIEBSANLEITUNG 20
IT Trivella a batteria ISTRUZIONI PER L’USO 28
NL Accugrondboor GEBRUIKSAANWIJZING 36
ES Ahoyadora Inalámbrica MANUAL DE
INSTRUCCIONES 44
PT Perfurador de Solo a Bateria MANUAL DE INSTRUÇÕES 52
DA Akku jordbor BRUGSANVISNING 60
EL 68
TR KULLANMA KILAVUZU 76

2
12
3 4
5 6
ABC
ABCH
Fig.1
1
1
Fig.2
1
2
3
2
3
Fig.3
2
1
1
2
Fig.4
1
2
Fig.5
1
2
Fig.6

3
1
Fig.7
1
Fig.8
1
A
B
Fig.9
1
Fig.10
1
2
3
Fig.11
1
Fig.12
1
2
3
Fig.13
1
2
Fig.14

4
1
2
Fig.15
1
2
33
2
1
Fig.16
Fig.17
Fig.18

5ENGLISH
ENGLISH (Original instructions)
SPECIFICATIONS
Model: DDG461
N o l o a d s p e e d H i g h 0 - 1, 4 00 m i n -1
Low 0 - 350 m i n -1
Dr i l l i n g c a p a c i t i e s
( Di a m e t e r )
H i g h F o r s a n d y s o i l : ø 60 m m
F o r c l a y s o i l : ø 60 m m
Low F o r s a n d y s o i l : ø 200 m m
F o r c l a y s o i l : ø 150 m m
O v e r a l l l e n g t h 84 0 m m * 1
R a t e d v o l t a g e D.C . 36 V
N e t w e i g h t 7 .0 - 7 .6 k g
* 1 W i t h s i d e h a n d l e
w i t h o u t n o t i c e .
-
Applicable battery cartridge and charger
B a t t e r y c a r t r i d g e
C harger
r e s i d e n c e .
WARNING: Only use the battery cartridges and chargers listed above.
Recommended cord connected power source
•B e f o r e u s i n g t h e c o r d c o n n e c t e d p o w e r s o u r c e , r e a d i n s t r u c t i o n a n d c a u t i o n a r y m a r k i n g s o n t h e m .
Intended use
T h e t o o l i s i n t e n d e d f o r d r i l l i n g t h e g r o u n d .
Noise
-
Measured based on the intended use
S o u n d p r e s s u r e l e v e l ( L
S o u n d p o w e r l e v e l ( L
NOTE: T h e d e c l a r e d n o i s e e m i s s i o n v a l u e ( s ) h a s
another.
NOTE: T h e d e c l a r e d n o i s e e m i s s i o n v a l u e ( s )
exposure.
WARNING: Wear ear protection.
WARNING: The noise emission during actual
value(s) depending on the ways in which the
tool is used especially what kind of workpiece is
processed.
WARNING: Be sure to identify safety mea-
sures to protect the operator that are based on an
estimation of exposure in the actual conditions of
use (taking account of all parts of the operating
cycle such as the times when the tool is switched
trigger time).

6ENGLISH
Vibration
-
Measured based on the intended use
h , D 2o r l e s s
2
NOTE:
m e a s u r e d i n a c c o r d a n c e w i t h a s t a n d a r d t e s t m e t h o d
NOTE:
WARNING: The vibration emission during
declared value(s) depending on the ways in which
the tool is used especially what kind of workpiece
is processed.
WARNING: Be sure to identify safety mea-
sures to protect the operator that are based on an
estimation of exposure in the actual conditions of
use (taking account of all parts of the operating
cycle such as the times when the tool is switched
trigger time).
Declarations of Conformity
For European countries only
t o t h i s i n s t r u c t i o n m a n u a l .
SAFETY WARNINGS
General power tool safety warnings
WARNING Read all safety warnings, instruc-
this power tool. F a i l u r e t o f o l l o w a l l i n s t r u c t i o n s l i s t e d
Save all warnings and instruc-
tions for future reference.
T h e t e r m " p o w e r t o o l " i n t h e w a r n i n g s r e f e r s t o y o u r
( c o r d l e s s ) p o w e r t o o l .
Cordless Earth Auger safety
warnings
1. Hold the tool with both hands at the intended
handles. L o s s o f c o n t r o l c a n c a u s e p e r s o n a l
2. Brace the tool properly before use. T h i s t o o l
p r o d u c e s a h i g h o u t p u t t o r q u e a n d w i t h o u t p r o p -
3. Hold the power tool by insulated gripping
surfaces, when performing an operation where
the digging accessory may contact hidden
wiring. Di g g i n g a c c e s s o r y c o n t a c t i n g a " l i v e "
w i r e m a y m a k e e x p o s e d m e t a l p a r t s o f t h e p o w e r
t o o l " l i v e " a n d c o u l d g i v e t h e o p e r a t o r a n e l e c t r i c
s h o c k .
4 . Never operate at higher speed than the maxi-
mum speed rating of the earth augering bit.
t o r o t a t e f r e e l y w i t h o u t c o n t a c t i n g t h e w o r k p i e c e ,
5. Always start earth augering at low speed and
with the earth augering tip in contact with the
ground.
i f a l l o w e d t o r o t a t e f r e e l y w i t h o u t c o n t a c t i n g t h e
6. Apply pressure only in direct line with the bit
and do not apply excessive pressure. B i t s c a n
7 . The outside diameter of the auger bit must be
instruction manual.
8.
sure no one is below when using the tool in
high locations.
9.
10. Keep hands away from rotating parts.
11. Do not leave the tool running. Operate the tool
only when hand-held.
12. Do not touch the auger bit immediately after
operation; it may be extremely hot and could
burn your skin.
13. Some material contains chemicals which may
be toxic. Take caution to prevent dust inhala-
tion and skin contact. Follow material supplier
safety data.
14 . If the auger bit cannot be loosened even you
remove the auger pin, use pliers to pull it out.
15. If something wrong with the tool such as
abnormal sounds, stop operating immediately
and ask your local Makita Service Center for
repair.
16. Before operation, make sure that there is no
buried object such as electric pipe, water pipe
or gas pipe in the ground. O t h e r w i s e , t h e t o o l
m a y t o u c h t h e m , r e s u l t i n g a n e l e c t r i c s h o c k , e l e c -
t r i c a l l e a k a g e o r g a s l e a k .
SAVE THESE INSTRUCTIONS.
WARNING: DO NOT let comfort or familiarity
with product (gained from repeated use) replace
strict adherence to safety rules for the subject
product. MISUSE or failure to follow the safety
rules stated in this instruction manual may cause
serious personal injury.

7ENGLISH
Important safety instructions for
battery cartridge
1.
Before using battery cartridge, read all instruc-
tions and cautionary markings on (1) battery
charger, (2) battery, and (3) product using battery.
2. Do not disassemble or tamper with the battery
cartridge.
o r e x p l o s i o n .
3. If operating time has become excessively
shorter, stop operating immediately. It may
result in a risk of overheating, possible burns
and even an explosion.
4 .
If electrolyte gets into your eyes, rinse them out
with clear water and seek medical attention right
away. It may result in loss of your eyesight.
5. Do not short the battery cartridge:
( 1) Do not touch the terminals with any con-
ductive material.
( 2) Avoid storing battery cartridge in a con-
tainer with other metal objects such as
nails, coins, etc.
( 3) Do not expose battery cartridge to water
or rain.
A battery short can cause a large current
breakdown.
6. Do not store and use the tool and battery car-
tridge in locations where the temperature may
reach or exceed 50 °C (122 °F).
7 . Do not incinerate the battery cartridge even if
it is severely damaged or is completely worn
8. Do not nail, cut, crush, throw, drop the battery
cartridge, or hit against a hard object to the
battery cartridge. S u c h c o n d u c t m a y r e s u l t i n a
9. Do not use a damaged battery.
10.
The contained lithium-ion batteries are subject to
the Dangerous Goods Legislation requirements.
f o r w a r d i n g a g e n t s , s p e c i a l r e q u i r e m e n t o n p a c k -
-
i n g a n e x p e r t f o r h a z a r d o u s m a t e r i a l i s r e q u i r e d .
n a t i o n a l r e g u l a t i o n s .
a r o u n d i n t h e p a c k a g i n g .
11. When disposing the battery cartridge, remove
it from the tool and dispose of it in a safe
place. Follow your local regulations relating to
disposal of battery.
12. Use the batteries only with the products
-
s i v e h e a t , e x p l o s i o n , o r l e a k o f e l e c t r o l y t e .
13. If the tool is not used for a long period of time,
the battery must be removed from the tool.
14 . During and after use, the battery cartridge may
take on heat which can cause burns or low
temperature burns. Pay attention to the han-
dling of hot battery cartridges.
15. Do not touch the terminal of the tool imme-
diately after use as it may get hot enough to
cause burns.
16. Do not allow chips, dust, or soil stuck into the
terminals, holes, and grooves of the battery
cartridge.
-
17 . Unless the tool supports the use near
high-voltage electrical power lines, do not use
the battery cartridge near high-voltage electri-
cal power lines. It m a y r e s u l t i n a m a l f u n c t i o n o r
18. Keep the battery away from children.
SAVE THESE INSTRUCTIONS.
CAUTION: Only use genuine Makita batteries.
a l s o v o i d t h e M a k i t a w a r r a n t y f o r t h e M a k i t a t o o l a n d
c h a r g e r .
Tips for maintaining maximum
battery life
1. Charge the battery cartridge before completely
discharged. Always stop tool operation and
charge the battery cartridge when you notice
less tool power.
2.
Never recharge a fully charged battery cartridge.
Overcharging shortens the battery service life.
3.
Charge the battery cartridge with room tempera-
ture at 10 °C - 40 °C (50 °F - 104 °F). Let a hot
battery cartridge cool down before charging it.
4 . When not using the battery cartridge, remove
it from the tool or the charger.
5. Charge the battery cartridge if you do not use
it for a long period (more than six months).
INITIAL SETTING
CAUTION: Always be sure that the tool is
before carrying out any work on the tool.
PARTS DESCRIPTION
Fig.1
1M a i n t o o l 2F r o n t h a n d l e
3S i d e h a n d l e 4R e a c t i o n r e c e i v e r
5B o l t 6W r e n c h
-N o m i n a l d i a m e t e r
W r e n c h s i z e ( H )
M 12 10 m m
BM 8 6 m m
CM 6 5 m m

8ENGLISH
Setting up tool
CAUTION: Always be sure that the front
handle, side handle and reaction receiver are
installed securely before operation.
NOTICE: Do not over tighten the bolts. It m a y
d a m a g e t h e t o o l .
Installing the side handle
Fig.2: 1. B o l t
Fig.3: 1. S i d e h a n d l e 2. 3. B o l t B
Installing the reaction receiver
-
t i o n r e c e i v e r c o m e s t o t h e l e f t s i d e o f t h e o p e r a t o r .
Fig.4: 1. B a r o f t h e r e a c t i o n r e c e i v e r 2. B o l t C
FUNCTIONAL DESCRIPTION
CAUTION: Always be sure that the tool is
before adjusting or checking function on the tool.
Indicating the remaining battery capacity
Only for battery cartridges with the indicator
Fig.5: 1. In d i c a t o r l a m p s 2.
-
Indicator lamps Remaining
capacity
Lighted Blinking
7 5% t o 100%
50% t o 7 5%
25% t o 50%
0% t o 25%
C h a r g e t h e
m a y h a v e
m a l f u n c t i o n e d .
NOTE: De p e n d i n g o n t h e c o n d i t i o n s o f u s e a n d t h e
f r o m t h e a c t u a l c a p a c i t y .
NOTE:
-
-
p l a c e d u n d e r o n e o f t h e f o l l o w i n g c o n d i t i o n s :
Overload protection
o v e r l o a d e d . T h e n t u r n t h e t o o l o n t o r e s t a r t .
Overheat protection
Overdischarge protection
Protections against other causes
t h a t c o u l d d a m a g e t h e t o o l a n d a l l o w s t h e t o o l t o s t o p
a u t o m a t i c a l l y . T a k e a l l t h e f o l l o w i n g s t e p s t o c l e a r t h e
h a l t o r s t o p i n o p e r a t i o n .
1.
s y s t e m , t h e n c o n t a c t y o u r l o c a l M a k i t a S e r v i c e C e n t e r .
Main power switch
WARNING: When the tool is not in use, turn
the neutral position to lock the trigger. Always be
sure that the main power lamp goes out after you
Fig.6: 1. 2. M a i n p o w e r l a m p
NOTE:
T o a v o i d u n i n t e n t i o n a l s t a r t u p , t h e m a i n p o w e r s w i t c h
w i l l a u t o m a t i c a l l y s h u t d o w n w h e n t h e s w i t c h t r i g g e r
s w i t c h i s t u r n e d o n .

9ENGLISH
Switch action
CAUTION: Before installing the battery car-
tridge into the tool, always check to see that the
switch trigger actuates properly and returns to
the "OFF" position when released.
Fig.7: 1. S w i t c h t r i g g e r
T o s t a r t t h e t o o l , p u l l t h e s w i t c h t r i g g e r w i t h t h e m a i n
-
i n g p r e s s u r e o n t h e s w i t c h t r i g g e r . R e l e a s e t h e s w i t c h
t r i g g e r t o s t o p .
NOTE: T h e t o o l a u t o m a t i c a l l y s t o p s i f y o u k e e p p u l l -
Lighting up the front lamp
CAUTION: Do not look in the light or see the
source of light directly.
Fig.8: 1. L a m p
T h e l a m p g o e s o u t a p p r o x i m a t e l y 10 s e c o n d s a f t e r
r e l e a s i n g t h e s w i t c h t r i g g e r .
NOTE: W h e n t h e t o o l i s o v e r h e a t e d , t h e t o o l s t o p s
5 m i n u t e ( s ) .
NOTE:
t h e l a m p . B e c a r e f u l n o t t o s c r a t c h t h e l e n s o f l a m p , o r
i t m a y l o w e r t h e i l l u m i n a t i o n .
Reversing switch action
CAUTION: Always check the direction of
rotation before operation.
CAUTION: Use the reversing switch only after
the tool comes to a complete stop. C h a n g i n g t h e
-
a g e t h e t o o l .
CAUTION: When not operating the tool,
always set the reversing switch lever to the neu-
tral position.
T h i s t o o l h a s a r e v e r s i n g s w i t c h t o c h a n g e t h e d i r e c t i o n
o f r o t a t i o n . De p r e s s t h e r e v e r s i n g s w i t c h l e v e r f r o m t h e
-
t e r c l o c k w i s e r o t a t i o n .
W h e n t h e r e v e r s i n g s w i t c h l e v e r i s i n t h e n e u t r a l p o s i -
Fig.9: 1. R e v e r s i n g s w i t c h l e v e r
Automatic speed change function
T h i s t o o l h a s " h i g h s p e e d m o d e " a n d " h i g h t o r q u e
m o d e " .
T h e t o o l a u t o m a t i c a l l y c h a n g e s t h e o p e r a t i o n m o d e
d e p e n d i n g o n t h e w o r k l o a d . W h e n t h e w o r k l o a d i s l o w ,
t h e t o o l w i l l r u n i n t h e " h i g h s p e e d m o d e " f o r q u i c k e r
o p e r a t i o n . W h e n t h e w o r k l o a d i s h i g h , t h e t o o l w i l l r u n
i n t h e " h i g h t o r q u e m o d e " f o r p o w e r f u l o p e r a t i o n .
Fig.10: 1. M o d e i n d i c a t o r
T h e m o d e i n d i c a t o r l i g h t s u p i n g r e e n w h e n t h e t o o l i s
r u n n i n g i n " h i g h t o r q u e m o d e " .
If t h e t o o l i s o p e r a t e d w i t h e x c e s s i v e l o a d , t h e m o d e
l o a d o n t h e t o o l .
Mode indicator status Operation
mode
On Blinking
H i g h s p e e d
m o d e
H i g h t o r q u e
m o d e
O v e r l o a d
a l e r t
Speed change
NOTICE: Use the speed change knob only after
the tool comes to a complete stop. C h a n g i n g t h e
NOTICE: Always set the speed change knob
carefully into the correct position. If y o u o p e r a t e
-
p o s i t i o n 1 f o r l o w s p e e d o r t h e p o s i t i o n 2 f o r h i g h s p e e d .
Fig.11:
1. 2. 3.
Torque limiter
T h e t o r q u e l i m i t e r w i l l a c t u a t e w h e n a c e r t a i n t o r q u e
l e v e l i s r e a c h e d a t t h e l o w s p e e d s e t t i n g ( p o s i t i o n 1) .
T h e m o t o r w i l l d i s e n g a g e f r o m t h e o u t p u t s h a f t . W h e n
t h e n p u l l t h e s w i t c h t r i g g e r a g a i n .
Accidental restart preventive function
-
t e n d e d o p e r a t i o n . T h e t o o l w i l l n o t s t a r t i f y o u p r e s s t h e
T o r e s t a r t t h e t o o l , r e l e a s e t h e s w i t c h t r i g g e r a n d t h e n
p u l l i t a g a i n .

10 ENGLISH
Electronic function
T h e t o o l i s e q u i p p e d w i t h t h e f o l l o w i n g e l e c t r o n i c f u n c -
t i o n s f o r e a s y o p e r a t i o n .
Electric brake
c o n s i s t e n t l y f a i l s t o q u i c k l y c e a s e t o f u n c t i o n a f t e r t h e
s w i t c h t r i g g e r i s r e l e a s e d , h a v e t h e t o o l s e r v i c e d a t a
M a k i t a s e r v i c e c e n t e r .
Soft start feature
l i m i t i n g t h e s t a r t -u p t o r q u e .
Strap hole
WARNING: Do not use the strap hole for
any other purpose than hanging the tool or than
anti-theft of the tool.
o c c u r .
Fig.12: 1. S t r a p h o l e
ASSEMBLY
Installing or removing battery
cartridge
CAUTION:
installing or removing of the battery cartridge.
CAUTION: Hold the tool and the battery car-
cartridge.
Fig.13: 1. R e d i n d i c a t o r 2. B u t t o n 3. B a t t e r y
c a r t r i d g e
i t i n t o p l a c e . In s e r t i t a l l t h e w a y u n t i l i t l o c k s i n p l a c e
w i t h a l i t t l e c l i c k . If y o u c a n s e e t h e r e d i n d i c a t o r a s
CAUTION: Always install the battery cartridge
fully until the red indicator cannot be seen. If n o t ,
y o u o r s o m e o n e a r o u n d y o u .
CAUTION: Do not install the battery cartridge
forcibly. If t h e c a r t r i d g e d o e s n o t s l i d e i n e a s i l y , i t i s
Mounting auger bit
CAUTION: Always be sure that the tool is
before carrying out any work on the tool.
CAUTION: When attaching the auger bit to the
spindle, make sure that the auger pin is locked
and inspect the auger pin for any damages.
CAUTION: When carrying the tool, remove
the auger bit from the tool.
Mounting auger bit on spindle
NOTE:
a n d t h e a u g e r p i n m a y v a r y d e p e n d i n g o n y o u r a u g e r
Fig.14: 1. 2. S p i n d l e
Fig.15: 1. 2. S a f e t y l o c k
OPERATION
CAUTION: This is a powerful tool which gen-
erates high torque. It is important that the tool is
securely held and properly braced.
CAUTION: Before operating, check that there
is no foreign matter (sand, dirt, etc.) stuck in the
openings or moving parts.
Work posture
M a i n t a i n i n g p r o p e r o p e r a t i n g p o s i t i o n i s o n e o f t h e
p o i n t s .
r e c e i v e r a l w a y s c o n t a c t s o n t h e l e f t s i d e o f y o u r
w a i s t .
a r e a s , k e e p i n g t h e g r i p p i n g a r e a s c r a d l e d
t h e l e g s a s r e q u i r e d d u r i n g t h e d i g g i n g p r o c e s s .
•S t a y a l e r t t o t h e t o r q u e r e a c t i o n f o r c e o f t h e t o o l .
w i t h s t a n d t h e t o r q u e r e a c t i o n f o r c e .
Fig.16: 1. H a n d l e 2. S i d e h a n d l e 3. B a r o f t h e r e a c -
t i o n r e c e i v e r
WARNING: Avoid improper positioning. Do
not stand too far from the tool.
Fig.17

11 ENGLISH
Digging operation
CAUTION: -
ing the tool.
CAUTION: Keep your face and hands away
from drilling attachments, such as an auger bit,
any rotating parts and drill cutting waste during
operation.
CAUTION: When leaving the tool, such as
during a break, do not leave the tool stabbed in
the ground or lean it against a wall. Store the tool
in a stable condition.
NOTICE: When the rotation speed comes down
extremely, reduce the load or stop the tool to
avoid the tool damage.
NOTICE: Pressing excessively on the tool will
not speed up the digging. In f a c t , t h i s e x c e s s i v e
p r e s s u r e w i l l o n l y s e r v e t o d a m a g e t h e t i p o f t h e
t h e s e r v i c e l i f e o f t h e t o o l .
NOTICE: Avoid digging in material that you
suspect contains hidden nails or other things that
may cause the auger bit to bind or break.
NOTICE: If the tool is operated continuously
until the battery cartridge has depleted, allow the
tool to rest for 15 minutes before proceeding with
a fresh battery.
t h e h o l e d i a m e t e r a n d c o n d i t i o n o f t h e g r o u n d .
•W h e n d i g g i n g a d e e p h o l e o r d i g g i n g i n c l a y s o i l ,
a n d d o w n t h e t o o l s o t h a t t h e s o i l i n t h e h o l e c a n
•If t h e r o t a t i o n s p e e d o f t h e t o o l s l o w s d o w n d u e t o
h i g h l o a d o p e r a t i o n , l i f t t h e t o o l u p l i t t l e , a n d m o v e
t h e t o o l u p a n d d o w n t o d i g i n s m a l l s t e p s .
When rotating the auger bit in
reverse
a c l o c k w i s e r e a c t i o n .
Fig.18
CAUTION: T h e t o o l m a y
MAINTENANCE
CAUTION: Always be sure that the tool is
before attempting to perform inspection or
maintenance.
NOTICE: Never use gasoline, benzine, thinner,
alcohol or the like. Discoloration, deformation or
cracks may result.
C e n t e r s , a l w a y s u s i n g M a k i t a r e p l a c e m e n t p a r t s .
OPTIONAL
ACCESSORIES
CAUTION: These accessories or attachments
are recommended for use with your Makita tool
T h e u s e o f a n y o t h e r
a c c e s s o r i e s o r a t t a c h m e n t s m i g h t p r e s e n t a r i s k o f
f o r i t s s t a t e d p u r p o s e .
If y o u n e e d a n y a s s i s t a n c e f o r m o r e d e t a i l s r e g a r d -
i n g t h e s e a c c e s s o r i e s , a s k y o u r l o c a l M a k i t a S e r v i c e
C e n t e r .
•H a n d l e s e t
NOTE:
t o o l p a c k a g e a s s t a n d a r d a c c e s s o r i e s . T h e y m a y

12 FRANÇAIS
FRANÇAIS (Instructions originales)
SPÉCIFICATIONS
Modèle :DDG461
V i t e s s e à v i d e É l e v é e 0 - 1 4 00 m i n -1
B a s s e 0 - 350 m i n -1
C a p a c i t é s d e p e r ç a g e
( Di a m è t r e )
É l e v é e
B a s s e
L o n g u e u r t o t a l e 84 0 m m * 1
T e n s i o n n o m i n a l e 36 V C C
7 , 0 - 7 , 6 k g
* 1
Batterie et chargeur applicables
B a t t e r i e
C hargeur
r é s i d e z .
AVERTISSEMENT : N’utilisez que les batteries et les chargeurs répertoriés ci-dessus. L ’ u t i l i s a t i o n
Source d’alimentation connectée par cordon recommandée
•L a o u l e s s o u r c e s d ’ a l i m e n t a t i o n c o n n e c t é e s p a r c o r d o n r é p e r t o r i é e s c i -d e s s u s p e u v e n t n e p a s ê t r e d i s p o -
i n s c r i t s d e s s u s .
Utilisations
L ’ o u t i l e s t c o n ç u p o u r p e r c e r l e s o l .
Bruit
Mesure basée sur l’utilisation prévue
N i v e a u d e p r e s s i o n s o n o r e ( L
N i v e a u d e p u i s s a n c e s o n o r e ( L
NOTE : -
r é e s o n t é t é m e s u r é e s c o n f o r m é m e n t à l a m é t h o d e
d e t e s t s t a n d a r d e t p e u v e n t ê t r e u t i l i s é e s p o u r c o m -
p a r e r l e s o u t i l s e n t r e e u x .
NOTE : -
r é e s p e u v e n t a u s s i ê t r e u t i l i s é e s p o u r l ’ é v a l u a t i o n
p r é l i m i n a i r e d e l ’ e x p o s i t i o n .
AVERTISSEMENT : Portez un serre-tête
antibruit.
AVERTISSEMENT : L’émission de bruit
lors de l’usage réel de l’outil électrique peut être
la façon dont l’outil est utilisé, particulièrement
selon le type de pièce usinée.
AVERTISSEMENT : Les mesures de sécurité
à prendre pour protéger l’utilisateur doivent être
basées sur une estimation de l’exposition dans
des conditions réelles d’utilisation (en tenant
compte de toutes les composantes du cycle
d’utilisation, comme par exemple le moment de
sa mise hors tension, lorsqu’il tourne à vide et le
moment de son déclenchement).

13 FRANÇAIS
Vibrations
Mesure basée sur l’utilisation prévue
h , D 2o u m o i n s
2
NOTE : -
r é e s o n t é t é m e s u r é e s c o n f o r m é m e n t à l a m é t h o d e
d e t e s t s t a n d a r d e t p e u v e n t ê t r e u t i l i s é e s p o u r c o m -
p a r e r l e s o u t i l s e n t r e e u x .
NOTE : -
r é e s p e u v e n t a u s s i ê t r e u t i l i s é e s p o u r l ’ é v a l u a t i o n
p r é l i m i n a i r e d e l ’ e x p o s i t i o n .
AVERTISSEMENT : L’émission de vibrations
lors de l’usage réel de l’outil électrique peut être
la façon dont l’outil est utilisé, particulièrement
selon le type de pièce usinée.
AVERTISSEMENT : Les mesures de sécurité
à prendre pour protéger l’utilisateur doivent être
basées sur une estimation de l’exposition dans
des conditions réelles d’utilisation (en tenant
compte de toutes les composantes du cycle
d’utilisation, comme par exemple le moment de
sa mise hors tension, lorsqu’il tourne à vide et le
moment de son déclenchement).
Déclarations de conformité
Pour les pays européens uniquement
CONSIGNES DE
SÉCURITÉ
Consignes de sécurité générales
pour outils électriques
AVERTISSEMENT Veuillez lire toutes les
consignes de sécurité, instructions, illustrations
-
trique. L e n o n -r e s p e c t d e t o u t e s l e s i n s t r u c t i o n s i n d i -
q u é e s c i -d e s s o u s p e u t e n t r a î n e r u n e é l e c t r o c u t i o n , u n
Conservez toutes les mises en
garde et instructions pour réfé-
rence ultérieure.
L e t e r m e « o u t i l é l e c t r i q u e » d a n s l e s a v e r t i s s e m e n t s
f a i t r é f é r e n c e à l ’ o u t i l é l e c t r i q u e a l i m e n t é p a r l e s e c t e u r
( a v e c c o r d o n d ’ a l i m e n t a t i o n ) o u à l ’ o u t i l é l e c t r i q u e f o n c -
Consignes de sécurité pour tarière
1. Tenez l’outil des deux mains par les poignées
prévues. T o u t e p e r t e d e m a î t r i s e d e l ’ o u t i l c o m -
2. Calez correctement l’outil avant de l’utiliser.
C e t o u t i l p r o d u i t u n c o u p l e d e s o r t i e é l e v é e t s ’ i l
n ’ e s t p a s c o r r e c t e m e n t c a l é p e n d a n t l ’ u t i l i s a t i o n ,
v o u s r i s q u e r e z d ’ e n p e r d r e l e c o n t r ô l e , c e q u i
3. Tenez l’outil électrique par des surfaces de
au cours de laquelle l’accessoire d’excavation
L e
s o u s t e n s i o n p e u t t r a n s m e t t r e d u c o u r a n t d a n s l e s
p i è c e s m é t a l l i q u e s e x p o s é e s d e l ’ o u t i l é l e c t r i q u e
e t é l e c t r o c u t e r l ’ u t i l i s a t e u r .
4 . Ne faites jamais fonctionner l’outil à une
vitesse supérieure à la vitesse nominale maxi-
male du foret pour tarière. À u n e v i t e s s e p l u s
é l e v é e , l e f o r e t r i s q u e d e s e t o r d r e s ’ i l l u i e s t p e r -
5. Commencez toujours le forage à basse vitesse
avec la pointe du foret pour tarière en contact
avec le sol. À u n e v i t e s s e p l u s é l e v é e , l e f o r e t
r i s q u e d e s e t o r d r e s ’ i l l u i e s t p e r m i s d e t o u r n e r
6. Appliquez une pression uniquement en ligne
directe avec le foret et n’exercez pas une pres-
sion excessive. L e s f o r e t s p e u v e n t s e t o r d r e e t
s e c a s s e r o u p r o v o q u e r l a p e r t e d e c o n t r ô l e , c e
7 . Le diamètre externe de la mèche hélicoïdale
dans ce manuel d’instructions. L a m a î t r i s e
d ’ u n e m è c h e h é l i c o ï d a l e d e f o r m a t i n c o r r e c t n e
p e u t ê t r e g a r a n t i e .
8. Assurez-vous toujours de travailler en position
stable. Veillez à ce que personne ne se trouve
en dessous de vous quand vous utilisez l’outil
en hauteur.
9. Tenez l’outil fermement.
10. Gardez les mains éloignées des pièces en
rotation.
11. Ne vous éloignez pas en laissant l’outil tour-
ner. Ne le faites fonctionner que lorsque vous
l’avez bien en main.
12. Ne touchez pas la mèche hélicoïdale immédia-
tement après avoir terminé le travail ; elle peut
être très chaude et vous brûler la peau.
13. Certains matériaux contiennent des produits
chimiques qui peuvent être toxiques. Prenez
garde de ne pas avaler la poussière et évitez
tout contact avec la peau. Suivez les données
de sécurité du fournisseur du matériau.
14 . Si la mèche hélicoïdale ne peut pas être des-
serrée même en retirant la goupille fendue,
utilisez des pinces pour l’extirper. -
-
s e r s i v o u s e s s a y e z d e l ’ e x t i r p e r m a n u e l l e m e n t .

14 FRANÇAIS
15. En cas d’anomalie de l’outil comme des bruits
inhabituels, cessez immédiatement de l’utiliser
et sollicitez une réparation à votre centre d’en-
tretien local Makita.
16. Avant utilisation, assurez-vous qu’aucun objet
comme des conduites électriques, des tuyaux
d’eau ou de gaz ne sont enterrés dans le sol.
S i n o n , l ’ o u t i l p e u t e n t r e r e n c o n t a c t a v e c u n t e l
f u i t e é l e c t r i q u e o u u n e f u i t e d e g a z .
CONSERVEZ CES
INSTRUCTIONS.
AVERTISSEMENT : NE vous laissez PAS
sentiment d’aisance et de familiarité avec le
produit, en négligeant le respect rigoureux des
consignes de sécurité qui accompagnent le pro-
duit en question. La MAUVAISE UTILISATION de
l’outil ou l’ignorance des consignes de sécurité
indiquées dans ce mode d’emploi peut entraîner
de graves blessures.
Consignes de sécurité importantes
pour la batterie
1. Avant d’utiliser la batterie, lisez toutes les
instructions et précautions relatives (1) au
chargeur de batterie, (2) à la batterie, et (3) au
produit utilisant la batterie.
2.
batterie. C e l a p o u r r a i t e n t r a î n e r u n i n c e n d i e , u n e
c h a l e u r e x c e s s i v e o u u n e e x p l o s i o n .
3. Cessez immédiatement l’utilisation si le temps
de fonctionnement devient excessivement
voire d’explosion.
4 .
Si l’électrolyte pénètre dans vos yeux, rincez-les
à l’eau claire et consultez immédiatement un
médecin. Il y a risque de perte de la vue.
5. Ne court-circuitez pas la batterie :
( 1) Ne touchez les bornes avec aucun maté-
riau conducteur.
( 2) Évitez de ranger la batterie dans un
conteneur avec d’autres objets métal-
liques, par exemple des clous, des pièces
de monnaie, etc.
( 3) N’exposez pas la batterie à l’eau ou à la
pluie.
Un court-circuit de la batterie peut provoquer
parfois des brûlures et même une panne.
6. Ne rangez ni n’utilisez l’outil et la batterie dans
un endroit où la température risque d’atteindre
ou de dépasser 50 °C.
7 . Ne jetez pas la batterie au feu même si elle est
sérieusement endommagée ou complètement
épuisée. La batterie peut exploser au contact
du feu.
8. Abstenez-vous de clouer, couper, écraser,
jeter, laisser tomber la batterie, ou de la heur-
ter contre un objet dur. C e l a p o u r r a i t e n t r a î n e r
u n i n c e n d i e , u n e c h a l e u r e x c e s s i v e o u u n e
e x p l o s i o n .
9. N’utilisez pas la batterie si elle est
endommagée.
10. Les batteries au lithium-ion contenues sont
soumises aux exigences de la législation sur
les marchandises dangereuses.
L o r s d u t r a n s p o r t c o m m e r c i a l p a r d e s t i e r c e s
p a r t i e s o u d e s t r a n s i t a i r e s p a r e x e m p l e , d e s e x i -
n é c e s s a i r e d e c o n s u l t e r u n e x p e r t e n m a t é r i a u
d a n g e r e u x . V e u i l l e z é g a l e m e n t r e s p e c t e r l e s
p l u s d é t a i l l é e s .
11. Lors de la mise au rebut de la batterie, reti-
rez-la de l’outil et jetez-la en lieu sûr. Suivez les
réglementations locales en matière de mise au
rebut des batteries.
12. Utilisez les batteries uniquement avec les
L ’ i n s e r t i o n d e
p r o v o q u e r u n i n c e n d i e , u n e c h a l e u r e x c e s s i v e ,
u n e e x p l o s i o n o u u n e f u i t e d e l ’ é l e c t r o l y t e .
13. Lorsque vous n’utilisez pas l’outil pendant une
période prolongée, la batterie doit être retirée
de l’outil.
14 . Pendant et après l’utilisation, la batterie peut
compris en cas de température relativement
basse. Manipulez les batteries chaudes avec
précaution.
15. Ne touchez pas la borne de l’outil immédiate-
ment après utilisation car elle peut être assez
chaude pour provoquer des brûlures.
16. Évitez que des copeaux, de la poussière ou
du sol adhèrent aux bornes, aux trous et aux
rainures de la batterie. C e l a p e u t p r o v o q u e r u n
17 . À moins que l’outil prenne en charge un tel
usage, n’utilisez pas la batterie à proximité de
lignes électriques haute tension. C e l a p o u r r a i t
e n t r a î n e r u n d y s f o n c t i o n n e m e n t o u c a s s e r l ’ o u t i l
18. Conservez la batterie hors de portée des
enfants.
CONSERVEZ CES
INSTRUCTIONS.
ATTENTION : N’utilisez que des batteries
Makita d’origine.
-
r i s q u e d ’ i n c e n d i e , d e d o m m a g e s m a t é r i e l s e t c o r p o -
r e l s . C e l a a n n u l e r a é g a l e m e n t l a g a r a n t i e M a k i t a p o u r
l ’ o u t i l e t l e c h a r g e u r M a k i t a .

15 FRANÇAIS
Conseils pour assurer la durée
de vie optimale de la batterie
1. Chargez la batterie avant qu’elle ne soit com-
plètement déchargée. Arrêtez toujours l’outil
et rechargez la batterie quand vous remarquez
que la puissance de l’outil diminue.
2. Ne rechargez jamais une batterie complète-
ment chargée. La surcharge réduit la durée de
service de la batterie.
3.
Chargez la batterie à une température ambiante
comprise entre 10 °C et 40 °C. Avant de charger
une batterie chaude, laissez-la refroidir.
4 . Lorsque vous n’utilisez pas la batterie, reti-
rez-la de l’outil ou du chargeur.
5. Rechargez la batterie si elle est restée inutili-
sée pendant une période prolongée (plus de
six mois).
RÉGLAGE INITIAL
ATTENTION : Assurez-vous toujours que
l’outil est hors tension et que sa batterie est reti-
DESCRIPTION DES PIÈCES
Fig.1
1O u t i l p r i n c i p a l 2
3 4R é c e p t e u r d e r é a c t i o n
5B o u l o n 6C l é
-Di a m è t r e n o m i n a l
T a i l l e d e l a c l é ( H )
M 12 10 m m
BM 8 6 m m
CM 6 5 m m

Préparation de l’outil
ATTENTION : Avant utilisation, assurez-vous
toujours que la poignée avant, la poignée laté-
rale et le récepteur de réaction sont solidement
installés.
REMARQUE : Ne serrez pas excessivement les
boulons. V o u s r i s q u e r i e z d ’ e n d o m m a g e r l ’ o u t i l .
Installation de la poignée latérale
perdus.
Fig.2: 1. B o u l o n
-
r e z -l e s s o l i d e m e n t a v e c l a c l é .
Fig.3: 1. 2. 3. B o u l o n B
Installation du récepteur de réaction
v i e n n e s u r l e c ô t é g a u c h e d e l ’ u t i l i s a t e u r .
s o r t e q u e l ’ a x e d e l a t i g e s o i t a u c e n t r e d u c o r p s d e
l ’ u t i l i s a t e u r .
Fig.4: 1. B a r r e d u r é c e p t e u r d e r é a c t i o n 2. B o u l o n C
DESCRIPTION DU
FONCTIONNEMENT
ATTENTION : Assurez-vous toujours que
l’outil est hors tension et que sa batterie est
fonctionnement.
Indication de la charge restante de
la batterie
Uniquement pour les batteries avec voyant
lumineux
Fig.5: 1. T é m o i n s 2.
t é m o i n s s ’ a l l u m e n t p e n d a n t q u e l q u e s s e c o n d e s .
Témoins Charge
restante
Allumé Éteint Clignotant
7 5 % à 100 %
50 % à 7 5 %
25 % à 50 %
0 % à 25 %
C h a r g e z l a
NOTE : S e l o n l e s c o n d i t i o n s d ’ u t i l i s a t i o n e t l a t e m -
NOTE : L e p r e m i e r t é m o i n ( c o m p l è t e m e n t à g a u c h e )
c l i g n o t e r a p e n d a n t l e f o n c t i o n n e m e n t d u s y s t è m e d e

16 FRANÇAIS
batterie
-
t a t i o n v e r s l e m o t e u r p o u r p r o l o n g e r l a d u r é e d e v i e d e
d a n s l ’ u n e d e s s i t u a t i o n s s u i v a n t e s , l ’ o u t i l c e s s e r a
a u t o m a t i q u e m e n t d e f o n c t i o n n e r .
Protection contre la surcharge
provoquantun appelde courantanorm alem entélevé,
l ’ o u t i l s ’ a r r ê t e a u t o m a t i q u e m e n t . Da n s c e c a s , é t e i g n e z
l ’ o u t i l e t a r r ê t e z l a t â c h e a y a n t p r o v o q u é l a s u r c h a r g e
s ’ a r r ê t e a u t o m a t i q u e m e n t . Da n s c e c a s , l a i s s e z l ’ o u t i l
Protection contre la décharge totale
de la batterie
-
r i e d e l ’ o u t i l e t c h a r g e z -l a .
Protections contre d’autres causes
L e s y s t è m e d e p r o t e c t i o n e s t é g a l e m e n t c o n ç u p o u r
d ’ a u t r e s c a u s e s q u i p o u r r a i e n t e n d o m m a g e r l ’ o u t i l
e t l u i p e r m e t d e s ’ a r r ê t e r a u t o m a t i q u e m e n t . S u i v e z
t o u t e s l e s é t a p e s c i -d e s s o u s p o u r é l i m i n e r l e s c a u s e s ,
l o r s q u e l ’ o u t i l a é t é a r r ê t é p r o v i s o i r e m e n t o u a c e s s é d e
f o n c t i o n n e r .
1. É t e i g n e z l ’ o u t i l , p u i s r a l l u m e z -l e p o u r l e
r e d é m a r r e r .
-
t è m e d e p r o t e c t i o n , c o n t a c t e z v o t r e c e n t r e d e s e r v i c e
M a k i t a l o c a l .
Interrupteur d’alimentation
principale
AVERTISSEMENT : Lorsque vous n’utili-
sez pas l’outil, éteignez-le et placez le levier de
l’inverseur en position neutre pour verrouiller la
d’alimentation principale s’éteint après que vous
éteignez l’outil.
-
-
m e n t a t i o n p r i n c i p a l e .
Fig.6: 1. B o u t o n d ’ a l i m e n t a t i o n p r i n c i p a l e 2. T é m o i n
d ’ a l i m e n t a t i o n p r i n c i p a l e
NOTE : C e t o u t i l d i s p o s e d ’ u n e f o n c t i o n d e m i s e h o r s
i n t e m p e s t i f , l ’ i n t e r r u p t e u r d ’ a l i m e n t a t i o n p r i n c i p a l e
l o r s q u e l a g â c h e t t e n ’ e s t p a s e n c l e n c h é e p e n d a n t
e n v i r o n 5 m i n u t e s a p r è s a c t i o n n e m e n t d e l ’ i n t e r r u p -
t e u r d ’ a l i m e n t a t i o n p r i n c i p a l e .
ATTENTION : Avant d’insérer la batterie dans
-
tionne bien et revient en position d’arrêt lorsque
Fig.7: 1. G â c h e t t e
l ’ i n t e r r u p t e u r p r i n c i p a l e s u r M a r c h e . L a v i t e s s e d e l ’ o u t i l
a u g m e n t e à m e s u r e q u e l ’ o n a c c r o î t l a p r e s s i o n e x e r -
NOTE : L ’ o u t i l s ’ a r r ê t e r a a u t o m a t i q u e m e n t s i v o u s
c o n t i n u e z d ’ e n c l e n c h e r l a g â c h e t t e p e n d a n t 6
m i n u t e s e n v i r o n .
Allumage de la lampe avant
ATTENTION : Évitez de regarder directement
le faisceau lumineux ou sa source.
Fig.8: 1. Lam pe
r e s t e a l l u m é e t a n t q u e l a g â c h e t t e e s t e n c l e n c h é e . L a l a m p e
s ’ é t e i n t e n v i r o n 10 s e c o n d e s a p r è s a v o i r r e l â c h é l a g â c h e t t e .
NOTE :
a u t o m a t i q u e m e n t e t l a l a m p e s e m e t à c l i g n o t e r .
S i c e l a s e p r o d u i t , r e l â c h e z l a g â c h e t t e . L a l a m p e
s ’ é t e i n d r a a p r è s 5 m i n u t e ( s ) .
NOTE : R e t i r e z l a s a l e t é s u r l a l e n t i l l e d e l a l a m p e
l a l e n t i l l e d e l a l a m p e s o u s p e i n e d e d i m i n u e r s o n
é c l a i r a g e .
Fonctionnement de l’inverseur
ATTENTION :
rotation avant d’utiliser l’outil.
ATTENTION : N’utilisez l’inverseur qu’une
fois que l’outil est complètement arrêté. S i v o u s
c h a n g e z l e s e n s d e r o t a t i o n a v a n t l ’ a r r ê t d e l ’ o u t i l ,
v o u s r i s q u e z d e l ’ e n d o m m a g e r .
ATTENTION : Lorsque vous n’utilisez pas
l’outil, placez toujours le levier de l’inverseur en
position neutre.
L ’ o u t i l p o s s è d e u n i n v e r s e u r q u i p e r m e t d e c h a n g e r
d ’ u n e m o n t r e , o u d u c ô t é B p o u r u n e r o t a t i o n d a n s l e
s e n s i n v e r s e d e s a i g u i l l e s d ’ u n e m o n t r e .
L e l e v i e r i n t e r r u p t e u r n e p e u t p a s ê t r e e n c l e n c h é s i l e
l e v i e r i n v e r s e u r s e t r o u v e e n p o s i t i o n n e u t r e .
Fig.9: 1. L e v i e r d e l ’ i n v e r s e u r

17 FRANÇAIS
Fonction de changement
automatique de vitesse
C e t o u t i l e s t p o u r v u d ’ u n « m o d e g r a n d e v i t e s s e » e t
d ’ u n « m o d e c o u p l e é l e v é » .
L ’ o u t i l c h a n g e a u t o m a t i q u e m e n t d e m o d e d e f o n c t i o n -
n e m e n t e n f o n c t i o n d e l a c h a r g e d e t r a v a i l . L o r s q u e l a
g r a n d e v i t e s s e » p o u r p e r m e t t r e u n e o p é r a t i o n p l u s
r a p i d e . L o r s q u e l a c h a r g e d e t r a v a i l e s t é l e v é e , l ’ o u t i l
f o n c t i o n n e e n « m o d e c o u p l e é l e v é » p o u r p e r m e t t r e
u n e o p é r a t i o n p u i s s a n t e .
Fig.10: 1. T é m o i n d e m o d e
L e t é m o i n d e m o d e s ’ a l l u m e e n v e r t l o r s q u e l ’ o u t i l f o n c -
t i o n n e e n « m o d e c o u p l e é l e v é » .
S i l ’ o u t i l e s t u t i l i s é a v e c u n e c h a r g e e x c e s s i v e , l e t é m o i n
d e m o d e c l i g n o t e e n v e r t . L e t é m o i n d e m o d e c e s s e d e
c l i g n o t e r , p u i s s ’ a l l u m e o u s ’ é t e i n t s i v o u s r é d u i s e z l a
c h a r g e s u r l ’ o u t i l .
Statut du témoin de mode Mode de
fonction-
nement
Allumé Éteint Clignotant
M o d e g r a n d e
v i t e s s e
M o d e c o u p l e
é l e v é
d e s u r c h a r g e
Changement de vitesse
REMARQUE : N’utilisez le bouton de change-
ment de vitesse qu’une fois l’outil complètement
arrêté. S i v o u s c h a n g e z l a v i t e s s e d e l ’ o u t i l a v a n t
l ’ a r r ê t d e l ’ o u t i l , v o u s r i s q u e z d e l ’ e n d o m m a g e r .
REMARQUE : Mettez toujours le bouton de
changement de vitesse soigneusement sur la
bonne position.
c h a n g e m e n t d e v i t e s s e p l a c é à m i -c h e m i n e n t r e l a
p o s i t i o n 1 e t l a p o s i t i o n 2, v o u s r i s q u e z d ’ e n d o m m a -
g e r l ’ o u t i l .
De u x p l a g e s d e v i t e s s e p e u v e n t ê t r e p r é s é l e c t i o n n é e s
-
s o r t e q u e l ’ i n d e x s o i t t o u r n é v e r s l a p o s i t i o n 1 p o u r l a
v i t e s s e l e n t e o u l a p o s i t i o n 2 p o u r l a g r a n d e v i t e s s e .
Fig.11: 1. B o u t o n d e v e r r o u i l l a g e 2. In d e x 3. B o u t o n
d e c h a n g e m e n t d e v i t e s s e
Limiteur de couple
L e l i m i t e u r d e c o u p l e s ’ a c t i v e l o r s q u ’ u n c e r t a i n n i v e a u
-
Da n s c e c a s , l e f o r e t d e l ’ o u t i l c e s s e d e t o u r n e r .
l e r e t i r e r d e l a p i è c e à t r a v a i l l e r p u i s e n c l e n c h e z l a
gâchette à nouveau.
Fonction de prévention de
redémarrage accidentel
U n e f o n c t i o n d e v e r r o u i l l a g e p o u r l a g â c h e t t e p e r m e t -
t a n t d ’ e m p ê c h e r t o u t f o n c t i o n n e m e n t i m p r é v u . L ’ o u t i l n e
-
t a t i o n p r i n c i p a l e t o u t e n e n c l e n c h a n t l a g â c h e t t e .
e n c l e n c h e z -l a d e n o u v e a u .
Fonction électronique
L ’ o u t i l e s t d o t é d e s f o n c t i o n s é l e c t r o n i q u e s s u i v a n t e s
p o u r e n f a c i l i t e r l e f o n c t i o n n e m e n t .
Frein électrique
C e t o u t i l e s t é q u i p é d ’ u n f r e i n é l e c t r i q u e . S i s y s t é m a t i -
q u e m e n t , l e r e l â c h e m e n t d e l a g â c h e t t e n ’ e n t r a î n e p a s
u n a r r ê t r a p i d e d e l ’ o u t i l , a d r e s s e z -v o u s à u n c e n t r e d e
s e r v i c e a p r è s -v e n t e M a k i t a p o u r f a i r e r é p a r e r l ’ o u t i l .
Fonction de démarrage en douceur
C e t t e f o n c t i o n p e r m e t l e d é m a r r a g e e n d o u c e u r d e
l ’ o u t i l e n l i m i t a n t l e c o u p l e d e d é m a r r a g e .
AVERTISSEMENT :
l’outil au mur ou d’éviter son vol. L e n o n -r e s p e c t
Fig.12: 1.
ASSEMBLAGE
Insertion ou retrait de la batterie
ATTENTION : Éteignez toujours l’outil avant
de mettre en place ou de retirer la batterie.
ATTENTION : Tenez fermement l’outil et la
batterie lors de la mise en place ou du retrait de
la batterie. S i v o u s n e t e n e z p a s f e r m e m e n t l ’ o u t i l
Fig.13: 1. In d i c a t e u r r o u g e 2. B o u t o n 3. B a t t e r i e
p o u v e z v o i r l ’ i n d i c a t e u r r o u g e c o m m e i l l u s t r é s u r l a

18 FRANÇAIS
ATTENTION : Insérez toujours complètement
la batterie jusqu’à ce que l’indicateur rouge ne
soit plus visible. -
ATTENTION : N’insérez pas la batterie de
force. S i e l l e n e g l i s s e p a s f a c i l e m e n t , c ’ e s t q u e v o u s
n e l ’ i n s é r e z p a s c o r r e c t e m e n t .
Fixation de la mèche hélicoïdale
ATTENTION : Assurez-vous toujours que
l’outil est hors tension et que sa batterie est reti-
ATTENTION :
hélicoïdale sur la tige, assurez-vous que la gou-
pille fendue est verrouillée et qu’elle ne présente
aucun dommage.
ATTENTION : Retirez la mèche hélicoïdale de
l’outil pour le transporter.
Fixation de la mèche hélicoïdale sur
la tige
NOTE : L a f o r m e e t l e m é c a n i s m e d e l a m è c h e h é l i -
c o ï d a l e e t d e l a g o u p i l l e f e n d u e d é p e n d e n t d e v o t r e
m è c h e h é l i c o ï d a l e .
Fig.14: 1. M è c h e h é l i c o ï d a l e 2. T i g e
F i x e z l a m è c h e h é l i c o ï d a l e a v e c l a g o u p i l l e f e n d u e e t l e
c a d e n a s d e s é c u r i t é .
Fig.15: 1. G o u p i l l e f e n d u e 2. C a d e n a s d e s é c u r i t é
UTILISATION
ATTENTION : Il s’agit d’un outil puissant qui
génère un couple élevé. Il est important que l’outil
soit fermement maintenu et correctement calé.
ATTENTION :
qu’aucun corps étranger (sable, saleté, etc.) ne
soit coincé dans les ouvertures ou les pièces en
mouvement.
Posture de travail
-
m a î t r i s e r l e r e c u l .
M a i n t e n e z u n e p o s i t i o n c o r r e c t e e n p r a t i q u a n t l e s p o i n t s
s u i v a n t s .
-
c ô t é g a u c h e d e v o t r e t a i l l e .
•T e n e z l a p o i g n é e e t l a p o i g n é e l a t é r a l e d e s d e u x
p r i s e , e n l e s s e r r a n t e n t r e v o t r e p o u c e e t v o t r e
i n d e x .
d ’ e x c a v a t i o n .
•R e s t e z v i g i l a n t à l a f o r c e d e r é a c t i o n d u c o u p l e d e
-
t i o n n e m e n t d a n s l a q u e l l e v o u s p o u v e z s u p p o r t e r
l a f o r c e d e r é a c t i o n d u c o u p l e .
Fig.16: 1. 2. 3. B a r r e d u
r é c e p t e u r d e r é a c t i o n
AVERTISSEMENT : Évitez un positionne-
ment incorrect. Ne vous tenez pas trop loin de
l’outil. V o u s r i s q u e r i e z d e n e p a s r é a g i r e t c o n t r ô l e r
l ’ o u t i l c o r r e c t e m e n t e n c a s d e r e c u l .
Fig.17
Excavation
ATTENTION : Tenez l’outil fermement lorsque
vous l’utilisez.
ATTENTION : Tenez votre visage et vos
mains à l’écart des accessoires de perçage,
comme une mèche hélicoïdale, toute pièce en
rotation et les débris des déblais de forage pen-
dant le fonctionnement.
ATTENTION : Lorsque vous abandonnez l’ou-
til, par exemple pendant une pause, ne le laissez
pas planté dans le sol ou ne le posez pas contre
un mur. Rangez l’outil dans une condition stable.
REMARQUE : Lorsque la vitesse de rotation
diminue considérablement, réduisez la charge ou
arrêtez l’outil pour éviter de l’abîmer.
REMARQUE : Une pression excessive sur l’outil
n’accélèrera pas l’excavation. -
-
e t r é d u i r a s a d u r é e d e s e r v i c e .
REMARQUE : Évitez de creuser dans des maté-
riaux que vous soupçonnez contenir des clous
cachés ou d’autres choses susceptibles de coin-
cer ou casser la mèche hélicoïdale.
REMARQUE : Si l’outil est utilisé de manière
continue jusqu’à ce que la batterie se vide, lais-
sez-le reposer 15 minutes avant de poursuivre le
travail avec une batterie chargée.
•L o r s q u e v o u s c r e u s e z u n t r o u p r o f o n d o u q u e
v o u s c r e u s e z d a n s u n s o l a r g i l e u x , n ’ e s s a y e z p a s
d e c r e u s e r e n u n e s e u l e f o i s . C r e u s e z l e t r o u e n
q u e l e s o l d a n s l e t r o u p u i s s e ê t r e d é v e r s é .
•S i l a v i t e s s e d e r o t a t i o n d e l ’ o u t i l r a l e n t i t e n r a i s o n
d ’ u n e o p é r a t i o n à c h a r g e é l e v é e , s o u l e v e z l é g è r e -
c r e u s e r p a r p e t i t e s é t a p e s .

19 FRANÇAIS
Lors de la rotation de la mèche
hélicoïdale à l’envers
U n e m è c h e h é l i c o ï d a l e c o i n c é e p e u t ê t r e r e t i r é e e n
r é g l a n t s i m p l e m e n t l ’ i n v e r s e u r s u r l a r o t a t i o n i n v e r s e
p o u r f a i r e m a r c h e a r r i è r e .
e m p ê c h e r u n e r é a c t i o n d a n s l e s e n s d e s a i g u i l l e s d ’ u n e
m o n t r e .
Fig.18
ATTENTION : Tenez l’outil fermement. L ’ o u t i l
ENTRETIEN
ATTENTION : Assurez-vous toujours que
l’outil est hors tension et que la batterie est reti-
d’entretien.
REMARQUE : N’utilisez jamais d’essence, ben-
zine, diluant, alcool ou autre produit similaire.
Cela risquerait de provoquer la décoloration, la
t o u t e r é p a r a t i o n , t o u t t r a v a i l d ’ e n t r e t i e n o u d e r é g l a g e
a g r é é , a v e c d e s p i è c e s d e r e c h a n g e M a k i t a .
ACCESSOIRES EN
OPTION
ATTENTION : Ces accessoires ou pièces
complémentaires sont recommandés pour l’utili-
d’emploi. L ’ u t i l i s a t i o n d e t o u t a u t r e a c c e s s o i r e o u
p i è c e c o m p l é m e n t a i r e p e u t c o m p o r t e r u n r i s q u e d e
-
c o n t a c t e z v o t r e c e n t r e d ’ e n t r e t i e n l o c a l M a k i t a .
•M è c h e s h é l i c o ï d a l e s
•B a r r e d e r a l l o n g e d e l a m è c h e h é l i c o ï d a l e
•B a t t e r i e e t c h a r g e u r M a k i t a d ’ o r i g i n e
NOTE : Il s e p e u t q u e c e r t a i n s é l é m e n t s d e l a l i s t e
q u ’ a c c e s s o i r e s s t a n d a r d . Il s p e u v e n t v a r i e r d ’ u n p a y s
à l ’ a u t r e .

20 DEUTSCH
DEUTSCH (Original-Anleitung)
TECHNISCHE DATEN
Modell: DDG461
Leerlaufdrehzahl H och 0 - 1.4 00 m i n -1
N i e d r i g 0 - 350 m i n -1
B o h r k a p a z i t ä t e n
( Du r c h m e s s e r )
H o c h F ü r s a n d i g e B ö d e n : ø 60 m m
N i e d r i g F ü r s a n d i g e B ö d e n : ø 200 m m
G e s a m t l ä n g e 84 0 m m * 1
N ennspannung 36 V G l e i c h s t r o m
N e t t o g e w i c h t 7 , 0 - 7 , 6 k g
* 1
•Di e t e c h n i s c h e n Da t e n k ö n n e n v o n L a n d z u L a n d u n t e r s c h i e d l i c h s e i n .
•
Ladegerät
WARNUNG: B e i V e r w e n d u n g i r g e n d -
Empfohlene kabelgebundene Stromquelle
•
W a r n m a r k i e r u n g e n d u r c h .
Vorgesehene Verwendung
Gemessen am Verwendungszweck
S c h a l l d r u c k p e g e l ( L
S c h a l l l e i s t u n g s p e g e l ( L
HINWEIS:
S t a n d a r d p r ü f m e t h o d e g e m e s s e n u n d k a n n ( k ö n n e n ) f ü r d e n
V e r g l e i c h z w i s c h e n W e r k z e u g e n h e r a n g e z o g e n w e r d e n .
HINWEIS:
S c h a l l e m i s s i o n s w e r t ( e ) k a n n ( k ö n n e n ) a u c h f ü r e i n e
w erden.
WARNUNG: Einen Gehörschutz tragen.
WARNUNG:
kann je nach der Benutzungsweise des
Werkzeugs, und speziell je nach der Art des bear-
beiteten Werkstücks, von dem (den) angegebenen
Wert(en) abweichen.
WARNUNG:
Sicherheitsmaßnahmen zum Schutz des
-
lichen Benutzungsbedingungen (unter
Berücksichtigung aller Phasen des Arbeitszyklus,
wie z. B. Ausschalt- und Leerlaufzeiten des
Other manuals for DDG461
2
Table of contents
Languages:
Other Makita Lawn And Garden Equipment manuals

Makita
Makita DG002G User manual

Makita
Makita EE400MP User guide

Makita
Makita EY403MP User manual

Makita
Makita UM104D User manual

Makita
Makita BUB182Z Quick start guide

Makita
Makita XMU05 User manual

Makita
Makita UM110D User manual

Makita
Makita DUM111 User manual

Makita
Makita DUM604Z User manual

Makita
Makita UB401MP User guide

Makita
Makita DG001G User manual

Makita
Makita DUM166 User manual

Makita
Makita DUM168RF User manual

Makita
Makita DUM604 User manual

Makita
Makita DUM604 User manual

Makita
Makita DUM604RFX User manual

Makita
Makita UM164D Series Manual

Makita
Makita DDG461PT2 User manual

Makita
Makita UM110D User manual

Makita
Makita DUM111 User manual