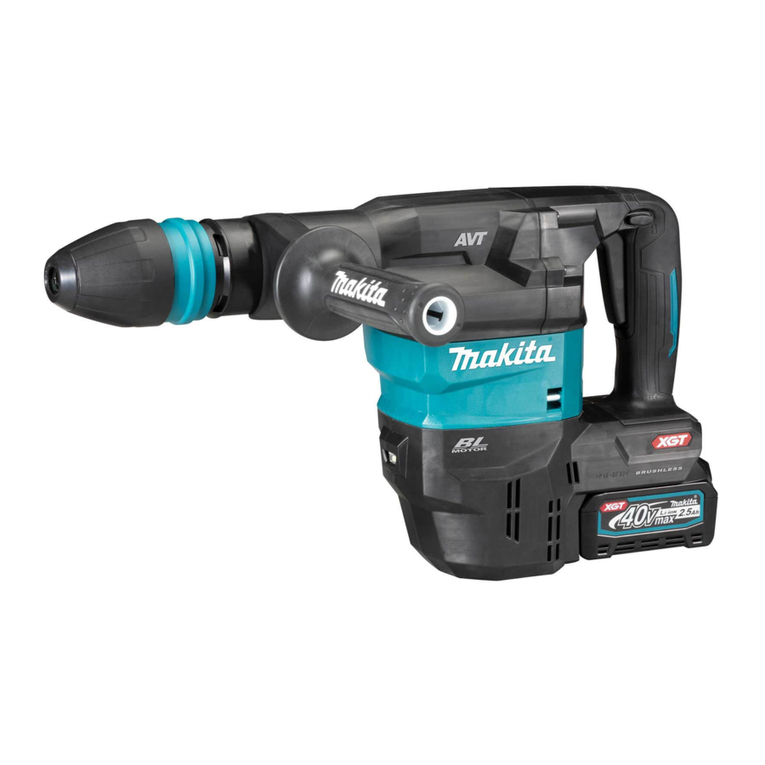
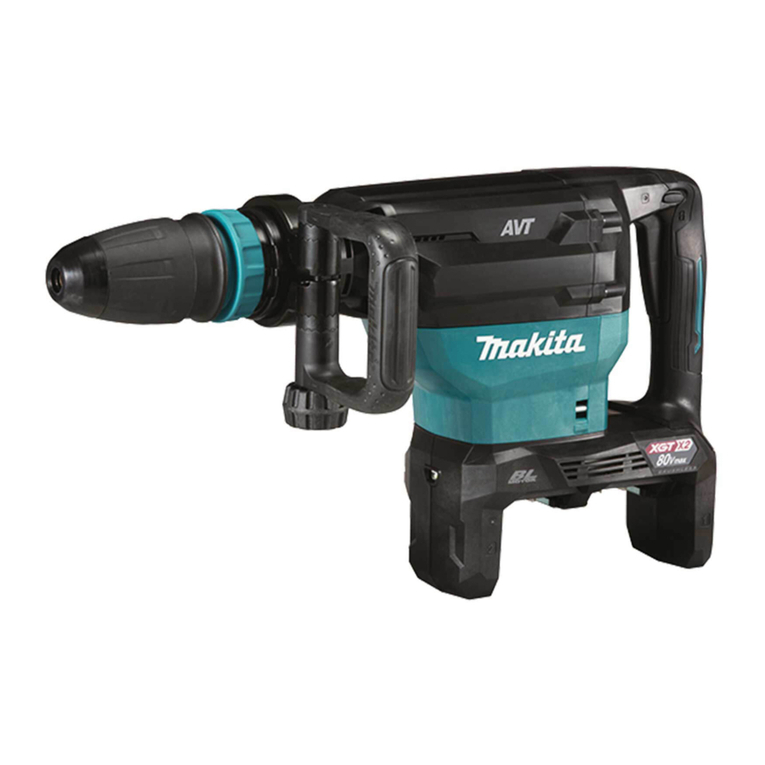
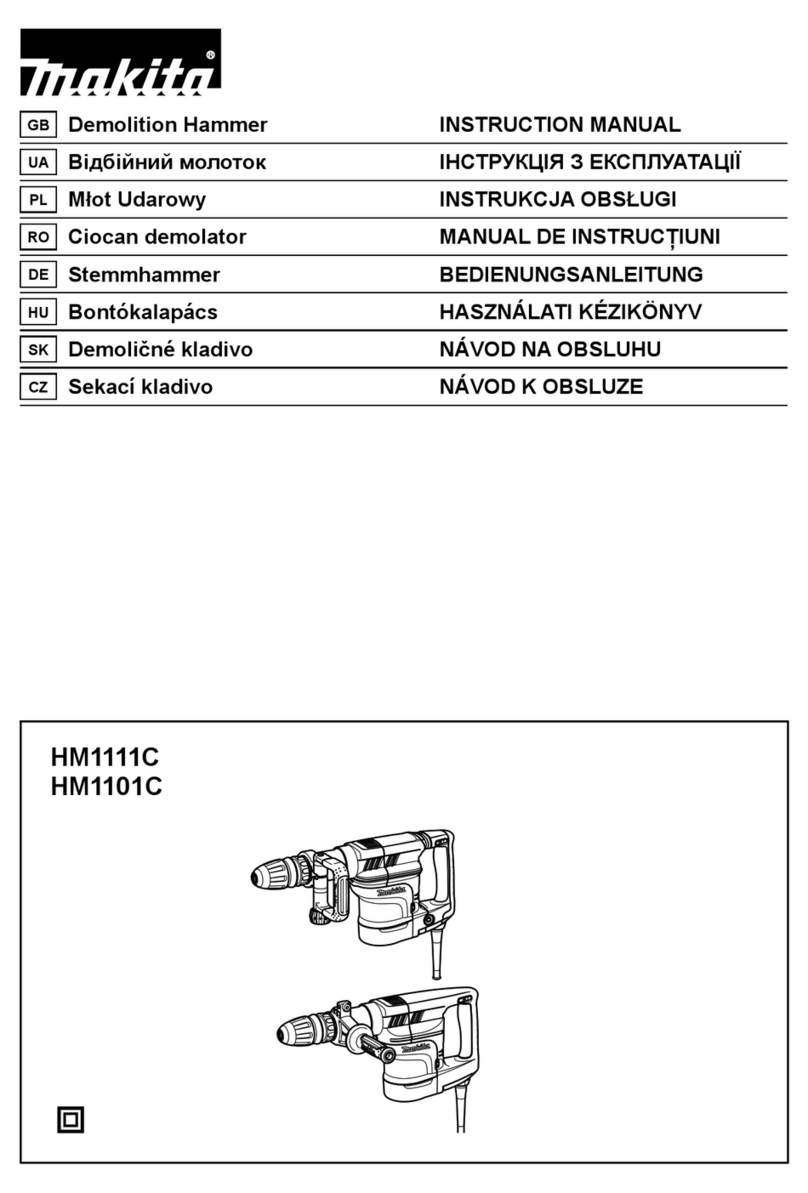
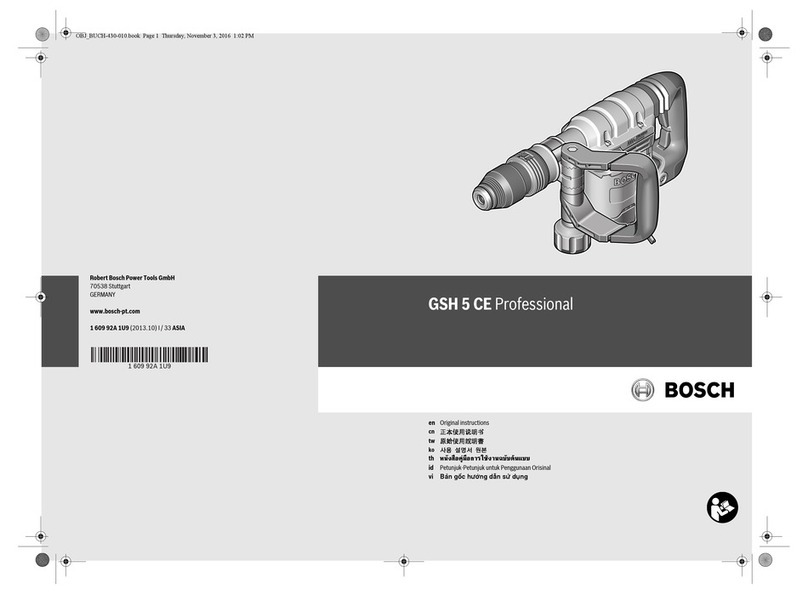
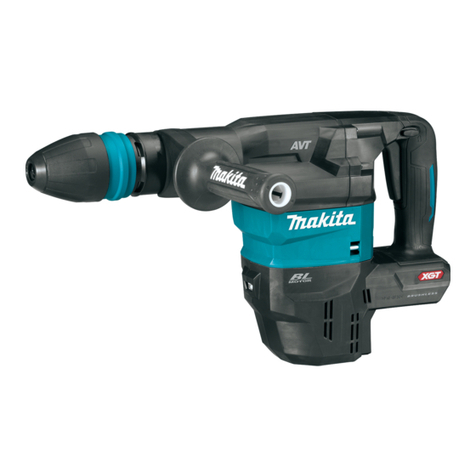
Makita HM002G User manual

HM002G
EN Cordless Demolition Hammer INSTRUCTION MANUAL 7
SV Batteridriven mejselhammare BRUKSANVISNING 17
NO Trådløs borhammer BRUKSANVISNING 27
FI Akkukäyttöinen murtovasara KÄYTTÖOHJE 37
DA Akku nedbrydningshammer BRUGSANVISNING 47
LV Bezvadu atskaldāmais āmurs LIETOŠANAS INSTRUKCIJA 57
LT Belaidis atskėlimo plaktukas NAUDOJIMO INSTRUKCIJA 67
ET Juhtmeta lammutusvasar KASUTUSJUHEND 77
RU Аккумуляторный отбойный
молоток РУКОВОДСТВО ПО
ЭКСПЛУАТАЦИИ 87

1
2
3
Fig.1
1
2
Fig.2
1
2
B A
Fig.3
1
Fig.4
1
Fig.5
1
2
Fig.6
1
2
Fig.7
1 2
Fig.8
2

2
1
Fig.9
1
Fig.10
1
2
3
Fig.11
1
2
Fig.12
3
21 4
Fig.13
(1)
Fig.14
3

Fig.15
Fig.16
1
Fig.17
1
2
34
Fig.18
1
2
3
Fig.19
1
Fig.20
4

12
1
2
Fig.21
Fig.22
1
Fig.23
21
Fig.24
1
Fig.25
1
Fig.26
5

12
1
2
Fig.27
6

7ENGLISH
ENGLISH (Original instructions)
SPECIFICATIONS
Model: HM002G
Blows per minute 950 - 1,900 min-1
Rated voltage D.C. 72 V - 80 V max
Overall length 574 mm
Net weight 12.0 - 13.3 kg
• Duetoourcontinuingprogramofresearchanddevelopment,thespecicationshereinaresubjecttochange
without notice.
• Specicationsmaydierfromcountrytocountry.
• Theweightmaydierdependingontheattachment(s),includingthebatterycartridge.Thelightestandheavi-
estcombination,accordingtoEPTA-Procedure01/2014,areshowninthetable.
Applicable battery cartridge and charger
Batterycartridge BL4020/BL4025/BL4040*/BL4050F*
*:Recommendedbattery
Charger DC40RA/DC40RB/DC40RC
•
Someofthebatterycartridgesandchargerslistedabovemaynotbeavailabledependingonyourregionofresidence.
WARNING: Only use the battery cartridges and chargers listed above.Useofanyotherbatterycartridges
andchargersmaycauseinjuryand/orre.
Intended use
The tool is intended for chiselling work in concrete,
brick,stoneandasphaltaswellasfordrivingandcom-
pacting with appropriate accessories.
Noise
ThetypicalA-weightednoiseleveldeterminedaccord-
ingtoEN60745-2-6:
Soundpressurelevel(LpA):92dB(A)
Soundpowerlevel(LWA):103dB(A)
Uncertainty(K):3dB(A)
NOTE:Thedeclarednoiseemissionvalue(s)has
beenmeasuredinaccordancewithastandardtest
methodandmaybeusedforcomparingonetoolwith
another.
NOTE:Thedeclarednoiseemissionvalue(s)
mayalsobeusedinapreliminaryassessmentof
exposure.
WARNING: Wear ear protection.
WARNING: The noise emission during actual
use of the power tool can dier from the declared
value(s) depending on the ways in which the
tool is used especially what kind of workpiece is
processed.
WARNING: Be sure to identify safety mea-
sures to protect the operator that are based on an
estimation of exposure in the actual conditions of
use (taking account of all parts of the operating
cycle such as the times when the tool is switched
o and when it is running idle in addition to the
trigger time).
Vibration
Thevibrationtotalvalue(tri-axialvectorsum)deter-
minedaccordingtoEN60745-2-6:
Workmode:chisellingfunctionwithsidehandle
Vibrationemission(ah, Cheq):8.0m/s2
Uncertainty(K):1.5m/s2
NOTE:Thedeclaredvibrationtotalvalue(s)hasbeen
measured in accordance with a standard test method
andmaybeusedforcomparingonetoolwithanother.
NOTE:Thedeclaredvibrationtotalvalue(s)mayalso
beusedinapreliminaryassessmentofexposure.
WARNING: The vibration emission during
actual use of the power tool can dier from the
declared value(s) depending on the ways in which
the tool is used especially what kind of workpiece
is processed.
WARNING: Be sure to identify safety mea-
sures to protect the operator that are based on an
estimation of exposure in the actual conditions of
use (taking account of all parts of the operating
cycle such as the times when the tool is switched
o and when it is running idle in addition to the
trigger time).
EC Declaration of Conformity
For European countries only
TheECdeclarationofconformityisincludedasAnnexA
to this instruction manual.

8ENGLISH
SAFETY WARNINGS
General power tool safety warnings
WARNING: Read all safety warnings, instruc-
tions, illustrations and specications provided
with this power tool.Failuretofollowallinstructions
listedbelowmayresultinelectricshock,reand/or
seriousinjury.
Save all warnings and instruc-
tions for future reference.
Theterm"powertool"inthewarningsreferstoyour
mains-operated(corded)powertoolorbattery-operated
(cordless)powertool.
Cordless Demolition Hammer safety
warnings
1. Wear ear protectors.Exposuretonoisecan
cause hearing loss.
2. Use auxiliary handle(s), if supplied with the
tool.Lossofcontrolcancausepersonalinjury.
3.
Hold power tool by insulated gripping sur-
faces, when performing an operation where the
cutting accessory may contact hidden wiring.
Cuttingaccessorycontactinga"live"wiremay
make exposed metal parts of the power tool "live"
and could give the operator an electric shock.
4.
Wear a hard hat (safety helmet), safety glasses and/
or face shield. Ordinary eye or sun glasses are NOT
safety glasses. It is also highly recommended that
you wear a dust mask and thickly padded gloves.
5.
Be sure the bit is secured in place before operation.
6.
Under normal operation, the tool is designed to
produce vibration. The screws can come loose
easily, causing a breakdown or accident. Check
tightness of screws carefully before operation.
7. In cold weather or when the tool has not been
used for a long time, let the tool warm up for
a while by operating it under no load. This
will loosen up the lubrication. Without proper
warm-up, hammering operation is dicult.
8.
Always be sure you have a rm footing. Be sure no
one is below when using the tool in high locations.
9. Hold the tool rmly with both hands.
10. Keep hands away from moving parts.
11. Do not leave the tool running. Operate the tool
only when hand-held.
12. Do not point the tool at any one in the area
when operating. The bit could y out and
injure someone seriously.
13.
Do not touch the bit, parts close to the bit, or
workpiece immediately after operation; they
may be extremely hot and could burn your skin.
14.
Some material contains chemicals which may be
toxic. Take caution to prevent dust inhalation and
skin contact. Follow material supplier safety data.
15.
Always be sure that the tool is switched o and
the battery cartridge and the bit are removed
before handing the tool to other person.
16. Before operation, make sure that there is no
buried object such as electric pipe, water pipe
or gas pipe in the working area. Otherwise, the
drillbit/chiselmaytouchthem,resultinganelectric
shock, electrical leakage or gas leak.
17. Do not operate the tool at no-load
unnecessarily.
SAVE THESE INSTRUCTIONS.
WARNING: DO NOT let comfort or familiarity
with product (gained from repeated use) replace
strict adherence to safety rules for the subject
product. MISUSE or failure to follow the safety
rules stated in this instruction manual may cause
serious personal injury.
Important safety instructions for
battery cartridge
1.
Before using battery cartridge, read all instruc-
tions and cautionary markings on (1) battery
charger, (2) battery, and (3) product using battery.
2.
Do not disassemble or tamper the battery cartridge.
Itmayresultinare,excessiveheat,orexplosion.
3. If operating time has become excessively
shorter, stop operating immediately. It may
result in a risk of overheating, possible burns
and even an explosion.
4.
If electrolyte gets into your eyes, rinse them out
with clear water and seek medical attention right
away. It may result in loss of your eyesight.
5. Do not short the battery cartridge:
(1) Do not touch the terminals with any con-
ductive material.
(2) Avoid storing battery cartridge in a con-
tainer with other metal objects such as
nails, coins, etc.
(3) Do not expose battery cartridge to water
or rain.
A battery short can cause a large current
ow, overheating, possible burns and even a
breakdown.
6. Do not store and use the tool and battery car-
tridge in locations where the temperature may
reach or exceed 50 °C (122 °F).
7. Do not incinerate the battery cartridge even if
it is severely damaged or is completely worn
out. The battery cartridge can explode in a re.
8. Do not nail, cut, crush, throw, drop the battery
cartridge, or hit against a hard object to the
battery cartridge.Suchconductmayresultina
re,excessiveheat,orexplosion.
9. Do not use a damaged battery.
10.
The contained lithium-ion batteries are subject to
the Dangerous Goods Legislation requirements.
Forcommercialtransportse.g.bythirdparties,
forwarding agents, special requirement on pack-
agingandlabelingmustbeobserved.
Forpreparationoftheitembeingshipped,consultingan
expertforhazardousmaterialisrequired.Pleasealso
observepossiblymoredetailednationalregulations.
Tapeormaskoopencontactsandpackupthe
batteryinsuchamannerthatitcannotmove
around in the packaging.
9ENGLISH
11.
When disposing the battery cartridge, remove it from
the tool and dispose of it in a safe place. Follow your
local regulations relating to disposal of battery.
12. Use the batteries only with the products
specied by Makita.Installingthebatteriesto
non-compliantproductsmayresultinare,exces-
siveheat,explosion,orleakofelectrolyte.
13. If the tool is not used for a long period of time,
the battery must be removed from the tool.
14. During and after use, the battery cartridge may
take on heat which can cause burns or low
temperature burns. Pay attention to the han-
dling of hot battery cartridges.
15.
Do not touch the terminal of the tool immediately
after use as it may get hot enough to cause burns.
16. Do not allow chips, dust, or soil stuck into the
terminals, holes, and grooves of the battery
cartridge.Itmayresultinpoorperformanceor
breakdownofthetoolorbatterycartridge.
17. Unless the tool supports the use near
high-voltage electrical power lines, do not use
the battery cartridge near a high-voltage elec-
trical power lines.Itmayresultinamalfunction
orbreakdownofthetoolorbatterycartridge.
18. Keep the battery away from children.
SAVE THESE INSTRUCTIONS.
CAUTION: Only use genuine Makita batteries.
Useofnon-genuineMakitabatteries,orbatteriesthat
havebeenaltered,mayresultinthebatterybursting
causingres,personalinjuryanddamage.Itwill
alsovoidtheMakitawarrantyfortheMakitatooland
charger.
Tips for maintaining maximum
battery life
1. Charge the battery cartridge before completely
discharged. Always stop tool operation and
charge the battery cartridge when you notice
less tool power.
2.
Never recharge a fully charged battery cartridge.
Overcharging shortens the battery service life.
3.
Charge the battery cartridge with room tempera-
ture at 10 °C - 40 °C (50 °F - 104 °F). Let a hot
battery cartridge cool down before charging it.
4. When not using the battery cartridge, remove
it from the tool or the charger.
5. Charge the battery cartridge if you do not use
it for a long period (more than six months).
Important safety instructions for
wireless unit
1. Do not disassemble or tamper with the wire-
less unit.
2. Keep the wireless unit away from young chil-
dren. If accidentally swallowed, seek medical
attention immediately.
3. Use the wireless unit only with Makita tools.
4. Do not expose the wireless unit to rain or wet
conditions.
5. Do not use the wireless unit in places where
the temperature exceeds 50 °C (122 °F).
6. Do not operate the wireless unit in places
where medical instruments, such as heart
pace makers are nearby.
7. Do not operate the wireless unit in places
where automated devices are nearby. If oper-
ated,automateddevicesmaydevelopmalfunction
or error.
8. Do not operate the wireless unit in places
under high temperature or places where
static electricity or electrical noise could be
generated.
9. The wireless unit can produce electromagnetic
elds (EMF) but they are not harmful to the
user.
10. The wireless unit is an accurate instrument. Be
careful not to drop or strike the wireless unit.
11. Avoid touching the terminal of the wireless
unit with bare hands or metallic materials.
12. Always remove the battery on the product
when installing the wireless unit into it.
13. When opening the lid of the slot, avoid the
place where dust and water may come into the
slot. Always keep the inlet of the slot clean.
14. Always insert the wireless unit in the correct
direction.
15. Do not press the wireless activation button
on the wireless unit too hard and/or press the
button with an object with a sharp edge.
16. Always close the lid of the slot when
operating.
17.
Do not remove the wireless unit from the slot
while the power is being supplied to the tool.
Doingsomaycauseamalfunctionofthewirelessunit.
18. Do not remove the sticker on the wireless unit.
19. Do not put any sticker on the wireless unit.
20. Do not leave the wireless unit in a place where
static electricity or electrical noise could be
generated.
21. Do not leave the wireless unit in a place sub-
ject to high heat, such as a car sitting in the
sun.
22. Do not leave the wireless unit in a dusty or
powdery place or in a place corrosive gas
could be generated.
23. Sudden change of the temperature may bedew
the wireless unit. Do not use the wireless unit
until the dew is completely dried.
24. When cleaning the wireless unit, gently wipe
with a dry soft cloth. Do not use benzine, thin-
ner, conductive grease or the like.
25. When storing the wireless unit, keep it in the
supplied case or a static-free container.
26. Do not insert any devices other than Makita
wireless unit into the slot on the tool.
27. Do not use the tool with the lid of the slot dam-
aged.Water,dust,anddirtcomeintotheslotmay
cause malfunction.
28. Do not pull and/or twist the lid of the slot more
than necessary.Restorethelidifitcomeso
from the tool.
29. Replace the lid of the slot if it is lost or
damaged.
SAVE THESE INSTRUCTIONS.

10 ENGLISH
FUNCTIONAL DESCRIPTION
CAUTION: Always be sure that the tool is
switched o and the battery cartridge is removed
before adjusting or checking function on the tool.
Installing or removing battery cartridge
CAUTION: Always switch o the tool before
installing or removing of the battery cartridge.
CAUTION: Hold the tool and the battery car-
tridge rmly when installing or removing battery
cartridge.Failuretoholdthetoolandthebattery
cartridgermlymaycausethemtoslipoyourhands
andresultindamagetothetoolandbatterycartridge
andapersonalinjury.
►Fig.1: 1. Red indicator 2. Button 3.Batterycartridge
Toremovethebatterycartridge,slideitfromthetool
whileslidingthebuttononthefrontofthecartridge.
Toinstallthebatterycartridge,alignthetongueonthe
batterycartridgewiththegrooveinthehousingandslip
itintoplace.Insertitallthewayuntilitlocksinplace
withalittleclick.Ifyoucanseetheredindicatoronthe
uppersideofthebutton,itisnotlockedcompletely.
CAUTION: Always install the battery cartridge
fully until the red indicator cannot be seen. If not,
itmayaccidentallyfalloutofthetool,causinginjuryto
youorsomeonearoundyou.
CAUTION: Do not install the battery cartridge
forcibly.Ifthecartridgedoesnotslideineasily,itis
notbeinginsertedcorrectly.
Indicating the remaining battery capacity
Pressthecheckbuttononthebatterycartridgetoindi-
catetheremainingbatterycapacity.Theindicatorlamps
light up for a few seconds.
►Fig.2: 1. Indicator lamps 2.Checkbutton
Indicator lamps Remaining
capacity
Lighted O Blinking
75% to 100%
50% to 75%
25% to 50%
0% to 25%
Charge the
battery.
Thebattery
mayhave
malfunctioned.
NOTE: Depending on the conditions of use and the
ambienttemperature,theindicationmaydierslightly
fromtheactualcapacity.
NOTE:Therst(farleft)indicatorlampwillblinkwhen
thebatteryprotectionsystemworks.
Tool / battery protection system
Thetoolisequippedwithatool/batteryprotectionsys-
tem.Thissystemautomaticallycutsopowertothe
motortoextendtoolandbatterylife.Thetoolwillauto-
maticallystopduringoperationifthetoolorbatteryis
placedunderoneofthefollowingconditions:
Overload protection
Whenthetoolorbatteryisoperatedinamannerthat
causesittodrawanabnormallyhighcurrent,thetool
automaticallystopswithoutanyindication.Inthissit-
uation,turnthetooloandstoptheapplicationthat
causedthetooltobecomeoverloaded.Thenturnthe
tool on to restart.
Overheat protection
Whenthetoolorbatteryisoverheated,thetoolstops
automatically.Inthiscase,letthetoolandbatterycool
beforeturningthetoolonagain.
NOTE:Whenthetoolisoverheated,thelampblinks.
Overdischarge protection
Whenthebatterycapacityisnotenough,thetoolstops
automatically.Inthiscase,removethebatteryfromthe
toolandchargethebattery.
Switch action
WARNING: Before installing the battery car-
tridge into the tool, always check to see that the
switch trigger actuates properly and returns to
the "OFF" position when released.
CAUTION: When not operating the tool,
depress the trigger-lock button from side to
lock the switch trigger in the OFF position.
Topreventtheswitchtriggerfromaccidentallypulled,
thetrigger-lockbuttonisprovided.Tostartthetool,
depressthetrigger-lockbuttonfromA( )sideandpull
theswitchtrigger.Toolspeedisincreasedbyincreas-
ing pressure on the switch trigger. Release the switch
triggertostop.Afteruse,depressthetrigger-lockbutton
fromB( )side.
►Fig.3: 1.Trigger-lockbutton2. Switch trigger
Using the trigger-lock button for
continuous operation
Forcontinuousoperation,depressthetrigger-lockbut-
tonfromB( )sidewhilepullingtheswitchtrigger,and
then release the switch trigger. To stop the tool, depress
thetrigger-lockbuttonfromA( )side.

11 ENGLISH
Speed change
►Fig.4: 1.Speedadjustingdial
Theblowsperminutecanbeadjustedbyturningthe
adjustingdial.
Thedialismarked1(lowestspeed)to5(fullspeed).
Refertothetablefortherelationshipbetweenthenum-
bersettingsonthedialandtheblowsperminute.
Number Blows per minute
51,900 min-1
41,800 min-1
31,450 min-1
21,000 min-1
1950 min-1
CAUTION: Do not turn the adjusting dial when
the tool is running. Failure to do so may result in
the loss of control of the tool and cause an injury.
NOTICE: The speed adjusting dial can be turned
only as far as 5 and back to 1. Do not force it past
5 or 1, or the speed adjusting function may no
longer work.
NOTE: Soft no-load rotation function
Blowsatnoloadperminutebecomessmallerthan
thoseonloadinordertoreducevibrationunderno
load,butthisdoesnotshowtrouble.
Onceoperationstartswithabitagainstconcrete,
blowsperminuteincreaseandreachthenumbersas
showninthetable.
Whentemperatureislow,thetoolmaynothavethis
function even with the motor rotating.
Lighting up the front lamp
►Fig.5: 1. Lamp
CAUTION: Do not look in the light or see the
source of light directly.
Pulltheswitchtriggertolightupthelamp.Thelamp
keepsonlightingwhiletheswitchtriggerisbeingpulled.
Thelampgoesoutapproximately10secondsafter
releasing the switch trigger.
NOTE:Useadryclothtowipethedirtothelensof
the lamp. Be careful not to scratch the lens of lamp, or
itmaylowertheillumination.
Electronic function
The tool is equipped with the electronic functions for
easyoperation.
• Constant speed control
The speed control function provides the constant
rotation speed regardless of load conditions.
• Soft start
The soft-start function minimizes start-up shock,
andmakesthemachinestartsmoothly.
ASSEMBLY
CAUTION: Always be sure that the tool is
switched o and the battery cartridge is removed
before carrying out any work on the tool.
Side handle (auxiliary handle)
CAUTION: Always use the side handle to
ensure safe operation.
CAUTION: After installing or adjusting the
side handle, make sure that the side handle is
rmly secured.
Thesidehandlecanbeswunginaverticaldirection
andsecuredatanydesiredposition.Itcanalsobe
adjustedateightstepsbackandforthinahorizontal
direction. Loosen the clamp nut to swing the side han-
dle to a desired position, and then tighten the clamp nut
securely.
►Fig.6: 1. Side handle 2. Clamp nut
Installing or removing bit
Grease
Cleantheshankendofthebitandapplygreasebefore
installingthebit.
Coattheshankendofthebitbeforehandwithasmall
amountofgrease(about0.5-1g).Thischucklubrica-
tion assures smooth action and longer service life.
►Fig.7: 1. Shank end 2. Grease
Insertthebitintothetool.Turnthebitandpushitinuntil
it engages.
Ifthebitcannotbepushedin,removethebit.Pullthe
release cover down a couple of times. Then insert the
bitagain.Turnthebitandpushitinuntilitengages.
Afterinstallingthebit,alwaysmakesurethatthebitis
securelyheldinplacebytryingtopullitout.
►Fig.8: 1. Bit 2. Release cover
Toremovethebit,pullthereleasecoverdownallthe
wayandpullthebitout.
►Fig.9: 1. Bit 2. Release cover
Bit angle
Thebitcanbesecuredat12dierentangles.To
changethebitangle,slidethechangeringcoverfor-
ward,thenturnthechangeringcovertochangethebit
angle.Atthedesiredangle,slidethechangeringcover
backtotheoriginalposition.Thebitwillbesecuredin
place.
Afterchangingthebitangle,makesuretheangleis
xedbytryingtorotatethebit.
►Fig.10: 1. Change ring cover

12 ENGLISH
Dust extractor attachment
Optional accessory
1. Installthehoseholder(A).
Loosentheclampnut,andthenremovethehexbolt.
Installthehoseholder(A)betweenthehexboltandthe
clampnutbytighteningtheclampnutrmly.
►Fig.11: 1.Hexbolt2.Hoseholder(A)3. Clamp nut
2. Attachtheholderjointtothetool,andthenattach
thehoseholder(C)totheholderjoint.
►Fig.12: 1.Holderjoint2.Hoseholder(C)
NOTE:Thehosejointcanbeattachedtoeitherside
of the tool.
WARNING: Use the mounting part of the tool
only for attaching the holder joint.
Usingthemountingpartforanyotherpurposemay
cause an unexpected accident.
3. Attachthedustcoverandthehosetothetool,and
thenxthehosetothehoseholders.
►Fig.13: 1. Dust cover 2. Hose 3.Hoseholder(A)
4.Hoseholder(C)
4. Connect the hose to the hose of the vacuum
cleanerwiththehosejoint.
NOTE: If the hose is not included, attach the dust
covertothecleaner'sjointorattachittoMakita's
hose ø28.
5. Adjustthedistancebetweenthedustcoverand
thetipofthechiselorbullpoint.Therecommended
distance is 30 mm to 100 mm.
►Fig.14: (1) 30 mm to 100 mm
OPERATION
CAUTION: Always use the side grip (auxiliary
handle) and rmly hold the tool by both side grip
and switch handle during operations.
CAUTION: Always make sure that the work-
piece is secured before operation. Failuretoprop-
erlysecuretheworkpiecemaycausetheworkpiece
tomoveresultingininjury.
CAUTION: Do not pull the tool out forcibly
even the bit gets stuck. Loss of control may
cause injury.
CAUTION: Do not leave the tool stabbed in
the workpiece. Otherwisethetoolmaystartsunin-
tentionallyandcauseaninjury.
NOTE:Ifthebatterycartridgeisinlowtemperature,
thetool’scapabilitymaynotbefullyobtained.Inthis
case,warmupthebatterycartridgebyusingthe
toolwithnoloadforawhiletofullyobtainthetool’s
capability.
Chipping/Scaling/Demolition
Holdthetoolrmlywithbothhands.Turnthetoolon
andapplyslightpressureonthetoolsothatthetoolwill
notbouncearound,uncontrolled.Pressingveryhardon
thetoolwillnotincreasetheeciency.
►Fig.15
WIRELESS ACTIVATION
FUNCTION
Optional accessory
What you can do with the wireless
activation function
Thewirelessactivationfunctionenablescleanandcom-
fortableoperation.Byconnectingasupportedvacuum
cleanertothetool,youcanrunthevacuumcleaner
automaticallyalongwiththeswitchoperationofthetool.
►Fig.16
To use the wireless activation function, prepare follow-
ingitems:
• Awirelessunit(optionalaccessory)
• Avacuumcleanerwhichsupportsthewireless
activation function
The overview of the wireless activation function
setting is as follows. Refer to each section for detail
procedures.
1. Installing the wireless unit
2. Tool registration for the vacuum cleaner
3. Starting the wireless activation function
Installing the wireless unit
Optional accessory
CAUTION: Place the tool on a at and stable
surface when installing the wireless unit.
NOTICE: Clean the dust and dirt on the tool
before installing the wireless unit. Dust or dirt
maycausemalfunctionifitcomesintotheslotofthe
wireless unit.
NOTICE: To prevent the malfunction caused by
static, touch a static discharging material, such
as a metal part of the tool, before picking up the
wireless unit.
NOTICE: When installing the wireless unit,
always be sure that the wireless unit is inserted
in the correct direction and the lid is completely
closed.

13 ENGLISH
1. Openthelidonthetoolasshowninthegure.
►Fig.17: 1. Lid
2. Insert the wireless unit to the slot and then close
the lid.
Wheninsertingthewirelessunit,aligntheprojections
with the recessed portions on the slot.
►Fig.18: 1. Wireless unit 2.Projection3. Lid
4. Recessed portion
Whenremovingthewirelessunit,openthelidslowly.
Thehooksonthebackofthelidwillliftthewirelessunit
asyoupullupthelid.
►Fig.19: 1. Wireless unit 2. Hook 3. Lid
Afterremovingthewirelessunit,keepitinthesupplied
case or a static-free container.
NOTICE: Always use the hooks on the back of
the lid when removing the wireless unit. If the
hooks do not catch the wireless unit, close the lid
completelyandopenitslowlyagain.
Tool registration for the vacuum
cleaner
NOTE:AMakitavacuumcleanersupportingthe
wireless activation function is required for the tool
registration.
NOTE:Finishinstallingthewirelessunittothetool
beforestartingthetoolregistration.
NOTE: During the tool registration, do not pull the
switch trigger or turn on the power switch on the
vacuum cleaner.
NOTE: Refer to the instruction manual of the vacuum
cleaner, too.
Ifyouwishtoactivatethevacuumcleaneralongwith
theswitchoperationofthetool,nishthetoolregistra-
tionbeforehand.
1. Installthebatteriestothevacuumcleanerandthe
tool.
2. Setthestand-byswitchonthevacuumcleanerto
"AUTO".
►Fig.20: 1.Stand-byswitch
3. Pressthewirelessactivationbuttononthevac-
uum cleaner for 3 seconds until the wireless activation
lampblinksingreen.Andthenpressthewirelessacti-
vationbuttononthetoolinthesameway.
►Fig.21: 1.Wirelessactivationbutton2. Wireless
activation lamp
If the vacuum cleaner and the tool are linked success-
fully,thewirelessactivationlampswilllightupingreen
for2secondsandstartblinkinginblue.
NOTE:Thewirelessactivationlampsnishblinking
ingreenafter20secondselapsed.Pressthewireless
activationbuttononthetoolwhilethewirelessacti-
vationlamponthecleanerisblinking.Ifthewireless
activationlampdoesnotblinkingreen,pushthewire-
lessactivationbuttonbrieyandholditdownagain.
NOTE: When performing two or more tool registra-
tionsforonevacuumcleaner,nishthetoolregistra-
tiononebyone.
Starting the wireless activation
function
NOTE:Finishthetoolregistrationforthevacuum
cleaner prior to the wireless activation.
NOTE: Refer to the instruction manual of the vacuum
cleaner, too.
Afterregisteringatooltothevacuumcleaner,the
vacuumcleanerwillautomaticallyrunsalongwiththe
switch operation of the tool.
1. Install the wireless unit to the tool.
2. Connect the hose of the vacuum cleaner with the
tool.
►Fig.22
3. Setthestand-byswitchonthevacuumcleanerto
"AUTO".
►Fig.23: 1.Stand-byswitch
4. Pushthewirelessactivationbuttononthetool
briey.Thewirelessactivationlampwillblinkinblue.
►Fig.24: 1.Wirelessactivationbutton2. Wireless
activation lamp
5. Pulltheswitchtriggerofthetool.Checkifthe
vacuumcleanerrunswhiletheswitchtriggerisbeing
pulled.
To stop the wireless activation of the vacuum cleaner,
pushthewirelessactivationbuttononthetool.
NOTE: The wireless activation lamp on the tool will
stopblinkinginbluewhenthereisnooperationfor
2hours.Inthiscase,setthestand-byswitchonthe
vacuumcleanerto"AUTO"andpushthewireless
activationbuttononthetoolagain.
NOTE:Thevacuumcleanerstarts/stopswithadelay.
There is a time lag when the vacuum cleaner detects
a switch operation of the tool.
NOTE: The transmission distance of the wireless unit
mayvarydependingonthelocationandsurrounding
circumstances.
NOTE: When two or more tools are registered to one
vacuumcleaner,thevacuumcleanermaystartrun-
ningevenifyoudonotpulltheswitchtriggerbecause
another user is using the wireless activation function.

14 ENGLISH
Description of the wireless activation lamp status
►Fig.25: 1. Wireless activation lamp
Thewirelessactivationlampshowsthestatusofthewirelessactivationfunction.Refertothetablebelowforthe
meaning of the lamp status.
Status Wireless activation lamp Description
Color
On
Blinking
Duration
Standby Blue 2 hours Thewirelessactivationofthevacuumcleanerisavailable.The
lampwillautomaticallyturnowhennooperationisperformed
for 2 hours.
When
the tool is
running.
Thewirelessactivationofthevacuumcleanerisavailableandthe
tool is running.
Tool
registration
Green 20 seconds Readyforthetoolregistration.Waitingfortheregistrationbythe
vacuum cleaner.
2 seconds Thetoolregistrationhasbeennished.Thewirelessactivation
lampwillstartblinkinginblue.
Cancelling
tool
registration
Red 20 seconds Readyforthecancellationofthetoolregistration.Waitingforthe
cancellationbythevacuumcleaner.
2 seconds Thecancellationofthetoolregistrationhasbeennished.The
wirelessactivationlampwillstartblinkinginblue.
Others Red 3 seconds The power is supplied to the wireless unit and the wireless activa-
tion function is starting up.
O - - The wireless activation of the vacuum cleaner is stopped.
Cancelling tool registration for the
vacuum cleaner
Performthefollowingprocedurewhencancellingthe
tool registration for the vacuum cleaner.
1. Installthebatteriestothevacuumcleanerandthe
tool.
2. Setthestand-byswitchonthevacuumcleanerto
"AUTO".
►Fig.26: 1.Stand-byswitch
3. Pressthewirelessactivationbuttononthevac-
uumcleanerfor6seconds.Thewirelessactivation
lampblinksingreenandthenbecomered.Afterthat,
pressthewirelessactivationbuttononthetoolinthe
sameway.
►Fig.27: 1.Wirelessactivationbutton2. Wireless
activation lamp
Ifthecancellationisperformedsuccessfully,thewire-
less activation lamps will light up in red for 2 seconds
andstartblinkinginblue.
NOTE:Thewirelessactivationlampsnishblinkingin
redafter20secondselapsed.Pressthewirelessacti-
vationbuttononthetoolwhilethewirelessactivation
lamponthecleanerisblinking.Ifthewirelessacti-
vationlampdoesnotblinkinred,pushthewireless
activationbuttonbrieyandholditdownagain.

15 ENGLISH
Troubleshooting for wireless activation function
Beforeaskingforrepairs,conductyourowninspectionrst.Ifyoundaproblemthatisnotexplainedinthemanual,
donotattempttodismantlethetool.Instead,askMakitaAuthorizedServiceCenters,alwaysusingMakitareplace-
ment parts for repairs.
State of abnormality Probable cause (malfunction) Remedy
The wireless activation lamp does
notlight/blink.
The wireless unit is not installed into the tool.
Thewirelessunitisimproperlyinstalled
into the tool.
Installthewirelessunitcorrectly.
Theterminalofthewirelessunitand/or
theslotisdirty.
Gentlywipeodustanddirtontheterminalofthe
wireless unit and clean the slot.
Thewirelessactivationbuttononthe
toolhasnotbeenpushed.
Pushthewirelessactivationbuttononthetool
briey.
Thestand-byswitchonthevacuum
cleanerisnotsetto"AUTO".
Setthestand-byswitchonthevacuumcleanerto
"AUTO".
Nopowersupply
Supplythepowertothetoolandthevacuumcleaner.
Cannotnishtoolregistration/can-
cellingtoolregistrationsuccessfully.
The wireless unit is not installed into the tool.
Thewirelessunitisimproperlyinstalled
into the tool.
Installthewirelessunitcorrectly.
Theterminalofthewirelessunitand/or
theslotisdirty.
Gentlywipeodustanddirtontheterminalofthe
wireless unit and clean the slot.
Thestand-byswitchonthevacuum
cleanerisnotsetto"AUTO".
Setthestand-byswitchonthevacuumcleanerto
"AUTO".
Nopowersupply
Supplythepowertothetoolandthevacuumcleaner.
Incorrect operation
Pushthewirelessactivationbuttonbrieyandperform
thetoolregistration/cancellationproceduresagain.
Thetoolandvacuumcleanerareaway
fromeachother(outofthetransmission
range).
Get the tool and vacuum cleaner closer to each other.
Themaximumtransmissiondistanceisapproximately10
mhoweveritmayvaryaccordingtothecircumstances.
Beforenishingthetoolregistration/cancellation;
-theswitchtriggeronthetoolispulledor;
-thepowerbuttononthevacuum
cleaner is turned on.
Pushthewirelessactivationbuttonbrieyand
performthetoolregistration/cancellationprocedures
again.
The tool registration procedures for the
toolorvacuumcleanerhavenotnished.
Performthetoolregistrationproceduresforboththe
tool and the vacuum cleaner at the same timing.
Radiodisturbancebyotherappliances
whichgeneratehigh-intensityradio
waves.
Keepthetoolandvacuumcleanerawayfromthe
appliancessuchasWi-Fidevicesandmicrowave
ovens.
The vacuum cleaner does not run
along with the switch operation of
the tool.
The wireless unit is not installed into the tool.
Thewirelessunitisimproperlyinstalled
into the tool.
Installthewirelessunitcorrectly.
Theterminalofthewirelessunitand/or
theslotisdirty.
Gentlywipeodustanddirtontheterminalofthe
wireless unit and clean the slot.
Thewirelessactivationbuttononthe
toolhasnotbeenpushed.
Pushthewirelessactivationbuttonbrieyandmake
surethatthewirelessactivationlampisblinkinginblue.
Thestand-byswitchonthevacuum
cleanerisnotsetto"AUTO".
Setthestand-byswitchonthevacuumcleanerto
"AUTO".
More than 10 tools are registered to the
vacuum cleaner.
Performthetoolregistrationagain.
If more than 10 tools are registered to the vacuum
cleaner,thetoolregisteredearliestwillbecancelled
automatically.
The vacuum cleaner erased all tool
registrations.
Performthetoolregistrationagain.
Nopowersupply
Supplythepowertothetoolandthevacuumcleaner.
Thetoolandvacuumcleanerareaway
fromeachother(outofthetransmission
range).
Get the tool and vacuum cleaner closer each other. The
maximumtransmissiondistanceisapproximately10m
howeveritmayvaryaccordingtothecircumstances.
Radiodisturbancebyotherappliances
whichgeneratehigh-intensityradio
waves.
Keepthetoolandvacuumcleanerawayfromthe
appliancessuchasWi-Fidevicesandmicrowave
ovens.
The vacuum cleaner runs while the
tool's switch trigger is not pulled.
Other users are using the wireless
activation of the vacuum cleaner with
their tools.
Turnothewirelessactivationbuttonoftheother
tools or cancel the tool registration of the other
tools.

16 ENGLISH
MAINTENANCE
CAUTION: Always be sure that the tool is
switched o and the battery cartridge is removed
before attempting to perform inspection or
maintenance.
NOTICE: Never use gasoline, benzine, thinner,
alcohol or the like. Discoloration, deformation or
cracks may result.
TomaintainproductSAFETYandRELIABILITY,
repairs,anyothermaintenanceoradjustmentshould
beperformedbyMakitaAuthorizedorFactoryService
Centers,alwaysusingMakitareplacementparts.
OPTIONAL
ACCESSORIES
CAUTION: These accessories or attachments
are recommended for use with your Makita tool
specied in this manual.Theuseofanyother
accessories or attachments might present a risk of
injurytopersons.Onlyuseaccessoryorattachment
for its stated purpose.
Ifyouneedanyassistanceformoredetailsregard-
ingtheseaccessories,askyourlocalMakitaService
Center.
• SDS-MAXbullpoint
• SDS-MAXcoldchisel
• SDS-MAXscalingchisel
• SDS-MAXclayspade
• Bit grease
• Side handle
• Safetygoggles
• Dust extractor attachment
• Wireless unit
• Makitagenuinebatteryandcharger
NOTE:Someitemsinthelistmaybeincludedinthe
toolpackageasstandardaccessories.Theymay
dierfromcountrytocountry.

17 SVENSKA
SVENSKA (Originalinstruktioner)
SPECIFIKATIONER
Modell: HM002G
Slag per minut 950 - 1 900 min-1
Märkspänning 72 V - 80 V likström max
Total längd 574 mm
Nettovikt 12,0 - 13,3 kg
• Pågrundavvårtpågåendeprogramförforskningochutvecklingkandessaspecikationerändrasutanföregå-
ende meddelande.
• Specikationerkanvarieramellanolikaländer.
• Viktenkanvarieraberoendepåtillbehören,inklusivebatterikassett.Denlättasteochdentyngstakombinatio-
nenenligtEPTA-procedur01/2014visasitabellen.
Tillgänglig batterikassett och laddare
Batterikassett BL4020/BL4025/BL4040*/BL4050F*
*:Rekommenderatbatteri
Laddare DC40RA/DC40RB/DC40RC
• Vissaavbatterikassetternaochladdarnapålistanovankanskeintennstillgängligaidinregion.
VARNING: Använd endast batterikassetter och laddare från listan ovan.Användningavandrabatterikas-
setterochladdarekanorsakapersonskadaoch/ellerbrand.
Avsedd användning
Verktygetäravsettförbearbetningavbetong,tegel,
stenochasfaltsamtförborrningochkomprimeringmed
passandetillbehör.
Buller
DennormalabullernivånförA-belastningärbestämd
enligtEN60745-2-6:
Ljudtrycksnivå(LpA):92dB(A)
Ljudeektnivå(LWA):103dB(A)
Mättolerans(K):3dB(A)
OBS:Detdeklareradebullervärdetharuppmättsi
enlighet med standardtestmetoden och kan användas
förjämförandetavenmaskinmedenannan.
OBS:Detdeklareradebulleremissionsvärdetkan
ocksåanvändasienpreliminärbedömningavexpo-
neringförvibration.
VARNING: Använd hörselskydd.
VARNING: Bulleremissionen under faktisk
användning av maskinen kan skilja sig från det
deklarerade värdet, beroende på hur maskinen
används och särskilt vilken typ av arbetsstycke
som behandlas.
VARNING: Var noga med att identiera säker-
hetsåtgärder för att skydda användaren, vilka är
grundade på en uppskattning av graden av expo-
nering för vibrationer under de faktiska använd-
ningsförhållandena, (ta, förutom avtryckartiden,
med alla delar av användarcykeln i beräkningen,
som till exempel tiden då maskinen är avstängd
och när den går på tomgång).
Vibration
Dettotalavibrationsvärdet(treaxladvektorsumma)
bestämtenligtEN60745-2-6:
Arbetsläge:bearbetningsfunktionmedsidohandtag
Vibrationsemission(ah, Cheq):8,0m/s2
Mättolerans(K):1,5m/s2
OBS:Detdeklareradetotalavibrationsvärdethar
uppmätts i enlighet med standardtestmetoden och
kananvändasförjämförandetavenmaskinmeden
annan.
OBS:Detdeklareradetotalavibrationsvärdetkan
ocksåanvändasienpreliminärbedömningavexpo-
neringförvibration.
VARNING: Vibrationsemissionen under fak-
tisk användning av maskinen kan skilja sig från
det deklarerade värdet, beroende på hur maski-
nen används och särskilt vilken typ av arbetss-
tycke som behandlas.
VARNING: Var noga med att identiera säker-
hetsåtgärder för att skydda användaren, vilka är
grundade på en uppskattning av graden av expo-
nering för vibrationer under de faktiska använd-
ningsförhållandena, (ta, förutom avtryckartiden,
med alla delar av användarcykeln i beräkningen,
som till exempel tiden då maskinen är avstängd
och när den går på tomgång).
EG-försäkran om överensstämmelse
Gäller endast inom EU
EG-försäkranomöverensstämmelseinkluderassom
bilagaAtilldennabruksanvisning.

18 SVENSKA
SÄKERHETSVARNINGAR
Allmänna säkerhetsvarningar för
maskiner
VARNING: Läs alla säkerhetsvarningar, anvis-
ningar, illustrationer och specikationer som
medföljer det här maskinen.Underlåtenhetattfölja
instruktionernakanledatillelstötar,brandoch/eller
allvarliga personskador.
Spara alla varningar och instruk-
tioner för framtida referens.
Termen ”maskin” som anges i varningarna hänvisar till
dineldrivnamaskin(sladdansluten)ellerbatteridrivna
maskin(sladdlös).
Säkerhetsvarningar för batteridriven
mejselhammare
1. Använd hörselskydd.Kraftigtbullerkanorsaka
hörselskador.
2. Använd extrahandtag om det levereras med
maskinen. Om du förlorar kontrollen över maski-
nen kan det leda till personskador.
3. Håll verktyget i de isolerade handtagen om
det nns risk för att sågverktyget kan komma
i kontakt med en dold elkabel.Omsågverktyget
kommer i kontakt med en strömförande ledning
blirverktygetsblottlagdametalldelarströmförande
och kan ge användaren en elektrisk stöt.
4. Använd en hård hjälm (skyddshjälm), skydds-
glasögon och/eller ansiktsskydd. Vanliga
glasögon och solglasögon är INTE skydds-
glasögon. Du bör också bära ett dammskydd
och tjockt fodrade handskar.
5.
Se till att borret sitter säkert innan maskinen används.
6.
Under normal användning vibrerar maskinen.
Skruvarna kan lätt lossna, vilket kan orsaka
maskinhaveri eller en olycka. Kontrollera att
skruvarna är åtdragna innan maskinen används.
7. I kall väderlek, eller när verktyget inte använts
under en längre tid, bör du värma upp verk-
tyget genom att använda det utan belastning.
Detta gör smörjningen mer viskös. Utan upp-
värmning blir det svårt att använda hammaren.
8.
Se till att alltid ha ordentligt fotfäste. Se till att ingen
står under dig när maskinen används på hög höjd.
9. Håll maskinen stadigt med båda händerna.
10. Håll händerna borta från rörliga delar.
11. Lämna inte maskinen igång. Använd endast
maskinen när du håller den i händerna.
12.
Rikta inte maskinen mot någon när den används.
Borret kan yga ut och skada någon allvarligt.
13. Rör inte vid borret, närliggande delar eller
arbetsstycket efter användning, då de kan vara
extremt varma och orsaka brännskador.
14. Vissa material kan innehålla giftiga kemikalier.
Se till att du inte andas in damm eller får det
på huden. Följ anvisningarna i leverantörens
materialsäkerhetsblad.
15. Se alltid till att maskinen är avstängd och att
batterikassetten och bitset är borttagna innan
du ger maskinen till en annan person.
16. Se innan användning till att det inte nns
några begravda föremål som elrör, vattenrör
eller gasrör inom arbetsområdet.Annarskan
borret/mejselnkommaåtdemvilketkanledatill
elektrisk stöt, läckströmmar eller gasläckor.
17. Använd inte maskinen obelastad i onödan.
SPARA DESSA ANVISNINGAR.
VARNING:
GLÖM INTE att också fortsättnings-
vis strikt följa säkerhetsanvisningarna för maski-
nen även efter att du blivit van att använda den. Vid
FELAKTIG HANTERING av maskinen eller om inte
säkerhetsanvisningarna i denna bruksanvisning
följs kan följden bli allvarliga personskador.
Viktiga säkerhetsanvisningar för
batterikassetten
1.
Innan batterikassetten används ska alla
instruktioner och varningsmärken på (1) batte-
riladdaren, (2) batteriet och (3) produkten läsas.
2. Montera inte isär eller mixtra med batterikas-
setten.Detkanledatillbrand,överdrivenvärme
eller explosion.
3.
Om drifttiden blivit avsevärt kortare ska använd-
ningen avbrytas omedelbart. Det kan uppstå över-
hettning, brännskador och t o m en explosion.
4. Om du får elektrolyt i ögonen ska de sköljas
med rent vatten och läkare uppsökas omedel-
bart. Det nns risk för att synen förloras.
5. Kortslut inte batterikassetten.
(1) Rör inte vid polerna med något strömfö-
rande material.
(2) Undvik att förvara batterikassetten till-
sammans med andra metallobjekt som
t.ex. spikar, mynt o.s.v.
(3) Skydda batteriet mot vatten och regn.
En batterikortslutning kan orsaka ett stort ström-
öde, överhettning, brand och maskinhaveri.
6. Förvara och använd inte verktyget och batteri-
kassetten på platser där temperaturen kan nå
eller överstiga 50 °C.
7. Bränn inte upp batterikassetten även om
den är svårt skadad eller helt utsliten.
Batterikassetten kan explodera i öppen eld.
8.
Spika inte i, krossa, kasta, tappa eller slå batte-
rikassetten mot hårda föremål.Dylikahändelser
kanledatillbrand,överdrivenvärmeellerexplosion.
9. Använd inte ett skadat batteri.
10.
De medföljande litiumjonbatterierna är föremål
för kraven i gällande lagstiftning för farligt gods.
Förkommersiellatransporter(avt.ex.tredjeparter
somspeditionsrmor)måstedesärskildatransport-
kravsomangespåemballagetochetiketteriakttas.
Förattförberedadenproduktsomskaavsändas
krävsattdukonsulterarenexpertpåriskmaterial.
Varocksåuppmärksampåattdetidittlandkan
nnasytterligareföreskrifterattfölja.
Tejpaöverellermaskerablottadekontakteroch
packabatterietpåsådantsättattdetintekanröra
sig fritt i förpackningen.

19 SVENSKA
11. När batterikassetten ska kasseras måste den
tas bort från maskinen och kasseras på ett
säkert sätt. Följ lokala föreskrifter beträande
avfallshantering av batteriet.
12.
Använd endast batterierna med de produkter som
specicerats av Makita.Attanvändabatterierna
medejgodkändaprodukterkanledatillbrand,över-
drivenvärme,explosionellerutläckandeelektrolyt.
13. Om maskinen inte används under en lång tid
måste batteriet tas bort från maskinen.
14. Under och efter användning kan batterikasset-
ten bli het vilket kan orsaka brännskador eller
lättare brännskador. Var uppmärksam på hur
du hanterar varma batterikassetter.
15. Vidrör inte verktygets kontakter direkt efter
användning eftersom de kan bli heta och
orsaka brännskador.
16. Låt inte isor, damm eller smuts fastna i kon-
takterna, i hål eller spår i batterikassetten. Det
kanledatilldåligprestandaellertillattverktyget
ellerbatterikassettengårsönder.
17. Såvida inte verktyget stöder arbeten i närheten
av högspänningsledningar får batterikassetten
inte användas i närheten av en högspännings-
ledning.Detkanledatillattverktygetellerbatteri-
kassettengårsönderellerintefungerarkorrekt.
18. Förvara batteriet utom räckhåll för barn.
SPARA DESSA ANVISNINGAR.
FÖRSIKTIGT:
Använda endast äkta Makita-
batterier.AnvändningavoäktaMakita-batteriereller
batteriersomharmanipuleratskanledatillperson-och
utrustningsskadorellertillattbatterietfattareld.Detupp-
häverocksåMakitasgarantiförverktygetochladdaren.
Tips för att uppnå batteriets max-
imala livslängd
1.
Ladda batterikassetten innan den är helt urlad-
dad. Stanna alltid maskinen och ladda batterikas-
setten när du märker att maskinen blir svagare.
2. Ladda aldrig en fulladdad batterikassett.
Överladdning förkortar batteriets livslängd.
3. Ladda batterikassetten vid en rumstemperatur
på 10 °C - 40 °C. Låt en varm batterikassett
svalna innan den laddas.
4. När batterikassetten inte används ska den tas
bort från verktyget eller laddaren.
5. Ladda batterikassetten om du inte har använt
den på länge (mer än sex månader).
Viktiga säkerhetsanvisningar för
den trådlösa enheten
1. Montera inte isär eller manipulera den trådlösa
enheten.
2.
Förvara den trådlösa enheten utom räckhåll för barn.
Om den råkar sväljas, sök omedelbart läkarhjälp.
3. Använd den trådlösa enheten endast ihop med
Makita-verktyg.
4. Utsätt inte den trådlösa enheten för regn eller
våta förhållanden.
5. Använd inte den trådlösa enheten på platser
där temperaturen överstiger 50 °C.
6. Använd inte den trådlösa enheten på platser
där medicinska instrument som pacemakers
nns i närheten.
7. Använd inte den trådlösa enheten på platser
där automatiska enheter nns i närheten. Om
deärigångkanautomatiskaenheterutveckla
funktionsstörningar eller fel.
8. Använd inte den trådlösa enheten på platser
med hög temperatur eller där det kan skapas
statisk elektricitet eller elektriskt brus.
9. Den trådlösa enheten kan alstra elektromagne-
tiska fält (EMF) men dessa är inte skadliga för
användaren.
10.
Den trådlösa enheten är ett noggrant instru-
ment. Var försiktig så att du inte råkar tappa den
trådlösa enheten eller utsätta den för stötar.
11. Undvik att vidröra den trådlösa enhetens ter-
minal med bara händer eller metallmaterial.
12. Ta alltid bort batteriet på produkten när du
installerar den trådlösa enheten på den.
13. När du öppnar skårans lock, undvik då det
ställe där damm och vatten kan komma in i
skåran. Håll alltid skårans inlopp rent.
14.
Sätt alltid in den trådlösa enheten i rätt riktning.
15. Tryck inte för hårt på knappen för trådlös akti-
vering på den trådlösa enheten, och tryck inte
på knappen med ett föremål med vass kant.
16. Stäng alltid skårans lock vid körning.
17. Ta inte bort den trådlösa enheten från skåran
medan ström tillförs till verktyget.Attgöradet
kanorsakafunktionsfelpådentrådlösaenheten.
18. Ta inte bort dekalen på den trådlösa enheten.
19. Sätt inte någon dekal på den trådlösa enheten.
20. Lämna inte den trådlösa enheten någonstans
där det kan skapas statisk elektricitet eller
elektriskt brus.
21. Lämna inte den trådlösa enheten någonstans
där den utsätts för hög värme, t.ex. en bil i
solen.
22. Lämna inte den trådlösa enheten på ett dam-
migt eller pulvrigt ställe eller någonstans där
korrosiv gas kan bildas.
23. Plötsliga temperaturförändringar kan göra den
trådlösa enheten daggbestänkt. Använd inte
den trådlösa enheten förrän daggen helt har
torkat bort.
24. När den trådlösa enheten rengörs, torka den
då med en torr mjuk duk. Använd inte tvättben-
sin, thinner, konduktivt fett eller liknande.
25. När den trådlösa enheten ska tas i förvar, ha
den då i det tillhörande fodralet eller en behål-
lare med skydd mot statisk laddning.
26. Sätt inte in några andra enheter än den tråd-
lösa Makita-enheten i skåran på verktyget.
27. Använd inte verktyget om skårans lock är ska-
dat. Det kan komma in vatten, damm och smuts i
skåransomorsakarfunktionsfel.
28. Dra eller vrid inte skårans lock mer än nöd-
vändigt.Sätttillbakalocketomdetlossnarfrån
verktyget.
29. Ersätt skårans lock om det går förlorat eller
skadas.
SPARA DESSA ANVISNINGAR.

20 SVENSKA
FUNKTIONSBESKRIVNING
FÖRSIKTIGT: Se alltid till att maskinen är
avstängd och batterikassetten borttagen innan
du justerar maskinen eller kontrollerar dess
funktioner.
Montera eller demontera batterikassetten
FÖRSIKTIGT: Stäng alltid av maskinen innan
du monterar eller tar bort batterikassetten.
FÖRSIKTIGT: Håll stadigt i maskinen och
batterikassetten när du monterar eller tar bort
batterikassetten. I annat fall kan det leda till att de
gliderurdinahänderochorsakarskadapåmaskinen
ochbatterikassettensamtpersonskada.
►Fig.1: 1. Röd indikator 2.Knapp3. Batterikassett
Tabortbatterikassettengenomattskjutanerknap-
penpåkassettensframsidasamtidigtsomdudrarut
batterikassetten.
Sättibatterikassettengenomattriktaintunganpåbat-
terikassettenmotspåretihöljetochskjutadenpåplats.
Tryckinkassettenhelavägentillsdenlåserfastmedett
klick.Omdukansedenrödaindikatornpåknappens
ovansidaärdenintelåstordentligt.
FÖRSIKTIGT: Sätt alltid i batterikassetten
helt tills den röda indikatorn inte längre syns. I
annatfallkandenoväntatfallaurverktygetochskada
digellernågonannan.
FÖRSIKTIGT: Montera inte batterikassetten
med våld.Omkassettenintelättgliderpåplatsär
den felinsatt.
Indikerar kvarvarande batterikapacitet
Tryckpåkontrollknappenpåbatterikassettenförattse
kvarvarandebatterikapacitet.Indikatorlampornalyseri
ett par sekunder.
►Fig.2: 1. Indikatorlampor 2.Kontrollknapp
Indikatorlampor Kvarvarande
kapacitet
Upplyst Av Blinkar
75% till 100%
50% till 75%
25% till 50%
0% till 25%
Ladda
batteriet.
Batteriet kan
ha skadats.
OBS:Beroendepåanvändningsförhållandenochden
omgivandetemperaturenkanindikationenskiljasig
lättfråndenfaktiskabatterikapaciteten.
OBS:Denförsta(längsttillvänster)indikatorlam-
pankommerattblinkanärbatteriskyddssystemet
fungerar.
Skyddssystem för maskinen/
batteriet
Verktygetärutrustatmedettskyddssystemförverktyget/
batteriet.Dettasystembryterautomatisktströmmentill
motornförattförlängaverktygetsochbatterietslivslängd.
Verktygetstopparautomatisktunderanvändningenom
verktygetellerbatteriethamnarienavföljandesituationer:
Överbelastningsskydd
Ommaskinenellerbatterietanvändspåettsättsom
görattdetdraronormaltmycketströmkandetstoppas
automatisktutanvarning.Stängdåavmaskinenoch
stoppaåtgärdensomgjordeattdenöverbelastades.
Starta därefter upp maskinen igen.
Överhettningsskydd
Närmaskinenellerbatterietöverhettasstoppasmaski-
nenautomatiskt.Isådantfallskadulåtamaskinenoch
batterietsvalnainnandustartarmaskinenigen.
OBS:Lampanblinkarnärmaskinenäröverhettad.
Överurladdningsskydd
Närbatterietskapacitetärotillräckligstopparmaskinen
automatiskt.Isådantfallskabatteriettasurmaskinen
och laddas.
Avtryckarens funktion
VARNING: Innan du sätter i batterikassetten
i maskinen ska du kontrollera att avtryckaren
fungerar och återgår till läget ”OFF” när du släp-
per den.
FÖRSIKTIGT: När maskinen inte används ska
startspärren vara intryckt från sidan för att låsa
avtryckaren i det avstängda läget OFF.
Avtryckarenförhindrarattverktygetstartasoavsiktligt.
TryckinlåsknappenföravtryckarenfrånsidanA( )
ochtrycksedaninavtryckarenförattstartamaskinen.
Hastighetenökasgenomattavtryckarentrycksinhår-
dare.Släppavtryckarenförattstoppamaskinen.Tryck
instartspärrenfrånsidanB( )efteranvändning.
►Fig.3: 1. Startspärr 2.Avtryckare
Använda startspärr för kontinuerlig
användning
Förkontinuerliganvändning,tryckinlåsknappenför
avtryckarenfrånB-sidan( )samtidigtsomdutrycker
inavtryckaren,ochsläppsedanavtryckaren.Stoppa
verktygetgenomatttryckainstartspärrenfrånA-sidan
().
Other manuals for HM002G
8
Table of contents
Languages:
Other Makita Power Hammer manuals

Makita
Makita M8600 User manual

Makita
Makita HM1214C User manual

Makita
Makita M8600 User manual

Makita
Makita HM001G User manual

Makita
Makita HM001G User manual

Makita
Makita HM1101C User manual

Makita
Makita HM0810 User manual

Makita
Makita HM002G User manual

Makita
Makita HM0871C User manual

Makita
Makita HR2455 Quick start guide

Makita
Makita HM1500 Quick start guide

Makita
Makita GRH10 User manual

Makita
Makita HM1213C User manual

Makita
Makita HM1100 User manual

Makita
Makita HR3210C Quick start guide

Makita
Makita HM0810TA User manual

Makita
Makita HR2621 User manual

Makita
Makita HM0860C User manual

Makita
Makita M8600G User manual

Makita
Makita M8600B User manual