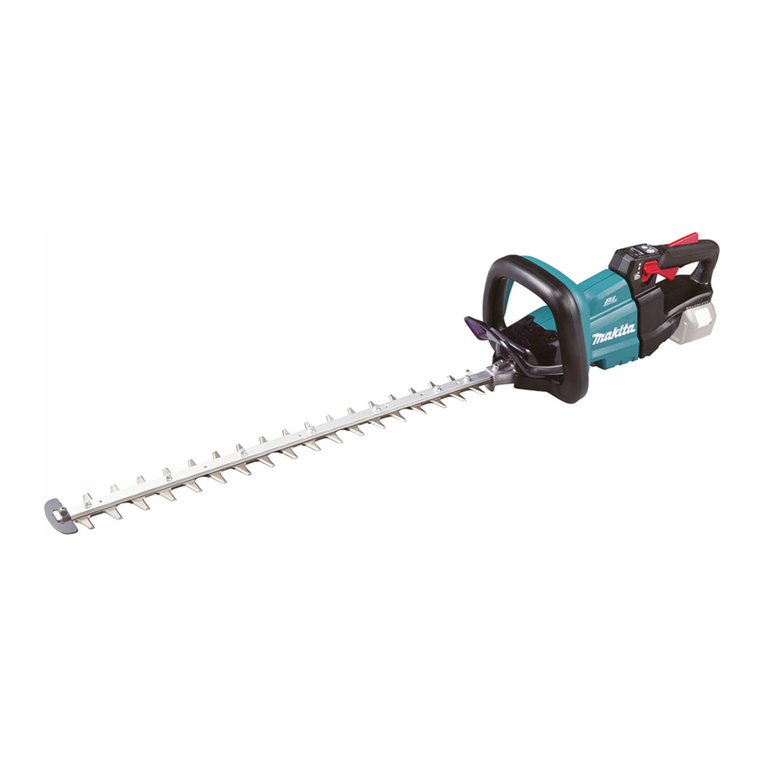
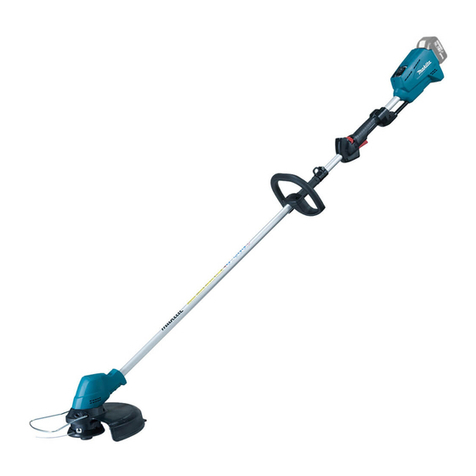
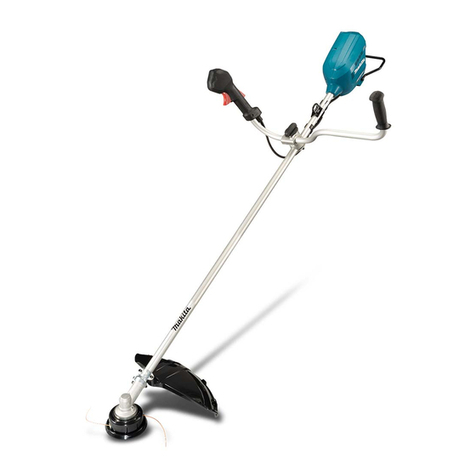
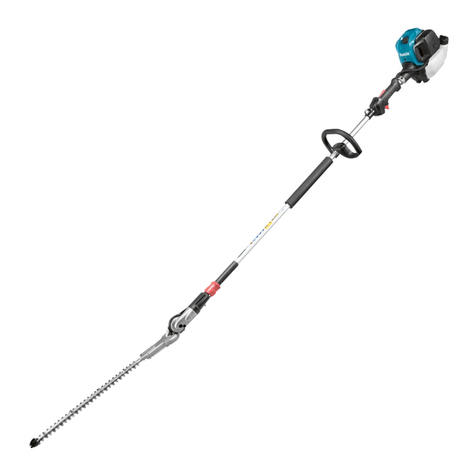
Makita DUR142L User manual

DUR142L
DUR182L
DUR183L
EN Cordless Grass Trimmer INSTRUCTION MANUAL 7
SL Brezžična kosilnica z nitjo za
travo NAVODILO ZA UPORABO 18
SQ Kositëse bari me bateri MANUALI I PËRDORIMIT 29
BG Акумулаторна косачка за
трева
РЪКОВОДСТВО ЗА
ЕКСПЛОАТАЦИЯ 40
HR Bežični Trimer za travu PRIRUČNIK S UPUTAMA 52
МК Безжичен тример за трева УПАТСТВО ЗА УПОТРЕБА 63
RO Motocositoare pentru iarbă
fără cablu MANUAL DE INSTRUCŢIUNI 75
SR Бежични тример за траву УПУТСТВО ЗА УПОТРЕБУ 86
RU Аккумуляторная Коса РУКОВОДСТВО ПО
ЭКСПЛУАТАЦИИ 97
UK Акумуляторна
газонокосарка
ІНСТРУКЦІЯ З
ЕКСПЛУАТАЦІЇ 109

12
3
1
2
1
2
A
B
1
2
3
1
Fig.1
Fig.2
Fig.3
Fig.4
Fig.5
Fig.6
Fig.7
Fig.8
2

1
1
2
1
2
1
1
2
3
4
5
2
1
1
2
3
54
3
1
2
2
3
4
5
6
Fig.9
Fig.10
Fig.11
Fig.12
Fig.13
Fig.14
Fig.15
Fig.16
3

1
2
1
2
3
1
1
2
1
2
4
3
1
2
Fig.17
Fig.18
Fig.19
Fig.20
Fig.21
Fig.22
Fig.23
Fig.24
4

1
1
1
1
Fig.25
Fig.26
Fig.27
Fig.28
Fig.29
Fig.30
Fig.31
Fig.32
5

Fig.33
6

7ENGLISH
ENGLISH (Original instructions)
SPECIFICATIONS
Model DUR142L DUR182L DUR183L
Type of pipe Integrated pipe Splittable pipe
No load speed 3,500 - 6,000 min-1
Overall length with nylon cutting head 1,843 mm
Split length -982 mm
Cutting diameter with nylon cutting head 300 mm
Net weight (with BL1430B or BL1830B) 3.8 kg 3.9 kg 4.1 kg
Rated voltage D.C. 14.4 V D.C. 18 V
Battery cartridge BL1415N, BL1430,
BL1430B, BL1440,
BL1450
BL1815N, BL1820, BL1820B, BL1830,
BL1830B, BL1840, BL1840B, BL1850,
BL1850B, BL1860B
• Due to our continuing program of research and development, the specications herein are subject to change with-
out notice.
• Specications and battery cartridge may differ from country to country.
• Weight, with battery cartridge, according to EPTA-Procedure 01/2003
Noise Sound pressure level Applicable standard
or directive
Model LPA (dB(A))
Uncertainty K (dB(A))
DUR142L 78 1.0 2000/14/EC
DUR182L / DUR183L 79 0.7
• Even if the sound pressure level listed above is 80 dB(A) or less, the level under working may exceed 80 dB(A).
Wear ear protection.
Vibration Front grip Rear grip Applicable
standard or
directive
Model ah (m/s2)Uncertainty
K (m/s2)
ah (m/s2)Uncertainty
K (m/s2)
DUR142L ≤ 2.5 1.5 ≤ 2.5 1.5 EN786
DUR182L / DUR183L ≤ 2.5 1.5 ≤ 2.5 1.5
NOTE: The declared vibration emission value has
been measured in accordance with the standard test
method and may be used for comparing one tool with
another.
NOTE: The declared vibration emission value
may also be used in a preliminary assessment of
exposure.
WARNING: The vibration emission during actual
use of the power tool can differ from the declared
emission value depending on the ways in which the
tool is used.
WARNING: Be sure to identify safety measures
to protect the operator that are based on an estima-
tion of exposure in the actual conditions of use (taking
account of all parts of the operating cycle such as
the times when the tool is switched off and when it is
running idle in addition to the trigger time).
Symbols
The following show the symbols used for the equip-
ment. Be sure that you understand their meaning before
use.
Take particular care and attention.
Read instruction manual.
Danger; be aware of thrown objects.
The distance between the tool and
bystanders must be at least 15 m.
Keep bystanders away.
15m(50FT)Keep distance at least 15 m.
Wear a helmet, goggles and ear protection.
Wear protective gloves.

8ENGLISH
Wear sturdy boots with nonslip soles.
Steeltoed safety boots are recommended.
Do not expose to moisture.
Top permissible tool speed.
Never use metal blade.
Ni-MH
Li-ion
Only for EU countries
Do not dispose of electric equipment or
battery pack together with household waste
material!
In observance of the European Directives,
on Waste Electric and Electronic
Equipment and Batteries and Accumulators
and Waste Batteries and Accumulators
and their implementation in accordance
with national laws, electric equipment and
batteries and battery pack(s) that have
reached the end of their life must be col-
lected separately and returned to an envi-
ronmentally compatible recycling facility.
For European countries only
EC Declaration of Conformity
Makita declares that the following Machine(s):
Designation of Machine:
Cordless Grass Trimmer
Model No./ Type: DUR142L, DUR182L, DUR183L
Specications: see "SPECIFICATIONS" table.
Conforms to the following European Directives:
2000/14/EC, 2006/42/EC
They are manufactured in accordance with the following
standard or standardized documents:
EN60335, EN50636
The technical le in accordance with 2006/42/EC is
available from:
Makita, Jan-Baptist Vinkstraat 2, 3070, Belgium
The conformity assessment procedure required by
Directive 2000/14/EC was in Accordance with annex VI
Notied Body:
TÜV Rheinland LGA Products GmbH
Tillystraße 2
90431 Nürnberg, Germany
Identication number 0197
Model DUR142L
Measured Sound Power Level: 89dB (A)
Guaranteed Sound Power Level: 90dB (A)
Model DUR182L, DUR183L
Measured Sound Power Level: 90dB (A)
Guaranteed Sound Power Level: 90dB (A)
1.10.2015
Yasushi Fukaya
Director
Makita, Jan-Baptist Vinkstraat 2, 3070, Belgium
IMPORTANT SAFETY
INSTRUCTIONS
WARNING! Read all safety warnings and all instruc-
tions. Failure to follow the warnings and instructions may
result in electric shock, re and/or serious injury.
Save all warnings and instruc-
tions for future reference.
1. Be familiar with the controls and proper use of
the equipment.
2. Cutting elements continue to rotate after the
motor is switched off.
3. Never allow children or people unfamiliar with
the instructions to use the machine.
4. Stop using the machine while people, espe-
cially children, or pets are nearby.
5.
Only use the machine in daylight or good articial light.
6. Before using the machine and after any
impact, check for signs of wear or damage and
repair as necessary.
7. Take care against injury from any device
tted for trimming the lament line length.
After extending new cutter line always return
the machine to its normal operating position
before switching on.
8. Never t metal cutting elements.
9.
This appliance is not intended for use by per-
sons (including children) with reduced physical,
sensory or mental capabilities, or lack of expe-
rience and knowledge, unless they have been
given supervision or instruction concerning use
of the appliance by a person responsible for
their safety. Children should be supervised to
ensure that they do not play with the appliance.
10.
Use the tool with the utmost care and attention.
11. Operate the tool only if you are in good phys-
ical condition. Perform all work calmly and
carefully. Use common sense and keep in mind
that the operator or user is responsible for
accidents or hazards occurring to other people
or their property.
12. Never operate the tool when tired, feeling ill or
under the inuence of alcohol or drugs.
13. The tool should be switched off immediately if
it shows any signs of unusual operation.
Intended use of the tool
1. Use right tool. The cordless grass trimmer is
only intended for cutting grass, light weeds. It
should not be used for any other purpose such
as hedge cutting as this may cause injury.
Personal protective equipment
► Fig.1
► Fig.2
1. Dress Properly. The clothing worn should be
functional and appropriate, i.e. it should be
tight-tting but not cause hindrance. Do not
wear either jewelry or clothing which could
become entangled with high grass. Wear pro-
tective hair covering to contain long hair.

9ENGLISH
2. When using the tool, always wear sturdy shoes
with a non-slip sole. This protects against
injuries and ensures a good footing.
3. Wear protective glasses or goggles.
Electrical and battery safety
1. Avoid dangerous environment. Don't use the
tool in damp or wet locations or expose it to
rain. Water entering the tool will increase the
risk of electric shock.
2. Recharge only with the charger specied by
the manufacturer. A charger that is suitable for
one type of battery pack may create a risk of
re when used with another battery pack.
3. Use power tools only with specically desig-
nated battery packs. Use of any other battery
packs may create a risk of injury and re.
4. When battery pack is not in use, keep it away
from other metal objects, like paper clips,
coins, keys, nails, screws or other small metal
objects, that can make a connection from one
terminal to another. Shorting the battery termi-
nals together may cause burns or a re.
5. Under abusive conditions, liquid may be ejected
from the battery; avoid contact. If contact acci-
dentally occurs, ush with water. If liquid contacts
eyes, seek medical help. Liquid ejected from the
battery may cause irritation or burns.
6. Do not dispose of the battery(ies) in a re. The
cell may explode. Check with local codes for
possible special disposal instructions.
7. Do not open or mutilate the battery(ies).
Released electrolyte is corrosive and may
cause damage to the eyes or skin. It may be
toxic if swallowed.
Starting up the tool
► Fig.3
1. Make sure that there are no children or other
people within a working range of 15 meters
(50 ft), also pay attention to any animals in the
working vicinity. Otherwise stop using the tool.
2.
Before use always check that the tool is safe for
operation. Check the security of the cutting tool
and the guard and the switch trigger/lever for
easy and proper action. Check for clean and dry
handles and test the on/off function of the switch.
3.
Check damaged parts before further use of
the tool. A guard or other part that is damaged
should be carefully checked to determine
that it will operate properly and perform its
intended function. Check for alignment of mov-
ing parts, binding of moving parts, breakage of
parts, mounting, and any other condition that
may affect its operation. A guard or other part
that is damaged should be properly repaired
or replaced by our authorized service center
unless indicated elsewhere in this manual.
4. Switch on the motor only when hands and feet
are away from the cutting tool.
5. Before starting make sure that the cutting
tool has no contact with hard objects such as
branches, stones etc. as the cutting tool will
revolve when starting.
Method of operation
1. Never operate the machine with damaged
guards or without the guards in place.
2. Only use the tool in good light and visibility.
During the winter season beware of slippery
or wet areas, ice and snow (risk of slipping).
Always ensure a safe footing.
3. Take care against injury to feet and hands from
the cutting tool.
4. Keep hands and feet away from the cutting
means at all times and especially when switch-
ing on the motor.
5. Never cut above waist height.
6. Never stand on a ladder and run the tool.
7. Never work on unstable surfaces.
8. Don't overreach. Keep proper footing and
balance at all times.
9. Always be sure of your footing on slopes.
10. Walk, never run.
11. Remove sand, stones, nails etc. found within
the working range. Foreign particles may
damage the cutting tool and can cause to be
thrown away, resulting in a serious injury.
12. Never touch moving hazardous parts before
the machine is disconnected from the mains
and the moving hazardous parts have come to
a complete stop.
13. Should the cutting tool hit stones or other hard
objects, immediately switch off the motor and
inspect the cutting tool.
14. Before commencing cutting, the cutting tool
must have reached full working speed.
15. During operation always hold the tool with
both hands. Never hold the tool with one hand
during use. Always ensure a safe footing.
16. All protective equipment such as guards
supplied with the tool must be used during
operation.
17. Except in case of emergency, never drop
or cast the tool to the ground or this may
severely damage the tool.
18. Never drag the tool on the ground when mov-
ing from place to place, the tool may become
damaged if moved in this manner.
19. Always remove the battery cartridge from the
tool:
— whenever leaving the tool unattended;
— before clearing a blockage;
— before checking, cleaning or working on
the tool;
— before making any adjustments, chang-
ing accessories or storing;
— whenever the tool starts vibrating
unusually;
— whenever transporting the tool.
20. Don't force the tool. It will do the job better and
with less likelihood of a risk of injury at the
rate for which it was designed.
21. Do not operate power tools in explosive atmo-
spheres, such as in the presence of ammable
liquids, gases or dust. Power tools create sparks
which may ignite the dust or fumes.

10 ENGLISH
22. Take a rest to prevent loss of control caused
by fatigue. We recommend to take a 10 to
20-minute rest every hour.
Maintenance instructions
1. The condition of the cutting tool, protective
devices and shoulder strap must be checked
before commencing work.
2. Turn off the motor and remove the battery
cartridge before carrying out maintenance,
replacing the cutting tool and cleaning the
tool.
3. After use, disconnect the battery cartridge
from the tool and check for damage.
4. Check for loose fasteners and damaged parts
such as nearly halfway cut-off state in the
cutting tool.
5. When not in use store the equipment in a dry
location that is locked up or out of children's
reach.
6. Use only the manufacturer's recommended
replacement parts and accessories.
7. Always ensure that ventilation openings are
kept clear of debris.
8. Inspect and maintain the tool regularly, espe-
cially before/after use. Have the tool repaired
only by our authorized service center.
9. Keep handles dry, clean and free from oil and
grease.
SAVE THESE INSTRUCTIONS.
WARNING: DO NOT let comfort or famil-
iarity with product (gained from repeated
use) replace strict adherence to safety
rules for the subject product. MISUSE or
failure to follow the safety rules stated in
this instruction manual may cause serious
personal injury.
IMPORTANT SAFETY
INSTRUCTIONS
FOR BATTERY CARTRIDGE
1. Before using battery cartridge, read all instruc-
tions and cautionary markings on (1) battery
charger, (2) battery, and (3) product using
battery.
2. Do not disassemble battery cartridge.
3. If operating time has become excessively
shorter, stop operating immediately. It may
result in a risk of overheating, possible burns
and even an explosion.
4. If electrolyte gets into your eyes, rinse them
out with clear water and seek medical atten-
tion right away. It may result in loss of your
eyesight.
5. Do not short the battery cartridge:
(1) Do not touch the terminals with any con-
ductive material.
(2) Avoid storing battery cartridge in a con-
tainer with other metal objects such as
nails, coins, etc.
(3) Do not expose battery cartridge to water
or rain.
A battery short can cause a large current
ow, overheating, possible burns and even a
breakdown.
6. Do not store the tool and battery cartridge in
locations where the temperature may reach or
exceed 50°C (122°F).
7. Do not incinerate the battery cartridge even if
it is severely damaged or is completely worn
out. The battery cartridge can explode in a re.
8. Be careful not to drop or strike battery.
9. Do not use a damaged battery.
10. The contained lithium-ion batteries are subject
to the Dangerous Goods Legislation require-
ments.
For commercial transports e.g. by third parties,
forwarding agents, special requirement on pack-
aging and labeling must be observed.
For preparation of the item being shipped, consult-
ing an expert for hazardous material is required.
Please also observe possibly more detailed
national regulations.
Tape or mask off open contacts and pack up the
battery in such a manner that it cannot move
around in the packaging.
11. Follow your local regulations relating to dis-
posal of battery.
SAVE THESE INSTRUCTIONS.
CAUTION: Only use genuine Makita batteries.
Use of non-genuine Makita batteries, or batteries that
have been altered, may result in the battery burst-
ing causing res, personal injury and damage. It will
also void the Makita warranty for the Makita tool and
charger.
Tips for maintaining maximum
battery life
1. Charge the battery cartridge before completely
discharged.
Always stop tool operation and charge the bat-
tery cartridge when you notice less tool power.
2. Never recharge a fully charged battery car-
tridge.
Overcharging shortens the battery service life.
3. Charge the battery cartridge with room tem-
perature at 10°C - 40°C (50°F - 104°F). Let a hot
battery cartridge cool down before charging it.
4. Charge the battery cartridge if you do not use
it for a long period (more than six months).

11 ENGLISH
PARTS DESCRIPTION
2
3
5
9
7
8
6
4
12
10
11
1
2
3
5
9
7
8
6
4
12
10
11
1
13
1
2
3
4
5
13
8
9
Battery cartridge
Indication lamp
Switch trigger
Hanger (suspension point)
Grip
Cutting tool
Shoulder harness
Wire guard
DUR142L
DUR182L
DUR183L
10
Cap
6
Guard
11
Speed adjusting dial
12
Power button
7
Lock-off lever

12 ENGLISH
FUNCTIONAL
DESCRIPTION
WARNING:
•
Always be sure that the tool is switched off and
battery cartridge is removed before adjusting
or checking the functions on the tool. Failure to
switch off and remove the battery cartridge may result
in serious personal injury from accidental start-up.
Installing or removing battery
cartridge
► Fig.4: 1. Red indicator 2. Button 3. Battery cartridge
CAUTION:
• Always switch off the tool before installing or
removing of the battery cartridge.
• Hold the tool and the battery cartridge rmly
when installing or removing battery car-
tridge. Failure to hold the tool and the battery
cartridge rmly may cause them to slip off your
hands and result in damage to the tool and
battery cartridge and a personal injury.
To remove the battery cartridge, slide it from the tool
while sliding the button on the front of the cartridge.
To install the battery cartridge, align the tongue on the
battery cartridge with the groove in the housing and slip
it into place. Insert it all the way until it locks in place
with a little click. If you can see the red indicator on the
upper side of the button, it is not locked completely.
CAUTION:
• Always install the battery cartridge fully until the
red indicator cannot be seen. If not, it may acci-
dentally fall out of the tool, causing injury to you
or someone around you.
• Do not install the battery cartridge forcibly. If the
cartridge does not slide in easily, it is not being
inserted correctly.
Power switch action
WARNING:
•
Before inserting the battery cartridge in the tool,
always check to see that the switch trigger actu-
ates properly and returns to the "OFF" position
when released. Do not pull the switch trigger
hard without turning the lock-off lever. This can
cause switch breakage. Operating a tool with a
switch that does not actuate properly can lead to
loss of control and serious personal injury.
► Fig.5: 1. Power indicator 2. Power button
Push the power button on the housing so that the tool is
powered on and power indicator lights.
► Fig.6: 1. Lock-off lever 2. Switch trigger
To prevent the switch trigger from being accidentally
pulled, a lock-off lever is provided.
To start the tool, turn the lock-off lever and then pull the
switch trigger. Release the switch trigger to stop.
NOTE:
• After the power button is pushed and the tool is
left one minute without any operations, the tool
is automatically powered off.
Reversing Switch for Debris
Removal
WARNING:
• Always be sure that the tool is switched
off and battery cartridge is removed before
removing weeds or debris entangled in the
tool that could not be removed when oper-
ated in the reverse mode. Failure to switch off
and remove the battery cartridge may result in
serious personal injury from accidental start-up.
► Fig.7: 1. Reversing switch 2. A position depressed
for normal operation 3. B position depressed
for weed and debris removal
This tool has a reversing switch which is only provided
to change the direction of rotation so that it can be used
to remove weeds and debris entangled in the tool. To
operate the tool normally the "A" side of the switch
should be depressed.
To remove weeds and debris that are jammed in the
rotating head the tool can be reversed by depressing
the "B" side of the switch. In the reverse position the
tool will only operate for a short period of time and
automatically shut off.
NOTICE:
• Always check the direction of rotation before
operation.
• Use the reversing switch only after the tool comes
to a complete stop. Changing the direction of
rotation before the tool stops may damage it.
Speed adjusting dial
► Fig.8: 1. Speed adjusting dial
The tool speed can be innitely adjusted from 3,500
min-1 to 6,000 min-1 with the speed adjusting dial.
Turn the speed adjusting dial clockwise for higher
speed, and counterclockwise for lower speed.
Battery protection system (Lithium-
ion battery with star marking)
► Fig.9: 1. Star marking
Lithium-ion batteries with a star marking are equipped
with a protection system. This system automatically
cuts off power to the tool to extend battery life.
The tool will automatically stop during operation if the
tool and/or battery are placed under one of the following
conditions:
• Overloaded:
The tool is operated in a manner that causes
it to draw an abnormally high current.
In this situation, release the switch trigger on
the tool and stop the application that caused
the tool to become overloaded. Then pull the
switch trigger again to restart.
If the tool does not start, the battery is over-
heated. In this situation, let the battery cool
before pulling the switch trigger again.

13 ENGLISH
• Low battery voltage:
The remaining battery capacity is too low
and the tool will not operate. In this situation,
remove and recharge the battery.
Indication lamps
► Fig.10: 1. Battery indicator 2. Power indicator
When the protection system works during the operation,
the lamps light up.
Refer to the following table for the status and action to
be taken for the indication lamp.
Status
Blinking
Lighting Up
Battery power has been
nearly used up.
Battery protector is
shutting off the power -
battery power has been
used up.
Action to be taken
Replace the battery with fully charged one.
Rest and cool down the equipment
for a while.
Overheat protector is shutting
off the power - overheating.
Power
indicator
Battery
indicator
Blinking
Indicating the remaining battery
capacity
(Only for battery cartridges with "B" at the end of the
model number.)
► Fig.11: 1. Indicator lamps 2. CHECK button
Press the check button on the battery cartridge to indi-
cate the remaining battery capacity. The indicator lamps
light up for few seconds.
Off BlinkingLighted
Indicator lamps
Charge the
battery.
0% to 25%
25% to 50%
50% to 75%
75% to 100%
Remaining
capacity
The battery
may have
malfunctioned.
NOTE:
• Depending on the conditions of use and the
ambient temperature, the indication may differ
slightly from the actual capacity.
Nylon cutting head
NOTICE:
• Do not attempt to bump feed the head while the
tool is operating at a high RPM. Bump feeding at a
high RPM may cause damage to the nylon cutting
head.
• The bump feed will not operate properly if the
head is not rotating.
► Fig.12: 1. Most effective cutting area
The nylon cutting head is a dual grass trimmer head
provided with a bump & feed mechanism.
To cause the nylon cord to feed out, the cutting head
should be bumped against the ground while rotating at
a low RPM.
NOTE: If the nylon cord does not feed out while
bumping the head, rewind/replace the nylon cord
by following the procedures described under
“Maintenance”.
ASSEMBLY
WARNING:
• Always be sure that the tool is switched
off and battery cartridge is removed before
carrying out any work on the tool. Failure to
switch off and remove the battery cartridge may
result in serious personal injury from accidental
start-up.
• Never start the tool unless it is completely
assembled. Operation of the tool in a partially
assembled state may result in serious personal
injury from accidental start-up.

14 ENGLISH
Mounting the attachment pipe
Only for model DUR183L
► Fig.13: 1. Joint 2. Lock lever 3. Joint cover 4. Lever
5. Pipe (Cutting tool side)
To mount the attachment to a power unit:
1. Make sure that the lever is not tightened.
2. To open the entrance of the joint, depress the joint
cover.
► Fig.14: 1. Lock lever 2. Concave portion
3. Protrusion
3. Align the protrusion on the pipe (cutting tool side )
with the concave portion of the joint part.
4. Insert the attachment pipe into the joint part. Make
sure that the surface of the lock lever is horizontal
to the pipe.
5. Tighten the lever rmly as shown.
To remove the attachment, loosen the lever, press the
front part of the lock lever and then slide the pipe.
Installing the grip
► Fig.15: 1. Grip 2. Hex bolts 3. Cover 4. Clamps
5. Cutting tool side 6. Spacer
Fit the grip onto the shaft pipe and tighten it with two
hex bolts. Make sure that the spacer on the shaft pipe is
located between the grip assembly and the other grip.
Do not remove or shrink the spacer.
CAUTION:
• For model DUR183L, never install the grip on
the joint.
Installing the guard
WARNING:
• Never use the tool without the guard illus-
trated in place. Failure to do so can cause
serious personal injury.
► Fig.16
► Fig.17: 1. Grooves 2. Protector
Align the protrusions on the protector with the grooves
of the motor housing.
► Fig.18: 1. Concave portions 2. Protector holder
3. Protrusions
Align the protrusions on the protector holder with the
concave portions of the motor housing. Insert the pro-
tector holder to the motor housing.
► Fig.19: 1. Hex bolts
After attaching the protector and the protector holder to
the motor housing, tighten the hex bolts securely.
Installing the wire guard
CAUTION:
• Before adjusting the wire guard, wait for the
cutting head comes to standstill. Do not adjust
the wire guard with your foot.
► Fig.20
To reduce the risk damaging the objects in front of the
cutting head, insert the wire guard so that it controls the
cutting range of the mowing line.
► Fig.21: 1. Holes 2. Wire guard
Slightly expand the wire guard outward and then insert
it into the holes of the protector.
NOTE:
• Do not expand the wire guard outward too
much. Otherwise it may break.
► Fig.22
When wire guard is not in use, lift it for the idle position.
Installing nylon cutting head
NOTICE:
• Be sure to use genuine Makita nylon cutting head.
Turn the tool upside down so that you can replace the
nylon cutting head easily.
► Fig.23: 1. Nylon cutting head 2. Metal guard
3. Receive washer 4. Hex wrench
Insert the hex wrench through the hole on the protector
cover and the motor housing and rotate the receive
washer until it is locked with the hex wrench. Mount the
metal guard, the nylon cutting head onto the threaded
spindle directly and tighten it by turning it counterclock-
wise. Remove the hex wrench.
To remove the nylon cutting head, turn the nylon cutting
head clockwise while holding the receive washer with
the hex wrench.
CAUTION:
• If during operation the nylon cutting
head accidentally impacts a rock or hard
object the trimmer should be stopped and
inspected for any damage. If the nylon cut-
ting head is damaged it should be replaced
immediately. Use of a damaged nylon cutting
head could result in serious personal injury.
OPERATION
Correct handling of tool
Attachment of shoulder harness
► Fig.24: 1. Buckle 2. Hook
Put the shoulder harness on. Then connect the buckles
on both the hook and the harness. Be sure that the
buckles click and lock completely in place.
Only for model DUR183L
► Fig.25: 1. Cap
When the cap is not in use, hang it on the hook.
Detachment
► Fig.26: 1. Buckle
The buckle is provided with a means of quick release.
Simply squeeze the sides and the buckle to release the
tool.

15 ENGLISH
WARNING:
• Be extremely careful to maintain control of
the tool at all times. Do not allow the tool to
be deected toward you or anyone in the
work vicinity. Failure to keep control of the tool
could result in serious injury to the bystander
and the operator.
Adjustment of the hanger position
and shoulder harness
► Fig.27: 1. Hex bolt
To change the hanger position, loosen the hex bolt on
the hanger with the supplied wrench. Then move the
hanger.
After adjusting the hanger position, tighten the hex bolt
with the wrench securely.
MAINTENANCE
WARNING:
• Always be sure that the tool is switched
off and battery cartridge is removed before
attempting to perform inspection or main-
tenance on the tool. Failure to switch off and
remove the battery cartridge may result in seri-
ous personal injury from accidental start-up.
NOTICE:
Never use gasoline, benzine, thinner, alcohol or
the like. Discoloration, deformation or cracks may
result.
Replacing the nylon cord
WARNING:
• Make sure that the cover of the nylon cutting
head is secured to the housing properly as
described below. Failure to properly secure the
cover may cause the nylon cutting head to y
apart resulting in serious personal injury.
► Fig.28
Take off cover from housing, pressing two latches which
are slotted section oppositely on side of housing.
► Fig.29: 1. 80-100 mm
Cut a nylon line in 3-6 m. Fold the cutting line in two
halves, leave one of half longer 80-100 mm than
another.
► Fig.30
Hook the middle of the new nylon cord to the notch
located at the center of the spool between the 2 chan-
nels provided for the nylon cord.
Wind both ends rmly around the spool in the direction
marked on the head for left hand direction indicated by
LH.
► Fig.31
Wind all but about 100 mm of the cords, leaving the
ends temporarily hooked through a notch on the side of
the spool.
► Fig.32
Mount the spool on the cover so that the grooves and
protrusions on the spool match up with those on the
cover. Now, unhook the ends of the cord from their tem-
porary position and feed the cords through the eyelets
to come out of the cover.
► Fig.33
Align the protrusion on the underside of the cover with
the slots of the eyelets. Then push the cover rmly onto
the housing to secure it. Make sure the latches fully
spread in the cover.
To maintain product SAFETY and RELIABILITY, repairs,
any other maintenance or adjustment should be per-
formed by Makita Authorized Service Centers, always
using Makita replacement parts.

16 ENGLISH
TROUBLE SHOOTING
Before asking for repairs, conduct your own inspection rst. If you nd a problem that is not explained in the manual,
do not attempt to dismantle the tool. Instead, ask Makita Authorized Service Centers, always using Makita replace-
ment parts for repairs.
Malfunction status
Motor does not run.
Cause
Battery cartridge is not installed.
Battery problem (under voltage)
Rotation is in reverse.
Overheating.
Battery power is dropping.
Electric or electronic malfunction.
Action
Install the battery cartridge.
Remove the foreign object.
Motor stops running after
a little use.
It does not reach maximum
RPM.
Cutting tool does not rotate:
stop the machine immediately!
Abnormal vibration:
stop the machine immediately!
Cutting tool and motor cannot
stop:
Remove the battery
immediately!
The drive system does not work
correctly.
One end of the nylon cord has
been broken.
The drive system does not work
correctly.
Foreign object such as a branch
is jammed between the guard and
the nylon cutting head.
The drive system does
not work correctly.
Battery is installed improperly.
Battery's charge level is low.
The drive system does not work
correctly.
Recharge the battery. If recharging
is not effective, replace battery.
Ask your local authorized service
center for repair.
Ask your local authorized service
center for repair.
Ask your local authorized service
center for repair.
Ask your local authorized service
center for repair.
Remove the battery and ask your
local authorized service center for
repair.
Bump the nylon cutting head
against the ground while it is
rotating to cause the cord to feed.
Recharge the battery. If recharging
is not effective, replace battery.
Install the battery cartridge as
described in this manual.
Stop using of tool to allow it to cool
down.
Recharge the battery. If recharging
is not effective, replace battery.
Change the direction of ratation
with the reversing switch.

17
OPTIONAL
ACCESSORIES
CAUTION:
• These accessories or attachments are recom-
mended for use with your Makita tool specied
in this manual. The use of any other accessories
or attachments might present a risk of injury to
persons. Only use accessory or attachment for
its stated purpose.
If you need any assistance for more details regard-
ing these accessories, ask your local Makita Service
Center.
• Nylon cutting head
• Nylon cord (cutting line)
• Shoulder harness
• Hex wrench
• Makita genuine battery and charger
NOTE:
• Some items in the list may be included in the
tool package as standard accessories. They
may differ from country to country.
ENGLISH

18 SLOVENŠČINA
SLOVENŠČINA (Originalna navodila)
TEHNIČNI PODATKI
Model DUR142L DUR182L DUR183L
Vrsta cevi Vgrajena cev Deljiva cev
Hitrost brez obremenitve 3.500 - 6.000 min-1
Skupna dolžina z najlonsko rezalno glavo 1.843 mm
Razdeljena dolžina -982 mm
Premer reza najlonske rezalne glave 300 mm
Neto teža (z BL1430B ali BL1830B) 3,8 kg 3,9 kg 4,1 kg
Nazivna napetost D.C. 14,4 V D.C. 18 V
Baterijski vložek BL1415N, BL1430,
BL1430B, BL1440,
BL1450
BL1815N, BL1820, BL1820B, BL1830,
BL1830B, BL1840, BL1840B, BL1850,
BL1850B, BL1860B
• Zaradi našega nenehnega programa raziskav in razvoja si pridržujemo pravico do spremembe tehničnih podatkov
brez obvestila.
• Tehnični podatki in baterijski vložki se lahko razlikujejo od države do države.
• Teža z baterijskim vložkom je v skladu z EPTA-postopkom 01/2003
Hrup Raven zvočnega tlaka Veljavni standard in
direktiva
Model LPA (dB (A))
Negotovost K (dB (A))
DUR142L 78 1,0 2000/14/EC
DUR182L / DUR183L 79 0,7
• Tudi če je zgoraj navedena raven zvočnega tlaka 80 dB (A) ali manj, lahko raven med delom preseže 80 dB (A).
Nosite zaščito za ušesa.
Vibracije Sprednji ročaj Zadnji ročaj Veljavni
standard in
direktiva
Model ah (m/s2)Negotovost
K (m/s2)
ah (m/s2)Negotovost
K (m/s2)
DUR142L ≤ 2,5 1,5 ≤ 2,5 1,5 EN786
DUR182L / DUR183L ≤ 2,5 1,5 ≤ 2,5 1,5
OPOMBA: Navedena vrednost oddajanja vibracij
je bila izmerjena v skladu s standardnimi metodami
testiranja in se lahko uporablja za primerjavo orodij.
OPOMBA: Navedena vrednost oddajanja vibra-
cij se lahko uporablja tudi pri predhodni oceni
izpostavljenosti.
OPOZORILO: Oddajanje vibracij med dejansko
uporabo električnega orodja se lahko razlikuje od
navedene vrednosti oddajanja, odvisno od načina
uporabe orodja.
OPOZORILO: Upravljavec mora za lastno zaš-
čito poznati varnostne ukrepe, ki temeljijo na oceni
izpostavljenosti v dejanskih pogojih uporabe (upošte-
vajoč celoten delovni proces v trenutkih, ko je orodje
izključeno in ko deluje v prostem teku z dodatkom
časa sprožitve).
Simboli
Naslednji simboli se uporabljajo v povezavi s strojem.
Pred uporabo proizvoda se obvezno seznanite z njiho-
vim pomenom.
Potrebna je posebna pozornost in
previdnost.
Preberite navodila za uporabo.
Nevarnost; pazite se letečih predmetov.
Razdalja med orodjem in prisotnimi ose-
bami mora biti najmanj 15 m.
Prisotne osebe se ne smejo približevati.
15m(50FT)Ohranite razdaljo najmanj 15 m.
Nosite čelado, očala in zaščito za sluh.
Uporabljajte zaščitne rokavice.

19 SLOVENŠČINA
Nosite močne škornje z nedrsečim podpla-
tom. Priporočeni so zaščitni škornji z
jekleno ploščico za zaščito prstov.
Ne izpostavljajte vlagi.
Najvišja dovoljena hitrost orodja.
Nikoli ne uporabljajte kovinskega rezila.
Ni-MH
Li-ion
Le za države EU
Električnega orodja ali akumulatorja ne
odlagajte skupaj z gospodinjskimi odpadki!
V skladu z Evropsko direktivo o odpadni
električni in elektronski opremi in o bateri-
jah in akumulatorjih ter odpadnih baterijah
in akumulatorjih in z njunim izvajanjem v
skladu z državno zakonodajo se morajo
električna oprema, baterije in akumulatorji,
ki so prišli do konca svojega življenjskega
cikla, zbirati ločeno in se vrniti v okoljsko
združljivo ustanovo za recikliranje.
Samo za evropske države
ES Izjava o skladnosti
Družba Makita izjavlja, da je/so naslednji stroj/-i:
Oznaka stroja:
Brezžična kosilnica z nitjo za travo
Št. modela / tip: DUR142L, DUR182L, DUR183L
Tehnični podatki: glejte tabelo "TEHNIČNI
PODATKI".
Je skladen z naslednjimi evropskimi direktivami:
2000/14/ES, 2006/42/ES
Izdelan v skladu z naslednjim standardom ali standardi-
ziranimi dokumenti:
EN60335, EN50636
Tehnična dokumentacija v skladu z direktivo 2006/42/
ES je na voljo na:
Makita, Jan-Baptist Vinkstraat 2, 3070, Belgija
Postopek za ugotavljanje skladnosti, ki ga predpisuje
direktiva 2000/14/ES, je v skladu s prilogo VI
Priglašeni organ:
TÜV Rheinland LGA Products GmbH
Tillystraße 2
90431 Nürnberg, Nemčija
Identikacijska številka 0197
Model DUR142L
Izmerjena stopnja jakosti zvoka: 89 dB (A)
Zajamčena stopnja jakosti zvoka: 90 dB (A)
Model DUR182L, DUR183L
Izmerjena stopnja jakosti zvoka: 90 dB (A)
Zajamčena stopnja jakosti zvoka: 90 dB (A)
1.10.2015
Yasushi Fukaya
Direktor
Makita, Jan-Baptist Vinkstraat 2, 3070, Belgija
POMEMBNA VARNOSTNA NAVODILA
OPOZORILO! Preberite vsa varnostna opozorila in
navodila. Neupoštevanje opozoril in navodil lahko povzroči
električni udar, požar in/ali hude telesne poškodbe.
Shranite vsa opozorila in navo-
dila za kasnejšo uporabo.
1. Seznanite se s funkcijami za upravljanje in
pravilno uporabo opreme.
2. Ko izključite motor, se rezila še vedno vrtijo.
3. Nikoli ne dovolite, da bi napravo uporabljali
otroci ali osebe, ki niso seznanjene z navodili.
4. Prekinite uporabo naprave, kadar so v bližini
osebe, še posebej otroci, ali domače živali.
5. Napravo uporabljajte le podnevi ali pri dobri
umetni svetlobi.
6. Pred uporabo stroja in po kakršnem koli
udarcu, preverite znake obrabe ali poškodb in
jih po potrebi popravite.
7. Pazite, da se ne poškodujete na napravah, ki
se uporabljajo za rezanje nitke na ustrezno dol-
žino. Kadar podaljšujete rezalno nit, napravo
povrnite v običajen položaj za upravljanje,
preden jo ponovno vklopite.
8. Nikoli ne nameščajte kovinskih rezil.
9. Naprave ne smejo uporabljate osebe (vključno
z otroki) z zmanjšanimi zičnimi, čutilnimi ali
psihičnimi sposobnostmi ter s pomanjkanjem
izkušenj in znanja, razen če niso seznanjene
z navodili za varno uporabo in pod nadzorom
odgovorne osebe. Zagotovite ustrezen nadzor
otrok in preprečite igranje z napravo.
10. Orodje uporabljajte z najvišjo mero previdnosti
in pozornosti.
11. Orodje uporabljajte samo, če ste dobro zično
pripravljeni. Vsa dela opravljajte mirno in
zbrano. Uporabljajte zdravo pamet in upošte-
vajte, da je upravljavec ali uporabnik odgo-
voren za nesreče ali nevarnosti, ki se zgodijo
drugim ljudem ali na njihovi lastnini.
12. Orodja ne uporabljajte, kadar ste utrujeni,
bolni ali pod vplivom alkohola in drog.
13. Če opazite kakršne koli znake nenavadnega
delovanja, napravo nemudoma izključite.
Namenska uporaba naprave
1.
Uporabljajte primerno orodje. Brezžična kosilnica
z nitjo za travo je namenjena samo za rezanje trave
in manjšega plevela. Ne uporabljajte je v drugačne
namene, npr. za posnemanje robov ali obrezova-
nje žive meje, saj lahko pride do poškodb.
Osebna zaščitna oprema
► Sl.1
► Sl.2
1. Nosite primerna oblačila. Oblačila morajo
biti funkcionalna in primerna, torej se morajo
tesno prilegati, vendar vas ne smejo ovirati. Ne
nosite nakita ali kosov oblačil, ki bi se lahko
zataknili za visoko travo. Če imate dolge lase,
uporabljajte zaščitno pokrivalo.

20 SLOVENŠČINA
2. Med uporabo orodja imejte vedno obute
močne čevlje z nedrsečim podplatom. Tako se
boste zaščitili pred poškodbami in zagotovili
dobro stojišče.
3. Nosite zaščitna očala.
Električna varnost in varnost
akumulatorjev
1.
Izogibajte se nevarnemu okolju. Orodja ne
uporabljajte na vlažnih ali mokrih mestih in ga
ne izpostavljajte dežju. Voda, ki bi prodrla v
orodje, povečuje nevarnost električnega udara.
2. Orodje polnite samo s polnilnikom, ki ga je
določil proizvajalec. Polnilnik, primeren za eno
vrsto akumulatorskih baterij, lahko povzroči
tveganje za požar, če ga uporabljate z drugimi
akumulatorskimi baterijami.
3. Električno orodje uporabljajte le s posebej
označenimi akumulatorskimi baterijami.
Uporaba drugih akumulatorskih baterij lahko
povzroči tveganje za poškodbe in požar.
4.
Kadar akumulatorskih baterij ne uporabljate, jih
ne hranite ob kovinskih predmetih, kot so sponke
za papir, kovanci, ključi, žeblji, vijaki ali drugi
manjši kovinski predmeti, ki lahko povzročijo stik
med priključkoma. Kratek stik akumulatorskih
priključkov lahko povzroči opekline ali požar.
5.
V neprimernih pogojih lahko iz akumulatorja uhaja
tekočina; izogibajte se stiku. Če pride do nena-
mernega stika, sperite z vodo. Če pride tekočina v
stik z očmi, poiščite zdravniško pomoč. Tekočina iz
akumulatorja lahko povzroči draženje ali opekline.
6. Akumulatorjev ne mečite v ogenj. Celica
lahko eksplodira. Preverite lokalna pra-
vila glede morebitnih posebnih navodil za
odstranjevanje.
7. Ne odpirajte ali preoblikujte akumulatorjev.
Sproščeni elektrolit je koroziven in lahko
povzroči poškodbe oči ali kože. Pri zaužitju je
lahko strupen.
Zagon orodja
► Sl.3
1. Zagotovite, da v delovnem območju 15 metrov
ne bodo otroci ali druge osebe, prav tako
pazite na živali. V nasprotnem primeru prene-
hajte uporabljati orodje.
2. Pred uporabo vedno preverite, ali je orodje
varno za uporabo. Preverite varnost rezal-
nega orodja in ščitnika ter enostavno in pra-
vilno upravljanje sprožilnega stikala/ročice.
Preverite, ali so ročaji čisti in suhi ter preizku-
site delovanje vklopa/izklopa.
3. Pred nadaljnjo uporabo orodja preverite
poškodovane dele. Ščitnik ali drug poškodo-
van del pozorno preglejte, da ugotovite, ali bo
pravilno deloval in služil svojemu namenu.
Preverite poravnanost in zatikanje gibljivih
delov, morebitne zlomljene dele in vsa druga
stanja, ki bi lahko vplivala na njegovo delo-
vanje. Ščitnik ali drug poškodovan del mora
ustrezno popraviti ali zamenjati pooblaščeni
servisni center, razen če ni drugače določeno
v teh navodilih.
4. Motor vključite samo, če roke in noge niso v
bližini rezalnega orodja.
5. Pred zagonom se prepričajte, ali rezalno
orodje ni v stiku s trdimi predmeti, npr. z
vejami, kamni ipd., saj se bo rezalno orodje ob
zagonu zavrtelo.
Način delovanja
1. Naprave nikoli ne upravljajte s poškodovanim
ščitnikom ali ne da bi namestili ščitnik.
2. Orodje uporabljajte samo ob dobri svetlobi in
vidljivosti. Pozimi bodite pozorni na drseča ali
mokra območja, led in sneg (nevarnost zdrsa).
Vedno stojte stabilno.
3. Bodite previdni, da si z rezalnim orodjem ne
poškodujete stopal in dlani.
4. Roke in noge vedno držite stran od rezil, še
posebej, ko izključite motor.
5. Nikoli ne kosite na višini nad pasom.
6. Nikoli ne stojte na lestvi, medtem ko zaganjate
orodje.
7. Nikoli ne delajte na nestabilnih površinah.
8. Ne segajte predaleč. Ves čas stojte stabilno in
ohranjajte ravnotežje.
9. Vedno bodite previdni, kadar stopate po
pobočjih.
10. Hodite, ne tecite.
11. Iz delovnega območja odstranite pesek,
kamne, žeblje itn. Tujki lahko poškodujejo
rezalno orodje in povzročijo, da ga odvrže,
zaradi česar lahko pride do resnih poškodb.
12. Nikoli se ne dotikajte premikajočih se nevarnih
delov, dokler stroja ne izključite iz napajanja in
dokler se premikajoči se nevarni deli povsem
ne ustavijo.
13. Če rezalno orodje zadene ob kamne ali
druge trde predmete, takoj izključite motor in
preglejte rezalno orodje.
14. Pred začetkom rezanja mora rezalno orodje
doseči polno delovno hitrost.
15. Med uporabo orodje vedno držite z obema
rokama. Orodja med uporabo nikoli ne držite z
eno roko. Vedno stojte stabilno.
16. Med uporabo uporabljajte priloženo zaščitno
opremo, npr. ščitnike.
17. Razen v nujnem primeru, orodja nikoli ne
spuščajte in ne mečite na tla, saj lahko s tem
opremo resno poškodujete.
18. Kadar se premikate z enega mesta na drugega,
orodja ne vlecite po tleh, ker bi se tako lahko
poškodovalo.
19. Akumulatorsko baterijo vedno odstranite iz
orodja v naslednjih primerih:
— kadar orodje puščate brez nadzora;
— pred odstranjevanjem blokade;
— pred pregledom, čiščenjem ali deli na
orodju;
— pred prilagajanjem, spreminjanjem doda-
tne opreme ali shranjevanjem;
— kadar se orodje začne nenavadno tresti;
— kadar orodje prevažate.
Other manuals for DUR142L
6
This manual suits for next models
2
Table of contents
Languages:
Other Makita Trimmer manuals

Makita
Makita DUH523 User manual

Makita
Makita M3702 User manual

Makita
Makita LXHU02Z User manual

Makita
Makita RBC2110 User manual

Makita
Makita EN4951SH User manual

Makita
Makita UR013G User manual

Makita
Makita DUR190U User manual

Makita
Makita ER2600L User guide

Makita
Makita DUR369A User manual

Makita
Makita UR014G User manual

Makita
Makita DUM604 User manual

Makita
Makita UH5580 User manual

Makita
Makita DUR364L User manual

Makita
Makita GRU02 User manual

Makita
Makita RT001GZ03 User manual

Makita
Makita UH4570 User manual

Makita
Makita DUR364L User manual

Makita
Makita XRU24 User manual

Makita
Makita M3700 User manual

Makita
Makita UR007GZ01 User manual