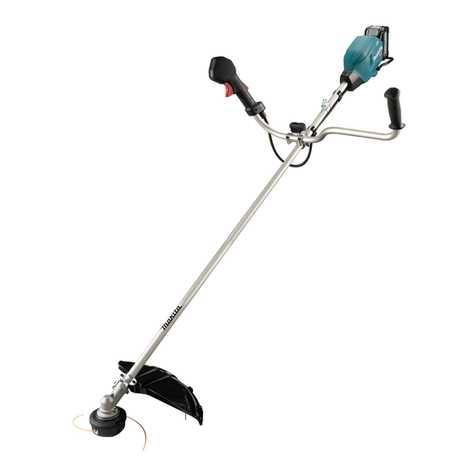
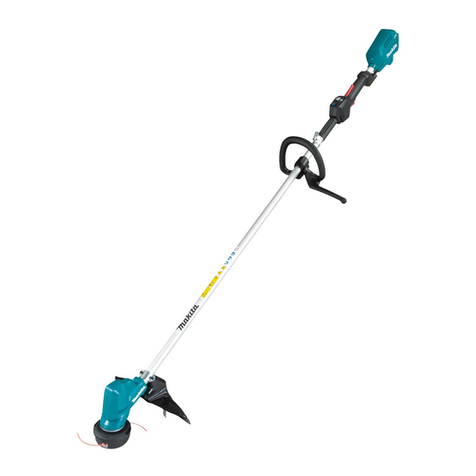
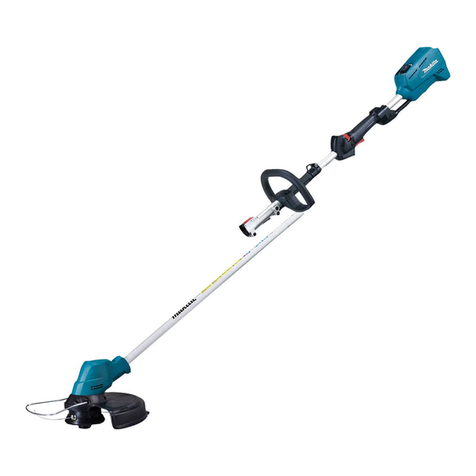
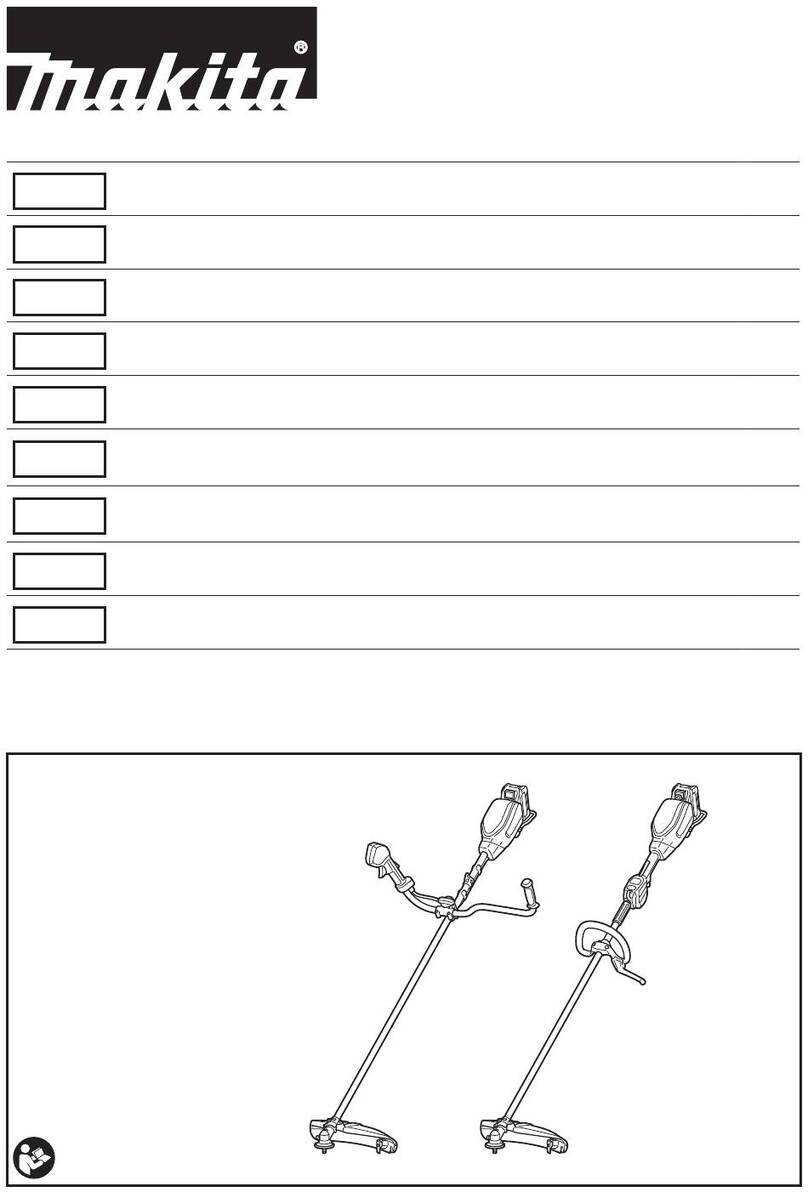
Makita UR100D User manual

UR100D
EN Cordless Grass Trimmer INSTRUCTION MANUAL 8
SL Brezžična kosilnica z nitjo NAVODILA ZA UPORABO 18
SQ Kositëse bari me bateri MANUALI I PËRDORIMIT 28
BG Акумулаторна косачка за
трева РЪКОВОДСТВО ЗА
ЕКСПЛОАТАЦИЯ 38
HR Bežični trimer za travu PRIRUČNIK S UPUTAMA 50
МК Безжичен тример за трева УПАТСТВО ЗА УПОТРЕБА 60
SR Бежични тример за траву УПУТСТВО ЗА УПОТРЕБУ 71
RO Motocositoare pentru iarbă
fără cablu MANUAL DE INSTRUCŢIUNI 82
UK Акумуляторна
газонокосарка ІНСТРУКЦІЯ З
ЕКСПЛУАТАЦІЇ 93
RU Аккумуляторная Коса РУКОВОДСТВО ПО
ЭКСПЛУАТАЦИИ 105

Fig.1
Fig.2
Fig.3
1
2
3
4
5
6
7
8
9
10
12
11
Fig.4
1
2
4
5
6
7
8
9
10
3
11
12
13
Fig.5
1
2
3
Fig.6
1
2
Fig.7
1
2
Fig.8
2

1
Fig.9
1
2
Fig.10
1
2
Fig.11
1
Fig.12
1
Fig.13
1
Fig.14
1
2
3
Fig.15
Fig.16
3

1
Fig.17
1
Fig.18
1
Fig.19
2
1
Fig.20
3
2
1
Fig.21
1
Fig.22
3
2
1
Fig.23
1
Fig.24
4

1
Fig.25
1
Fig.26
Fig.27
Fig.28
Fig.29
Fig.30
1
Fig.31
5

1
Fig.32
1
Fig.33
1
Fig.34
1
2
Fig.35
1
Fig.36
1
2
Fig.37
6

(1)
(2)
Fig.38
7

8ENGLISH
ENGLISH (Original instructions)
SPECIFICATIONS
Model: UR100D
No load speed
(without cutting tool)
10,000 min-1
Overall length
(without cutting tool)
835 - 1,185 mm
Nylon cord diameter 1.65 mm
Applicable cutting tool and
cutting diameter
Nylon cutting head
(P/N 198852-2 / 198853-0)
260 mm
Plastic blade head
(P/N 198847-5 / 198848-3)
230 mm
Rated voltage D.C. 10.8 V - 12 V max
Standard battery cartridge BL1015 / BL1016 / BL1020B / BL1021B / BL1040B / BL1041B
Net weight 1.9 - 2.1 kg
• Duetoourcontinuingprogramofresearchanddevelopment,thespecicationshereinaresubjecttochange
without notice.
• Specicationsandbatterycartridgemaydifferfromcountrytocountry.
• The weight may differ depending on the attachment(s), including the battery cartridge. The lightest and heavi-
est combination, according to EPTA-Procedure 01/2014, are shown in the table.
Noise
Applicable standard : EN50636
Type Sound pressure level average
LPA(dB(A)) Uncertainty K (dB(A))
Nylon cutting head 74 0.74
Plastic blade 75.8 2.84
• Even if the sound pressure level listed above is 80 dB (A) or less, the level under working may exceed 80 dB
(A). Wear ear protection.
Vibration
Applicable standard : EN50636
Type Left hand Right hand
ah,W (m/s2)
Uncertainty K (m/s2)
ah,W (m/s2)
Uncertainty K (m/s2)
Nylon cutting head 2.5 0.1 2.5 0.5
Plastic blade 2.5 0.1 2.5 0.1
NOTE: The declared vibration emission value has been measured in accordance with the standard test method
and may be used for comparing one tool with another.
NOTE: The declared vibration emission value may also be used in a preliminary assessment of exposure.
WARNING: The vibration emission during actual use of the power tool can differ from the declared emission
value depending on the ways in which the tool is used.
WARNING: Be sure to identify safety measures to protect the operator that are based on an estimation of
exposure in the actual conditions of use (taking account of all parts of the operating cycle such as the times when
the tool is switched off and when it is running idle in addition to the trigger time).

9ENGLISH
Symbols
The following show the symbols used for the equip-
ment. Be sure that you understand their meaning before
use.
Take particular care and attention.
Read instruction manual.
Danger;beawareofthrownobjects.
The distance between the tool and
bystanders must be at least 15 m.
360°
Keep bystanders away.
15m(50FT)Keep distance at least 15 m.
Wear a helmet, goggles and ear protection.
Wear protective gloves.
Wear sturdy boots with nonslip soles.
Steeltoed safety boots are recommended.
Do not expose to moisture.
Never use metal blade.
Ni-MH
Li-ion
Only for EU countries
Do not dispose of electric equipment or
battery pack together with household
waste material! In observance of the
European Directives, on Waste Electric
and Electronic Equipment and Batteries
and Accumulators and Waste Batteries and
Accumulators and their implementation
in accordance with national laws, electric
equipment and batteries and battery
pack(s) that have reached the end of
their life must be collected separately and
returned to an environmentally compatible
recycling facility.
EC Declaration of Conformity
For European countries only
The EC declaration of conformity is included as Annex A
to this instruction manual.
SAFETY WARNINGS
IMPORTANT SAFETY INSTRUCTIONS
WARNING: Read all safety warnings and
all instructions. Failure to follow the warnings and
instructionsmayresultinelectricshock,reand/or
seriousinjury.
Save all warnings and instruc-
tions for future reference.
1. Be familiar with the controls and proper use of
the equipment.
2. Cutting elements continue to rotate after the
motor is switched off.
3. Never allow children or people unfamiliar with
the instructions to use the machine. Local reg-
ulations may restrict the age of the operator.
4. Stop using the machine while people, espe-
cially children, or pets are nearby.
5. Only use the machine in daylight or good
articial light. Avoid using the machine in bad
weather conditions especially when there is a
risk of lightning.
6. Before using the machine and after any
impact, check for signs of wear or damage and
repair as necessary.
7. Take care against injury from any device
tted for trimming the lament line length.
After extending new cutter line always return
the machine to its normal operating position
before switching on.
8. Never t metal cutting elements.
9. This appliance is not intended for use by
persons (including children) with reduced
physical, sensory or mental capabilities, or
lack of experience and knowledge, unless they
have been given supervision or instruction
concerning use of the appliance by a person
responsible for their safety. Children should be
supervised to ensure that they do not play with
the appliance.
10. Use the tool with the utmost care and
attention.
11. Operate the tool only if you are in good phys-
ical condition. Perform all work calmly and
carefully. Use common sense and keep in mind
that the operator or user is responsible for
accidents or hazards occurring to other people
or their property.
12. Never operate the tool when tired, feeling ill or
under the inuence of alcohol or drugs.
13. The tool should be switched off immediately if
it shows any signs of unusual operation.
14. Keep ngers away from switch trigger when
not operating the tool and when moving from
one operating position to another.
Intended use of the tool
1. Use right tool. The cordless grass trimmer is
only intended for cutting grass, light weeds. It
should not be used for any other purpose such
as hedge cutting as this may cause injury.
Personal protective equipment
►Fig.1
►Fig.2
1. Dress Properly. The clothing worn should be
functional and appropriate, i.e. it should be
tight-tting but not cause hindrance. Do not
wear either jewelry or clothing which could
become entangled with high grass. Wear pro-
tective hair covering to contain long hair.

10 ENGLISH
2. When using the tool, always wear sturdy shoes
with a non-slip sole. This protects against
injuries and ensures a good footing.
3. Always wear protective goggles to protect
your eyes from injury when using power tools.
The goggles must comply with ANSI Z87.1 in
the USA, EN 166 in Europe, or AS/NZS 1336
in Australia/New Zealand. In Australia/New
Zealand, it is legally required to wear a face
shield to protect your face, too.
It is an employer's responsibility to enforce
the use of appropriate safety protective equip-
ments by the tool operators and by other per-
sons in the immediate working area.
Electrical and battery safety
1. Avoid dangerous environment. Don't use the
tool in damp or wet locations or expose it to
rain. Water entering the tool will increase the
risk of electric shock.
2. Recharge only with the charger specied by
the manufacturer. A charger that is suitable for
one type of battery pack may create a risk of
re when used with another battery pack.
3. Use power tools only with specically desig-
nated battery packs. Use of any other battery
packs may create a risk of injury and re.
4. When battery pack is not in use, keep it away
from other metal objects, like paper clips,
coins, keys, nails, screws or other small metal
objects, that can make a connection from one
terminal to another. Shorting the battery termi-
nals together may cause burns or a re.
5. Under abusive conditions, liquid may be
ejected from the battery; avoid contact. If con-
tact accidentally occurs, ush with water. If
liquid contacts eyes, seek medical help. Liquid
ejected from the battery may cause irritation or
burns.
6. Do not dispose of the battery(ies) in a re. The
cell may explode. Check with local codes for
possible special disposal instructions.
7. Do not open or mutilate the battery(ies).
Released electrolyte is corrosive and may
cause damage to the eyes or skin. It may be
toxic if swallowed.
8. Do not charge battery in rain, or in wet
locations.
Starting up the tool
►Fig.3
1. Make sure that there are no children or other
people within a working range of 15 meters
(50 ft), also pay attention to any animals in the
working vicinity. Otherwise stop using the tool.
2. Before use always check that the tool is safe
for operation. Check the security of the cutting
tool and the guard and the switch trigger/lever
for easy and proper action. Check for clean
and dry handles and test the on/off function of
the switch.
3. Check damaged parts before further use of
the tool. A guard or other part that is damaged
should be carefully checked to determine
that it will operate properly and perform its
intended function. Check for alignment of
moving parts, binding of moving parts, break-
age of parts, mounting, and any other condi-
tion that may affect its operation. A guard or
other part that is damaged should be properly
repaired or replaced by our authorized ser-
vice center unless indicated elsewhere in this
manual.
4. Switch on the motor only when hands and feet
are away from the cutting tool.
5. Before starting make sure that the cutting
tool has no contact with hard objects such as
branches, stones etc. as the cutting tool will
revolve when starting.
6. Make sure there are no electrical cables, water
pipes, gas pipes etc. that could cause a hazard
if damaged by use of the tool.
Method of operation
1. Never operate the machine with damaged
guards or without the guards in place.
2. Only use the tool in good light and visibility.
During the winter season beware of slippery
or wet areas, ice and snow (risk of slipping).
Always ensure a safe footing.
3. Take care against injury to feet and hands from
the cutting tool.
4. Keep hands and feet away from the cutting
means at all times and especially when switch-
ing on the motor.
5. Never cut above waist height.
6. Never stand on a ladder and run the tool.
7. Never work on unstable surfaces.
8. Don't overreach. Keep proper footing and
balance at all times.
9. Remove sand, stones, nails etc. found within
the working range. Foreign particles may
damage the cutting tool and can cause to be
thrown away, resulting in a serious injury.
10. Should the cutting tool hit stones or other hard
objects, immediately switch off the motor and
inspect the cutting tool.
11. Before commencing cutting, the cutting tool
must have reached full working speed.
12. During operation always hold the tool with
both hands. Never hold the tool with one hand
during use. Always ensure a safe footing.
11 ENGLISH
13. All protective equipment such as guards
supplied with the tool must be used during
operation.
14. Except in case of emergency, never drop
or cast the tool to the ground or this may
severely damage the tool.
15. Never drag the tool on the ground when mov-
ing from place to place, the tool may become
damaged if moved in this manner.
16. Always remove the battery cartridge from the
tool:
— whenever leaving the tool unattended;
— before clearing a blockage;
— before checking, cleaning or working on
the tool;
— before making any adjustments, chang-
ing accessories or storing;
— whenever the tool starts vibrating
unusually;
— whenever transporting the tool.
17. Don't force the tool. It will do the job better and
with less likelihood of a risk of injury at the
rate for which it was designed.
18. Do not operate power tools in explosive atmo-
spheres, such as in the presence of ammable
liquids, gases or dust. Power tools create sparks
which may ignite the dust or fumes.
19. Take a rest to prevent loss of control caused
by fatigue. We recommend to take a 10 to
20-minute rest every hour.
20. Do not use the tool on steep slopes.
21. The shoulder harness must be used during
operation, if supplied with the tool.
Maintenance instructions
1. The condition of the cutting tool, protec-
tive devices and shoulder harness must be
checked before commencing work.
2. Turn off the motor and remove the battery
cartridge before carrying out maintenance,
replacing the cutting tool and cleaning the
tool.
3. After use, disconnect the battery cartridge
from the tool and check for damage.
4. Check for loose fasteners and damaged parts
such as nearly halfway cut-off state in the
cutting tool.
5. When not in use store the equipment in a dry
location that is locked up or out of children's
reach.
6. Use only the manufacturer's recommended
replacement parts and accessories.
7. Always ensure that ventilation openings are
kept clear of debris.
8. Inspect and maintain the tool regularly, espe-
cially before/after use. Have the tool repaired
only by our authorized service center.
9. Keep handles dry, clean and free from oil and
grease.
SAVE THESE INSTRUCTIONS.
WARNING: DO NOT let comfort or familiarity
with product (gained from repeated use) replace
strict adherence to safety rules for the subject
product. MISUSE or failure to follow the safety
rules stated in this instruction manual may cause
serious personal injury.
Important safety instructions for
battery cartridge
1. Before using battery cartridge, read all instruc-
tions and cautionary markings on (1) battery
charger, (2) battery, and (3) product using
battery.
2. Do not disassemble battery cartridge.
3. If operating time has become excessively
shorter, stop operating immediately. It may
result in a risk of overheating, possible burns
and even an explosion.
4. If electrolyte gets into your eyes, rinse them
out with clear water and seek medical atten-
tion right away. It may result in loss of your
eyesight.
5. Do not short the battery cartridge:
(1) Do not touch the terminals with any con-
ductive material.
(2) Avoid storing battery cartridge in a con-
tainer with other metal objects such as
nails, coins, etc.
(3) Do not expose battery cartridge to water
or rain.
A battery short can cause a large current
ow, overheating, possible burns and even a
breakdown.
6. Do not store the tool and battery cartridge in
locations where the temperature may reach or
exceed 50 °C (122 °F).
7. Do not incinerate the battery cartridge even if
it is severely damaged or is completely worn
out. The battery cartridge can explode in a re.
8. Be careful not to drop or strike battery.
9. Do not use a damaged battery.
10. The contained lithium-ion batteries are subject
to the Dangerous Goods Legislation require-
ments.
For commercial transports e.g. by third parties,
forwarding agents, special requirement on pack-
aging and labeling must be observed.
For preparation of the item being shipped, consult-
ing an expert for hazardous material is required.
Please also observe possibly more detailed
national regulations.
Tape or mask off open contacts and pack up the
battery in such a manner that it cannot move
around in the packaging.
11. Follow your local regulations relating to dis-
posal of battery.
12. Use the batteries only with the products
specied by Makita. Installing the batteries to
non-compliantproductsmayresultinare,exces-
sive heat, explosion, or leak of electrolyte.
SAVE THESE INSTRUCTIONS.

12 ENGLISH
CAUTION: Only use genuine Makita batteries.
Use of non-genuine Makita batteries, or batteries that
have been altered, may result in the battery bursting
causingres,personalinjuryanddamage.Itwill
also void the Makita warranty for the Makita tool and
charger.
Tips for maintaining maximum
battery life
1. Charge the battery cartridge before completely
discharged. Always stop tool operation and
charge the battery cartridge when you notice
less tool power.
2. Never recharge a fully charged battery car-
tridge. Overcharging shortens the battery
service life.
3. Charge the battery cartridge with room tem-
perature at 10 °C - 40 °C (50 °F - 104 °F). Let
a hot battery cartridge cool down before
charging it.
PARTS DESCRIPTION
Parts description (with nylon cutting
head)
►Fig.4
1Switch trigger 2Battery cartridge
3Lock lever 4Protector
5Nylon cutting head 6Nylon cord
7Wire guard 8Thumb nut
9Front grip 10 Hanger for shoulder
harness
11 Indication lamp 12 Lock-off button
Parts description (with plastic blade)
►Fig.5
1Switch trigger 2Battery cartridge
3Blade holder 4Lock lever
5Protector 6Plastic blade head
7Plastic blade 8Wire guard
9Thumb nut 10 Front grip
11 Hanger for shoulder
harness
12 Indication lamp
13 Lock-off button - -
FUNCTIONAL
DESCRIPTION
WARNING: Always be sure that the tool is
switched off and the battery cartridge is removed
before adjusting or checking function on the tool.
Failure to switch off and remove the battery cartridge
mayresultinseriouspersonalinjuryfromaccidental
start-up.
Installing or removing battery
cartridge
CAUTION: Always switch off the tool before
installing or removing of the battery cartridge.
CAUTION: Hold the tool and the battery car-
tridge rmly when installing or removing battery
cartridge. Failure to hold the tool and the battery
cartridgermlymaycausethemtoslipoffyourhands
and result in damage to the tool and battery cartridge
andapersonalinjury.
►Fig.6: 1. Red indicator 2. Button 3. Battery cartridge
To remove the battery cartridge, slide it from the tool
while sliding the button on the front of the cartridge.
To install the battery cartridge, align the tongue on the
battery cartridge with the groove in the housing and slip
it into place. Insert it all the way until it locks in place
with a little click. If you can see the red indicator on the
upper side of the button, it is not locked completely.
CAUTION: Always install the battery cartridge
fully until the red indicator cannot be seen. If not,
itmayaccidentallyfalloutofthetool,causinginjuryto
you or someone around you.
CAUTION: Do not install the battery cartridge
forcibly. If the cartridge does not slide in easily, it is
not being inserted correctly.
Battery protection system
The tool is equipped with a battery protection system.
This system automatically cuts off power to the motor to
extend battery life.
The tool will automatically stop during operation if the
tool and/or battery are placed under one of the following
conditions:
Overloaded:
The tool is operated in a manner that causes it to draw
an abnormally high current.
In this situation, turn the tool off and stop the application
that caused the tool to become overloaded. Then turn
the tool on to restart.
If the tool does not start, the battery is overheated. In
this situation, let the battery cool before turning the tool
on again.
Low battery voltage:
The remaining battery capacity is too low and the tool
will not operate. If you turn the tool on, the motor runs
again but stops soon. In this situation, remove and
recharge the battery.

13 ENGLISH
Indicating the remaining battery
capacity
Only for battery cartridges with the indicator
►Fig.7: 1. Indicator lamps 2. Check button
Press the check button on the battery cartridge to indi-
cate the remaining battery capacity. The indicator lamps
light up for a few seconds.
Indicator lamps Remaining
capacity
Lighted Off
75% to 100%
50% to 75%
25% to 50%
0% to 25%
NOTE: Depending on the conditions of use and the
ambient temperature, the indication may differ slightly
from the actual capacity.
Switch action
WARNING: Before installing the battery car-
tridge into the tool, always check to see that the
switch trigger actuates properly and returns to
the "OFF" position when released.
WARNING: For your safety, this tool is
equipped with the lock-off button which prevents
the tool from unintended starting. Never use the
tool if it starts when you pull the switch trigger
without pressing the lock-off button. Ask your local
Makita Service Center for repairs.
WARNING: Never disable the lock function or
tape down the lock-off button.
NOTICE: Do not pull the switch trigger forcibly
without pressing the lock-off button. The switch
may break.
►Fig.8: 1. Switch trigger 2. Lock-off button
To prevent the switch trigger from being accidentally
pulled, a lock-off button is provided.
To start the tool, press the lock-off button and pull the
switch trigger. Release the switch trigger to stop. The lock-
off button can be pressed from either the right or left side.
Indication lamp
Running the tool allows the indication lamp to show the
battery cartridge capacity status.
►Fig.9: 1. Lamp
When the tool is also overloaded and has stopped
during operation, the lamp lights up in red. Refer to the
following table for the status and action to be taken for
the indication lamp.
Indication lamp Status Action to be taken
The lamp blinks
in red.
This indicates the
appropriate time to
replace the battery
cartridge when
the battery power
becomes low.
Recharge the
battery cartridge.
The lamp lights up
in red. (Note 1)
This function works
when the battery
power is almost
used up. At this
time, tool stops
immediately.
Recharge the
battery cartridge.
The lamp lights up
in red. (Note 1)
Autostop due to
overload.
Turn off the tool.
Note 1: The time at which the indication lamp lights up varies by
the temperature around the work area and the battery cartridge
conditions.
Nylon cutting head
NOTICE: Do not bump the tool to the concrete or
asphalt surface. Bumping to this kind of objects
may cause the tool damage.
NOTE: If the nylon cord does not feed out while
bumping the head, rewind or replace the nylon cord
by following the procedures in this manual.
NOTE: The bump and feed mechanism will not work
properly if the nylon cutting head is not rotating.
►Fig.10: 1. Nylon cutting head 2. Cutter
The nylon cutting head has a bump and feed mecha-
nism. To feed the nylon cord, bump the cutting head
against the ground while the tool is running. As the
nylon cord is feeding out, it will automatically be cut to
the proper length by the cutter.
Plastic blade storage
►Fig.11: 1. Plastic blade 2. Blade holder
A plastic blade for replacement can be stored in the
blade holder of the tool. When storing or taking out the
blade, remove the battery cartridge.
Adjusting the position of the handle
and front grip
CAUTION: Before adjusting the shaft length,
be sure to switch off the tool and remove the
battery cartridge from the tool. Failure to do so may
causeapersonalinjury.
Adjustthelengthoftheshaftsothatyoucanholdthe
handle when lowering your right hand.
►Fig.12: 1. Handle
Toadjusttheshaftlength,openthelocklever,then
adjustthelengthoftheshaft,andthenclosethelock
lever.
►Fig.13: 1. Lock lever
Adjustthepositionofthefrontgripsothatyoucanhold
the front grip when lowering your left hand.
►Fig.14: 1. Front grip

14 ENGLISH
ASSEMBLY
CAUTION: Always be sure that the tool is
switched off and the battery cartridge is removed
before carrying out any work on the tool.
CAUTION: Never start the tool unless it is
completely assembled. Operation of the tool in a
partially assembled state may result in serious per-
sonalinjuryfromaccidentalstart-up.
Installing the front grip
Attach the front grip to the front grip holder and secure
it with a hex bolt and the thumb nut as shown in the
gure.
►Fig.15: 1. Front grip 2. Thumb nut 3. Hex bolt
Thefrontgripangleisadjustable.Toadjustthefront
grip angle, loosen the thumb nut, set the front grip at an
proper angle according to your work and then tighten
thethumbnutclockwisermly.
Installing the wire guard
NOTICE: Do not expand the wire guard outward
too much. Otherwise it may break.
►Fig.16
Toreducetheriskofdamagingtheobjectsinfrontofthe
cutting head, attach the wire guard to the protector so
that it controls the cutting range.
Slightly expand the wire guard outward and then insert
it into the holes of the protector.
For nylon cutting head:
Attach the wire guard to the holes on the front side of
the protector. The nylon cord mark on the protector
indicates the hole to be used.
►Fig.17: 1. Hole
For plastic blade head:
Attach the wire guard to the holes on the rear side of the
protector. The blade mark on the protector indicates the
hole to be used.
►Fig.18: 1. Hole
When wire guard is not in use, lift it for the idle position.
►Fig.19: 1. Wire guard
Installing the protector
CAUTION: While installing the protector, be
careful not to contact the nylon cord cutter on
the protector. Contact with the cutter could result in
personalinjury.
►Fig.20: 1. Screw 2. Protector
Mounttheprotectorbyttingitontothemotorhousing,
and then secure it with two screws.
Installing nylon cutting head
Optional accessory
CAUTION: If the nylon cutting head acciden-
tally impacts a rock or hard object during oper-
ation, stop the tool and inspect for any damage.
If the nylon cutting head is damaged, replace it
immediately. Use of a damaged cutting tool could
resultinseriouspersonalinjury.
CAUTION: Be sure to remove the hex wrench
after installation.
CAUTION: When installing or removing the
nylon cutting head, be careful not to contact the
nylon cord cutter on the protector. Contact with the
cuttermayresultinpersonalinjury.
NOTICE: Be sure to use genuine Makita nylon
cutting head.
1. Turn the tool upside down so that you can replace
the cutting tool easily.
2. Insert the hex wrench through the hole on the
motor housing and rotate the spindle until the spindle is
locked.
►Fig.21: 1. Hex wrench 2. Hole 3. Spindle
3. Place the nylon cutting head onto the spindle and
tighten it by turning it clockwise.
►Fig.22: 1. Nylon cutting head
4. Remove the hex wrench.
To remove the nylon cutting head, turn it counterclock-
wise while locking the spindle with the hex wrench.
Installing plastic blade head
Optional accessory
CAUTION: If the plastic blade accidentally
impacts a rock or hard object during operation,
stop the tool and inspect for any damage. If the
plastic blade is damaged, replace it immediately.
Use of a damaged cutting tool could result in serious
personalinjury.
CAUTION: Be sure to remove the hex wrench
after installation.
CAUTION: When installing or removing the
plastic blade head, be careful not to contact the
nylon cord cutter on the protector. Contact with the
cuttermayresultinpersonalinjury.
CAUTION: If the plastic blade head is worn
out, replace it with a new one. If it is worn out, the
plastic blade may be thrown away from the plastic
bladeheadduringoperationandcauseaninjury.
NOTICE: Be sure to use genuine Makita plastic
blade.
1. Turn the tool upside down so that you can replace
the cutting tool easily.
2. Insert the hex wrench through the hole on the
motor housing and rotate the spindle until the spindle is
locked.
►Fig.23: 1. Hex wrench 2. Hole 3. Spindle

15 ENGLISH
3. Place the plastic blade head onto the spindle and
tighten it by turning it clockwise.
►Fig.24: 1. Plastic blade head
4. Remove the hex wrench.
To remove the plastic blade, turn it counterclockwise
while locking the spindle with the hex wrench.
Attaching the shoulder harness
►Fig.25: 1. Hook
Attach the hooks of the shoulder harness to the tool as
showninthegure.
CAUTION: Be sure to attach the hooks of the
shoulder harness to the tool securely. If the hooks
are attached incompletely, they may come off and
cause injury.
Hex wrench storage
CAUTION: Be careful not to leave the hex
wrench inserted in the tool head. It may cause
injuryand/ordamagetothetool.
When not in use, store the hex wrench as shown in the
guretokeepitfrombeinglost.
►Fig.26: 1. Hex wrench
OPERATION
Cutting the grass
Hold the grass trimmer at the angle of about 50° to the
ground. Move the grass trimmer from right to left slowly.
Cut the grass a few times from the top of the grass at
the tip of the nylon cord or with the blade.
NOTICE: Do not cut high grass at a time. Cutting
the high grass at a time near the root may cause the
nylon cutting head or plastic blade to be entangled by
grass. This may cause the motor overload, resulting
in damage to the grass trimmer.
NOTICE: Use the grass trimmer without getting
the spool or plastic blade into a contact with the
ground surface. Using the spool or plastic blade
contacting the ground surface may cause the motor
under overload resulting in damage to the grass
trimmer.
►Fig.27
NOTICE: Do not force the trimmer in densely
growing grass.
►Fig.28
NOTICE: Do not use the trimmer as if you dig out
the ground.
►Fig.29
Cutting the grass near tree, block,
brick, or stone
Hold and tilt the grass trimmer at a height where the
spool or blade does not touch the ground. Cut the grass
using the nylon cord tip or plastic blade like knocking
the ground.
►Fig.30
NOTICE: When cutting the grass, move the
grass trimmer around the tree or blocks so that
the nylon cord or blade does not touch the tree or
blocks. It is recommended to keep the tool more than
5 cm away from the tree or block. If the nylon cord or
blade touch the tree or block, the nylon cord may be
torn or the blade may wear out rapidly. If the nylon
cord is torn in the spool, set the nylon cord again
referring to the replacement procedure in this manual.
Using the grass trimmer as an edger
Using the grass trimmer as an edger is suitable for
cutting the grass growing along the bricks or blocks.
Pull down the wire guard and rotate the grass trimmer
180°.
Asshowninthegure,whilecontactingthewireguard
with the ground, move the grass trimmer to cut the
grass.Youcancutthegrassefcientlybywalkingin
parallel along the bricks or blocks.
►Fig.31: 1. Wire guard
Detaching the shoulder harness
WARNING: Be extremely careful to maintain
control of the machine when detaching the shoul-
der harness.
CAUTION: Before operation, adjust the
shoulder harness to the proper length to prevent
fatigue.
CAUTION: Be sure that the tool is held
securely by the shoulder harness before
operation.
The shoulder harness features a means of quick
release. Squeeze the sides of the buckle to release the
tool from the shoulder harness.
►Fig.32: 1. Buckle
MAINTENANCE
WARNING: Always be sure that the tool is
switched off and battery cartridge is removed
before attempting to perform inspection or main-
tenance on the tool. Failure to switch off and remove
the battery cartridge may result in serious personal
injuryfromaccidentalstart-up.
NOTICE: Never use gasoline, benzine, thinner,
alcohol or the like. Discoloration, deformation or
cracks may result.

16 ENGLISH
To maintain product SAFETY and RELIABILITY,
repairs,anyothermaintenanceoradjustmentshould
be performed by Makita Authorized or Factory Service
Centers, always using Makita replacement parts.
Cleaning the tool
Clean the tool by wiping off dust, dirt, or cut off grass
with a dry cloth or one dipped in soapy water and wrung
out. If the cut off grass is adhered to the motor housing,
be sure to remove it.
►Fig.33: 1. Motor housing
Storage
The hole in the handle is convenient for hanging the tool
from a nail or screw on the wall. Before storing the tool,
raise the wire guard, shorten the shaft, and then fold the
front grip.
►Fig.34: 1. Wire guard
►Fig.35: 1. Front grip 2. Shaft
►Fig.36: 1. Hole
Replacing the plastic blade
If the plastic blade is worn out, replace it with a new
one. To install the plastic blade, align the direction of the
blade with the mark on the plastic blade head, and then
insert it all the way until it locks in place with a little click.
To remove the plastic blade, perform the installation
procedure in reverse.
►Fig.37: 1. Blade 2. Mark
NOTE: If the plastic blade is worn out, the vibration
increases when the machine is operated with no-load.
Replacing the nylon cord
WARNING: Use nylon cord with diameter specied in “SPECIFICATIONS” only. Never use heavier line,
metal wire, rope or the like. Use recommended nylon cord only, otherwise it may cause damage to the tool and
resultinseriouspersonalinjury.
WARNING: Make sure that the cover of the nylon cutting head is secured to the housing properly as
described below.Failuretoproperlysecurethecovermaycausethenyloncuttingheadtoyapartresultingin
seriouspersonalinjury.
Replace the nylon cord if the cord is not feeding any more.
►Fig.38: (1) Up to 8 m (2) 70 - 80 mm

17 ENGLISH
TROUBLESHOOTING
Beforeaskingforrepairs,conductyourowninspectionrst.Ifyoundaproblemthatisnotexplainedinthemanual,
do not attempt to dismantle the tool. Instead, ask Makita Authorized Service Centers, always using Makita replace-
ment parts for repairs.
State of abnormality Probable cause (malfunction) Remedy
Motor does not run. Battery cartridge is not installed. Install the battery cartridge.
Battery problem (under voltage) Recharge the battery. If recharging is not effective,
replace battery.
The drive system does not work
correctly.
Ask your local authorized service center for repair.
Motor stops running after a little use. Battery's charge level is low. Recharge the battery. If recharging is not effective,
replace battery.
Overheating. Stop using of tool to allow it to cool down.
It does not reach maximum RPM. Battery is installed improperly. Install the battery cartridge as described in this
manual.
Battery power is dropping. Recharge the battery. If recharging is not effective,
replace battery.
The drive system does not work
correctly.
Ask your local authorized service center for repair.
Cutting tool does not rotate:
stop the machine immediately!
Foreignobjectsuchasabranchis
jammedbetweentheguardandthe
nylon cutting head.
Removetheforeignobject.
The drive system does not work
correctly.
Ask your local authorized service center for repair.
Abnormal vibration:
stop the machine immediately!
One end of the nylon cord has been
broken.
Tap the nylon cutting head against the ground while
it is rotating to cause the cord to feed.
The drive system does not work
correctly.
Ask your local authorized service center for repair.
Cutting tool and motor cannot stop:
Remove the battery immediately!
Electric or electronic malfunction. Remove the battery and ask your local authorized
service center for repair.
OPTIONAL ACCESSORIES
CAUTION: These accessories or attachments are recommended for use with your Makita tool spec-
ied in this manual.Theuseofanyotheraccessoriesorattachmentsmightpresentariskofinjurytopersons.
Only use accessory or attachment for its stated purpose.
If you need any assistance for more details regarding these accessories, ask your local Makita Service Center.
• Nylon cutting head
• Nylon cord (cutting line)
• Plastic blade head
• Plastic blade
• Makita genuine battery and charger
NOTE: Some items in the list may be included in the tool package as standard accessories. They may differ from
country to country.

18 SLOVENŠČINA
SLOVENŠČINA (Originalna navodila)
TEHNIČNI PODATKI
Model: UR100D
Hitrost brez obremenitve
(brezrezalnegaorodja)
10.000 min-1
Skupnadolžina
(brezrezalnegaorodja)
835 – 1.185 mm
Premernajlonskeniti 1,65 mm
Uporabljenorezalnoorodjein
rezalni premer
Najlonskarezalnaglava
(P/N 198852-2/198853-0)
260 mm
Glavaplastičnegarezila
(P/N 198847-5/198848-3)
230 mm
Nazivna napetost D.C.10,8V-12V(največ)
Standardnibaterijskivložek BL1015 / BL1016 / BL1020B / BL1021B / BL1040B / BL1041B
Netoteža 1,9 – 2,1 kg
• Kernenehnoopravljamoraziskaveinrazvijamosvojeizdelke,selahkotehničnipodatkivtemdokumentu
spremenijobrezobvestila.
• Tehničnipodatkiinbaterijskivložkiselahkorazlikujejogledenadržavouporabeizdelka.
• Težaselahkorazlikujegledenapriključke,vključnozakumulatorskobaterijo.Najlažjainnajtežjakombinacijav
skladu s postopkom EPTA 01/2014 sta prikazani v preglednici.
Hrup
Veljavnistandard:EN50636
Vrsta Povprečnaravenzvočnegatlaka
LPA(dB(A)) OdstopanjeK(dB(A))
Najlonskarezalnaglava 74 0,74
Plastičnorezilo 75,8 2,84
• Tudičejezgorajnavedenaravenzvočnegatlaka80dB(A)alimanj,lahkomeddelovanjempreseže80dB(A).
Uporabljajtezaščitozasluh.
Vibracije
Veljavnistandard:EN50636
Vrsta Leva smer Desna smer
ah,W (m/s2)
OdstopanjeK(m/s2)
ah,W (m/s2)
OdstopanjeK(m/s2)
Najlonskarezalnaglava 2,5 0,1 2,5 0,5
Plastičnorezilo 2,5 0,1 2,5 0,1
OPOMBA:Navedenavrednostoddajanjavibracijjebilaizmerjenavskladusstandardnimimetodamitestiranjain
selahkouporabljazaprimerjavoorodij.
OPOMBA:Navedenavrednostoddajanjavibracijselahkouporabljatudipripredhodnioceniizpostavljenosti.
OPOZORILO:Oddajanjevibracijmeddejanskouporaboelektričnegaorodjaselahkorazlikujeodnavedene
vrednostioddajanja,odvisnoodnačinauporabeorodja.
OPOZORILO:Upravljavecmorazalastnozaščitopoznativarnostneukrepe,kitemeljijonaoceniizpostavlje-
nostivdejanskihpogojihuporabe(polegčasaproženjajetrebaupoštevaticelotendelovnicikel,vključnosčasom,
kojeorodjeizklopljeno,inčasom,kodelujevprostemteku).

19 SLOVENŠČINA
Simboli
Naslednjisimboliseuporabljajovpovezavisstrojem.
Preduporaboizdelkaseobveznoseznaniteznjihovim
pomenom.
Potrebnajeposebnapozornostin
previdnost.
Preberite navodila za uporabo.
Nevarnost;paziteseletečihpredmetov.
Razdaljamedorodjeminosebamivbližini
morabitinajmanj15m.
360°
Nedovoliteosebam,dasepribližajo.
15m(50FT)Ohranjajterazdaljonajmanj15m.
Nositečelado,očalainzaščitozasluh.
Nositezaščitnerokavice.
Nositemočneškornjeznedrsečimpodpla-
tom.Priporočajosezaščitniškornjiz
jeklenokapicozazaščitoprstov.
Neizpostavljajtevlagi.
Nikolineuporabljajtekovinskegarezila.
Ni-MH
Li-ion
SamozadržaveEU
Električnegaorodjainakumulatorskebate-
rijeneodlagajteskupajzgospodinjskimi
odpadki! V skladu z evropskimi direktivami
oodpadnielektričniinelektronskiopremi,
baterijahinakumulatorjih,odpadnihbate-
rijahinakumulatorjihterupoštevanjem
njihovihdoločilvskladuzdržavnozako-
nodajojetrebaelektričnoopremo,baterije
inakumulatorje,katerihživljenjskadoba
jepretekla,zbiratiločenoinjihdostaviti
vustrezenobratzarecikliranje,kideluje
skladnozokoljevarstvenimizahtevami.
Izjava o skladnosti ES
Samo za evropske države
IzjavaESoskladnostijevključenavdodatkuA,kije
priložentemnavodilomzauporabo.
VARNOSTNA OPOZORILA
POMEMBNA VARNOSTNA
NAVODILA
OPOZORILO: Preberite vsa varnostna opo-
zorila in navodila. Neupoštevanjeopozorilinnavodil
lahkoprivededoelektričnegaudara,požarain/ali
resnihtelesnihpoškodb.
Shranite vsa opozorila in navo-
dila za poznejšo uporabo.
1. Seznanite se s funkcijami za upravljanje in
pravilno uporabo opreme.
2. Ko izključite motor, se rezila še vedno vrtijo.
3. Nikoli ne dovolite, da bi napravo uporabljali
otroci ali osebe, ki niso seznanjene z navodili
za njeno uporabo. Lokalni predpisi morda
omejujejo starost uporabnika naprave.
4. Prekinite uporabo naprave, ko so v bližini
osebe, zlasti otroci, ali domače živali.
5. Napravo uporabljajte le podnevi ali pri dobri
umetni svetlobi. Stroja ne uporabljajte ob
slabem vremenu, še posebej, kadar bliska.
6. Pred uporabo naprave in po kakršnem koli
udarcu preverite znake obrabe ali poškodb in
jih po potrebi popravite.
7. Pazite, da se ne poškodujete ob uporabi
naprav, ki se uporabljajo za rezanje nitke na
ustrezno dolžino. Kadar podaljšujete rezalno
nit, napravo postavite v običajen položaj za
upravljanje, preden jo ponovno vklopite.
8. Nikoli ne nameščajte kovinskih rezil.
9. Naprave ne smejo uporabljati osebe (vključno
z otroki) z zmanjšanimi zičnimi, čutnimi ali
umskimi sposobnostmi ter s pomanjkanjem
izkušenj in znanja, razen če so seznanjene
z navodili za varno uporabo naprave ali so
pod nadzorom odgovorne osebe. Zagotovite
ustrezen nadzor otrok in preprečite igranje z
napravo.
10. Pri uporabi orodja bodite zelo previdni in
pozorni.
11. Orodje uporabljajte samo, če ste dobro zično
pripravljeni. Vsa dela opravljajte mirno in
zbrano. Uporabljajte zdrav razum in upošte-
vajte, da je upravljavec ali uporabnik odgo-
voren za nesreče ali nevarnosti, ki se zgodijo
drugim ljudem ali njihovi lastnini.
12. Orodja ne uporabljajte, kadar ste utrujeni,
bolni ali pod vplivom alkohola in drog.
13. Če opazite kakršne koli znake nenavadnega
delovanja, napravo takoj izključite.
14. Umaknite prste s sprožilca, ko orodja ne upo-
rabljate in ko ga pomikate iz enega delovnega
položaja v drugega.
Predvidena uporaba naprave
1. Uporabljajte primerno orodje. Brezžična
kosilnica z nitjo je namenjena samo za rezanje
trave in manjšega plevela. Ne uporabljajte je za
druge namene, npr. za obrezovanje žive meje,
saj se lahko poškodujete.
Osebna zaščitna oprema
►Sl.1
►Sl.2
1. Nosite ustrezna oblačila. Oblačila morajo biti
funkcionalna in primerna, torej se morajo
tesno prilegati, vendar vas ne smejo ovirati. Ne
nosite nakita ali kosov oblačil, ki bi se lahko
zataknili za visoko travo. Če imate dolge lase,
uporabljajte zaščitno pokrivalo.

20 SLOVENŠČINA
2. Med uporabo orodja imejte vedno obute
močne čevlje z nedrsečim podplatom. Tako se
boste zaščitili pred poškodbami in zagotovili
dobro stojišče.
3. Pri uporabi električnih orodij vedno nosite
zaščitna očala, da preprečite poškodbe oči.
Očala morajo ustrezati standardu ANSI Z87.1
v ZDA, EN 166 v Evropi ali AS/NZS 1336 v
Avstraliji/Novi Zelandiji. V Avstraliji/Novi
Zelandiji je zakonsko zahtevano tudi nošenje
obrazne zaščite.
Delodajalec mora zagotoviti, da upravljavci
orodja in druge osebe v neposrednem delov-
nem območju uporabljajo ustrezno zaščitno
opremo.
Električna zaščita in zaščita akumulatorja
1. Izogibajte se nevarnemu okolju. Orodja ne
uporabljajte na vlažnih ali mokrih mestih in
ga ne izpostavljajte dežju. Voda, ki prodre v
orodje, bo povečala nevarnost električnega
udara.
2. Orodje polnite samo s polnilnikom, ki ga je
določil proizvajalec. Polnilnik, ki je primeren
za eno vrsto akumulatorskih baterij, lahko
pomeni nevarnost požara, če ga uporabljate z
drugimi akumulatorskimi baterijami.
3. Električno orodje uporabljajte le s posebej
označenimi akumulatorskimi baterijami.
Uporaba drugih akumulatorskih baterij lahko
pomeni nevarnost telesnih poškodb in požara.
4. Ko akumulatorske baterije ne uporabljate,
je ne hranite ob kovinskih predmetih, kot so
sponke za papir, kovanci, ključi, žeblji, vijaki
ali drugi manjši kovinski predmeti, ki lahko
povzročijo stik med priključkoma. Kratek stik
akumulatorskih priključkov lahko povzroči
opekline ali požar.
5. V neprimernih pogojih lahko iz akumulatorja
uhaja tekočina; izogibajte se stiku. Če pride
do nenamernega stika, sperite z vodo. Če
pride tekočina v stik z očmi, poiščite zdravni-
ško pomoč. Tekočina iz akumulatorja lahko
povzroči draženje ali opekline.
6. Akumulatorja/-ev ni dovoljeno metati v ogenj.
Celica lahko eksplodira. Preverite lokalne
predpise glede morebitnih posebnih navodil za
odstranjevanje.
7. Ne odpirajte ali spreminjajte akumulatorja/-
-ev. Sproščeni elektrolit je koroziven in lahko
povzroči poškodbe oči ali kože. Pri zaužitju je
lahko strupen.
8. Akumulatorja ne polnite v dežju ali na mokrih
mestih.
Zagon orodja
►Sl.3
1. Zagotovite, da v delovnem območju 15 metrov
ne bodo otroci ali druge osebe, prav tako
pazite na živali. V nasprotnem primeru prene-
hajte uporabljati orodje.
2. Pred uporabo vedno preverite, ali je orodje
varno za uporabo. Preverite varnost rezalnega
orodja in ščitnika ter sprožilnega stikala/
ročice, če je upravljanje enostavno in pravilno.
Preverite, ali so ročaji čisti in suhi ter preizku-
site delovanje funkcije vklopa/izklopa.
3. Pred nadaljnjo uporabo orodja preverite
poškodovane dele. Ščitnik ali drug poškodo-
van del je treba skrbno pregledati, da ugoto-
vite, ali bo pravilno deloval in služil svojemu
namenu. Preverite poravnanost in zatikanje
gibljivih delov, morebitne zlomljene dele in vsa
druga stanja, ki bi lahko vplivala na njegovo
delovanje. Ščitnik ali drug poškodovani del
mora ustrezno popraviti ali zamenjati poo-
blaščeni servisni center, razen če je drugače
določeno v teh navodilih.
4. Motor vključite samo, če roke in noge niso v
bližini rezalnega orodja.
5. Pred zagonom se prepričajte, ali rezalno
orodje ni v stiku s trdimi predmeti, npr. z
vejami, kamni ipd., saj se bo rezalno orodje ob
zagonu zavrtelo.
6. Prepričajte se, da v bližini ni električnih kablov,
vodovodnih cevi, plinskih cevi in drugih ele-
mentov, ki bi predstavljali nevarnost, če bi jih
poškodovali z orodjem.
Način delovanja
1. Naprave nikoli ne upravljajte s poškodovanim
ščitnikom ali brez ščitnika.
2. Orodje uporabljajte samo ob dobri svetlobi in
vidljivosti. Pozimi bodite pozorni na drseča
ali mokra območja ter led in sneg (nevarnost
zdrsa). Vedno se prepričajte, da imate trdno
oporo.
3. Bodite previdni, da z rezalnim orodjem ne
poškodujete stopal in dlani.
4. Roke in noge vedno držite stran od rezil, zlasti
ko izklopite motor.
5. Nikoli ne kosite nad višino pasu.
6. Nikoli ne stojte na lestvi, medtem ko zaganjate
orodje.
7. Nikoli ne delajte na nestabilnih površinah.
8. Z orodjem ne segajte previsoko. Vselej pazite
na ustrezno oporo in ravnotežje.
9. Iz delovnega območja odstranite pesek,
kamne, žeblje itd. Tujki lahko poškodujejo
rezalno orodje in povzročijo nenaden sunek,
zaradi česar lahko pride do resnih poškodb.
10. Če rezalno orodje zadene ob kamne ali
druge trde predmete, takoj izklopite motor in
preglejte rezalno orodje.
11. Pred začetkom rezanja mora orodje doseči
polno delovno hitrost.
Other manuals for UR100D
10
This manual suits for next models
2
Table of contents
Languages:
Other Makita Trimmer manuals

Makita
Makita DUN500W User manual

Makita
Makita UH5570 User manual

Makita
Makita BUR141 User manual

Makita
Makita 3711 User manual

Makita
Makita DUH521 User manual

Makita
Makita EM4351UH User guide

Makita
Makita GRU04 User manual

Makita
Makita RPT250 User manual

Makita
Makita DUN500W User manual

Makita
Makita DUR364L User manual

Makita
Makita DUR192L User manual

Makita
Makita M3702 User manual

Makita
Makita DUN461W User manual

Makita
Makita DUR192L User manual

Makita
Makita DUH551 User manual

Makita
Makita XHU09 User manual

Makita
Makita RT0700C User manual

Makita
Makita EM2600U Instruction Manual

Makita
Makita UH4570 User manual

Makita
Makita UH013G User manual