10 ENGLISH
ENGLISH (Original instructions)
SPECIFICATIONS
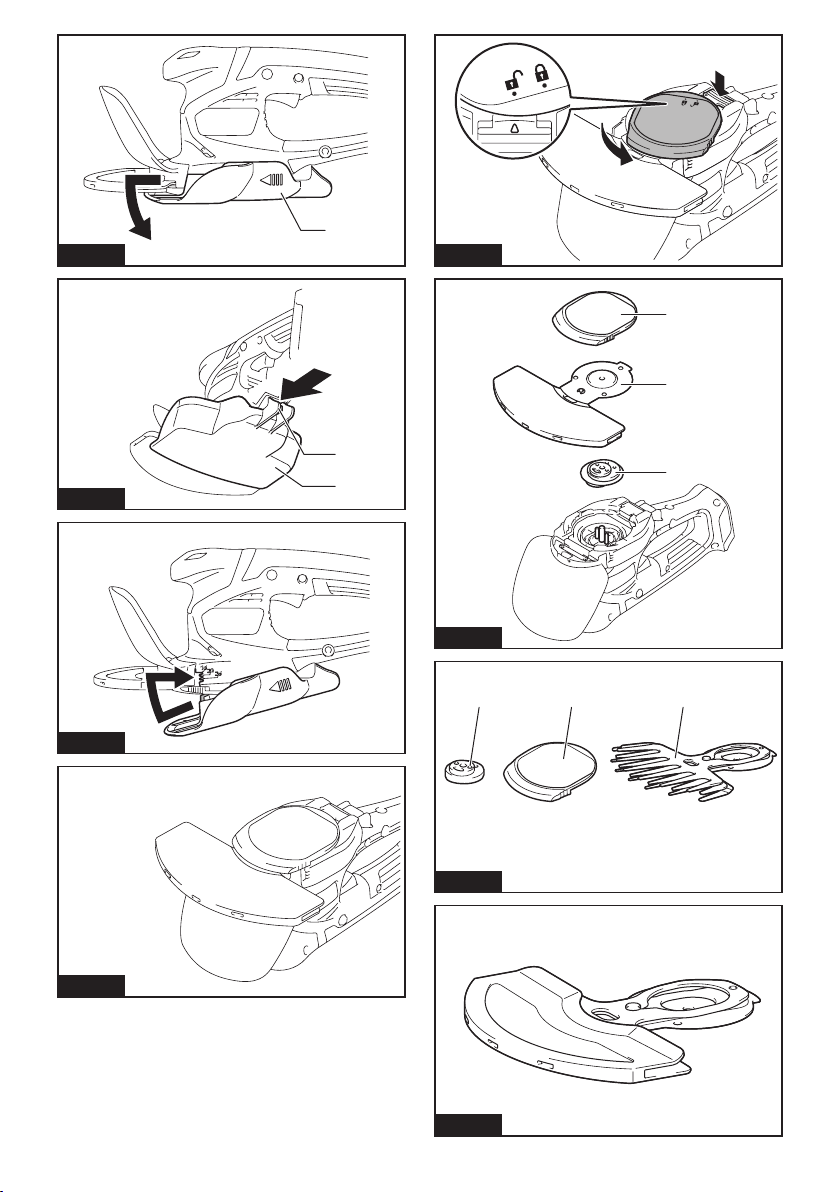
UM600D with shear blade for grass shear installed
Model: UM600D
Cutting width 160 mm
Strokes per minute 2,500 min-1
Dimensions
(L x W x H)
347 mm x 177 mm x 131 mm
Rated voltage D.C. 10.8 V - 12 V max
Net weight 1.3 - 1.5 kg
UH201D with shear blade for hedge trimmer installed
Model: UH201D
Blade length 200 mm
Strokes per minute 2,500 min-1
Dimensions
(L x W x H)
504 mm x 120 mm x 131 mm
Rated voltage D.C. 10.8 V - 12 V max
Net weight 1.3 - 1.5 kg
• Duetoourcontinuingprogramofresearchanddevelopment,thespecicationshereinaresubjecttochange
withoutnotice.
• Specicationsandbatterycartridgemaydifferfromcountrytocountry.
• Theweightmaydifferdependingontheattachment(s),includingthebatterycartridge.Thelightestandheavi-
estcombinations,accordingtoEPTA-Procedure01/2014,areshowninthetable.
Applicable battery cartridge and charger
Batterycartridge BL1015/BL1016/BL1020B/BL1021B/BL1040B/BL1041B
Charger DC10SA/DC10SB/DC10WC/DC10WD/DC18RE
• Someofthebatterycartridgesandchargerslistedabovemaynotbeavailabledependingonyourregionof
residence.
WARNING: Only use the battery cartridges and chargers listed above.Useofanyotherbatterycartridges
andchargersmaycauseinjuryand/orre.
Symbols
Thefollowingsshowthesymbolsusedfortheequip-
ment.Besurethatyouunderstandtheirmeaningbefore
use.
Takeparticularcareandattention.
Readinstructionmanual.
Danger;beawareofthrownobjects.
Keepbystandersaway.
Cuttingmeanscontinuestorunafterthe
motorisswitchedoff.
Do not expose to moisture.
Li-ion
OnlyforEUcountries
Donotdisposeofelectricequipmentor
batterypacktogetherwithhouseholdwaste
material!
InobservanceoftheEuropeanDirectives,
onWasteElectricandElectronic
EquipmentandBatteriesandAccumulators
andWasteBatteriesandAccumulators
andtheirimplementationinaccordance
withnationallaws,electricequipmentand
batteriesandbatterypack(s)thathave
reachedtheendoftheirlifemustbecol-
lectedseparatelyandreturnedtoanenvi-
ronmentallycompatiblerecyclingfacility.
Intended use
UM600D with shear blade for grass shear installed
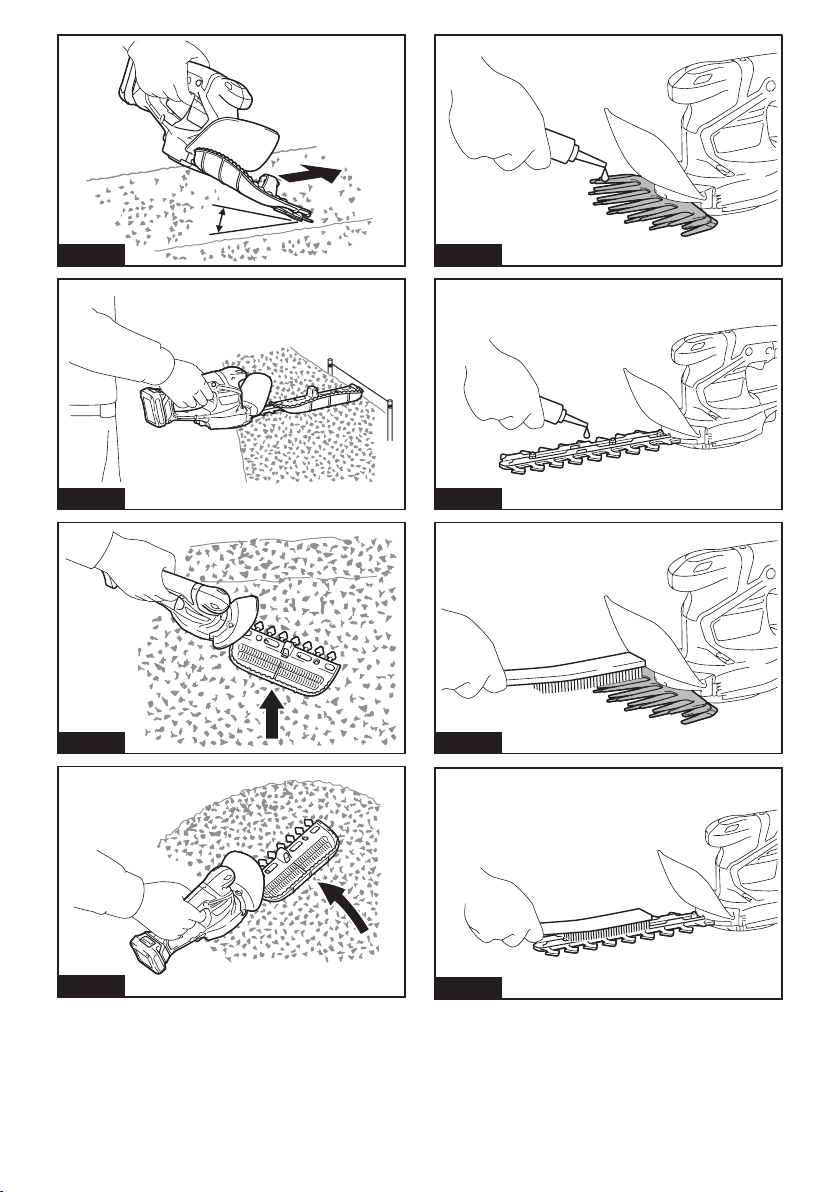
Thetoolisintendedforcuttinglawnedgesorsprouts.
UH201D with shear blade for hedge trimmer
installed
Thetoolisintendedfortrimminghedges.