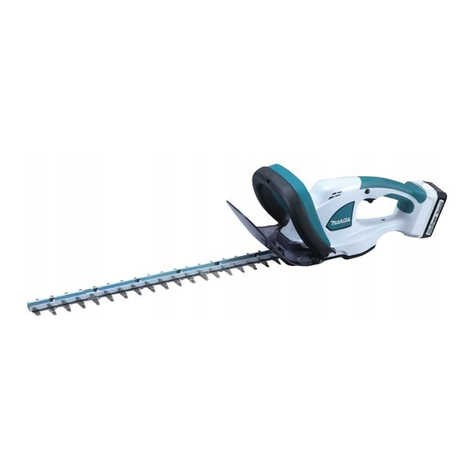
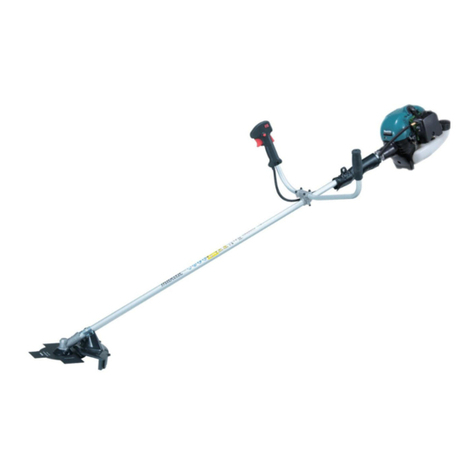
Makita EH5000WG User manual

EH5000W/EH5000WG/EH6000W/EH6000WG/EH7500W/
EH7500WG
EN PETROL HEDGE TRIMMER
PTBR APARADOR DE CERCA-VIVA A GASOLINA
ESMX CORTA SETOS A GASOLINA
INSTRUCTION MANUAL
MANUAL DE INSTRUÇÕES
MANUAL DE INSTRUCCIONES

2
WARNING:
To reduce the RISK of injury, user must read and understand the instruction manual before using the hedge
trimmer. Manufacturer reserves the right to change specications without notice. Specications may differ
from country to country. Do only hand over the hedge trimmer together with this manual.
AVISO:
Para reduzir o RISCO de lesão, o usuário deve ler e entender o manual de instruções antes de usar o
aparador de cerca viva. O fabricante reserva o direito de alterar as especicações sem aviso prévio. As
especicações podem variar de país para país. Somente entregue o aparador de cerca viva junto com este
manual.
¡ADVERTENCIA!
Para reducir el RIESGO de lesiones, el usuario deberá leer y comprender el manual de instrucciones antes
de usar el cortasetos. El fabricante se reserva el derecho de cambiar las especicaciones sin previo aviso.
Puede que las especicaciones dieran de país a país. Al dar el cortasetos a otra persona, hágalo solo
incluyendo este manual.

3
Thank you very much for selecting the MAKITA hedge trimmer. We are pleased
to be able to offer you the MAKITA hedge trimmer which is the result of a long
development program and many years of knowledge and experience.
The hedge trimmer models EH5000W, EH5000WG, EH6000W, EH6000WG,
EH7500W and EH7500WG combine the advantages of state-of-the-art
technology with ergonomic design, light weight, handy, compact and represent
professional equipment for a great variety of applications.
Please read, understand and follow this booklet which refers in detail to
the various points that will demonstrate its outstanding performance. This
will assist you to safely obtain the best possible results from your MAKITA
hedge trimmer.
It is very important to understand the following symbols when reading this instructions manual.
SYMBOLS
English
WARNING/DANGER Fuel and oil mixture
Read, Understand and Follow
Instruction Manual Engine-Manual start
Forbidden Emergency stop
No smoking First Aid
No open ame Recycling
Protective gloves must be worn ON/START
Keep the area of operation clear of all
persons and pets OFF/STOP
Wear protective helmet,
eye and ear protection!
(Original instructions)
Table of Contents Page
Symbols.........................................................................3
Safety instructions .........................................................4
Technical data................................................................7
Designation of parts.......................................................8
Fuels/refueling...............................................................9
Precautions before starting..........................................10
Starting the machine.................................................... 11
Stopping the machine.................................................. 11
Operation of the machine ............................................12
Adjusting rear handle angle.........................................12
Maintenance instructions.............................................13
Storage........................................................................16
Maintenance schedule.................................................16
Fault location ...............................................................16

4
General Instructions
- THIS MACHINE CAN CAUSE SERIOUS INJURIES. Read the Instructions
carefully for correct handling, preparation, maintenance, starting and stopping of
the machine. Be familiar with all controls and the proper use of the machine. (1)
- It is recommended only to loan the hedge trimmer to people who have proven to
be experienced with hedge trimmers.
Always hand over the instruction manual.
- First-time users should ask the dealer for basic instructions to familiarize
themselves with handling of an engine powered hedge trimmer.
- Children and young persons aged under 18 years must not be allowed to operate
the hedge trimmer. Persons over the age of 16 years may however use the
device for the purpose of being trained only while under the supervision of a
qualied trainer.
- Use the hedge trimmer with the utmost care and attention.
- Operate the hedge trimmer only if you are in a good physical condition. Perform
all work calmly and carefully. The user has to accept liability for others.
- Never use the hedge trimmer after consuming alcohol or drugs, or if feeling tired
or ill. (2)
Intended use of the machine
- The hedge trimmer is designed for only the purpose of trimming bushes and
hedges, and must not be used for any other purpose. Do not abuse the Trimmer.
Personal protective equipment
- The clothing worn should be functional and appropriate, i.e. it should be tight-
tting but not cause hindrance. Do not wear jewelry or loose clothing which could
become entangled with bushes or shrubs, or the machine.
- In order to avoid eye, hand or foot injuries as well as to protect your hearing,
the following protective equipment and protective clothing must be used during
operation of the hedge trimmer.
- During operation of the hedge trimmer always wear goggles or a visor to prevent
eye injuries. (3)
- Wear adequate noise protection equipment to avoid hearing impairment, ear
muffs, ear plugs, etc. (3)
- We strongly recommend that the user wears work overalls. (4)
- Special gloves made of thick leather are part of the prescribed equipment and
must always be worn during operation of the hedge trimmer. (4)
- When using the hedge trimmer, always wear sturdy shoes with a non- slip sole.
This protects against injuries and ensures a good footing. (4)
SAFETY INSTRUCTIONS
(1)
(2)
(3)
(4)

5
Starting up the hedge trimmer
- Please make sure that there are no children or other people within a working
range of 15 meters (5), also pay attention to any animal in the working vicinity.
- Before operating, always check the hedge trimmer is safe for operation.
- Check the security of the throttle lever. The throttle lever should be checked for
the smooth and easy actions. Check for proper functioning of the throttle lever
lock. Check for clean and dry handles and test the function of the I-O switch.
Keep handles free of oil and fuel.
Start the hedge trimmer only in accordance with the instructions.
Do not use any other methods for starting the engine (6)!
- Use the hedge trimmer only for applications specied.
- Start the hedge trimmer engine only after the entire assembly is done. Operation
of the hedge trimmer is permitted only after all the appropriate accessories are
attached!
- Before starting, make sure that the cutter blade will not contact any objects such
as branches, stones, etc.
- Stop the engine immediately if there are any engine problems.
- During operation, hold both the front and rear handle rmly by wrapping your
ngers around the handles. Keep handles clean and free of moisture, resin, oil or
grease.
Always ensure a safe, well-balanced footing.
- Only use outdoors.
- Always be aware of your surroundings and stay alert for possible hazards that
you may not hear due to the noise of the machine.
- Operate the hedge trimmer in such a manner as to avoid inhalation of the
exhaust gases. Never run the engine in enclosed rooms (risk of suffocation and
gas poisoning). Carbon monoxide is an odorless gas. Always ensure there is an
adequate ventilation.
- Stop the engine when resting and when leaving the hedge trimmer unattended.
Place it in a safe location to prevent danger to others or, setting re to
combustible materials or damage to the machine.
- Never put the hot hedge trimmer onto dry grass or onto any combustible
materials.
- To reduce re hazard, keep the engine and silencer free of debris, leaves, or
excessive lubricant.
- Never operate the engine with a faulty exhaust mufer.
- Stop the engine during transport (7).
- Stop the engine before:
- Cleaning a blockage;
- Checking, maintenance or working on the machine.
- Position the hedge trimmer safely during car or truck transportation to avoid a fuel
leakage.
- When transporting the hedge trimmer ensure that the fuel tank is completely
empty to avoid fuel leakage.
- When transporting or storing the machine always t the cutting device guard.
Refuelling
- Stop the engine before refuelling (7), keep well away from open ame (8) and do
not smoke.
- Do not attempt to refuel a hot or a running engine.
- Avoid skin contact with petroleum products. Do not inhale fuel vapors. Always
wear protective gloves during refuelling. Change and clean protective clothing at
regular intervals.
- Take care not to spill either fuel or oil in order to prevent soil contamination
(environmental protection). Wipe down the hedge trimmer immediately after fuel
has been spilled. Dry the cloths used for wiping the fuel at a well ventilated area
before disposing them. Failure to do so may cause spontaneous combustion.
- Avoid any fuel contact with your clothes. Change your clothes immediately if fuel
has been spilled on it (dangerous hazard).
- Inspect the fuel cap at regular intervals making sure that it stays securely fastened.
- Carefully tighten the fuel tank cap. Change locations to start the engine (at least 3
meters away from the place of refuelling) (9).
- Never refuel in closed rooms. Fuel vapors accumulate at ground level (risk of
explosions).
- Only transport and store fuels in approved containers. Make sure stored fuel is
not accessible to children.
- When mixing gasoline with two-stroke engine oil, use only gasoline which
contains no ethanol or methanol (types of alcohol).
This will help to prevent damage to fuel lines and other engine parts.
15 meters
(50 feet)
360°
(5)
(6)
(7)
• Resting
• Transporting
• Refuelling
• Maintenance
• Tool Replacement
(8)
(9)
3 meters
(10 feet)

6
Method of operation
- Always use two hands to grip each handle during operation.
- Use the hedge trimmer only in a good light and visibility. During cold seasons
beware of slippery or wet areas, ice and snow (risk of slipping). Always ensure a
safe footing.
- Never work on unstable surfaces or steep terrain.
- Never stand on a ladder and run the hedge trimmer.
- Never climb up onto trees to perform cutting operation with the hedge trimmer.
- To reduce the risk of stumbling and loss of control, do not walk backward while
operating the machine.
- Always stop the engine before cleaning or servicing the unit or replacing parts.
- Do not operate the machine with a damaged or excessively worn cutting device.
Maintenance instructions
- Be kind to the environment. Operate the hedge trimmer with as little noise and
pollution as possible. In particular check the correct adjustment of the carburetor.
- Clean the hedge trimmer at regular intervals and check that all screws and nuts
are securely tightened.
- Never service or store the hedge trimmer in the vicinity of open ames, sparks,
etc. (11).
- Empty the fuel tank before storing the hedge trimmer.
- Never store the hedge trimmer in the vicinity of naked ames to avoid res.
- Store the hedge trimmer in well ventilated and high or locked location out of reach
of children.
- Do not attempt to repair the machine unless you are qualied to do so.
Observe and follow all relevant accident prevention instructions issued by the trade associations safety board and by insurance
companies.
Do not perform any modications to the hedge trimmer as this will risk your safety.
The performance of maintenance or repair work by the user is limited to those activities as described in this instruction manual. All other works
are to be done by Authorized Service Agents.
Use only genuine spare parts and accessories supplied by MAKITA authorized or factory service centers.
Use of non-approved accessories and tools means increased risk of accidents and injuries. MAKITA will not accept any liability for accidents or
damage caused by the use of any non-approved accessories.
First aid
In case of an accident make sure that a well-stocked rst-aid kit according to DIN
13164, is available in the vicinity of the cutting operations.
Immediately replace any item taken from the rst aid kit.
When asking for help, please give the following information:
- Place of accident
- What happened
- Number of injured persons
- Extend of injuries
- Your name
Packaging
The MAKITA hedge trimmer is delivered in a protective cardboard box to prevent
shipping damage. Cardboard is a basic raw material and is therefore consequently
reusable or suitable for recycling (waste paper recycling).
(10)
(11)

7
TECHNICAL DATA
Model EH5000W/EH5000WG EH6000W/EH6000WG EH7500W/EH7500WG
Dimension (L x W x H) mm 1,014 x 262 x 216 1,119 x 262 x 216 1,259 x 262 x 216
Mass (without blade cover) kg 4.8 5.0 5.2
Volume (fuel tank) L 0.4
Engine displacement cm322.2
Cutting length mm 483 588 728
Maximum engine performance kW 0.68
Stroke per minute min-1 4,270
Idling speed min-1 3,000
Clutch engagement speed min-1 4,000
Carburetor type type WALBRO WYL
Ignition system type Solid state ignition
Spark plug type NGK CMR6A
Electrode gap mm 0.7 - 0.8
Vibration per
EN ISO 10517
Right handle ahv eq m/s23.7 3.4 3.0
Uncertainty K m/s21.7 1.8 1.3
Left handle ahv eq m/s25.9 5.3 3.1
Uncertainty K m/s21.7 2.2 0.5
Noise per
EN ISO 10517
Sound pressure level dB (A) 93.0 92.8 93.9
Uncertainty K dB (A) 1.4 2.2 1.2
Sound power level dB (A) 104.5 104.4 104.4
Uncertainty K dB (A) 1.2 1.2 0.8
Mixture ratio (fuel: engine oil)
MAKITA genuine two-stroke
engine oil 50 : 1
Other manufacutrer's two-
stroke engine oil 25 : 1
Gear ratio 9 : 43
Models EH5000WG, EH6000WG and EH7500WG accept Brazilian gasoline (E25).

8
DESIGNATION OF PARTS
DESIGNATION OF PARTS DESIGNATION OF PARTS DESIGNATION OF PARTS
1 Blade 7 Carburetor (not shown) 13 Release lever
2 Blunt extension 8 I-O switch (ON-OFF) 14 Mufer
3 Front handle 9 Spark plug 15 Primer pump
4 Recoil starter 10 Lock-off lever 16 Fuel tank
5 Fuel tank cap 11 Throttle lever 17 Blade cover
6 Choke lever 12 Rear handle
1
11
12
8
14
10
4
3
2
6
1516
7
13
59
17

9
Fuel and oil mixture
- The engine of the hedge trimmer is a high-efciency two-stroke engine.
It is run with a mixture of fuel and two-stroke engine oil. The engine is designed
for unleaded regular fuel with a min. octane value of 91 ROZ.
In case no such fuel is available, you can use fuel with a higher octane value.
This will not damage the engine, but may cause poor operating behaviour.
A similar situation will arise from the use of leaded fuel.
To obtain optimum engine operation and to protect your health and the
environment, only unleaded fuel should be used!
- For lubricating the engine use a two-stroke engine oil (quality grade: TSC-3),
which is added to the fuel.
The engine has been designed for use with MAKITA two-stroke engine oil and a
mixture ratio of 50:1 only to protect the environment. In addition, a long service
life and a reliable operation with a minimum emission of exhaust gases is
guaranteed. It is absolutely essential to observe a mixture ratio of 50:1 (MAKITA
2-stroke engine oil), otherwise the reliable function of the hedge trimmer cannot
be guaranteed.
- The correct mixture ratio:
Gasoline: Specied two-stroke engine oil = 50 : 1 or
Gasoline: Other manufacturer’s two-stroke engine oil = 25 : 1
recommended
NOTE: • For preparing the fuel-oil mixture, rst mix the entire oil quantity with half of
the fuel required in an approved canister which meets or exceeds all local
code standards. Then add the remaining fuel.
Thoroughly shake the mixture before lling it into the hedge trimmer’s tank.
Do not add more engine oil than specied to ensure safe operation. It will
only result in a higher production of combustion residues which will pollute
the environment and clog the exhaust channel in the cylinder as well as
the mufer. In addition, the fuel consumption will rise and the performance
will decrease.
• Model EH6000WG accept Brazilian gasoline (E25).
Handling petroleum products
Utmost care is required when handling fuels. Fuels may contain substances similar
to solvents. Refuel either in a well ventilated area or outdoors. Do not inhale fuel
vapors, avoid any contact of fuel or oil with your skin.
If your skin comes in contact with these substances repeatedly and for an extended
period of time, it will desiccate.
Various skin diseases may result. In addition, allergic reactions are known to occur.
Eyes can be irritated by contact with oil, fuel etc.
If oil, fuel, etc., comes into your eyes, immediately wash them with clear water.
If your eyes are still irritated, see a doctor immediately!
FUELS/REFUELING
Observe the Safety Instructions on page 5.
1,000 cm3(1 litter)
5,000 cm3(5 litter)
10,000 cm3(10 litter)
20 cm340 cm3
100 cm3200 cm3
200 cm3400 cm3
Gasoline Oil
+
50:1
50:1 25:1

10
Refuelling
- The engine must be switched off.
- Stop the engine during refuelling, keep away from ames and do not smoke.
- Take care not to spill either fuel or oil in order to prevent soil contamination.
Clean the hedge trimmer immediately after fuel has been spilled.
- Do not spill fuel onto the engine. Wipe down if the fuel is spilled.
- Avoid any fuel contact with your clothes. Change your clothes instantly if fuel has
been spilled on it (to prevent clothes catching re).
- Inspect the fuel cap regularly making sure that it can be securely fastened and
does not leak the fuel.
- Carefully tighten the fuel tank cap. Change location to start the engine (at least
3 meters away from the place of refuelling.)
- Never refuel in closed rooms. Fuel vapors accumulate at ground level. (Risk of
explosions.)
- Transport and store fuel only in approved containers. Make sure the fuel stored is
not accessible to children.
- Thoroughly clean the area around the tank cap to prevent dirt from getting into
the fuel tank.
- Unscrew the plug and ll the tank with fuel. Use a gauze funnel to lter the fuel.
- Tightly screw on the plug by hand only.
- Clean around the screw plug and the tank after refuelling.
- Always wipe up any spilled fuel to prevent a re.
Storage of fuel
- Fuel cannot be stored for an unlimited period of time.
- Purchase only the quantity required for a 4 week operation period.
- Use approved fuel storage containers only.
- Make sure that there are no children or other people within a working range of
15 meters. Also pay attention to any animal in the working vicinity.
- Before use always check that the hedge trimmer is safe for operation. Check the
cutting device is not damaged, the control lever for easy action and check for the
proper function of the I-O switch.
Make sure that the cutting blades do not run when the engine is idling.
Check with your dealer for adjustment if in doubt. Check for clean and dry
handles and test function of the I-O switch.
- Start the hedge trimmer only in accordance with the instructions. Do not use any
other methods for starting the engine. (See Starting)
- Start the engine only after the entire assembly is done. Operation of the engine is
only permitted after all the appropriate accessories are attached. Otherwise there
is a risk of injury.
- Before starting, make sure that the cutting blades have no contact with objects
such as branches, stones, etc.
- Before trimming, inspect the area for wires, cords, glass, or other foreign objects
which could come in contact with the blade.
- Electrical shock. Be aware of any and all electric lines and electric fences. Check
all areas for electrical lines before cutting.
PRECAUTIONS BEFORE STARTING
3 meters
(10 feet)
Diagrammatic
gure
15 meters
(50 feet)
360°

11
Move at least 3 meters away from the place of refuelling. Place the hedge trimmer
on a clean area of ground. Make sure that the cutting blades do not come into
contact with the ground or any other objects.
Cold starting: (When the engine is cold or it has been stopped for more than
5 minutes or when fuel is added to the engine.)
1. Push the I-O switch (1) to “I” position.
2. Repeat pushing the primer pump (2) gently (7 to 10 times) until the fuel comes
into the primer pump.
3. Move the choke lever (3) to position “ ”.
4. Hold the hedge trimmer down rmly to avoid loss of control while cranking the
engine. Failure to do so may cause serious injury and/or property damage due to
falling or contact with the cutting blade.
5. Pull the starter handle slowly for 10 to 15 cm until you feel the resistance.
6. Pull the starter handle strongly with feeling the resistance and start the engine.
7. When the engine starts or pop-up and stop, return the choke lever (4) to “ ”.
8. Run the engine for approximately one minute at a moderate speed before
accelerating to full throttle.
Note: • If the starter handle is pulled repeatedly when the choke lever
remains at “ ” position, the engine will not start easily due to
excessive fuel intake.
• In case of excessive fuel intake, remove the spark plug and pull the
starter handle slowly to remove excess fuel. Also, dry the electrode
section of the spark plug.
Hot starting: (Restarting immediately after the engine has stopped.) When
restarting a hot engine, rst try the above procedure: 1, 2, 4, 5, 6 with the choke
lever (4) to “ ”. If the engine does not start, repeat above steps 1-8.
Note: Do not pull the starter rope to its full extension. Do not allow the
starter grip to be retracted without control. Ensure that it is retracted
slowly.
STARTING THE MACHINE
1. Release the throttle lever completely.
2. Push the I-O switch (1) to “O” position. The engine will slow down and stop.
STOPPING THE MACHINE

12
- Never operate the hedge trimmer with a loose grip.
- Never touch the cutting blades when starting the engine and during operation.
- Operate the hedge trimmer in such a manner as to avoid inhalation of the
exhaust gases. Never run the engine in enclosed rooms (Risk of gas poisoning).
Carbon monoxide is an odorless gas.
- All protective equipment such as a guard supplied with the machine must be used
during operation.
- Never operate the engine if the mufer is faulty or missing.
- Use the hedge trimmer only in good light and visibility.
- During the winter season beware of slippery or wet areas, ice and snow. (Risk of
slipping.) Always ensure a safe footing.
- Never stand on a ladder and run the hedge trimmer. Keep both feet on the
ground.
- Never climb up the trees with the hedge trimmer to perform cutting operation.
- Never work on unstable surfaces.
- Remove sand, stone, nails, wire, etc. found within the working area. Foreign
objects may damage the cutting blades.
- Prior to the cutting operation, cut away 8 mm or thicker branches with pruning
shears.
- Before commencing cutting, the cutting blades must have reached full working
speed.
- Always hold the hedge trimmer rmly with both hands on the handles.
- Use a rm grip with thumbs and ngers encircling the handles.
- When you release the throttle, it takes a few moments before the cutting blades
stop.
- Do not operate the hedge trimmer with high idle speed. You cannot adjust the
cutting speed with the throttle control if the idle speed is too high.
- During the cutting operation, hold the hedge trimmer so that the blades form a
15-30° angle with the cutting line.
- Pay special attention when cutting hedges close to or against wire fences.
- Do not touch hard objects such as wire fence, stone or ground with the cutter
blades. It may cause blades to crack, chip or break.
- Should the cutting blades hit stones or other hard objects, immediately switch off
the engine and inspect the cutting blades for damage. Replace damaged blades
before re-commencing work.
- Take a rest periodically. Makita recommends to take a 10- to 20-minute rest every
50 minutes of use.
- Switch off the engine immediately in case of any engine problems.
- Operate the hedge trimmer with as little noise and contamination as possible. In
particular check the correct setting of the carburetor and the fuel/oil ratio.
- Never attempt to remove jammed cut material when blades are running. Put unit
down, turn it off, and remove necessary cuttings.
The rear handle can be turned down to 90° to the left or right side and set at every
45°.
To change the angle:
1. Press the release lever to release the lock.
2. Turn the handle to an angle of 0°, 45° or 90°.
3. Make sure that the release lever returns to the original position to engage the
lock.
Do not pull the throttle lever while the lock is released.
Do not release the lock during operation.
OPERATION OF THE MACHINE
ADJUSTING REAR HANDLE ANGLE

13
- Turn off the engine and remove the spark plug connector when cleaning/replacing/sharpening the cutting blades or carrying out any
maintenance.
- Never straighten or weld a damaged cutting blade.
- Frequently inspect the cutting blades for damage with the engine switched off.
- Keep the cutting blades sharp.
- Clean the hedge trimmer and check that all screws and nuts are well tightened regularly.
- Never service the hedge trimmer in the vicinity of naked ames to avoid res.
- Always wear leather gloves when handling or sharpening the blades, as they are sharp.
Sharpening blade
If the edges are rounded and do not cut well any more, grind off only the shaded
portions in the gure. Do not grind the contact surfaces (sliding surfaces) of the top
and bottom edges.
- Before grinding, be sure to secure the blade rmly and switch off the engine and
remove the spark plug cap.
- Wear gloves, protective glasses, etc.
- Do not remove too much material. It lose the hardened layer and cause the
blades to get dull very quickly in use.
Adjusting blade clearance
The upper/lower blades wear. If you cannot get a clean cut though the blades are
sharp enough, adjust the clearance as follows.
1. Remove the blunt extension by loosen the screws.
2. Loosen the nut (1) with a box or open-ended wrench.
3. Tighten the truss bolt (2) with a hex wrench lightly till it stops and screw it back a
quarter turn.
4. Tighten the nut (1), holding the truss bolt (2).
5. Apply light oil on the friction surface of the blades.
6. Start the engine, operate the throttle on and off for a minute.
7. Measure the time necessary for the blades to stop after releasing the throttle. If it is two seconds or longer, stop the engine and repeat the
step 2 to 7.
8. Stop the engine and touch the blade surface. If they are not too hot to touch, you have made a proper adjustment. If they are too hot to touch,
turn the truss bolt (2) back a little and repeat the step 6 to 8.
9. Attach the blunt extension by tightening the screws.
NOTE: Before making the adjustment, stop the engine and wait for the blades to stop.
The blades have a slot around screw (2). In case you nd dust in the end of any of the slots, clean it.
MAINTENANCE INSTRUCTIONS
10° 10°
45°
Disk grinder
Edge cross
section
Holding the disk grinder at
a 45° angle, grind the edge
off to the dotted line to
sharpen the rounded tip.
①Nut
②Truss bolt
③Blade guide
④Upper blade
⑤Lower blade

14
Checking and adjusting the idling speed
The cutting blades should not run when the engine is at idle.
- Idle speed should be set to 3,000 min-1 (rpm).
- If necessary, adjust the idle screw (the cutting blades must not run when the
engine is on idle).
• The cutting blades run while idling - turn the idle screw counterclockwise to
decrease the idle speed.
• The engine stops while idling - turn the idle screw clockwise to increase the idle
speed.
If the cutting blades still continue to run at idle after the adjustment, consult your
nearest authorized service agent.
• The clutch should engage at 3,750 min-1 (rpm) or higher revolution.
• Check the functioning of the I-O switch, the lock-off lever and the throttle lever.
Cleaning the air cleaner
DANGER: Inammables strictly prohibited
Check and clean the air cleaner daily or every 10 operating hours.
- Turn the choke lever to the close side fully, and keep the carburetor free from
dust or dirt.
- Loosen the xing bolt.
- Pull the rear side of the air cleaner cover and move it forward to detach.
- If oil adheres to the element (sponge), squeeze it rmly.
- For heavy contamination:
1) Remove the element (sponge), immerse it in warm water or in water-diluted
neutral detergent, and dry it completely.
2) Clean the element (felt) with gasoline, and dry it completely.
- Before attaching the elements, be sure to dry it completely. Insufcient drying of
the elements may lead to difcult startup.
- Wipe out oil adhering around the air cleaner with waste cloth.
- Immediately after cleaning is nished, attach the cleaner cover and tighten it with
xing bolts. (In remounting, rst place the upper claw.)
Points in handling the air cleaner elements
- Clean the elements several times a day, if excessive dust adheres to it.
- If operation continues with the elements remaining not cleared of oil, oil in
the air cleaner may fall outside, resulting in oil contamination.
Element (Sponge)
Fixing bolt
Element (felt)
Upper claw

15
For any maintenance or adjustment not described in this manual, ask your local Makita authorized service center.
Daily checkup and maintenance
To ensure a long service life and to avoid any damage to the equipment, the following servicing operations should be performed at regular
intervals.
- Before use;
• Check the machine for loose screws or missing parts. Pay particular attention to the tightness of the cutter blade screws.
• Check for clogging of the cooling air passage and the cylinder ns. Clean them if necessary.
• Clean and check the fuel tank for fuel leakage or foreign object in the tank.
- After use;
• Clean the hedge trimmer externally and inspect for damage.
• Clean the air lter. When working under extremely dusty conditions, clean the lter several times a day.
• Check the blades for damage and make sure they are rmly mounted.
Checking the spark plug
Check and clean the spark plug daily or every 8 operating hours.
- Only use the supplied universal wrench to remove or install the spark plug.
- The gap between the two electrodes of the spark plug should be 0.7 to
0.8 mm. If the gap is too wide or too narrow, adjust it. If the spark plug is
clogged with carbon or fouled, clean it thoroughly or replace it. Use an exact
replacement.
0.7 - 0.8 mm
Grease nipple
Tank cap
Fuel pipe
Supplying grease and lubricant
- Supply grease through the grease nipple every 50 operating hours. (Shell
Alvania No. 3 or equivalent)
NOTE: Be sure to observe the specied time and amount of grease supply.
Otherwise an insufcient grease supply will cause a machine trouble.
Cleaning the fuel lter (suction head in the fuel tank)
WARNING: Inammables strictly prohibited
Check and clean the fuel lter monthly or every 50 operating hours.
- The felt lter (1) of the suction head is used to lter the fuel required by the
carburetor.
- Visually check the felt lter regularly.
- To check the felt lter, open the tank cap, use a wire hook and pull out the
suction head through the tank opening.
Replace the felt lter if it has hardened, been contaminated or be clogged.
- Replace the felt lter at least quarterly to ensure an enough fuel supply to the
carburetor. Otherwise an insufcient fuel supply will cause the engine start
failure and limited maximum speed.
Replacing the fuel pipe
CAUTION: Inammables strictly prohibited
Check and clean the fuel pipe daily or every 10 operating hours.
Replace the fuel pipe every 200 operating hours or every year regardless of
operating frequency. Otherwise fuel leakage may lead to re.
If you nd any leakage during inspection, replace the oil pipe immediately.
Replacing the tank cap
- If there is any aw or damage on the tank cap, replace it.
- The tank cap wears out in course of time. Replace it every two or three years.

16
- When keeping the machine in storage for a long time, drain fuel from the fuel tank
and carburetor, as follows: Drain all fuel from the fuel tank.
- Remove the spark plug and add a few drops of oil into the spark plug hole. Then,
pull the starter gently to conrm that oil lm covers inside of the engine and
tighten the spark plug.
- Clear dirt or dust from the cutter blade and outside of the engine, wipe them with
a oil-immersed cloth and keep the machine at a place as dry as possible.
STORAGE
After each refuelling Throttle lever
I-O switch
Check the function
Check the function
Before each use Engine assembly,
screws and nuts
Air lter
Cooling air duct
Cutting tool
Idling speed
Fuel tank
Visually check for damage and tightness
Check for general condition and security
Clean
Clean
Check for damage and sharpness
Inspection (cutting tool must not move)
Check and clean
Every 50 hours Gear case Supply grease
Weekly Spark plug Check and replace if necessary
Yearly Fuel pipe Replace
Biyearly Tank cap Replace
Before long term storage Fuel tank
Carburetor
Suction head
Empty and clean
Operate until the engine runs out of fuel
Replace
MAINTENANCE SCHEDULE
FAULT LOCATION
Fault System Observation Cause
Engine not starting or
under difculties
Ignition system Ignition spark is present Faulty fuel supply or compression system, mechanical
defect
No ignition spark I-O switch operated, wiring fault or short circuit, spark
plug or connector defective, ignition module faulty
Fuel supply Fuel tank lled Incorrect choke position, carburetor defective, suction
head (gas line lter) dirty, fuel supply line bent or
interrupted
Compression Inside of engine Cylinder bottom gasket defective, crankshaft seals
damaged, cylinder or piston rings defective
Outside of engine Improper sealing of spark plug
Mechanical fault Starter not engaging Broken starter spring, broken parts inside of the engine
Warm start problems Tank lled Ignition spark
existing
Carburetor contaminated, have it cleaned
Engine starts but dies
immediately
Fuel supply Tank lled Incorrect idling adjustment, suction head or carburetor
contaminated
Fuel tank vent defective, fuel supply line interrupted,
cable or I-O switch faulty
Insufcient performance Several systems may
simultaneously be
affected
Engine idling Air lter contaminated, carburetor contaminated, mufer
clogged, exhaust duct in the cylinder clogged

17
Obrigado por selecionar o aparador de cerca viva da MAKITA. É com satisfação
que podemos oferecer o aparador de cerca viva da MAKITA como resultado
de um longo programa de desenvolvimento e muitos anos de conhecimento e
experiência.
Os modelos de aparador de cerca viva EH5000W, EH5000WG, EH6000W,
EH6000WG, EH7500W e EH7500WG combinam as vantagens da tecnologia
moderna com projeto ergonômico, são leves, úteis, compactos e representam
um equipamento prossional para uma grande variedade de aplicações.
Leia, compreenda e siga este livreto, o qual se refere em detalhes aos
vários pontos que demonstrarão seu excelente desempenho. Isto irá lhe
ajudar a obter o melhor resultado possível de seu aparador de cerca viva
da MAKITA.
É muito importante entender os seguintes símbolos ao ler este manual de instruções.
SÍMBOLOS
Português
AVISO/PERIGO Mistura de combustível e óleo
Leia, entenda e siga
Manual de Instruções Início manual do motor
Proibido Parada de emergência
Proibido fumar Primeiros socorros
Proibida chama aberta Reciclagem
Luvas de proteção devem ser usadas ON/START (ligar/iniciar)
Mantenha a área de operação livre de
pessoas e animais de estimação OFF/STOP (desligar/parar)
Use capacete de proteção, óculos de
segurança e protetores de ouvido!
(Instruções originais)
Índice Página
Símbolos......................................................................17
Instruções de segurança .............................................18
Dados técnicos............................................................21
Designação de peças..................................................22
Combustíveis/abastecimento ......................................23
Precauções antes de iniciar ........................................24
Partida da máquina .....................................................25
Parada da máquina .....................................................25
Funcionamento da máquina........................................26
Ajuste do ângulo da empunhadura traseira.................26
Instruções de manutenção ..........................................27
Armazenamento ..........................................................30
Programação de manutenção .....................................30
Localização de falha....................................................30

18
Instruções gerais
- ESTA MÁQUINA PODE CAUSAR LESÕES GRAVES. Leia cuidadosamente as
instruções para o correto manuseio, preparação, manutenção, partida e parada
da máquina. Familiarize-se com todos os controles e com o uso apropriado da
máquina. (1)
- Recomenda-se emprestar o aparador de cerca viva somente a pessoas que
possuem experiência comprovada com aparadores de cerca viva.
Entregue sempre o manual de instruções.
- Os usuários que estejam utilizando pela primeira vez devem pedir ao vendedor
instruções básicas para se familiarizarem com o manuseio de um aparador de
cerca viva.
- Crianças e jovens com menos de 18 anos não devem ter permissão de operar
o aparador de cerca viva. Pessoas acima de 16 anos podem, porém, utilizar
o aparelho apenas para o propósito de treinamento, enquanto estiverem sob
supervisão de um instrutor qualicado.
- Utilize o aparador de cerca viva com o maior cuidado e atenção.
- Opere o aparador de cerca viva somente se estiver em boas condições físicas.
Execute todo o trabalho com calma e cuidado. O usuário tem que aceitar
responsabilidade sobre os outros.
- Nunca utilize o aparador de cerca viva após consumir álcool ou drogas, ou se
estiver se sentindo cansado ou doente. (2)
Aplicação da máquina
- O aparador de cerca viva é projetado somente para o propósito de aparar
matos e cercas vivas, e não deve ser usado para qualquer outro m. Não use o
aparador de cerca viva indevidamente.
Equipamentos de proteção pessoal
- As roupas usadas devem ser funcionais e apropriadas, ou seja, devem ser
justas, mas não devem causar qualquer impedimento. Não use joias ou roupas
frouxas que possam enroscar com mato, arbustos ou com a máquina.
- Para evitar ferimentos aos olhos, mãos ou pés, assim como para proteger sua
audição, os seguintes equipamentos e vestimentas de proteção devem ser
utilizados durante o uso do aparador de cerca viva.
- Durante a operação do aparador de cerca viva, use sempre óculos de proteção
ou um visor para evitar ferimentos aos olhos. (3)
- Use equipamento de proteção adequado contra ruído para evitar danos à
audição, como protetores auriculares, tampões de ouvido, etc. (3)
- Recomendamos com veemência que o usuário vista macacões de trabalho. (4)
- Luvas especiais fabricadas com couro grosso fazem parte do equipamento
prescrito e devem ser sempre usadas durante a operação do aparador de cerca
viva. (4)
- Quando utilizar o aparador de cerca viva, use sempre sapatos resistentes com
sola antiderrapante. Isto protege contra ferimentos e assegura rmeza dos pés.
(4)
INSTRUÇÕES DE SEGURANÇA
(1)
(2)
(3)
(4)

19
Colocação do aparador de cerca viva em funcionamento
- Certique-se de que não haja crianças ou outras pessoas dentro de uma área
de trabalho de 15 metros (5), prestando atenção também para animais nas
proximidades do trabalho.
- Antes de colocar em funcionamento, verique se o aparador de cerca viva está
seguro para operação.
- Verique a segurança da alavanca do acelerador. O acelerador deve ser
vericado para ver se está com movimento fácil e sem problemas. Verique
se a trava do acelerador está funcionando corretamente. Verique se as
empunhaduras estão limpas e secas e teste o funcionamento do interruptor liga/
desliga. Mantenha as empunhaduras limpas de óleo e combustível.
Dê início ao aparador de cerca viva somente de acordo com as instruções.
Não use qualquer outro método de partida do motor (6)!
- Use o aparador de cerca viva somente para as aplicações especicadas.
- Dê partida ao aparador de cerca viva somente depois que o conjunto inteiro
estiver pronto. A operação do aparador de cerca viva é permitida somente depois
que todos os acessórios apropriados estiverem colocados!
- Antes de dar partida, certique-se de que a lâmina do cortador não entrará em
contato com objetos, tais como galhos, pedras, etc.
- Pare o motor imediatamente se houver algum problema com o motor.
- Durante a operação, segure a empunhadura frontal e a traseira com rmeza,
envolvendo seus dedos nas empunhaduras. Mantenha as empunhaduras limpas
e sem umidade, resina, óleo ou graxa.
Assegure sempre um posicionamento seguro e bem equilibrado dos pés.
- Utilize somente ao ar livre.
- Certique-se sempre de seus arredores e que alerta quanto a possíveis perigos
que você possa não escutar devido ao ruído da máquina.
- Opere o aparador de cerca viva de modo que seja evitada a inalação de gases
de escape. Nunca coloque o motor em funcionamento em ambientes fechados
(risco de asxia e envenenamento por gás). Monóxido de carbono é um gás sem
odor. Certique-se sempre de haver ventilação adequada.
- Pare o motor quando descansar e quando deixar o aparador de cerca viva
sozinho. Coloque-o em um local seguro para evitar perigo a outras pessoas,
incêndio em materiais combustíveis ou danos à máquina.
- Nunca coloque o aparador de cerca viva quente sobre a grama seca ou sobre
materiais inamáveis.
- Para reduzir o risco de incêndio, mantenha o motor e o silenciador sem resíduos,
folhas ou lubricante excessivo.
- Nunca opere o motor com um silencioso de escape defeituoso.
- Pare o motor durante o transporte (7).
- Pare o motor antes de:
- Liberar uma obstrução;
- Vericação, manutenção ou trabalho na máquina.
- Posicione o aparador de cerca viva com segurança durante o transporte por
carro ou caminhão para evitar o vazamento de combustível.
- Quando transportar o aparador de cerca viva, certique-se de que o tanque de
combustível está completamente vazio para evitar o vazamento de combustível.
- Quando transportar ou guardar a máquina, coloque sempre o protetor do aparato
de corte.
Reabastecimento
- Pare o motor durante o reabastecimento (7), mantendo o equipamento longe de
chamas abertas (8) e não fume.
- Não tente reabastecer de combustível um motor quente ou em funcionamento.
- Evite o contato da pele com produtos à base de petróleo. Não inale vapor de
combustível. Vista sempre luvas protetoras durante o reabastecimento. Mude e
limpe roupas protetoras em intervalos regulares.
- Cuidado para não derramar combustível ou óleo para evitar contaminação do
solo (proteção ambiental). Limpe o aparador de cerca viva imediatamente depois
de derramar combustível. Seque os panos usados para limpar o combustível em
uma área bem ventilada antes de descartá-los. Caso contrário, poderá causar
combustão espontânea.
- Evite qualquer contato do combustível com suas roupas. Mude sua roupa
imediatamente se derramar combustível sobre a mesma (perigo).
- Inspecione a tampa do combustível em intervalos regulares, certicando-se de que
foi apertada com segurança.
- Aperte com cuidado a tampa do tanque de combustível. Mude de local para dar
partida ao motor (pelo menos 3 metros de distância do local de reabastecimento)
(9).
- Nunca reabasteça em ambientes fechados. Os vapores de combustível se
acumulam ao nível do chão (risco de explosão).
- Somente transporte e armazene combustível em recipientes aprovados.
Certique-se de que o combustível armazenado não seja acessível por crianças.
- Quando misturar gasolina com óleo de motor de dois tempos, use somente
gasolina que não contenha etanol ou metanol (tipos de álcool).Isso ajuda a evitar
danos às linhas de combustível e outras peças do motor.
15 metros
(50 pés)
360°
(5)
(6)
(7)
• Repouso
• Transporte
• Reabastecimento
• Manutenção
• Substituição da ferramenta
(8)
(9)
3 metros
(10 pés)

20
Método de operação
- Use sempre as duas mãos spara agarrar cada empunhadura durante a
operação.
- Utilize somente o aparador de cerca viva em boas condições de luminosidade
e visibilidade. Durante a estação de inverno, cuidado com áreas escorregadias
ou molhadas, gelo e neve (risco de escorregar). Assegure sempre um
posicionamento rme dos pés.
- Nunca trabalhe em superfícies instáveis ou terreno íngreme.
- Nunca suba em uma escada e coloque o aparador de cerca viva em
funcionamento.
- Nunca suba em árvores para executar a operação de corte com o aparador de
cerca viva.
- Para reduzir o risco de tombo e perda de controle, não ande para trás enquanto
opera a máquina.
- Pare sempre o motor antes de limpar o prestar serviço à unidade ou às peças de
substituição.
- Não opere a máquina com um dispositivo de corte excessivamente gasto ou
danicado.
Instruções de manutenção
- Trate bem o ambiente. Opere o aparador de cerca viva com o mínimo de ruído e
poluição possível. Em especial, verique o ajuste correto do carburador.
- Limpe o aparador de cerca viva em intervalos regulares e verique se todos os
parafusos e porcas estão apertados com segurança.
- Nunca conserte ou guarde o aparador de cerca viva nas proximidades de
chamas, faíscas, etc. (11)
- Esvazie o tanque de combustível antes de armazenar o aparador de cerca viva.
- Nunca guarde o aparador de cerca viva nas proximidades de chamas
descobertas para evitar incêndio.
- Guarde o aparador de cerva viva em um local bem ventilado e alto ou com
cadeado, longe do alcance de crianças.
- Não tente consertar a máquina a menos que seja qualicado para isso.
Observe e siga todas as instruções relevantes de prevenção de acidentes emitidas pela comissão de segurança das associações
comerciais e por seguradoras.
Não execute quaisquer modicações no aparador de cerca viva, pois isto colocará em risco a sua segurança.
O desempenho de manutenção ou reparo pelo usuário é limitado às atividades conforme descritas neste manual de instruções. Todos os outros
tipos de trabalho devem ser executados por representantes de assistência técnica autorizados.
Use somente acessórios e peças de reposição originais fornecidos por centros de assistência técnica autorizada MAKITA.
O uso de acessórios e ferramentas não aprovados signica um risco maior de acidentes e ferimentos. A MAKITA não aceitará qualquer
responsabilidade por acidentes ou danos causados pelo uso de acessórios não aprovados.
Primeiros socorros
No caso de acidente, certique-se de que uma caixa de primeiros socorros, de
acordo com DIN 13164, se encontra disponível nas proximidades dos trabalhos de
corte.
Reponha imediatamente qualquer item tirado da caixa de primeiros socorros.
Quando pedir ajuda, dê as seguintes informações:
- Local do acidente
- O que aconteceu
- Número de pessoas feridas
- Extensão dos ferimentos
- Seu nome
Embalagem
O aparador de cerca viva MAKITA é entregue em uma caixa de papelão para evitar
danos à remessa. Papelão é uma matéria prima básica e, consequentemente, é
reutilizável ou adequado para a reciclagem (reciclagem de papel usado).
(10)
(11)
This manual suits for next models
4
Table of contents
Languages:
Other Makita Trimmer manuals

Makita
Makita UH014G User manual

Makita
Makita EN402MP User manual

Makita
Makita DUR364L User manual

Makita
Makita DUH506 User manual

Makita
Makita DUR141 User manual

Makita
Makita UH200D User manual

Makita
Makita DBC340 User manual

Makita
Makita BUR142U User manual

Makita
Makita DUR193 User manual

Makita
Makita RBC2510 Quick start guide

Makita
Makita DUR366L User manual

Makita
Makita BUH481 User manual

Makita
Makita M3700 User manual

Makita
Makita MT370 User manual

Makita
Makita UH 6350 User manual

Makita
Makita XNU01 User manual

Makita
Makita DUH481 User manual

Makita
Makita BUR141 User manual

Makita
Makita EN401MP User guide

Makita
Makita DUR369N User manual