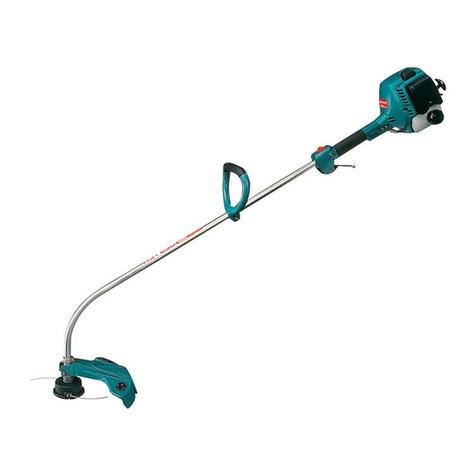
Makita DUR364L User manual

DUR364L
EN Cordless Grass Trimmer INSTRUCTION MANUAL 6
SV Batteridriven grästrimmer BRUKSANVISNING 17
NO Batteridrevet gresstrimmer BRUKSANVISNING 27
FI Akkukäyttöinen
viimeistelyleikkuri KÄYTTÖOHJE 38
LV Bezvada zāles trimers LIETOŠANAS INSTRUKCIJA 49
LT Belaidė žoliapjovė NAUDOJIMO INSTRUKCIJA 59
ET Akuga murutrimmer KASUTUSJUHEND 69
RU Аккумуляторная Коса РУКОВОДСТВО ПО
ЭКСПЛУАТАЦИИ 80

1
2
3
1
2
2
1
1
1
2
Fig.1
Fig.2
Fig.3
Fig.4
Fig.5
Fig.6
Fig.7
Fig.8
2

1
1
1
2
1
5
3
4
1
3
2
1
3
2
1
2
3
4
13
2
4
5
Fig.9
Fig.10
Fig.11
Fig.12
Fig.13
Fig.14
Fig.15
Fig.16
3

1
1
2
1
1
1
Fig.17
Fig.18
Fig.19
Fig.20
Fig.21
Fig.22
Fig.23
Fig.24
4

Fig.25
Fig.26
Fig.27
Fig.28
5

6ENGLISH
ENGLISH (Original instructions)
SPECIFICATIONS
Model DUR364L
Type of handle Loop handle
No load speed 5,000 / 6,500 min-1
Overall length 1,754 mm
Nylon cord diameter 2.0 – 2.4 mm
Applicable cutting tool Nylon cutting head
(P/N 197297-1)
Plastic blade
(P/N 197188-6)
Nylon cutting head
(P/N 197297-1)
Plastic blade
(P/N 197188-6)
Cutting blade diameter 350 mm 255 mm 350 mm 255 mm
Rated voltage D.C. 36 V
Net weight 4.0 kg 3.9 kg 4.5 kg 4.4 kg
Standard battery cartridge BL1815N / BL1820 / BL1820B
BL1830 / BL1830B / BL1840 / BL1840B /
BL1850 / BL1850B / BL1860B
• Due to our continuing program of research and development, the specications herein are subject to change with-
out notice.
• Specications and battery cartridge may differ from country to country.
• Weight, with battery cartridge, according to EPTA-Procedure 01/2003
Noise Sound pressure
level average
Sound power level average Applicable
standard
LPA (dB (A)) LWA (dB (A))
Uncertainty K (dB (A))
Nylon cutting head 81 89 0.3 2000/14/EC
Plastic blade 83 92 0.3
Vibration Left hand Right hand Applicable
standard
ah,W (m/s2)Uncertainty K
(m/s2)
ah,W (m/s2)Uncertainty K
(m/s2)
Nylon cutting head ≤ 2.5 1.5 ≤ 2.5 1.5 EN50636-2-91
Plastic blade ≤ 2.5 1.5 ≤ 2.5 1.5
NOTE: The declared vibration emission value has
been measured in accordance with the standard test
method and may be used for comparing one tool with
another.
NOTE: The declared vibration emission value
may also be used in a preliminary assessment of
exposure.
WARNING: The vibration emission during actual
use of the power tool can differ from the declared
emission value depending on the ways in which the
tool is used.
WARNING: Be sure to identify safety measures
to protect the operator that are based on an estima-
tion of exposure in the actual conditions of use (taking
account of all parts of the operating cycle such as
the times when the tool is switched off and when it is
running idle in addition to the trigger time).
Symbols
The following show the symbols used for the equip-
ment. Be sure that you understand their meaning before
use.
Take particular care and attention.
Read instruction manual.
Danger; be aware of thrown objects.
The distance between the tool and
bystanders must be at least 15 m.
Keep bystanders away.
15m(50FT)Keep distance at least 15 m.
Wear a helmet, goggles and ear protection.
Wear protective gloves.
Wear sturdy boots with nonslip soles.
Steeltoed safety boots are recommended.
Do not expose to moisture.

7ENGLISH
Top permissible tool speed.
Never use metal blade.
Ni-MH
Li-ion
Only for EU countries
Do not dispose of electric equipment or
battery pack together with household waste
material!
In observance of the European Directives,
on Waste Electric and Electronic
Equipment and Batteries and Accumulators
and Waste Batteries and Accumulators
and their implementation in accordance
with national laws, electric equipment and
batteries and battery pack(s) that have
reached the end of their life must be col-
lected separately and returned to an envi-
ronmentally compatible recycling facility.
For European countries only
EC Declaration of Conformity
Makita declares that the following Machine(s):
Designation of Machine:
Cordless Grass Trimmer
Model No./ Type: DUR364L
Specications: see "SPECIFICATIONS" table.
Conforms to the following European Directives:
2000/14/EC, 2006/42/EC
They are manufactured in accordance with the following
standard or standardized documents:
EN60335, EN/ISO11806, EN50636
The technical le in accordance with 2006/42/EC is
available from:
Makita, Jan-Baptist Vinkstraat 2, 3070, Belgium
The conformity assessment procedure required by
Directive 2000/14/EC was in Accordance with annex V.
With plastic blade
Measured sound power level 92dB(A)
Guaranteed sound power level 92dB(A)
The conformity assessment procedure required by
Directive 2000/14/EC was in Accordance with annex VI.
Notied Body:
TÜV Rheinland LGA Products GmbH
Tillystraße 2
90431 Nürnberg, Germany
Identication number 0197
With nylon cutting head
Measured sound power level 89dB(A)
Guaranteed sound power level 90dB(A)
1.10.2015
Yasushi Fukaya
Director
Makita, Jan-Baptist Vinkstraat 2, 3070, Belgium
IMPORTANT SAFETY
INSTRUCTIONS
WARNING! Read all safety warnings and all instruc-
tions. Failure to follow the warnings and instructions may
result in electric shock, re and/or serious injury.
Save all warnings and instruc-
tions for future reference.
1. Be familiar with the controls and proper use of
the equipment.
2. Cutting elements continue to rotate after the
motor is switched off.
3. Never allow children or people unfamiliar with
the instructions to use the machine.
4. Stop using the machine while people, espe-
cially children, or pets are nearby.
5. Only use the machine in daylight or good arti-
cial light.
6. Before using the machine and after any
impact, check for signs of wear or damage and
repair as necessary.
7.
Take care against injury from any device tted for
trimming the lament line length. After extending
new cutter line always return the machine to its
normal operating position before switching on.
8. Never t metal cutting elements.
9.
This appliance is not intended for use by per-
sons (including children) with reduced physical,
sensory or mental capabilities, or lack of expe-
rience and knowledge, unless they have been
given supervision or instruction concerning use
of the appliance by a person responsible for
their safety. Children should be supervised to
ensure that they do not play with the appliance.
10.
Use the tool with the utmost care and attention.
11. Operate the tool only if you are in good phys-
ical condition. Perform all work calmly and
carefully. Use common sense and keep in mind
that the operator or user is responsible for
accidents or hazards occurring to other people
or their property.
12. Never operate the tool when tired, feeling ill or
under the inuence of alcohol or drugs.
13. The tool should be switched off immediately if
it shows any signs of unusual operation.
Intended use of the tool
1. Use right tool. The cordless grass trimmer is
only intended for cutting grass, light weeds. It
should not be used for any other purpose such
as hedge cutting as this may cause injury.
Personal protective equipment
► Fig.1
► Fig.2
1. Dress Properly. The clothing worn should be
functional and appropriate, i.e. it should be
tight-tting but not cause hindrance. Do not
wear either jewelry or clothing which could
become entangled with high grass. Wear pro-
tective hair covering to contain long hair.

8ENGLISH
2. When using the tool, always wear sturdy shoes
with a non-slip sole. This protects against
injuries and ensures a good footing.
3. Wear protective glasses or goggles.
Electrical and battery safety
1. Avoid dangerous environment. Don't use the
tool in damp or wet locations or expose it to
rain. Water entering the tool will increase the
risk of electric shock.
2. Recharge only with the charger specied by
the manufacturer. A charger that is suitable for
one type of battery pack may create a risk of
re when used with another battery pack.
3. Use power tools only with specically desig-
nated battery packs. Use of any other battery
packs may create a risk of injury and re.
4. When battery pack is not in use, keep it away
from other metal objects, like paper clips,
coins, keys, nails, screws or other small metal
objects, that can make a connection from one
terminal to another. Shorting the battery termi-
nals together may cause burns or a re.
5. Under abusive conditions, liquid may be ejected
from the battery; avoid contact. If contact acci-
dentally occurs, ush with water. If liquid contacts
eyes, seek medical help. Liquid ejected from the
battery may cause irritation or burns.
6. Do not dispose of the battery(ies) in a re. The
cell may explode. Check with local codes for
possible special disposal instructions.
7. Do not open or mutilate the battery(ies).
Released electrolyte is corrosive and may
cause damage to the eyes or skin. It may be
toxic if swallowed.
Starting up the tool
► Fig.3
1. Make sure that there are no children or other
people within a working range of 15 meters
(50 ft), also pay attention to any animals in the
working vicinity. Otherwise stop using the tool.
2.
Before use always check that the tool is safe for
operation. Check the security of the cutting tool
and the guard and the switch trigger/lever for
easy and proper action. Check for clean and dry
handles and test the on/off function of the switch.
3.
Check damaged parts before further use of
the tool. A guard or other part that is damaged
should be carefully checked to determine that it
will operate properly and perform its intended
function. Check for alignment of moving parts,
binding of moving parts, breakage of parts,
mounting, and any other condition that may
affect its operation. A guard or other part that
is damaged should be properly repaired or
replaced by our authorized service center
unless indicated elsewhere in this manual.
4. Switch on the motor only when hands and feet
are away from the cutting tool.
5. Before starting make sure that the cutting
tool has no contact with hard objects such as
branches, stones etc. as the cutting tool will
revolve when starting.
Method of operation
1. Never operate the machine with damaged
guards or without the guards in place.
2. Only use the tool in good light and visibility.
During the winter season beware of slippery
or wet areas, ice and snow (risk of slipping).
Always ensure a safe footing.
3. Take care against injury to feet and hands from
the cutting tool.
4. Keep hands and feet away from the cutting
means at all times and especially when switch-
ing on the motor.
5. Never cut above waist height.
6. Never stand on a ladder and run the tool.
7. Never work on unstable surfaces.
8. Don't overreach. Keep proper footing and
balance at all times.
9. Remove sand, stones, nails etc. found within
the working range. Foreign particles may
damage the cutting tool and can cause to be
thrown away, resulting in a serious injury.
10. Should the cutting tool hit stones or other hard
objects, immediately switch off the motor and
inspect the cutting tool.
11. Before commencing cutting, the cutting tool
must have reached full working speed.
12. During operation always hold the tool with
both hands. Never hold the tool with one hand
during use. Always ensure a safe footing.
13. All protective equipment such as guards
supplied with the tool must be used during
operation.
14. Except in case of emergency, never drop
or cast the tool to the ground or this may
severely damage the tool.
15. Never drag the tool on the ground when mov-
ing from place to place, the tool may become
damaged if moved in this manner.
16. Always remove the battery cartridge from the
tool:
— whenever leaving the tool unattended;
— before clearing a blockage;
— before checking, cleaning or working on
the tool;
— before making any adjustments, chang-
ing accessories or storing;
— whenever the tool starts vibrating
unusually;
— whenever transporting the tool.
17. Don't force the tool. It will do the job better and
with less likelihood of a risk of injury at the
rate for which it was designed.
Maintenance instructions
1. The condition of the cutting tool, protective
devices and shoulder strap must be checked
before commencing work.
2. Turn off the motor and remove the battery
cartridge before carrying out maintenance,
replacing the cutting tool and cleaning the
tool.

9ENGLISH
3. After use, disconnect the battery cartridge
from the tool and check for damage.
4. Check for loose fasteners and damaged parts
such as nearly halfway cut-off state in the
cutting tool.
5. When not in use store the equipment in a dry
location that is locked up or out of children's
reach.
6. Use only the manufacturer's recommended
replacement parts and accessories.
7. Always ensure that ventilation openings are
kept clear of debris.
8. Inspect and maintain the tool regularly, espe-
cially before/after use. Have the tool repaired
only by our authorized service center.
9. Keep handles dry, clean and free from oil and
grease.
SAVE THESE INSTRUCTIONS.
WARNING: DO NOT let comfort or famil-
iarity with product (gained from repeated
use) replace strict adherence to safety
rules for the subject product. MISUSE or
failure to follow the safety rules stated in
this instruction manual may cause serious
personal injury.
Important safety instructions for
battery cartridge
1. Before using battery cartridge, read all instruc-
tions and cautionary markings on (1) battery
charger, (2) battery, and (3) product using
battery.
2. Do not disassemble battery cartridge.
3. If operating time has become excessively
shorter, stop operating immediately. It may
result in a risk of overheating, possible burns
and even an explosion.
4. If electrolyte gets into your eyes, rinse them
out with clear water and seek medical atten-
tion right away. It may result in loss of your
eyesight.
5. Do not short the battery cartridge:
(1) Do not touch the terminals with any con-
ductive material.
(2) Avoid storing battery cartridge in a con-
tainer with other metal objects such as
nails, coins, etc.
(3) Do not expose battery cartridge to water
or rain.
A battery short can cause a large current
ow, overheating, possible burns and even a
breakdown.
6. Do not store the tool and battery cartridge in
locations where the temperature may reach or
exceed 50 °C (122 °F).
7. Do not incinerate the battery cartridge even if
it is severely damaged or is completely worn
out. The battery cartridge can explode in a re.
8. Be careful not to drop or strike battery.
9. Do not use a damaged battery.
10. The contained lithium-ion batteries are subject
to the Dangerous Goods Legislation require-
ments.
For commercial transports e.g. by third parties,
forwarding agents, special requirement on pack-
aging and labeling must be observed.
For preparation of the item being shipped, consult-
ing an expert for hazardous material is required.
Please also observe possibly more detailed
national regulations.
Tape or mask off open contacts and pack up the
battery in such a manner that it cannot move
around in the packaging.
11. Follow your local regulations relating to dis-
posal of battery.
SAVE THESE INSTRUCTIONS.
CAUTION: Only use genuine Makita batteries.
Use of non-genuine Makita batteries, or batteries that
have been altered, may result in the battery bursting
causing res, personal injury and damage. It will
also void the Makita warranty for the Makita tool and
charger.
Tips for maintaining maximum
battery life
1. Charge the battery cartridge before completely
discharged. Always stop tool operation and
charge the battery cartridge when you notice
less tool power.
2. Never recharge a fully charged battery car-
tridge. Overcharging shortens the battery
service life.
3. Charge the battery cartridge with room tem-
perature at 10 °C - 40 °C (50 °F - 104 °F). Let
a hot battery cartridge cool down before
charging it.
4. Charge the battery cartridge if you do not use
it for a long period (more than six months).

10 ENGLISH
PARTS DESCRIPTION
1
3
5
7
9
2
4
6
8
1
2
3
4
56
8
7
9
Battery cartridge
Switch trigger
Main power button
Hanger Grip
Lock-off lever
Power lamp
Reverse button
Protector (cutting tool guard)

11 ENGLISH
FUNCTIONAL
DESCRIPTION
WARNING:
• Always be sure that the tool is switched off
and the battery cartridge is removed before
adjusting or checking function on the tool.
Failure to switch off and remove the battery
cartridge may result in serious personal injury
from accidental start-up.
Installing or removing battery
cartridge
► Fig.4: 1. Red indicator 2. Button 3. Battery cartridge
CAUTION:
• Always switch off the tool before installing or
removing of the battery cartridge.
• Hold the tool and the battery cartridge rmly
when installing or removing battery car-
tridge. Failure to hold the tool and the battery
cartridge rmly may cause them to slip off your
hands and result in damage to the tool and
battery cartridge and a personal injury.
To remove the battery cartridge, slide it from the tool
while sliding the button on the front of the cartridge.
To install the battery cartridge, align the tongue on the
battery cartridge with the groove in the housing and slip
it into place. Insert it all the way until it locks in place
with a little click. If you can see the red indicator on the
upper side of the button, it is not locked completely.
CAUTION:
• Always install the battery cartridge fully until the
red indicator cannot be seen. If not, it may acci-
dentally fall out of the tool, causing injury to you
or someone around you.
• Do not install the battery cartridge forcibly. If the
cartridge does not slide in easily, it is not being
inserted correctly.
NOTE:
• The tool does not work with only one battery
cartridge.
Tool / battery protection system
The tool is equipped with a tool/battery protection sys-
tem. This system automatically cuts off power to the
motor to extend tool and battery life.
The tool will automatically stop during operation if the
tool or battery is placed under one of the following con-
ditions. In some conditions, the indicators light up.
Overload protection
On Off Blinking
If the tool is overloaded by entangled weeds or other
debris, the tool stops automatically, and indica-
tors blink. In this situation, turn the tool off and stop the
application that caused the tool to become overloaded.
Then turn the tool on to restart.
Overheat protection for tool
On Off Blinking
When the tool is overheated, the tool stops automati-
cally, and , , and the battery indicator blink about
60 seconds. In this situation, let the tool cool down
before turning the tool on again.
Overdischarge protection
When the battery capacity becomes low, the tool stops
automatically. If the product does not operate even
when the switches are operated, remove the batteries
from the tool and charge the batteries.
Indicating the remaining battery
capacity
(Only for battery cartridges with "B" at the end of the
model number.)
► Fig.5: 1. Indicator lamps 2. CHECK button
Press the check button on the battery cartridge to indi-
cate the remaining battery capacity. The indicator lamps
light up for few seconds.
Off BlinkingLighted
Indicator lamps
Charge the
battery.
0% to 25%
25% to 50%
50% to 75%
75% to 100%
Remaining
capacity
The battery
may have
malfunctioned.

12 ENGLISH
NOTE:
• Depending on the conditions of use and the
ambient temperature, the indication may differ
slightly from the actual capacity.
Remaining battery capacity
indication
(Country specic)
► Fig.6: 1. Battery indicator 2. CHECK button
Press the check button to make the battery indicators
show the remaining battery capacities. The battery
indicators correspond to each battery.
Remaining battery capacity
indication
Battery indicator status
Remaining battery capacity
50 % - 100 %
20 % - 50 %
0 % - 20 %
Charge the battery
On Off Blinking
Power switch action
WARNING:
• Before inserting the battery cartridge into
the tool, always check to see that the switch
trigger actuates properly and returns to the
"OFF" position when released. Operating a
tool with a switch that does not actuate properly
can lead to loss of control and serious personal
injury.
► Fig.7: 1. Main power button
Press and hold the main power button for some sec-
onds to turn on the tool.
To turn off the tool, press and hold the main power
button again.
► Fig.8: 1. Lock-off lever 2. Switch trigger
To prevent the switch trigger from being accidentally
pulled, a lock-off lever is provided.
To start the tool, grasp the rear handle (the lock-off lever
is released by the grasp) and then pull the switch trig-
ger. To stop the tool, release the switch trigger.
NOTE:
• The tool is automatically turned off after the tool
is left one minute without any operations.
Speed adjusting
► Fig.9: 1. Main power button
You can adjust the tool speed by tapping the main
power button.
Each time you tap the main power button, indi-
cator or indicator lights up. is for high speed
and for low speed.
Reverse button for debris removal
WARNING:
• Switch off the tool and remove the battery
cartridge before you remove entangled
weeds or debris which the reverse rotation
function can not remove. Failure to switch off
and remove the battery cartridge may result in
serious personal injury from accidental start-up.
► Fig.10: 1. Reverse button
This tool has a reverse button to change the direction of
rotation. It is only for removing weeds and debris entan-
gled in the tool.
To reverse the rotation, tap the reverse button and pull
the trigger when the tool’s head is stopped. The power
lamp starts blinking, and the tool's head rotates in
reverse direction when you pull the switch trigger.
To return to regular rotation, release the trigger and wait
until the tool's head stops.
NOTE:
• During the reverse rotation, the tool operates
only for a short period of time and then automat-
ically stops.
• Once the tool is stopped, the rotation returns to
regular direction when you start the tool again.
• If you tap the reverse button while the tool's
head is still rotating, the tool comes to stop and
to be ready for reverse rotation.
Nylon cutting head (optional
accessory)
NOTICE:
• The bump feed will not operate properly if the
head is not rotating.
► Fig.11: 1. Most effective cutting area
The nylon cutting head is a dual string trimmer head
provided with a bump & feed mechanism.
To cause the nylon cord to feed out, the cutting head
should be bumped against the ground while rotating.
NOTE: If the nylon cord does not feed out while
bumping the head, rewind/replace the nylon cord
by following the procedures described under
“Maintenance”.

13 ENGLISH
ASSEMBLY
WARNING:
• Always be sure that the tool is switched
off and battery cartridge is removed before
carrying out any work on the tool. Failure to
switch off and remove the battery cartridge may
result in serious personal injury from accidental
start-up.
• Never start the tool unless it is completely
assembled. Operation of the tool in a partially
assembled state may result in serious personal
injury from accidental start-up.
Installing the grip
► Fig.12: 1. Grip 2. Hex bolt 3. Cover 4. Clamp
5. Hanger
Fit the grip onto the pipe and tighten it with two hex
bolts. Make sure that the grip is located further than the
hanger.
Installing the guard
WARNING:
• Never use the tool without the guard illus-
trated in place. Failure to do so can cause
serious personal injury.
CAUTION:
• Take care not to injure yourself on the cutter for
cutting the nylon cord.
► Fig.13: 1. Cutter 2. Clamp 3. Bolt
► Fig.14: 1. Cutter 2. Clamp 3. Bolt
(The shape of the guard may differ from country to
country.)
Align the clamp on the pipe with the protector. And
tighten them with bolts.
Installing nylon cutting head or
plastic blade (optional accessory)
CAUTION:
• If the nylon cutting head / plastic blade acci-
dentally impacts a rock or hard object during
operation, stop the tool and inspect for any
damage. If the nylon cutting head / plastic
blade is damaged, replace it immediately.
Use of a damaged cutting tool could result in
serious personal injury.
NOTICE:
• Be sure to use genuine Makita nylon cutting head
/ plastic blade.
Turn the tool upside down so that you can replace the
nylon cutting head easily.
► Fig.15: 1. Nylon cutting head 2. Metal guard
3. Receive washer 4. Hex wrench
► Fig.16: 1. Plastic blade 2. Nut 3. Metal guard
4. Receive washer 5. Hex wrench
Insert the hex wrench through the hole on the motor
housing and rotate the receive washer until it is locked
with the hex wrench. Place the nylon cutting head /
plastic blade onto the threaded spindle directly and
tighten it by turning it clockwise. Remove the hex
wrench.
To remove the nylon cutting head / plastic blade, turn it
counterclockwise while holding the receive washer with
the hex wrench.
Hex wrench storage
► Fig.17: 1. Hex wrench
When not in use, store the hex wrench as shown in the
gure to keep it from being lost.
OPERATION
Correct handling of tool
Correct posture
WARNING:
• Always position the tool on your right-hand
side. Correct positioning of the tool allows for
maximum control and will reduce the risk of
serious personal injury caused by kickback.
• Be extremely careful to maintain control of
the tool at all times. Do not allow the tool to
be deected toward you or anyone in the
work vicinity. Failure to keep control of the tool
could result in serious injury to the bystander
and the operator.
► Fig.18
Shoulder harness
Optional accessory
Attachment of shoulder harness
► Fig.19: 1. Buckle 2. Hook
Put the shoulder harness on. Then connect the buckles
on both the hook and the harness. Be sure that the
buckles click and lock completely in place.
Detachment
► Fig.20: 1. Buckle
The buckle is provided with a means of quick release.
Simply squeeze the sides and the buckle to release the
tool.
Adjustment of the hanger position
and shoulder harness
► Fig.21: 1. Hex bolt
To change the hanger position, loosen the hex bolt on
the hanger with the supplied wrench. Then move the
hanger.
After adjusting the hanger position, tighten the hex bolt
with the wrench securely.

14 ENGLISH
MAINTENANCE
WARNING:
• Always be sure that the tool is switched
off and battery cartridge is removed before
attempting to perform inspection or main-
tenance on the tool. Failure to switch off and
remove the battery cartridge may result in seri-
ous personal injury from accidental start-up.
NOTICE:
Never use gasoline, benzine, thinner, alcohol or
the like. Discoloration, deformation or cracks may
result.
Replacing the nylon cord
WARNING:
• Never use metal wire, rope or the like. Use
recommended nylon cord only, otherwise it may
cause damage to the tool and result in serious
personal injury.
• Make sure that the cover of the nylon cutting
head is secured to the housing properly as
described below. Failure to properly secure the
cover may cause the nylon cutting head to y
apart resulting in serious personal injury.
► Fig.22
Take off cover from housing, pressing two latches which
are slotted section oppositely on side of housing.
► Fig.23: 1. 80-100 mm
Cut a nylon line in 3 m. Fold the cutting line in two
halves, leave one of half longer 80-100 mm than
another.
► Fig.24
Hook the middle of the new nylon cord to the notch
located at the center of the spool between the 2 chan-
nels provided for the nylon cord.
Wind both ends rmly around the spool in the direction
marked on the head for right hand direction indicated
by RH.
► Fig.25
Wind all but about 100 mm of the cords, leaving the
ends temporarily hooked through a notch on the side of
the spool.
► Fig.26
Mount the spool on the cover so that the grooves and
protrusions on the spool match up with those on the
cover. Now, unhook the ends of the cord from their tem-
porary position and feed the cords through the eyelets
to come out of the cover.
► Fig.27
Align the protrusion on the underside of the cover with
the slots of the eyelets. Then push the cover rmly onto
the housing to secure it. Make sure the latches fully
spread in the cover.
Replacing the blade for plastic blade
► Fig.28
Replace the blade when it is worn out or broken.
To maintain product SAFETY and RELIABILITY, repairs,
any other maintenance or adjustment should be per-
formed by Makita Authorized Service Centers, always
using Makita replacement parts.

15 ENGLISH
TROUBLE SHOOTING
Before asking for repairs, conduct your own inspection
rst. If you nd a problem that is not explained in the
manual, do not attempt to dismantle the tool. Instead,
ask Makita Authorized Service Centers, always using
Makita replacement parts for repairs.
Malfunction status
Motor does not run.
Cause
Battery cartridge is not installed.
Battery problem (under voltage)
Rotation is in reverse.
Overheating.
Battery power is dropping.
Electric or electronic malfunction.
Action
Install the battery cartridge.
Remove the foreign object.
Motor stops running after
a little use.
It does not reach maximum
RPM.
Cutting tool does not rotate:
stop the machine immediately!
Abnormal vibration:
stop the machine immediately!
Cutting tool and motor cannot
stop:
Remove the battery
immediately!
The drive system does not work
correctly.
One end of the nylon cord has
been broken.
The drive system does not work
correctly.
Foreign object such as a branch
is jammed between the guard and
the nylon cutting head.
The drive system does
not work correctly.
Battery is installed improperly.
Battery's charge level is low.
The drive system does not work
correctly.
Recharge the battery. If recharging
is not effective, replace battery.
Ask your local authorized service
center for repair.
Ask your local authorized service
center for repair.
Ask your local authorized service
center for repair.
Ask your local authorized service
center for repair.
Remove the battery and ask your
local authorized service center for
repair.
Bump the nylon cutting head
against the ground while it is
rotating to cause the cord to feed.
Recharge the battery. If recharging
is not effective, replace battery.
Install the battery cartridge as
described in this manual.
Stop using of tool to allow it to cool
down.
Recharge the battery. If recharging
is not effective, replace battery.
Change the direction of ratation
with the reversing switch.

16 ENGLISH
OPTIONAL
ACCESSORIES
WARNING:
• Do not mount a blade on this tool and only
use the recommended accessories or attach-
ments indicated in this manual. The use of a
blade or any other accessory or attachment may
result in serious personal injury.
CAUTION:
• These accessories or attachments are recom-
mended for use with your Makita tool specied
in this manual. The use of any other accessories
or attachments might present a risk of injury to
persons. Only use accessory or attachment for
its stated purpose.
If you need any assistance for more details regard-
ing these accessories, ask your local Makita Service
Center.
• Nylon cutting head
• Nylon cord (cutting line)
• Plastic blade
• Shoulder harness
• Makita genuine battery and charger
NOTE:
• Some items in the list may be included in the
tool package as standard accessories. They
may differ from country to country.

17 SVENSKA
SVENSKA (Originalinstruktioner)
SPECIFIKATIONER
Modell DUR364L
Handtagsmodell Handtagsögla
Obelastat varvtal 5 000 / 6 500 min-1
Total längd 1 754 mm
Diameter för nylontråd 2,0 – 2,4 mm
Tillämpligt skärverktyg Trimmerhuvud
(art.nr. 197297-1)
Plastkniv
(art.nr. 197188-6)
Trimmerhuvud
(art.nr. 197297-1)
Plastkniv
(art.nr. 197188-6)
Skärknivens diameter 350 mm 255 mm 350 mm 255 mm
Märkspänning 36 V likström
Vikt 4,0 kg 3,9 kg 4,5 kg 4,4 kg
Standard batterikassett BL1815N / BL1820 / BL1820B
BL1830 / BL1830B / BL1840 / BL1840B /
BL1850 / BL1850B / BL1860B
• På grund av vårt pågående program för forskning och utveckling kan dessa specikationer ändras utan föregående
meddelande.
• Specikationer och batterikassett kan variera från land till land.
• Vikt med batterikassett i enlighet med EPTA-procedur 01/2003
Buller Genomsnittlig
ljudtrycksnivå
Genomsnittlig ljudeffektnivå Tillämplig standard
LPA (dB (A)) LWA (dB (A))
Mättolerans K (dB (A))
Trimmerhuvud 81 89 0,3 2000/14/EC
Plastkniv 83 92 0,3
Vibration Vänster hand Höger hand Tillämplig
standard
ah,W (m/s2)Mättolerans K
(m/s2)
ah,W (m/s2)Mättolerans K
(m/s2)
Trimmerhuvud ≤ 2,5 1,5 ≤ 2,5 1,5 EN50636-2-91
Plastkniv ≤ 2,5 1,5 ≤ 2,5 1,5
OBS: Det deklarerade vibrationsemissionsvärdet har
uppmätts i enlighet med standardtestmetoden och
kan användas för jämförandet av en maskin med en
annan.
OBS: Det deklarerade vibrationsemissionsvärdet kan
också användas i preliminär bedömning av expone-
ring för vibration.
VARNING: Viberationsemissionen under faktisk
användning av maskinen kan skilja sig från det dekla-
rerade emissionsvärdet, beroende på hur maskinen
används.
VARNING: Se till att hitta säkerhetsåtgärder som
kan skydda användaren och som grundar sig på en
uppskattning av exponering i verkligheten (ta med i
beräkningen alla delar av användandet såsom antal
gånger maskinen är avstängd och när den körs på
tomgång samt då startomkopplaren används).
Symboler
Följande visar symbolerna som används för utrust-
ningen. Se till att du förstår innebörden innan du använ-
der borrmaskinen.
Var särskilt försiktig och uppmärksam!
Läs igenom bruksanvisningen.
Fara! Se upp för ygande föremål.
Avståndet mellan maskinen och åskådare
måste vara minst 15 m.
Håll åskådare på avstånd.
15m(50FT)Håll avstånd på minst 15 m.
Använd hjälm, skyddsglasögon och
hörselskydd.
Bär skyddshandskar.
Använd kraftiga stövlar med halkfri sula.
Skyddsstövlar med stålförstärkt tåhätta
rekommenderas.
Utsätt inte maskinen för fukt.

18 SVENSKA
Högsta tillåtna maskinhastighet.
Använd aldrig metallknivar.
Ni-MH
Li-ion
Gäller endast EU-länder
Elektrisk utrustning eller batteripaket får
inte kastas i hushållssoporna!
Enligt EU-direktiven som avser förbrukad
elektrisk och elektronisk utrustning, bat-
terier, ackumulatorer, förbrukade batterier
och ackumulatorer, samt direktivens
tillämpning enligt nationell lagstiftning, ska
uttjänt elektrisk utrustning, batterier och
batteripaket sorteras separat och lämnas
till miljövänlig återvinning.
Gäller endast Europa
EU-konformitetsdeklaration
Makita försäkrar att följande maskiner:
Maskinbeteckning:
Batteridriven grästrimmer
Modellnr./-typ: DUR364L
Specikationer: se tabellen “SPECIFIKATIONER“.
Följer följande EU-direktiv:
2000/14/EU, 2006/42/EU
De är tillverkade i enlighet med följande standard eller
standardiseringsdokument:
EN60335, EN/ISO11806, EN50636
Den tekniska dokumentationen i enlighet med 2006/42/
EG nns tillgänglig från:
Makita, Jan-Baptist Vinkstraat 2, 3070, Belgium
Proceduren för konformitetsbedömning som erfordras
enligt direktiv 2000/14/EU var i enlighet med tillägg V.
Med plastkniv
Uppmätt ljudeffektnivå 92 dB (A)
Garanterad ljudeffektnivå 92 dB (A)
Bedömningen av överensstämmelse som krävs enligt
direktiv 2000/14/EU var i enlighet med bilaga VI.
Anmält organ:
TÜV Rheinland LGA Products GmbH
Tillystraße 2
90431 Nürnberg, Tyskland
Identikationsnr. 0197
Med trimmerhuvud
Uppmätt ljudeffektnivå 89 dB (A)
Garanterad ljudeffektnivå 90 dB (A)
1.10.2015
Yasushi Fukaya
Direktör
Makita, Jan-Baptist Vinkstraat 2, 3070, Belgium
VIKTIGA
SÄKERHETSANVISNINGAR
VARNING! Läs igenom alla säkerhetsvarningar
och anvisningar. Underlåtenhet att följa varningar och
anvisningar kan leda till elektrisk stöt, brand och/eller
allvarliga personskador.
Spara alla varningar och instruk-
tioner för framtida referens.
1. Bekanta dig med manöverkontrollerna och den
korrekta användningen av utrustningen.
2. Skärande delar fortsätter att rotera efter det att
motorn stängts av.
3. Låt aldrig maskinen användas av barn
eller personer som inte känner till dessa
anvisningar.
4. Använd aldrig maskinen när personer (speci-
ellt barn) eller djur nns i närheten.
5. Använd endast maskinen i dagsljus eller i god
belysning.
6. Innan du använder maskinen eller efter att den
fått ett slag, ska du kontrollera om det nns
tecken på slitage eller skada och reparera vid
behov.
7. Var försiktig så att du inte skadar dig på någon
del avsedd för trimning av trådens längd. Efter
att ny skärtråd har dragits ut, ska maskinen
alltid återföras till sitt normala driftsläge innan
den startas.
8. Sätt aldrig dit skärande metallföremål.
9. Denna maskin är inte avsedd att användas av
personer (inklusive barn) med nedsatt fysisk,
sensorisk eller mental förmåga, eller personer
utan erfarenhet av och kunskap om maskinen,
såvida de inte har övervakats eller fått instruk-
tioner angående användningen av maskinen
av en person som är ansvarig för deras säker-
het. Barn ska övervakas så att de inte leker
med maskinen.
10. Använd maskinen med största försiktighet och
uppmärksamhet.
11. Använd endast maskinen när du är i god fysisk
kondition. Utför allt arbete noggrant och i lugnt
tempo. Använd sunt förnuft och glöm inte att
användaren är ansvarig för olyckor eller even-
tuell fara gentemot andra personer och deras
egendom.
12. Arbeta aldrig med maskinen när du är trött,
känner dig sjuk eller under påverkan av alko-
hol eller droger.
13. Maskinen ska stängas av omedelbart om den
visar tecken på något onormalt.
Maskinens användningsområde
1. Använd rätt maskin. Den batteridrivna gräst-
rimmern är endast avsedd för klippning av
gräs och lätt ogräs. Den ska inte användas för
något annat ändamål som t.ex. häckklippning
eftersom detta kan orsaka skada.

19 SVENSKA
Personlig skyddsutrustning
► Fig.1
► Fig.2
1. Klä dig rätt. Tänk på att ha en bekväm och
funktionell klädsel med god passform, dvs
varken för hårt eller löst sittande plagg. Bär
varken smycken eller kläder som kan trassla in
sig. Använd skyddsmössa om du har långt hår.
2. Bär alltid kraftiga skor med halkfri sula när
du arbetar med maskinen. Detta skyddar mot
skador och garanterar en god balans.
3. Bär skyddsglasögon eller korgglasögon.
El- och batterisäkerhet
1. Undvik farlig miljö. Använd inte maskinen på
fuktiga eller blöta områden, eller utsätt den för
regn. Vatten som kommer in i maskinen ökar
risken för elektrisk stöt.
2. Ladda endast med den laddare som angivits
av tillverkaren. En laddare som passar en
typ av batteri kan skapa risk för brand när
den används tillsammans med annan typ av
batteri.
3. Använd endast maskiner tillsammans med till-
hörande batterier. Om andra batterier används
kan risken för personskada och brand öka.
4. När batteriet inte används bör det hållas borta
från andra metallföremål som till exempel gem,
mynt, nycklar, spik, skruvar eller andra små
metallföremål som kan skapa anslutning från
en terminal till en annan. Kortslutning av batte-
ripolerna kan orsaka brännskador eller brand.
5. Under hårda förhållande kan det komma vätska
ur batteriet. Undvik kontakt. Spola med vatten
om kontakt ändå råkar uppstå. Om du får vätska i
ögonen ska du uppsöka läkare. Vätska från batte-
riet kan orsaka hudirritation eller ge brännskador.
6. Släng inte batteriet/batterierna i öppen eld.
Cellen kan explodera. Kontrollera de lokala
reglerna för möjlig speciell avfallshantering.
7. Öppna inte eller förstör batteriet/batterierna.
Elektrolyt som kommer ut är frätande och kan
ge ögon- eller hudskador. Det kan vara giftigt
vid intag.
Starta maskinen
► Fig.3
1. Kontrollera att barn och andra obehöriga inte
benner sig inom ett arbetsområde av 15
meter (50 ft) från maskinen, och var även upp-
märksam på eventuella djur i omgivningen. I
annat fall ska du sluta att använda maskinen.
2. Kontrollera alltid före användningen att maski-
nen är säker att använda. Kontrollera säker-
heten för klippverktyget och skyddet samt
avtryckaren/startspaken för enkel och korrekt
funktion. Kontrollera att handtagen är rena och
torra, och testa strömbrytarens on/off-funktion
(på/av).
3. Kontrollera skadade delar före fortsatt använd-
ning av maskinen. Ett skydd eller annan del
som är skadad, ska noggrant kontrolleras för
att avgöra om den kommer att fungera korrekt
och utför det arbete som den är avsedd för.
Kontrollera inriktningen och fästet för rörliga
delar, om det nns trasiga delar, monteringen
eller andra förhållande som kan påverka
användningen av maskinen. Ett skydd eller
annan del som är skadad ska repareras
ordentligt eller bytas ut av en auktoriserad
serviceverkstad om inte något annat anges i
denna bruksanvisning.
4. Starta endast motorn när du inte har dina
händer och fötter i närheten av skärverktyget.
5. Kontrollera innan du startar att skärverktyget
inte är i kontakt med hårda föremål såsom gre-
nar, stenar etc. eftersom skärverktyget roterar
vid start.
Arbetsmetod
1. Kör aldrig maskinen med skadade skydd eller
utan skydden på plats.
2.
Använd endast maskinen då du har goda ljus-
och siktförhållanden. Var uppmärksam på våta
och hala äckar, snö och is under vintersä-
songen (halkrisk). Se till att alltid ha bra fotfäste.
3. Var försiktig så att du inte skadar händer och
fötter på skärverktyget.
4. Håll alltid händer och fötter borta från skä-
rande delar, särskilt när du startar motorn.
5. Klipp aldrig över midjehöjd.
6. Stå aldrig på en stege när du kör maskinen.
7. Arbeta aldrig på ostadigt underlag.
8. Översträck inte. Stå alltid stabilt och ha god
balans.
9. Ta bort sand, stenar, spikar etc. som nns
i arbetsområdet. Främmande föremål kan
skada skärverktyget och kastas iväg vilket kan
orsaka allvarlig skada.
10. Stäng omedelbart av motorn och inspektera
skärverktyget om det har slagit i stenar eller
andra hårda föremål.
11. Innan klippningen kan börja måste skärverkty-
get uppnått full arbetshastighet.
12. Håll alltid maskinen med båda händerna under
arbetet. Håll aldrig maskinen med en hand
under användningen. Se till att alltid ha bra
fotfäste.
13. All skyddsutrustning såsom skydd som med-
följer maskinen, måste användas när du arbe-
tar med maskinen.
14. Tappa inte eller kasta maskinen på marken
förutom i nödsituationer eftersom det allvarligt
kan skada den.
15. Dra aldrig maskinen på marken när du yttar
den från plats till plats. I annat fall kan den
skadas.
16. Ta alltid bort batterikassetten från maskinen:
— när maskinen lämnas utan uppsikt.
— innan du tar bort något som fastnat.
— innan maskinen kontrolleras, rengörs
eller något arbete utförs på den.

20 SVENSKA
— innan justeringar, byte av tillbehör eller
förvaring.
— när maskinen börjar vibrera onormalt.
— när maskinen transporteras.
17. Tvinga inte maskinen. Den gör sitt arbete
bättre och med mindre risk för olycka med den
fart som den är konstruerad för.
Underhållsanvisningar
1. Skärverktygets, skyddsenheternas och axel-
bandets förhållande måste kontrolleras innan
arbetet påbörjas.
2. Stäng av motorn och ta bort batterikassetten
innan du utför något underhållsarbete, byter ut
skärverktyget eller rengör maskinen.
3. Ta bort batterikassetten från maskinen och
kontrollera så att det inte nns några skador
efter användningen.
4. Kontrollera om det nns lösa fästanordningar
eller skadade delar såsom sprickor nästan
halvvägs genom skärverktyget.
5. När utrustningen inte används ska den förva-
ras på en torr plats som är låst eller utom räck-
håll för barn.
6. Använd endast tillverkarens rekommenderade
reservdelar och tillbehör.
7. Försäkra dig alltid om att ventilationshålen är
fria från skräp.
8. Inspektera och underhåll maskinen regelbun-
det, speciellt före och efter användning. Låt
endast vårt auktoriserade servicecenter repa-
rera maskinen.
9. Håll handtag torra, rena och fria från olja och
fett.
SPARA DESSA ANVISNINGAR.
VARNING: GLÖM INTE att noggrant följa
säkerhetsanvisningarna för maskinen även
efter det att du har blivit van att använda
den. OVARSAM hantering eller underlåten-
het att följa säkerhetsanvisningarna i denna
bruksanvisning kan leda till allvarliga
personskador.
Viktiga säkerhetsanvisningar för
batterikassetten
1. Innan batterikassetten används ska alla
instruktioner och varningsmärken på (1) bat-
teriladdaren, (2) batteriet och (3) produkten
läsas.
2. Montera inte isär batterikassetten.
3. Om drifttiden blivit avsevärt kortare ska
användningen avbrytas omedelbart. Det kan
uppstå överhettning, brännskador och t o m en
explosion.
4. Om du får elektrolyt i ögonen ska de sköljas
med rent vatten och läkare uppsökas omedel-
bart. Det nns risk för att synen förloras.
5. Kortslut inte batterikassetten.
(1) Rör inte vid polerna med något strömfö-
rande material.
(2) Undvik att förvara batterikassetten till-
sammans med andra metallobjekt som
t.ex. spikar, mynt o.s.v.
(3) Skydda batteriet mot vatten och regn.
En batterikortslutning kan orsaka ett
stort strömöde, överhettning, brand och
maskinhaveri.
6. Förvara inte maskinen och batterikassetten på
platser där temperaturen kan nå eller överstiga
50 °C.
7. Bränn inte upp batterikassetten även om
den är svårt skadad eller helt utsliten.
Batterikassetten kan explodera i öppen eld.
8. Var försiktig så att du inte råkar tappa batteriet
och utsätt det inte för stötar.
9. Använd inte ett skadat batteri.
10. De medföljande litiumjonbatterierna är föremål
för kraven i gällande lagstiftning för farligt
gods.
För kommersiella transporter (av t.ex. tredje parter
som speditionsrmor) måste de särskilda trans-
portkrav som anges på emballaget och etiketter
iakttas.
För att förbereda den produkt som ska avsändas
krävs att du konsulterar en expert på riskmaterial.
Var också uppmärksam på att det i ditt land kan
nnas ytterligare föreskrifter att följa.
Tejpa över eller maskera blottade kontakter och
packa batteriet på sådant sätt att det inte kan röra
sig fritt i förpackningen.
11. Följ lokala föreskrifter beträffande avfallshan-
tering av batteriet.
SPARA DESSA ANVISNINGAR.
FÖRSIKTIGT: Använda endast äkta Makita-
batterier. Användning av oäkta Makita-batterier eller
batterier som har manipulerats kan leda till person-
och utrustningsskador eller till att batteriet fattar eld.
Det upphäver också Makitas garanti för verktyget och
laddaren.
Tips för att uppnå batteriets max-
imala livslängd
1. Ladda batterikassetten innan den är helt
urladdad. Stanna alltid maskinen och ladda
batterikassetten när du märker att maskinen
blir svagare.
2. Ladda aldrig en fulladdad batterikassett.
Överladdning förkortar batteriets livslängd.
3. Ladda batterikassetten vid en rumstemperatur
på 10 °C - 40 °C. Låt en varm batterikassett
svalna innan den laddas.
4. Ladda batterikassetten om du inte har använt
den på länge (mer än sex månader).
Other manuals for DUR364L
10
Table of contents
Languages:
Other Makita Trimmer manuals

Makita
Makita HTB7600 User manual

Makita
Makita UH 6350 Instruction Manual

Makita
Makita 3707 User manual

Makita
Makita UN460WDZX1 User manual

Makita
Makita UH5580 User manual

Makita
Makita DUH506 User manual

Makita
Makita ER2650LH User manual

Makita
Makita UH013G User manual

Makita
Makita UH004G User manual

Makita
Makita DUH481 User manual

Makita
Makita RBC2110 User manual

Makita
Makita UH5570 User manual

Makita
Makita DUR364L User manual

Makita
Makita BBC231U User manual

Makita
Makita DUR181Z User manual

Makita
Makita DUR187U User manual

Makita
Makita BC231UD User manual

Makita
Makita UR360D User manual

Makita
Makita DUH604S User manual

Makita
Makita M3700 User manual