Makita GRU04 User manual

INSTRUCTION MANUAL
MANUAL DE INSTRUCCIONES
Cordless Grass Trimmer
Cortador Inalámbrico de Pasto
GRU04
IMPORTANT: Read Before Using.
IMPORTANTE: Lea antes de usar.

2ENGLISH
ENGLISH (Original instructions)
SPECIFICATIONS
Model: GRU04
Handle type Loop handle
No load speed
(at each rotation speed level)
3: 0 - 6,000 /min
2: 0 - 4,600 /min
1: 0 - 4,000 /min
Overall length
(without cutting tool and battery)
1,803 mm (71″)
Nylon cord diameter 2.0 mm (0.08″)
Applicable cutting tool and
cutting diameter
Nylon cutting head
(P/N 198893-8)
430 mm (17″)
Rated voltage D.C. 36 V - 40 V max
Net weight 5.0 - 5.7 kg (11.0 - 12.6 lbs)
• Due to our continuing program of research and development, the specications herein are subject to change
without notice.
• Specications may dier from country to country.
• The weight may dier depending on the attachment(s), including the battery cartridge. The lightest and heavi-
est combination, according to EPTA-Procedure 01/2014, are shown in the table.
Applicable battery cartridge and charger
Battery cartridge BL4020 / BL4025* / BL4040* / BL4050F*
* : Recommended battery
Charger DC40RA / DC40RB / DC40RC
• Some of the battery cartridges and chargers listed above may not be available depending on your region of
residence.
WARNING: Only use the battery cartridges and chargers listed above. Use of any other battery cartridges
and chargers may cause injury and/or re.
Recommended cord connected power source
Portable power pack PDC01 / PDC1200
• The cord connected power source(s) listed above may not be available depending on your region of residence.
• Before using the cord connected power source, read instruction and cautionary markings on them.
SAFETY WARNINGS
Important safety instructions
WARNING: When using electric gardening
appliances, basic safety precautions should
always be followed to reduce the risk of re,
electric shock, and personal injury, including the
following.
Read All Instructions
Failure to follow the warnings and instructions may
result in electric shock, re and/or serious injury.
SAVE THESE INSTRUCTIONS.
General instructions
1. Never allow people unfamiliar with these
instructions or children to use the machine.
Local regulations can restrict the age of the
operator. It is dangerous in the hands of untrained
users or children.
2. Be sure that anyone who is to operate the
string trimmer has rst read the instruction
manual.
3. Use the string trimmer with the utmost care
and attention.
4. Operate the string trimmer only if you are in
good physical condition. Perform all work
calmly and carefully. Use common sense
and keep in mind that the operator or user is
responsible for accidents or hazards occurring
to other people or their property.

3ENGLISH
5. Never operate the string trimmer when tired,
feeling ill or under the inuence of alcohol or
drugs.
6. Avoid accidentally starting:
— Ensure the switch is in the o posi-
tion before installing the battery pack.
Inserting the battery pack into the string
trimmer with the switch on invites accidents.
— Carrying the string trimmer with your
nger on the switch invites accidents.
7. The string trimmer should be switched o
immediately if it shows any signs of abnormal
operation.
8. Don't force the tool. It will do the job better and
with less likelihood of a risk of injury at the rate for
which it was designed.
9. Don't overreach. Keep proper footing and
balance at all times.
10. Stay Alert - Watch what you are doing. Use
common sense. Do not operate appliance
when you are tired.
11. Store idle appliances indoors.
12. Keep ngers away from switch trigger when
not operating the tool and when moving from
one operating position to another.
Intended use of the tool
1. Use right tool. The cordless string trimmer
is only intended for cutting grass and light
weeds. It should not be used for any other
purpose such as edging or hedge cutting as
this may cause injury.
2. Use only the manufacturer’s recommended
accessories and attachments. Use of any other
accessories and attachments may increase the
risk of injury.
Personal protective equipment
1. Dress Properly. The clothing worn should be
functional and appropriate, i.e. it should be
tight-tting but not cause hindrance. Do not
wear loose clothing or jewelry. They can be
caught in moving parts. Use of thick leather
gloves and substantial footwear is recom-
mended when working outdoors. Wear protec-
tive hair covering to contain long hair.
2. In order to avoid either head, eye, hand or foot
injuries as well as to protect your hearing the
following protective equipment and protective
clothing must be used during operation of the
equipment.
3. Always wear a helmet where there is a risk of
falling objects. The protective helmet is to be
checked at regular intervals for damage and
is to be replaced at least every ve years. Use
only approved protective helmets.
4.
Use safety glasses. The visor of the helmet (or alter-
natively goggles) protects the face from ying debris
and stones. During operation of the tool always wear
goggles, or a visor to prevent eye injuries.
5.
Wear adequate noise protection equipment to avoid
hearing impairment (ear mus , ear plugs etc.).
6. Work overalls protect against injury from
ying stones and debris. It is strongly recom-
mended that the user wears work overalls.
7. Special gloves made of thick leather are part of
the prescribed equipment and must always be
worn during operation of the tool.
8. When using the tool, always wear sturdy shoes
with a nonslip sole. This protects against injuries
from ying debris and ensures a good footing.
9. Use a dust mask if operation is dusty.
Electrical and battery safety
1. Avoid dangerous environment. Don't use the
tool in damp or wet locations or expose it to
rain. Water entering the tool will increase the risk
of electric shock.
2. Prevent unintentional starting. Ensure the
switch is in the o-position before connecting
to battery pack, picking up or carrying the
machine. Carrying the machine with your nger
on the switch or energizing machine that have the
switch on invites accidents.
3. Disconnect the battery pack from the machine
before making any adjustments, changing
accessories, or storing machine. Such preven-
tive safety measures reduce the risk of starting the
machine accidentally.
4. Recharge only with the charger specied by
the manufacturer. A charger that is suitable for
one type of battery pack may create a risk of re
when used with another battery pack.
5. Use machines only with specically desig-
nated battery packs. Use of any other battery
packs may create a risk of injury and re.
6. When battery pack is not in use, keep it away
from other metal objects, like paper clips,
coins, keys, nails, screws or other small metal
objects, that can make a connection from one
terminal to another. Shorting the battery termi-
nals together may cause burns or a re.

4ENGLISH
7. Under abusive conditions, liquid may be
ejected from the battery; avoid contact. If con-
tact accidentally occurs, ush with water. If
liquid contacts eyes, seek medical help. Liquid
ejected from the battery may cause irritation or
burns.
8. Do not use a battery pack or machine that is
damaged or modied. Damaged or modied
batteries may exhibit unpredictable behaviour
resulting in re, explosion or risk of injury.
9. Do not expose a battery pack or machine to
re or excessive temperature. Exposure to re
or temperature above 130°C (265°F) may cause
explosion.
10. Follow all charging instructions and do not
charge the battery pack or machine outside of
the temperature range specied in the instruc-
tions. Charging improperly or at temperatures
outside of the specied range may damage the
battery and increase the risk of re.
11. Have servicing performed by a qualied repair
person using only identical replacement parts.
This will ensure that the safety of the product is
maintained.
12. Do not modify or attempt to repair the machine
or the battery pack except as indicated in the
instructions for use and care.
13. Do not dispose of the battery(ies) in a re.
The cell may explode. Check with local codes for
possible special disposal instructions.
14. Do not open or mutilate the battery(ies).
Released electrolyte is corrosive and may cause
damage to the eyes or skin. It may be toxic if
swallowed.
15. Do not charge battery in rain, or in wet
locations.
16. Make sure there are no electrical cables, water
pipes, gas pipes etc. that could cause a hazard
if damaged by use of the tool.
17. Do not replace the battery with wet hands.
18. Do not replace the battery in the rain.
19. Do not wet the terminal of battery with liquid
such as water, or submerge the battery. Do not
leave the battery in the rain, nor charge, use,
or store the battery in a damp or wet place. If
the terminal gets wet or liquid enters inside of bat-
tery, the battery may be short circuited and there is
a risk of overheat, re, or explosion.
20. After removing the battery from the tool or
charger, be sure to attach the battery cover to
the battery and store it in a dry place.
21. If the battery cartridge gets wet, drain the
water inside and then wipe it with a dry cloth.
Dry the battery cartridge completely in a dry
place before use.
22. Do not charge the battery outdoors.
23. Do not handle charger, including charger plug,
and charger terminals with wet hands.
Starting up the tool
1. Make sure that there are no children or other
people within a working range of 15 meters
(50 ft), also pay attention to any animals in the
working vicinity. Otherwise stop using the tool.
2. Before use always check that the tool is safe
for operation. Check the security of the nylon
cutting head and the guard and the switch
trigger/lever for easy and proper action. Check
for clean and dry handles and test the on/o
function of the switch.
3. Check damaged parts before further use of
the tool. A guard or other part that is damaged
should be carefully checked to determine
that it will operate properly and perform its
intended function. Check for alignment of
moving parts, binding of moving parts, break-
age of parts, mounting, and any other condi-
tion that may aect its operation. A guard or
other part that is damaged should be properly
repaired or replaced by our authorized ser-
vice center unless indicated elsewhere in this
manual.
4. Switch on the motor only when hands and feet
are away from the nylon cutting head.
5. Before starting make sure that the nylon cut-
ting head has no contact with hard objects
such as branches, stones etc. as the nylon
cutting head will revolve when starting.
6. Remove any adjusting key, wrench or blade
cover before turning the power tool on. An
accessory left attached to a rotating part of the
power tool may result in personal injury.
7. Make sure there are no electrical cables, water
pipes, gas pipes etc. that could cause a hazard
if damaged by use of the tool.
8. Do not use a cutting tool which is not recom-
mended by Makita.
9. Do not operate the tool in bad weather or if
there is a risk of lightning.
Method of operation
1. Only use the tool in good light and visibility.
During the winter season beware of slippery
or wet areas, ice and snow (risk of slipping).
Always ensure a safe footing.
2. Take care against injury to feet and hands from
the nylon cutting head.
3. Never cut above waist height.
4. Never stand on a ladder and run the tool.

5ENGLISH
5. Never climb up into trees to perform cutting
operation with the tool.
6. Never work on unstable surfaces.
7. Remove sand, stones, nails etc. found within
the working range. Foreign particles may dam-
age the nylon cutting head.
8. Should the nylon cutting head hit stones or
other hard objects, immediately switch o the
motor and inspect the nylon cutting head.
9. Before commencing cutting, the nylon cutting
head must have reached full working speed.
10. During operation always hold the tool with
both hands. Never hold the tool with one hand
during use. Always ensure a safe footing.
11. The nylon cutting head has to be equipped
with the guard. Never run the tool with dam-
aged guards or without guards in place!
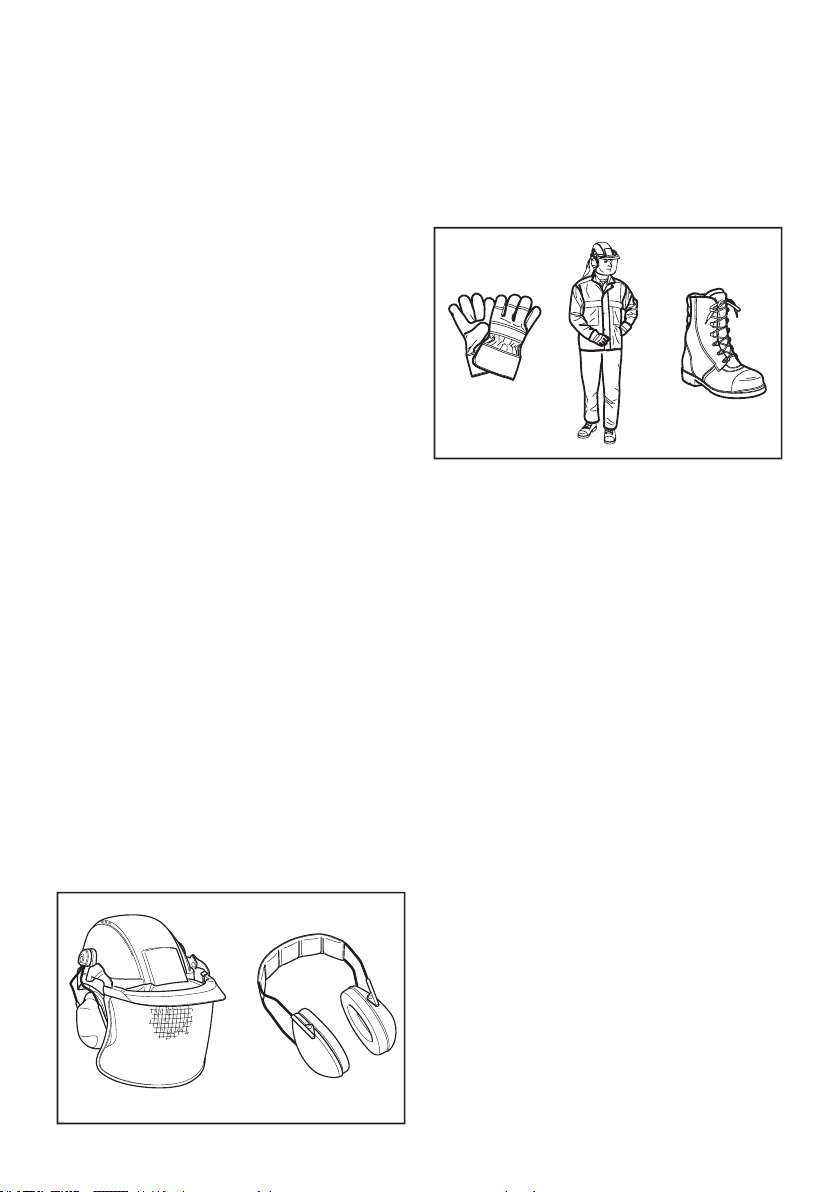
12. All protective equipment such as guards sup-
plied with the string trimmer must be used
during operation.
13. Except in case of emergency, never drop
or cast the tool to the ground or this may
severely damage the tool.
14. Never drag the tool on the ground when mov-
ing from place to place, the tool may become
damaged if moved in this manner.
15. Always remove the battery cartridge from the
tool:
— whenever leaving the tool unattended;
— before clearing a blockage;
— before checking, cleaning or working on
the tool;
— whenever the tool starts vibrating
abnormally;
— whenever transporting the tool.
16. Always ensure that the ventilation openings
are kept clear of debris.
17. Cutting elements continue to rotate after the
motor is switched o.
18. Do not operate power tools in explosive atmo-
spheres, such as in the presence of ammable
liquids, gases or dust. Power tools create sparks
which may ignite the dust or fumes.
19. Take a rest to prevent loss of control caused
by fatigue. We recommend to take a 10 to
20-minute rest every hour.
20. Hold the power tool by insulated gripping
surfaces only, because the cutting tool may
contact hidden wiring. Cutting tool contacting a
“live” wire may make exposed metal parts of the
power tool “live” and could give the operator an
electric shock.
21. Do not use the tool on steep slopes.
22. The shoulder harness must be used during
operation, if supplied with the tool.
23. Do not start the tool when the cutting tool is
tangled with cut grass.
24. Before starting the tool, be sure that the cut-
ting tool is not touching the ground and other
obstacles such as a tree.
25. Always keep your hands, face, and clothes
away from the cutting tool when it is rotating.
Failure to do so may cause personal injury.
26. Only use the cutting tool that are marked with
a speed equal or higher than the speed marked
on the tool.
27. Do not touch the gear case during and imme-
diately after the operation. The gear case
becomes hot during operation and can cause burn
injury.
28. Do not use the tool when there is a risk of
lightning.
29. When you use the tool on muddy ground, wet
slope, or slippery place, pay attention to your
footing.
30. Avoid working in poor environment where
increased user fatigue is expected.
31. Do not use the tool in bad weather where visi-
bility is limited. Failure to do so may cause fall or
incorrect operation due to low visibility.
32. Do not submerge the tool into a puddle.
33. Do not leave the tool unattended outdoors in
the rain.
34. When wet leaves or dirt adhere to the suc-
tion mouth (ventilation window) due to rain,
remove them.
35. Do not use the tool in the snow.
36. Swing the tool evenly in a half-circle from
right to left, like using a scythe. This allows the
proper segment of the blade to contact plants to
be cut.
37. Check the cutting attachment frequently
during operation for cracks or damages.
Before the inspection, remove the battery
cartridge and wait until the cutting attachment
stops completely. Replace damaged cutting
attachment immediately, even if it has only
supercial cracks.
Vibration
1. People with poor circulation who are exposed
to excessive vibration may experience injury
to blood vessels or the nervous system.
Vibration may cause the following symptoms
to occur in the ngers, hands or wrists: "Falling
asleep" (numbness), tingling, pain, stabbing sen-
sation, alteration of skin color or of the skin. If any
of these symptoms occur, see a physician!
2. To reduce the risk of "white nger disease",
keep your hands warm during operation and
well maintain the tool and accessories.
Maintenance instructions
1. The condition of the nylon cutting head, pro-
tective devices must be checked before com-
mencing work.
2. Turn o the motor and remove the battery
cartridge before carrying out maintenance,
replacing the nylon cutting head or nylon cord
and cleaning the tool.
3. Check for loose fasteners and damaged parts
such as cracks in the nylon cutting head.
4. Follow instructions for lubricating and chang-
ing accessories if applicable.
5. When not in use store the equipment in an
indoor dry location that is locked up or out of
children's reach.

6ENGLISH
6. Use only the manufacturer's recommended
replacement parts and accessories.
7. Inspect and maintain the tool regularly, espe-
cially before/after use. Have the tool repaired
only by our authorized service center.
8. Keep handles dry, clean and free from oil and
grease. Keep all cooling air inlets clear of
debris.
9. Always keep the tool in good working condi-
tion. Poor maintenance can result in inferior per-
formance and shorten the life of the tool.
10. Do not wash the tool with high pressure water.
11. When washing the tool, do not let water enter
the electrical mechanism such as battery,
motor, and terminals.
12. When storing the tool, avoid direct sunlight
and rain, and store it in a place where it does
not get hot or humid.
13. Perform inspection or maintenance in a place
where rain can be avoided.
14. After using the tool, remove the adhered dirt
and dry the tool completely before storing.
Depending on the season or the area, there is a
risk of malfunction due to freezing.
15. Before transporting the tool, turn it o and
remove the battery cartridge.
Storage
1. Before storing the tool, perform full clean-
ing and maintenance. Remove the battery
cartridge.
2. Store the tool in a dry and high or locked loca-
tion out of reach of children.
3. Do not prop the tool against something, such
as a wall. Otherwise it may fall suddenly and
cause an injury.
SAVE THESE INSTRUCTIONS.
WARNING: DO NOT let comfort or familiarity
with product (gained from repeated use) replace
strict adherence to safety rules for the subject
product. MISUSE or failure to follow the safety
rules stated in this instruction manual may cause
serious personal injury.
WARNING: Use of this product can create
dust containing chemicals which may cause
respiratory or other illnesses. Some examples of
these chemicals are compounds found in pesti-
cides, insecticides, fertilizers and herbicides.
Your risk from these exposures varies, depend-
ing on how often you do this type of work. To
reduce your exposure to these chemicals: work
in a well ventilated area, and work with approved
safety equipment, such as those dust masks that
are specially designed to lter out microscopic
particles.
Symbols
The followings show the symbols used for tool.
volts
direct current
no load speed
revolutions or reciprocation per minute
Important safety instructions for
battery cartridge
1.
Before using battery cartridge, read all instruc-
tions and cautionary markings on (1) battery
charger, (2) battery, and (3) product using battery.
2. Do not disassemble or tamper the battery
cartridge. It may result in a re, excessive heat,
or explosion.
3. If operating time has become excessively
shorter, stop operating immediately. It may
result in a risk of overheating, possible burns
and even an explosion.
4.
If electrolyte gets into your eyes, rinse them out
with clear water and seek medical attention right
away. It may result in loss of your eyesight.
5. Do not short the battery cartridge:
(1) Do not touch the terminals with any con-
ductive material.
(2) Avoid storing battery cartridge in a con-
tainer with other metal objects such as
nails, coins, etc.
(3) Do not expose battery cartridge to water
or rain.
A battery short can cause a large current
ow, overheating, possible burns and even a
breakdown.
6. Do not store and use the tool and battery car-
tridge in locations where the temperature may
reach or exceed 50 °C (122 °F).
7. Do not incinerate the battery cartridge even if
it is severely damaged or is completely worn
out. The battery cartridge can explode in a re.
8. Do not nail, cut, crush, throw, drop the battery
cartridge, or hit against a hard object to the
battery cartridge. Such conduct may result in a
re, excessive heat, or explosion.
9. Do not use a damaged battery.
10.
The contained lithium-ion batteries are subject to
the Dangerous Goods Legislation requirements.
For commercial transports e.g. by third parties,
forwarding agents, special requirement on pack-
aging and labeling must be observed.
For preparation of the item being shipped, consulting an
expert for hazardous material is required. Please also
observe possibly more detailed national regulations.
Tape or mask o open contacts and pack up the
battery in such a manner that it cannot move
around in the packaging.

7ENGLISH
11. When disposing the battery cartridge, remove
it from the tool and dispose of it in a safe
place. Follow your local regulations relating to
disposal of battery.
12. Use the batteries only with the products
specied by Makita. Installing the batteries to
non-compliant products may result in a re, exces-
sive heat, explosion, or leak of electrolyte.
13. If the tool is not used for a long period of time,
the battery must be removed from the tool.
14. During and after use, the battery cartridge may
take on heat which can cause burns or low
temperature burns. Pay attention to the han-
dling of hot battery cartridges.
15. Do not touch the terminal of the tool imme-
diately after use as it may get hot enough to
cause burns.
16. Do not allow chips, dust, or soil stuck into the
terminals, holes, and grooves of the battery
cartridge. It may result in poor performance or
breakdown of the tool or battery cartridge.
17. Unless the tool supports the use near
high-voltage electrical power lines, do not use
the battery cartridge near a high-voltage elec-
trical power lines. It may result in a malfunction
or breakdown of the tool or battery cartridge.
18. Keep the battery away from children.
SAVE THESE INSTRUCTIONS.
CAUTION: Only use genuine Makita batteries.
Use of non-genuine Makita batteries, or batteries that
have been altered, may result in the battery bursting
causing res, personal injury and damage. It will
also void the Makita warranty for the Makita tool and
charger.
Tips for maintaining maximum
battery life
1. Charge the battery cartridge before completely
discharged. Always stop tool operation and
charge the battery cartridge when you notice
less tool power.
2. Never recharge a fully charged battery car-
tridge. Overcharging shortens the battery
service life.
3. Charge the battery cartridge with room tem-
perature at 10 °C - 40 °C (50 °F - 104 °F). Let
a hot battery cartridge cool down before
charging it.
4. When not using the battery cartridge, remove
it from the tool or the charger.
5. Charge the battery cartridge if you do not use
it for a long period (more than six months).

8ENGLISH
PARTS DESCRIPTION
1 2
3
4 5
6
7
8
10
11
12
9
1Speed indicator 2ADT indicator
(ADT = Automatic Torque
Drive Technology)
3Caution lamp 4Main power button
5Reverse button 6Battery cartridge 7Lock-o lever 8Switch trigger
9Hanger 10 Handle 11 Protector 12 Shoulder harness

9ENGLISH
FUNCTIONAL DESCRIPTION
WARNING: Always be sure that the tool is
switched o and the battery cartridge is removed
before adjusting or checking function on the tool.
Failure to switch o and remove the battery cartridge
may result in serious personal injury from accidental
start-up.
Installing or removing battery
cartridge
CAUTION: Always switch o the tool before
installing or removing of the battery cartridge.
CAUTION: Hold the tool and the battery car-
tridge rmly when installing or removing battery
cartridge. Failure to hold the tool and the battery
cartridge rmly may cause them to slip o your hands
and result in damage to the tool and battery cartridge
and a personal injury.
2 3
1
1
► 1. Red indicator 2. Button 3. Battery cartridge
To remove the battery cartridge, slide it from the tool
while sliding the button on the front of the cartridge.
To install the battery cartridge, align the tongue on the
battery cartridge with the groove in the housing and slip
it into place. Insert it all the way until it locks in place
with a little click. If you can see the red indicator as
shown in the gure, it is not locked completely.
CAUTION: Always install the battery cartridge
fully until the red indicator cannot be seen. If not,
it may accidentally fall out of the tool, causing injury to
you or someone around you.
CAUTION: Do not install the battery cartridge
forcibly. If the cartridge does not slide in easily, it is
not being inserted correctly.
Tool / battery protection system
The tool is equipped with a tool/battery protection
system. This system automatically cuts o power to
the motor to extend tool and battery life. The tool will
automatically stop during operation if the tool is placed
under one of the following conditions:
Caution lamp Status
Color On Blinking
Green Overload
Red (tool) / (battery) Overheat
Red Over
discharge
Overload protection
If the tool gets into one of the following situation, the
tool automatically stops and the caution lamp starts
blinking in green:
— The tool is overloaded by entangled weeds or
other debris.
— The cutting tool is locked.
— The main power button is turned on while the
switch trigger is being pulled.
In this situation, release the switch trigger and remove
entangled weeds or debris if necessary. After that, pull
the switch trigger again to resume.
CAUTION: If you need to remove the entan-
gled weeds on the tool or release the locked
cutting tool, be sure to turn the tool o before you
start.
Overheat protection for tool or
battery
If the tool or battery cartridge is overheated, the tool
stops automatically. When the tool is overheated, the
caution lamp lights up in red. When the battery cartridge
is overheated, the caution lamp blinks in red. Let the
tool and/or battery cool down before turning the tool on
again.
Overdischarge protection
When the battery capacity becomes low, the tool stops
automatically and the caution lamp starts blinking in red.
If the tool does not operate even when the switches are
operated, remove the battery cartridge from the tool and
charge it.

10 ENGLISH
Indicating the remaining battery
capacity
Press the check button on the battery cartridge to indi-
cate the remaining battery capacity. The indicator lamps
light up for a few seconds.
1
2
► 1. Indicator lamps 2. Check button
Indicator lamps Remaining
capacity
Lighted O Blinking
75% to 100%
50% to 75%
25% to 50%
0% to 25%
Charge the
battery.
The battery
may have
malfunctioned.
NOTE: Depending on the conditions of use and the
ambient temperature, the indication may dier slightly
from the actual capacity.
NOTE: The rst (far left) indicator lamp will blink when
the battery protection system works.
Main power switch
Tap the main power button to turn on the tool.
To turn o the tool, press and hold the main power
button until the speed indicator goes o.
2
1
► 1. Speed indicator 2. Main power button
NOTE: The tool will automatically turned o if it is left
without any operations for a certain period of time.
Switch action
WARNING: For your safety, this tool is
equipped with lock-o lever which prevents the
tool from unintended starting. NEVER use the tool
if it runs when you simply pull the switch trigger
without pressing the lock-o lever. Return the
tool to our authorized service center for proper
repairs BEFORE further usage.
WARNING: NEVER tape down or defeat pur-
pose and function of lock-o lever.
CAUTION: Before installing the battery car-
tridge into the tool, always check to see that the
switch trigger actuates properly and returns to
the "OFF" position when released. Operating a tool
with a switch that does not actuate properly can lead
to loss of control and serious personal injury.
CAUTION: Never put your nger on the main
power button and switch trigger when carrying
the tool. The tool may start unintentionally and cause
injury.
NOTICE: Do not pull the switch trigger hard with-
out pressing the lock-o lever. This can cause
switch breakage.

11 ENGLISH
To prevent the switch trigger from being accidentally
pulled, a lock-o lever is provided. To start the tool,
depress the lock-o lever and pull the switch trigger.
The tool speed increases by increasing pressure on the
switch trigger. Release the switch trigger to stop.
1
2
► 1. Lock-o lever 2. Switch trigger
Speed adjusting
You can select the tool speed by tapping the main
power button. Each time you tap the main power button,
the level of speed will change.
2
1
► 1. Speed indicator 2. Main power button
Speed indicator Mode Rotation speed
High 0 - 6,000 /min
Medium 0 - 4,600 /min
Low 0 - 4,000 /min
Automatic Torque Drive Technology
When you turn on the Automatic Torque Drive
Technology (ADT), the tool runs at optimum rotation
speed and torque for the condition of grass being cut.
To start ADT, press and hold the reverse button until the
ADT indicator turns on.
To stop ADT, press and hold the reverse button until the
ADT indicator turns o.
2
1
► 1. ADT indicator 2. Reverse button
Indicator Mode Rotation speed
ADT 3,500 - 6,000 /min
Reverse button for debris removal
WARNING:
Switch o the tool and remove the
battery cartridge before you remove entangled weeds
or debris which the reverse rotation function can not
remove. Failure to switch o and remove the battery cartridge
may result in serious personal injury from accidental start-up.
This tool has a reverse button to change the direction of rotation.
It is only for removing weeds and debris entangled in the tool.
To reverse the rotation, tap the reverse button and pull
the switch trigger while depressing the lock-o lever when
the cutting tool is stopped. The speed indicators and
ADT indicator start blinking, and the cutting tool rotates in
reverse direction when you pull the switch trigger.
To return to regular rotation, release the trigger and wait
until the cutting tool stops.
3
2
1
►
1. Speed indicator 2. ADT indicator 3. Reverse button

12 ENGLISH
NOTE:
During the reverse rotation, the tool operates only
for a short period of time and then automatically stops.
NOTE: Once the tool is stopped, the rotation returns
to regular direction when you start the tool again.
NOTE:
If you tap the reverse button while the cutting tool is still
rotating, the tool comes to stop and to be ready for reverse rotation.
Electric brake
This tool is equipped with an electric brake. If the tool
consistently fails to quickly stop after the switch trigger
is released, have the tool serviced at our service center.
CAUTION:
This brake system is not a substitute for
the protector. Never use the tool without the protector. An
unguarded cutting tool may result in serious personal injury.
Electronic function
Constant speed control
The speed control function provides the constant rota-
tion speed regardless of load conditions.
Soft start feature
Soft start because of suppressed starting shock.
ASSEMBLY
WARNING: Always be sure that the tool is
switched o and battery cartridge is removed
before carrying out any work on the tool. Failure to
switch o and remove the battery cartridge may result
in serious personal injury from accidental start-up.
WARNING: Never start the tool unless it is
completely assembled. Operation of the tool in a
partially assembled state may result in serious per-
sonal injury from accidental start-up.
Installing the handle
1. Attach the upper and lower clamps on the damper.
2. Put the handle on the upper clamp and x it with
hex socket head bolts as illustrated.
1
2 3
5
4
► 1. Hex socket head bolt 2. Handle 3. Upper clamp
4. Damper 5. Lower clamp
Hex wrench storage
CAUTION: Be careful not to leave the hex
wrench inserted in the tool head. It may cause
injury and/or damage to the tool.
When not in use, store the hex wrench as illustrated to
keep it from being lost.
1
► 1. Hex wrench
Correct combination of the cutting
tool and the protector
CAUTION:
Always use the correct combination of
cutting tool and the protector. A wrong combination may
not protect you from the cutting tool, ying debris, and stones.
It can also aect the balance of the tool and result in an injury.
Cutting tool Protector
Nylon cutting head
Installing the protector
WARNING: Never use the tool without the
guard illustrated in place. Failure to do so can
cause serious personal injury.
CAUTION: Take care not to injure yourself on
the cutter for cutting the nylon cord.

13 ENGLISH
Attach the protector to the clamp using bolts.
1
2
3
► 1. Clamp 2. Protector 3. Cutter
Installing the cutting tool
CAUTION: Always use the supplied
wrench(es) to remove or to install the cutting tool.
CAUTION: Be sure to remove the hex wrench
inserted into the tool head after installing the
cutting tool.
NOTE: The type of the cutting tool(s) supplied as
the standard accessory varies depending on the
countries.
NOTE: Turn the tool upside down so that you can
replace the cutting tool easily.
Nylon cutting head
NOTICE: Be sure to use genuine Makita nylon
cutting head.
4
5
3
1
2
► 1. Nylon cutting head 2. Spindle 3. Hex wrench
4. Loosen 5. Tighten
1. Insert the hex wrench through the hole in the gear
case to lock the spindle. Rotate the spindle until the hex
wrench is fully inserted.
2. Place the nylon cutting head onto the spindle and
tighten it securely by hand.
3. Remove the hex wrench from the gear case.
To remove the nylon cutting head, follow the installation
procedures in reverse.
OPERATION
Attaching the shoulder harness
WARNING: Be extremely careful to maintain
control of the tool at all times. Do not allow the
tool to be deected toward you or anyone in the
work vicinity. Failure to keep control of the tool
could result in serious injury to the bystander and the
operator.
CAUTION: Always use the shoulder harness
attached to the tool. Before operation, adjust the
shoulder harness according to the user size to
prevent fatigue.
CAUTION: Before operation, make sure that
the shoulder harness is properly attached to the
hanger on the tool.
CAUTION: When you use the tool in combi-
nation of the backpack-type power supply such
as portable power pack, do not use the shoulder
harness included in the tool package, but use the
hanging band recommended by Makita.
If you put on the shoulder harness included in the
tool package and the shoulder harness of the back-
pack-type power supply at the same time, removing
the tool or backpack-type power supply is dicult in
case of an emergency, and it may cause an accident
or injury. For the recommended hanging band, ask
Makita Authorized Service Centers.
1. Clasp the hook on the shoulder harness to tool's
ring and hanger.
1
2
3
2
► 1. Ring 2. Hook 3. Hanger

14 ENGLISH
2. Put on the shoulder harness on your left shoulder.
Adjust the shoulder harness to a comfortable working
position.
The shoulder harness features a means of quick
release. Simply squeeze the sides of the buckle while
holding the tool to release the tool from the shoulder
harness.
1
► 1. Buckle
Correct handling of the tool
WARNING: Always position the tool on your
right-hand side. Correct positioning of the tool allows
for maximum control and will reduce the risk of seri-
ous personal injury.
WARNING: Be extremely careful to maintain
control of the tool at all times. Do not allow the
tool to be deected toward you or anyone in the
work vicinity. Failure to keep control of the tool
could result in serious injury to the bystander and the
operator.
WARNING: To avoid accident, leave more
than 15m (50 ft) distance between operators when
two or more operators work in one area. Also,
arrange a person to observe the distance between
operators. If someone or an animal enters the
working area, immediately stop the operation.
CAUTION: If the cutting tool accidentally
impacts a rock or hard object during operation,
stop the tool and inspect for any damage. If the
cutting tool is damaged, replace it immediately.
Use of a damaged cutting tool may result in serious
personal injury.
Correct positioning and handling allow optimum control
and reduce the risk of injury.
When using a nylon cutting head (bump & feed type)
The nylon cutting head is a dual string trimmer head
provided with a bump & feed mechanism.
To feed out the nylon cord, tap the cutting head against
the ground while rotating.
1
► 1. Most eective cutting area
NOTICE: The bump feed will not operate prop-
erly if the nylon cutting head is not rotating.
NOTE: If the nylon cord does not feed out while
tapping the head, rewind/replace the nylon cord
by following the procedures in the section for the
maintenance.
MAINTENANCE
WARNING: Always be sure that the tool is
switched o and battery cartridge is removed
before attempting to perform inspection or main-
tenance on the tool. Failure to switch o and remove
the battery cartridge may result in serious personal
injury from accidental start-up.
NOTICE: Never use gasoline, benzine, thinner,
alcohol or the like. Discoloration, deformation or
cracks may result.
To maintain product SAFETY and RELIABILITY,
repairs, any other maintenance or adjustment should
be performed by Makita Authorized or Factory Service
Centers, always using Makita replacement parts.

15 ENGLISH
Cleaning the tool
Clean the tool by wiping o dust, dirt, or cut o grass
with a dry cloth or one dipped in soapy water and wrung
out. To avoid overheating of the tool, be sure to remove
the cut o grass or debris adhered to the vent of the
tool.
Replacing the nylon cord
WARNING: Use only the nylon cord with
diameter specied in this instruction manual.
Never use heavier line, metal wire, rope or the
like. Failure to do so may cause damage to the tool
and result in serious personal injury.
WARNING: Always remove the nylon cutting
head from the tool when replacing the nylon cord.
WARNING: Make sure that the cover of the
nylon cutting head is secured to the housing
properly as described below. Failure to properly
secure the cover may cause the nylon cutting head to
y apart resulting in serious personal injury.
Replace the nylon cord if it is not fed any more. The
method of replacing the nylon cord varies depending on
the type of the nylon cutting head.

16 ENGLISH
96-M10L
1
2
4
3
5
6
4 m (13 ft)
100 mm
(3-15/16″)

17
TROUBLESHOOTING
Before asking for repairs, conduct your own inspection rst. If you nd a problem that is not explained in the manual,
do not attempt to dismantle the tool. Instead, ask Makita Authorized Service Centers, always using Makita replace-
ment parts for repairs.
State of abnormality Probable cause (malfunction) Remedy
Motor does not run. Battery cartridge is not installed. Install the battery cartridge.
Battery problem (under voltage) Recharge the battery cartridge. If recharging is not
eective, replace battery cartridge.
The drive system does not work
correctly.
Ask your local authorized service center for repair.
Motor stops running after a little use. Battery's charge level is low. Recharge the battery cartridge. If recharging is not
eective, replace battery cartridge.
Overheating. Stop using of tool to allow it to cool down.
The tool does not reach maximum
RPM.
Battery cartridge is installed improperly. Install the battery cartridge as described in this
manual.
Battery power is dropping. Recharge the battery cartridge. If recharging is not
eective, replace battery cartridge.
The drive system does not work
correctly.
Ask your local authorized service center for repair.
Cutting tool does not rotate:
stop the machine immediately!
Foreign object such as a branch is
jammed between the guard and the
cutting tool.
Remove the foreign object.
Cutting tool is loosely attached. Tighten the cutting tool securely.
The drive system does not work
correctly.
Ask your local authorized service center for repair.
Abnormal vibration:
stop the machine immediately!
Broken, bent or worn cutting tool Replace the cutting tool.
Cutting tool is loosely attached. Tighten the cutting tool securely.
The drive system does not work
correctly.
Ask your local authorized service center for repair.
Cutting tool and motor cannot stop:
Remove the battery immediately!
Electric or electronic malfunction. Remove the battery cartridge and ask your local
authorized service center for repair.
OPTIONAL ACCESSORIES
WARNING: Only use the recommended
accessories or attachments indicated in this man-
ual. The use of any other accessory or attachment
may result in serious personal injury.
CAUTION: These accessories or attachments
are recommended for use with your Makita tool
specied in this manual. The use of any other
accessories or attachments might present a risk of
injury to persons. Only use accessory or attachment
for its stated purpose.
If you need any assistance for more details regard-
ing these accessories, ask your local Makita Service
Center.
• Nylon cutting head
• Nylon cord (cutting line)
• Protector
• Makita genuine battery and charger
NOTE: Some items in the list may be included in the
tool package as standard accessories. They may
dier from country to country.
MAKITA LIMITED WARRANTY
Please refer to the annexed warranty sheet for the
most current warranty terms applicable to this product.
If annexed warranty sheet is not available, refer to the
warranty details set forth at below website for your
respective country.
United States of America: www.makitatools.com
Canada: www.makita.ca
Other countries: www.makita.com
ENGLISH

18 ESPAÑOL
ESPAÑOL (Instrucciones originales)
ESPECIFICACIONES
Modelo: GRU04
Tipo de mango Mango redondo
Velocidad sin carga
(en cada nivel de la velocidad de rotación)
3: 0 r/min - 6 000 r/min
2: 0 r/min - 4 600 r/min
1: 0 r/min - 4 000 r/min
Longitud total
(sin la herramienta de corte y la batería)
1 803 mm (71″)
Diámetro del cordón de nailon 2,0 mm (0,08″)
Herramienta de corte aplicable
y diámetro de corte
Cabezal de corte de nailon
(No. de pza. 198893-8)
430 mm (17″)
Tensión nominal c.c. 36 V - 40 V máx.
Peso neto 5,0 kg - 5,7 kg (11,0 lbs - 12,6 lbs)
• Debido a nuestro continuo programa de investigación y desarrollo, las especicaciones aquí incluidas están
sujetas a cambio sin previo aviso.
• Las especicaciones pueden variar de país a país.
• El peso puede variar en función de los accesorios, incluido el cartucho de batería. En la tabla se muestra la
combinación de peso más ligero y más pesado conforme al procedimiento 01/2014 de EPTA.
Cartucho de batería y cargador aplicables
Cartucho de batería BL4020 / BL4025* / BL4040* / BL4050F*
* : Batería recomendada
Cargador DC40RA / DC40RB / DC40RC
• Algunos de los cartuchos de batería y cargadores enumerados arriba podrían no estar disponibles depen-
diendo de su área de residencia.
ADVERTENCIA: Use únicamente los cartuchos de batería y los cargadores indicados arriba. El uso de
cualquier otro cartucho de batería y cargador podría ocasionar una lesión y/o un incendio.
Fuente de alimentación conectada por cable recomendada
Unidad portátil de alimentación eléctrica PDC01 / PDC1200
• La o las fuentes de alimentación conectadas por cable enumeradas arriba podrían no estar disponibles depen-
diendo de su área de residencia.
• Antes de utilizar la fuente de alimentación conectada por cable, lea las instrucciones e indicaciones de precau-
ción sobre ellas.
ADVERTENCIAS DE
SEGURIDAD
Instrucciones importantes de
seguridad
ADVERTENCIA: Al utilizar aparatos eléc-
tricos de jardinería, siempre deben tomarse en
cuenta las precauciones básicas de seguridad
a n de reducir el riesgo de incendio, descarga
eléctrica y lesiones personales, incluyendo lo
siguiente.
Lea todas las instrucciones
El no seguir las advertencias e instrucciones podrá
ocasionar descargas eléctricas, incendios y/o lesiones
graves.
GUARDE ESTAS
INSTRUCCIONES.
Instrucciones generales
1.
Nunca permita que los niños o gente que no
esté familiarizada con estas instrucciones uti-
lice la máquina. Las regulaciones locales pue-
den restringir la edad del operador. Es peligroso
en manos de usuarios no entrenados o de niños.
2. Asegúrese de que cualquier persona que vaya
a utilizar la desbrozadora haya leído primero el
manual de instrucciones.

19 ESPAÑOL
3.
Use la desbrozadora con extremo cuidado y atención.
4. Opere la desbrozadora sólo si se encuentra en
buena condición física. Realice todo el trabajo
tranquila y cuidadosamente. Use el sentido
común y tenga en cuenta que el operador o
usuario es responsable de los accidentes o
peligros que le ocurran a otras personas o a
su propiedad.
5. Nunca opere la desbrozadora si está cansado,
se siente enfermo o está bajo la inuencia de
alcohol o drogas.
6. Evite la puesta en marcha accidental:
— Asegúrese de que el interruptor se
encuentre en la posición de apagado
antes de instalar el paquete de batería.
Insertar el paquete de batería en la desbro-
zadora con el interruptor encendido puede
provocar accidentes.
— Cargar la desbrozadora con su dedo en el
interruptor puede provocar accidentes.
7. La desbrozadora deberá apagarse inmediata-
mente si muestra alguna señal de operación
anormal.
8. No fuerce la herramienta. Esto permitirá hacer
mejor el trabajo con un menor riesgo de lesiones a
la velocidad para la que fue diseñada.
9. No utilice la herramienta donde no alcance.
Mantenga los pies sobre suelo rme y el equi-
librio en todo momento.
10. Manténgase alerta - Preste atención a lo que
está haciendo. Utilice el sentido común. No
utilice el aparato cuando esté cansado.
11. Almacene los aparatos que no use en
interiores.
12. Mantenga los dedos alejados del gatillo inte-
rruptor cuando no opere la herramienta y
cuando pase de una posición de operación a
otra.
Uso previsto de la herramienta
1. Utilice la herramienta adecuada. La desbroza-
dora inalámbrica está diseñada sólo para cor-
tar césped y maleza ligera. No debe utilizarse
para ningún otro propósito tal como la poda de
bordes o cercos de setos, ya que esto podría
causar lesiones.
2. Use sólo los accesorios y aditamentos reco-
mendados por el fabricante. El uso de cualquier
otro accesorio y aditamento puede incrementar el
riesgo de lesiones.
Equipo de protección personal
1. Use una vestimenta adecuada. La vestimenta
que lleve deberá ser funcional y adecuada,
es decir, deberá quedar ajustada pero sin que
estorbe. No use ropa oja ni alhajas. Éstas
podrían engancharse en las piezas móviles.
Cuando se trabaje en exteriores es recomen-
dable usar guantes de piel gruesa y un calzado
resistente. Lleve protección en el cabello para
cubrirlo en caso de tenerlo largo.
2. Para evitar lesiones ya sea en la cabeza, ojos,
manos o pies, así como para proteger su audi-
ción, se requiere el uso del siguiente equipo
de protección y prendas protectoras durante la
operación del equipo.
3. Use siempre casco donde haya riesgo de caída
de objetos. El casco protector debe ser revi-
sado durante intervalos periódicos para ver
si tiene daños y debe reemplazarse al menos
cada cinco años. Use sólo cascos protectores
aprobados.
4. Use gafas de seguridad. El visor del casco (o
gafas protectoras como alternativa) protege
la cara de los residuos y piedras que salgan
proyectados. Use siempre gafas protectoras o
visor para evitar lesiones en los ojos durante
el uso de la herramienta.
5. Use un equipo adecuado de protección contra
ruido para evitar el daño auditivo (orejeras,
tapones para los oídos, etc.).
6. Los overoles de trabajo protegen contra lesio-
nes a causa de residuos y piedras que salgan
proyectados. Es altamente recomendable que
el usuario use un overol de trabajo.
7. Los guantes especiales hechos de piel gruesa
forman parte del equipo recomendado y deben
usarse siempre durante la operación de la
herramienta.
8. Cuando utilice la herramienta, use siempre un
calzado resistente con suela antiderrapante.
Esto lo protegerá contra lesiones a causa de
residuos que salgan proyectados y asegurará que
pise rmemente.
9. Utilice una máscara contra polvo si la opera-
ción es polvorienta.
Seguridad eléctrica y de la batería
1. Evite los entornos peligrosos. No utilice la
herramienta en lugares húmedos o mojados ni
la exponga a la lluvia. El agua que ingrese a la
herramienta incrementará el riesgo de descarga
eléctrica.

20 ESPAÑOL
2. Evite una puesta en marcha accidental.
Asegúrese de que el interruptor esté en
la posición apagada antes de conectar el
paquete de baterías, levantar la herramienta o
cargarla. Cargar la herramienta con su dedo en el
interruptor o pasar energía a la herramienta con el
interruptor encendido puede propiciar accidentes.
3.
Desconecte el paquete de baterías de la herra-
mienta antes de hacer cualquier ajuste, cambiar
accesorios o almacenar la herramienta. Estas
medidas de seguridad preventivas reducen el riesgo de
poner en marcha la herramienta accidentalmente.
4. Recargue sólo con el cargador especicado
por el fabricante. Un cargador que sea adecuado
para un tipo especíco de paquete de batería
puede generar un riesgo de incendio al usarse
con un paquete de batería distinto.
5.
Use las herramientas únicamente con los paque-
tes de baterías designados especícamente para
ellas. El uso de otros paquetes de baterías puede
generar riesgo de lesiones e incendio.
6. Cuando no se esté usando el paquete de
batería, manténgalo alejado de otros objetos
metálicos, como sujetapapeles (clips), mone-
das, llaves, clavos, tornillos u otros objetos
pequeños de metal que puedan crear una
conexión entre una terminal y otra. Causar un
cortocircuito en las terminales de la batería puede
provocar quemaduras o incendio.
7. En condiciones de mal uso, podría escapar
líquido de la batería; evite el contacto. Si toca
el líquido accidentalmente, enjuague con agua.
Si hay contacto del líquido con los ojos, soli-
cite atención médica. El líquido expulsado de la
batería puede causar irritación o quemaduras.
8. No utilice un paquete de baterías o una herra-
mienta que esté dañado/dañada o haya sido
modicado/modicada. Las baterías dañadas
o modicadas podrían comportarse de manera
impredecible causando un incendio, explosión
o riesgo de lesión.
9. No exponga un paquete de baterías o una
herramienta al fuego o a una temperatura
excesiva. La exposición al fuego a una tempe-
ratura superior a 130 °C (265 °F) podría causar
una explosión.
10. Siga todas las instrucciones relativas a la
carga y no cargue el paquete de baterías o la
herramienta fuera del rango de temperatura
especicado en las instrucciones. Cargar de
manera inapropiada o a temperaturas fuera del
rango especicado podría dañar la batería e incre-
mentar el riesgo de incendio.
11. Pida que el servicio lo realice un técnico en
reparaciones calicado y que utilice única-
mente piezas de repuesto idénticas a las
originales. Esto garantizará que se mantenga la
seguridad del producto.
12. No modique ni intente reparar la herramienta
ni el paquete de baterías salvo como se indi-
que en las instrucciones para el uso y cuidado.
13. No deseche la(s) batería(s) donde haya fuego.
La celda podría explotar. Consulte los códigos
locales para ver si hay instrucciones especiales
relativas al desecho.
14. No abra ni dañe la(s) batería(s). Los electrolitos
liberados son corrosivos y pueden ocasionar
daños en los ojos o la piel. Éstos pueden ser
tóxicos si se llegan a tragar.
15. No cargue la batería bajo la lluvia ni en lugares
mojados.
16. Asegúrese de que no haya cables eléctricos,
tubos de agua, tubos de gas, etc. que pudieran
representar un peligro en caso de ser dañados
por el uso de la herramienta.
17. No reemplace la batería con las manos
mojadas.
18. No reemplace la batería bajo la lluvia.
19. No moje el terminal de la batería con líquidos,
como el agua, ni sumerja la batería en ellos.
No deje la batería bajo la lluvia, ni cargue,
utilice, o guarde la batería en un lugar húmedo
o mojado. Si el terminal se moja o entra líquido
dentro de la batería, la batería puede sufrir un
cortocircuito, con el consiguiente riesgo de sobre-
calentamiento, incendio o explosión.
20. Después de retirar la batería de la herramienta
o el cargador, asegúrese de acoplar la cubierta
de la batería a la batería y de guardarla en un
lugar seco.
21. Si el cartucho de batería se moja, drene el
agua que se haya acumulado en el interior
y luego límpielo con un paño seco. Seque el
cartucho de batería por completo en un lugar
seco antes de usarlo.
22. No cargue la batería en exteriores.
23. No manipule el cargador, incluida la la clavija
del cargador, ni los terminales con las manos
mojadas.
Puesta en marcha de la herramienta
1. Asegúrese de que no haya niños ni otras per-
sonas en un rango de 15 metros (50 pies), y
cuide también que no haya animales alrededor
del área de trabajo. En caso contrario, inte-
rrumpa la operación de la herramienta.
2. Antes de usar la herramienta, revísela siem-
pre para una operación segura. Compruebe
la seguridad del cabezal de corte de nailon
y el protector, así como el gatillo interrup-
tor/palanca para un accionamiento fácil y
correcto. Revise que los mangos estén limpios
y secos, y compruebe el funcionamiento del
interruptor de encendido/apagado.
Table of contents
Languages:
Other Makita Trimmer manuals

Makita
Makita RT0702CX3J User manual

Makita
Makita DUH481 User manual

Makita
Makita GRU05 User manual

Makita
Makita DUH523RT User manual

Makita
Makita UH5580 User manual

Makita
Makita DUH483 User manual

Makita
Makita DUR365U User manual

Makita
Makita UH420D User manual

Makita
Makita UR100DSAE User manual

Makita
Makita DUR192L User manual

Makita
Makita 3709 User manual

Makita
Makita DUR181RF User manual

Makita
Makita DUN500W User manual

Makita
Makita DUH507SF User manual

Makita
Makita UH200D User manual

Makita
Makita UH3502 User manual

Makita
Makita HTR5600 User manual

Makita
Makita UH200D User manual

Makita
Makita DUR141 User manual

Makita
Makita 3712J User manual