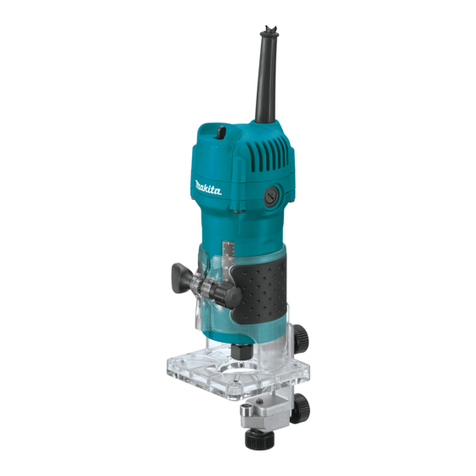
Makita DRT50 User manual

DRT50
EN Cordless Trimmer INSTRUCTION MANUAL 14
ZHCN 充电式木工修边机 使用说明书 25
ID Mesin Prol Tanpa Kabel PETUNJUK PENGGUNAAN 37
VI Máy Đánh Cạnh Cầm Tay
Hoạt Động Bằng Pin TÀI LIỆU HƯỚNG DẪN 50
TH 61

1
2
3
Fig.1
1
2
Fig.2
21
Fig.3
1
Fig.4
2
1
Fig.5
1
Fig.6
1
2
Fig.7
2
3
1
Fig.8
2

1
2
Fig.9
2
3
1
Fig.10
1
Fig.11
1
2
Fig.12
1
Fig.13
1
Fig.14
1
Fig.15
1
Fig.16
3

12
3
4
5
Fig.17
12
3
1
4
Fig.18
1
Fig.19
1
2
Fig.20
1
Fig.21
1
Fig.22
12
Fig.23
4

Fig.24
1
Fig.25
1
2
3
Fig.26
1
2
Fig.27
1
2
3
Fig.28
1
Fig.29
1
Fig.30
5

2
1
Fig.31
1
Fig.32
1
Fig.33
1
2
3
Fig.34
1
2
3
Fig.35
2
1
Fig.36
1
Fig.37
1
2
Fig.38
6

1
2
3
Fig.39
Fig.40
Fig.41
1
3
2
Fig.42
2
1
Fig.43
1
Fig.44
1
Fig.45
Fig.46
7

A
Fig.47
1
Fig.48
1
Fig.49
2
1
Fig.50
1
2
Fig.51
Fig.52
12
3
4
Fig.53
Fig.54
8

1
Fig.55
1
2
Fig.56
1
2
3
Fig.57
1
Fig.58
12
Fig.59
Fig.60
12
Fig.61
9

2
1
Fig.62
1
2
Fig.63
1
23
4
Fig.64
1
Fig.65
Fig.66
1
2
Fig.67
Fig.68
Fig.69
10

A
Fig.70
12
3
Fig.71
D
A
L1
L2
Fig.72
D
A
L1
L2
R
Fig.73
D
A
L1
L2
θ
Fig.74
D
A
L1
L2
L3
Fig.75
D
A
L1
L2
L3
L4
Fig.76
11

D
A1
A2
L1
L2
L3
R
Fig.77
D
A
θ
L1
L2
L3
Fig.78
D
A
L1
L2
R
Fig.79
D
A
L1
L2
Fig.80
D
A1
A2
L1
L2
L3
R
Fig.81
D
A1
A2
L1
L2
θ
Fig.82
D
A1
A2
A3
L1
L2
L3
R
Fig.83
D
A1
A2
A3
A4
L1
L2
L3
R
Fig.84
12

D
A1
A2
L1
L2
L3
R1
R2
Fig.85
13

14 ENGLISH
ENGLISH (Original instructions)
SPECIFICATIONS
Model: DRT50
Collet chuck capacity 6 mm, 8 mm, 1/4", or 3/8"
No load speed 10,000 - 30,000 min-1
Overall length 226 mm
Rated voltage D.C. 18 V
Net weight 1.8 - 2.1 kg
• Duetoourcontinuingprogramofresearchanddevelopment,thespecicationshereinaresubjecttochange
without notice.
• Specicationsandbatterycartridgemaydierfromcountrytocountry.
• Theweightmaydierdependingontheattachment(s),includingthebatterycartridge.Thelightestandheavi-
estcombinations,accordingtoEPTA-Procedure01/2014,areshowninthetable.
Applicable battery cartridge and charger
Battery cartridge BL1815N / BL1820B / BL1830B / BL1840B / BL1850B / BL1860B
Charger DC18RC/DC18RD/DC18RE/DC18SD/DC18SE/DC18SF/
DC18SH
• Someofthebatterycartridgesandchargerslistedabovemaynotbeavailabledependingonyourregionof
residence.
WARNING: Only use the battery cartridges and chargers listed above.Useofanyotherbatterycartridges
andchargersmaycauseinjuryand/orre.
Symbols
Thefollowingsshowthesymbolswhichmaybeused
fortheequipment.Besurethatyouunderstandtheir
meaningbeforeuse.
Read instruction manual.
Wearsafetyglasses.
Ni-MH
Li-ion
OnlyforEUcountries
Duetothepresenceofhazardouscom-
ponentsintheequipment,wasteelectrical
andelectronicequipment,accumulators
andbatteriesmayhaveanegativeimpact
on the environment and human health.
Donotdisposeofelectricalandelectronic
appliancesorbatterieswithhousehold
waste!
InaccordancewiththeEuropeanDirective
onwasteelectricalandelectronicequip-
mentandonaccumulatorsandbatteries
andwasteaccumulatorsandbatteries,
as well as their adaptation to national law,
wasteelectricalequipment,batteriesand
accumulatorsshouldbestoredseparately
and delivered to a separate collection point
formunicipalwaste,operatinginaccor-
dance with the regulations on environmen-
tal protection.
Thisisindicatedbythesymbolofthe
crossed-outwheeledbinplacedonthe
equipment.
Intended use
Thetoolisintendedforushtrimmingandprolingof
wood, plastic and similar materials.
SAFETY WARNINGS
General power tool safety warnings
WARNING: Read all safety warnings, instruc-
tions, illustrations and specications provided
with this power tool.Failuretofollowallinstructions
listedbelowmayresultinelectricshock,reand/or
seriousinjury.
Save all warnings and instruc-
tions for future reference.
Theterm“powertool”inthewarningsreferstoyour
mains-operated(corded)powertoolorbattery-operated
(cordless)powertool.
Work area safety
1. Keep work area clean and well lit. Cluttered or
dark areas invite accidents.
2. Do not operate power tools in explosive atmo-
spheres, such as in the presence of ammable
liquids, gases or dust.Powertoolscreatesparks
whichmayignitethedustorfumes.

15 ENGLISH
3. Keep children and bystanders away while
operating a power tool. Distractions can cause
you to lose control.
Electrical safety
1. Power tool plugs must match the outlet. Never
modify the plug in any way. Do not use any
adapter plugs with earthed (grounded) power
tools. Unmodiedplugsandmatchingoutletswill
reduceriskofelectricshock.
2. Avoid body contact with earthed or grounded
surfaces, such as pipes, radiators, ranges and
refrigerators.Thereisanincreasedriskofelec-
tricshockifyourbodyisearthedorgrounded.
3. Do not expose power tools to rain or wet con-
ditions. Water entering a power tool will increase
theriskofelectricshock.
4. Do not abuse the cord. Never use the cord for
carrying, pulling or unplugging the power tool.
Keep cord away from heat, oil, sharp edges
or moving parts. Damaged or entangled cords
increasetheriskofelectricshock.
5. When operating a power tool outdoors, use an
extension cord suitable for outdoor use.Useof
acordsuitableforoutdoorusereducestheriskof
electric shock.
6. If operating a power tool in a damp location
is unavoidable, use a residual current device
(RCD) protected supply.UseofanRCDreduces
theriskofelectricshock.
7. Power tools can produce electromagnetic
elds (EMF) that are not harmful to the user.
However,usersofpacemakersandothersimilar
medicaldevicesshouldcontactthemakeroftheir
deviceand/ordoctorforadvicebeforeoperating
this power tool.
Personal safety
1. Stay alert, watch what you are doing and use
common sense when operating a power tool.
Do not use a power tool while you are tired or
under the inuence of drugs, alcohol or med-
ication.Amomentofinattentionwhileoperating
powertoolsmayresultinseriouspersonalinjury.
2. Use personal protective equipment. Always
wear eye protection.Protectiveequipmentsuch
asadustmask,non-skidsafetyshoes,hardhator
hearingprotectionusedforappropriateconditions
willreducepersonalinjuries.
3. Prevent unintentional starting. Ensure the
switch is in the o-position before connecting
to power source and/or battery pack, picking
up or carrying the tool. Carrying power tools with
yourngerontheswitchorenergisingpowertools
that have the switch on invites accidents.
4. Remove any adjusting key or wrench before
turning the power tool on.Awrenchorakeyleft
attachedtoarotatingpartofthepowertoolmay
resultinpersonalinjury.
5. Do not overreach. Keep proper footing and
balance at all times.Thisenablesbettercontrol
ofthepowertoolinunexpectedsituations.
6. Dress properly. Do not wear loose clothing or
jewellery. Keep your hair and clothing away
from moving parts.Looseclothes,jewelleryor
longhaircanbecaughtinmovingparts.
7. If devices are provided for the connection of
dust extraction and collection facilities, ensure
these are connected and properly used.Useof
dustcollectioncanreducedust-relatedhazards.
8. Do not let familiarity gained from frequent use
of tools allow you to become complacent and
ignore tool safety principles.Acarelessaction
cancausesevereinjurywithinafractionofa
second.
9. Always wear protective goggles to protect
your eyes from injury when using power tools.
The goggles must comply with ANSI Z87.1 in
the USA, EN 166 in Europe, or AS/NZS 1336
in Australia/New Zealand. In Australia/New
Zealand, it is legally required to wear a face
shield to protect your face, too.
It is an employer's responsibility to enforce
the use of appropriate safety protective equip-
ments by the tool operators and by other per-
sons in the immediate working area.
Power tool use and care
1. Do not force the power tool. Use the correct
power tool for your application.Thecorrect
powertoolwilldothejobbetterandsaferatthe
rateforwhichitwasdesigned.
2. Do not use the power tool if the switch does
not turn it on and o.Anypowertoolthatcannot
becontrolledwiththeswitchisdangerousand
mustberepaired.
3. Disconnect the plug from the power source
and/or remove the battery pack, if detachable,
from the power tool before making any adjust-
ments, changing accessories, or storing power
tools.Suchpreventivesafetymeasuresreduce
theriskofstartingthepowertoolaccidentally.
4. Store idle power tools out of the reach of chil-
dren and do not allow persons unfamiliar with
the power tool or these instructions to operate
the power tool.Powertoolsaredangerousinthe
handsofuntrainedusers.
5. Maintain power tools and accessories. Check
for misalignment or binding of moving parts,
breakage of parts and any other condition that
may aect the power tool’s operation. If dam-
aged, have the power tool repaired before use.
Manyaccidentsarecausedbypoorlymaintained
power tools.
6. Keep cutting tools sharp and clean.Properly
maintained cutting tools with sharp cutting edges
arelesslikelytobindandareeasiertocontrol.

16 ENGLISH
7. Use the power tool, accessories and tool bits
etc. in accordance with these instructions, tak-
ing into account the working conditions and
the work to be performed.Useofthepowertool
foroperationsdierentfromthoseintendedcould
resultinahazardoussituation.
8. Keep handles and grasping surfaces dry,
clean and free from oil and grease.Slippery
handlesandgraspingsurfacesdonotallowfor
safehandlingandcontrolofthetoolinunexpected
situations.
9. When using the tool, do not wear cloth work
gloves which may be entangled.Theentangle-
mentofclothworkglovesinthemovingpartsmay
resultinpersonalinjury.
Battery tool use and care
1. Recharge only with the charger specied by
the manufacturer.Achargerthatissuitablefor
onetypeofbatterypackmaycreateariskofre
whenusedwithanotherbatterypack.
2. Use power tools only with specically desig-
nated battery packs.Useofanyotherbattery
packsmaycreateariskofinjuryandre.
3. When battery pack is not in use, keep it away
from other metal objects, like paper clips,
coins, keys, nails, screws or other small metal
objects, that can make a connection from one
terminal to another.Shortingthebatterytermi-
nalstogethermaycauseburnsorare.
4. Under abusive conditions, liquid may be
ejected from the battery; avoid contact. If con-
tact accidentally occurs, ush with water. If
liquid contacts eyes, additionally seek medical
help.Liquidejectedfromthebatterymaycause
irritationorburns.
5. Do not use a battery pack or tool that is dam-
aged or modied.Damagedormodiedbatteries
mayexhibitunpredictablebehaviourresultingin
re,explosionorriskofinjury.
6. Do not expose a battery pack or tool to re or
excessive temperature.Exposuretoreortem-
peratureabove130°Cmaycauseexplosion.
7. Follow all charging instructions and do not
charge the battery pack or tool outside the
temperature range specied in the instruc-
tions. Charging improperly or at temperatures
outsidethespeciedrangemaydamagethe
batteryandincreasetheriskofre.
Service
1. Have your power tool serviced by a qualied
repair person using only identical replacement
parts.Thiswillensurethatthesafetyofthepower
tool is maintained.
2. Never service damaged battery packs.Service
ofbatterypacksshouldonlybeperformedbythe
manufacturerorauthorizedserviceproviders.
3. Follow instruction for lubricating and chang-
ing accessories.
Cordless trimmer safety warnings
1. Use clamps or another practical way to secure
and support the workpiece to a stable plat-
form.Holdingtheworkbyyourhandoragainst
thebodyleavesitunstableandmayleadtolossof
control.
2. Wear hearing protection during extended
period of operation.
3. Handle the trimmer bits very carefully.
4. Check the trimmer bit carefully for cracks or
damage before operation. Replace cracked or
damaged bit immediately.
5. Avoid cutting nails. Inspect for and remove all
nails from the workpiece before operation.
6. Hold the tool rmly.
7. Keep hands away from rotating parts.
8. Make sure the trimmer bit is not contacting the
workpiece before the switch is turned on.
9. Before using the tool on an actual workpiece,
let it run for a while. Watch for vibration or
wobbling that could indicate improperly
installed bit.
10. Be careful of the trimmer bit rotating direction
and the feed direction.
11. Do not leave the tool running. Operate the tool
only when hand-held.
12. Always switch o and wait for the trimmer bit
to come to a complete stop before removing
the tool from workpiece.
13. Do not touch the trimmer bit immediately after
operation; it may be extremely hot and could
burn your skin.
14. Do not smear the base carelessly with thin-
ner, gasoline, oil or the like. They may cause
cracks in the base.
15. Use trimmer bits of the correct shank diameter
suitable for the speed of the tool.
16. Some material contains chemicals which may
be toxic. Take caution to prevent dust inhala-
tion and skin contact. Follow material supplier
safety data.
17. Always use the correct dust mask/respirator
for the material and application you are work-
ing with.
SAVE THESE INSTRUCTIONS.
WARNING: DO NOT let comfort or familiarity
with product (gained from repeated use) replace
strict adherence to safety rules for the subject
product. MISUSE or failure to follow the safety
rules stated in this instruction manual may cause
serious personal injury.

17 ENGLISH
Important safety instructions for
battery cartridge
1. Before using battery cartridge, read all instruc-
tions and cautionary markings on (1) battery
charger, (2) battery, and (3) product using
battery.
2. Do not disassemble or tamper with the battery
cartridge.Itmayresultinare,excessiveheat,
orexplosion.
3. If operating time has become excessively
shorter, stop operating immediately. It may
result in a risk of overheating, possible burns
and even an explosion.
4. If electrolyte gets into your eyes, rinse them
out with clear water and seek medical atten-
tion right away. It may result in loss of your
eyesight.
5. Do not short the battery cartridge:
(1) Do not touch the terminals with any con-
ductive material.
(2) Avoid storing battery cartridge in a con-
tainer with other metal objects such as
nails, coins, etc.
(3) Do not expose battery cartridge to water
or rain.
A battery short can cause a large current
ow, overheating, possible burns and even a
breakdown.
6. Do not store and use the tool and battery car-
tridge in locations where the temperature may
reach or exceed 50 °C (122 °F).
7. Do not incinerate the battery cartridge even if
it is severely damaged or is completely worn
out. The battery cartridge can explode in a re.
8. Do not nail, cut, crush, throw, drop the battery
cartridge, or hit against a hard object to the
battery cartridge.Suchconductmayresultina
re,excessiveheat,orexplosion.
9. Do not use a damaged battery.
10. The contained lithium-ion batteries are subject
to the Dangerous Goods Legislation require-
ments.
Forcommercialtransportse.g.bythirdparties,
forwardingagents,specialrequirementonpack-
agingandlabelingmustbeobserved.
Forpreparationoftheitembeingshipped,consult-
inganexpertforhazardousmaterialisrequired.
Pleasealsoobservepossiblymoredetailed
national regulations.
Tapeormaskoopencontactsandpackupthe
batteryinsuchamannerthatitcannotmove
around in the packaging.
11. When disposing the battery cartridge, remove
it from the tool and dispose of it in a safe
place. Follow your local regulations relating to
disposal of battery.
12. Use the batteries only with the products
specied by Makita.Installingthebatteriesto
non-compliantproductsmayresultinare,exces-
siveheat,explosion,orleakofelectrolyte.
13. If the tool is not used for a long period of time,
the battery must be removed from the tool.
14. During and after use, the battery cartridge may
take on heat which can cause burns or low
temperature burns. Pay attention to the han-
dling of hot battery cartridges.
15. Do not touch the terminal of the tool imme-
diately after use as it may get hot enough to
cause burns.
16. Do not allow chips, dust, or soil stuck into the
terminals, holes, and grooves of the battery
cartridge.Itmayresultinpoorperformanceor
breakdownofthetoolorbatterycartridge.
17. Unless the tool supports the use near
high-voltage electrical power lines, do not use
the battery cartridge near high-voltage electri-
cal power lines.Itmayresultinamalfunctionor
breakdownofthetoolorbatterycartridge.
18. Keep the battery away from children.
SAVE THESE INSTRUCTIONS.
CAUTION: Only use genuine Makita batteries.
Useofnon-genuineMakitabatteries,orbatteriesthat
havebeenaltered,mayresultinthebatterybursting
causingres,personalinjuryanddamage.Itwill
alsovoidtheMakitawarrantyfortheMakitatooland
charger.
Tips for maintaining maximum
battery life
1. Charge the battery cartridge before completely
discharged. Always stop tool operation and
charge the battery cartridge when you notice
less tool power.
2. Never recharge a fully charged battery car-
tridge. Overcharging shortens the battery
service life.
3. Charge the battery cartridge with room tem-
perature at 10 °C - 40 °C (50 °F - 104 °F). Let
a hot battery cartridge cool down before
charging it.
4. When not using the battery cartridge, remove
it from the tool or the charger.
5. Charge the battery cartridge if you do not use
it for a long period (more than six months).

18 ENGLISH
FUNCTIONAL
DESCRIPTION
CAUTION: Always be sure that the tool is
switched o and the battery cartridge is removed
before adjusting or checking function on the tool.
Installing or removing battery
cartridge
CAUTION: Always switch o the tool before
installing or removing of the battery cartridge.
CAUTION: Hold the tool and the battery car-
tridge rmly when installing or removing battery
cartridge.Failuretoholdthetoolandthebattery
cartridgermlymaycausethemtoslipoyourhands
andresultindamagetothetoolandbatterycartridge
andapersonalinjury.
►Fig.1: 1. Red indicator 2. Button 3. Battery cartridge
Toremovethebatterycartridge,slideitfromthetool
whileslidingthebuttononthefrontofthecartridge.
Toinstallthebatterycartridge,alignthetongueonthe
batterycartridgewiththegrooveinthehousingandslip
it into place. Insert it all the way until it locks in place
withalittleclick.Ifyoucanseetheredindicatoronthe
uppersideofthebutton,itisnotlockedcompletely.
CAUTION: Always install the battery cartridge
fully until the red indicator cannot be seen.Ifnot,
itmayaccidentallyfalloutofthetool,causinginjuryto
you or someone around you.
CAUTION: Do not install the battery cartridge
forcibly.Ifthecartridgedoesnotslideineasily,itis
notbeinginsertedcorrectly.
Indicating the remaining battery
capacity
Only for battery cartridges with the indicator
►Fig.2: 1. Indicator lamps 2.Checkbutton
Pressthecheckbuttononthebatterycartridgetoindi-
catetheremainingbatterycapacity.Theindicatorlamps
lightupforafewseconds.
Indicator lamps Remaining
capacity
Lighted O Blinking
75% to 100%
50% to 75%
25% to 50%
0% to 25%
Charge the
battery.
Thebattery
may have
malfunctioned.
NOTE:Dependingontheconditionsofuseandthe
ambienttemperature,theindicationmaydierslightly
fromtheactualcapacity.
NOTE:Therst(farleft)indicatorlampwillblinkwhen
thebatteryprotectionsystemworks.
Tool / battery protection system
Thetoolisequippedwithatool/batteryprotectionsys-
tem.Thissystemautomaticallycutsopowertothe
motortoextendtoolandbatterylife.Thetoolwillauto-
maticallystopduringoperationifthetoolorbatteryis
placedunderoneofthefollowingconditions:
Overload protection
Whenthebatteryisoperatedinamannerthatcauses
ittodrawanabnormallyhighcurrent,thetoolautomat-
ically stops without any indication. In this situation, turn
thetooloandstoptheapplicationthatcausedthetool
tobecomeoverloaded.Thenturnthetoolontorestart.
Overheat protection
Whenthetoolorbatteryisoverheated,thetoolstops
automaticallyandthelampblinks.Inthiscase,letthe
toolandbatterycoolbeforeturningthetoolonagain.
Overdischarge protection
Whenthebatterycapacityisnotenough,thetoolstops
automatically.Inthiscase,removethebatteryfromthe
toolandchargethebattery.
Switch action
Toturnonthetool,pressthelock/unlockbutton.The
toolturnsintothestandbymode.Tostartthetool,press
thestart/stopbuttoninthestandbymode.Tostopthe
tool,pressthestart/stopbuttonagain.Thetoolturns
intothestandbymode.Toturnothetool,pressthe
lock/unlockbuttoninthestandbymode.
►Fig.3: 1.Lock/unlockbutton2.Start/stopbutton

19 ENGLISH
NOTE:Ifthetoolisleftfor10secondswithoutany
operationinthestandbymode,thetoolautomatically
turnsoandthelampgoeso.
NOTE:Youcanalsostopandturnothetoolby
pressingthelock/unlockbuttonwhilethetoolis
operating.
Lighting up the front lamp
CAUTION: Do not look in the light or see the
source of light directly.
Toturnonthelamp,pressthelock/unlockbutton.To
turnothelamp,pressthelock/unlockbuttonagain.
NOTICE: When the tool is overheated, the lamp
ickers. Cool down the tool fully before operating
the tool again.
NOTE:Useadryclothtowipethedirtothelensof
thelamp.Becarefulnottoscratchthelensoflamp,or
it may lower the illumination.
Speed adjusting dial
Therotationspeedofthetoolcanbechangedbyturn-
ingthespeedadjustingdial.Thetablebelowshows
thenumberonthedialandthecorrespondingrotation
speed.
►Fig.4: 1.Speedadjustingdial
Number Speed
110,000 min-1
215,000 min-1
320,000 min-1
425,000 min-1
530,000 min-1
NOTICE: If the tool is operated continuously at
low speed for a long time, the motor will get over-
loaded, resulting in tool malfunction.
NOTICE: When changing the speed dial from “5”
to “1”, turn the dial counterclockwise. Do not turn
the dial clockwise forcibly.
Electronic function
Thetoolisequippedwiththeelectronicfunctionsfor
easy operation.
• Constantspeedcontrol
Thespeedcontrolfunctionprovidestheconstant
rotationspeedregardlessofloadconditions.
• Softstart
Thesoft-startfunctionminimizesstart-upshock,
and makes the tool start smoothly.
Adjusting cutting depth
Toadjustthecuttingdepth,openthelocklever,then
movethetoolbaseupordownbyturningtheadjusting
screw.Aftertheadjustment,closethelockleverrmly.
►Fig.5: 1. Lock lever 2.Adjustingscrew
NOTICE: If the tool is not secured after closing
the lock lever, tighten the hex nut, and then close
the lock lever.
►Fig.6: 1.Hexnut
Adjusting cutting depth with the
plunge base
Optional accessory
1. Placethetoolontheatsurface.
2. Selectthestopperscrewbyrotatingthestopper
base.
►Fig.7: 1.Stopperscrew2.Stopperbase
3. Loosenthestopperpolexingnut,thenpullupthe
stopperpolewhilepressingthefeedbutton.
►Fig.8: 1.Stopperpole2.Fixingnut3.Feedbutton
4. Pushdownthetooluntilthetipofthetrimmerbit
touchestheatsurface,andthenturnthexingleverto
secure the tool.
►Fig.9: 1.Fixinglever2.Trimmerbit
5. Pressdownthestopperpolewhilepressingthe
feedbuttonuntilitcontactsthestopperscrew.
►Fig.10: 1.Stopperpole2.Stopperscrew3.Feed
button
6. Slidethedepthpointersothatthepointerindi-
cates“0”onthescale.
►Fig.11: 1. Depth pointer
7. Adjustthecuttingdepthbypullingupthestopper
polewhilepressingthefeedbutton.
►Fig.12: 1.Stopperpole2.Feedbutton
8. Toperformneadjustmentofthecuttingdepth,
turnthedialonthestopperpolesothatitindicates“0”.
►Fig.13: 1. Dial
9. Turntheheadofthestopperpoletoobtainthe
desireddepth.Toincreasethedepth,turnthehead
counterclockwise.Todecreasethedepth,turnthehead
clockwise.
►Fig.14: 1.Headofthestopperpole
10. Tightenthestopperpolexingnut.
►Fig.15: 1.Fixingnut
11. Releasethexinglever.
►Fig.16: 1.Fixinglever

20 ENGLISH
ASSEMBLY
CAUTION: Always be sure that the tool is
switched o and the battery cartridge is removed
before carrying out any work on the tool.
Installing or removing trimmer bit
NOTICE: Do not tighten the collet nut without
inserting the bit.Thecolletconemaybreak.
Insertthetrimmerbitallthewayintothecolletcone.
Presstheshaftlockandtightenthecolletnutwiththe
wrench or tighten the collet nut securely with the two
wrenches.Toremovethebit,followtheinstallation
procedure in reverse.
►Fig.17: 1.Shaftlock2. Loosen 3.Tighten
4. Wrench 5. Collet nut
►Fig.18: 1. Wrench 2. Loosen 3.Tighten4. Collet nut
NOTE:Theshaftlockmaynotreturntotheoriginal
position when you tighten the collet nut at the instal-
lationofthetrimmerbit.Theshaftlockreturnstothe
original position when you start the tool.
►Fig.19: 1.Shaftlock
Changing the collet cone
CAUTION: Use the correct size collet cone for
the trimmer bit which you intended to use.
CAUTION: Do not tighten the collet nut with-
out installing a trimmer bit, or the collet cone may
break.
1. Loosen the collet nut and remove.
2. Replace the installed collet cone with desired
collet cone.
3. Reinstall collet nut.
►Fig.20: 1. Collet cone 2. Collet nut
Installing or removing the trimmer
base
1. Openthelockleverofthetrimmerbase,then
insertthetoolintothetrimmerbasealigningthegroove
onthetoolwiththeprotrusiononthetrimmerbase.
►Fig.21: 1. Lock lever
NOTE:Youcanusethetrimmerbase(resin)asan
optionalaccessoryasshowninthegure.When
usingthetrimmerbase(resin),loosenortightenthe
thumbnutinsteadofopeningorclosingthelocklever.
►Fig.22: 1.Thumbnut
2. Close the lock lever.
3. Attachthedustnozzletothetrimmerbase,and
thentightenthethumbscrew.
►Fig.23: 1.Dustnozzle2.Thumbscrew
►Fig.24
Toremovethebase,followtheinstallationprocedure
in reverse.
CAUTION: When using the tool with the trim-
mer base, be sure to install the dust nozzle on the
trimmer base.
NOTE:Insomecountries,thedustnozzlemaynotbe
included in the tool package as standard accessory.
Installing or removing the tilt base
Optional accessory
1. Openthelockleverofthetiltbase,theninsertthe
toolintothetiltbasealigningthegrooveonthetoolwith
theprotrusiononthetiltbase.
►Fig.25: 1. Lock lever
2. Close the lock lever.
Toremovethebase,followtheinstallationprocedure
in reverse.
Installing or removing the oset
base
Optional accessory
1. Presstheshaftlock,thenloosenthecolletnut.
►Fig.26: 1. Collet nut 2.Shaftlock3. Wrench
2. Remove the collet nut and the collet cone.
►Fig.27: 1. Collet nut 2. Collet cone
3. Installthepulleyonthetoolbypressingtheshaft
lock and tightening the pulley with the wrench.
►Fig.28: 1. Wrench 2.Pulley3.Shaftlock
4. Loosenthescrewsonthebaseplate,andthen
removethebaseplate.
►Fig.29: 1. Base plate
5. Openthelockleveroftheosetbase,theninsert
thetoolintotheosetbase.
►Fig.30: 1. Lock lever
6. Mountthebelttothepulleybyrotatingthebelt
manually.
►Fig.31: 1.Pulley2. Belt
7. Close the lock lever.
►Fig.32: 1. Lock lever
8. Attachthebaseplatebytighteningthescrews.
►Fig.33: 1. Base plate
9. Insertthecolletconeandthetrimmerbitintothe
osetbase,andthentightenthecolletnut.
►Fig.34: 1.Trimmerbit2. Collet nut 3. Collet cone
10. Insertthehexwrenchintotheholeoftheoset
base,andthentightenthecolletnutwiththewrench.
►Fig.35: 1. Collet nut 2. Wrench 3.Hexwrench
Toremovethebase,followtheinstallationprocedure
in reverse.
NOTE:Youcanalsomountthebelttothepulleywith-
outremovingthebaseplateasshowninthegure.
►Fig.36: 1.Pulley2. Belt
Other manuals for DRT50
11
Table of contents
Languages:
Other Makita Trimmer manuals

Makita
Makita DUR190U User manual

Makita
Makita DUR187LZ User manual

Makita
Makita UH4261 User manual
Makita
Makita UR101C User manual

Makita
Makita UR002G User manual

Makita
Makita UH200D Manual

Makita
Makita GTR01 User manual

Makita
Makita BBC231U User manual

Makita
Makita HTR5600 User manual

Makita
Makita UH4261 Manual

Makita
Makita EM4351UH User guide

Makita
Makita M372 User manual

Makita
Makita EM4351UH User guide

Makita
Makita DUR369A User manual

Makita
Makita EN7350SH Instruction Manual

Makita
Makita LXT XRU16 Series User manual

Makita
Makita UH013G User manual

Makita
Makita DUH501 User manual

Makita
Makita DUH506 User manual
Makita
Makita DUR365U User manual