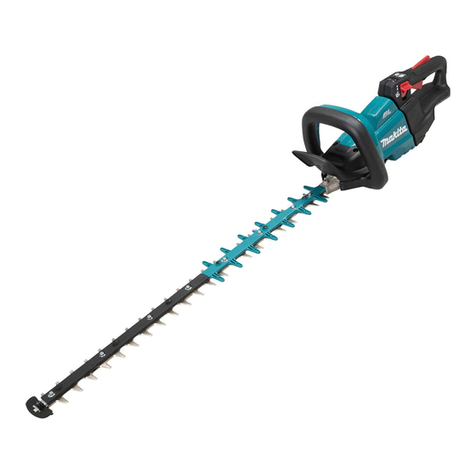
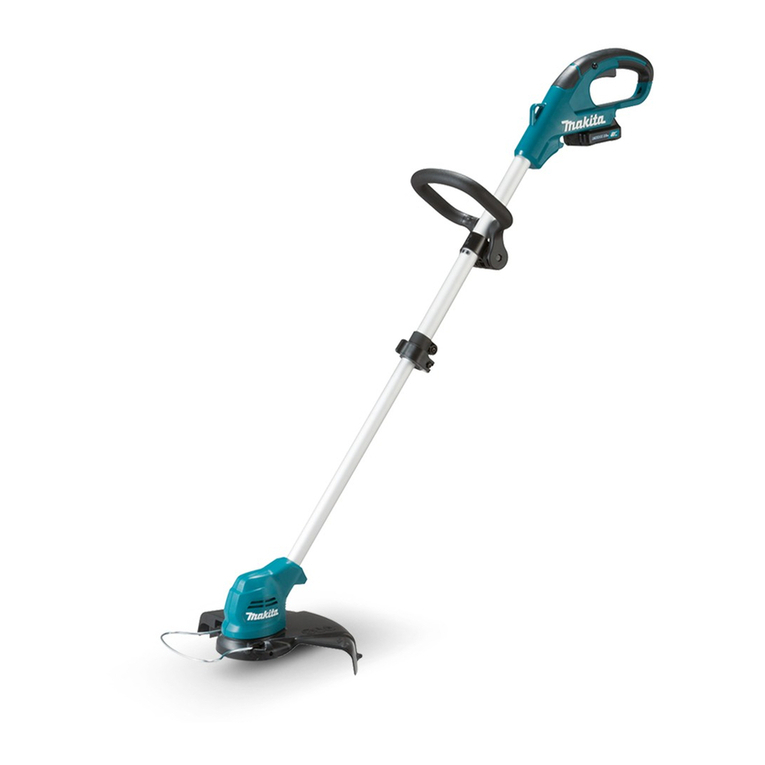
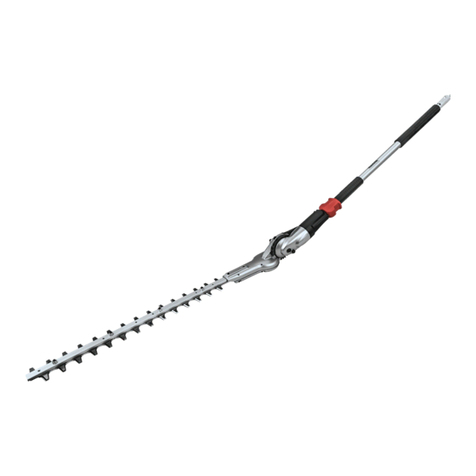
Makita UR100DSAE User manual

UR100D
EN Cordless Grass Trimmer INSTRUCTION MANUAL 8
FR Coupe Herbe Sans Fil MANUEL D’INSTRUCTIONS 18
DE Akku-Rasentrimmer BETRIEBSANLEITUNG 29
IT Tagliabordi a batteria ISTRUZIONI PER L’USO 40
NL Accugrastrimmer GEBRUIKSAANWIJZING 51
ES Cortador Inalámbrico de
Pasto
MANUAL DE
INSTRUCCIONES 62
PT TESOURA PARA GRAMA A
BATERIA MANUAL DE INSTRUÇÕES 73
DA Akku græstrimmer BRUGSANVISNING 84
EL Φορητό κουρευτικό γκαζόν ΕΓΧΕΙΡΙΔΙΟ ΟΔΗΓΙΩΝ 94
TR Akülü Yan Tırpan KULLANMA KILAVUZU 105

Fig.1
Fig.2
Fig.3
1
2
3
4
5
6
7
8
9
10
12
11
Fig.4
1
2
4
5
6
7
8
9
10
3
11
12
13
Fig.5
1
2
3
Fig.6
1
2
Fig.7
1
2
Fig.8
2

1
Fig.9
1
2
Fig.10
1
2
Fig.11
1
Fig.12
1
Fig.13
1
Fig.14
1
2
3
Fig.15
Fig.16
3

1
Fig.17
1
Fig.18
1
Fig.19
2
1
Fig.20
3
2
1
Fig.21
1
Fig.22
3
2
1
Fig.23
1
Fig.24
4

1
Fig.25
1
Fig.26
Fig.27
Fig.28
Fig.29
Fig.30
1
Fig.31
5

1
Fig.32
1
Fig.33
1
Fig.34
1
2
Fig.35
1
Fig.36
1
2
Fig.37
6

(1)
(2)
Fig.38
7

8ENGLISH
ENGLISH (Original instructions)
SPECIFICATIONS
Model: UR100D
No load speed
(without cutting tool)
10,000 min-1
Overall length
(without cutting tool)
835 - 1,185 mm
Nylon cord diameter 1.65 mm
Applicable cutting tool and
cutting diameter
Nylon cutting head
(P/N 198852-2 / 198853-0)
260 mm
Plastic blade head
(P/N 198847-5 / 198848-3)
230 mm
Rated voltage D.C. 10.8 V - 12 V max
Standard battery cartridge BL1015 / BL1016 / BL1020B / BL1021B / BL1040B / BL1041B
Net weight 1.9 - 2.1 kg
• Duetoourcontinuingprogramofresearchanddevelopment,thespecicationshereinaresubjecttochange
without notice.
• Specicationsandbatterycartridgemaydifferfromcountrytocountry.
• Theweightmaydifferdependingontheattachment(s),includingthebatterycartridge.Thelightestandheavi-
estcombination,accordingtoEPTA-Procedure01/2014,areshowninthetable.
Noise
Applicable standard : EN50636
Type Sound pressure level average
LPA(dB(A)) Uncertainty K (dB(A))
Nylon cutting head 74 0.74
Plastic blade 75.8 2.84
• Evenifthesoundpressurelevellistedaboveis80dB(A)orless,thelevelunderworkingmayexceed80dB
(A). Wear ear protection.
Vibration
Applicable standard : EN50636
Type Lefthand Right hand
ah,W (m/s2)
Uncertainty K (m/s2)
ah,W (m/s2)
Uncertainty K (m/s2)
Nylon cutting head 2.5 0.1 2.5 0.5
Plastic blade 2.5 0.1 2.5 0.1
NOTE:Thedeclaredvibrationemissionvaluehasbeenmeasuredinaccordancewiththestandardtestmethod
andmaybeusedforcomparingonetoolwithanother.
NOTE:Thedeclaredvibrationemissionvaluemayalsobeusedinapreliminaryassessmentofexposure.
WARNING:Thevibrationemissionduringactualuseofthepowertoolcandifferfromthedeclaredemission
value depending on the ways in which the tool is used.
WARNING:Besuretoidentifysafetymeasurestoprotecttheoperatorthatarebasedonanestimationof
exposureintheactualconditionsofuse(takingaccountofallpartsoftheoperatingcyclesuchasthetimeswhen
thetoolisswitchedoffandwhenitisrunningidleinadditiontothetriggertime).

9ENGLISH
Symbols
Thefollowingshowthesymbolsusedfortheequip-
ment.Besurethatyouunderstandtheirmeaningbefore
use.
Takeparticularcareandattention.
Read instruction manual.
Danger;beawareofthrownobjects.
Thedistancebetweenthetooland
bystanders must be at least 15 m.
360°
Keep bystanders away.
15m(50FT)Keep distance at least 15 m.
Wear a helmet, goggles and ear protection.
Wear protective gloves.
Wear sturdy boots with nonslip soles.
Steeltoedsafetybootsarerecommended.
Do not expose to moisture.
Never use metal blade.
Ni-MH
Li-ion
OnlyforEUcountries
Donotdisposeofelectricequipmentor
battery pack together with household
wastematerial!Inobservanceofthe
European Directives, on Waste Electric
andElectronicEquipmentandBatteries
and Accumulators and Waste Batteries and
Accumulators and their implementation
in accordance with national laws, electric
equipmentandbatteriesandbattery
pack(s)thathavereachedtheendof
theirlifemustbecollectedseparatelyand
returned to an environmentally compatible
recyclingfacility.
EC Declaration of Conformity
For European countries only
TheECdeclarationofconformityisincludedasAnnexA
to this instruction manual.
SAFETY WARNINGS
IMPORTANT SAFETY INSTRUCTIONS
WARNING: Read all safety warnings and
all instructions. Failuretofollowthewarningsand
instructionsmayresultinelectricshock,reand/or
seriousinjury.
Save all warnings and instruc-
tions for future reference.
1. Be familiar with the controls and proper use of
the equipment.
2. Cutting elements continue to rotate after the
motor is switched off.
3. Never allow children or people unfamiliar with
the instructions to use the machine. Local reg-
ulations may restrict the age of the operator.
4. Stop using the machine while people, espe-
cially children, or pets are nearby.
5. Only use the machine in daylight or good
articial light. Avoid using the machine in bad
weather conditions especially when there is a
risk of lightning.
6. Before using the machine and after any
impact, check for signs of wear or damage and
repair as necessary.
7. Take care against injury from any device
tted for trimming the lament line length.
After extending new cutter line always return
the machine to its normal operating position
before switching on.
8. Never t metal cutting elements.
9. This appliance is not intended for use by
persons (including children) with reduced
physical, sensory or mental capabilities, or
lack of experience and knowledge, unless they
have been given supervision or instruction
concerning use of the appliance by a person
responsible for their safety. Children should be
supervised to ensure that they do not play with
the appliance.
10. Use the tool with the utmost care and
attention.
11. Operate the tool only if you are in good phys-
ical condition. Perform all work calmly and
carefully. Use common sense and keep in mind
that the operator or user is responsible for
accidents or hazards occurring to other people
or their property.
12. Never operate the tool when tired, feeling ill or
under the inuence of alcohol or drugs.
13. The tool should be switched off immediately if
it shows any signs of unusual operation.
14. Keep ngers away from switch trigger when
not operating the tool and when moving from
one operating position to another.
Intended use of the tool
1. Use right tool. The cordless grass trimmer is
only intended for cutting grass, light weeds. It
should not be used for any other purpose such
as hedge cutting as this may cause injury.
Personal protective equipment
►Fig.1
►Fig.2
1. Dress Properly. The clothing worn should be
functional and appropriate, i.e. it should be
tight-tting but not cause hindrance. Do not
wear either jewelry or clothing which could
become entangled with high grass. Wear pro-
tective hair covering to contain long hair.

10 ENGLISH
2. When using the tool, always wear sturdy shoes
with a non-slip sole. This protects against
injuries and ensures a good footing.
3. Always wear protective goggles to protect
your eyes from injury when using power tools.
The goggles must comply with ANSI Z87.1 in
the USA, EN 166 in Europe, or AS/NZS 1336
in Australia/New Zealand. In Australia/New
Zealand, it is legally required to wear a face
shield to protect your face, too.
It is an employer's responsibility to enforce
the use of appropriate safety protective equip-
ments by the tool operators and by other per-
sons in the immediate working area.
Electrical and battery safety
1. Avoid dangerous environment. Don't use the
tool in damp or wet locations or expose it to
rain. Water entering the tool will increase the
risk of electric shock.
2. Recharge only with the charger specied by
the manufacturer. A charger that is suitable for
one type of battery pack may create a risk of
re when used with another battery pack.
3. Use power tools only with specically desig-
nated battery packs. Use of any other battery
packs may create a risk of injury and re.
4. When battery pack is not in use, keep it away
from other metal objects, like paper clips,
coins, keys, nails, screws or other small metal
objects, that can make a connection from one
terminal to another. Shorting the battery termi-
nals together may cause burns or a re.
5. Under abusive conditions, liquid may be
ejected from the battery; avoid contact. If con-
tact accidentally occurs, ush with water. If
liquid contacts eyes, seek medical help. Liquid
ejected from the battery may cause irritation or
burns.
6. Do not dispose of the battery(ies) in a re. The
cell may explode. Check with local codes for
possible special disposal instructions.
7. Do not open or mutilate the battery(ies).
Released electrolyte is corrosive and may
cause damage to the eyes or skin. It may be
toxic if swallowed.
8. Do not charge battery in rain, or in wet
locations.
Starting up the tool
►Fig.3
1. Make sure that there are no children or other
people within a working range of 15 meters
(50 ft), also pay attention to any animals in the
working vicinity. Otherwise stop using the tool.
2.
Before use always check that the tool is safe for
operation. Check the security of the cutting tool
and the guard and the switch trigger/lever for
easy and proper action. Check for clean and dry
handles and test the on/off function of the switch.
3.
Check damaged parts before further use of
the tool. A guard or other part that is damaged
should be carefully checked to determine
that it will operate properly and perform its
intended function. Check for alignment of mov-
ing parts, binding of moving parts, breakage of
parts, mounting, and any other condition that
may affect its operation. A guard or other part
that is damaged should be properly repaired
or replaced by our authorized service center
unless indicated elsewhere in this manual.
4. Switch on the motor only when hands and feet
are away from the cutting tool.
5. Before starting make sure that the cutting
tool has no contact with hard objects such as
branches, stones etc. as the cutting tool will
revolve when starting.
6. Make sure there are no electrical cables, water
pipes, gas pipes etc. that could cause a hazard
if damaged by use of the tool.
Method of operation
1. Never operate the machine with damaged
guards or without the guards in place.
2. Only use the tool in good light and visibility.
During the winter season beware of slippery
or wet areas, ice and snow (risk of slipping).
Always ensure a safe footing.
3. Take care against injury to feet and hands from
the cutting tool.
4. Keep hands and feet away from the cutting
means at all times and especially when switch-
ing on the motor.
5. Never cut above waist height.
6. Never stand on a ladder and run the tool.
7. Never work on unstable surfaces.
8. Don't overreach. Keep proper footing and
balance at all times.
9. Remove sand, stones, nails etc. found within
the working range. Foreign particles may
damage the cutting tool and can cause to be
thrown away, resulting in a serious injury.
10. Should the cutting tool hit stones or other hard
objects, immediately switch off the motor and
inspect the cutting tool.
11. Before commencing cutting, the cutting tool
must have reached full working speed.
12. During operation always hold the tool with
both hands. Never hold the tool with one hand
during use. Always ensure a safe footing.
13. All protective equipment such as guards
supplied with the tool must be used during
operation.
11 ENGLISH
14. Except in case of emergency, never drop
or cast the tool to the ground or this may
severely damage the tool.
15. Never drag the tool on the ground when mov-
ing from place to place, the tool may become
damaged if moved in this manner.
16. Always remove the battery cartridge from the
tool:
— whenever leaving the tool unattended;
— before clearing a blockage;
— before checking, cleaning or working on
the tool;
— before making any adjustments, chang-
ing accessories or storing;
— whenever the tool starts vibrating
unusually;
— whenever transporting the tool.
17. Don't force the tool. It will do the job better and
with less likelihood of a risk of injury at the
rate for which it was designed.
18. Do not operate power tools in explosive atmo-
spheres, such as in the presence of ammable
liquids, gases or dust. Power tools create sparks
whichmayignitethedustorfumes.
19. Take a rest to prevent loss of control caused
by fatigue. We recommend to take a 10 to
20-minute rest every hour.
20. Do not use the tool on steep slopes.
21. The shoulder harness must be used during
operation, if supplied with the tool.
Maintenance instructions
1. The condition of the cutting tool, protec-
tive devices and shoulder harness must be
checked before commencing work.
2.
Turn off the motor and remove the battery
cartridge before carrying out maintenance,
replacing the cutting tool and cleaning the tool.
3. After use, disconnect the battery cartridge
from the tool and check for damage.
4. Check for loose fasteners and damaged parts
such as nearly halfway cut-off state in the
cutting tool.
5. When not in use store the equipment in a dry
location that is locked up or out of children's
reach.
6. Use only the manufacturer's recommended
replacement parts and accessories.
7. Always ensure that ventilation openings are
kept clear of debris.
8. Inspect and maintain the tool regularly, espe-
cially before/after use. Have the tool repaired
only by our authorized service center.
9. Keep handles dry, clean and free from oil and
grease.
SAVE THESE INSTRUCTIONS.
WARNING: DO NOT let comfort or familiarity
with product (gained from repeated use) replace
strict adherence to safety rules for the subject
product. MISUSE or failure to follow the safety
rules stated in this instruction manual may cause
serious personal injury.
Important safety instructions for
battery cartridge
1. Before using battery cartridge, read all instruc-
tions and cautionary markings on (1) battery
charger, (2) battery, and (3) product using
battery.
2. Do not disassemble battery cartridge.
3. If operating time has become excessively
shorter, stop operating immediately. It may
result in a risk of overheating, possible burns
and even an explosion.
4. If electrolyte gets into your eyes, rinse them
out with clear water and seek medical atten-
tion right away. It may result in loss of your
eyesight.
5. Do not short the battery cartridge:
(1) Do not touch the terminals with any con-
ductive material.
(2) Avoid storing battery cartridge in a con-
tainer with other metal objects such as
nails, coins, etc.
(3) Do not expose battery cartridge to water
or rain.
A battery short can cause a large current
ow, overheating, possible burns and even a
breakdown.
6. Do not store the tool and battery cartridge in
locations where the temperature may reach or
exceed 50 °C (122 °F).
7. Do not incinerate the battery cartridge even if
it is severely damaged or is completely worn
out. The battery cartridge can explode in a re.
8. Be careful not to drop or strike battery.
9. Do not use a damaged battery.
10. The contained lithium-ion batteries are subject
to the Dangerous Goods Legislation require-
ments.
For commercial transports e.g. by third parties,
forwardingagents,specialrequirementonpack-
aging and labeling must be observed.
Forpreparationoftheitembeingshipped,consult-
inganexpertforhazardousmaterialisrequired.
Please also observe possibly more detailed
national regulations.
Tapeormaskoffopencontactsandpackupthe
battery in such a manner that it cannot move
around in the packaging.
11. Follow your local regulations relating to dis-
posal of battery.
12. Use the batteries only with the products
specied by Makita. Installing the batteries to
non-compliantproductsmayresultinare,exces-
siveheat,explosion,orleakofelectrolyte.
SAVE THESE INSTRUCTIONS.
CAUTION: Only use genuine Makita batteries.
Useofnon-genuineMakitabatteries,orbatteriesthat
have been altered, may result in the battery bursting
causingres,personalinjuryanddamage.Itwill
alsovoidtheMakitawarrantyfortheMakitatooland
charger.

12 ENGLISH
Tips for maintaining maximum
battery life
1. Charge the battery cartridge before completely
discharged. Always stop tool operation and
charge the battery cartridge when you notice
less tool power.
2. Never recharge a fully charged battery car-
tridge. Overcharging shortens the battery
service life.
3. Charge the battery cartridge with room tem-
perature at 10 °C - 40 °C (50 °F - 104 °F). Let
a hot battery cartridge cool down before
charging it.
PARTS DESCRIPTION
Parts description (with nylon cutting
head)
►Fig.4
1Switch trigger 2Battery cartridge
3Lock lever 4Protector
5Nylon cutting head 6Nylon cord
7Wire guard 8Thumbnut
9Front grip 10 Hangerforshoulder
harness
11 Indication lamp 12 Lock-offbutton
Parts description (with plastic blade)
►Fig.5
1Switch trigger 2Battery cartridge
3Blade holder 4Lock lever
5Protector 6Plastic blade head
7Plastic blade 8Wire guard
9Thumbnut 10 Front grip
11 Hangerforshoulder
harness
12 Indication lamp
13 Lock-offbutton - -
FUNCTIONAL
DESCRIPTION
WARNING: Always be sure that the tool is
switched off and the battery cartridge is removed
before adjusting or checking function on the tool.
Failuretoswitchoffandremovethebatterycartridge
mayresultinseriouspersonalinjuryfromaccidental
start-up.
Installing or removing battery
cartridge
CAUTION: Always switch off the tool before
installing or removing of the battery cartridge.
CAUTION: Hold the tool and the battery car-
tridge rmly when installing or removing battery
cartridge. Failure to hold the tool and the battery
cartridgermlymaycausethemtoslipoffyourhands
and result in damage to the tool and battery cartridge
andapersonalinjury.
►Fig.6: 1. Red indicator 2. Button 3. Battery cartridge
Toremovethebatterycartridge,slideitfromthetool
whileslidingthebuttononthefrontofthecartridge.
Toinstallthebatterycartridge,alignthetongueonthe
battery cartridge with the groove in the housing and slip
it into place. Insert it all the way until it locks in place
withalittleclick.Ifyoucanseetheredindicatoronthe
uppersideofthebutton,itisnotlockedcompletely.
CAUTION: Always install the battery cartridge
fully until the red indicator cannot be seen.Ifnot,
itmayaccidentallyfalloutofthetool,causinginjuryto
you or someone around you.
CAUTION: Do not install the battery cartridge
forcibly.Ifthecartridgedoesnotslideineasily,itis
not being inserted correctly.
Battery protection system
Thetoolisequippedwithabatteryprotectionsystem.
Thissystemautomaticallycutsoffpowertothemotorto
extendbatterylife.
Thetoolwillautomaticallystopduringoperationifthe
tooland/orbatteryareplacedunderoneofthefollowing
conditions:
Overloaded:
Thetoolisoperatedinamannerthatcausesittodraw
an abnormally high current.
Inthissituation,turnthetooloffandstoptheapplication
thatcausedthetooltobecomeoverloaded.Thenturn
the tool on to restart.
Ifthetooldoesnotstart,thebatteryisoverheated.In
thissituation,letthebatterycoolbeforeturningthetool
on again.
Low battery voltage:
Theremainingbatterycapacityistoolowandthetool
willnotoperate.Ifyouturnthetoolon,themotorruns
again but stops soon. In this situation, remove and
recharge the battery.

13 ENGLISH
Indicating the remaining battery
capacity
Only for battery cartridges with the indicator
►Fig.7: 1. Indicator lamps 2. Check button
Press the check button on the battery cartridge to indi-
catetheremainingbatterycapacity.Theindicatorlamps
lightupforafewseconds.
Indicator lamps Remaining
capacity
Lighted Off
75% to 100%
50% to 75%
25% to 50%
0% to 25%
NOTE:Dependingontheconditionsofuseandthe
ambienttemperature,theindicationmaydifferslightly
fromtheactualcapacity.
Switch action
WARNING: Before installing the battery car-
tridge into the tool, always check to see that the
switch trigger actuates properly and returns to
the "OFF" position when released.
WARNING: For your safety, this tool is
equipped with the lock-off button which prevents
the tool from unintended starting. Never use the
tool if it starts when you pull the switch trigger
without pressing the lock-off button. Ask your local
MakitaServiceCenterforrepairs.
WARNING: Never disable the lock function or
tape down the lock-off button.
NOTICE: Do not pull the switch trigger forcibly
without pressing the lock-off button.Theswitch
may break.
►Fig.8: 1. Switch trigger 2.Lock-offbutton
Topreventtheswitchtriggerfrombeingaccidentally
pulled,alock-offbuttonisprovided.
Tostartthetool,pressthelock-offbuttonandpullthe
switchtrigger.Releasetheswitchtriggertostop.Thelock-
offbuttoncanbepressedfromeithertherightorleftside.
Indication lamp
Running the tool allows the indication lamp to show the
battery cartridge capacity status.
►Fig.9: 1. Lamp
When the tool is also overloaded and has stopped
duringoperation,thelamplightsupinred.Refertothe
followingtableforthestatusandactiontobetakenfor
the indication lamp.
Indication lamp Status Action to be taken
Thelampblinks
in red.
Thisindicatesthe
appropriate time to
replace the battery
cartridge when
the battery power
becomes low.
Recharge the
battery cartridge.
Thelamplightsup
in red. (Note 1)
Thisfunctionworks
when the battery
power is almost
used up. At this
time, tool stops
immediately.
Recharge the
battery cartridge.
Thelamplightsup
in red. (Note 1)
Autostop due to
overload.
Turnoffthetool.
Note1:Thetimeatwhichtheindicationlamplightsupvariesby
the temperature around the work area and the battery cartridge
conditions.
Nylon cutting head
NOTICE: Do not bump the tool to the concrete or
asphalt surface. Bumping to this kind of objects
may cause the tool damage.
NOTE:Ifthenyloncorddoesnotfeedoutwhile
bumping the head, rewind or replace the nylon cord
byfollowingtheproceduresinthismanual.
NOTE:Thebumpandfeedmechanismwillnotwork
properlyifthenyloncuttingheadisnotrotating.
►Fig.10: 1. Nylon cutting head 2. Cutter
Thenyloncuttingheadhasabumpandfeedmecha-
nism.Tofeedthenyloncord,bumpthecuttinghead
against the ground while the tool is running. As the
nyloncordisfeedingout,itwillautomaticallybecutto
the proper length by the cutter.
Plastic blade storage
►Fig.11: 1. Plastic blade 2. Blade holder
Aplasticbladeforreplacementcanbestoredinthe
bladeholderofthetool.Whenstoringortakingoutthe
blade, remove the battery cartridge.
Adjusting the position of the handle
and front grip
CAUTION: Before adjusting the shaft length,
be sure to switch off the tool and remove the
battery cartridge from the tool. Failure to do so may
causeapersonalinjury.
Adjustthelengthoftheshaftsothatyoucanholdthe
handle when lowering your right hand.
►Fig.12: 1. Handle
Toadjusttheshaftlength,openthelocklever,then
adjustthelengthoftheshaft,andthenclosethelock
lever.
►Fig.13: 1. Lock lever
Adjustthepositionofthefrontgripsothatyoucanhold
thefrontgripwhenloweringyourlefthand.
►Fig.14: 1. Front grip

14 ENGLISH
ASSEMBLY
CAUTION: Always be sure that the tool is
switched off and the battery cartridge is removed
before carrying out any work on the tool.
CAUTION: Never start the tool unless it is
completely assembled.Operationofthetoolina
partially assembled state may result in serious per-
sonalinjuryfromaccidentalstart-up.
Installing the front grip
Attachthefrontgriptothefrontgripholderandsecure
it with a hex bolt and the thumb nut as shown in the
gure.
►Fig.15: 1. Front grip 2.Thumbnut3. Hex bolt
Thefrontgripangleisadjustable.Toadjustthefront
gripangle,loosenthethumbnut,setthefrontgripatan
proper angle according to your work and then tighten
thethumbnutclockwisermly.
Installing the wire guard
NOTICE: Do not expand the wire guard outward
too much. Otherwise it may break.
►Fig.16
Toreducetheriskofdamagingtheobjectsinfrontofthe
cutting head, attach the wire guard to the protector so
that it controls the cutting range.
Slightly expand the wire guard outward and then insert
itintotheholesoftheprotector.
For nylon cutting head:
Attachthewireguardtotheholesonthefrontsideof
theprotector.Thenyloncordmarkontheprotector
indicates the hole to be used.
►Fig.17: 1. Hole
For plastic blade head:
Attachthewireguardtotheholesontherearsideofthe
protector.Theblademarkontheprotectorindicatesthe
hole to be used.
►Fig.18: 1. Hole
Whenwireguardisnotinuse,liftitfortheidleposition.
►Fig.19: 1. Wire guard
Installing the protector
CAUTION: While installing the protector, be
careful not to contact the nylon cord cutter on
the protector. Contact with the cutter could result in
personalinjury.
►Fig.20: 1. Screw 2. Protector
Mounttheprotectorbyttingitontothemotorhousing,
and then secure it with two screws.
Installing nylon cutting head
Optional accessory
CAUTION: If the nylon cutting head acciden-
tally impacts a rock or hard object during oper-
ation, stop the tool and inspect for any damage.
If the nylon cutting head is damaged, replace it
immediately.Useofadamagedcuttingtoolcould
resultinseriouspersonalinjury.
CAUTION: Be sure to remove the hex wrench
after installation.
CAUTION: When installing or removing the
nylon cutting head, be careful not to contact the
nylon cord cutter on the protector. Contact with the
cuttermayresultinpersonalinjury.
NOTICE: Be sure to use genuine Makita nylon
cutting head.
1. Turnthetoolupsidedownsothatyoucanreplace
the cutting tool easily.
2. Insert the hex wrench through the hole on the
motor housing and rotate the spindle until the spindle is
locked.
►Fig.21: 1. Hex wrench 2. Hole 3. Spindle
3. Place the nylon cutting head onto the spindle and
tighten it by turning it clockwise.
►Fig.22: 1. Nylon cutting head
4. Remove the hex wrench.
Toremovethenyloncuttinghead,turnitcounterclock-
wise while locking the spindle with the hex wrench.
Installing plastic blade head
Optional accessory
CAUTION: If the plastic blade accidentally
impacts a rock or hard object during operation,
stop the tool and inspect for any damage. If the
plastic blade is damaged, replace it immediately.
Useofadamagedcuttingtoolcouldresultinserious
personalinjury.
CAUTION: Be sure to remove the hex wrench
after installation.
CAUTION: When installing or removing the
plastic blade head, be careful not to contact the
nylon cord cutter on the protector. Contact with the
cuttermayresultinpersonalinjury.
CAUTION: If the plastic blade head is worn
out, replace it with a new one.Ifitiswornout,the
plasticblademaybethrownawayfromtheplastic
bladeheadduringoperationandcauseaninjury.
NOTICE: Be sure to use genuine Makita plastic
blade.
1. Turnthetoolupsidedownsothatyoucanreplace
the cutting tool easily.
2. Insert the hex wrench through the hole on the
motor housing and rotate the spindle until the spindle is
locked.

15 ENGLISH
►Fig.23: 1. Hex wrench 2. Hole 3. Spindle
3. Place the plastic blade head onto the spindle and
tighten it by turning it clockwise.
►Fig.24: 1. Plastic blade head
4. Remove the hex wrench.
Toremovetheplasticblade,turnitcounterclockwise
while locking the spindle with the hex wrench.
Attaching the shoulder harness
►Fig.25: 1. Hook
Attachthehooksoftheshoulderharnesstothetoolas
showninthegure.
CAUTION: Be sure to attach the hooks of the
shoulder harness to the tool securely. If the hooks
are attached incompletely, they may come off and
cause injury.
Hex wrench storage
CAUTION: Be careful not to leave the hex
wrench inserted in the tool head. It may cause
injuryand/ordamagetothetool.
When not in use, store the hex wrench as shown in the
guretokeepitfrombeinglost.
►Fig.26: 1. Hex wrench
OPERATION
Cutting the grass
Holdthegrasstrimmerattheangleofabout50°tothe
ground.Movethegrasstrimmerfromrighttoleftslowly.
Cutthegrassafewtimesfromthetopofthegrassat
thetipofthenyloncordorwiththeblade.
NOTICE: Do not cut high grass at a time. Cutting
the high grass at a time near the root may cause the
nylon cutting head or plastic blade to be entangled by
grass.Thismaycausethemotoroverload,resulting
in damage to the grass trimmer.
NOTICE: Use the grass trimmer without getting
the spool or plastic blade into a contact with the
ground surface. Using the spool or plastic blade
contactingthegroundsurfacemaycausethemotor
under overload resulting in damage to the grass
trimmer.
►Fig.27
NOTICE: Do not force the trimmer in densely
growing grass.
►Fig.28
NOTICE: Do not use the trimmer as if you dig out
the ground.
►Fig.29
Cutting the grass near tree, block,
brick, or stone
Hold and tilt the grass trimmer at a height where the
spool or blade does not touch the ground. Cut the grass
using the nylon cord tip or plastic blade like knocking
the ground.
►Fig.30
NOTICE: When cutting the grass, move the
grass trimmer around the tree or blocks so that
the nylon cord or blade does not touch the tree or
blocks. It is recommended to keep the tool more than
5cmawayfromthetreeorblock.Ifthenyloncordor
blade touch the tree or block, the nylon cord may be
tornortheblademaywearoutrapidly.Ifthenylon
cord is torn in the spool, set the nylon cord again
referringtothereplacementprocedureinthismanual.
Using the grass trimmer as an edger
Usingthegrasstrimmerasanedgerissuitablefor
cutting the grass growing along the bricks or blocks.
Pull down the wire guard and rotate the grass trimmer
180°.
Asshowninthegure,whilecontactingthewireguard
with the ground, move the grass trimmer to cut the
grass.Youcancutthegrassefcientlybywalkingin
parallel along the bricks or blocks.
►Fig.31: 1. Wire guard
Detaching the shoulder harness
WARNING: Be extremely careful to maintain
control of the machine when detaching the shoul-
der harness.
CAUTION: Before operation, adjust the
shoulder harness to the proper length to prevent
fatigue.
CAUTION: Be sure that the tool is held
securely by the shoulder harness before
operation.
Theshoulderharnessfeaturesameansofquick
release.Squeezethesidesofthebuckletoreleasethe
toolfromtheshoulderharness.
►Fig.32: 1. Buckle
MAINTENANCE
WARNING: Always be sure that the tool is
switched off and battery cartridge is removed
before attempting to perform inspection or main-
tenance on the tool.Failuretoswitchoffandremove
the battery cartridge may result in serious personal
injuryfromaccidentalstart-up.
NOTICE: Never use gasoline, benzine, thinner,
alcohol or the like. Discoloration, deformation or
cracks may result.

16 ENGLISH
TomaintainproductSAFETYandRELIABILITY,
repairs,anyothermaintenanceoradjustmentshould
beperformedbyMakitaAuthorizedorFactoryService
Centers,alwaysusingMakitareplacementparts.
Cleaning the tool
Cleanthetoolbywipingoffdust,dirt,orcutoffgrass
with a dry cloth or one dipped in soapy water and wrung
out.Ifthecutoffgrassisadheredtothemotorhousing,
be sure to remove it.
►Fig.33: 1.Motorhousing
Storage
Theholeinthehandleisconvenientforhangingthetool
fromanailorscrewonthewall.Beforestoringthetool,
raisethewireguard,shortentheshaft,andthenfoldthe
frontgrip.
►Fig.34: 1. Wire guard
►Fig.35: 1. Front grip 2.Shaft
►Fig.36: 1. Hole
Replacing the plastic blade
Iftheplasticbladeiswornout,replaceitwithanew
one.Toinstalltheplasticblade,alignthedirectionofthe
blade with the mark on the plastic blade head, and then
insert it all the way until it locks in place with a little click.
Toremovetheplasticblade,performtheinstallation
procedure in reverse.
►Fig.37: 1. Blade 2.Mark
NOTE:Iftheplasticbladeiswornout,thevibration
increases when the machine is operated with no-load.
Replacing the nylon cord
WARNING: Use nylon cord with diameter specied in “SPECIFICATIONS” only. Never use heavier line,
metal wire, rope or the like. Use recommended nylon cord only, otherwise it may cause damage to the tool and
resultinseriouspersonalinjury.
WARNING: Make sure that the cover of the nylon cutting head is secured to the housing properly as
described below.Failuretoproperlysecurethecovermaycausethenyloncuttingheadtoyapartresultingin
seriouspersonalinjury.
Replacethenyloncordifthecordisnotfeedinganymore.
►Fig.38: (1) Up to 8 m (2) 70 - 80 mm

17 ENGLISH
TROUBLESHOOTING
Beforeaskingforrepairs,conductyourowninspectionrst.Ifyoundaproblemthatisnotexplainedinthemanual,
donotattempttodismantlethetool.Instead,askMakitaAuthorizedServiceCenters,alwaysusingMakitareplace-
mentpartsforrepairs.
State of abnormality Probable cause (malfunction) Remedy
Motordoesnotrun. Battery cartridge is not installed. Install the battery cartridge.
Battery problem (under voltage) Rechargethebattery.Ifrechargingisnoteffective,
replace battery.
Thedrivesystemdoesnotwork
correctly.
Askyourlocalauthorizedservicecenterforrepair.
Motorstopsrunningafteralittleuse. Battery's charge level is low. Rechargethebattery.Ifrechargingisnoteffective,
replace battery.
Overheating. Stopusingoftooltoallowittocooldown.
ItdoesnotreachmaximumRPM. Battery is installed improperly. Install the battery cartridge as described in this
manual.
Battery power is dropping. Rechargethebattery.Ifrechargingisnoteffective,
replace battery.
Thedrivesystemdoesnotwork
correctly.
Askyourlocalauthorizedservicecenterforrepair.
Cutting tool does not rotate:
stop the machine immediately!
Foreignobjectsuchasabranchis
jammedbetweentheguardandthe
nylon cutting head.
Removetheforeignobject.
Thedrivesystemdoesnotwork
correctly.
Askyourlocalauthorizedservicecenterforrepair.
Abnormal vibration:
stop the machine immediately!
Oneendofthenyloncordhasbeen
broken.
Tapthenyloncuttingheadagainstthegroundwhile
itisrotatingtocausethecordtofeed.
Thedrivesystemdoesnotwork
correctly.
Askyourlocalauthorizedservicecenterforrepair.
Cutting tool and motor cannot stop:
Remove the battery immediately!
Electricorelectronicmalfunction. Removethebatteryandaskyourlocalauthorized
servicecenterforrepair.
OPTIONAL ACCESSORIES
CAUTION: These accessories or attachments are recommended for use with your Makita tool spec-
ied in this manual.Theuseofanyotheraccessoriesorattachmentsmightpresentariskofinjurytopersons.
Onlyuseaccessoryorattachmentforitsstatedpurpose.
Ifyouneedanyassistanceformoredetailsregardingtheseaccessories,askyourlocalMakitaServiceCenter.
• Nyloncuttinghead
• Nyloncord(cuttingline)
• Plasticbladehead
• Plasticblade
• Makitagenuinebatteryandcharger
NOTE:Someitemsinthelistmaybeincludedinthetoolpackageasstandardaccessories.Theymaydifferfrom
country to country.

18 FRANÇAIS
FRANÇAIS (Instructions originales)
SPÉCIFICATIONS
Modèle : UR100D
Vitesse à vide
(sans outil de coupe)
10 000 min-1
Longueur totale
(sans outil de coupe)
835 à 1 185 mm
Diamètre du cordon en nylon 1,65 mm
Outil de coupe applicable et
diamètre de coupe
Têtedecoupeàlnylon
(P/N 198852-2 / 198853-0)
260 mm
Têteàlameenplastique
(P/N 198847-5 / 198848-3)
230 mm
Tensionnominale 10,8 V - 12 V c.c. max.
Batterie standard BL1015 / BL1016 / BL1020B / BL1021B / BL1040B / BL1041B
Poids net 1,9 à 2,1 kg
• Étantdonnél’évolutionconstantedenotreprogrammederechercheetdedéveloppement,lesspécications
contenuesdanscemanuelsontsujettesàmodicationsanspréavis.
• Lesspécicationsetlabatteriepeuventêtredifférentessuivantlespays.
• Lepoidspeutêtredifférentselonlesaccessoires,notammentlabatterie.Lesassociationslapluslégèreetla
pluslourde,conformémentàlaprocédureEPTA01/2014,sontindiquéesdansletableau.
Bruit
Norme applicable : EN50636
Type Niveau de pression sonore moyenne
LPA(dB(A)) Incertitude K (dB(A))
Têtedecoupeàlnylon 74 0,74
Lameenplastique 75,8 2,84
• Mêmesileniveaudepressionsonoreindiquéci-dessusestinférieurouégalà80dB(A),leniveauenfonction-
nementpeutdépasser80dB(A).Portezunserre-têteantibruit.
Vibration
Norme applicable : EN50636
Type Maingauche Maindroite
ah,W (m/s2)
Incertitude K (m/s2)
ah,W (m/s2)
Incertitude K (m/s2)
Têtedecoupeàlnylon 2,5 0,1 2,5 0,5
Lameenplastique 2,5 0,1 2,5 0,1
NOTE :Lavaleurd’émissiondevibrationsdéclaréeaétémesuréeconformémentàlaméthodedeteststandard
etpeutêtreutiliséepourcomparerlesoutilsentreeux.
NOTE :Lavaleurd’émissiondevibrationsdéclaréepeutaussiêtreutiliséepourl’évaluationpréliminairede
l’exposition.
AVERTISSEMENT :L’émissiondevibrationslorsdel’usageréeldel’outilélectriquepeutêtredifférentede
lavaleurd’émissiondéclarée,suivantlafaçondontl’outilestutilisé.
AVERTISSEMENT :Lesmesuresdesécuritéàprendrepourprotégerl’utilisateurdoiventêtrebaséessur
uneestimationdel’expositiondansdesconditionsréellesd’utilisation(entenantcomptedetouteslescompo-
santesducycled’utilisation,commeparexemplelemomentdesamisehorstension,lorsqu’iltourneàvideetle
momentdesondéclenchement).

19 FRANÇAIS
Symboles
Voustrouverezci-dessouslessymbolesutiliséspour
l’appareil.Veillezàcomprendreleursignicationavant
toute utilisation.
Veuillezêtreprudentetresterattentif.
Lirelemoded’emploi.
Danger;prendregardeauxprojections
d’objets.
Ladistanceentrel’outiletlesbadaudsdoit
êtred’aumoins15m.
360°
Tenirlespersonnesàl’écart.
15m(50FT)Maintenezunedistanced’aumoins15m.
Portezuncasque,deslunettesàcoqueset
unserre-têteantibruit.
Portezdesgantsdeprotection.
Portezdesbottesrobustesàsemellesanti-
dérapantes.Ilestconseillédeporterdes
chaussuresavecemboutdesécurité.
Nepasexposeràl’eau.
N’utilisezjamaisdelamemétallique.
Ni-MH
Li-ion
Uniquementpourlespayseuropéens
Nejetezpaslesappareilsélectriquesou
lesbatteriesavecvosorduresménagères!
Conformémentauxdirectiveseuropéennes
relativesauxdéchetsd’équipements
électriquesetélectroniquesetauxpiles
etaccumulateursainsiqu’auxdéchetsde
pilesetd’accumulateursetleurmiseen
œuvreconformémentauxloisnationales,
leséquipementsélectriquesetlespileset
batteriesenndeviedoiventfairel’objet
d’unecollectesélectiveetêtreconésà
une usine de recyclage respectueuse de
l’environnement.
Déclaration de conformité CE
Pour les pays européens uniquement
LadéclarationdeconformitéCEestfournieenAnnexe
Aàcemoded’emploi.
CONSIGNES DE
SÉCURITÉ
CONSIGNES DE SÉCURITÉ
IMPORTANTES
AVERTISSEMENT : Lisez toutes les
consignes de sécurité et toutes les instructions. Il
yarisqued’électrocution,d’incendieet/oudegraves
blessures si les mises en garde et les instructions ne
sontpasrespectées.
Conservez toutes les mises en
garde et instructions pour réfé-
rence ultérieure.
1. Familiarisez-vous avec les commandes et
l’utilisation correcte de l’appareil.
2. Les éléments de coupe continuent de tourner
une fois le moteur coupé.
3. Ne laissez jamais les enfants ou les personnes
qui ne sont pas familiarisées avec ces instruc-
tions utiliser la machine. Les réglementations
locales peuvent limiter l’âge de l’utilisateur.
4. Arrêtez d’utiliser la machine en présence de
personnes, particulièrement les enfants et
animaux domestiques, à proximité.
5. N’utilisez la machine qu’à la lumière du jour ou
sous un bon éclairage articiel. Évitez d’utili-
ser la machine par mauvais temps, particuliè-
rement en cas d’orage.
6. Avant d’utiliser la machine et après un impact,
vériez l’absence d’usure ou de dégât, et répa-
rez au besoin.
7. Prenez garde de ne pas vous blesser avec le
dispositif xé pour la coupe de la longueur du
lament. Après avoir allongé le l de coupe,
ramenez toujours la machine à sa position
de fonctionnement normal avant de la mettre
sous tension.
8. Ne xez jamais d’éléments de coupe
métalliques.
9. Cet appareil n’est pas destiné à être utilisé par
des personnes (y compris les enfants) aux
facultés physiques, sensorielles ou mentales
diminuées ou sans expérience ni expertise, à
moins qu’une personne responsable de leur
sécurité ne leur fournisse la surveillance et les
instructions nécessaires à l’utilisation de cet
appareil. Les enfants doivent être sous la sur-
veillance d’un adulte an de s’assurer qu’ils ne
jouent pas avec l’appareil.
10. Soyez toujours très prudent et attentif lorsque
vous utilisez l’outil.
11. N’utilisez l’outil que si vous êtes en bonne
condition physique. Travaillez toujours en
faisant preuve de calme et de prudence. Faites
preuve de bons sens et gardez à l’esprit que
l’opérateur ou l’utilisateur est responsable des
accidents ou risques encourus par les per-
sonnes ou leur propriété.

20 FRANÇAIS
12. N’utilisez jamais l’outil lorsque vous êtes
fatigué, malade ou sous l’emprise d’alcool, de
drogues ou de médicaments.
13. Si vous remarquez un fonctionnement inhabi-
tuel de l’outil, éteignez-le immédiatement.
14. Éloignez les doigts de la gâchette lorsque
vous n’utilisez pas l’outil et lorsque vous vous
déplacez d’un point à un autre.
Utilisation prévue de l’outil
1. Utilisez le bon outil. Le coupe herbe sans l
est exclusivement conçu pour couper l’herbe
ou les mauvaises herbes à racines nes. Il ne
doit pas être utilisé à d’autres ns, pour tailler
des haies, par exemple, sous peine de provo-
quer des blessures.
Équipement de protection individuelle
►Fig.1
►Fig.2
1. Portez des vêtements adéquats. Les vête-
ments portés doivent être fonctionnels et
adéquats, c’est-à-dire moulants sans être
toutefois gênants. Ne portez ni bijoux ni vête-
ments susceptibles de s’enchevêtrer dans
l’herbe haute. Portez un let à cheveux pour
retenir les cheveux longs.
2. Lorsque vous utilisez l’outil, portez toujours
des chaussures robustes à semelles antidéra-
pantes. Ceci vous protègera des blessures et
garantira un bon appui.
3. Pour protéger vos yeux des blessures lorsque
vous utilisez un outil électrique, portez tou-
jours des lunettes de protection, lesquelles
doivent être conformes à ANSI Z87.1 aux
États-Unis, EN 166 en Europe ou AS/NZS 1336
en Australie/Nouvelle-Zélande. En Australie/
Nouvelle-Zélande, la loi exige également le
port d’un écran facial pour se protéger le
visage.
L’employeur est responsable d’imposer le
port d’équipements de sécurité appropriés
par les utilisateurs de l’outil et par les autres
personnes se trouvant à proximité de la zone
de travail.
Sécurité électrique et sécurité des batteries
1. Évitez les environnements dangereux.
N’utilisez pas l’outil dans un endroit humide, ni
ne l’exposez à la pluie. Le risque d’électrocu-
tion augmente si de l’eau pénètre dans l’outil.
2. Rechargez la batterie uniquement avec le
chargeur spécié par le fabricant. Un chargeur
prévu pour un type de batterie peut être à
l’origine d’un incendie s’il est utilisé avec une
autre batterie.
3. Utilisez l’outil électrique uniquement avec la
batterie spéciquement indiquée. L’utilisation
de toute autre batterie peut présenter un
risque de blessure et d’incendie.
4.
Lorsque vous n’utilisez pas la batterie, tenez-la à
l’écart des objets métalliques, comme des trom-
bones, pièces de monnaie, clés, clous, vis ou
autres petits objets métalliques, susceptibles de
créer une connexion entre deux bornes. Court-
circuiter les bornes d’une batterie entre elles
peut provoquer des brûlures ou un incendie.
5. Dans des conditions d’utilisation inadéquate, il
peut y avoir une fuite de l’électrolyte de la bat-
terie. Le cas échéant, évitez tout contact avec
ce liquide. En cas de contact accidentel, rincez
à l’eau. Si le liquide entre en contact avec
les yeux, consultez un médecin. Le liquide
s’échappant de la batterie peut provoquer une
irritation ou des brûlures.
6. Ne jetez pas la ou les batteries au feu.
L’élément de la pile pourrait exploser.
Consultez les codes locaux pour de possibles
instructions de mise au rebut spéciales.
7. N’ouvrez ni ne manipulez la ou les batteries.
L’électrolyte qui s’échappe de la batterie est
corrosif et peut irriter la peau ou les yeux. Il
peut être toxique en cas d’ingestion.
8. Ne chargez pas la batterie sous la pluie ou
dans un endroit mouillé.
Mise en marche de l’outil
►Fig.3
1. Assurez-vous qu’il n’y a pas d’enfants ou
d’autres personnes dans un rayon de 15 m
autour de la zone de travail. Faites également
attention aux animaux à proximité. Autrement,
arrêtez d’utiliser l’outil.
2. Avant de l’utiliser, vériez toujours la sécu-
rité de l’outil. Vériez la sécurité de l’outil
de coupe, du carter de protection et de la
gâchette ou du levier pour un fonctionnement
facile et correct. Vériez que les poignées
sont propres et sèches et testez la fonction de
marche/arrêt de la gâchette.
3.
Vériez qu’aucune pièce n’est endommagée
avant de continuer à utiliser l’outil. Vériez soi-
gneusement le carter de protection ou toute autre
pièce endommagés pour vous assurer qu’ils
fonctionnent bien et remplissent leurs fonctions
respectives. Assurez-vous que les pièces en
mouvement ne sont pas désalignées ou coincées,
qu’aucune pièce ou xation n’est cassée ou la
présence de toute autre condition pouvant affec-
ter le bon fonctionnement. Si le carter de protec-
tion ou toute autre pièce sont endommagés, ils
doivent être réparés ou remplacés de manière
adéquate par notre centre de service après-vente
agréé sauf indication contraire dans ce manuel.
4. Démarrez le moteur uniquement lorsque les
mains et les pieds sont éloignés de l’outil de
coupe.
This manual suits for next models
1
Table of contents
Languages:
Other Makita Trimmer manuals

Makita
Makita DUH551 User manual

Makita
Makita UH200D User manual

Makita
Makita dur365 User manual

Makita
Makita RBC230 User manual

Makita
Makita DUH483 User manual

Makita
Makita EM4350RH User manual

Makita
Makita UM140D User manual

Makita
Makita EN400MP User guide

Makita
Makita XRU09 User manual

Makita
Makita UH 6350 User manual

Makita
Makita UR016G User manual

Makita
Makita Trimmer User manual

Makita
Makita UR013G User manual

Makita
Makita UR012G User manual

Makita
Makita UR012GZ04 User manual

Makita
Makita XHU02M1 User manual

Makita
Makita UH4570 User manual

Makita
Makita DUH481 User manual

Makita
Makita DUH483 User manual

Makita
Makita DUH506 User manual