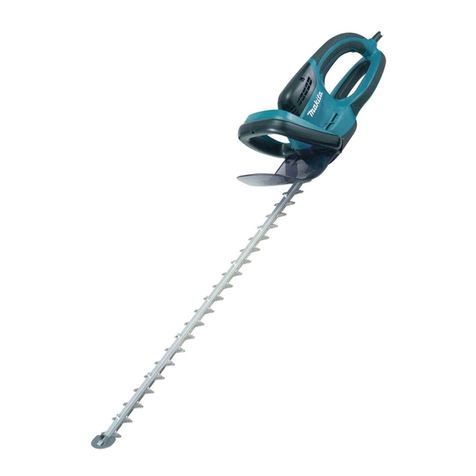
Makita DUH483 User manual

DUH483
DUH523
EN Cordless Hedge Trimmer INSTRUCTION MANUAL 6
SL Brezžične škarje za živo mejo NAVODILO ZA UPORABO 13
SQ Prerës shkurresh me bateri MANUALI I PËRDORIMIT 20
BG Безжичен храсторез за жив
плет РЪКОВОДСТВО ЗА
ЕКСПЛОАТАЦИЯ 27
HR Bežični trimer za živicu PRIRUČNIK S UPUTAMA 35
МК Безжичен тример за жива
ограда УПАТСТВО ЗА УПОТРЕБА 42
RO Maşină de tuns gardul viu
fără cablu MANUAL DE INSTRUCŢIUNI 50
SR Бежични тример за живу
ограду УПУТСТВО ЗА УПОТРЕБУ 58
RU Аккумуляторный Кусторез РУКОВОДСТВО ПО
ЭКСПЛУАТАЦИИ 66
UK Акумуляторна пила для
підрізання живоплоту ІНСТРУКЦІЯ З
ЕКСПЛУАТАЦІЇ 74

1
2
3
1
1
2
12
3
1
(1)
(2)
1
2
3
Fig.1
Fig.2
Fig.3
Fig.4
Fig.5
Fig.6
Fig.7
Fig.8
2

1
1
2
3
4
1
1
2
2
3
3
1
2
1
2
Fig.9
Fig.10
Fig.11
Fig.12
Fig.13
Fig.14
Fig.15
Fig.16
3

1
1
2
3
1
2
3
4
1
1
1
1
2
3
1
1
2
Fig.17
Fig.18
Fig.19
Fig.20
Fig.21
Fig.22
Fig.23
Fig.24
4

1
Fig.26
Fig.25
5

6ENGLISH
ENGLISH (Original instructions)
SPECIFICATIONS
Model DUH483 DUH523
Blade length 480 mm 520 mm
Strokes per minute (min-1)1,350
Rated voltage D.C. 18 V
Overall length
(Depending on the battery)
873 - 888 mm 923 - 938 mm
Net weight 3.0 - 3.3 kg 3.0 - 3.4 kg
•
Due to our continuing program of research and development, the specications herein are subject to change without notice.
• Specications may dier from country to country.
• The weight may dier depending on the attachment(s), including the battery cartridge. The lightest and heavi-
est combination, according to EPTA-Procedure 01/2014, are shown in the table.
Applicable battery cartridge and charger
Battery cartridge BL1815N / BL1820B / BL1830B / BL1840B / BL1850B / BL1860B
Charger DC18RC / DC18RD / DC18RE / DC18SD / DC18SE / DC18SF /
DC18SH
•
Some of the battery cartridges and chargers listed above may not be available depending on your region of residence.
WARNING: Only use the battery cartridges and chargers listed above. Use of any other battery cartridges
and chargers may cause injury and/or re.
Recommended battery adapter
Battery adapter PDC01
• The battery adapter(s) listed above may not be available depending on your region of residence.
• Before using the battery adapter, read instruction and cautionary markings on the battery adapter.
Symbols
The followings show the symbols which may be used
for the equipment. Be sure that you understand their
meaning before use.
Read instruction manual.
Do not expose to moisture.
Wear eye protection.
DANGER - Keep hands away from blade.
Ni-MH
Li-ion
Only for EU countries
Do not dispose of electric equipment or battery
pack together with household waste material!
In observance of the European Directives,
on Waste Electric and Electronic Equipment
and Batteries and Accumulators and Waste
Batteries and Accumulators and their imple-
mentation in accordance with national laws,
electric equipment and batteries and battery
pack(s) that have reached the end of their life
must be collected separately and returned to an
environmentally compatible recycling facility.
Intended use
The tool is intended for trimming hedges.
Noise
The typical A-weighted noise level determined accord-
ing to EN62841-4-2:
Model DUH483
Sound pressure level (LpA) : 73 dB(A)
Uncertainty (K) : 3.9 dB(A)
Model DUH523
Sound pressure level (LpA) : 73 dB(A)
Uncertainty (K) : 4.3 dB(A)
The noise level under working may exceed 80 dB (A).
NOTE: The declared noise emission value(s) has
been measured in accordance with a standard test
method and may be used for comparing one tool with
another.
NOTE: The declared noise emission value(s)
may also be used in a preliminary assessment of
exposure.

7ENGLISH
WARNING: Wear ear protection.
WARNING: The noise emission during actual
use of the power tool can dier from the declared
value(s) depending on the ways in which the
tool is used especially what kind of workpiece is
processed.
WARNING: Be sure to identify safety mea-
sures to protect the operator that are based on an
estimation of exposure in the actual conditions of
use (taking account of all parts of the operating
cycle such as the times when the tool is switched
o and when it is running idle in addition to the
trigger time).
Vibration
The vibration total value (tri-axial vector sum) deter-
mined according to EN62841-4-2:
Vibration emission (ah) : 2.5 m/s2or less
Uncertainty (K) : 1.5 m/s2
NOTE: The declared vibration total value(s) has been
measured in accordance with a standard test method
and may be used for comparing one tool with another.
NOTE: The declared vibration total value(s) may also
be used in a preliminary assessment of exposure.
WARNING: The vibration emission during
actual use of the power tool can dier from the
declared value(s) depending on the ways in which
the tool is used especially what kind of workpiece
is processed.
WARNING: Be sure to identify safety mea-
sures to protect the operator that are based on an
estimation of exposure in the actual conditions of
use (taking account of all parts of the operating
cycle such as the times when the tool is switched
o and when it is running idle in addition to the
trigger time).
EC Declaration of Conformity
For European countries only
The EC declaration of conformity is included as Annex A
to this instruction manual.
General power tool safety warnings
WARNING: Read all safety warnings, instruc-
tions, illustrations and specications provided
with this power tool. Failure to follow all instructions
listed below may result in electric shock, re and/or
serious injury.
Save all warnings and instruc-
tions for future reference.
The term "power tool" in the warnings refers to your
mains-operated (corded) power tool or battery-operated
(cordless) power tool.
Cordless Hedge Trimmer Safety Warnings
1. Keep all parts of the body away from the blade.
Do not remove cut material or hold material
to be cut when blades are moving. Blades
continue to move after the switch is turned o. A
moment of inattention while operating the hedge
trimmer may result in serious personal injury.
2. Carry the hedge trimmer by the handle with the
blade stopped and taking care not to operate
any power switch. Proper carrying of the hedge
trimmer will decrease the risk of inadvertent start-
ing and resultant personal injury from the blades.
3. When transporting or storing the hedge trim-
mer, always t the blade cover. Proper handling
of the hedge trimmer will decrease the risk of
personal injury from the blades.
4. When clearing jammed material or servicing
the unit, make sure all power switches are o
and the battery pack is removed or discon-
nected. Unexpected actuation of the hedge trim-
mer while clearing jammed material or servicing
may result in serious personal injury.
5.
Hold the hedge trimmer by insulated gripping
surfaces only, because the blade may contact
hidden wiring. Blades contacting a "live" wire may
make exposed metal parts of the hedge trimmer
"live" and could give the operator an electric shock.
6. Keep all power cords and cables away from
cutting area. Power cords or cables may be hid-
den in hedges or bushes and can be accidentally
cut by the blade.
7. Do not use the hedge trimmer in bad weather
conditions, especially when there is a risk of
lightning. This decreases the risk of being struck
by lightning.
Additional Safety Instructions
Preparation
1. Check the hedges and bushes for foreign
objects, such as wire fences or hidden wiring
before operating the tool.
2. The tool must not be used by children or
young persons under 18 years of age. Young
persons over 16 years of age may be exempted
from this restriction if they are undergoing training
under the supervision of an expert.
3. First-time users should have an experienced
user show them how to use the tool.
4.
Use the tool only if you are in good physical
condition. If you are tired, your attention will be
reduced. Be especially careful at the end of a work-
ing day. Perform all work calmly and carefully. The
user is responsible for all damages to third parties.
5. Never use the tool when under the inuence of
alcohol, drugs or medication.
6. Work gloves of stout leather are part of the
basic equipment of the tool and must always
be worn when working with it. Also wear
sturdy shoes with anti-skid soles.
7. Before starting work check to make sure that
the tool is in good and safe working order.
Ensure guards are tted properly. The tool
must not be used unless fully assembled.

8ENGLISH
Operation
1. Hold the tool rmly with both hands when
using the tool.
2. The tool is intended to be used by the operator
at ground level. Do not use the tool on ladders
or any other unstable support.
3.
DANGER - Keep hands away from blade. Contact
with blade will result in serious personal injury.
4. Do not use the tool in the rain or in wet or
very damp conditions. The electric motor is not
waterproof.
5. Make sure you have a secure footing before
starting operation.
6. Do not operate the tool at no-load
unnecessarily.
7. Immediately switch o the tool and remove the
battery cartridge if the shear blades should
come into contact with a fence or other hard
object. Check the blades for damage, and if
damaged, replace the blades immediately.
8. Before checking the shear blades, taking care
of faults, or removing material caught in the
shear blades, always switch o the tool and
remove the battery cartridge.
9.
Never point the shear blades to yourself or others.
10. If the blades stop moving due to the stuck of
foreign objects between the blades during
operation, switch o the tool and remove the
battery cartridge, and then remove the foreign
objects using tools such as pliers. Removing
the foreign objects by hand may cause an injury
for the reason that the blades may move in reac-
tion to removing the foreign objects.
11. Avoid dangerous environment. Don't use the
tool in damp or wet locations or expose it to
rain. Water entering the tool will increase the
risk of electric shock.
Maintenance and storage
1. Switch o the tool and remove the battery
cartridge before doing any maintenance work.
2. When moving the tool to another location,
including during work, always remove the
battery cartridge and put the blade cover on
the shear blades. Never carry or transport the
tool with the blades running. Never grasp the
blades with your hands.
3. Clean the tool and especially the shear blades
after use, and before putting the tool into stor-
age for extended periods. Lightly oil the blades
and put on the blade cover.
4. Store the tool with the blade cover on, in a dry
room. Keep it out of reach of children. Never
store the tool outdoors.
5. Do not dispose of the battery(ies) in a re. The
cell may explode. Check with local codes for
possible special disposal instructions.
6. Do not open or mutilate the battery(ies).
Released electrolyte is corrosive and may
cause damage to the eyes or skin. It may be
toxic if swallowed.
7. Do not charge battery in rain, or in wet
locations.
SAVE THESE INSTRUCTIONS.
WARNING: DO NOT let comfort or familiarity
with product (gained from repeated use) replace
strict adherence to safety rules for the subject
product. MISUSE or failure to follow the safety
rules stated in this instruction manual may cause
serious personal injury.
Important safety instructions for
battery cartridge
1. Before using battery cartridge, read all instruc-
tions and cautionary markings on (1) battery
charger, (2) battery, and (3) product using
battery.
2. Do not disassemble or tamper with the battery
cartridge. It may result in a re, excessive heat,
or explosion.
3. If operating time has become excessively
shorter, stop operating immediately. It may
result in a risk of overheating, possible burns
and even an explosion.
4. If electrolyte gets into your eyes, rinse them
out with clear water and seek medical atten-
tion right away. It may result in loss of your
eyesight.
5. Do not short the battery cartridge:
(1) Do not touch the terminals with any con-
ductive material.
(2) Avoid storing battery cartridge in a con-
tainer with other metal objects such as
nails, coins, etc.
(3) Do not expose battery cartridge to water
or rain.
A battery short can cause a large current
ow, overheating, possible burns and even a
breakdown.
6. Do not store and use the tool and battery car-
tridge in locations where the temperature may
reach or exceed 50 °C (122 °F).
7. Do not incinerate the battery cartridge even if
it is severely damaged or is completely worn
out. The battery cartridge can explode in a re.
8. Do not nail, cut, crush, throw, drop the battery
cartridge, or hit against a hard object to the
battery cartridge. Such conduct may result in a
re, excessive heat, or explosion.
9. Do not use a damaged battery.
10. The contained lithium-ion batteries are subject
to the Dangerous Goods Legislation require-
ments.
For commercial transports e.g. by third parties,
forwarding agents, special requirement on pack-
aging and labeling must be observed.
For preparation of the item being shipped, consult-
ing an expert for hazardous material is required.
Please also observe possibly more detailed
national regulations.
Tape or mask o open contacts and pack up the
battery in such a manner that it cannot move
around in the packaging.

9ENGLISH
11. When disposing the battery cartridge, remove
it from the tool and dispose of it in a safe
place. Follow your local regulations relating to
disposal of battery.
12. Use the batteries only with the products
specied by Makita. Installing the batteries to
non-compliant products may result in a re, exces-
sive heat, explosion, or leak of electrolyte.
13. If the tool is not used for a long period of time,
the battery must be removed from the tool.
14. During and after use, the battery cartridge may
take on heat which can cause burns or low
temperature burns. Pay attention to the han-
dling of hot battery cartridges.
15. Do not touch the terminal of the tool imme-
diately after use as it may get hot enough to
cause burns.
16. Do not allow chips, dust, or soil stuck into the
terminals, holes, and grooves of the battery
cartridge. It may result in poor performance or
breakdown of the tool or battery cartridge.
17. Unless the tool supports the use near
high-voltage electrical power lines, do not use
the battery cartridge near high-voltage electri-
cal power lines. It may result in a malfunction or
breakdown of the tool or battery cartridge.
18. Keep the battery away from children.
SAVE THESE INSTRUCTIONS.
CAUTION: Only use genuine Makita batteries.
Use of non-genuine Makita batteries, or batteries that
have been altered, may result in the battery bursting
causing res, personal injury and damage. It will
also void the Makita warranty for the Makita tool and
charger.
Tips for maintaining maximum
battery life
1. Charge the battery cartridge before completely
discharged. Always stop tool operation and
charge the battery cartridge when you notice
less tool power.
2. Never recharge a fully charged battery car-
tridge. Overcharging shortens the battery
service life.
3. Charge the battery cartridge with room tem-
perature at 10 °C - 40 °C (50 °F - 104 °F). Let
a hot battery cartridge cool down before
charging it.
4. When not using the battery cartridge, remove
it from the tool or the charger.
5. Charge the battery cartridge if you do not use
it for a long period (more than six months).
FUNCTIONAL
DESCRIPTION
CAUTION:
• Always be sure that the tool is switched o and
the battery cartridge is removed before adjust-
ing or checking function on the tool.
Installing or removing battery cartridge
► Fig.1: 1. Red indicator 2. Button 3. Battery cartridge
CAUTION:
• Always switch o the tool before installing or
removing of the battery cartridge.
• Hold the tool and the battery cartridge rmly
when installing or removing battery car-
tridge. Failure to hold the tool and the battery
cartridge rmly may cause them to slip o your
hands and result in damage to the tool and
battery cartridge and a personal injury.
To remove the battery cartridge, slide it from the tool
while sliding the button on the front of the cartridge.
To install the battery cartridge, align the tongue on the
battery cartridge with the groove in the housing and slip
it into place. Insert it all the way until it locks in place
with a little click. If you can see the red indicator on the
upper side of the button, it is not locked completely.
CAUTION:
• Always install the battery cartridge fully until the
red indicator cannot be seen. If not, it may acci-
dentally fall out of the tool, causing injury to you
or someone around you.
• Do not install the battery cartridge forcibly. If the
cartridge does not slide in easily, it is not being
inserted correctly.
Battery protection system (Lithium-
ion battery with star marking)
► Fig.2: 1. Star marking
Lithium-ion batteries with a star marking are equipped
with a protection system. This system automatically
cuts o power to the tool to extend battery life.
The tool will automatically stop during operation if the
tool and/or battery are placed under one of the following
conditions:
• Overloaded:
The tool is operated in a manner that causes
it to draw an abnormally high current.
In this situation, release the switch trigger on
the tool and stop the application that caused
the tool to become overloaded. Then pull the
switch trigger again to restart.
If the tool does not start, the battery is over-
heated. In this situation, let the battery cool
before pulling the switch trigger again.
• Low battery voltage:
The remaining battery capacity is too low
and the tool will not operate. In this situation,
remove and recharge the battery.

10 ENGLISH
Indicating the remaining battery
capacity
(Only for battery cartridges with "B" at the end of the
model number.)
► Fig.3: 1. Indicator lamps 2. CHECK button
Press the check button on the battery cartridge to indi-
cate the remaining battery capacity. The indicator lamps
light up for few seconds.
Off BlinkingLighted
Indicator lamps
Charge the
battery.
0% to 25%
25% to 50%
50% to 75%
75% to 100%
Remaining
capacity
The battery
may have
malfunctioned.
NOTE:
• Depending on the conditions of use and the
ambient temperature, the indication may dier
slightly from the actual capacity.
Switch action
CAUTION:
• Before inserting the battery cartridge into the
tool, always check to see that the switch trigger
actuates properly and returns to the "OFF"
position when released.
► Fig.4: 1. Switch trigger A 2. Switch trigger B
3. Lock-o button
For your safety, this tool is equipped with a dual switch-
ing system. To turn on the tool, press the lock-o button
and triggers A and B. Release either one of the two
pressed triggers to turn o. The sequence of switch-
ing is unimportant as the tool only starts when both
switches are activated.
Indication lamp
► Fig.5: 1. Indication lamp
Running the tool allows the indication lamp to show the battery cartridge capacity status.
When the tool is also overloaded and has stopped during operation, the lamp lights up in red.
Refer to the following table for the status and action to be taken for the indication lamp.
Note 1: The time at which the indication lamp lights up varies by the temperature
around the work area and the battery cartridge conditions.
Indication lamp
The lamp blinks in red.
The lamp lights up in red.
(Note 1)
The lamp lights up in red.
(Note 1)
Status
This indicates the appropriate
time to replace the battery
cartridge when the battery
power becomes low.
This function works when the
battery power is almost used
up. At this time, tool stops
immediately.
Autostop due to overload.
Action to be taken
Recharge the battery cartridge
as soon as possible.
Recharge the battery cartridge.
Turn off the tool.

11 ENGLISH
OPERATION
CAUTION:
• Be careful not to accidentally contact a metal
fence or other hard objects while trimming. The
blade will break and may cause serious injury.
• Overreaching with a hedge trimmer, particularly
from a ladder, is extremely dangerous. Do not
work from anything wobbly or inrm.
NOTICE: Do not attempt to cut branches thicker
than 10 mm in diameter with the tool. Cut branches
to 10 cm lower than the cutting height using branch
cutters before using the tool.
► Fig.6: (1) Cutting height (2) 10 cm
CAUTION:
• Do not cut o dead trees or similar hard objects.
Failure to do so may damage the tool.
► Fig.7
Hold the trimmer with both hands and pull the switch
trigger A or B and then move it in front of your body.
► Fig.8: 1. Trimming direction 2. Hedge surface to be
trimmed 3. Tilt the blades
As a basic operation, tilt the blades towards the trim-
ming direction and move it calmly and slowly at the
speed rate of 3 - 4 seconds per meter.
► Fig.9: 1. String
To cut a hedge top evenly, it helps to tie a string at the
desired hedge height and to trim along it, using it as a
reference line.
► Fig.10
Attaching the chip receiver (optional accessory) on the
tool when trimming the hedge straight can avoid cut o
leaves’ being thrown away.
► Fig.11
To cut a hedge side evenly, it helps to cut from the
bottom upwards.
► Fig.12
Trim boxwood or rhododendron from the base toward
the top for a nice appearance and good job.
Installing or removing chip receiver
(optional accessory)
CAUTION:
• Always be sure that the tool is switched o and
unplugged before installing or removing chip
receiver.
NOTE:
• When replacing the chip receiver, always wear
gloves so that hands and face does not directly
contact the blade. Failure to do so may cause
personal injury.
• Always be sure to remove the blade cover
before installing the chip receiver.
• The chip receiver receives cut-o leaves and
alleviates collecting thrown-away leaves. This
can be installed on either side of the tool.
► Fig.13: 1. Press 2. Chip receiver 3. Nut 4. Shear
blade
Press the chip receiver on the shear blades so that its
slits overlap with the nuts on the shear blades.
► Fig.14: 1. Hooks 2. Fit the hooks into groove
3. Grooves
At this time, the chip receiver needs to be installed so
that its hooks t into grooves in the shear blade unit.
► Fig.15: 1. Press the levers on both sides 2. Unlock
the hooks
To remove the chip receiver, press its lever on both
sides so that the hooks are unlocked.
CAUTION:
• The blade cover (standard equipment) cannot
be installed on the tool with the chip receiver
being installed. Before carrying or storing, unin-
stall the chip receiver and then install the blade
cover to avoid blade exposure.
NOTE:
• Check the chip receiver for secure installment
before use.
• Never try to uninstall the chip receiver by an
excessive force with its hooks locked in the
blade unit grooves. Using the excessive force
may damage it.
MAINTENANCE
CAUTION:
• Always be sure that the tool is switched o and
the battery cartridge is removed before attempt-
ing to perform inspection or maintenance.
Cleaning the tool
Clean out the tool by wiping o dust with a dry or soap-
dipped rag.
CAUTION:
• Never use gasoline, benzine, thinner, alcohol
or the like. Discoloration, deformation or cracks
may result.
Blade maintenance
Smear the blade before and once per hour during oper-
ation using machine oil or the like.
NOTE:
• Before smearing the blade, remove the chip
receiver.
After operation, remove dust from both sides of the
blade with wired brush, wipe it o with a rag and then
apply enough low-viscosity oil, such as machine oil etc.
and spray-type lubricating oil.
CAUTION:
• Do not wash the blades in water. Failure to do
so may cause rust or damage on the tool.

12 ENGLISH
Removing or installing shear blade
CAUTION:
• Before removing or installing shear blade,
always be sure that the tool is switched o and
the battery cartridge is removed.
• When replacing the shear blade, always wear
gloves without removing blade cover so that
hands and face does not directly contact the
blade. Failure to do so may cause personal
injury.
NOTE:
• Do not wipe o grease from the gear and crank.
Failure to do so may cause damage to the tool.
Removing the shear blades
► Fig.16: 1. Screws 2. Under cover
Reverse the tool and loosen four screws and remove
the under cover.
NOTE:
• Be careful not to get your hands dirty as grease
is applied in the shear blade driving area.
► Fig.17: 1. Screws 2. Sponge 3. Washer
Loosen four screws and remove the blades. Remove
the washer and sponge from the shear blades and put
them aside. They are required for the later installation.
► Fig.18: 1. Gear 2. Sleeves 3. Washer 4. Groove
If the sleeves are still left in the holes of the gear,
remove the gear and push the sleeves out of it with a
screwdriver or the like.
NOTE: The washer underneath the gear may come
o by mistake when removing the gear. In this case,
return it to the original position as it was installed.
Installing the shear blade
► Fig.19: 1. Blade cover
Remove the blade cover from the old shear blades and
t it onto the new ones to avoid contact with blades.
► Fig.20
Adjust the hole positions by turning the gear as illustrated.
► Fig.21: 1. Grease
► Fig.22: 1. Grease
Apply some grease provided with the new shear blades
as illustrated.
► Fig.23: 1. Blade 2. Sponge 3. Sleeves
Put the removed sponge in the same position as the
old one. Make sure that the sleeves provided with the
new shear blades are put on the pins of the blade.
Place the new shear blades on the tool so that the pins
t in the holes of the gear. If the sleeves on the pins
come o mistakenly, put them into the holes of the gear
beforehand.
► Fig.24: 1. Screws 2. Washer
Install the blade and tighten the four screws and put the
removed washer in the same position as the old one.
► Fig.25: 1. Screws
Install the under cover on the tool and tighten the four
screws rmly.
Storage
The hook hole in the tool bottom is convenient for hang-
ing the tool from a nail or screw on the wall.
► Fig.26
Remove the battery cartridge and put the blade cover
on the shear blades so that the blades are not exposed.
Store the tool out of the reach of children carefully.
Store the tool in the place not exposed to water and
rain.
To maintain product SAFETY and RELIABILITY, repairs,
any other maintenance or adjustment should be per-
formed by Makita Authorized Service Centers, always
using Makita replacement parts.
OPTIONAL
ACCESSORIES
CAUTION:
• These accessories or attachments are recom-
mended for use with your Makita tool specied
in this manual. The use of any other accessories
or attachments might present a risk of injury to
persons. Only use accessory or attachment for
its stated purpose.
If you need any assistance for more details regard-
ing these accessories, ask your local Makita Service
Center.
• Blade cover
• Shear blade assembly
• Makita genuine battery and charger
• Chip receiver
NOTE:
• Some items in the list may be included in the
tool package as standard accessories. They
may dier from country to country.

13 SLOVENŠČINA
SLOVENŠČINA (Originalna navodila)
TEHNIČNI PODATKI
Model DUH483 DUH523
Dolžina rezila 480 mm 520 mm
Rezi na minuto (min-1)1.350
Nazivna napetost D.C. 18 V
Celotna dolžina
(odvisno od akumulatorja)
873 - 888 mm 923 - 938 mm
Neto teža 3,0 - 3,3 kg 3,0 - 3,4 kg
•
Ker nenehno opravljamo raziskave in razvijamo svoje izdelke, se lahko tehnični podatki v tem dokumentu spremenijo brez obvestila.
• Tehnični podatki se lahko razlikujejo od države do države.
• Teža se lahko razlikuje glede na priključke, vključno z akumulatorsko baterijo. Najlažja in najtežja kombinacija v
skladu s postopkom EPTA 01/2014 sta prikazani v preglednici.
Uporabna akumulatorska baterija in polnilnik
Baterijski vložek BL1815N / BL1820B / BL1830B / BL1840B / BL1850B / BL1860B
Polnilnik DC18RC / DC18RD / DC18RE / DC18SD / DC18SE / DC18SF /
DC18SH
• Nekatere zgoraj navedene akumulatorske baterije in polnilniki morda v vaši državi prebivališča niso na voljo.
OPOZORILO: Uporabljajte le zgoraj navedene akumulatorske baterije in polnilnike. Uporaba drugih
akumulatorskih baterij in polnilnikov lahko povzroči telesne poškodbe in/ali požar.
Priporočeni adapter za baterije
Adapter za baterije PDC01
• Nekateri zgoraj navedeni adapterji za baterije morda v vaši državi prebivališča niso na voljo.
• Pred uporabo adapterja za akumulator preberite navodila in varnostne oznake na adapterju za akumulator.
Simboli
Naslednji simboli se lahko uporabljajo v povezavi s strojem. Pred
uporabo izdelka se obvezno seznanite z njihovim pomenom.
Preberite navodila za uporabo.
Ne izpostavljajte vlagi.
Uporabljajte zaščito za oči.
NEVARNOST – z rokami ne segajte v
območje rezila.
Ni-MH
Li-ion
Samo za države EU
Ne zavrzite izrabljene električne opreme ali aku-
mulatorskega sklopa med gospodinjske odpadke!
V skladu z Evropskimi direktivami o
odpadni električni in elektronski opremi,
baterijah in akumulatorjih, odpadnih bate-
rijah in akumulatorjih ter upoštevanjem
njihovih določil v skladu z državno zako-
nodajo je treba električno opremo, baterije
in akumulatorje, katerih življenjski cikel
je pretekel, zbirati ločeno in jih dostaviti
v ustrezen obrat za recikliranje, ki deluje
skladno z okoljevarstvenimi zahtevami.
Predvidena uporaba
Orodje je namenjeno rezanju žive meje.
Hrup
Običajna A-ovrednotena raven hrupa v skladu z
EN62841-4-2:
Model DUH483
Raven zvočnega tlaka (LpA): 73 dB (A)
Odstopanje (K): 3,9 dB (A)
Model DUH523
Raven zvočnega tlaka (LpA): 73 dB (A)
Odstopanje (K): 4,3 dB (A)
Nivo hrupa med delom lahko preseže 80 dB (A).
OPOMBA: Navedene vrednosti oddajanja hrupa so
bile izmerjene v skladu s standardnimi metodami
testiranja in se lahko uporabljajo za primerjavo orodij.
OPOMBA: Navedene vrednosti oddajanja hrupa
se lahko uporabljajo tudi pri predhodni oceni
izpostavljenosti.

14 SLOVENŠČINA
OPOZORILO: Uporabljajte zaščito za sluh.
OPOZORILO: Oddajanje hrupa med dejansko
uporabo električnega orodja se lahko razlikuje od
navedenih vrednosti, odvisno od načina uporabe
orodja in predvsem vrste obdelovanca.
OPOZORILO: Upravljavec mora za lastno
zaščito poznati varnostne ukrepe, ki temeljijo
na oceni izpostavljenosti v dejanskih pogojih
uporabe (poleg časa proženja je treba upoštevati
celoten delovni cikel, vključno s časom, ko je
orodje izklopljeno, in časom, ko deluje v prostem
teku).
Vibracije
Skupne vrednosti vibracij (vektorska vsota treh osi) v
skladu z EN62841-4-2:
Emisije vibracij (ah): 2,5 m/s2 ali manj
Odstopanje (K): 1,5 m/s2
OPOMBA: Navedene skupne vrednosti oddajanja
vibracij so bile izmerjene v skladu s standardnimi
metodami testiranja in se lahko uporabljajo za primer-
javo orodij.
OPOMBA: Navedene skupne vrednosti oddajanja
vibracij se lahko uporabljajo tudi pri predhodni oceni
izpostavljenosti.
OPOZORILO: Oddajanje vibracij med
dejansko uporabo električnega orodja se lahko
razlikuje od navedenih vrednosti, odvisno
od načina uporabe orodja in predvsem vrste
obdelovanca.
OPOZORILO: Upravljavec mora za lastno
zaščito poznati varnostne ukrepe, ki temeljijo
na oceni izpostavljenosti v dejanskih pogojih
uporabe (poleg časa proženja je treba upoštevati
celoten delovni cikel, vključno s časom, ko je
orodje izklopljeno, in časom, ko deluje v prostem
teku).
Izjava o skladnosti ES
Samo za evropske države
Izjava ES o skladnosti je vključena v dodatku A, ki je
priložen tem navodilom za uporabo.
Splošna varnostna opozorila za
električno orodje
OPOZORILO: Preberite vsa varnostna opo-
zorila in navodila s slikami in tehničnimi podatki,
ki so dobavljeni skupaj z električnim orodjem.
Ob neupoštevanju spodaj navedenih navodil obstaja
nevarnost električnega udara, požara in/ali hudih
telesnih poškodb.
Shranite vsa opozorila in navo-
dila za poznejšo uporabo.
Izraz „električno orodje“ v opozorilih se nanaša na vaše
električno orodje (s kablom) ali baterijsko električno
orodje (brez kabla).
Varnostna opozorila za brezžični
rezalnik za živo mejo
1. Ne približujte delov telesa rezilu. Ne odstra-
njujte odrezanega materiala in ne držite mate-
riala, ki ga boste rezali, kadar se rezila premi-
kajo. Ko izključite stikalo, se rezila še vedno vrtijo.
Trenutek nepazljivosti pri delu s škarjami za živo
mejo lahko privede do hudih telesnih poškodb.
2. Škarje za živo mejo nosite za ročaj, rezilo mora
biti ustavljeno, bodite pozorni, da ne vklopite
stikala. Če boste škarje za živo mejo pravilno
nosili, boste zmanjšali tveganje za nehoteni zagon
in posledično telesno poškodbo z rezili.
3. Kadar prenašate ali shranjujete škarje za živo
mejo, vedno namestite pokrov rezila. Ustrezno
rokovanje s škarjami za živo mejo bo zmanjšalo
morebitne telesne poškodbe zaradi rezil.
4. Ko odstranjujete zataknjeni material ali
popravljate enoto, se prepričajte, da so vsi
gumbi za vklop/izklop izklopljeni in da je aku-
mulatorska baterija odstranjena ali izklopljena.
Nepričakovan zagon škarij za živo mejo med
čiščenjem zataknjenega materiala ali popravlja-
njem lahko povzroči resne telesne poškodbe.
5.
Držite škarje za živo mejo na izoliranih držalnih
površinah, saj lahko rezilo prereže skrito električno
napeljavo. Ob stiku rezil z vodniki pod napetostjo dobijo
napetost vsi neizolirani kovinski deli škarij za živo mejo,
zaradi česar lahko uporabnik utrpi električni udar.
6.
Električne kable odstranite z območja reza-
nja. Med uporabo so lahko kabli skriti živi meji ali
grmovju in jih lahko z rezilom nenamerno prerežete.
7. Škarij za živo mejo ne uporabljajte ob slabem
vremenu, še posebej, kadar bliska. S tem
zmanjšate tveganje, da bi vas zadela strela.
Dodatna varnostna navodila
Priprava
1.
Pred uporabo orodja preverite, da v živi meji in grmi-
čevju ni tujkov, kot so žične ograje ali skrite žice.
2. Orodja ne smejo uporabljati otroci ali mlajši
od 18 let. Mladoletne osebe, starejše od 16 let,
so lahko izvzete iz te omejitve, če se usposabljajo
pod nadzorom strokovnjaka.
3. Uporabnike, ki prvič uporabljajo orodje, naj
izkušeni uporabnik pouči o uporabi orodja.
4. Orodje uporabljajte samo, če ste dobro zično
pripravljeni. Če ste utrujeni, bo vaša zbranost
zmanjšana. Še posebej bodite pozorni ob koncu
delovnega dne. Vsa dela opravljajte mirno in
zbrano. Uporabnik je odgovoren za vse poškodbe,
povzročene tretjim osebam.
5. Nikoli ne uporabljajte orodja pod vplivom
alkohola, drog ali zdravil.
6. Delovne rokavice iz robustnega usnja so del
osnovne opreme orodja in jih je pri delu treba
vedno nositi. Prav tako nosite močne čevlje z
nedrsečim podplatom.
7. Pred začetkom dela se prepričajte, da je
orodje v dobrem stanju in varno za delo.
Zagotovite, da so ščitniki pravilno nameščeni.
Orodja ni dovoljeno uporabljati, če ni v celoti
sestavljeno.

15 SLOVENŠČINA
Uporaba
1.
Med uporabo trdno držite orodje z obema rokama.
2. Orodje je namenjeno uporabi na tleh. Orodja
ne uporabljajte na lestvah ali drugih nestabil-
nih oporah.
3. NEVARNOST - Ne približujte rok rezilu. Stik z
rezilom povzroči hude telesne poškodbe.
4. Orodja ne uporabljajte v dežju ali v zelo vlažnih
pogojih. Električni motor ni vodotesen.
5. Pred začetkom uporabe zagotovite trdno
stojišče.
6. Ne uporabljajte orodja brez obremenitve po
nepotrebnem.
7. Če rezila škarij pridejo v stik z ograjo ali dru-
gim trdim predmetom, takoj ugasnite orodje in
odstranite akumulatorsko baterijo. Preverite
rezila, ali so poškodovana, in jih v tem primeru
takoj zamenjajte.
8. Preden rezila škarij pregledate, odpravite
napake ali odstranite material, ki se je ujel v
rezila škarij, vedno izklopite orodje in odstra-
nite akumulatorsko baterijo.
9. Rezil nikoli ne usmerite proti sebi ali drugim
osebam.
10. Če se med delovanjem rezila nehajo premikati,
ker so se med njih zataknili tujki, izklopite
orodje, odstranite akumulatorsko baterijo in
nato odstranite tujke z orodjem, kot so klešče.
Odstranjevanje tujkov z rokami lahko povzroči
poškodbe, saj se zaradi odstranjevanja tujkov
lahko premaknejo rezila.
11. Izogibajte se nevarnemu okolju. Orodja ne
uporabljajte na vlažnih ali mokrih mestih in
ga ne izpostavljajte dežju. Voda, ki prodre v
orodje, bo povečala nevarnost električnega
udara.
Vzdrževanje in shranjevanje
1. Pred vzdrževalnimi deli izklopite orodje in
odstranite akumulatorsko baterijo.
2. Kadar prenašate orodje na drugo lokacijo, tudi
med delom, vedno odstranite akumulatorsko
baterijo in namestite pokrov rezila škarij. Nikoli
ne prenašajte ali prevažajte orodja, kadar
deluje. Nikoli ne prijemajte rezil z rokami.
3. Po uporabi in preden shranite orodje za dlje
časa ga očistite (še posebej rezilo škarij).
Rahlo naoljite rezila in namestite pokrov za
rezila.
4. Orodje shranjujte z nameščenim pokrovom za
rezila in v suhem prostoru. Shranjujte nedo-
segljivo otrokom. Orodja nikoli ne shranjujte
na prostem.
5. Akumulatorja/-ev ni dovoljeno metati v ogenj.
Celica lahko eksplodira. Preverite lokalne
predpise glede morebitnih posebnih navodil za
odstranjevanje.
6. Ne odpirajte ali spreminjajte akumulatorja/-
-ev. Sproščeni elektrolit je koroziven in lahko
povzroči poškodbe oči ali kože. Pri zaužitju je
lahko strupen.
7. Akumulatorja ne polnite v dežju ali na mokrih
mestih.
SHRANITE TA NAVODILA.
OPOZORILO: NE dovolite, da bi zaradi udob-
nejšega dela ali znanja o uporabi izdelka (prido-
bljenega z večkratno uporabo) opustili strogo
upoštevanje varnostnih zahtev v okviru pravilne
uporabe orodja. ZLORABA ali neupoštevanje var-
nostnih zahtev v teh navodilih za uporabo lahko
povzroči resne telesne poškodbe.
Pomembna varnostna navodila za
akumulatorsko baterijo
1. Pred uporabo baterijskega vložka preberite
vsa navodila in opozorilne oznake na (1) pol-
nilniku akumulatorja, (2) akumulatorju in (3)
izdelku, ki uporablja akumulator.
2. Ne razstavljajte ali spreminjajte akumulatorske
baterije. S tem lahko povzročite požar, preko-
merno vročino ali eksplozijo.
3. Če se je čas delovanja občutno skrajšal, takoj
prenehajte uporabljati orodje. V nasprotnem
primeru lahko pride do pregretja, morebitnih
opeklin in celo eksplozije.
4. Če pride elektrolit v stik z očmi, jih sperite s
čisto vodo in takoj poiščite zdravniško pomoč.
Posledica je lahko izguba vida.
5. Ne povzročite kratkega stika baterijskega
vložka:
(1) Ne dotikajte se priključkov s kakršnim
koli prevodnim materialom.
(2) Izogibajte se shranjevanju baterijskega
vložka v vsebniku z drugimi kovinskimi
predmeti kot so žeblji, kovanci itn.
(3) Ne izpostavljajte baterijskega vložka vodi
ali dežju.
Kratek stik akumulatorja lahko povzroči velik
električni tok, pregrevanje, morebitne opekline
in celo okvaro.
6. Ne shranjujte in uporabljajte orodja in akumu-
latorske baterije na mestih, kjer lahko tempera-
tura doseže ali preseže 50 °C (122 °F).
7. Ne sežigajte baterijskega vložka, tudi če je
hudo poškodovan ali v celoti izpraznjen.
Baterijski vložek lahko v ognju eksplodira.
8. Ne pribijajte, režite, drobite, mečite, spuščajte
akumulatorske baterije oziroma ne udarjajte
z akumulatorsko baterijo po trdem predmetu.
Takšno ravnanje lahko povzroči požar, preko-
merno vročino ali eksplozijo.
9. Ne uporabljajte poškodovanih akumulatorjev.
10. Priložene litij-ionske baterije ustrezajo zahte-
vam zakonodaje v zvezi z nevarnim blagom.
Za komercialne prevoze, npr. tiste, ki jih opravljajo
tretje stranke in carinski posredniki, je treba upo-
števati posebne zahteve v zvezi z embalažo in
označevanjem.
Med postopkom priprave na odpremo izdelka se
je treba posvetovati s strokovnjakom za nevarne
snovi. Pri tem upoštevajte tudi podrobnejše nacio-
nalne predpise.
Odprte stike oblepite z lepilnim trakom ali jih dru-
gače zaščitite, baterijo pa zapakirajte tako, da se v
embalaži ne more premikati.

16 SLOVENŠČINA
11. Ko odstranjujete akumulatorsko baterijo, jo
vzemite iz orodja in varno zavrzite. Upoštevajte
lokalne uredbe glede odlaganja baterije.
12. Baterije uporabljajte le z izdelki, ki jih določi
Makita. Če namestite baterije v neskladne izdelke,
lahko pride do požara, pregrevanja, eksplozije ali
puščanja elektrolita.
13. Če orodja dlje časa ne uporabljate, morate iz
njega odstraniti baterijo.
14. Med uporabo in po uporabi lahko akumu-
latorska baterija postane vroča in povzroči
opekline. Z vročimi akumulatorskimi baterijami
ravnajte pazljivo.
15. Ne dotikajte se priključka orodja takoj po upo-
rabi, ker se lahko dovolj segreje, da povzroči
opekline.
16. Ne dovolite, da bi se v priključke, odprtine in
utore akumulatorske baterije zlepili ostružki,
prah ali zemlja. Umazanija lahko povzroči slabše
delovanje ali okvaro orodja oziroma akumulator-
ske baterije.
17. Razen če orodje podpira uporabo v bližini
visokonapetostnih električnih vodov, akumula-
torske baterije ne uporabljajte v bližini visoko-
napetostnih električnih vodov. Takšna uporaba
lahko povzroči motnje v delovanju ali okvaro
orodja oziroma akumulatorske baterije.
18. Baterijo hranite izven dosega otrok.
SHRANITE TA NAVODILA.
POZOR: Uporabljajte le originalne baterije
Makita. Če uporabljate neoriginalne baterije Makita
ali baterije, ki so bile spremenjene, lahko pride do
eksplozije baterije in posledično do požara, telesnih
poškodb ali materialne škode. S takšno uporabo
boste tudi razveljavili garancijo Makita za orodje in
polnilnik Makita.
Nasveti za ohranjanje največje
zmogljivosti akumulatorja
1. Napolnite baterijski vložek, preden se v celoti
izprazni. Ko opazite, da ima orodje manjšo
moč, vedno ustavite delovanje orodja in napol-
nite baterijski vložek.
2. Nikoli znova ne polnite popolnoma napol-
njenega baterijskega vložka. Prenapolnjenje
skrajša življenjsko dobo akumulatorja.
3. Baterijski vložek s sobno temperaturo pol-
nite pri temperaturi okolja od 10 °C do 40 °C.
Počakajte, da se vroč baterijski vložek pred
polnjenjem ohladi.
4. Ko akumulatorske baterije ne uporabljate, jo
odstranite iz orodja ali polnilnika.
5. Če baterijskega vložka ne uporabljate dalj časa
(več kot 6 mesecev), ga napolnite.
OPIS DELOVANJA
POZOR:
• Pred vsako nastavitvijo ali pregledom delovanja
orodja se prepričajte, da je le to izključeno in da
je akumulatorska baterija odstranjena.
Nameščanje ali odstranjevanje
akumulatorske baterije
► Sl.1: 1. Rdeči indikator 2. Gumb 3. Baterijski vložek
POZOR:
• Vedno izklopite orodje, preden namestite ali
odstranite akumulatorsko baterijo.
• Kadar nameščate ali odstranjujete akumula-
torsko baterijo, trdno držite orodje in akumu-
latorsko baterijo. Če orodja in akumulatorske
baterije ne držite trdno, se lahko zgodi, da vam
zdrsneta iz rok, posledica pa je poškodba orodja
in akumulatorske baterije ter telesna poškodba.
Za odstranitev akumulatorske baterije iz orodja jo
premaknite iz orodja, ob tem pa premaknite gumb na
sprednji strani akumulatorske baterije.
Pri vstavljanju akumulatorske baterije poravnajte jezi-
ček na akumulatorski bateriji z utorom na ohišju in ga
potisnite v ležišče. Akumulatorsko baterijo vstavite do
konca, da se razločno zaskoči. Če vidite rdeči indikator
na zgornji strani gumba, ta ni popolnoma zaklenjen.
POZOR:
•
Vedno namestite akumulatorsko baterijo, tako da
rdeči indikator ni več viden. Če tega ne upoštevate,
lahko akumulator nepričakovano izpade iz orodja in
poškoduje vas ali osebe v neposredni bližini.
• Ne nameščajte akumulatorske baterije s silo. Če
se akumulatorska baterija ne zaskoči zlahka, ni
pravilno vstavljena.
Sistem za zaščito akumulatorja (litij-
ionske akumulatorji z zvezdico)
► Sl.2: 1. Oznaka z zvezdico
Litij-ionske akumulatorji so opremljene z zaščitnim siste-
mom. Ta sistem samodejno izklopi dovajanje električne
energije v orodje, da bi podaljšal življenjsko dobo baterije.
Orodje se bo samodejno zaustavilo med delovanjem, če
sta orodje in/ali baterija zamenjana pod naslednjimi pogoji:
• Preobremenjeno:
Orodje deluje na način, ki povzroča, da
povleče nenormalno visok tok.
V takem primeru sprostite sprožilno stikalo na
orodju in ga prenehajte uporabljati na način,
zaradi katerega je prišlo do preobremenitve. Nato
znova povlecite sprožilno stikalo, da ga zaženete.
Če se orodje ne zažene, je akumulator pregret.
V tem primeru pustite, da se akumulator ohladi,
preden znova pritisnete sprožilno stikalo.
• Nizka napetost akumulatorja:
Preostala zmogljivost akumulatorja je pre-
nizka in orodje ne bo delovalo. V tem pri-
meru odstranite in napolnite akumulator.

17 SLOVENŠČINA
Prikazuje preostalo zmogljivost
akumulatorja
(Samo za akumulatorske baterije z oznako »B« na
koncu številke modela.)
► Sl.3: 1. Indikatorske lučke 2. Gumb CHECK
Pritisnite gumb za preverjanje napolnjenosti na aku-
mulatorski bateriji, da preverite preostalo zmogljivost.
Indikatorske lučke zasvetijo za nekaj sekund.
Ne sveti UtripaSveti
Indikatorske lučke
Napolnite
akumulator.
od 0 % do 25 %
od 25 % do 50 %
od 50 % do 75 %
od 75 % do 100 %
Preostala
zmogljivost
Akumulator
je morda
okvarjen.
OPOMBA:
• Odvisno od pogojev uporabe in okoljske tem-
perature se označba lahko nekoliko razlikuje od
dejanske napolnjenosti.
Delovanje stikala
POZOR:
• Preden vstavite akumulatorsko baterijo v orodje
se vedno prepričajte, da je stikalo brezhibno
in da se vrača v položaj za izklop (OFF), ko ga
spustite.
► Sl.4: 1. Sprožilno stikalo A 2. Sprožilno stikalo B
3. Sprostilni gumb
Za vašo varnost je to orodje opremljeno z dvojnim
vklopnim sistemom. Za vklop orodja pritisnite sprostilni
gumb in sprožili A in B. Za izklop spustite katero koli
izmed obeh pritisnjenih sprožil. Zaporedje vklopa ni
pomembno, saj se orodje zažene samo, kadar sta
aktivirani obe stikali.
Opozorilna lučka
► Sl.5: 1. Kontrolna lučka
Delovanje orodja omogoča, da opozorilna lučka prikazuje stanje zmogljivosti akumulatorske baterije.
Če je orodje preobremenjeno in se je med delovanjem ustavilo, lučka sveti rdeče.
Glejte naslednjo tabelo glede stanja in potrebnih ukrepov, ki jih označuje opozorilna lučka.
Opomba 1:
Čas, pri katerem zasveti opozorilna lučka, je odvisen od temperature v delovnem
okolju in pogojev akumulatorske baterije.
Kontrolna lučka
Lučka utripa rdeče.
Lučka zasveti rdeče.
(opomba 1)
Lučka zasveti rdeče.
(opomba 1)
Stanje
To kaže na ustrezen čas za
zamenjavo akumulatorske
baterije, ker je akumulator
skoraj izpraznjen.
Ta funkcija deluje, kadar je
akumulator skoraj izpraznjen.
V tem primeru se orodje takoj
ustavi.
Samodejna ustavitev zaradi
preobremenitve.
Dejanja, ki jih je treba izvesti
Čim prej napolnite akumulatorsko
baterijo.
Napolnite akumulatorsko baterijo.
Izklopite orodje.

18 SLOVENŠČINA
DELOVANJE
POZOR:
• Pazite, da se med rezanjem nenamerno ne
dotaknete kovinske ograje ali drugih trdih pred-
metov. Rezilo se bo zlomilo in lahko povzroči
hude telesne poškodbe.
• Previsoko seganje s škarjami za živo mejo,
še posebej z lestve, je izjemno nevarno. Ne
delajte tako, da stojite na majavih ali nestabilnih
podlagah.
OBVESTILO: S tem orodjem ne poskušajte
rezati vej, debelejših od 10 mm. Pred uporabo
orodja s škarjami za veje odrežite veje do višine 10
cm nižje od višine za rezanje.
► Sl.6: (1) Višina za rezanje (2) 10 cm
POZOR:
• Ne režite podrtih dreves ali podobnih trdih pred-
metov. V nasprotnem primeru lahko pride do
poškodb orodja.
► Sl.7
Držite obrezovalnik z obema rokama in povlecite spro-
žilno stikalo A ali B, nato pa ga premaknite pred svoje
telo.
► Sl.8: 1. Smer rezanja s škarjami 2. Površina žive
meje, ki jo boste rezali 3. Nagnite rezila
Pri osnovni uporabi nagnite rezila v smeri rezanja in jih
mirno in počasi premikajte pri hitrosti 3 - 4 sekunde na
meter.
► Sl.9: 1. Vrvica
Za enakomerno rezanje vrha žive meje pomaga, če
privežete vrvico v želeni višini žive meje in režete vzdolž
vrvice, ki služi za referenco.
► Sl.10
S pritrditvijo prestreznika odrezanega materiala (doda-
tna oprema) na orodje med ravnim obrezovanjem žive
meje, se lahko izognete, da odrezani listi niso zavrženi.
► Sl.11
Za enakomerno rezanje žive meje pomaga, če režete
od spodaj navzgor.
► Sl.12
Zelenike ali rododendron režite od spodaj navzgor, da
bodo videti lepi in da boste dobro opravili delo.
Nameščanje ali odstranjevanje
prestreznika odrezanega materiala
(izbirni dodatni pribor)
POZOR:
• Pred vsako nastavitvijo ali odstranjevanjem
prestreznika odrezanega materiala se prepri-
čajte, ali je orodje izključeno in odklopljeno z
električnega omrežja.
OPOMBA:
• Kadar menjujete prestreznik odrezanega mate-
riala, vedno nosite rokavice, tako da se dlani in
obraz neposredno ne dotikajo rezila. V naspro-
tnem primeru lahko pride do hudih telesnih
poškodb.
• Preden namestite prestreznik odrezanega mate-
riala vedno odstranite pokrov rezila.
• Prestreznik odrezanega materiala prestreza
odrezano listje in zmanjša razmetavanje listov.
Lahko ga namestite na katero koli stran orodja.
► Sl.13: 1. Pritisnite 2. Prestreznik odrezanega mate-
riala 3. Matica 4. Rezilo škarij
Pritisnite prestreznik odrezanega materiala na rezila
škarij, tako da se njegove reže prekrivajo z maticami na
rezilih škarij.
► Sl.14: 1. Kavlji 2. Namestitev kavljev v zarezo
3. Zareze
Zdaj je treba namestiti prestreznik odrezanega materi-
ala, tako da se njegovi kavlji prilegajo v zareze v enoti
z rezili škarij.
► Sl.15: 1. Pritisnite vzvoda na obeh straneh
2. Odklenite kavlje
Za odstranjevanje prestreznika odrezanega materiala
pritisnite njegov vzvod na obeh straneh, tako da se
kavlja odkleneta.
POZOR:
• Pokrova rezila (standardna oprema) ni možno
namestiti na orodje, če je nameščen prestreznik
odrezanega materiala. Pred prenašanjem ali
hrambo demontirajte prestreznik odrezanega
materiala in namestite pokrov rezila, da prepre-
čite izpostavljenost rezila.
OPOMBA:
• Pred uporabo preverite prestreznik odrezanega
materiala, če je trdno nameščen.
• Nikoli ne poskušajte demontirati prestreznika
odrezanega materiala s čezmerno silo ali če
sta kavlja zataknjena v zarezah enote z rezili.
Uporaba čezmerne sile jo lahko poškoduje.
VZDRŽEVANJE
POZOR:
• Preden se lotite pregledovanja ali vzdrževanja
orodja, se vedno prepričajte, da je orodje izklo-
pljeno in akumulatorska baterija odstranjena.
Čiščenje orodja
Očistite orodje, tako da obrišete prah s suho ali v mil-
nico namočeno krpo.
POZOR:
• Nikoli ne uporabljajte bencina, razredčila, alko-
hola ali podobnega. V tem primeru se orodje
lahko razbarva, deformira, lahko pa tudi nasta-
nejo razpoke.

19 SLOVENŠČINA
Vzdrževanje rezila
Rezilo namažite pred uporabo in enkrat na uro med
uporabo s strojnim ali podobnim oljem.
OPOMBA:
• Preden namažete rezilo odstranite prestreznik
odrezanega materiala.
Po uporabi odstranite prah z obeh strani rezila z žičnato
krtačo, ga obrišite s krpo, nato pa nanesite dovolj olja
z nizko viskoznostjo, kot je strojno olje itn. in mazalnim
oljem v razpršilu.
POZOR:
• Rezil ne perite z vodo. V nasprotnem primeru
lahko pride do rje ali poškodb orodja.
Odstranjevanje ali nameščanje
rezila škarij
POZOR:
• Preden namestite ali odstranite strižno rezilo
se vedno prepričajte, da je orodje izklopljeno in
akumulatorska baterija odstranjena.
• Kadar menjujete rezilo škarij, vedno nosite
rokavice in pri tem ne odstranjujte pokrova
rezila, tako da se dlani in obraz neposredno
ne dotikajo rezila. V nasprotnem primeru lahko
pride do hudih telesnih poškodb.
OPOMBA:
• Z orodja in ročice ne brišite trave. V nasprotnem
primeru lahko pride do poškodb orodja.
Odstranitev rezil škarij
► Sl.16: 1. Vijaki 2. Spodnji pokrov
Zamenjajte smer delovanja orodja in odvijte štiri vijake
ter odstranite spodnji pokrov.
OPOMBA:
• Bodite previdni, da si ne umažete rok, saj se
mast nanaša v pogonsko območje rezila škarij.
► Sl.17: 1. Vijaki 2. Gobica 3. Podložka
Odvijte štiri vijake in odstranite rezila. Odstranite pod-
ložko in gobico z rezil škarij in ju odložite. Potrebovali ju
boste kasneje.
► Sl.18: 1. Orodje 2. Stročnice 3. Podložka 4. Utor
Če stročnice ostanejo v odprtinah orodja, odstranite
orodje in potisnite stročnice ven z uporabo izvijača ali
podobnega predmeta.
OPOMBA: Podložka pod orodjem se lahko med
odstranjevanjem orodja pomotoma sname. V tem
primeru jo vrnite v prvotni položaj.
Namestitev rezila škarij
► Sl.19: 1. Pokrov rezila
Odstranite pokrov rezila s starih rezil škarij in ga name-
stite na nova, da preprečite stik z rezili.
► Sl.20
Prilagodite položaj odprtine, tako da obrnete orodje, kot
je prikazano.
► Sl.21: 1. Mast
► Sl.22: 1. Mast
Nanesite nekaj masti, ki je priložena novim rezilom
škarij, kot je prikazano.
► Sl.23: 1. Rezilo 2. Gobica 3. Stročnice
Namestite odstranjeno gobico v isti položaj kot staro.
Zagotovite, da bodo stročnice, priložene novim rezilom
škarij, nameščene na zatiče rezila. Namestite nova
rezila škarij na orodje, tako da se zatiči prilegajo v odpr-
tine na orodju. Če se stročnice na zatičih pomotoma
snamejo, jih predhodno namestite v odprtine orodja.
► Sl.24: 1. Vijaki 2. Podložka
Namestite rezilo in zategnite štiri vijake ter namestite
odstranjeno podložko v isti položaj kot staro.
► Sl.25: 1. Vijaki
Na orodje namestite spodnji pokrov in trdno zategnite
štiri vijake.
Shranjevanje
Luknja za obešanje v podstavku orodja je primerna za
obešanje orodja na žebelj ali vijak v steni.
► Sl.26
Odstranite akumulatorsko baterijo in položite pokrov
rezila na rezila škarij ter jih tako zaščitite. Orodje hranite
izven dosega otrok.
Orodje shranjujte na mestu, ki ni izpostavljeno vodi in dežju.
VARNO in ZANESLJIVO delovanje tega izdelka bo
zagotovljeno le, če boste popravila, vzdrževanje in
nastavitve prepustili pooblaščenemu servisu za orodja
Makita, ki vgrajuje izključno originalne nadomestne dele.
DODATNI PRIBOR
POZOR:
• Ta dodatni pribor ali pripomočki so predvideni
za uporabo z orodjem Makita, ki je opisano v
teh navodilih za uporabo. Pri uporabi drugega
pribora ali pripomočkov obstaja nevarnost tele-
snih poškodb. Dodatni pribor ali pripomočke
uporabljajte samo za navedeni namen.
Za več informacij o dodatnem priboru in opremi se
obrnite na najbližji pooblaščeni Makita servis.
• Pokrov rezila
• Sklop rezila škarij
• Originalna akumulator in polnilnik Makita
• Prestreznik odrezanega materiala
OPOMBA:
• Nekateri predmeti na seznamu so lahko pri-
loženi orodju kot standardni pribor. Lahko se
razlikuje od države do države.

20 SHQIP
SHQIP (Udhëzimet origjinale)
SPECIFIKIMET
Modeli DUH483 DUH523
Gjatësia e tehut 480 mm 520 mm
Goditje në minutë (min-1)1350
Tensioni nominal DC 18 V
Gjatësia e përgjithshme
(Në varësi të baterisë)
873 - 888 mm 923 - 938 mm
Pesha neto 3,0 - 3,3 kg 3,0 - 3,4 kg
•
Për shkak të programit tonë të vazhdueshëm të kërkim-zhvillimit, specikimet që jepen këtu mund të ndryshojnë pa dhënë njoftim.
• Specikimet mund të ndryshojnë nga njëri shtet në tjetrin.
• Pesha mund të ndryshojë në varësi të aksesorit(ëve), përfshirë kutinë e baterisë. Kombinimi më i lehtë dhe më
i rëndë, sipas Procedurës EPTA 01/2014, tregohet në tabelë.
Kutia e aplikueshme e baterisë dhe karikuesi
Kutia e baterisë BL1815N / BL1820B / BL1830B / BL1840B / BL1850B / BL1860B
Karikuesi DC18RC / DC18RD / DC18RE / DC18SD / DC18SE / DC18SF /
DC18SH
•
Disa prej kutive të baterive dhe karikuesve të renditura më lart mund të mos jenë të disponueshme në varësi të zonës ku ju banoni.
PARALAJMËRIM: Përdorni vetëm kutitë e baterisë dhe karikuesit e listuar më lart. Përdorimi i
karikuesve dhe kutive të tjera të baterisë mund të shkaktojë lëndim dhe/ose zjarr.
Përshtatësi i rekomanduar i baterisë
Përshtatësi i baterisë PDC01
•
Disa prej përshtatësve të baterive të renditur më lart mund të mos jenë të disponueshme në varësi të zonës ku ju banoni.
•
Përpara përdorimit të përshtatësit të baterisë, lexoni udhëzimet dhe shënimet paralajmëruese te përshtatësi i baterisë.
Simbolet
Pjesët në vazhdim tregojnë simbolet që mund të
përdoren për pajisjen. Sigurohuni që merrni vesh
kuptimin e tyre përpara përdorimit.
Lexoni manualin e përdorimit.
Mos e ekspozoni ndaj lagështirës.
Mbani mbrojtëse për sytë.
RREZIK - Mbajini duart larg etës.
Ni-MH
Li-ion
Vetëm për shtetet e BE-së
Mos i hidhni pajisjet elektrike ose paketën e
baterisë së bashku me mbeturinat e shtëpisë!
Në përputhje me Direktivën Evropiane për
mbetjet nga pajisjet elektrike dhe elektronike,
për bateritë dhe akumulatorët dhe mbetjet nga
bateritë dhe akumulatorët dhe implementimin
e tyre në përputhje me legjislacionin kombëtar,
pajisjet elektrike, bateritë dhe paketën(at) e
baterisë që kanë arritur fundin e jetëgjatësisë së
tyre duhet të mblidhen veçmas dhe të dorëzohen
në një objekt riciklimi që nuk dëmton mjedisin.
Përdorimi i synuar
Vegla është prodhuar për t’u përdorur për prerjen e
shkurreve.s
Zhurma
Niveli tipik i zhurmës A, i matur sipas EN62841-4-2:
Modeli DUH483
Niveli i presionit të zhurmës (LpA) : 73 dB (A)
Pasiguria (K): 3,9 dB (A)
Modeli DUH523
Niveli i presionit të zhurmës (LpA) : 73 dB (A)
Pasiguria (K): 4,3 dB (A)
Niveli i zhurmës mund të tejkalojë 80 dB (A).
SHËNIM: Vlerat e deklaruar totale të emetimeve
të zhurmës janë matur sipas një metode standarde
testimi dhe mund të përdoren për të krahasuar një
vegël me një tjetër.
SHËNIM: Vlerat e deklaruara të emetimeve të
zhurmës mund të përdoren për një vlerësim paraprak
të ekspozimit.
Other manuals for DUH483
3
This manual suits for next models
1
Table of contents
Languages:
Other Makita Trimmer manuals

Makita
Makita EN4950H User guide

Makita
Makita DUH481 User manual

Makita
Makita DUR189 User manual

Makita
Makita DUH751 User manual

Makita
Makita M3701 User manual

Makita
Makita DUR188L User manual

Makita
Makita DUR187U User manual

Makita
Makita DUH501 User manual

Makita
Makita DUR141 User manual

Makita
Makita DUR189 User manual

Makita
Makita EH7500S User manual

Makita
Makita DUH551 User manual

Makita
Makita EM4351UH User guide

Makita
Makita UH013G User manual

Makita
Makita EM2600U User guide

Makita
Makita MT370 User manual

Makita
Makita RT001GZ03 User manual

Makita
Makita HRU01 User manual

Makita
Makita UR202C User manual

Makita
Makita EN4950H User guide