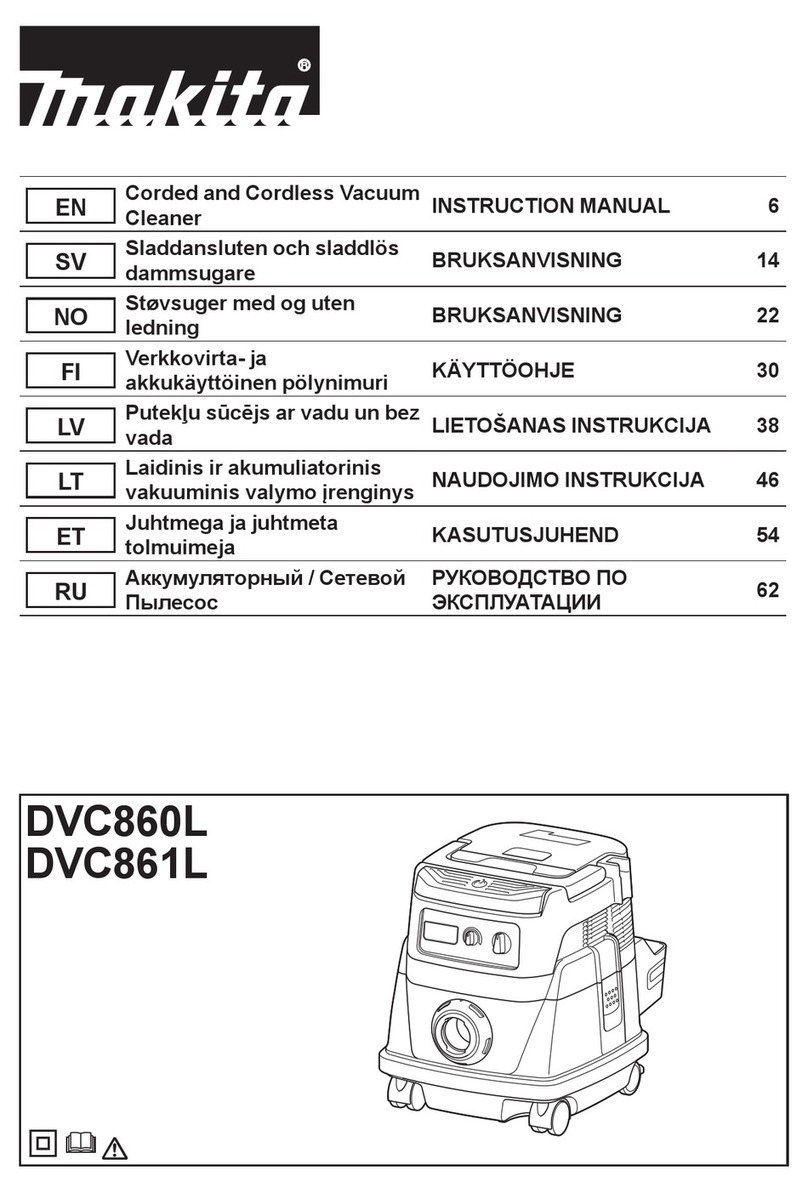
Makita DVC150L User manual

DVC150L
DVC151L
EN Corded and Cordless Vacuum
Cleaner INSTRUCTION MANUAL 6
PL Odkurzacz Przewodowy/
Bezprzewodowy INSTRUKCJA OBSŁUGI 14
HU Vezetékes és vezeték nélküli
porszívó HASZNÁLATI KÉZIKÖNYV 23
SK Káblový a akumulátorový
vysávač NÁVOD NA OBSLUHU 32
CS Kabelový a bezdrátový
akumulátorový vysavač NÁVOD K OBSLUZE 41
UK Дротяний і бездротовий
пилосос ІНСТРУКЦІЯ З
ЕКСПЛУАТАЦІЇ 50
RO Aspirator cu cablu şi fără
cablu MANUAL DE INSTRUCŢIUNI 60
DE Akku- und Netzsauger BETRIEBSANLEITUNG 69

1
4
5
2
3
Fig.1
1
2
3
4
5
Fig.2
1
Fig.3
12
1
Fig.4
2
1
Fig.5
1
Fig.6
1
2
Fig.7
2

12
1
2
Fig.8
1 212
Fig.9
2
1
3
Fig.10
1
2
3
4
Fig.11
Fig.12
2
1
Fig.13
1
2
3
4
5
6
6
6
Fig.14
3

1
2
3
3
Fig.15
1
1
Fig.16
1
2
Fig.17
1
2
Fig.18
1
Fig.19
Fig.20
Fig.21
Fig.22
4

Fig.23
Fig.24
Fig.25
Fig.26
Fig.27
1
Fig.28
Fig.29
5

6ENGLISH
ENGLISH (Original instructions)
WARNING
This machine is not intended for use by persons (including children)
with reduced physical, sensory or mental capabilities, or a lack of
experience and knowledge.
Children should be supervised to ensure that they do not play with
the appliance.
SPECIFICATIONS
Model: DVC150L DVC151L
Standard lter type
Cloth lter (for dry and wet dust)
Powder lter (for dry dust)
Volume ow (air) DC operation
(with BL1850B, ø38 mm x 2.5 m hose)
2.1 m3/min
AC operation
(with ø38 mm x 2.5 m hose)
3.6 m3/min
Vacuum DC operation
(with BL1850B, ø38 mm x 2.5 m hose)
9.0 kPa
AC operation
(with ø38 mm x 2.5 m hose)
24.0 kPa
Recoverable capacity Dust 15 L
Water 12 L -
Dimensions (L x W x H) 366 mm x 334 mm x 421 mm
Rated voltage D.C. 36 V
Net weight 8.9 - 9.6 kg 9.6 - 10.3 kg
Safety class /II
• Due to our continuing program of research and development, the specications herein are subject to change
without notice.
• Specications and battery cartridge may differ from country to country.
• The weight does not include accessories but battery cartridge(s). The lightest and heaviest combination weight
of the appliance and battery cartridge(s) are shown in the table.
• For wet dust, the oat and the water lter or cloth lter are required.
Applicable battery cartridge and charger
Battery cartridge BL1815N / BL1820 / BL1820B / BL1830 / BL1830B / BL1840 /
BL1840B / BL1850 / BL1850B / BL1860B
Charger DC18RC / DC18RD / DC18RE / DC18SD / DC18SE / DC18SF
• Some of the battery cartridges and chargers listed above may not be available depending on your region of
residence.
WARNING: Only use the battery cartridges and chargers listed above. Use of any other battery cartridges
and chargers may cause injury and/or re.

7ENGLISH
Symbols
The followings show the symbols used for the equip-
ment. Be sure that you understand their meaning before
use.
Read instruction manual.
Take particular care and attention.
Warning! The cleaner may contain haz-
ardous dust.
Never stand on the cleaner.
Dust class L (light). The cleaners are capa-
ble of picking up dust class L. Follow your
country's regulations relating to dusts and
to occupational health and safety.
DOUBLE INSULATION
Ni-MH
Li-ion
Only for EU countries
Do not dispose of electric equipment or
battery pack together with household
waste material! In observance of the
European Directives, on Waste Electric
and Electronic Equipment and Batteries
and Accumulators and Waste Batteries and
Accumulators and their implementation
in accordance with national laws, electric
equipment and batteries and battery
pack(s) that have reached the end of
their life must be collected separately and
returned to an environmentally compatible
recycling facility.
Intended use
The tool is suitable for commercial use, for example in
hotels, schools, hospitals, factories, shops, ofces and
rental businesses.
DVC150L
The tool is intended for collecting both wet and dry dust.
DVC151L
The tool is intended for collecting dry dust only.
Power supply
The tool should be connected only to a power supply of
the same voltage as indicated on the nameplate, and
can only be operated on single-phase AC supply. They
are double-insulated and can, therefore, also be used
from sockets without earth wire.
Noise
The typical A-weighted noise level determined accord-
ing to EN60335-2-69:
Model DVC150L
Sound pressure level (LpA) : 75 dB(A)
Uncertainty (K) : 2.5 dB(A)
Model DVC151L
Sound pressure level (LpA) : 75 dB(A)
Uncertainty (K) : 2.5 dB(A)
The noise level under working may exceed 80 dB (A).
NOTE:
The declared noise emission value(s) has been
measured in accordance with a standard test method
and may be used for comparing one tool with another.
NOTE:
The declared noise emission value(s) may
also be used in a preliminary assessment of exposure.
WARNING: Wear ear protection.
WARNING:
The noise emission during actual
use of the power tool can differ from the declared
value(s) depending on the ways in which the tool is
used especially what kind of workpiece is processed.
WARNING:
Be sure to identify safety measures
to protect the operator that are based on an estima-
tion of exposure in the actual conditions of use (tak-
ing account of all parts of the operating cycle such
as the times when the tool is switched off and when
it is running idle in addition to the trigger time).
Vibration
The vibration total value (tri-axial vector sum) deter-
mined according to EN60335-2-69:
Vibration emission (ah,M) : 2.5 m/s2or less
Uncertainty (K) : 1.5 m/s2
NOTE: The declared vibration total value(s) has been
measured in accordance with a standard test method
and may be used for comparing one tool with another.
NOTE: The declared vibration total value(s) may also
be used in a preliminary assessment of exposure.
WARNING: The vibration emission during
actual use of the power tool can differ from the
declared value(s) depending on the ways in which
the tool is used especially what kind of workpiece
is processed.
WARNING: Be sure to identify safety mea-
sures to protect the operator that are based on an
estimation of exposure in the actual conditions of
use (taking account of all parts of the operating
cycle such as the times when the tool is switched
off and when it is running idle in addition to the
trigger time).
EC Declaration of Conformity
For European countries only
The EC declaration of conformity is included as Annex A
to this instruction manual.
SAFETY WARNINGS
Corded and cordless vacuum
cleaner safety warnings
WARNING: IMPORTANT! READ CAREFULLY
all safety warnings and all instructions BEFORE
USE. Failure to follow the warnings and instructions
may result in electric shock, re and/or serious injury.

8ENGLISH
1. Before use, make sure that this cleaner must
be used by people who have been adequately
instructed on the use of this cleaner.
2.
If foam/liquid comes out, switch off immediately.
3. Clean the water level limiting device regularly
and examine it for signs of damage.
4. Do not use the cleaner without the lter.
Replace a damaged lter immediately.
5. USE OF EXTENSION CORD. When using an
extension cord because of the great distance
to your power source, try to employ a cord that
is sufciently thick but not too long, or cleaner
performance will be adversely affected. For
outdoor applications use an extension cord
suitable for outdoor use.
6. VOLTAGE WARNING: Before connecting the
cleaner to a power source (receptacle, outlet,
etc.) be sure the voltage supplied is the same
as that specied on the nameplate of the
cleaner. A power source with voltage greater
than that specied for the cleaner can result
in SERIOUS INJURY to the operator as well
as damage to the cleaner. If in doubt, DO NOT
PLUG IN THE CLEANER. Using a power source
with voltage less than the nameplate rating is
harmful to the motor.
7. AVOID UNINTENTIONAL STARTING. Be sure
switch is OFF when plugging in.
8. Do not attempt to pick up ammable materials,
re works, lighted cigarettes, hot ashes, hot
metal chips, sharp materials such as razors,
needles, broken glass or the like.
9.
NEVER USE THE CLEANER IN THE VICINITY
OF GASOLINE, GAS, PAINT, ADHESIVES OR
OTHER HIGHLY EXPLOSIVE SUBSTANCES.
The switch emits sparks when turned ON and
OFF. And so does the motor commutator during
operation. A dangerous explosion may result.
10.
Never vacuum up toxic, carcinogenic, com-
bustible or other hazardous materials such as
asbestos, arsenic, barium, beryllium, lead, pes-
ticides, or other health endangering materials.
11. Never use the cleaner outdoors in the rain.
12. Do not use close to heat sources (stoves, etc.).
13. GUARD AGAINST ELECTRIC SHOCK. Prevent
body contact with grounded surfaces. For
example; pipes, radiators, ranges, refrigerator
enclosures.
14. Do not block cooling vents. These vents per-
mit cooling of the motor. Blockage should be
carefully avoided otherwise the motor will burn
out from lack of ventilation.
15. Keep proper footing and balance at all times.
16. DO NOT ABUSE CORD. Never carry the cleaner
by cord or yank it to disconnect from recepta-
cle. Keep cord away from heat, oil, and sharp
edges. Inspect cleaner cords periodically and
if damaged, have repaired by authorized ser-
vice facility. Inspect extension cords periodi-
cally and replace if damaged.
17. Do not fold, tug or step on the hose.
18. Stop the cleaner immediately if you notice
poor performance or anything abnormal
during operation.
19. DISCONNECT THE CLEANER. When not in
use, before servicing, and when changing
accessories.
20. Clean and service the cleaner immediately
after each use to keep it in tiptop operating
condition.
21. MAINTAIN THE CLEANER WITH CARE. Keep
the cleaner clean for better and safer per-
formance. Follow instructions for changing
accessories. Keep handles dry, clean, and free
from oil and grease.
22. CHECK DAMAGED PARTS. Before further use
of the cleaner, a guard or other part that is
damaged should be carefully checked to deter-
mine that it will operate properly and perform
its intended function. Check for alignment of
moving parts, binding of moving parts, break-
age of parts, mounting, and any other condi-
tions that may affect its operation. A guard or
other part that is damaged should be properly
repaired or replaced by an authorized service
center unless otherwise indicated elsewhere
in this instruction manual. Have defective
switches replaced by authorized service cen-
ter. Don’t use the cleaner if switch does not
turn it on and off.
23. REPLACEMENT PARTS. When servicing, use
only identical replacement parts.
24. STORE IDLE CLEANER. When not in use, the
cleaner should be stored indoors.
25. Wet lters and the interior part of the liquid
container shall be dried before storage.
26. Be kind to your cleaner. Rough handling can
cause breakage of even the most sturdily built
cleaner.
27. Do not attempt to clean the exterior or interior
with benzine, thinner or cleaning chemicals.
Cracks and discoloration may be caused.
28. Do not use cleaner in an enclosed space where
ammable, explosive or toxic vapors are given
off by oil-base paint, paint-thinner, gasoline,
some mothproong substances, etc., or in
areas where ammable dust is present.
29. Do not leave the cleaner cord lying on the oor
after you have nished a cleaning job. It can
become a tripping hazard or may cause dam-
age to the cleaner.
30. Do not operate this or any tool while under the
inuence of drugs or alcohol.
31. As a basic rule of safety, use safety goggles or
safety glasses with side shields.
32. Use a dust mask in dusty work conditions.
33. This machine is not intended for use by per-
sons including children with reduced physical,
sensory or mental capabilities, or lack of expe-
rience and knowledge.
34. Young children should be supervised to
ensure that they do not play with the cleaner.
35. Never handle plug cord or cleaner with wet
hands.
36. Use extreme caution when cleaning on stairs.
37. Do not use the cleaner as a stool or work
bench. The machine may fall down and may
result in personal injury.
9ENGLISH
Battery tool use and care
1. Recharge only with the charger specied by
the manufacturer. A charger that is suitable for
one type of battery pack may create a risk of re
when used with another battery pack.
2. Use power tools only with specically desig-
nated battery packs. Use of any other battery
packs may create a risk of injury and re.
3.
When battery pack is not in use, keep it away from
other metal objects, like paper clips, coins, keys, nails,
screws or other small metal objects, that can make a
connection from one terminal to another. Shorting the
battery terminals together may cause burns or a re.
4.
Under abusive conditions, liquid may be ejected
from the battery; avoid contact. If contact acci-
dentally occurs, ush with water. If liquid contacts
eyes, additionally seek medical help. Liquid ejected
from the battery may cause irritation or burns.
5. Do not use a battery pack or tool that is dam-
aged or modied. Damaged or modied batteries
may exhibit unpredictable behaviour resulting in
re, explosion or risk of injury.
6. Do not expose a battery pack or tool to re or
excessive temperature. Exposure to re or tem-
perature above 130 °C may cause explosion.
7. Follow all charging instructions and do not
charge the battery pack or tool outside the
temperature range specied in the instruc-
tions. Charging improperly or at temperatures
outside the specied range may damage the
battery and increase the risk of re.
SAVE THESE INSTRUCTIONS.
WARNING:
DO NOT let comfort or familiarity with
product (gained from repeated use) replace strict adher-
ence to safety rules for the subject product. MISUSE or
failure to follow the safety rules stated in this instruc-
tion manual may cause serious personal injury.
Important safety instructions for
battery cartridge
1.
Before using battery cartridge, read all instruc-
tions and cautionary markings on (1) battery char-
ger, (2) battery, and (3) product using battery.
2. Do not disassemble battery cartridge.
3. If operating time has become excessively
shorter, stop operating immediately. It may
result in a risk of overheating, possible burns
and even an explosion.
4.
If electrolyte gets into your eyes, rinse them out
with clear water and seek medical attention right
away. It may result in loss of your eyesight.
5. Do not short the battery cartridge:
(1) Do not touch the terminals with any con-
ductive material.
(2) Avoid storing battery cartridge in a con-
tainer with other metal objects such as
nails, coins, etc.
(3) Do not expose battery cartridge to water
or rain.
A battery short can cause a large current ow, over-
heating, possible burns and even a breakdown.
6. Do not store the tool and battery cartridge in
locations where the temperature may reach or
exceed 50 °C (122 °F).
7. Do not incinerate the battery cartridge even if
it is severely damaged or is completely worn
out. The battery cartridge can explode in a re.
8. Be careful not to drop or strike battery.
9. Do not use a damaged battery.
10.
The contained lithium-ion batteries are subject to
the Dangerous Goods Legislation requirements.
For commercial transports e.g. by third parties,
forwarding agents, special requirement on pack-
aging and labeling must be observed.
For preparation of the item being shipped, consult-
ing an expert for hazardous material is required.
Please also observe possibly more detailed
national regulations.
Tape or mask off open contacts and pack up the
battery in such a manner that it cannot move
around in the packaging.
11. Follow your local regulations relating to dis-
posal of battery.
12. Use the batteries only with the products
specied by Makita. Installing the batteries to
non-compliant products may result in a re, exces-
sive heat, explosion, or leak of electrolyte.
SAVE THESE INSTRUCTIONS.
CAUTION: Only use genuine Makita batteries.
Use of non-genuine Makita batteries, or batteries that
have been altered, may result in the battery bursting
causing res, personal injury and damage. It will
also void the Makita warranty for the Makita tool and
charger.
Tips for maintaining maximum
battery life
1. Charge the battery cartridge before completely
discharged. Always stop tool operation and
charge the battery cartridge when you notice
less tool power.
2.
Never recharge a fully charged battery cartridge.
Overcharging shortens the battery service life.
3. Charge the battery cartridge with room tem-
perature at 10 °C - 40 °C (50 °F - 104 °F). Let
a hot battery cartridge cool down before
charging it.
4. Charge the battery cartridge if you do not use
it for a long period (more than six months).
PARTS DESCRIPTION
Model DVC150L
(Cloth lter (for dry and wet dust) model)
► Fig.1: 1. Tank cover 2. Float 3. Float cage 4. Cloth
lter 5. Tank
Model DVC151L
(Powder lter (for dry dust) model)
► Fig.2: 1. Tank cover 2. Powder lter (HEPA)
3. Damper 4. Prelter 5. Tank

10 ENGLISH
FUNCTIONAL DESCRIPTION
Use with AC power:
WARNING: Before plugging the cleaner,
always make sure that the cleaner is switched off.
Plugging the cleaner with the switch on may cause an
unexpected start resulting in serious personal injury.
Connect the plug to a power supply.
► Fig.3: 1. Plug (the shape and cord length may differ
from country to country)
The AC power indicator lights up when setting the
stand-by switch to "I" side.
► Fig.4: 1. AC power indicator
NOTE:
Even operating in DC power mode, the cleaner is
automatically changed into AC power mode when plugged in.
NOTE:
If the cleaner is unplugged during operation with
the battery inserted, the cleaner gets into stand-by state.
Use with battery:
CAUTION: Always be sure that the cleaner is
switched off, unplugged, and the battery cartridge
is removed before adjusting or checking function
on the cleaner.
Installing or removing battery cartridge
CAUTION: Always switch off the tool before
installing or removing of the battery cartridge.
CAUTION: Hold the cleaner and the battery
cartridge rmly when installing or removing bat-
tery cartridge. Failure to hold the cleaner and the
battery cartridge rmly may cause them to slip off
your hands and result in damage to the cleaner and
battery cartridge and a personal injury.
CAUTION: Be careful not to pinch your n-
gers when opening or closing the battery cover.
Failure to do so may cause personal injury.
To install the battery cartridge, release the lock rst, and then
open the battery cover. After that, insert the battery cartridge.
► Fig.5: 1. Lock 2. Battery cover
Align the tongue on the battery cartridge with the groove
in the housing and slip it into place. Insert it all the way
until it locks in place with a little click. Then lock the
battery cover.
► Fig.6: 1. Battery cartridge
To remove the battery cartridge, slide it from the tool
while sliding the button in front of the cartridge.
CAUTION: Always install the battery cartridge
fully until the red indicator cannot be seen. If not,
it may accidentally fall out of the cleaner, causing
injury to you or someone around you.
CAUTION: Do not install the battery cartridge
forcibly. If the cartridge does not slide in easily, it is
not being inserted correctly.
NOTE: The cleaner does not work with only one
battery cartridge.
NOTE: Remove the plug of the cleaner from the
extension cord when using the cleaner with the
batteries.
Indicating the remaining battery capacity
Only for battery cartridges with the indicator
► Fig.7: 1. Indicator lamps 2. Check button
Press the check button on the battery cartridge to indi-
cate the remaining battery capacity. The indicator lamps
light up for a few seconds.
Indicator lamps Remaining
capacity
Lighted Off Blinking
75% to 100%
50% to 75%
25% to 50%
0% to 25%
Charge the
battery.
The battery
may have
malfunctioned.
NOTE: Depending on the conditions of use and the
ambient temperature, the indication may differ slightly
from the actual capacity.
Indicating the remaining battery capacity
► Fig.8: 1. Battery indicator 2. Check button
► Fig.9
Press the check button to indicate the remaining battery
capacities. The battery indicators correspond to each
battery.
Battery indicator status Remaining
battery
capacity
On Off Blinking
50% to 100%
20% to 50%
0% to 20%
Charge the
battery

11 ENGLISH
Tool / battery protection system
The tool is equipped with a tool/battery protection sys-
tem. This system automatically cuts off power to the
motor to extend tool and battery life. The tool will auto-
matically stop during operation if the tool or battery is
placed under one of the following conditions:
Overload protection
When the tool is operated in a manner that causes it to
draw an abnormally high current, the tool automatically
stops without any indication. In this situation, turn the
tool off and stop the application that caused the tool to
become overloaded. Then turn the tool on to restart.
Overheat protection
On Blinking
When the tool is overheated, the tool stops automati-
cally, and the battery indicator blinks about 60 seconds.
In this situation, let the tool cool down before turning the
tool on again.
Overdischarge protection
When the battery capacity becomes low, the tool stops
automatically. If the product does not operate even
when the switches are operated, remove the batteries
from the tool and charge the batteries.
Switch action
► Fig.10: 1. Stand-by switch 2. Power button
3. Suction force adjusting knob
To start the cleaner:
1. Set the stand-by switch to the "I" side. The cleaner
gets into stand-by state.
2. Press the power button.
To make the cleaner get into stand-by mode, press the
power button again.
To turn off the cleaner, set the stand-by switch to the "O" side.
The suction power can be adjusted according to your work need.
Suction power can be increased by turning the suction force
adjusting knob from the symbol to the symbol.
NOTICE: Always set the stand-by switch to the "O"
side when not using the cleaner for long time. The
cleaner consumes power during stand-by state.
Auto-suction stop during wet
suction operation
Only for the cloth lter model
WARNING:
Do not use for a long time while the oat
is at work. Using the cleaner with its oat at work for a long
time can cause overheat, resulting in the cleaner deformation.
WARNING:
Do not pick up foam or soapy liquid.
Picking up foam or soapy liquid can cause foam to come out of
air exit before the oat works. Continuing to using in this condi-
tion may cause an electric shock and breakage of the cleaner.
Auto-suction stop works only when using with the oat
and oat cage.
The cleaner has a oat mechanism that prevents water
from immersing into the motor when picking up more
than a certain amount of water. When the tank is full
and the cleaner no longer picks up water, switch off the
cleaner and empty the tank.
Locking or unlocking the caster
► Fig.11: 1. Caster 2. Stopper lever 3. FREE position
4. LOCK position
Locking the caster is convenient when storing the cleaner,
stopping the work on the way and keeping the cleaner still.
To operate the stopper, move it by hand.
To lock the caster with a stopper, lower the stopper
lever and the caster no longer will rotate. To release the
caster from the locked position, raise the stopper lever.
NOTE: When moving the cleaner, make sure that
the caster is unlocked. Moving the cleaner with the
caster in the locked position may cause damage to
the caster.
Carriage handle
When carrying the cleaner, carry it by holding the han-
dle on the head. The handle is retractable at the head
when not in use.
► Fig.12
ASSEMBLY
CAUTION: Always be sure that the cleaner is
switched off, unplugged, and the battery cartridge
is removed before carrying out any work on the
cleaner.
CAUTION: Always wear dust mask during
assembly or maintenance.
Installing the powder lter (HEPA)
and prelter (for dry dust)
Optional accessory for cloth lter model
CAUTION: Never pick up water or other liq-
uids or wet dusts when using the powder lter.
Picking up such things may cause the powder lter
breakage.
To use powder lter:
1.
Remove the oat cage and oat by removing the bolts.
► Fig.13: 1. Float 2. Float cage
2. Place the prelter in the tank with aligning the
mounting position markings.
3. Mount the damper on the powder lter and then
place them in the prelter with aligning the mounting
position markings.
4. Finally, mount the tank cover and lock it.
► Fig.14: 1. Tank cover 2. Powder lter (HEPA)
3. Damper 4. Prelter 5. Tank 6. Mounting
position marking

12 ENGLISH
NOTICE: Before using the powder lter, make
sure that prelter and damper are always used
together. It is not allowed to install powder lter
solely.
Installing the water lter
Optional accessory for cloth lter model
CAUTION:
Never pick up water or wet dust with-
out the oat and the cloth lter or the water lter.
CAUTION:
For picking up wet dust, make sure that
the oat cage and the oat are installed on the cleaner.
CAUTION: When installing the water lter on
the tank, set it tight at the opening of the tank so
that the hook of the water lter engages the tank
opening rmly and there is no space between the
water lter and the tank.
To pick up water or wet dust only, the water lter is more
suitable than the cloth lter.
When installing the water lter, align its mounting posi-
tion mark with the one on the tank.
► Fig.15: 1. Water lter 2. Tank 3. Mounting position
marking
NOTE:
It is recommended using water lter when pick-
ing up large amount of water repeatedly. Otherwise
vacuum ability may be reduced in case of cloth lter.
Installing the paper pack
Optional accessory
WARNING: When using the paper pack, also
use the cloth lter or prelter together that is
preinstalled on the cleaner. Failure to use the cloth
lter / prelter together may cause unusual noise and
heat, resulting in a re.
CAUTION: (For the cloth lter model)
• Never pick up water or other liquids or wet
dusts when using the paper pack. Picking
up such things may cause the paper pack
breakage.
• Before using the paper pack, make sure that
powder lter (optional accessory), damper
(optional accessory) and prelter are always
used together.
CAUTION: (For the powder lter model)
• Before using the paper pack, make sure
that powder lter, damper and prelter are
always used together.
1. Remove the rubber holder.
► Fig.16: 1. Rubber holder
2. Extend the paper pack.
3. Align the paper pack opening with the dust suction
opening of the cleaner.
4. Insert the cardboard of the paper pack onto the
holder so that it is positioned at the end beyond the
detent protrusion.
► Fig.17: 1. Paper pack 2. Holder
Installing the polyethylene bag
Cleaner can also be used without polyethylene bag.
However, using polyethylene bag is easier to empty the
tank without letting your hands dirty.
Spread the polyethylene bag in the tank. Insert it
between the holder plate and the tank, and pull it to the
hose inlet.
► Fig.18: 1. Holder plate 2. Polyethylene bag
Spread the bag around the top of the tank so that the
cloth lter / prelter edge can catch and hold the bag
securely.
► Fig.19: 1. Cloth lter / prelter
NOTE:
A polyethylene bag available on the market
can be used. 0.04 mm or thicker one is recommended.
NOTE:
Too much dust will tear the bag easily, so do not
collect the dust more than the half of the bag capacity.
Emptying the polyethylene bag
WARNING: Always make sure that the cleaner
is switched off, unplugged, and the battery car-
tridge is removed before emptying the polyeth-
ylene bag. Failure to do so may cause an electric
shock and serious personal injury.
CAUTION: Do not apply a great impact on the
oat cage and tank. Applying a great impact may
cause deformation and damage to the parts.
CAUTION: Empty the tank at least once a day
although this depends on picked-up dust volume
in the tank. Or, the suction force will weaken and the
motor may be broken.
CAUTION: Do not grab the hook when empty-
ing the tank. Grabbing the hook may cause the hook
to break.
Unhook and lift up the tank cover.
Shake off the dust from the cloth lter / prelter and then
take the polyethylene bag out of the tank.
► Fig.20
NOTE: Take the polyethylene bag carefully out of the
tank so that the polyethylene bag cannot be caught
and torn by the protrusion inside the tank when emp-
tying it.
NOTE: Empty the polyethylene bag before it
becomes full. Too much dust in the tank may cause
the polyethylene bag to be torn.
Installing the tool box
1. Release the lock of the battery cover, and open
the battery cover.
2. Set the rails on the tool box along the grooves on
the housing.
3. Close the battery cover and apply the lock.
► Fig.21
The tool box is convenient for carrying batteries, exten-
sion code, pipe, or cuffs.
► Fig.22

13 ENGLISH
Connecting the hose
NOTICE: Never force the hose for bending or
stamp it. Never move the cleaner by a hose.
Forcing, stamping and pulling the hose may cause a
breakage or deformation of the hose.
NOTICE: When picking up large wastes such as
planer carvings, concrete dusts or similar other
than small wastes, use the 38 mm inner diameter
hose (optional accessory). Using the 28 mm inner
diameter hose (optional accessory) may cause a
hose stufng and damage.
Insert the hose onto the mounting port of the tank and
turn it clockwise until it locks.
► Fig.23
MAINTENANCE
CAUTION: Always be sure that the cleaner is
switched off, unplugged, and the battery cartridge
is removed before attempting to perform inspec-
tion or maintenance.
NOTICE: Never use gasoline, benzine, thinner,
alcohol or the like. Discoloration, deformation or
cracks may result.
To maintain product SAFETY and RELIABILITY,
repairs, any other maintenance or adjustment should
be performed by Makita Authorized or Factory Service
Centers, always using Makita replacement parts.
Storage of power supply cord
You can wind up the power supply cord around the tool
box.
► Fig.24
Storage of accessories
The pipes can be placed into the pipe holder when not
using the cleaner for a short time.
► Fig.25
► Fig.26
The hose can be stored around the tool by connecting
each ends.
► Fig.27
Cleaning of cloth lter
Only for the cloth lter model
Clogged cloth lter causes poor suction performance.
Clean out the cloth lter from time to time.
To remove dust or particles adhering to the cloth lter,
shake the frame bottom quickly several times.
► Fig.28: 1. Cloth lter
Cleaning of powder lter (HEPA) and
prelter
Only for the powder lter model
Clogged powder lter, prelter and damper cause poor
suction performance. Clean out the lters and dampers
from time to time.
To remove dust or particles adhering to the lters, shake
the frame bottom quickly several times.
► Fig.29
Occasionally wash the powder lter in water, rinse and
dry thoroughly in the shade before use. Never wash
lters in a washing machine.
NOTE: Do not rub or scratch the powder lter, the
prelter or the damper with hard objects such as a
brush and a paddle.
NOTE: The lters wear out in course of time. It is
recommended to have some spares for them.
OPTIONAL
ACCESSORIES
CAUTION: These accessories or attachments
are recommended for use with your Makita tool
specied in this manual. The use of any other
accessories or attachments might present a risk of
injury to persons. Only use accessory or attachment
for its stated purpose.
If you need any assistance for more details regard-
ing these accessories, ask your local Makita Service
Center.
• Hose
• Front cuff (22, 24, 38)
• Straight pipe
• Corner nozzle
• Round brush
• Powder lter, HEPA (for dry dust)
• Damper
• Prelter
• Nozzle assembly
• Bent pipe
• Polyethylene bag
• Paper pack
• Holder set
• Water Filter (option for the cloth lter model)
• Makita genuine battery and charger
NOTE: Some items in the list may be included in the
tool package as standard accessories. They may
differ from country to country.

14 POLSKI
POLSKI (Instrukcja oryginalna)
OSTRZEŻENIE
To urządzenie nie jest przeznaczone do użytkowania przez osoby
(w tym dzieci) o ograniczonej sprawności ruchowej, sensorycznej
lub umysłowej oraz osoby nieposiadające odpowiedniej wiedzy i
doświadczenia.
Należy pilnować, aby dzieci nie bawiły się urządzeniem.
DANE TECHNICZNE
Model: DVC150L DVC151L
Filtr standardowy Filtr z tkaniny
(do pyłu suchego i mokrego)
Filtr pyłu (do pyłu suchego)
Przepływ objętościowy
(powietrza)
Zasilanie prądem stałym
(BL1850B, wąż ø38 mm x 2,5 m)
2,1 m3/min
Zasilanie prądem przemiennym
(wąż ø38 mm x 2,5 m)
3,6 m3/min
Podciśnienie Zasilanie prądem stałym
(BL1850B, wąż ø38 mm x 2,5 m)
9,0 kPa
Zasilanie prądem przemiennym
(wąż ø38 mm x 2,5 m)
24,0 kPa
Pojemność Pył 15 l
Woda 12 l -
Wymiary (dług. x szer. x wys.) 366 mm x 334 mm x 421 mm
Napięcie znamionowe Prąd stały 36 V
Ciężar netto 8,9 - 9,6 kg 9,6 - 10,3 kg
Klasa bezpieczeństwa /II
• W związku ze stale prowadzonym przez naszą rmę programem badawczo-rozwojowym niniejsze dane mogą
ulec zmianom bez wcześniejszego powiadomienia.
• W innych krajach urządzenie może mieć odmienne parametry techniczne i może być wyposażone w inny
akumulator.
• Waga nie uwzględnia akcesoriów (oprócz akumulatorów). Wagę najlżejszych i najcięższych kombinacji urzą-
dzenia z akumulatorami przedstawiono w tabeli.
• W przypadku mokrego pyłu wymagane jest stosowanie pływaka oraz ltra wody lub ltra z tkaniny.
Kompatybilne akumulatory i ładowarki
Akumulator BL1815N / BL1820 / BL1820B / BL1830 / BL1830B / BL1840 /
BL1840B / BL1850 / BL1850B / BL1860B
Ładowarka DC18RC / DC18RD / DC18RE / DC18SD / DC18SE / DC18SF
• Pewne z wymienionych powyżej akumulatorów i ładowarek mogą być niedostępne w regionie zamieszkania
użytkownika.
OSTRZEŻENIE: Należy używać wyłącznie akumulatorów i ładowarek wymienionych powyżej.
Używanie innych akumulatorów i ładowarek może stwarzać ryzyko wystąpienia obrażeń ciała lub pożaru.

15 POLSKI
Symbole
Poniżej pokazano symbole zastosowane na urządzeniu. Przed
rozpoczęciem użytkowania należy zapoznać się z ich znaczeniem.
Przeczytać instrukcję obsługi.
Zachować szczególną ostrożność.
Ostrzeżenie! W odkurzaczu może się
znajdować niebezpieczny pył.
Nigdy nie stawać na odkurzaczu.
Klasa pyłu L (lekki). Odkurzacze przezna-
czone są do zbierania pyłu klasy L. Należy
postępować zgodnie z przepisami lokal-
nymi odnoszącymi się do pyłów oraz do
bezpieczeństwa i higieny pracy.
PODWÓJNA IZOLACJA
Ni-MH
Li-ion
Dotyczy tylko państw UE
Nie wyrzucać urządzeń elektrycznych ani
akumulatorów wraz z odpadami z gospo-
darstwa domowego! Zgodnie z dyrektywami
europejskimi w sprawie zużytego sprzętu
elektrycznego i elektronicznego oraz baterii
i akumulatorów oraz zużytych baterii i aku-
mulatorów, a także dostosowaniem ich do
prawa krajowego, zużyte urządzenia elek-
tryczne, baterie i akumulatory należy skła-
dować osobno i przekazywać do zakładu
recyklingu działającego zgodnie z przepi-
sami dotyczącymi ochrony środowiska.
Przeznaczenie
Narzędzie jest przeznaczone do użytku komercyjnego, na
przykład w hotelach, szkołach, szpitalach, fabrykach, sklepach,
biurach oraz przez rmy świadczące usługi wynajmu narzędzi.
DVC150L
Narzędzie przeznaczone jest do usuwania suchego i mokrego pyłu.
DVC151L
To narzędzie jest przeznaczone do odsysania tylko suchego pyłu.
Zasilanie
Narzędzie wolno podłączać tylko do źródeł zasilania o
napięciu zgodnym z napięciem podanym na tabliczce
znamionowej. Można je zasilać wyłącznie jednofazo-
wym prądem przemiennym. Narzędzie ma podwójną
izolację, dlatego też można je zasilać z gniazda elek-
trycznego bez uziemienia.
Hałas
Typowy równoważny poziom dźwięku A określony w
oparciu o normę EN60335-2-69:
Model DVC150L
Poziom ciśnienia akustycznego (LpA): 75 dB(A)
Niepewność (K): 2,5 dB(A)
Model DVC151L
Poziom ciśnienia akustycznego (LpA): 75 dB(A)
Niepewność (K): 2,5 dB(A)
Poziom hałasu podczas pracy może przekraczać 80 dB (A).
WSKAZÓWKA: Deklarowana wartość emisji hałasu
została zmierzona zgodnie ze standardową metodą
testową i można ją wykorzystać do porównywania
narzędzi.
WSKAZÓWKA: Deklarowaną wartość emisji hałasu
można także wykorzystać we wstępnej ocenie
narażenia.
OSTRZEŻENIE: Nosić ochronniki słuchu.
OSTRZEŻENIE: Poziom hałasu wytwa-
rzanego podczas rzeczywistego użytkowania
elektronarzędzia może się różnić od wartości
deklarowanej w zależności od sposobu użytko-
wania narzędzia, a w szczególności od rodzaju
obrabianego elementu.
OSTRZEŻENIE: W oparciu o szacowane
narażenie w rzeczywistych warunkach użytkowa-
nia należy określić środki bezpieczeństwa w celu
zapewnienia ochrony operatora (uwzględniając
wszystkie elementy cyklu działania, tj. czas, kiedy
narzędzie jest wyłączone i kiedy pracuje na biegu
jałowym, a także czas, kiedy jest włączone).
Drgania
Całkowita wartość poziomu drgań (suma wektorów w 3
osiach) określona zgodnie z normą EN60335-2-69:
Emisja drgań (ah,M): 2,5 m/s2 lub mniej
Niepewność (K): 1,5 m/s2
WSKAZÓWKA: Deklarowana wartość poziomu
drgań została zmierzona zgodnie ze standardową
metodą testową i można ją wykorzystać do porówny-
wania narzędzi.
WSKAZÓWKA: Deklarowaną wartość poziomu
drgań można także wykorzystać we wstępnej ocenie
narażenia.
OSTRZEŻENIE: Drgania wytwarzane pod-
czas rzeczywistego użytkowania elektronarzędzia
mogą się różnić od wartości deklarowanej w
zależności od sposobu użytkowania narzędzia,
a w szczególności od rodzaju obrabianego
elementu.
OSTRZEŻENIE: W oparciu o szacowane
narażenie w rzeczywistych warunkach użytkowa-
nia należy określić środki bezpieczeństwa w celu
zapewnienia ochrony operatora (uwzględniając
wszystkie elementy cyklu działania, tj. czas, kiedy
narzędzie jest wyłączone i kiedy pracuje na biegu
jałowym, a także czas, kiedy jest włączone).
Deklaracja zgodności WE
Dotyczy tylko krajów europejskich
Deklaracja zgodności WE jest dołączona jako załącznik
A do niniejszej instrukcji obsługi.

16 POLSKI
OSTRZEŻENIA DOTYCZĄCE
BEZPIECZEŃSTWA
Ostrzeżenia dotyczące
bezpieczeństwa dla odkurzacza
przewodowego/bezprzewodowego
OSTRZEŻENIE:
WAŻNE! UWAŻNIE PRZECZYTAĆ
wszystkie zasady bezpieczeństwa i zalecenia PRZED
UŻYCIEM. Niezastosowanie się do wspomnianych ostrzeżeń
i instrukcji może doprowadzić do porażenia prądem elek-
trycznym, pożaru i/lub poważnych obrażeń ciała.
1. Odkurzacza mogą używać wyłącznie osoby
odpowiednio przeszkolone.
2. W przypadku gdy z odkurzacza wydostaje się
piana/ciecz, należy niezwłocznie go wyłączyć.
3. Regularnie czyścić ogranicznik poziomu wody
i sprawdzać pod kątem uszkodzeń.
4.
Odkurzacza nie wolno używać bez ltra.
Uszkodzony ltr należy niezwłocznie wymienić.
5.
UŻYCIE PRZEDŁUŻACZA. W razie konieczności
użycia przedłużacza ze względu na dużą odle-
głość od źródła zasilania należy zapewnić prze-
wód o wystarczającej grubości, ale nie za długi;
w przeciwnym razie wydajność odkurzacza
ulegnie pogorszeniu. W przypadku eksploatacji
na zewnątrz należy używać przedłużacza prze-
znaczonego do użycia w takim środowisku.
6.
OSTRZEŻENIE DOTYCZĄCE NAPIĘCIA: Przed pod-
łączeniem odkurzacza do źródła zasilania (gniazdo
zasilające itp.) należy upewnić się, że napięcie jest
zgodne z opisem na tabliczce znamionowej odku-
rzacza. Użycie źródła zasilania o napięciu wyższym
niż określone dla urządzenia może doprowadzić
do POWAŻNYCH OBRAŻEŃ ciała operatora oraz
do uszkodzenia odkurzacza. W razie wątpliwości
NIE PODŁĄCZAĆ ODKURZACZA DO ŹRÓDŁA
ZASILANIA. Użycie źródła zasilania o napięciu
niższym niż wskazane na tabliczce znamionowej
niekorzystnie wpływa na silnik.
7.
UNIKAĆ PRZYPADKOWEGO URUCHOMIENIA.
Podczas podłączania do zasilania należy upewnić się,
że przełącznik znajduje się w położeniu wyłączonym.
8. Nie próbować wciągać odkurzaczem materia-
łów łatwopalnych, fajerwerków, zapalonych
papierosów, gorącego popiołu, gorących
wiórów metalowych ani ostrych przedmiotów,
takich jak żyletki, igły czy zbite szkło.
9.
NIGDY NIE UŻYWAĆ ODKURZACZA W POBLIŻU
ZBIORNIKÓW BENZYNY, GAZU, LAKIERU, KLEJU
ANI INNYCH WYBUCHOWYCH SUBSTANCJI.
Włączanie/wyłączanie przełącznika zasilania powo-
duje iskrzenie. Iskrzenie powoduje także komuta-
tor silnika. Może to być przyczyną wybuchu.
10. Nigdy nie wciągać odkurzaczem materiałów
toksycznych, rakotwórczych, łatwopalnych ani
innych materiałów niebezpiecznych, takich jak
azbest, arsen, bar, beryl, ołów, pestycydy lub
inne materiały niebezpieczne dla zdrowia.
11. Nigdy nie używać odkurzacza na zewnątrz
podczas deszczu.
12.
Nie używać w pobliżu źródeł ciepła (pieców itp.).
13.
OSŁONA ZABEZPIECZAJĄCA PRZED PORAŻENIEM
PRĄDEM ELEKTRYCZNYM. Unikać kontaktu ciała z
powierzchniami uziemionymi. Na przykład z: rurami,
grzejnikami, obudowami kuchenek i lodówek.
14.
Nie zasłaniać otworów wentylacyjnych.
Zapewniają one chłodzenie silnika. Otwory wen-
tylacyjne powinny być zawsze odsłonięte; w prze-
ciwnym razie może dojść do zapalenia się silnika.
15. Zawsze stać na pewnym podłożu i utrzymywać
równowagę.
16.
OBCHODZIĆ SIĘ Z PRZEWODEM
ZASILAJĄCYM W PRAWIDŁOWY SPOSÓB.
Nigdy nie trzymać odkurzacza za przewód
ani nie wyszarpywać przewodu z gniazdka.
Trzymać przewód z dala od źródeł ciepła, oleju
i ostrych krawędzi. Systematycznie sprawdzać
przewody odkurzacza i w razie ich uszkodzenia
przekazać do naprawy do autoryzowanego
serwisu. Należy okresowo sprawdzać przedłu-
żacze i wymieniać je w przypadku uszkodzenia.
17.
Nie zginać i nie szarpać węża ani nie stawać na nim.
18. W przypadku zauważenia małej skuteczności
działania lub innych nietypowych objawów
natychmiast wyłączyć odkurzacz.
19. ODŁĄCZYĆ ODKURZACZ. Gdy odkurzacz
nie jest używany, podczas konserwacji oraz
wymiany akcesoriów.
20. Po każdym użyciu natychmiast wyczyścić i
wykonać konserwację w celu utrzymania urzą-
dzenia w idealnym stanie technicznym.
21.
STARANNIE WYKONYWAĆ CZYNNOŚCI
KONSERWACYJNE. Utrzymywać czystość
odkurzacza, aby zapewnić lepsze i bezpieczniej-
sze działanie. Przestrzegać instrukcji wymiany
akcesoriów. Utrzymywać rękojeści suche, czy-
ste i niezabrudzone olejem ani smarem.
22.
SPRAWDZIĆ USZKODZONE CZĘŚCI.
Uszkodzoną osłonę lub inną część należy
dokładnie sprawdzić przed dalszym użytkowa-
niem odkurzacza, aby mieć pewność, że będzie
ona poprawnie działać i spełniać swoją funkcję.
Należy sprawdzić narzędzie pod kątem nieprawi-
dłowego ustawienia lub zablokowania elementów
ruchomych, pęknięć części, zamocowania oraz
innych usterek, które mogą mieć wpływ na jego
działanie. Osłona lub inne uszkodzone części
powinny zostać naprawione lub wymienione
przez autoryzowany punkt serwisowy, o ile w
instrukcji nie podano inaczej. Uszkodzone prze-
łączniki powinny zostać wymienione w autoryzo-
wanym punkcie serwisowym. Nie używać odku-
rzacza, jeśli nie działają funkcje przełącznika.
23. CZĘŚCI ZAMIENNE. Do wymiany należy uży-
wać tylko identycznych części zamiennych.
24. PRZECHOWYWANIE ODKURZACZA. Gdy
odkurzacz nie jest używany, należy go prze-
chowywać w pomieszczeniu.
25. Mokre ltry i części wewnętrzne zbiornika
cieczy należy wysuszyć przed odłożeniem
urządzenia do przechowywania.
26. Z odkurzaczem należy obchodzić się delikat-
nie. Niedbałe i agresywne użytkowanie może
spowodować uszkodzenie nawet najbardziej
wytrzymałego odkurzacza.

17 POLSKI
27. Nie czyścić powierzchni zewnętrznych ani
wewnętrznych benzyną, rozpuszczalnikiem ani
chemicznymi środkami czyszczącymi. Mogą
powstać pęknięcia i odbarwienia.
28. Nie używać odkurzacza w pomieszczeniach
zamkniętych, w których występują łatwopalne,
wybuchowe lub toksyczne opary farb olejnych,
rozpuszczalników, benzyny, niektórych sub-
stancji przeciwmolowych itp. ani w miejscach,
w których występuje łatwopalny pył.
29. Po zakończeniu pracy nie pozostawiać prze-
wodu odkurzacza na podłodze. Może to stwa-
rzać ryzyko przewrócenia lub może doprowa-
dzić do uszkodzenia odkurzacza.
30. Odkurzacza ani żadnego innego urządzenia
nie wolno obsługiwać, będąc pod wpływem
narkotyków lub alkoholu.
31. W ramach podstawowej ochrony nosić gogle
lub okulary ochronne z osłonami bocznymi.
32. W miejscach silnie zapylonych używać maski.
33. To urządzenie nie jest przeznaczone do użyt-
kowania przez osoby, w tym dzieci, o ograni-
czonej sprawności ruchowej, sensorycznej lub
umysłowej oraz osoby nieposiadające odpo-
wiedniej wiedzy i doświadczenia.
34. Należy pilnować, aby dzieci nie bawiły się
odkurzaczem.
35. Nie wolno obsługiwać przewodu ani odkurza-
cza mokrymi rękami.
36. Zachować szczególną ostrożność podczas
sprzątania na schodach.
37. Nie używać odkurzacza jako stołka ani stołu
warsztatowego. Urządzenie może się przewró-
cić i spowodować obrażenia.
Użytkowanie narzędzi akumulatorowych i dbałość o nie
1.
Akumulator należy ładować wyłącznie przy
użyciu określonej przez producenta ładowarki.
Ładowarka przeznaczona do jednego typu aku-
mulatora może stwarzać zagrożenie pożarem, gdy
będzie używana do ładowania innego akumulatora.
2.
Do zasilania elektronarzędzi używać tylko spe-
cjalnie do tego celu przeznaczonych akumulato-
rów. Używanie innych akumulatorów może stwarzać
ryzyko wystąpienia obrażeń ciała lub pożaru.
3. Gdy akumulator nie jest używany, należy
zabezpieczyć go przed kontaktem z metalo-
wymi przedmiotami, typu spinacze, monety,
klucze, gwoździe, wkręty lub innymi metalo-
wymi drobiazgami, które mogą powodować
zwarcie styków akumulatora. Zwarcie styków
akumulatora grozi poparzeniami lub pożarem.
4. W niewłaściwych warunkach eksploatacji
może dojść do wycieku elektrolitu z akumu-
latora. Nie należy go dotykać. W razie przy-
padkowego kontaktu należy przemyć skażoną
skórę wodą. W przypadku dostania się elek-
trolitu do oczu należy dodatkowo skorzystać
z porady lekarza. Elektrolit z akumulatora może
powodować podrażnienia lub poparzenia.
5. Nie używać uszkodzonego lub przerobionego
akumulatora ani narzędzia. Uszkodzone lub
przerobione akumulatory mogą działać w nieprze-
widywalny sposób i spowodować pożar, wybuch
lub obrażenia ciała.
6. Nie wystawiać akumulatora ani narzędzia na
działanie ognia ani nadmiernej temperatury.
Narażenie na ogień lub temperaturę wyższą niż
130°C może spowodować wybuch.
7. Przestrzegać wszystkich instrukcji ładowania
i nie ładować akumulatora ani narzędzia w
temperaturze wykraczającej poza zakres okre-
ślony w instrukcji. Nieprawidłowe ładowanie lub
temperatury wykraczająca poza określony zakres
mogą spowodować uszkodzenie akumulatora
oraz wzrost zagrożenia pożarem.
ZACHOWAĆ NINIEJSZE
INSTRUKCJE.
OSTRZEŻENIE: NIE WOLNO pozwolić,
aby wygoda lub rutyna (nabyta w wyniku wielo-
krotnego używania urządzenia) zastąpiły ścisłe
przestrzeganie zasad bezpieczeństwa obsługi.
NIEWŁAŚCIWE UŻYTKOWANIE narzędzia lub
niestosowanie się do zasad bezpieczeństwa
podanych w niniejszej instrukcji obsługi może
prowadzić do poważnych obrażeń ciała.
Ważne zasady bezpieczeństwa
dotyczące akumulatora
1. Przed użyciem akumulatora zapoznać się ze
wszystkimi instrukcjami i znakami ostrze-
gawczymi na (1) ładowarce, (2) akumulatorze
i (3) produkcie, w którym będzie używany
akumulator.
2. Akumulatora nie wolno rozbierać.
3. Jeśli czas działania uległ znacznemu skróce-
niu, należy natychmiast przerwać pracę. Może
bowiem dojść do przegrzania, ewentualnych
poparzeń, a nawet eksplozji.
4. W przypadku przedostania się elektrolitu do
oczu, przemyć je czystą wodą i niezwłocznie
uzyskać pomoc lekarską. Może on bowiem
spowodować utratę wzroku.
5. Nie doprowadzać do zwarcia akumulatora:
(1) Nie dotykać styków materiałami przewo-
dzącymi prąd.
(2) Unikać przechowywania akumulatora w
pojemniku z metalowymi przedmiotami,
takimi jak gwoździe, monety itp.
(3) Chronić akumulator przed deszczem lub
wodą.
Zwarcie prowadzi do przepływu prądu elek-
trycznego o dużym natężeniu i przegrzania
akumulatora, co w konsekwencji może grozić
poparzeniami a nawet awarią urządzenia.
6. Narzędzia i akumulatora nie wolno przecho-
wywać w miejscach, w których temperatura
osiąga bądź przekracza 50°C (122°F).
7. Akumulatorów nie wolno spalać, również tych
poważnie uszkodzonych lub całkowicie zuży-
tych. Akumulator może eksplodować w ogniu.
8. Chronić akumulator przed upadkiem i
uderzeniami.
9. Nie wolno używać uszkodzonego akumulatora.

18 POLSKI
10. Stanowiące wyposażenie akumulatory lito-
wo-jonowe podlegają przepisom dotyczącym
produktów niebezpiecznych.
Na potrzeby transportu komercyjnego, np. świad-
czonego przez rmy trzecie czy spedycyjne,
należy przestrzegać specjalnych wymagań w
zakresie pakowania i oznaczania etykietami.
Przygotowanie produktu do wysyłki wymaga
skonsultowania się ze specjalistą ds. materiałów
niebezpiecznych. Należy także przestrzegać
przepisów krajowych, które mogą być bardziej
szczegółowe.
Zakleić taśmą lub zaślepić otwarte styki akumula-
tora oraz zabezpieczyć go, aby nie mógł się prze-
suwać w opakowaniu.
11. Postępować zgodnie z przepisami lokalnymi
dotyczącymi usuwania akumulatorów.
12. Używać akumulatorów tylko z produktami
określonymi przez rmę Makita. Zastosowanie
akumulatorów w niezgodnych produktach może
spowodować pożar, przegrzanie, wybuch lub
wyciek elektrolitu.
ZACHOWAĆ NINIEJSZE
INSTRUKCJE.
PRZESTROGA: Używać wyłącznie oryginal-
nych akumulatorów rmy Makita. Używanie nie-
oryginalnych akumulatorów rm innych niż Makita lub
akumulatorów, które zostały zmodykowane, może
spowodować wybuch akumulatora i pożar, obrażenia
ciała oraz zniszczenie mienia. Stanowi to również
naruszenie warunków gwarancji rmy Makita doty-
czących narzędzia i ładowarki.
Wskazówki dotyczące zachowania
maksymalnej trwałości akumulatora
1. Akumulator należy naładować zanim zostanie
do końca rozładowany. Po zauważeniu spadek
mocy narzędzia należy przerwać pracę i nała-
dować akumulator.
2. Nie wolno ładować powtórnie w pełni nałado-
wanego akumulatora. Przeładowanie akumula-
tora skraca jego trwałość.
3.
Akumulator należy ładować w temperaturze poko-
jowej w przedziale 10–40°C (50–104°F). W przy-
padku gorącego akumulatora przed przystąpie-
niem do ładowania należy poczekać, aż ostygnie.
4. Akumulatory niklowo-wodorkowe należy nała-
dować po okresie długiego nieużytkowania
(dłuższego niż sześć miesięcy).
OPIS CZĘŚCI
Model DVC150L
(model z ltrem z tkaniny (do pyłu suchego i mokrego))
► Rys.1: 1. Pokrywa zbiornika 2. Pływak 3. Kosz
pływaka 4. Filtr z tkaniny 5. Zbiornik
Model DVC151L
(model z ltrem pyłu (do pyłu suchego))
► Rys.2: 1. Pokrywa zbiornika 2. Filtr pyłu (HEPA)
3. Przepustnica 4. Filtr wstępny 5. Zbiornik
OPIS DZIAŁANIA
Zasilanie prądem przemiennym:
OSTRZEŻENIE: Przed podłączeniem odku-
rzacza do zasilania należy zawsze sprawdzić,
czy jest on wyłączony. Podłączenie odkurzacza do
zasilania przy przełączniku ustawionym w położeniu
włączenia może spowodować nieoczekiwane urucho-
mienie i doprowadzić do poważnych obrażeń ciała.
Podłączyć wtyczkę do źródła zasilania.
► Rys.3: 1. Wtyczka (kształt i długość przewodu
mogą różnić się w zależności od kraju)
Wskaźnik zasilania prądem przemiennym włącza się po
ustawieniu przełącznika gotowości w położeniu „I”.
► Rys.4: 1. Wskaźnik zasilania prądem przemiennym
WSKAZÓWKA: Po podłączeniu do zasilania odku-
rzacz zostaje automatycznie przełączony w tryb
zasilania prądem przemiennym, nawet w przypadku
działania w trybie zasilania prądem stałym.
WSKAZÓWKA: Jeśli podczas pracy z włożonym
akumulatorem wtyczka odkurzacza jest odłączona,
urządzenie przechodzi w stan gotowości.
Użycie z włożonym akumulatorem:
PRZESTROGA: Przed przystąpieniem do regu-
lacji lub sprawdzenia działania odkurzacza należy
upewnić się, czy urządzenie jest wyłączone,
wtyczka jest odłączona od zasilania, a akumulator
został wyjęty.
Wkładanie i wyjmowanie akumulatora
PRZESTROGA: Przed włożeniem lub wyjęciem
akumulatora należy zawsze wyłączyć narzędzie.
PRZESTROGA: Podczas wkładania lub wyj-
mowania akumulatora należy mocno trzymać
odkurzacz i akumulator. W przeciwnym razie mogą
się one wyślizgnąć z rąk, powodując uszkodzenie
odkurzacza lub akumulatora i obrażenia ciała.
PRZESTROGA: Zachować ostrożność, aby
podczas otwierania lub zamykania pokrywy
akumulatora nie przytrzasnąć palców.
Niezastosowanie się do tej zasady może spowodo-
wać obrażenia ciała.
Aby zamontować akumulator, należy w pierwszej kolej-
ności zwolnić blokadę i otworzyć pokrywę akumulatora.
Następnie należy wsunąć akumulator.
► Rys.5: 1. Blokada 2. Pokrywa akumulatora
Wyrównać występ na akumulatorze z rowkiem w obudowie i
wsunąć go na swoje miejsce. Akumulator należy wsunąć do oporu,
aż się zatrzaśnie na miejscu, co jest sygnalizowane delikatnym
kliknięciem. Następnie zablokować pokrywę akumulatora.
► Rys.6: 1. Akumulator
Aby wyjąć akumulator, należy wysunąć go z narzędzia,
przesuwając przycisk znajdujący się w przedniej części
akumulatora.

19 POLSKI
PRZESTROGA: Akumulator należy włożyć
do końca, tak aby czerwony wskaźnik nie był
widoczny. W przeciwnym razie może on przypad-
kowo wypaść z odkurzacza, powodując obrażenia u
operatora lub osób postronnych.
PRZESTROGA: Nie wkładać akumulatora na
siłę. Jeśli akumulator nie daje się swobodnie wsunąć,
oznacza to, że został włożony nieprawidłowo.
WSKAZÓWKA: Odkurzacz nie działa w przypadku
włożenia tylko jednego akumulatora.
WSKAZÓWKA: W przypadku użycia odkurzacza z
włożonymi akumulatorami wyjąć wtyczkę odkurzacza
z przedłużacza.
Wskazanie stanu naładowania
akumulatora
Tylko w przypadku akumulatorów ze wskaźnikiem
► Rys.7: 1. Lampki wskaźnika 2. Przycisk kontrolny
Nacisnąć przycisk kontrolny na akumulatorze w celu
wyświetlenia stanu naładowania akumulatora. Lampki
wskaźnika zaświecą się przez kilka sekund.
Lampki wskaźnika Pozostała
energia
akumulatora
Świeci się Wyłączony Miga
75–100%
50–75%
25–50%
0–25%
Naładować
akumulator.
Akumulator
może nie
działać
poprawnie.
WSKAZÓWKA: Zależnie od warunków użytkowania
i temperatury otoczenia, wskazywany poziom może
nieznacznie się różnić od rzeczywistego stanu nała-
dowania akumulatora.
Wskazanie stanu naładowania
akumulatora
► Rys.8: 1. Wskaźnik akumulatora 2. Przycisk
kontrolny
► Rys.9
Nacisnąć przycisk kontrolny, aby sprawdzić poziom
naładowania akumulatora. Wskaźniki akumulatora
odpowiadają każdemu akumulatorowi.
Stan wskaźnika akumulatora Stan nała-
dowania
akumulatora
Włączony Wyłączony Miga
50% do 100%
20% do 50%
0% do 20%
Naładować
akumulator.
Układ zabezpieczenia narzędzia/
akumulatora
Narzędzie jest wyposażone w układ zabezpieczenia
narzędzia/akumulatora. Układ automatycznie odcina
zasilanie silnika w celu wydłużenia trwałości narzędzia
i akumulatora. Narzędzie zostanie automatycznie
zatrzymane podczas pracy w następujących sytuacjach
związanych z narzędziem lub akumulatorem:
Zabezpieczenie przed przeciążeniem
W przypadku obsługi narzędzia w sposób powodujący
pobór nadmiernie wysokiego prądu narzędzie zostanie
automatycznie zatrzymane bez żadnej sygnalizacji. W
takiej sytuacji należy wyłączyć narzędzie i zaprzestać
wykonywania czynności powodującej przeciążenie
narzędzia. Następnie należy włączyć narzędzie w celu
jego ponownego uruchomienia.
Zabezpieczenie przed przegrzaniem
Włączone Miga
W przypadku przegrzania narzędzie zostanie auto-
matycznie zatrzymane, a wskaźnik akumulatora
zacznie migać przez około 60 s. W takiej sytuacji przed
ponownym włączeniem należy poczekać, aż narzędzia
ostygnie.
Zabezpieczenie przed nadmiernym
rozładowaniem
Gdy poziom naładowania akumulatora spadnie, narzę-
dzie zostanie automatycznie zatrzymane. Jeśli produkt
nie działa pomimo włączenia przełączników, należy
wyjąć akumulatory z narzędzia i naładować je.

20 POLSKI
Działanie przełącznika
► Rys.10: 1. Przełącznik gotowości 2. Przycisk zasi-
lania 3. Pokrętło regulacji siły ssania
Aby uruchomić odkurzacz:
1. Ustawić przełącznik gotowości w położeniu „I”.
Odkurzacz przejdzie w stan gotowości.
2. Nacisnąć przycisk zasilania.
Aby przełączyć odkurzacz w tryb gotowości, należy
nacisnąć przycisk ponownie.
Aby wyłączyć odkurzacz, należy ustawić przełącznik
gotowości w położeniu „O”.
Siłę ssania można regulować stosownie do potrzeb.
Siłę ssania można zwiększyć przez przestawienie
pokrętła regulacji siły ssania z symbolu na .
UWAGA: Zawsze w przypadku dłuższych przerw w
pracy odkurzacza należy ustawiać przełącznik goto-
wości w położeniu „O”. Odkurzacz w stanie gotowości
zużywa energię.
Automatyczne wyłączenie ssania
podczas pracy odkurzacza na mokro
Tylko w przypadku modelu z ltrem z tkaniny
OSTRZEŻENIE: Nie używać przez dłuższy
czas z działającym pływakiem. Używanie odku-
rzacza z działającym pływakiem przez dłuższy czas
może spowodować przegrzanie, a w rezultacie
odkształcenie obudowy odkurzacza.
OSTRZEŻENIE: Odkurzaczem nie wolno
zbierać piany ani płynów zawierających mydło.
Zbieranie piany lub płynów zawierających mydło
może doprowadzić do wydostawania się piany
przez wylot powietrza przed zadziałaniem pływaka.
Kontynuowanie używania odkurzacza w takich
warunkach może doprowadzić do porażenia prądem
elektrycznym i uszkodzenia urządzenia.
Automatyczne wyłączenie ssania działa tylko podczas
korzystania z pływaka i kosza pływaka.
Odkurzacz został wyposażony w mechanizm pływa-
kowy zapobiegający przedostaniu się wody do silnika
w przypadku zbierania dużych ilości wody. Gdy zbiornik
zapełni się, a odkurzacz przestanie zbierać wodę,
należy wyłączyć go i opróżnić zbiornik.
Blokowanie i odblokowywanie kółka
► Rys.11: 1. Kółko 2. Dźwignia ogranicznika
3. Pozycja ODBLOKOWANIA 4. Pozycja
ZABLOKOWANIA
Blokowanie kółka jest przydatne w przypadku składania
odkurzacza, podczas przerw w pracy oraz do unieru-
chamiania go.
Dźwignię ogranicznika należy przestawiać rękami.
Aby zablokować kółko za pomocą ogranicznika, należy
przestawić dźwignię ogranicznika w dół; kółko nie
będzie się obracać. Aby odblokować kółko, należy
przestawić dźwignię do góry.
WSKAZÓWKA: Podczas przesuwania odkurzacza
kółko powinno być odblokowane. Przesuwanie odku-
rzacza z zablokowanym kółkiem może doprowadzić
do jego uszkodzenia.
Uchwyt do przenoszenia
Odkurzacz należy przenosić, trzymając go za uchwyt w gór-
nej części. Jeśli uchwyt nie jest używany, można go złożyć.
► Rys.12
MONTAŻ
PRZESTROGA:
Przed przystąpieniem do jakich-
kolwiek prac związanych z odkurzaczem należy
upewnić się, że jest on wyłączony, wtyczka jest
odłączona od zasilania, a akumulator został wyjęty.
PRZESTROGA: Zawsze podczas montażu lub
konserwacji należy nosić maskę przeciwpyłową.
Zakładanie ltra pyłu (HEPA) oraz
ltra wstępnego (do pyłu suchego)
Akcesorium opcjonalne w przypadku modelu z
ltrem z tkaniny
PRZESTROGA: Nigdy nie należy zbierać wody
ani innych cieczy bądź mokrego pyłu podczas
korzystania z ltra pyłu. Może to spowodować
uszkodzenie ltra pyłu.
Aby użyć ltra pyłu:
1.
Wymontować kosz pływaka i pływak, odkręcając śruby.
► Rys.13: 1. Pływak 2. Kosz pływaka
2. Umieścić ltr wstępny w zbiorniku, wyrównując
oznaczenia pozycji montażowej.
3. Zamontować przepustnicę na ltrze pyłu, a
następnie umieścić te elementy w ltrze wstępnym,
wyrównując oznaczenia pozycji montażowej.
4. Na koniec zamontować i zablokować pokrywę
zbiornika.
► Rys.14: 1. Pokrywa zbiornika 2. Filtr pyłu (HEPA)
3. Przepustnica 4. Filtr wstępny 5. Zbiornik
6. Oznaczenie pozycji montażowej
UWAGA:
Przed użyciem ltra pyłu należy się
zawsze upewnić, że jest założony ltr wstępny i
przepustnica. Nie należy zakładać samego ltra pyłu.
Zakładanie ltra wody
Akcesorium opcjonalne w przypadku modelu z
ltrem z tkaniny
PRZESTROGA: Nigdy nie należy zbierać wody
ani mokrego pyłu bez pływaka i ltra z tkaniny lub
ltra wody.
PRZESTROGA: W przypadku zbierania
mokrego pyłu należy upewnić się, że w odkurza-
czu zamontowano kosz pływaka oraz pływak.
PRZESTROGA: Podczas zakładania ltra wody
do zbiornika należy go dobrze osadzić w otworze
zbiornika, aby zaczep ltra wody był ściśle dopa-
sowany do otworu, a pomiędzy ltrem a zbiorni-
kiem nie było szczeliny.
Other manuals for DVC150L
5
This manual suits for next models
1
Table of contents
Languages:
Other Makita Vacuum Cleaner manuals

Makita
Makita VC008G User manual

Makita
Makita LC02 User manual

Makita
Makita BCL140 User manual

Makita
Makita LC06ZW User manual

Makita
Makita VC1310LX1 User manual

Makita
Makita DCL180 User manual

Makita
Makita VC007GL User manual

Makita
Makita DUB187 User manual

Makita
Makita DVC867L User manual

Makita
Makita BVC340 User manual

Makita
Makita DVC867L User manual

Makita
Makita DVC665 User manual

Makita
Makita DVC260 User manual

Makita
Makita 449 User manual

Makita
Makita DCL282F User manual

Makita
Makita DCL180 User manual

Makita
Makita VC2000L User manual

Makita
Makita DVC660 User manual

Makita
Makita DVC867L User manual

Makita
Makita VC005GL User manual