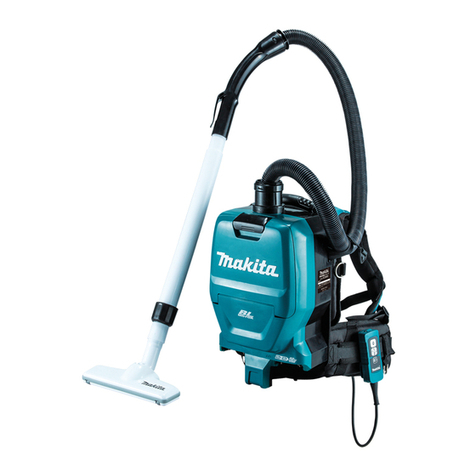
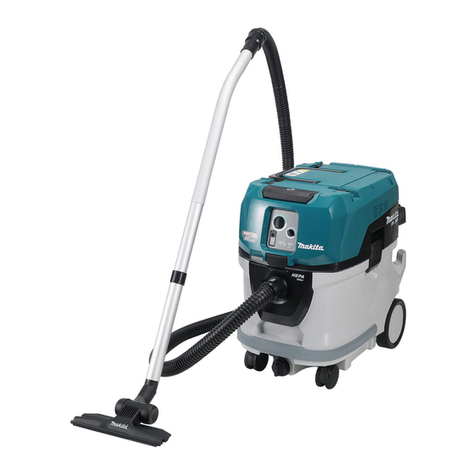
Makita DVC860L User manual

1
GB
Corded and Cordless Vacuum Cleaner
INSTRUCTION MANUAL
SI
Žični in brezžični vakuumski sesalnik za prah
NAVODILO ZA UPORABO
AL Fshesë me korrent dhe me bateri MANUALI I PËRDORIMIT
BG Захранвана от мрежата и
акумулаторна прахосмукачка
РЪКОВОДСТВО ЗА ЕКСПЛОАТАЦИЯ
HR Žičani i bežični usisivačPRIRUČNIK S UPUTAMA
MK
Жична ибезжична правосмукалка
У
ПАТСТВО ЗА УПОТРЕБА
RO Aspirator cu cablu şi fărăcablu MANUAL DE INSTRUCŢIUNI
RS
Бежични усисивач иусисивач са каблом
У
ПУТСТВО ЗА УПОТРЕБУ
RUS
Аккумуляторный / Сетевой Пылесос РУКОВОДСТВО ПО ЭКСПЛУАТАЦИИ
UA
Акумуляторний пилосос та пилосос,
що працює від електромережі
ІНСТРУКЦІЯ ЗЕКСПЛУАТАЦІЇ
DVC860L
DVC861L

2
1
1 015533
12
1
2 015549
1
2
3 015530
1
4 015531
12
1
5 015550
1
2
6 015676
1
2
3
7 015529
12
3
4
8 011611 9 015545
1
2
10 015551
1
2
3
3
11 015532
1
1
12 015535
1
2
13 015536 14 015544 15 015537

3
16 015538 17 015541 18 015724
19 015539 20 015618 21 015548
22 015543 23 015547

4
ENGLISH (Original instructions)
WARNING: This appliance can be used by children aged from 8
years and above and persons with reduced physical, sensory or
mental capabilities or lack of experience and knowledge if they have
been given supervision or instruction concerning use of the
appliance in a safe way and understand the hazards involved.
Children shall not play with the appliance. Cleaning and user
maintenance shall not be made by children without supervision.
Explanation of general view
1-1. Plug (the shape and cord length
may differ from country to country)
2-1. AC power indicator
3-1. Lock
3-2. Battery cover
4-1. Battery cartridge
5-1. CHECK button
6-1. Indicator lamps
6-2. CHECK button
7-1. Stand-by switch
7-2. Power button
7-3. Suction force adjusting knob
8-1. Caster
8-2. Stopper lever
8-3. FREE position
8-4. LOCK position
10-1. Float
10-2. Float cage
11-1. Water filter
11-2. Tank
11-3. Mounting position marking
12-1. Rubber holder
13-1. Paper pack
13-2. Holder
SPECIFICATIONS
Model DVC860L DVC861L
Standard filter type
Cloth filter (for dry and wet dust)
Powder filter (for dry dust)
DC operation (with BL1830, ø38 mm x 2.5 m hose)
2.1 m3/min
Volume flow
(air) AC operation (with ø38 mm x 2.5 m hose) 3.6 m3/min
DC operation (with BL1830, ø38 mm x 2.5 m hose)
90 hPa
Vacuum AC operation (with ø38 mm x 2.5 m hose) 240 hPa
Dust 8 L
Recoverable
capacity Water 6 L -
Dimensions (L x W x H) 366 mm x 334 mm x 368 mm
Rated voltage (operation with batteries) DC 36 V
Standard battery cartridges BL1815N, BL1820, BL1820B, BL1830, BL1830B, BL1840,
BL1840B, BL1850, BL1850B, BL1860B
Net weight (with BL1815N / BL1820) 8.6 kg 9.3 kg
Net weight (with BL1830 / BL1840 / BL1850) 9.2 kg 9.9 kg
Safety class /II
• Due to our continuing program of research and development, the specifications herein are subject to change without notice.
• Specifications may differ from country to country.
• Weight, with battery cartridge, according to EPTA-Procedure 01/2003
• For wet dust, the float and the water filter or cloth filter are required.

5
END118-1
Symbols
The following show the symbols used for the equipment.
Be sure that you understand their meaning before use.
・Read instruction manual.
・Take particular care and attention.
・Warning! The cleaner may contain
hazardous dust.
・Never stand on the cleaner.
・Dust class L (light). The cleaners are
capable of picking up dust class L.
Follow your country's regulations
relating to dusts and to occupational
health and safety.
・DOUBLE INSULATION
・Only for EU countries
Do not dispose of electric equipment or
battery pack together with household
waste material!
In observance of the European Directives,
on Waste Electric and Electronic Equipment
and Batteries and Accumulators and Waste
Batteries and Accumulators and their
implementation in accordance with national
laws, electric equipment and batteries and
battery pack(s) that have reached the end
of their life must be collected separately and
returned to an environmentally compatible
recycling facility.
ENE084-1
Intended use
The tool is intended for collecting both wet and dry dust.
The tool is suitable for commercial use, for example in
hotels, schools, hospitals, factories, shops, offices and
rental businesses.
ENF002-2
Power supply
The tool should be connected only to a power supply of
the same voltage as indicated on the nameplate, and
can only be operated on single-phase AC supply. They
are double-insulated and can, therefore, also be used
from sockets without earth wire.
ENG905-1
Noise
The typical A-weighted noise level determined
according to EN/IEC60704:
Sound pressure level (LpA) : 75 dB (A)
Uncertainty (K) : 3.0 dB (A)
The noise level under working may exceed 80 dB (A).
Wear ear protection
ENG900-1
Vibration
The vibration total value (tri-axial vector sum)
determined according to IEC 60335-2-69:
Vibration emission (ah) : 2.5 m/s2or less
Uncertainty (K) : 1.5 m/s2
ENH038-3
For European countries only
EC Declaration of Conformity
Makita declares that the following Machine(s):
Designation of Machine:
Corded and Cordless Vacuum Cleaner
Model No./ Type: DVC860L, DVC861L
Conforms to the following European Directives:
2006/42/EC
They are manufactured in accordance with the following
standard or standardized documents:
EN60335
The technical file in accordance with 2006/42/EC is
available from:
Makita, Jan-Baptist Vinkstraat 2, 3070, Belgium
25.9.2014
000331
Yasushi Fukaya
Director
Makita, Jan-Baptist Vinkstraat 2, 3070, Belgium
ENB124-1
CORDED AND CORDLESS
VACUUM CLEANER SAFETY
WARNINGS
WARNING! IMPORTANT READ CAREFULLY all
safety warnings and all instructions BEFORE USE.
Failure to follow the warnings and instructions may
result in electric shock, fire and/or serious injury.
1. Before use, make sure that this cleaner must
be used by people who have been adequately
instructed on the use of this cleaner.
2.
If foam/liquid comes out, switch off immediately.
3. Clean the water level limiting device regularly
and examine it for signs of damage.
4. Do not use the cleaner without the filter.
Replace a damaged filter immediately.
5. USE OF EXTENSION CORD. When using an
extension cord because of the great distance
to your power source, try to employ a cord
that is sufficiently thick but not too long, or
cleaner performance will be adversely
affected. For outdoor applications use an
extension cord suitable for outdoor use.
Cd
Ni-MH
Li-ion

6
6.
VOLTAGE WARNING: Before connecting the
cleaner to a power source (receptacle, outlet, etc.)
be sure the voltage supplied is the same as that
specified on the nameplate of the cleaner. A power
source with voltage greater than that specified for
the cleaner can result in SERIOUS INJURY to the
operator as well as damage to the cleaner. If in
doubt, DO NOT PLUG IN THE CLEANER. Using a
power source with voltage less than the nameplate
rating is harmful to the motor.
7. AVOID UNINTENTIONAL STARTING. Be sure
switch is OFF when plugging in.
8. Do not attempt to pick up flammable materials,
fire works, lighted cigarettes, hot ashes, hot
metal chips, sharp materials such as razors,
needles, broken glass or the like.
9.
NEVER USE THE CLEANER IN THE VICINITY OF
GASOLINE, GAS, PAINT, ADHESIVES OR OTHER
HIGHLY EXPLOSIVE SUBSTANCES. The switch
emits sparks when turned ON and OFF. And so
does the motor commutator during operation. A
dangerous explosion may result.
10.
Never vacuum up toxic, carcinogenic,
combustible or other hazardous materials such
as asbestos, arsenic, barium, beryllium, lead,
pesticides, or other health endangering materials.
11. Never use the cleaner outdoors in the rain.
12. Do not use close to heat sources (stoves, etc.).
13. GUARD AGAINST ELECTRIC SHOCK. Prevent
body contact with grounded surfaces. For
example; pipes, radiators, ranges, refrigerator
enclosures.
14. Do not block cooling vents. These vents
permit cooling of the motor. Blockage should
be carefully avoided otherwise the motor will
burn out from lack of ventilation.
15. Keep proper footing and balance at all times.
16. DO NOT ABUSE CORD. Never carry the
cleaner by cord or yank it to disconnect from
receptacle. Keep cord away from heat, oil, and
sharp edges. Inspect cleaner cords
periodically and if damaged, have repaired by
authorized service facility. Inspect extension
cords periodically and replace if damaged.
17. Do not fold, tug or step on the hose.
18. Stop the cleaner immediately if you notice
poor performance or anything abnormal
during operation.
19.
DISCONNECT THE CLEANER. When not in use,
before servicing, and when changing accessories.
20.
Clean and service the cleaner immediately after
each use to keep it in tiptop operating condition.
21. MAINTAIN THE CLEANER WITH CARE. Keep
the cleaner clean for better and safer
performance. Follow instructions for
changing accessories. Keep handles dry,
clean, and free from oil and grease.
22. CHECK DAMAGED PARTS. Before further use
of the cleaner, a guard or other part that is
damaged should be carefully checked to
determine that it will operate properly and
perform its intended function. Check for
alignment of moving parts, binding of moving
parts, breakage of parts, mounting, and any
other conditions that may affect its operation.
A guard or other part that is damaged should
be properly repaired or replaced by an
authorized service center unless otherwise
indicated elsewhere in this instruction manual.
Have defective switches replaced by
authorized service center. Don’t use the
cleaner if switch does not turn it on and off.
23. REPLACEMENT PARTS. When servicing, use
only identical replacement parts.
24. STORE IDLE CLEANER. When not in use, the
cleaner should be stored indoors.
25. Be kind to your cleaner. Rough handling can
cause breakage of even the most sturdily built
cleaner.
26. Do not attempt to clean the exterior or interior
with benzine, thinner or cleaning chemicals.
Cracks and discoloration may be caused.
27. Do not use cleaner in an enclosed space
where flammable, explosive or toxic vapors
are given off by oil-base paint, paint-thinner,
gasoline, some mothproofing substances, etc.,
or in areas where flammable dust is present.
28. Do not leave the cleaner cord lying on the
floor after you have finished a cleaning job. It
can become a tripping hazard or may cause
damage to the cleaner.
29. Do not operate this or any tool while under
the influence of drugs or alcohol.
30. As a basic rule of safety, use safety goggles
or safety glasses with side shields.
31. Use a dust mask in dusty work conditions.
32. This machine is not intended for use by
persons including children with reduced
physical, sensory or mental capabilities, or
lack of experience and knowledge.
33. Young children should be supervised to
ensure that they do not play with the cleaner.
34. Never handle plug cord or cleaner with wet
hands.
35. Use extreme caution when cleaning on stairs.
36. Do not use the cleaner as a stool or work
bench. The machine may fall down and may
result in personal injury.
Battery tool use and care
1. Recharge only with the charger specified by
the manufacturer. A charger that is suitable
for one type of battery pack may create a risk
of fire when used with another battery pack.

7
2. Use power tools only with specifically
designated battery packs. Use of any other
battery packs may create a risk of injury and
fire.
3. When battery pack is not in use, keep it away
from other metal objects, like paper clips,
coins, keys, nails, screws or other small metal
objects, that can make a connection from one
terminal to another. Shorting the battery
terminals together may cause burns.
4. Under abusive conditions, liquid may be
ejected from the battery; avoid contact. If
contact accidentally occurs, flush with water.
If liquid contacts eyes, additionally seek
medical help. Liquid ejected from the battery
may cause irritation or burns.
KEEP FOR FUTURE
REFERENCE
WARNING:
DO NOT let comfort or familiarity with product
(gained from repeated use) replace strict adherence
to safety rules for the subject product. MISUSE or
failure to follow the safety rules stated in this
instruction manual may cause serious personal
injury.
ENC007-11
IMPORTANT SAFETY
INSTRUCTIONS
FOR BATTERY CARTRIDGE
1. Before using battery cartridge, read all
instructions and cautionary markings on (1)
battery charger, (2) battery, and (3) product
using battery.
2. Do not disassemble battery cartridge.
3. If operating time has become excessively
shorter, stop operating immediately. It may
result in a risk of overheating, possible burns
and even an explosion.
4. If electrolyte gets into your eyes, rinse them
out with clear water and seek medical
attention right away. It may result in loss of
your eyesight.
5. Do not short the battery cartridge:
(1) Do not touch the terminals with any
conductive material.
(2) Avoid storing battery cartridge in a
container with other metal objects such
as nails, coins, etc.
(3) Do not expose battery cartridge to water
or rain.
A battery short can cause a large current flow,
overheating, possible burns and even a
breakdown.
6. Do not store the tool and battery cartridge in
locations where the temperature may reach or
exceed 50 ゚C (122 ゚F).
7. Do not incinerate the battery cartridge even if
it is severely damaged or is completely worn
out. The battery cartridge can explode in a fire.
8. Be careful not to drop or strike battery.
9. Do not use a damaged battery.
10. The contained lithium-ion batteries are
subject to the Dangerous Goods Legislation
requirements.
For commercial transports e.g. by third parties,
forwarding agents, special requirement on
packaging and labeling must be observed.
For preparation of the item being shipped,
consulting an expert for hazardous material is
required. Please also observe possibly more
detailed national regulations.
Tape or mask off open contacts and pack up the
battery in such a manner that it cannot move
around in the packaging.
11. Follow your local regulations relating to
disposal of battery.
SAVE THESE INSTRUCTIONS.
CAUTION: Only use genuine Makita batteries.
Use of non-genuine Makita batteries, or batteries that
have been altered, may result in the battery bursting
causing fires, personal injury and damage. It will also
void the Makita warranty for the Makita tool and charger.
Tips for maintaining maximum battery life
1. Charge the battery cartridge before
completely discharged.
Always stop tool operation and charge the
battery cartridge when you notice less tool
power.
2. Never recharge a fully charged battery
cartridge.
Overcharging shortens the battery service life.
3. Charge the battery cartridge with room
temperature at 10 ゚C - 40 ゚C (50 ゚F - 104 ゚F).
Let a hot battery cartridge cool down before
charging it.
4. Charge the battery cartridge if you do not use
it for a long period (more than six months).

8
FUNCTIONAL DESCRIPTION
Use with AC power:
WARNING:
• Before plugging the cleaner, always make sure
that the cleaner is switched off. Plugging the
cleaner with the switch on may cause an
unexpected start resulting in serious personal
injury.
Fig.1
Connect the plug to a power supply.
Fig.2
The AC power indicator lights up when setting the
stand-by switch to "I" side.
NOTE:
• Even operating in DC power mode , the tool is
automatically changed into AC power mode when
plugged in.
• If the tool is unplugged during operation with the
battery inserted, the cleaner gets into stand-by
state.
Use with battery:
Installing or removing battery cartridge
CAUTION:
• Always be sure that the cleaner is switched off,
unplugged, and the battery cartridge is removed
before adjusting or checking function on the tool.
• Hold the cleaner and the battery cartridge
firmly when installing or removing battery
cartridge. Failure to hold the cleaner and the
battery cartridge firmly may cause them to slip off
your hands and result in damage to the cleaner
and battery cartridge and a personal injury.
• Be careful not to pinch your fingers when
opening or closing the battery cover. Failure to
do so may cause personal injury.
Fig.3
To install the battery cartridge, release the lock first, and
open the battery cover. And then, insert the battery
cartridge.
Fig.4
Align the tongue on the battery cartridge with the groove
in the housing and slip it into place. Insert it all the way
until it locks in place with a little click. Then lock the
battery cover.
To remove the battery cartridge, slide it from the tool
while sliding the button on the front of the cartridge.
NOTICE:
• Remove the plug of the cleaner from the extension
cord when using the cleaner with the batteries.
CAUTION:
• Always install the battery cartridge fully in place. If
not, it may accidentally fall out of the tool, causing
injury to you or someone around you.
• Do not install the battery cartridge forcibly. If the
cartridge does not slide in easily, it is not being
inserted correctly.
NOTE:
• The cleaner does not work with only one battery
cartridge.
Tool / battery protection system
The tool is equipped with a tool/battery protection
system. This system automatically cuts off power to the
motor to extend tool and battery life.
The tool will automatically stop during operation if the
tool or battery is placed under one of the following
conditions. In some conditions, the indicators light up.
Overload protection
If the tool is overloaded, the tool stops automatically. In
this situation, turn the tool off and stop the application
that caused the tool to become overloaded. Then turn
the tool on to restart.
Overheat protection for tool
On Blinking
015485
When the tool is overheated, the tool stops automatically, and
the battery indicator blink about 60 seconds. In this situation,
let the tool cool down before turning the tool on again.
Overdischarge protection
When the battery capacity becomes low, the tool stops
automatically. If the product does not operate even
when the switches are operated, remove the batteries
from the tool and charge the batteries.
Remaining battery capacity indication
Fig.5
1 212
015674

9
Press the check button to make the battery indicators
show the remaining battery capacities. The battery
indicators correspond to each battery.
Remaining battery capacity indication
Battery indicator status
Remaining battery capacity
50% - 100%
20% - 50%
0% - 20%
Charge the battery
On Off Blinking
015527
Indicating the remaining battery capacity
(Only for battery cartridges with "B" at the end of the
model number.)
Fig.6
Press the check button on the battery cartridge to
indicate the remaining battery capacity. The indicator
lamps light up for few seconds.
Off BlinkingLighted
Indicator lamps
Charge the
battery.
0% to 25%
25% to 50%
50% to 75%
75% to 100%
Remaining
capacity
The battery
may have
malfunctioned.
015658
NOTE:
• Depending on the conditions of use and the
ambient temperature, the indication may differ
slightly from the actual capacity.
Switch action
Fig.7
To start the cleaner:
1. Set the stand-by switch to the "I" side. The
cleaner gets into stand-by state.
2. Press the power button.
To make the cleaner get into stand-by mode, press the
power button again.
To turn off the cleaner, set the stand-by switch to the "O"
side.
The suction power can be adjusted according to your
work need.
Suction power can be increased by turning the suction
force adjusting knob from the symbol to the
symbol.
NOTICE:
• Always set the stand-by switch to the "O" side
when not using the cleaner for long time. The
cleaner consumes power during stand-by state.
Auto-suction stop during wet suction
operation (for the cloth filter model)
WARNING:
• Do not use for a long time while the float is at
work. Using the cleaner with its float at work for a
long time can cause overheat, resulting in the
cleaner deformation.
• Do not pick up foam or soapy liquid. Picking up
foam or soapy liquid can cause foam to come out
of air exit before the float works. Continuing to
using in this condition may cause an electric shock
and breakage of the cleaner.
Auto-suction stop works only when using with the float
and float cage.
The cleaner has a float mechanism that prevents water
from immersing into the motor when picking up more
than a certain amount of water.
When the tank is full and the cleaner no longer picks up
water, switch off the cleaner and empty the tank.
Locking or unlocking the caster
Fig.8
To lock the caster with a stopper, lower the stopper lever
and the caster no longer will rotate. To release the
caster from the locked position, raise the stopper lever.
Locking the caster is convenient when storing the
cleaner, stopping the work on the way and keeping the
cleaner still.
To operate the stopper, move it by hand.
NOTE:
• When moving the cleaner, make sure that the
caster is unlocked. Moving the cleaner with the
caster in the locked position may cause damage to
the caster.
Carriage handle
Fig.9
When carrying the cleaner, carry it by holding the
handle on the head. The handle is retractable at the
head when not in use.

10
PARTS DESCRIPTION
Model DVC860L
(Cloth filter (for dry and wet dust) model)
1
2
3
4
5
015616
Model DVC861L
(Powder filter (for dry dust) model)
1
2
3
4
5
015617
ASSEMBLY
CAUTION:
• Always be sure that the cleaner is switched off,
unplugged, and the battery cartridge is removed
before carrying out any work on the cleaner.
•
Always wear dust mask during assembly or maintenance.
Installing the powder filter and prefilter
(for dry dust)
(optional accessory for cloth filter model)
CAUTION:
• Never pick up water or other liquids or wet dusts
when using the powder filter. Picking up such
things may cause the powder filter breakage.
1
2
3
4
6
6
6
5
015534
Fig.10
To use powder filter, remove the float cage and float by
removing the bolts.
Place the prefilter in the tank.
Next, mount the damper on the powder filter and then
place them in the prefilter.
When installing powder filter and prefilter, align the
mounting position marking on each of them with that
one at the top of the tank.
Finally, mount the tank cover and lock it.
NOTE:
• Before using the powder filter, make sure that
prefilter and damper are always used together. It is
1. Tank cover
2. Float
3. Float cage
4. Cloth filter
5. Tank
1. Tank cover
2. Powder filter
3. Damper
4. Prefilter
5. Tank
1. Tank cover
2. Powder filter
3. Damper
4. Prefilter
5. Tank
6. Mounting position marking

11
not allowed to install powder filter solely.
Installing the water filter
(for cloth filter model) (optional accessory)
CAUTION:
• Never pick up water or wet dust without the float
and the cloth filter or the water filter.
• For picking up wet dust, make sure that the float
cage and the float are installed on the cleaner.
•
When installing the water filter on the tank, set it tight
at the opening of the tank so that the hook of the
water filter engages the tank opening firmly and there
is no space between the water filter and the tank.
NOTICE:
•
It is recommended using water filter when picking
up large amount of water repeatedly. Otherwise
vacuum ability may be reduced in case of cloth filter.
Fig.11
To pick up water or wet dust only, the water filter is more
suitable than the cloth filter.
When installing the water filter, align its mounting
position mark with the one on the tank.
Installing the paper pack (optional accessory)
WARNING:
• When using the paper pack, also use the cloth
filter or prefilter together that is preinstalled on the
tool. Failure to use the cloth filter / prefilter
together may cause unusual noise and heat,
resulting in a fire.
CAUTION:
(For the cloth filter model)
• Never pick up water or other liquids or wet dusts
when using the paper pack. Picking up such things
may cause the paper pack breakage.
•
Before using the paper pack, make sure that
powder filter (optional accessory), damper (optional
accessory) and prefilter are always used together.
(For the powder filter model)
• Before using the paper pack, make sure that
powder filter, damper and prefilter are always used
together.
1. Remove the rubber holder.
Fig.12
2. Extend the paper pack.
3. Align the paper pack opening with the dust
suction opening of the cleaner.
4. Insert the cardboard of the paper pack onto the
holder so that it is positioned at the end beyond
the detent protrusion.
Fig.13
Installing the polyethylene bag
Cleaner can also be used without polyethylene bag.
However, using polyethylene bag is easier to empty the
tank without letting your hands dirty.
1
2
015542
Spread the polyethylene bag in the tank. Insert it between
the holder plate and the tank, and pull it to the hose inlet.
Spread the bag around the top of the tank so that the
prefilter edge can catch and hold the bag securely.
NOTE:
• A polyethylene bag available on the market can be
used. 0.04 mm or thicker one is recommended.
•
Too much dust will tear the bag easily, so do not
collect the dust more than the half of the bag capacity.
Emptying the polyethylene bag
WARNING:
• Always make sure that the cleaner is switched off
and unplugged before emptying the polyethylene
bag. Failure to do so may cause an electric shock
and serious personal injury.
CAUTION:
• Do not apply a great impact on the float cage and
tank. Applying a great impact may cause
deformation and damage to the parts.
•
Empty the tank at least once a day although this
depends on picked-up dust volume in the tank. Or, the
suction force will weaken and the motor may be broken.
• Do not grab the hook when emptying the tank.
Grabbing the hook may cause the hook to break.
Unhook and lift up the tank cover.
Fig.14
Shake off the dust from the cloth filter / powder filter and
then take the polyethylene bag out of the tank.
NOTE:
•
Take the polyethylene bag carefully out of the tank so
that the polyethylene bag cannot be caught and torn
by the protrusion inside the tank when emptying it.
• Empty the polyethylene bag before it becomes full.
Too much dust in the tank may cause the
polyethylene bag to be torn.
1. Holder plate
2. Polyethylene bag

12
Installing the tool box
Fig.15
1. Release the lock of the battery cover, and open
the battery cover.
2. Set the rails on the tool box along the grooves on
the housing.
3. Close the battery cover and apply the lock.
Fig.16
The tool box is convenient for carrying batteries,
extension code, pipe, or cuffs.
Connecting the hose
CAUTION:
• Never force the hose for bending or stamp it.
Never move the cleaner by a hose. Forcing,
stamping and pulling the hose may cause a
breakage or deformation of the hose.
•
When picking up large wastes such as planer carvings,
concrete dusts or similar other than small wastes, use
the 38 mm inner diameter hose (optional accessory).
Using the 28 mm inner diameter hose (optional
accessory) may cause a hose stuffing and damage.
Fig.17
Insert the hose onto the mounting port of the tank and
turn it clockwise until it locks.
MAINTENANCE
CAUTION:
•
Always be sure that the tool is switched off, unplugged,
and the battery cartridge is removed before attempting
to perform inspection or maintenance.
Storage of power supply cord
Fig.18
You can wind up the power supply cord around the tool box.
Storage of accessories
Fig.19
Fig.20
The pipes can be placed into the pipe holder when not
using the cleaner for a short time.
Fig.21
The hose can be stored around the tool by connecting
each ends.
Cleaning
CAUTION:
•
Never use gasoline, benzine, thinner, alcohol or the
like. Discoloration, deformation or cracks may result.
Cleaning of cloth filter (for the cloth filter model)
Fig.22
Clogged cloth filter causes poor suction performance.
Clean out the cloth filter from time to time.
To remove dust or particles adhering to the cloth filter,
shake the frame bottom quickly several times.
Cleaning of powder filter and prefilter
(for the powder filter model)
Clogged powder filter, prefilter and damper cause poor
suction performance.
Clean out the filters and dampers from time to time.
To remove dust or particles adhering to the filters, shake
the frame bottom quickly several times.
Fig.23
Occasionally wash the powder filter in water, rinse and
dry thoroughly in the shade before use. Never wash
filters in a washing machine.
NOTE:
• Do not rub and scratch the powder filter, the
prefilter or the damper with hard objects such as a
brush and a paddle.
• The filters wear out in course of time. It is
recommended to have some spares for them.
To maintain product SAFETY and RELIABILITY, repairs,
any other maintenance or adjustment should be
performed by Makita Authorized Service Centers,
always using Makita replacement parts.
OPTIONAL ACCESSORIES
CAUTION:
• These accessories or attachments are
recommended for use with your Makita tool
specified in this manual. The use of any other
accessories or attachments might present a risk of
injury to persons. Only use accessory or
attachment for its stated purpose.
If you need any assistance for more details regarding
these accessories, ask your local Makita Service Center.
• Makita genuine battery and charger
• Hose
• Front cuffs (22, 24, 38)
• Straight pipe
• Corner nozzle
• Round brush
• Powder filter (for dry dust)
• Damper
• Prefilter
• Nozzle assembly
• Bent pipe
• Polyethylene bag
• Water Filter (option for the cloth filter model)
• Paper pack
• Holder set
NOTE:
• Some items in the list may be included in the tool
package as standard accessories. They may differ
from country to country.

13
SLOVENŠČINA (izvirna navodila)
OPOZORILO: To napravo lahko na varen način, če razumejo
vključena tveganja, uporabljajo otroci, stari 8 let in večter osebe z
zmanjšanimi fizičnimi, čutilnimi ali psihičnimi sposobnostmi, ter s
pomanjkanjem izkušenj in znanja, če so pod ustreznim nadzorom ali
so prejeli navodila v zvezi z uporabo naprave. Otroci se z napravo
ne smejo igrati. Otroci brez nadzora ne smejo izvajati čiščenja in
uporabniškega vzdrževanja.
Razlaga splošnega pogleda
1-1. Vtič(oblika in dolžina kabla se
lahko med posameznimi državami
razlikujeta)
2-1. Indikator električnega napajanja
3-1. Zakleni
3-2. Pokrov akumulatorja
4-1. Baterijski vložek
5-1. Gumb CHECK
6-1. Indikatorske lučke
6-2. Gumb CHECK
7-1. Stikalo za stanje pripravljenosti
7-2. Vklopno-izklopni gumb
7-3. Gumb za nastavljanje moči
sesanja
8-1. Kolo
8-2. Ročica zamaška
8-3. PROSTI položaj
8-4. Položaj za zaklep
10-1. Plovec
10-2. Ohišje plovca
11-1. Filter za vodo
11-2. Rezervoar
11-3. Oznaka za položaj nameščanja
12-1. Gumijasto držalo
13-1. Papirnati element
13-2. Držalo
TEHNIČNI PODATKI
Model DVC860L DVC861L
Standardna vrsta filtra Filter iz blaga
(za suhi in mokri prah) Protiprašni filter (za suhi prah)
Obratovanje na enosmerni tok
(z gibko cevjo BL1830, ø38 mm x 2,5 m) 2,1 m3/min
Volumen
pretoka (zrak) Obratovanje na izmenični tok
(z gibko cevjo ø38 mm x 2,5 m) 3,6 m3/min
Obratovanje na enosmerni tok
(z gibko cevjo BL1830, ø38 mm x 2,5 m) 90 hPa
Vakuum Obratovanje na izmenični tok
(z gibko cevjo ø38 mm x 2,5 m) 240 hPa
Prah 8 L
Obnovljiva
zmogljivost Voda 6 L -
Mere (D x Š x V) 366 mm x 334 mm x 368 mm
Nazivna napetost (delovanje na baterije) D.C. 36 V
Standardne akumulatorske baterije BL1815N, BL1820, BL1820B, BL1830, BL1830B, BL1840,
BL1840B, BL1850, BL1850B, BL1860B
Neto teža (z BL1815N / BL1820) 8,6 kg 9,3 kg
Neto teža (z BL1830 / BL1840 / BL1850) 9,2 kg 9,9 kg
Varnostni razred /II
• Zaradi našega nenehnega programa raziskav in razvoja si pridržujemo pravico do spremembe tehničnih podatkov brez obvestila.
• Tehnični podatki se lahko razlikujejo od države do države.
• Teža z baterijskim vložkom je v skladu z EPTA-postopkom 01/2003
• Za moker prah potrebujete plovec in vodni filter ali filter iz blaga.

14
END118-1
Simboli
Naslednji simboli se uporabljajo v povezavi s strojem.
Pred uporabo proizvoda se obvezno seznanite z
njihovim pomenom.
・Preberite navodila za uporabo.
・Potrebna je posebna pozornost in
previdnost.
・Opozorilo! Sesalnik za prah lahko
vsebuje nevarni prah.
・Nikoli ne stojte na sesalniku za prah.
・
Prah razreda L (lahko). Sesalniki za prah
so sposobni posesati prah razreda L.
Upoštevajte državne uredbe v zvezi s
prahom ter zdravjem in varnostjo pri delu.
・DVOJNA IZOLACIJA
・Le za države EU
Električnega orodja ali akumulatorja ne
odlagajte skupaj z gospodinjskimi
odpadki!
V skladu z Evropsko direktivo o odpadni
električni in elektronski opremi in o
baterijah in akumulatorjih ter odpadnih
baterijah in akumulatorjih in z njunim
izvajanjem v skladu z državno
zakonodajo se morajo električna oprema,
baterije in akumulatorji, ki so prišli do
konca svojega življenjskega cikla, zbirati
ločeno in se vrniti v okoljsko združljivo
ustanovo za recikliranje.
ENE084-1
Namenska uporaba
Orodje je namenjeno za pobiranje mokrega in suhega
prahu. Orodje je primerno za komercialno uporabo, na
primer v hotelih, šolah, bolnišnicah, tovarnah, trgovinah,
pisarnah in podjetjih za izposojo.
ENF002-2
Priključitev na električno omrežje
Napetost električnega omrežja se mora ujemati s
podatki na tipski ploščici. Stroj deluje samo z enofazno
izmenično napetostjo. Stroj je po evropskih smernicah
dvojno zaščitno izoliran, zato se ga lahko priključi tudi
na vtičnice brez ozemljitvenega voda.
ENG905-1
Hrup
Tipični, z A ocenjeni vrednosti hrupa glede na
EN/IEC60704:
Raven zvočnega tlaka (LpA): 75 dB (A)
Odstopanje (K): 3,0 dB (A)
Nivo hrupa med delom lahko preseže 80 dB (A).
Uporabljajte zaščito za sluh
ENG900-1
Vibracije
Skupne vrednosti vibracij (vektorska vsota treh osi) po
IEC 60335-2-69:
Oddajanje tresljajev (ah): 2,5 m/s2ali manj
Odstopanje (K): 1,5 m/s2
ENH038-3
Samo za evropske države
ES Izjava o skladnosti
Družba Makita izjavlja, da je/so naslednji stroj/-i:
Oznaka stroja:
Žični in brezžični vakuumski sesalnik za prah
Model št./vrsta: DVC860L, DVC861L
Je skladen z naslednjimi evropskimi direktivami:
2006/42/ES
Izdelan v skladu z naslednjim standardom ali
standardiziranimi dokumenti:
EN60335
Tehnična dokumentacija v skladu z direktivo
2006/42/ES je na voljo na:
Makita, Jan-Baptist Vinkstraat 2, 3070, Belgija
25.9.2014
000331
Yasushi Fukaya
Direktor
Makita, Jan-Baptist Vinkstraat 2, 3070, Belgija
ENB124-1
VARNOSTNA OPOZORILA ZA
ŽIČNI IN BREZŽIČNI VAKUUMSKI
SESALNIK ZA PRAH
OPOZORILO! POMEMBNO! POZORNO PREBERITE
vsa varnostna opozorila in navodila pred uporabo.
Neupoštevanje opozoril in navodil lahko povzroči električni
udar, požar in/ali hude telesne poškodbe.
1. Pred uporabo se prepričajte, da ta sesalnik za
prah uporabljajo le osebe, ki so bile ustrezno
seznanjene z uporabo tega sesalnika za prah.
2. Če začne iztekati pena/tekočina, takoj
izklopite napravo.
3. Napravo za omejevanje nivoja vode redno
čistite in pregledujte za znaki okvare.
4. Sesalnika za prah ne uporabljajte brez filtra.
Če je filter poškodovan, ga takoj zamenjajte.
5. UPORABA PODALJŠKA. Ko uporabljate
podaljšek zaradi večje razdalje do svojega
vira napajanja, poskusite uporabiti kabel, ki je
dovolj debel, a ne predolg, saj lahko to vpliva
na slabše delovanje sesalnika za prah. Za
zunanjo uporabo uporabite podaljšek, ki je
primeren za zunanjo uporabo.
Cd
Ni-MH
Li-ion

15
6. OPOZORILO O NAPETOSTI: Preden povežete
sesalnik za prah na vir napajanja (vtičnica itd.),
se prepričajte, da je napajalna napetost ista,
kot je označeno na tablici sesalnika za prah.
Če je napetost vira napajanja večja, kot je
določena za sesalnik za prah, lahko to
povzroči RESNO POŠKODBO operatorja, kot
tudi okvaro sesalnika za prah. Če ste v
dvomih, NE VKLAPLJAJTE SESALNIKA ZA
PRAH. Če uporabljate vir napajanja z nižjo
napetostjo, kot je označena na tablici, to
škoduje motorju.
7. IZOGIBAJTE SE NEŽELENEMU ZAGONU. Ko
priklapljate napravo, se prepričajte, da je
stikalo IZKLOPLJENO.
8.
Ne poskušajte pobirati vnetljivih materialov,
ognja, prižganih cigaret, vročega pepela, vročih
kovinskih okruškov, ostrih materialov, kot so
britvice, igle, zlomljeno steklo ali podobno.
9. NIKOLI NE UPORABLJAJTE SESALNIKA ZA
PRAH V BLIŽINI BENCINA, PLINA, BARVE,
LEPIL ALI DRUGIH LAHKO VNETLJIVIH
SNOVI. Med VKLOPOM in IZKLOPOM stikala,
le-ta oddaja iskre. Prav tako oddaja iskre
komutator med delovanje motorja. Lahko
pride do nevarne eksplozije.
10.
Nikoli ne sesajte strupenih, rakotvornih,
vnetljivih ali drugih nevarnih materialov, npr.
azbesta, arzenika, barija, berilija, svinca,
pesticidov ali drugih zdravju nevarnih materialov.
11. Sesalnika za prah nikoli ne uporabljajte zunaj
v dežju.
12. Ne uporabljajte v bližini virov toplote
(štedilnik itd.).
13. VAROVALO PRED ELEKTRIČNIM UDAROM.
Izogibajte se fizičnemu stiku z ozemljenimi
površinami. Na primer: cevi, radiatorji,
štedilniki, ohišja hladilnikov.
14.
Ne blokirajte odprtin za prezračevanje. Te
odprtine omogočajo hlajenje motorja. Blokadam
se je treba izogniti, saj lahko drugače motor
pregori zaradi nezadostnega prezračevanja.
15.
Ves čas pazite na ustrezno oporo in ravnotežje.
16. NE ZLORABLJAJTE KABLA. Nikoli ne nosite
sesalnika za prah, tako da ga držite za kabel,
in ga ne vlecite iz vtičnice. Kabla ne približujte
vročini, olju in ostrim robovom. Periodično
pregledujte kable sesalnika za prah in če so
poškodovani, naj jih popravi pooblaščeni
servis. Periodično pregledujte podaljške in jih
zamenjajte, če so poškodovani.
17. Ne zlagajte, vlecite in stopajte na cev.
18. Če sesalnik za prah slabo deluje ali med
njegovim delovanjem opazite karkoli
nenavadnega, ga takoj izklopite.
19. IZKLJUČITE SESALNIK ZA PRAH. Ko ga ne
uporabljate, med servisiranjem in med
menjavo dodatkov.
20. Očistite in servisirajte sesalnik za prah po
vsaki uporabo in ga tako ohranite v
najboljšem stanju.
21. SESALNIK ZA PRAH PREVIDNO VZDRŽUJTE.
Sesalnik za prah redno čistite za boljše in
varnejše delovanje. Sledite navodilom za
zamenjavo dodatkov. Ročice morajo biti suhe,
čiste in brez olja ter masti.
22.
PREGLEJTE POŠKODOVANE DELE. Pred nadaljnjo
uporabo sesalnika za prah pozorno preglejte
varovalo ali druge dele, ki so poškodovani ter tako
določite, ali bodo pravilno delovali. Preglejte
poravnavo gibljivih delov, povezave gibalnih delov,
zlome delov, montažo in druga stanja, ki lahko
vplivajo na delovanje. Varovalo ali drugi del, ki je
poškodovan, mora ustrezno popraviti ali zamenjati
pooblaščeni servis, razen če ni v teh navodilih za
uporabo navedeno drugače. Stikala v okvari naj
zamenja pooblaščeni servis. Sesalnika za prah ne
uporabljajte, če ga ne morete vklopiti in izklopiti s
stikalom.
23. NADOMESTNI DELI. Med servisiranjem
uporabite le originalne nadomestne dele.
24. SESALNIK ZA PRAH SHRANJUJTE V
NEDEJAVNEM STANJU. Ko sesalnika za prah
ne uporabljate, ga hranite v zaprtem prostoru.
25. Lepo ravnajte z vašim sesalnikom za prah.
Grobo ravnanje lahko povzroči okvaro tudi
najbolj robustno zgrajenega sesalnika za prah.
26. Zunanjosti ali notranjosti sesalnika za prah ne
čistite z bencinom, razredčilom ali čistilnimi
kemikalijami. S tem lahko povzročite razpoke
in razbarvanje.
27. Sesalnika za prah ne uporabljajte v zaprtem
prostoru, kjer uhajajo vnetljivi, eksplozivni ali
strupeni plini zaradi barve na osnovi olja,
razredčila za barve, bencina, nekaterih snovi,
ki so odporne na molje itd. ali v prostorih, kjer
je prisoten vnetljivi plin.
28.
Kabla sesalnika za prah ne puščajte ležati na
tleh, po tem, ko ste zaključili s čiščenjem. To je
lahko nevarno zaradi spotikanja čez kabel, ali
pa lahko povzročite okvaro sesalnika za prah.
29. Tega ali drugega orodja ne upravljajte pod
vplivom drog ali alkohola.
30. Kot osnovno pravilo varnosti uporabljajte
zaščitna očala, ki imajo stransko zaščito.
31. V prašnih delovnih pogojih uporabljajte
masko za prah.
32. Ta stroj ni namenjen za uporabo osebam,
vključno z otroki, z oslabljenimi fizičnimi,
senzornimi in duševnimi zmogljivostmi ali
osebam brez ustreznik izkušenj in znanja.
33. Zagotovite ustrezen nadzor otrok in preprečite
igranje s sesalnikom za prah.
34. Vtičnega kabla ali sesalnika za prah nikoli ne
upravljajte z mokrimi rokami.
35.
Med čiščenjem stopnic bodite izjemno previdni.

16
36. Sesalnika za prah ne uporabljajte namesto
stola ali delovnega pulta. Stroj lahko pade na
tla in povzroči telesno poškodbo.
Uporaba in vzdrževanje baterijskega orodja
1. Orodje polnite samo s polnilnikom, ki ga je
določil proizvajalec. Polnilnik, primeren za
eno vrsto akumulatorskih baterij, lahko
povzroči tveganje za požar, če ga uporabljate
z drugimi akumulatorskimi baterijami.
2. Električno orodje uporabljajte le s posebej
označenimi akumulatorskimi baterijami.
Uporaba drugih akumulatorskih baterij lahko
povzroči tveganje za poškodbe in požar.
3.
Ko baterija ni v uporabi, je ne hranite ob kovinskih
predmetih, kot so sponke za papir, kovanci, ključi,
žeblji, vijaki ali drugi manjši kovinski predmeti, ki
lahko povežejo oba kontakta. Če kratko vežete
kontakta baterije, lahko pride do opeklin.
4. V neprimernih pogojih lahko iz akumulatorja
uhaja tekočina; izogibajte se stiku. Če pride
do nenamernega stika, sperite z vodo. Če
pride tekočina v stik z očmi, takoj poiščite
zdravniško pomoč. Tekočina iz akumulatorja
lahko povzroči draženje ali opekline.
HRANITE ZA MOREBITNE
POTREBE V PRIHODNJE
OPOZORILO:
NE dopustite si, da bi zaradi udobnejšega dela ali
poznavanja izdelka (pridobljenega z večkratno
uporabo) opustili striktno upoštevanje varnostnih
pravil pri uporabi stroja. ZLORABA ali
neupoštevanje varnostnih pravil v teh navodilih za
uporabo lahko povzroči hude telesne poškodbe.
ENC007-11
POMEMBNA VARNOSTNA
NAVODILA
ZA BATERIJSKE VLOŽKE
1. Pred uporabo baterijskega vložka preberite
vsa navodila in opozorilne oznake na (1)
polnilniku akumulatorja, (2) akumulatorju in
(3) izdelku, ki uporablja akumulator.
2. Ne razstavljajte baterijskega vložka.
3. Če se je čas delovanja občutno skrajšal, takoj
prekinite z uporabo. V nasprotnem primeru je
lahko rezultat pregretje, morebitne opekline in
celo eksplozija.
4. Če pride elektrolit v oči, jih sperite s čisto
vodo in takoj poiščite zdravniško pomoč.
Posledica je lahko izguba vida.
5.
Ne povzročite kratkega stika baterijskega vložka:
(1) Ne dotikajte se priključkov s kakršnim
koli prevodnim materialom.
(2) Izogibajte se shranjevanju baterijskega
vložka v posodo z drugimi kovinskimi
predmeti kot so žeblji, kovanci itn.
(3) Ne izpostavljajte baterijskega vložka vodi
ali dežju.
Kratek stik akumulatorja lahko povzroči velik tok,
pregretje, morebitne opekline in celo eksplozijo.
6. Ne shranjujte orodja in baterijskega vložka na
lokacijah, kjer lahko temperatura doseže ali
preseže 50 ゚C (122 ゚F).
7. Ne sežigajte baterijskega vložka, tudi če je
hudo poškodovan ali v celoti izpraznjen.
Baterijski vložek lahko v ognju eksplodira.
8. Bodite previdni, da vam akumulator ne pade
in ga ne udarjajte.
9. Ne uporabljajte poškodovanih akumulatorjev.
10. Pri vsebovanih litij-ionskih baterijah je treba
upoštevati zahteve mednarodnih predpisov za
prevoz nevarnega blaga.
Za komercialne prevoze, npr. tretjih oseb ali
špediterja, je treba upoštevati posebne zahteve
glede pakiranja in označevanja.
Pri pripravi blaga za dostavo se je treba
posvetovati s strokovnjakom za nevarne
materiale. Prosimo, da upoštevate tudi
podrobnejše državne predpise.
Zalepite ali prekrijte odprte stike in zapakirajte
akumulator na način, ki bo preprečil premikanje
znotraj embalaže.
11. Upoštevajte lokalne uredbe glede odlaganja
akumulatorja.
SHRANITE TA NAVODILA.
POZOR: Uporabljajte samo originalne
akumulatorje družbe Makita.
Uporaba akumulatorjev drugih znamk ali akumulatorjev,
v katere se je karkoli že posegalo, lahko privede do
eksplozije in posledično do požara, telesne poškodbe ali
kakršnekoli druge škode. Prav tako bo to izničilo
garancijo družbe Makita za orodje in polnilnik Makita.
Nasveti za maksimalno življenjsko dobo
akumulatorja
1. Napolnite baterijski vložek preden se v celoti
izprazni.
Ko opazite, da ima orodje manjšo moč, vedno
ustavite delovanje orodja in napolnite
baterijski vložek.
2. Nikoli znova ne polnite popolnoma
napolnjenega baterijskega vložka.
Prenapolnjenje skrajša življenjsko dobo
akumulatorja.
3. Napolnite baterijski vložek pri sobni
temperaturi med 10 ゚C in 40 ゚C (50 ゚F - 104 ゚
F). Počakajte, da se vročbaterijski vložek
pred polnjenjem ohladi.
4. Akumulatorsko baterijo napolnite, če je ne
uporabljate dalj časa (dlje kot šest mesecev).

17
OPIS DELOVANJA
Uporaba z izmeničnim tokom:
OPOZORILO:
• Preden vključite sesalnik za prah, se
prepričajte, da je izklopljen. Če vključite sesalnik
za prah z vklopljenim stikalom, lahko pride do
neželenega zagona, ki lahko povzroči resno
telesno poškodbo.
Sl.1
Priključite vtičv električno vtičnico.
Sl.2
Ko boste stikalo za stanje pripravljenosti preklopili na stran
„I“, bo zasvetil indikator za napajanje na izmenični tok.
OPOMBA:
• Tudi pri uporabi načina z enosmernim tokom bo
orodje samodejno preklopilo na izmenični tok, ko
ga boste priključili v omrežje.
• Če orodje med uporabo odklopite in so v njem
baterije, se bo sesalnik za prah preklopil v stanje
pripravljenosti.
Uporaba z baterijo:
Nameščanje ali odstranjevanje
akumulatorske baterije
POZOR:
• Pred vsako nastavitvijo ali pregledom delovanja
orodja se prepričajte, ali je sesalnik za prah
izključen in ali je akumulatorska baterija
odstranjena.
• Kadar nameščate ali odstranjujete
akumulatorsko baterijo, trdno držite sesalnik
za prah in akumulatorsko baterijo. Če sesalnika
za prah in akumulatorske baterije ne držite trdno,
se lahko zgodi, da vam zdrsneta iz rok, posledica
pa je poškodba sesalnika za prah in
akumulatorske baterije ter telesna poškodba.
• Bodite previdni, da si med odpiranjem ali
zapiranjem pokrova akumulatorja ne stisnete
prsta. Neupoštevanje tega lahko povzroči telesno
poškodbo.
Sl.3
Za namestitev akumulatorske baterije najprej sprostite
zaklep in nato odprite pokrov akumulatorja. Nato
vstavite akumulatorsko baterijo.
Sl.4
Poravnajte jeziček na akumulatorski bateriji z utorom na
ohišju ter jo vstavite na svoje mesto. Akumulatorsko
baterijo vstavite do konca, da se zaskoči. Nato zaklenite
pokrov akumulatorja.
Za odstranitev akumulatorske baterije iz orodja jo
premaknite iz orodja, ob tem pa premaknite gumb na
sprednji strani akumulatorske baterije.
OPOMBA:
• Kadar uporabljate sesalnik za prah z baterijami,
izvlecite vtičsesalnika za prah iz podaljška.
POZOR:
• Akumulatorsko baterijo vedno vstavite do konca.
Če tega ne upoštevate, lahko baterija
nepričakovano izpade iz orodja in poškoduje vas
ali osebe v neposredni bližini.
• Ne nameščajte akumulatorske baterije s silo. Če
se akumulatorska baterija ne zaskoči zlahka, ni
pravilno vstavljena.
OPOMBA:
• Sesalnik za prah ne deluje samo z eno
akumulatorsko baterijo.
Zaščitni sistem orodja/akumulatorja
Orodje je opremljeno z zaščitnim sistemom
orodja/akumulatorja. Sistem samodejno prekine
napajanje orodja, da se podaljša življenjska doba orodja
in akumulatorja.
Orodje se bo samodejno zaustavilo med delovanjem, če
sta orodje ali akumulator zamenjana pod naslednjimi
pogoji: V nekaterih primerih svetijo indikatorji.
Varovalo pred preobremenitvijo
Če je orodje preobremenjeno, se samodejno zaustavi. V
takem primeru izklopite orodje in ga prenehajte
uporabljati na način, zaradi katerega je prišlo do
preobremenitve orodja. Nato orodje vklopite in ga znova
zaženite.
Zaščita pred pregrevanjem orodja
VKLOP Utripa
015485
Kadar se orodje pregreje, se samodejno ustavi in
indikator akumulatorja utripa približno 60 sekund. V tem
primeru pustite, da se orodje ohladi, preden ga znova
vklopite.
Varovalo pred prekomerno izpraznitvijo
Ko se zmogljivost akumulatorja zmanjša, se orodje
samodejno ustavi. Če izdelek ne deluje, tudi če so
stikala vklopljena, odstranite akumulatorje iz orodja in jih
napolnite.

18
Prikaz preostale zmogljivosti akumulatorja
Sl.5
1 212
015674
Pritisnite gumb za preverjanje, da vidite, koliko
zmogljivosti akumulatorja je še ostalo, kar prikazujejo
indikatorji akumulatorja. Indikatorji akumulatorja so
namenjeni za vsak akumulator.
Prikaz preostale zmogljivosti akumulatorja
Indikator stanja akumulatorja
Preostala zmogljivost akumulatorja
50 % - 100 %
20 % - 50 %
0 % - 20 %
Napolnite akumulator
VKLOP
Ne sveti
Utripa
015527
Prikazuje preostalo zmogljivost akumulatorja
(Samo za akumulatorske baterije z oznako »B« na
koncu številke modela.)
Sl.6
Pritisnite gumb za preverjanje napolnjenosti na
akumulatorski bateriji, da preverite preostalo zmogljivost.
Indikatorske lučke zasvetijo za nekaj sekund.
Ne sveti UtripaSveti
Indikatorske lučke
Napolnite
akumulator.
od 0 % do 25 %
od 25 % do 50 %
od 50 % do 75 %
od 75 % do 100 %
Preostala
zmogljivost
Akumulator
je morda
okvarjen.
015658
OPOMBA:
• Odvisno od pogojev uporabe in okoljske
temperature se označba lahko nekoliko razlikuje
od dejanske napolnjenosti.
Delovanje stikala
Sl.7
Za zagon sesalnika za prah:
1.
Stikalo za stanje pripravljenosti preklopite na stran „I“.
Sesalnik za prah se preklopi v stanje pripravljenosti.
2. Pritisnite gumb za vklop.
Da preklopite sesalnik za prah v stanje pripravljenosti,
ponovno pritisnite gumb za vklop.
Za izklop sesalnika za prah stikalo za stanje
pripravljenosti preklopite na stran „O“.
Močsesanja lahko prilagodite glede na svoje delo.
Močsesanja lahko povečate z obračanjem gumba za
nastavljanje moči sesanja od simbola do simbola .
OPOMBA:
• Če sesalnika za prah dlje časa ne boste
uporabljali, stikalo za stanje pripravljenosti vedno
preklopite na stran „O“. Sesalnik za prah v stanju
pripravljenosti porablja električni tok.
Samodejna zaustavitev sesanja med mokrim
sesanjem (pri modelu s filtrom iz blaga)
OPOZORILO:
• Ne uporabljajte dolgoročno, dokler deluje
plovec. Dolgoročna uporaba sesalnika za prah z
delujočim plovcem lahko povzroči pregrevanje,
posledica pa je deformacija sesalnika za prah.
• Ne pobirajte pene ali milnate tekočine.
Pobiranje pene ali milnate tekočine lahko povzroči
uhajanje pene skozi izhod za zrak, preden plovec
preneha delovati. Če boste nadaljevali z uporabo
sesalnika za prah v tem stanju, lahko pride do
električnega udara ali okvare sesalnika za prah.

19
Funkcija za samodejno zaustavitev sesanja deluje samo
pri uporabi plovca in ohišja plovca.
Sesalnik za prah ima mehanizem s plovcem, ki
preprečuje vdor vode v motor med pobiranjem večje
količine vode.
Ko je rezervoar poln in sesalnik za prah ne sesa več
vode, izklopite sesalnik za prah in izpraznite rezervoar.
Zaklepanje ali odklepanje kolesa
Sl.8
Če želite zakleniti kolo z zamaškom, znižajte ročico
zamaška in kolo se bo prenehalo vrteti. Če želite
sprostiti kolo iz zaklenjenega položaja, dvignite ročico
zamaška.
Zaklepanje kolesa je priročno med shranjevanjem
sesalnika za prah, ustavitvijo dela na poti in
ohranjanjem sesalnika za prah pri miru.
Za upravljanje zamaška ga premaknite z roko.
OPOMBA:
• Med premikanjem sesalnika za prah se prepričajte,
da je kolo odklenjeno. Premikanje sesalnika za
prah s kolesom v zaklenjenem položaju lahko
povzroči okvaro kolesa.
Transportni ročaj
Sl.9
Sesalnik za prah pri prenašanju držite za ročaj na glavi.
Ročaj lahko vstavite v glavo, kadar ga ne potrebujete.
OPIS DELOV
Model DVC860L
(model s filtrom iz blaga (za suhi in mokri prah))
1
2
3
4
5
015616
Model DVC861L
(model s protiprašnim filtrom (za suhi prah))
1
2
3
4
5
015617
MONTAŽA
POZOR:
• Preden se lotite kakršnega koli dela na sesalniku
za prah, mora biti sesalnik za prah izključen in
akumulatorska baterija odstranjena.
• Med sestavljanjem ali vzdrževanjem vedno nosite
protiprašno masko.
Nameščanje protiprašnega filtra in predfiltra
(za suhi prah)
(dodatna oprema za model s filtrom iz blaga)
POZOR:
• Ko uporabljate protiprašni filter, ne pobirajte vode,
drugih tekočin ali mokrega prahu. Pobiranje teh
stvari lahko povzroči poškodbo protiprašnega filtra.
1. Pokrov rezervoarja
2. Plovec
3. Ohišje plovca
4. Filter iz blaga
5. Rezervoar
1. Pokrov rezervoarja
2. Filter za prah
3. Blažilnik
4. Pred filter
5. Rezervoa
r

20
1
2
3
4
6
6
6
5
015534
Sl.10
Za uporabo protiprašnega filtra odstranite ohišje plovca
in plovec tako, da odstranite vijake.
V rezervoar vstavite predfilter.
Nato namestite dušilnik na protiprašni filter in ju
namestite v predfilter.
Ko nameščate protiprašni filter in predfilter, oznake
namestitev poravnajte s tistimi na vrhu rezervoarja.
Na koncu namestite pokrov rezervoarja in ga zaklenite.
OPOMBA:
• Pred uporabo protiprašnega filtra se prepričajte, ali
sta predfilter in dušilnik vedno uporabljena skupaj.
Ni dovoljeno namestiti le protiprašnega filtra.
Nameščanje vodnega filtra (za model s filtrom
iz blaga) (dodatna oprema)
POZOR:
• Nikoli ne pobirajte vode ali mokrega prahu brez
plovca in filtra iz blaga ali vodnega filtra.
• Za pobiranje mokrega prahu vedno preverite, ali
sta na sesalnik za prah nameščena ohišje plovca
in plovec.
• Kadar nameščate filter za vodo na rezervoar, ga
namestite tesno ob odprtino rezervoarja, tako da
se kavelj filtra za vodo zaskoči v odprtino
rezervoarja in da ni prostora med filtrom za vodo
in rezervoarjem.
OPOMBA:
• Pri ponavljajočem se pobiranju večje količine vode
se priporoča uporaba vodnega filtra. V primeru
uporabe filtra iz blaga se lahko zmanjša zmožnost
sesanja.
Sl.11
Za pobiranje vode ali mokrega prahu je vodni filter
primernejši od filtra iz blaga.
Pri nameščanju vodnega filtra poravnajte njegovo
oznako za namestitev z oznako na rezervoarju.
Nameščanje papirnatega elementa
(dodatna oprema)
OPOZORILO:
• Kadar uporabljate papirnati element, prav tako
uporabite skupaj filter iz blaga ali predfilter, ki je
predhodno nameščen na orodje. Če ne uporabite
filtra iz blaga/predfiltra, lahko pride do
nenavadnega hrupa in vročine, ki lahko povzroči
požar.
POZOR:
(Za model s filtrom iz blaga)
• Kadar uporabljate papirnati element, ne pobirajte
vode ali drugih tekočin ali mokrega prahu.
Pobiranje teh stvari lahko povzroči poškodbo
papirnatega elementa.
• Pred uporabo papirnatega elementa se prepričajte,
ali so protiprašni filter (dodatna oprema), dušilnik
(dodatna oprema) in predfilter vedno uporabljeni
skupaj.
(Za model s protiprašnim filtrom)
• Pred uporabo papirnatega elementa se prepričajte,
ali so protiprašni filter, dušilnik in predfilter vedno
uporabljeni skupaj.
1. Odstranite gumijasto držalo.
Sl.12
2. Razširite papirnati element.
3. Poravnajte odprtino papirnatega elementa z
odprtino za sesanje prahu sesalnika za prah.
4. Vstavite karton papirnatega elementa na držalo,
tako da bo nameščen na koncu čez izboklino.
Sl.13
Nameščanje polietilenske vrečke
Sesalnik lahko uporabljate tudi brez polietilenske vrečke.
Vendar je preprosteje izprazniti rezervoar z uporabo
polietilenske vrečke, ne da bi si pri tem umazali roke.
1. Pokrov rezervoarja
2. Filter za prah
3. Blažilnik
4. Pred filter
5. Rezervoar
6. Oznaka za položaj nameščanja
Other manuals for DVC860L
12
This manual suits for next models
1
Table of contents
Languages:
Other Makita Vacuum Cleaner manuals

Makita
Makita DCL283F User manual

Makita
Makita DCL180 User manual

Makita
Makita DVC860L User manual

Makita
Makita DVC866L User manual

Makita
Makita DRC300 User manual

Makita
Makita DRC300 User manual

Makita
Makita XLC02 User manual

Makita
Makita DVC860L Manual

Makita
Makita DVC866L User manual

Makita
Makita CL107FD User manual

Makita
Makita DCL181F User manual

Makita
Makita 440 User manual

Makita
Makita DVC866L User manual

Makita
Makita DVC660 User manual

Makita
Makita VC3012L User manual

Makita
Makita 406 User manual

Makita
Makita 447 M User manual

Makita
Makita DVC150L User manual

Makita
Makita CL117FDX4 User manual

Makita
Makita VC011G User manual