Mako MK5 User manual
1 Manual Updated May 19, 2020
MK5 Operator's Manual

2 Manual Updated May 19, 2020
Overview
With over 25 years of experience developing field-rugged instrumentation, Arbiter’s team is proud to
introduce the Mako, a revolutionary tool for the backflow and cross connection control industry.
The Mako provides a tough, water resistant digital solution with benefits and features unseen in a
traditional mechanical gauge.
The MK5 is the ONLY USC FCCCHR Manual 10 Approved gauge.
The MAKO can perform all standard backflow testing procedures including those from USC FCCCHR, ABPA,
NEWWA, AWWA, UF TREEO and ASSE.
The MAKO also allows you to do things that aren’t possible with mechanical gauges.
Since its release the Mako has included Bluetooth, meaning the Mako provides the missing link between
field testing and the app software already being used while collecting data in the field.
Its large values and backlit display allow you to read measurements with ease in a variety of lighting
conditions.
Its unique Capture Value function makes remembering values effortless. It allows you to more easily
capture fast-changing values on RPBAs, PVBAs and SVBAs by freeing you up to look at the assembly rather
than at the gauge and assembly.
Its ergonomic design allows you to easily grip the Mako and the soft rubber over-molding provides your
hand with a comfortable hold that is easier to grab and hold, even when wet.
The Mako’s design also allows it to sit flat on the ground and ease of use when used in the hand or hung
from the strong hook recessed on its back.
The Mako includes custom hoses designed specifically for cross connection control testing. The hoses are
more flexible than others in the industry and are made from materials that are suitable for potable water,
following the NSF 61 and FDA guidelines. The hoses include a 40-micron filter, which is a higher grade than
the industry standard filter which keeps more debris out of your tool.

3 Manual Updated May 19, 2020
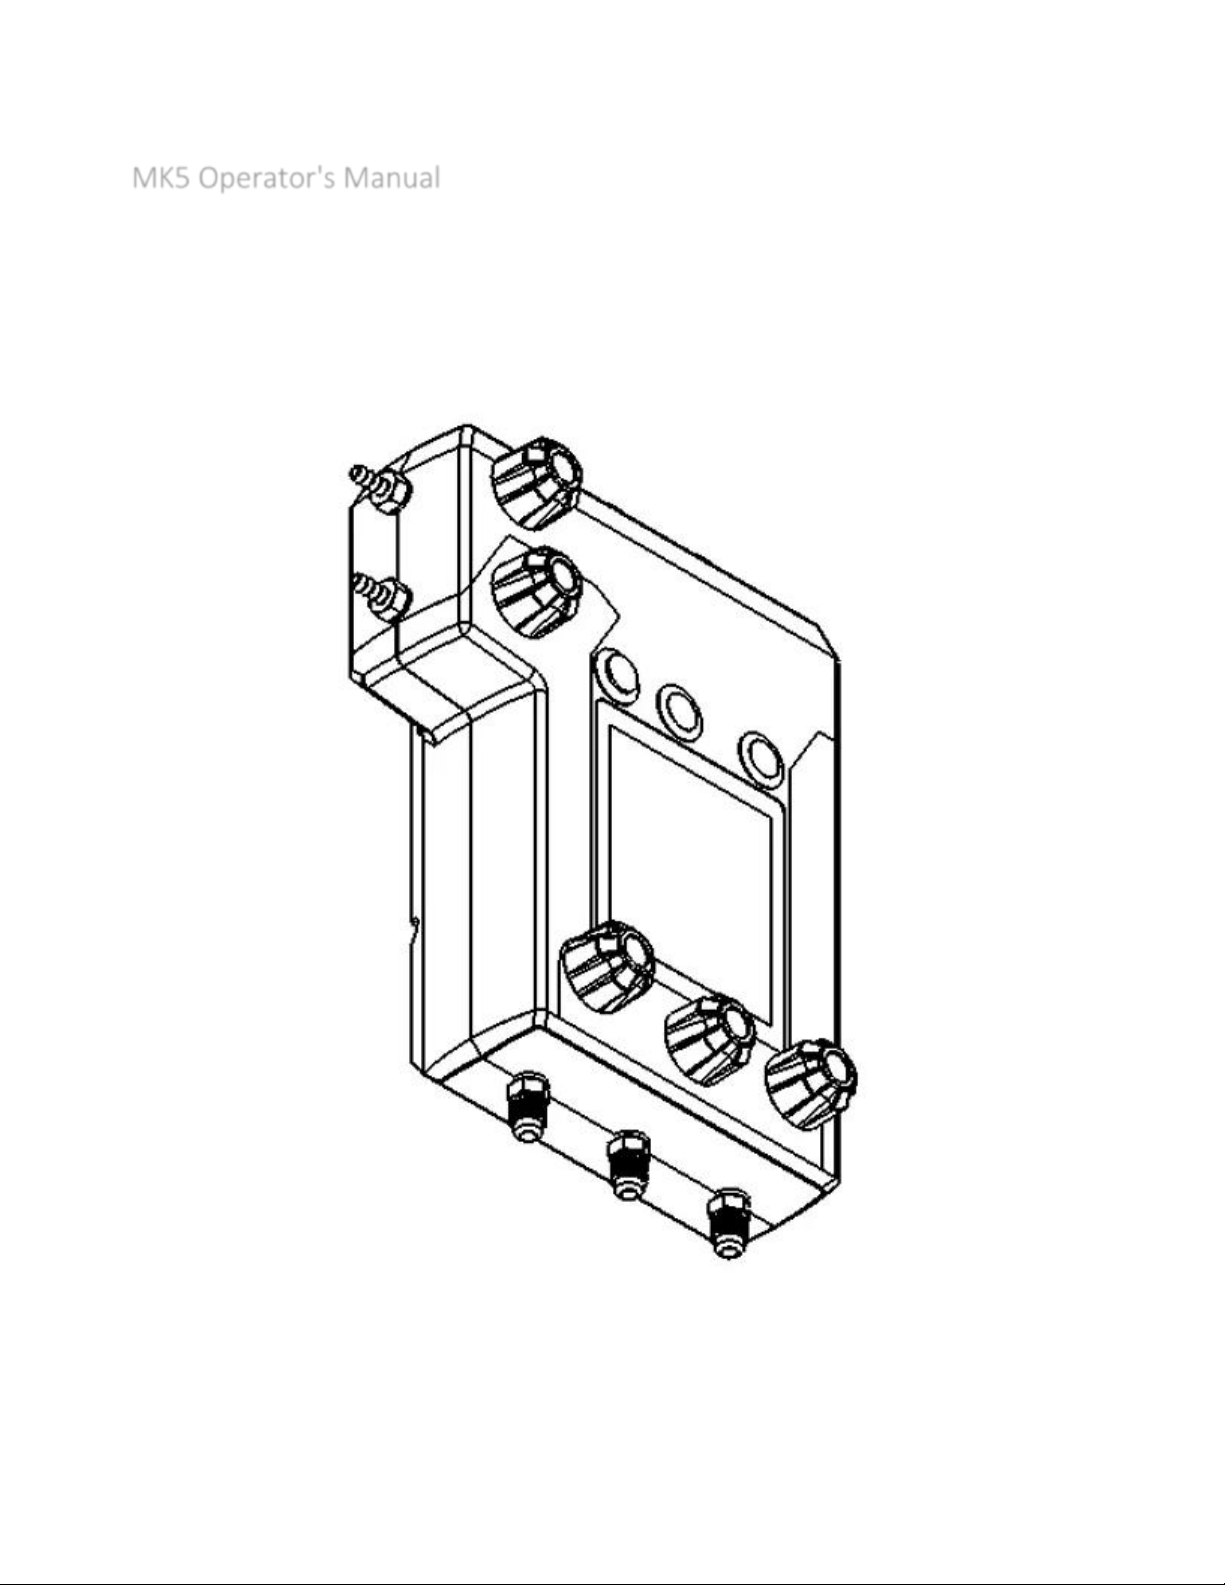
Diagram of MK5

4 Manual Updated May 19, 2020
MK5 Front
1. Low Bleed Port: Connect your included Low Bleed Port hose here.
2. Low Bleed Port Knob: Turn knob clockwise to close the Low Bleed Port. Turn knob
counterclockwise to open the Low Bleed Port. Do not exceed finger tight when closing the knob.
Do not use any external tools to increase torque applied to this or any knob on the Mako.
3. High Bleed Port: Connect your included High Bleed Port hose here.
4. High Bleed Port Knob: Turn knob clockwise to close the High Bleed Port. Turn knob
counterclockwise to open the High Bleed Port. Do not exceed finger tight when closing the knob.
Do not use any external tools to increase torque applied to this or any knob on the Mako.
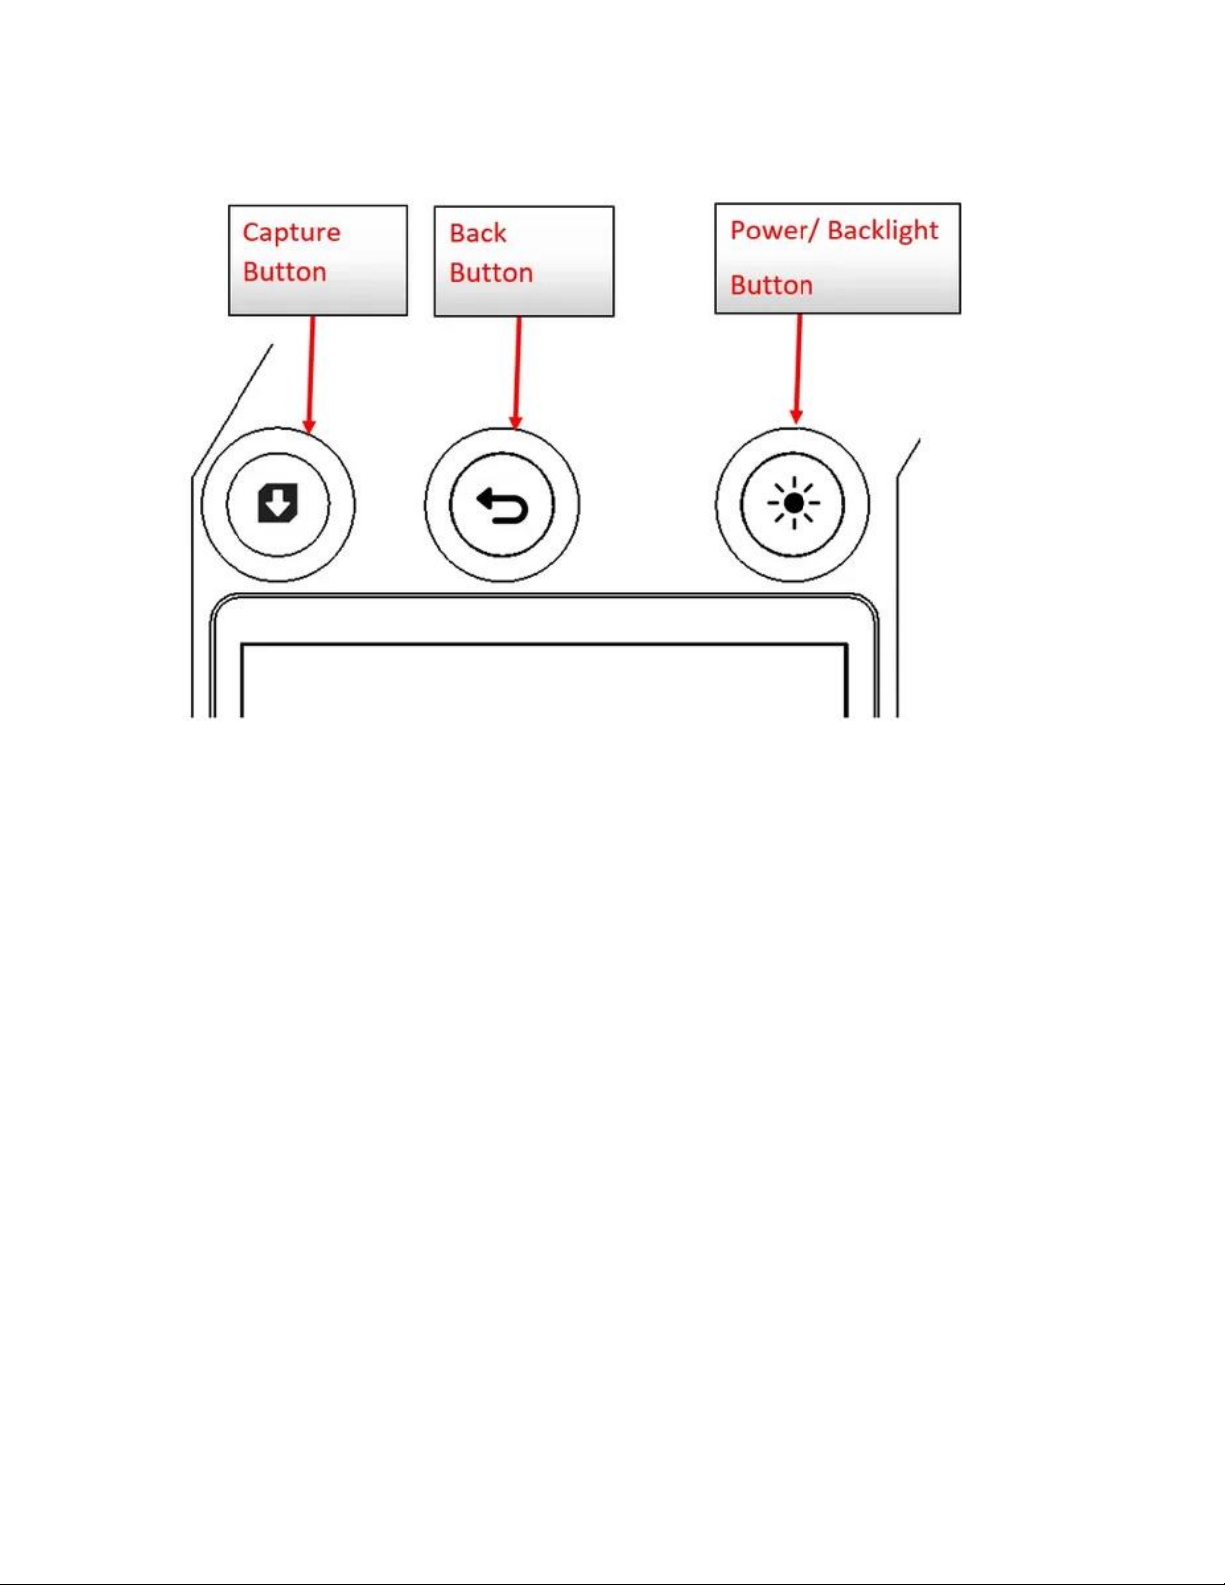
5. Capture button: Use this button to capture the live readings from the Main Display into one of
the Capture Positions. More details are available in the Capture and Clear Values section.
6. Back Button: Press the Back Button once to delete the previous Captured Value. Hold the Back
Button for 1.5 seconds to clear all Captured Values. More details are available in the Capture and
Clear Values section.
7. Power Button: Hold the Power Button to turn the unit on or off. When the unit is on, press and
release this button quickly to toggle the backlight on and off.
8. Display: The Display (LCD) shows all the Mako measurements and information. See Display
Overview section for more details.
9. High Pressure Port Knob: Turn this knob clockwise to close the High Pressure Passthrough. Turn
this knob counterclockwise to open the High Pressure Passthrough. Do not exceed finger tight
when closing the knob. Do not use any external tools to increase torque applied to this or any knob
on the Mako.
10. High Pressure Port: Connect your included High Pressure Port hose here. The Mako uses a
differential pressure sensor which displays High Pressure - Low Pressure; when testing a backflow
assembly or across any pressure drop, be sure to connect the higher pressure source to the High
Pressure Port and the lower pressure source to the Low Pressure Port or the gauge will read “0.0”.
11. Bypass Port Knob (Sometimes referred to as Vent Port Knob): The Bypass Knob allows you to
transfer water through the Bypass Port; it is used when testing Reduced Pressure Backflow
Assemblies (RPBAs). Do not exceed finger tight when closing the knob. Do not use any external
tools to increase torque applied to this or any knob on the Mako.
12. Bypass Port: Connect your included Bypass Port hose here.
13. Low Pressure Port Knob: Turn this knob clockwise to close the Low Pressure Passthrough. Turn
this knob counterclockwise to open the Low Pressure Passthrough. Do not exceed finger tight
when closing the knob. Do not use any external tools to increase torque applied to this or any knob
on the Mako.
14. Low Pressure Port: Connect your included Low Pressure Port hose here. The Mako uses a
differential pressure sensor which displays High Pressure - Low Pressure; when testing a backflow
assembly or across any pressure drop, be sure to connect the higher pressure source to the High
Pressure Port and the lower pressure source to the Low Pressure Port or the gauge will read “0.0”.

5 Manual Updated May 19, 2020
Diagram of MK5 Continued

6 Manual Updated May 19, 2020
MK5 Rear
15. Hook with Strap: This hook and strap allow you to hang the Mako while you are reading or performing
tests. Only hang on well-fixed pipes that fit within the diameter of the hook.
16. Hook Clip: This clip keeps the Hook and Strap safely stowed and out of the way when the Hook and
Strap are not being used.
17. Moisture Vent: This vent allows condensate moisture to escape the meter while preventing external
water from entering the unit. Take care not to puncture the Vent with any tools or sharp objects as doing
so will void your warranty and may reduce the lifespan of the Mako.
18. Hook Groove: Groovy Place for the Hook to be stowed when not in use. The orientation of the hook can
be reversed (facing left or right).
19. Battery Compartment Screws: Unscrew all four Battery Compartment Screws before removing the
battery cover. When replacing the compartment, make sure all screws are firmly tightened to keep the
gasket compressed.
20. Battery Cover Lip: Place your fingernail under the lip and lift gently once you have removed the Battery
Compartment Screws to reveal the batteries.
Do not use sharp tools or great force to remove battery cover as you may damage the Battery Cover Gasket.
Replace only with rechargeable or alkaline AA batteries.
21. Battery Cover Gasket: Is an important part of what keeps the Mako water-resistant. Make sure the
gasket around the battery cover is in place and undamaged before replacing the battery cover.

7 Manual Updated May 19, 2020
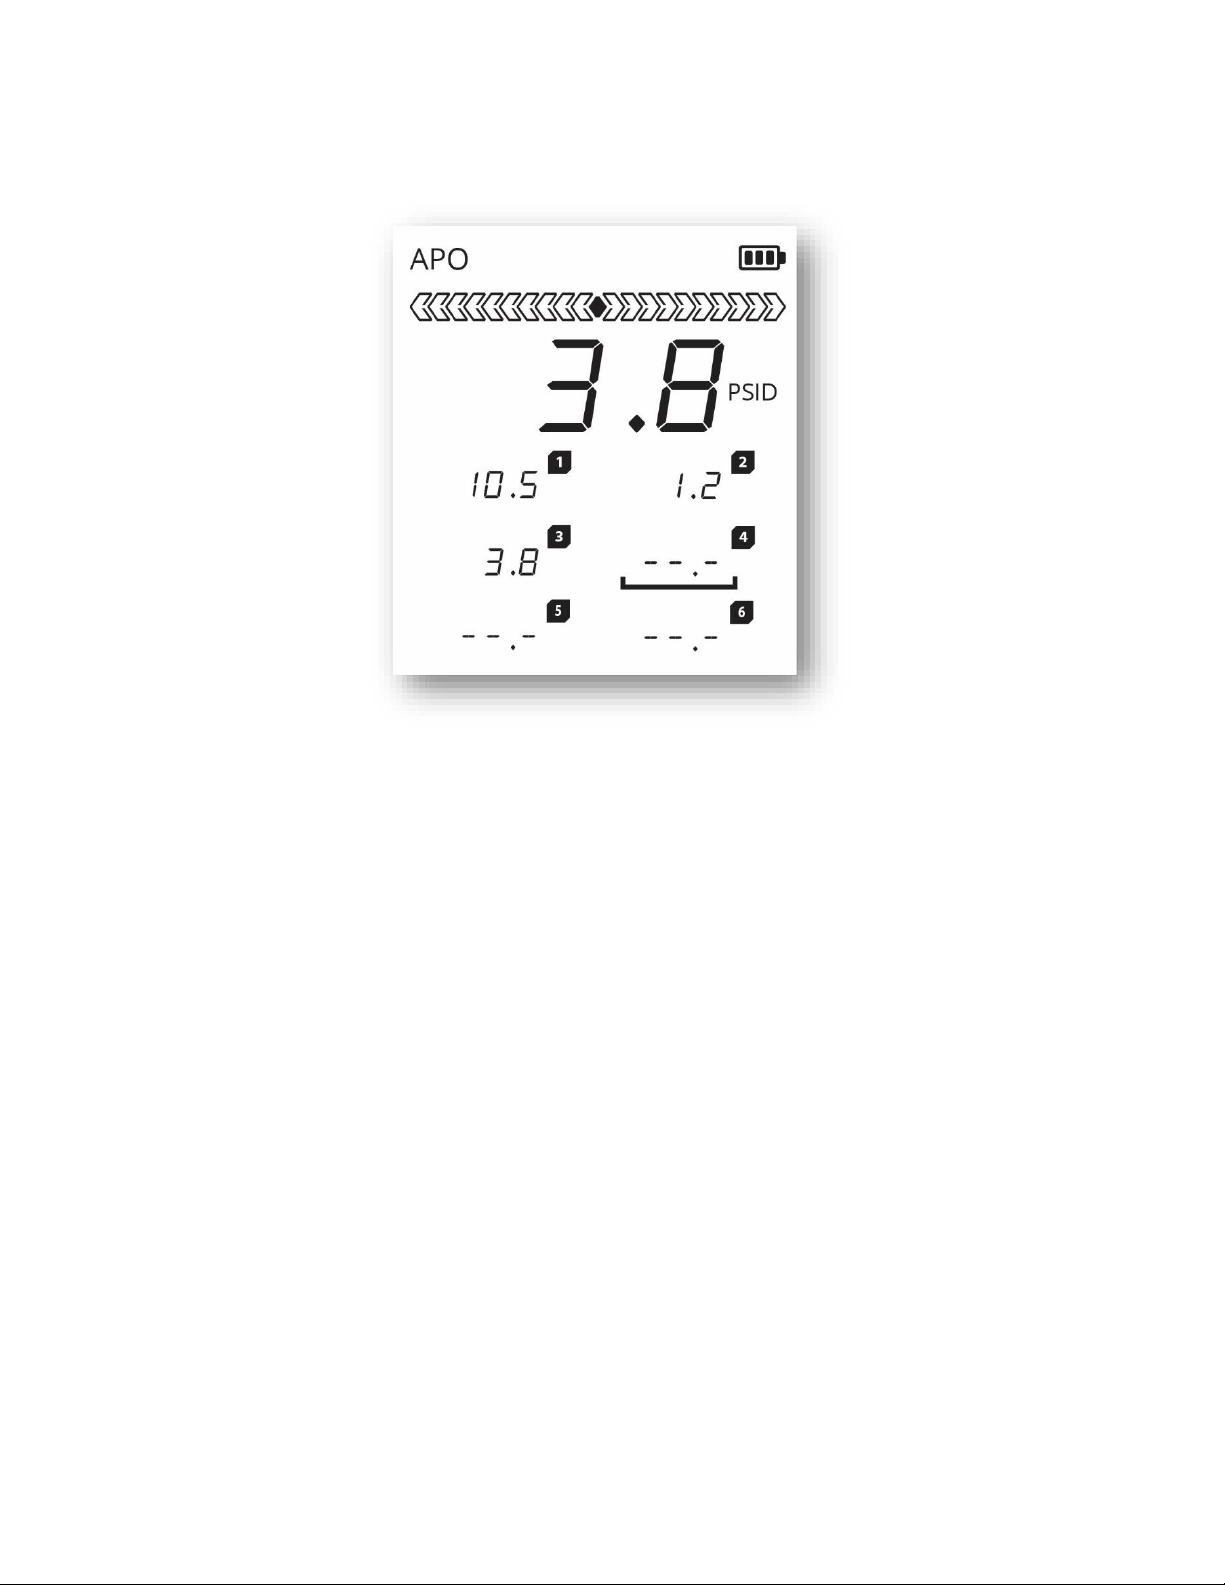
MK5 Display

8 Manual Updated May 19, 2020
MK5 Display Details
A. Rate of Change Graph: Tells you how quickly the measurement is changing. When a reading is
stable, the bar will have a single dot in the middle. See the Rate of Change Graph section for more
details on how this feature is used.
B. Main Display: Shows the current, live reading from the differential pressure sensor.
C. Captured Value: Up to six captured values can be stored in positions 1-6. These readings can be
cleared individually or all at once at any time. See the Capture and Clear Values section for more
details.
D. Active Position Cursor: Shows you to which position the next Captured Value will be saved.
E. Auto Power Off (APO) indicator: The Mako is set to automatically power off after 30 minutes of
no use. This conserves power and saves you batteries if you forget to turn MAKO off between
uses.
F. Calibration (CAL) Mode indicator: Shows when the unit is in calibration mode.
G. Download Indicator: Shows when a firmware update is being downloaded into MAKO.
H. Wireless Connection Indicator: Shows that the Mako has a Bluetooth connection to a mobile
device.
I. Battery Life Indicator: Shows the approximate battery life remaining. When the battery reaches
zero bars, the empty battery icon will begin to blink alerting you that the batteries should be
changed. When the battery life is critically low, a warning tone will sound before the unit shuts
down.
J. Units: Shows the pressure units currently being displayed. There are two possible pressure
differential units, PSID and KPaD.
K. Captured position ID: Label for the Captured Value or Capture Position adjacent to the ID

9 Manual Updated May 19, 2020
MK5 Water Flow Diagram
MK5 Water Flow Details
In the diagram above, arrows start and end on valves or the water source. This is an accepted 5
valve water flow configuration as prescribed by the USC FCCCHR Manual 10.

10 Manual Updated May 19, 2020
Capturing and Clearing Values
Button Diagram
Capturing values allows you to eliminate the need for a pencil and paper at each assembly. Six
values can be captured in memory and on the display allowing you to capture the working
pressure as well as all test values on any backflow assembly. The capture button allows the tester
to focus on the backflow assembly rather than the gauge, crucial for recording the relief valve or
air inlet valve opening points.
11 Manual Updated May 19, 2020
Capture Example Display
The active capture slot (where the next reading will be captured) is shown by an active position
cursor. Position 4 in the example display above.
To capture a value, press the Capture button.
To clear a value press and release Back button.
To clear all captured values, press and hold the Back button. Release button once all captured
values are cleared.
12 Manual Updated May 19, 2020
Rate of Change Graph/ Sensor Level Indicator
Indicates how quickly the current live reading is changing. The rate of change graph helps you get
a feel for stable and unstable water pressures which lets you determine when a test will yield good
results or when the pressure is too volatile to test.
The rate of change graph also coincides with the sensor location inside the Mako when held in the
proper vertical testing orientation. This allows the tester to level the sensor appropriately when
testing on DCBA’s, SVBA’s and PVBA’s.
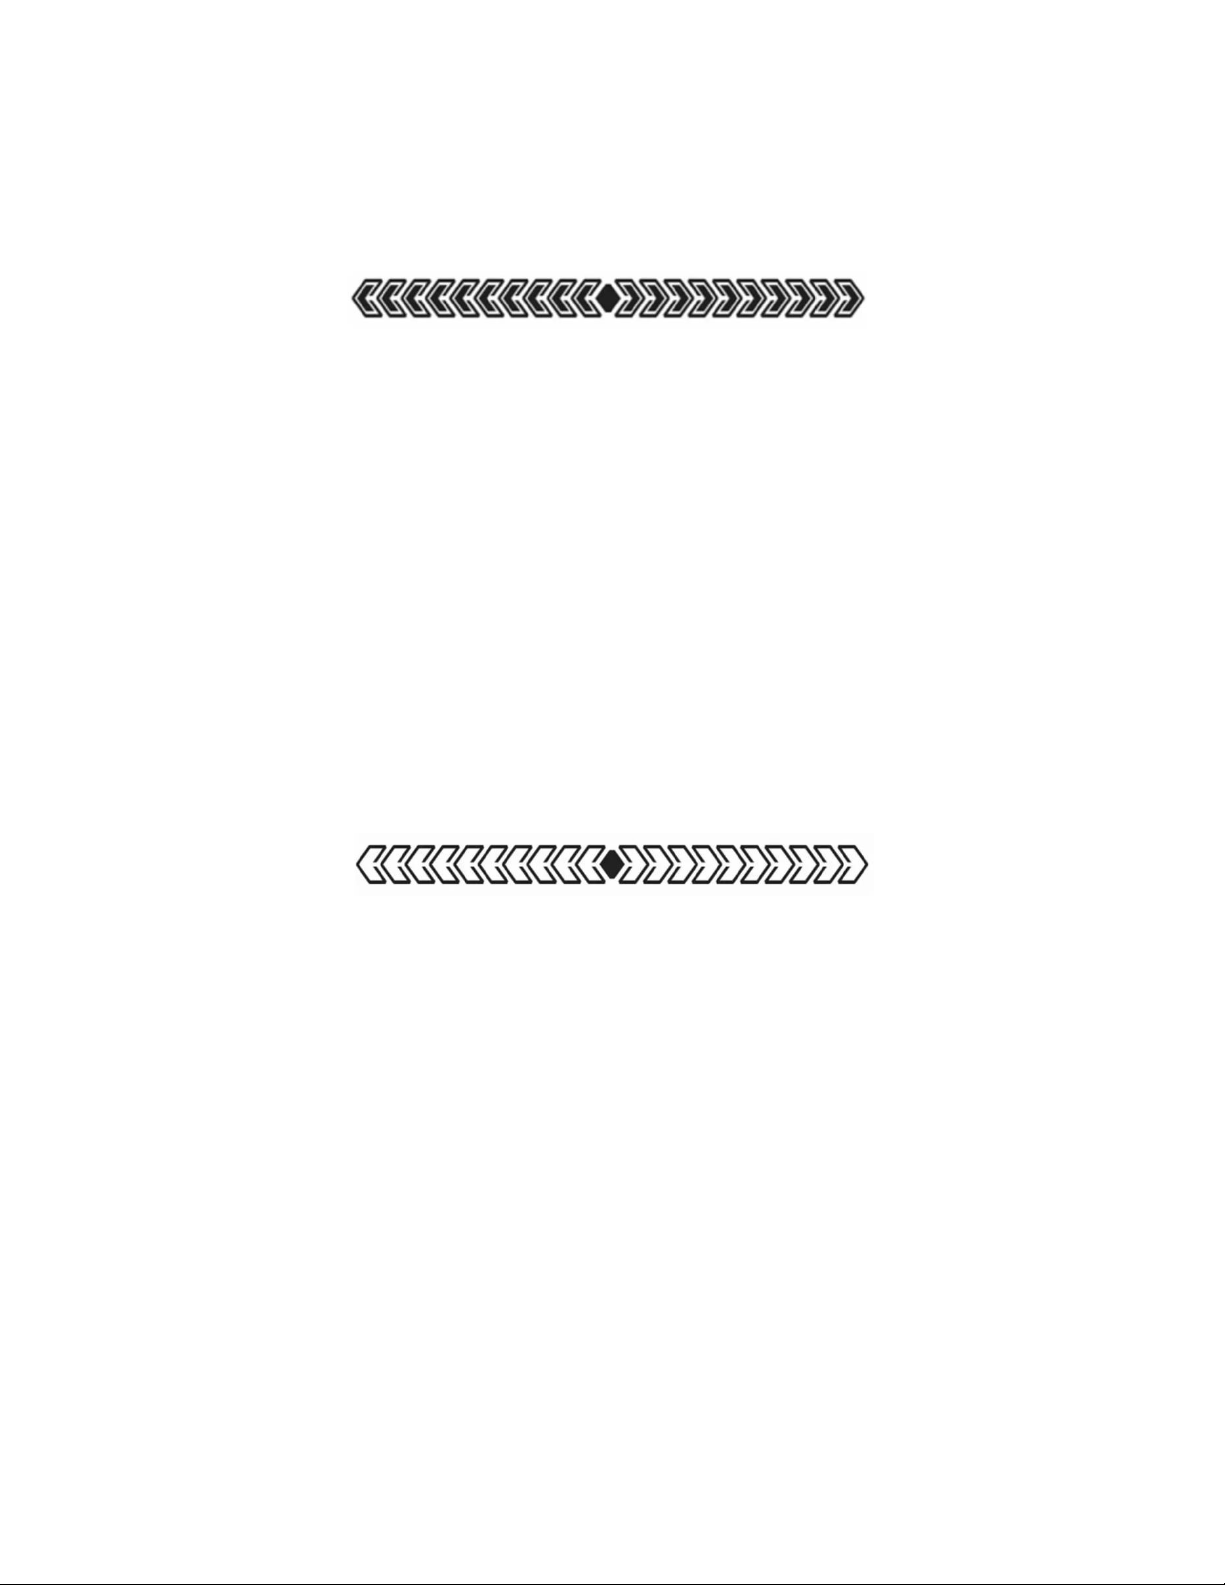
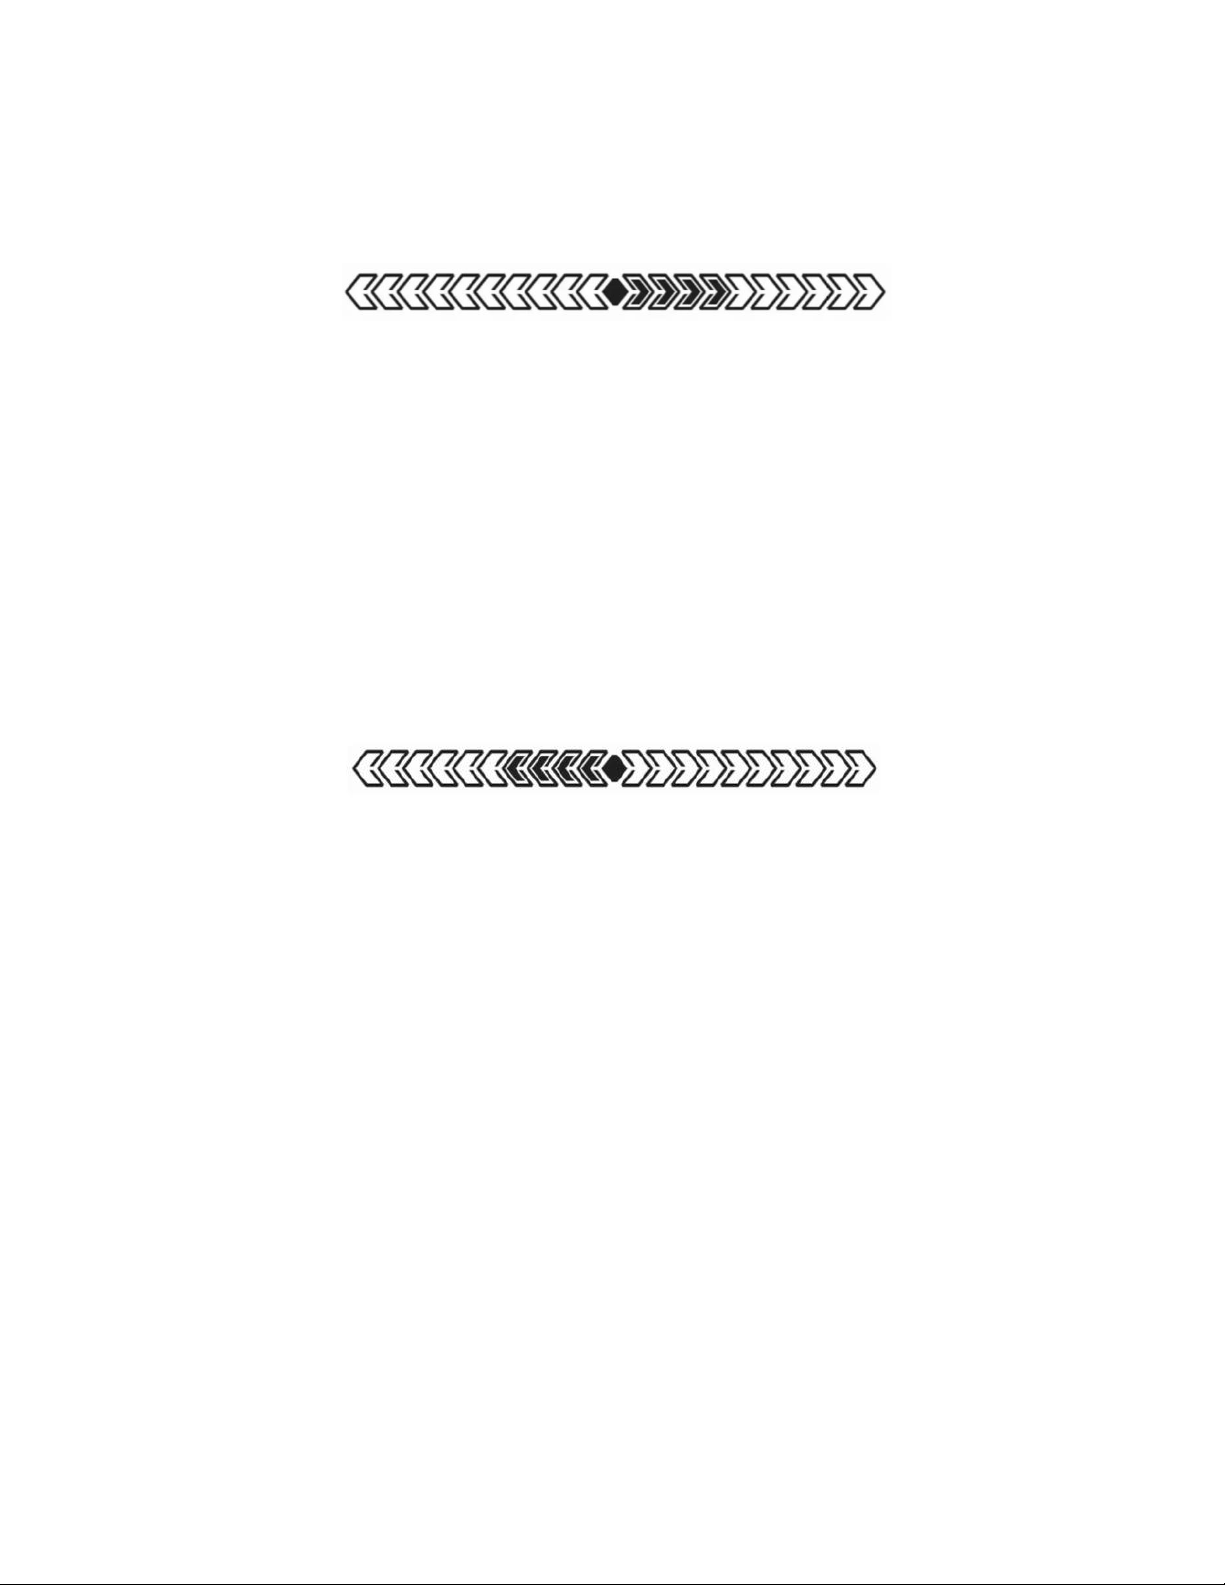
Stable Differential Pressure
When the pressure is stable, the Rate of Change Graph will look like the example above or have
one to two units filled in either direction.
13 Manual Updated May 19, 2020
Increasing Differential Pressure
When the pressure is increasing, the arrows on the right side of the graph will be darkened as in
the picture above. The faster the pressure is increasing; the more arrows will be darkened.
Decreasing Differential Pressure
When the pressure reading is decreasing, the arrows on the left side of the graph will be darkened
as in the picture above. The faster the pressure is decreasing; the more arrows will be darkened.
14 Manual Updated May 19, 2020
Secondary Operations
Toggling Backlight
To preserve battery life, the backlight defaults to off when powering on the Mako.
To toggle the backlight, briefly press and release the Power/ Backlight button. Pressing the button
too long will power the unit off.
Auto Power Off
Auto Power Off (APO) turns the Mako off after 30 minutes of non-use.
To disable the Auto Power Off function, Hold the Back button while powering on the Mako. The
Auto Power off indicator “APO" will no longer be visible in the upper left area of the display. APO is
enabled by default when the Mako is powered on.
Change Units
The Mako is factory defaulted to PSID.
If you wish to change units between PSID and KPaD, you can change the units by holding the
Capture button while powering on the unit.

15 Manual Updated May 19, 2020
Additional Specifications
Ingress Protection: IP57
Weight (without batteries): 4 lbs. 2.9 oz (1.90 kg)
Batteries: 4 x AA
Maximum Working Temperature (temperature of the water being measured): 140°F (60°C)
Maximum Working Pressure (inlet pressure into the backflow prevention assembly being tested): 175 psi
(1206 kPa)
Normal Operating Temperature: 64.4°F to 82.4°F (18°C to 28°C)
Accuracy: Provided the MK5 has been calibrated within the past 12 months and has version 12 of firmware
or later installed:
Range [PSID]
Accuracy (@70°F) [PSID]
0 to 15
±0.1
15 to 100
± 1% of reading
100 to 150
± 5% of reading
150 to 175
±10% of reading
Note for USC FCCCHR Manual 10 Approval, a minimum of ±0.2 PSID accuracy must be verified through
testing throughout the maximum range of working temperatures and pressures. The Mako has passed
this testing at the USC FCCCHR lab.
Storage Temperature: -4°F to 140°F (20°C to 60°C) 0 to 80% RH with battery removed from meter (batteries
tend to degrade from temperature and humidity changes and when outside normal operating
environments)
Auto-power off (when not disabled): 30 minutes
Response time: 1 second for the main display and 1/30 second for the rate of change graph.

16 Manual Updated May 19, 2020
Cautions and Warnings
Freezing Temperatures must be avoided
Exposure to freezing temperatures with water inside will constitute
abuse and void your warranty.
ALWAYS DRAIN WATER FROM YOUR GAUGE AFTER USE.
OPENING YOUR MAKO beyond the battery compartment VOIDS the WARRANTY. For service IN or
OUTSIDE the WARRANTY, contact Arbiter Inc. or one of our calibration, distribution or service
partners.
Reversing any hose direction or operating the Mako without hoses other than those provided by
Arbiter or operating a hose without a filter provided by Arbiter VOIDS the WARRANTY. Regularly
cleaning and replacement of the hose filters is necessary to maintain proper operation of the
Mako. For a video on how to perform this properly, visit our website and watch the video on how
to properly clean and replace your hose filters.

17 Manual Updated May 19, 2020
Warranty
FREEZING TEMPERATURES MUST BE AVOIDED.
Exposure to freezing temperatures with water inside will constitute abuse and void your
warranty.
Arbiter sets a new standard for the warranty of a digital backflow gauge. Arbiter warrants that all
MK5 gauges sold shall be free from defects in workmanship and manufacturer’s defects for (5) five
years. Contact Arbiter with service or warranty questions. Warranty for accessories (hoses, soft
padded case, valves, etc.) are limited to (1) one year. Consumables (batteries, water filters, etc.)
do not have a warranty.
Opening the product or breaching the product case in any way except for opening the battery
compartment to change batteries will void the warranty. Damage to or failure to replace the
battery compartment seal will also void the warranty. Any neglect or abuse of the Mako by the
user will void the warranty. Determination of neglect and abuse is at the discretion of Arbiter
Incorporated and the service agents acting on Arbiter’s behalf. Differentiation between an
accessory and consumable is also at Arbiter’s discretion. Repairs needed for sludge, debris or other
material inside the Mako that arrived due to use without filters, reversal of hoses or use with third
party hoses are outside the warranty.
Table of contents


