manuals.online logo
Brands
  1. Home
  2. •
  3. Brands
  4. •
  5. Mamiya
  6. •
  7. Camera Accessories
  8. •
  9. Mamiya 645 User manual

Mamiya 645 User manual

Power Grip WG402
English Instructions
Features
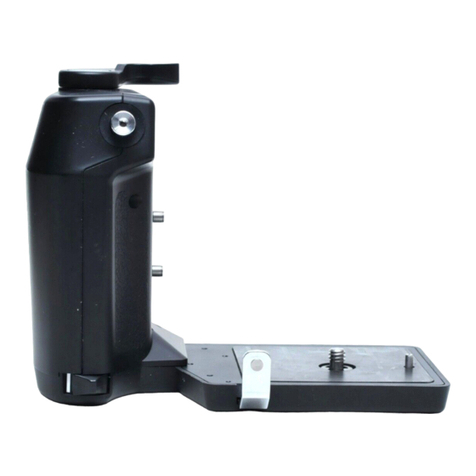
The Power Grip WG402 is designed specifically for the Mamiya 645 Pro camera.
Providing compact size, light weight, simplicity and a comfortable grip, it advances the film at approximately
0.8 frames per second, except at slow shutter speeds.
Specifications
Power Source Lithium battery, 2CR5, 6v.
Film Transport Ratio Approx. one frame/0.8 sec., except at slow shutter speeds
Operation
By pressing the Grip’s Shutter Release Button, the
Power Grip will be in operative mode. When the
last frame is exposed, the film will be automatically
wound on the take-up spool.
Photographing Mode
Single-frame photography. Continuous-frame photography
is possible by pressing the camera’s Shutter Release Button or
By using the Electromagnetic Cable Release.
Multiple Exposures Use the camera’s Multiple Exposure Lever
Maximum Transport Ratio Approx. 130 rolls of 120 film with lithium battery
Size 56 x 83 x 69mm (WHL)
Weight 190g without battery
Names of Parts
1. Shutter Release Lock Lever
2. Shutter Release Button
3. Electrical Contacts
4. Attaching Part
5. Lock Lever
6. Lock Release Button
7. Battery Chamber Cover
8. Battery Chamber Cover Latch
Installing the Battery
1. Using your thumbnail, push the latch cover release mechanism on the Battery Chamber Latch Cover
(8) to release the latch, Fig. 1.
2. Hold the latch cover release mechanism in the release position, and then open the Battery Chamber
Latch Cover (8).
3. Insert a 2CR-5, 6 volt lithium battery into the Battery Chamber making sure to match the polarity of
the battery with the diagram in the Grip’s Battery Chamber, Fig. 2.
4. Close the Battery Chamber Latch Cover (8) firmly. The cover will click when it is completely closed.
Attaching the Power Grip to the Camera Body
1. Push the Wind-up Crank Lock Lever in the direction of the arrow and remove the crank, Fig. 3.
2. Set the Multiple Exposure Lever on the camera body to its ‘WHITE SQUARE’ position, Fig. 4.
3. While pushing the Lock Release Button (6), push the Lock Lever (5) in the direction of the arrow, Fig.
5.
4. Insert the mounting guide holes, located in the mounting side of the Power Drive, into the four
mounting pins on the camera body. The Neck Strap Lug on the camera body is also used as a
mounting pin for the Power Drive.
5. After each pin, including the Neck Strap Lug, is inserted into the guide holes, lower the Lock Lever
(5). The Power Grip will be attached to the camera body.
Removing the Power Grip from the Camera Body
While pushing the Lock Release Button (6), push the Lock Lever (5) in the direction of the arrow, and then
remove the Power Grip from the camera, Fig. 5.
Using the Power Grip
1. Attach the Roll Film Holder to the camera body.
2. Remove the Dark Slide and store it in the Dark Slide Storage Slot on the Roll Film Holder.
3. Push and release the Power Grip’s Shutter Release Button (2). The film will be advanced to the first
frame and the shutter will be cocked.
4. For continuous exposures, push and hold down the camera’s Shutter Release Button. To stop
taking continuous exposures, release the camera’s Shutter Release Button. Continuous exposures can
also be made using the Electromagnetic Cable Release.
5. To create a multiple exposure:
1. Remove the Power Grip from the camera body.
2. Set the camera’s Multiple Exposure Lever to its ‘BLACK SQUARE’ position, Fig.4.
3. Reattach the Power Grip to the camera body.
To return to making single exposures:
1. Remove the Power Grip from the camera body.
2. Set the camera’s Multiple Exposure Lever to its ‘WHITE SQUARE’ position, Fig. 4.
3. Reattach the Power Grip, and then depress the Grip’s Shutter Release Button (2) to advance the
film to the next frame and cock the shutter.
Notes
oWhen a Roll Film Holder is attached to the camera in mid-roll, you must push the Power
Drive’s Shutter Release Button to advance the film to the next frame and cock the shutter.
oAfter the last exposure, the Power Grip will completely wind the film on the take-up spool.
oIf you are not going to use the Power Grip for some time, remove the battery.
oLeaf-shutter lenses may be used with the Power Grip; however, they must be manually
cocked.
oKeep the Power Drive Grip’s electrical contacts free of dirt and other contaminates.
oWrist Strap – If you are going to use the Wrist Strap, attach it to the Neck Strap Lug before
attaching the Power Grip to the camera body.

Other Mamiya Camera Accessories manuals

Mamiya Angle Finder Model 2 User manual

Mamiya

Mamiya Angle Finder Model 2 User manual

Mamiya RB67 Pro-S User manual

Mamiya

Mamiya RB67 Pro-S User manual

Mamiya 645E User manual

Mamiya

Mamiya 645E User manual

Mamiya RZ67 AE User manual

Mamiya

Mamiya RZ67 AE User manual

Mamiya FD-401 User manual

Mamiya

Mamiya FD-401 User manual

Mamiya RB67 Pro-S User manual

Mamiya

Mamiya RB67 Pro-S User manual

Mamiya M645 Super User manual

Mamiya

Mamiya M645 Super User manual

Mamiya Mirror-up Cable Release User manual

Mamiya

Mamiya Mirror-up Cable Release User manual

Mamiya BA701 User manual

Mamiya

Mamiya BA701 User manual

Mamiya M645super User manual

Mamiya

Mamiya M645super User manual

Mamiya Power Drive N User manual

Mamiya

Mamiya Power Drive N User manual

Mamiya HP402 User manual

Mamiya

Mamiya HP402 User manual

Mamiya 645 Bellows Lens Hood User manual

Mamiya

Mamiya 645 Bellows Lens Hood User manual

Mamiya Power Winder II RZ User manual

Mamiya

Mamiya Power Winder II RZ User manual

Mamiya 645 User manual

Mamiya

Mamiya 645 User manual

Mamiya PD Prism Finder S User manual

Mamiya

Mamiya PD Prism Finder S User manual

Mamiya RB67 Professional User manual

Mamiya

Mamiya RB67 Professional User manual

Mamiya FE401 User manual

Mamiya

Mamiya FE401 User manual

Mamiya RZ67 User manual

Mamiya

Mamiya RZ67 User manual

Mamiya HA401 User manual

Mamiya

Mamiya HA401 User manual

Mamiya Leaf Aptus II 8 User manual

Mamiya

Mamiya Leaf Aptus II 8 User manual

Mamiya FK402 User manual

Mamiya

Mamiya FK402 User manual

Mamiya 645 User manual

Mamiya

Mamiya 645 User manual

Popular Camera Accessories manuals by other brands

CamRanger CamRanger user manual

CamRanger

CamRanger CamRanger user manual

Custom Brackets HDV CAGE KIT Instructions for use

Custom Brackets

Custom Brackets HDV CAGE KIT Instructions for use

Aegis ABL052010P user manual

Aegis

Aegis ABL052010P user manual

Saft SRA Series Installation and operating instructions

Saft

Saft SRA Series Installation and operating instructions

Kodak TIB5200 technical information

Kodak

Kodak TIB5200 technical information

Videotec HEG instruction manual

Videotec

Videotec HEG instruction manual

Ikelite 6171.11 manual

Ikelite

Ikelite 6171.11 manual

Pentax Auto Bellows Slide Copier K user manual

Pentax

Pentax Auto Bellows Slide Copier K user manual

Nikon UT-1 user manual

Nikon

Nikon UT-1 user manual

dji RONIN 4D quick start guide

dji

dji RONIN 4D quick start guide

SLIK ABLE 300DX user manual

SLIK

SLIK ABLE 300DX user manual

Rebelcell 36V70 user manual

Rebelcell

Rebelcell 36V70 user manual

Trojan GC2 48V quick start guide

Trojan

Trojan GC2 48V quick start guide

Calumet 7100 Series CK7114 operating instructions

Calumet

Calumet 7100 Series CK7114 operating instructions

Ropox 4Single Series User manual and installation instructions

Ropox

Ropox 4Single Series User manual and installation instructions

Cambo Wide DS Digital Series Main operating instructions

Cambo

Cambo Wide DS Digital Series Main operating instructions

Samsung SHG-120 Specification sheet

Samsung

Samsung SHG-120 Specification sheet

Ryobi BPL-1820 Owner's operating manual

Ryobi

Ryobi BPL-1820 Owner's operating manual

manuals.online logo
manuals.online logoBrands
  • About & Mission
  • Contact us
  • Privacy Policy
  • Terms and Conditions

Copyright 2025 Manuals.Online. All Rights Reserved.