Mamiya RZ67 User manual

7:
DO7f!0rS3S;iai'JAl
Instructions
Mamiya
iim iiiiiii
■liil
iiii
ilil
I
iiilii
;; Mar«^-PPCo.,LM.: Printed in Japan
i
■in 520030-DE-01E
111*
Iiii
■■■■
1liiiii
iiiiiii ii

For proper use of the camera
The Importance of Proper Maintenance
Your camera has mechanisms like film transport, shutter and diaphragm blades etc.
They are controlled by gears, levers, springs, and so on. All require special lubrication
from time to time. Ambien t conditio ns can also affect thes e mechanis ms, as well as t he
electronic components and the optical glass of your lenses. We therefore suggest that
you have your camera and lenses checked, and if necessary serviced, periodically.
#In order to prevent injury to you or others read the "Safety precautions" thoroughly.
●The symbols used in this manual and their meanings are as follows.
AWARNING calls attention to aprocedure, practice, condition or the like, which, if
not correctly performed or adhered to, could result in serious injury or death.
ACAUTION calls attention to aprocedure, practice, condition or the like, which, if not correctly
performed or adhered to, could result in injury to people and may damage or destroy property
Precautions; These items contain important safety descriptions. Make sure to follow the advice.
^WARNING-
ACAUTI0N--
AWARNING
●Store the batteries and small accessories out of the reach of infants and small chil¬
dren. If they are swallowed, contact aphysician immediately.
●Store the camera out of the reach of infants and small children. They might wind the
strap on the camera around their necks.
●If you detect an abnormality with the camera, such as generating heat, smoke, or a
burning smell, stop using it immediately. Remove the batteries from the camera. Oth¬
erwise, afire may break out or you may burn your skin.If removing the batteries be¬
cause of an abnormal condition, do not touch them with your bare hands.
ACAUTION
●Do not let the batteries' terminals {"+" and "-") come into contact with metal objects or carry
or store batteries together with metal hair pins, chains, paper clips or other metal objects.
●When storing and disposing of batteries, insulate (apply tape to) the batteries' terminals
and "-") so that they do not come into contact with metal objects or other batteries.
●Do not charge the batteries, take them apart, apply pressure to them, heat them or
dispose of them in flames.
●Do not use new batteries together with used ones or mix batteries of different manufacturers or types.
●Do not bang or drop the camera. The camera may break and you may be injured by
the broken parts. If it is banged or dropped, stop using it.
●Remove spent batteries from the camera immediately.
●Use atripod providing sufficient strength for the camera and lens. Also do not trans¬
port the camera with it mounted on atripod. Doing so could damage the camera or
cause you to trip, resulting in injury or other accidents.
●Be sure to fasten the neck strap securely to the camera's strap mount. Failure to do so
may result in the camera falling, causing injury or damage to the product.
●Do not look directly at the sun or strong light sources through the lens. Doing so could impair your vision.
●Put acap on the Lens. Without the cap, sunlight can enter through the Lens and will be
f o c u s e d . T h i s c o u l d c a u s e a fi r e .
●Do not lift or hold the camera by the viewfinder. The viewfinder may break or the
camera may fall, you could be injured or the camera may be damaged.
●Do not disassemble. Internal electrical circuitry may cause electric shocks if touched.
●Do not use the camera for purposes other than taking pictures. Specifications and appearance are subject to change without notice.
70
1

Common Sense Camera Care and Practice Introduction
The Mamiya RZ67 PRO IID is aprecision optical/mechanical instrument, built for heavy
professional use and along service life, if properly treated and maintained. Please ob¬
s e r v e t h e s e b a s i c c a v e a t s :
Congratulations on your purchase of the Mamiya RZ67PRO HD and welcome to the
world-wide family of happy Mamiya camera owners!
The Mamiya RZ67PRO HD is a6x7cm format single-lens reflex camera with alens
shutter on which is installed arevolutionary Rotating Back.
Complimented by its large selection of world-class Mamiya lenses, and many other sys¬
tem accessories, the RZ67 has become the camera of choice by the world's top photog¬
raphers. The RZ67PROIID is aversatile camera, ideally suited to many photographic
applications, including commercial portraits, fashion, industrial documentation, nature
and scientific photography.
Also, the Digital Back accessory for the RZ67PRO ED is compatible with Mamiya's spe¬
cial Digital Control System, so it can expand the applications of this camera for both film
and digital work.
●Read instructions before using camera.
●Protect camera against shocks and falls. Use the neck strap supplied with it, when¬
ever possible.
●Check the battery frequently and always carry spares. The sealed battery supplied
with the camera may have been subject to storage conditions which have reduced its
service life.
●Be sure to wipe battery contacts before installation and watch correct polarity.
In order to take full advantage of its capabilities, and to insure proper operation, please
read this instruction manual carefully before you use the camera. After reading the manual,
store it in ahandy location for further reference.
●Battery life diEers, depending on frequency of use, type, age, storage condition, am¬
bient temperature (use External Battery Case in very cold weather), etc.
This manual gives general instructions for normal uses of the camera. However, the
manual may not cover some uses of the camera when combined with other systems. In
such cases, read the user's manual for each system and reread this manual.
●Always remove the battery (and film) when camera is not used for along period of
time.
●Always keep covers on lenses and camera body.
F e a t u r e s o f t h e R Z 6 7 P R 0 I I D●Do not store the camera at temperatures exceeding 40°C (105T) and -10°C (15T).
A l s o a v o i d h u m i d o r s e a a i r e n v i r o n m e n t . OVersatile range of lenses available from wide angle to telephotography.
OMirror-up and multiple exposure functions.
ORotating back that can change the view between horizontal and vertical,
oBellows extension focal adjustment mechanism (double focal point adjustment mecha¬
nism equipped with afine feed knob)
estrobe flash is synchronized at ali shutter speeds.
@intermediate shutter speeds can be used.
OLED indicators in the viewfinder and an audible alarm.
©Mamiya Digital Communication System creates the optimum conditions between the
camera and the digital back.
●Prolonged disuse shortens camera life. Periodically exercise the shutter (at diEerent
speeds, lens diaphragms and focusing mounts.
●Protect camera against rain and moisture.
●Do not touch lens surfaces. Use blower or lens tissue to remove dust particles.
●Always test your equipment before going on important assignments.
In order to combine camera functions with digital processing, the RZ67PROI1D employs the MSCE^ com¬
munication standard. Using this serial protocol the camera can operation of the camera and digital back can
be optimized, producing state-of-the-art, ultra high pixel, neutral control, digital imaging technology.
^Mamiya External Serial Communication standard, or MESC is Mamiya's proprietary digital com¬
munication standard for communicating data directly between the camera and the digital back.
69

N a m e s o f E a c h P a r t s
Body Focusing Method :The rack and pinion focusing extends the built-in bellows up to amaxi¬
mum of 46 mm /Equipped with aFocusing Knob and Lock Lever /With
subject distance and exposure factor indications.
Winder :RZ Winder II (RZ Winder Icannot be used)
Foucsing Screen Cable release contact :The shutter can be released by mean of acable release connected to a
contact on the camera body /Remote control is possible by means of a
r e c e i v e r c o n n e c t e d t o t h e s a m e c o n t a c t .
(P56)
B a t t e r y T y p e :One alkali battery (4LR44) or one silver oxide battery (4SR11), and one lithium battery (2CR1/3)
Gold Plated Contacts S a f e t y f e a t u r e s ( i n n o r m a l s h u t t e r r e l e a s e o p e r a t i o n ) :
Viewfind er display (by LEDs and pictorial sy mbols);
Warning on incomplete cocking lever setting /Warning on failure to pull
out the dark slide /Battery check.
E l e c t r o n i c a l a r m s o u n d w h e n :
The shutter speed dial is at the "RBL" position when an RZ lens is used /
The shutter dial is at the "AEF" position when the AE Prism Finder is
removed /The shutter speed dial is any other position than "RBL" when
no lens is mounted or an RB lens is mounted on the camera /The battery
power has dropped.
Release locked when :The cocking lever has been set incompletely /The dark slide has not
been pulled out /The shutter speed dial is at the "RBL" position when an
RZ lens is used /The shutter speed dial is at the "AEF" position when the
AE Prism Finder is removed /The shutter speed dial is at any other posi¬
tion than "RBL" when there is no lens on the body or an RB lens is mounted
on the camera.
R - M L e v e r Lens Alignment
Dot
(P31)
Mirror
Alignment
Mark
Auxiliary
Electronic
/ S h u t t e r R e l e a s e
/ Contacts
Cocking
Lever
(P18.19
36.41)
Dimensions :108 mm (width) X133.4 mm (height) X212.5 mm (length).
Weight :2,490g when the body (1,350g) (with Waist-Level Finder), 120 Roll Film
Holder (530g) and 110 mm f/2.8 lens (61 Og) are combined.
Distance Scale
(P49.51)
Focal Length
Scale
S h u t t e r R e l e a s e B u t t o n
(P16)
(P49.51)
Collar Stop Lever
Dual Focusing Knob (P30)
(P38.41)
Release Button Collar
(P30)
68

Mamiya RZ67 PRO IID Specifications
Camera Type : 6 x 7 c m r o l l fi l m S L R w i t h l e n s s h u t t e r
Film Holder : 1 2 0 R o l l F i l m H o l d e r H A 7 0 3 — t h e s t a n d a r d h o l d e r —
220 Roll Film Holder HB702
6x4.5 120 Roll Film Holder RZ
Polaroid Pack Film Holder HP702
interchangeable
R o l l fi l m h o l d e r c o n t a c t s
F i l m t y p e :120 film (120 Roll Film Holder HA703) (10 exposure)
120 film (6x4.5 120 Roll Film Holder RZ) (15 exposures)
220 film (220 Roll Film Holder HB702) (20 exposure)
Instant film (Polaroid Pack Film Holder HP702)
Sh u t t e r S pe e d Di a l
Alignment Mark
(P21.22)
(P27)
Negative size : 6 x 7 c m f o r m a t : 5 6 x 6 9 . 5 m m
6 x 4 . 5 c m f o r m a t : 5 6 x 4 1 . 5 m m
P o l a r o i d P a c k ; 7 0 x 7 0 m m Revolving Ring
Carrying Strap Lug
Revolving Back :The back revolves 90 to change from the horizontal to vertical format or
vice versa. Viewfinder format automatically changes as back revolves. (P55)
F i l m A d v a n c e
Coupler
Lens Mount :Special bayonet mount (with built-in safety lock)
Lock Release
Button
L e n s t y p e :110 mm f/2.8—the Standard Lenses /Interchangeable RZ lenses /Inter¬
changeable lenses for the RB can also be used.
o
(P21)
Shutter S e i k o # 1 e l e c t r o n i c s h u t t e r /Light Baffle
/
S h u t t e r r e l e a s e Body shutter release plus electronic shutter release contacts.
A
Hot-Shoe
S h u t t e r s p e e d 1/400-8 sec. (with intermediate speeds), B, T(mechanical) /RBL (when
the RB lens is used) and AEF (when the AE Prism Finders used) posi¬
t i o n s / M e c h a n i c a l s h u t t e r o f 1 / 4 0 0 s e c u s a b l e .
0
Film Holder
Mount Pin
One of four
)
Focusing Knob
L o c k L e v e r
n0
S y n c o p e r a t i o n :with flash sync terminal (X-sync) on lens or hot shoe. 00-
(P38) 00^
Q00
00 (P9.28)
0
Multiple exposure ;possible by means of R-M lever. O0 7/
00
Focusing Screen :Type AMatte is the standard /Focusing screens for the RZ are inter¬
changeable.
0055oO
Winder Coupler Cover 0^ B a t t e r y C h a m b e r
Cover
ooO
Viewfinder :Waist-Level Finder FW702 is the standard interchangeable with the AE
P r i s m F i n d e r F E 7 0 1 / F i n d e r s f o r t h e R Z a n d R B c a n a l s o b e u s e d . (P9.13)
Percentage of the
field of view visible
:95% This information is based on alinear (horizontal /vertical)
measurement. Tripod Socket C o n t a c t s f o r P o w e r W i n d e r
(P50)
F i l m T r a n s p o r t :Asingle 114° stroke of the Cocking Lever advances the film and Exposure
Counter, sets the Mirror and Light Baffle, and cocks the shutter. Contacts for the Digital Pack
67 fA\

Using RB Series Lenses and Accessories
Lenses
Roll Film Holder
1. Focusing
RB67 lenses are mounted directly onto the RZ PRO IID ;however, the bellows must be
extended 7mm in order to focus the lens at infinity H. Therefore, even when photo¬
graphing distant subjects, be sure to use the Focusing Screen.
Alignment Mark
(P9.28)
CAUTION:
Because of the differences in flange back between the two series of lenses, the Distance
Scale of the RZ PRO IID body does not apply when using RB67 lenses.
D a r k S l i d e R e l e a s e P i n
C o n t a c t s t h e b o d y
(for the horizontal position)
2. Shutter Speed Selection
When aRB67 lens is mounted on the RZ PRO IID body, use the Shutter Speed Ring of
the lens for shutter speed selection.
Be sure to set to the "RBL" position. Once this done all the other speed dial settings are
immobilized.
T h e s h u t t e r i s c o c k e d a n d r e l e a s e d i n t h e s a m e m a n n e r a s R Z s e r i e s l e n s e s .
When using aMamiya Sekor Clens for the RB series on the RZ PRO IID body, be sure
to insert an optional interchange mounting ring into the lens rear mount to assure correct
coupling with the camera body.
C o n t a c t s t h e b o d y
(for the vertical position)
Holder Lock Pin
Voider RB Lenses should be checked before use, to determine if their shutter
torque is compatible with the RZ PRO IID. Before trying, please send such
lenses to the service department of your country's Mamiya distributor,
★if the Shutter Speed Dial is set to the RBL position, the Shutter can be released
even if the Lens is not attached. When you pull out the Dark Slide, be careful not
to press the Shutter Release Button.
(Two positions: upper and iower)
F i l m A d v a n c e K n o b
(P34.36)
Dual Exposure Counter
(P37)
Finders
When using the RB series PD Prism Finder or PD
Magnifying Finder be sure the Electrical Contact
Cover is in place, for it is used to depress the
switch at the base of the finder.
Memo Clip
(P37)
iCAUTION:
T h e R Z P D P r i s m F i n d e r w i l l n o t f u n c t i o n o n t h e
RZ IID. It cannot be retrofitted.Dark Slide Storage Slot
(P37)
66

When using accessories for RZ67PRO
O u t e r c a s s e t t e
CAUTION:
●The winder RZ-1 cannot be used on the RZ PRO IID body.
●When using the Mirror Lock-up operation in the B(bulb) mode, use an optional double
cable release.
●The previous models of AE Prism Finders or AE Magnifying Finders cannot be used
with the RZ PRO IID unless their circuits are modified. Contact your country's
Mamiya Distributor for further information.
●The AE Prism Finder FE701 can be directly mounted on the RZ PRO IID.
●E l e c t r o n i c F l a s h P r e c a u t i o n s
Electronic Flash units that have ahigh sync trigger voltage may seriously damage the
electronic circuitry of your RZ PRO IID. Flash units with amaximum of 12 volts sync
output trigger voltage are safe for use. Please contact your flash manufacturer, or
have your local flash repair station test the sync line trigger voltage before using with
your RZ PRO IID. Older studio flash power packs are particularly suspect of using
high voltage sync trigger voltages, sometimes feeding as much as 400 volts into your
RZ PRO IID sync terminal! To prevent this problem, your may consider using a"filter"
or regulating circuit between your power pack and sync cord. Contact your local flash
dealer or manufacturer f o r m o r e i n f o r m a t i o n a b o u t t h e s e devices.
B a c k C o v e r L a t c h
(Two positions:
upper and lower)
Film Speed Dial
(P35)
(P33.35)
D a r k S l i d e
(P10.29.
37.43.47)
b
b
O
Holder Lock Lever
(P9.27.28.29) L o c k R e l e a s e L e v e r
F i l m i n s e r t
Fi l m Sp o ol S t u d
Take-up Spool
(P34)
(P33.34.42)
Start Mark
(P34)
Spool Release Pins
(P33.34.42)
65

Waist-Level Finder F r o n t H o o d f o r G - 3
●Using the Front Hood for G-3 along with Bellows Lens Hood G-3 will bring higher
vignetting efficiency. With the Front Lens Hood used along with Bellows Lens Hood
G-3, it can be possible to use 50mm f/4.5w Lens or longer focal length lenses, except
for 100-200mm zoom lens and 500mm APO lens. Front Hood for G-3 has an inserting
slot for 12cm square size vignetter. Maximum and minimum extent of bellows: 105mm
and 25mm.
Mamiya Quick-Shoe AQ701
●The shoe that makes tripod-mounted camera changes quick and easy. Slip on a
camera and it instantly locks in place on the shoe automatically. Adouble-action re¬
lease mechanism allows quick operation while protection against automatic release.
UElectromagnetic Cable Release
●Co n n e c t s to t h e e le c tr o n ic s h ut t e r re l e a s e s oc k e t o f t h e ca m e ra .
Remote Control RS401
●Consists of Trans m i t t e r a n d c a m e ra-mounted Re c e i v e r. C h o i c e o f t h r ee infrared cha n ¬
nels for interference free operation.30M operating range. Transmitter uses two AA
Alkaline, Receiver one 9Volt, batteries.
Finder Release Button
(P23)
M a g n i fi e r R e l e a s e
(P25) Gelatine Filter Holder Model 2
●ASpecial holder for 3-inch (7.5cm) gelatine filters; attaches to 50, 65, 90, 110, 140,
150, 180, 250, and 350mm lenses. This holder is indispensable for accurate correc¬
tion of color (under differing types of light, for example). The holder allows insertion of
multiple filters.
Magnifier
(P25.26)
Finder Release Button
(P23)
F i n d e r C a t c h
(P23)
64

Lens
L-Grip Holder RZ
#Acontoured left-hand grip that provides excellent balance for both hand-held shooting
and for carrying. The grip is equipped with alocking shutter release (electronically
linked to the camera's own release) and acold-shoe for accessories. Alignment Mark Bayonet Ring
(P9.19) (P9.17.19.20)
Depth-of-Field Scale
Mirror Lock-up Cable Release
●The perfect tool to prevent even the slightest camera shake during slow-shutter-speed
exposures; one cable connects to the camera body's shutter release, the other to the
Mirror Lock-up switch. When the release is pressed, the Mirror Lock-up operation
activates first, followed by operation of the shutter. Very useful for both close-up and
telephoto applications.
Flas h Sync Terminal ( X-syn c) (P49)
(P50)
Aperture Ring
(P20)
L e n s D i s t a n c e S c a l e
Knob for turning Depth of
Field Calculating Ring
Magnifier (f o r P r i s m F i n d e r)
●Attached to the prism finder, it assures enhanced precision focusing by magnifying
the central portion of the screen. After focusing, it can be raised to confirm overall
composition. Built-in -6 to -I-4 diopter correction.
(P49)
Depth-of-Field Preview Lever
(P49)
Bellows Lens Hood G-2
●Attaches to the front accessory thread of Zseries (90mm-350mm) lenses; provides
optimum shading of the lens to prevent all stray light. Rack &pinion adjustment allows
selection of optimal setting by actual preview; width is easily adjusted; incorporates
gelatine filter holder. Maximum and minimum extension of bellows: 110mm and 30mm.
T i m e L o c k B u t t o n
(P45) S h u t t e r L o c k P i n
(P54)
Bellows Lens Hood G-3
●utilizing side struts, instead of base rails, this Bellows Lens Hood G-3 provides highly
efficient protection against extraneous light and it has inserting slot for 3-inch (7.5cm)
square filter and 12cm square size vignetter. Vignetter can adjust up and down within
14mm. Gelatin filter mount is provided. Maximum and minimum extent of bellows:
1 7 5 m m a n d 5 0 m m .
Sh u t t e r C oc k i ng P i ns
(P18.54)
Time Exposure Lever
(P20.45)
M i r r o r L o c k - u p C a b l e
Release Socket
(P46.48)
Cocking Position Marks
(P18)
Shutter Cocking Pins
(P18.54)
63 8

Camera operation test Accessory System
1. Insert abattery 2. Attach the lens A E P r i s m F i n d e r F E 7 0 1
●This aperture-priority AE finder offers both spot and averaged metering choices, as its
own special auto-selection function that switches between spot and averaged auto¬
matically to suit the shooting conditions.
^Make sure that
t h e M i r r o r o n t h e
body is in the low¬
ered position and
that t he Shu tter i s
released.
Focusing Screen
#Type AMatte ●Type A3 Matte ●Type A4 Checker ●Type BRangefinder Spot ●Type C
Microprism ●Type DCross-hair ●Type ERangefinder Spot/Microprism
Seven types of screen are available to meet with photo taking purpose, lens to use,
and objective conditions.
Open the Battery cover and insert aRemove the Front Cap from the body and the Front
battery, negative ©end first. Then and Rear Caps from the Lens. Match the mark on
the lens with the one on the body. Then turn the
bayonet ring on the lens in the direction shown by
the arrow until it stops.
W i n d e r R Z M o d e l 2
●An extremely important accessory for almost all professional applications, the Winder
RZ frees the photographer from the need to manually activate the film advance/shut¬
ter cocking mechanism. This lets the photographer concentrate fully on the subject,
while the motorized winder takes care of film, shutter and mirror settings. Single¬
frame or sequential film advance (1.5 sec/per frame); the Winder RZ Model 2is pow¬
ered by six AA type alkaline cells (500-600 consecutive shot are possible), or six Ni-
Cd batteries (300-360 consecutive shots are possible). An optional 9V AC adapter is
available.
close the battery cover.
3 . A t t a c h t h e r o l l fi l m h o l d e r .
Remove the Rear Cap from the
body and the Protective Cap
f r o m t h e R o l l F i l m H o l d e r . M a t c h
the Alignment Mark on the Roll
F i l m H o l d e r w i t h t h e o n e o n t h e
body. Then, slide the Holder
L o c k L e v e r o n t h e R o l l F i l m
H o l d e r t o s e c u r e i t .
T e l e - C o n v e r t e r 1 . 4 x R Z
●This teleconverter is optically designed to provide the best possible results in use with
the superior Zseries lenses; it provides an effective focal length extension of 1.4x,
and can be recommended for the following Zseries lenses; 90mm, 110mm, 140mm,
150mm, 180mm.
^ Yo u c a n t e s t t h e c a m e r a ' s f u n c t i o n
without attaching the Roll Film
Holder. Auto Extension Tube RZ
●This series of extension tube, for close-up and macrophotography, provides fully au¬
tomatic shutter operation. This two automatic tube can be used individually or in com¬
bi n a ti o n . No 1 = 4 5m m e x te n s io n ; N o 2= 8 2 mm ; N o 1 -f N o 2 = 12 7 m m. S i n ce t h e c am ¬
era body bellows features an extension of 46mm, using the tubes provides atotal
m a x i m u m e x t e n s i o n o f 1 7 3 m m .
4. Lift the Waist-Level Finder.
L i f t t h e b a c k o f t h e W a i s t - L e v e l F i n d e r
to open it.
62

Camera Pack System
ritisbesttobecomeacquaintedwiththemethodforreieasing the shutter before using fiim in the camera. ]
120 Roll Film Holder HA703
220 Roll Film Holder HB702
120 Roll Film Holder 6X4.5 HA704
3
I
■SB
M
H
I
I
1Polaroid Land Pack Film Holder
HP702
»
if
i
I
I
I
9
I
I
Digit al Pack Adapte r HA701
This is an adapter that makes it possibie to
attach aDigitai Pack which conform to
Mamiya's proprietary digital communication
standard (MSCE). It is equipped with a
Rotating Mechanism to allow changing the
f o r m a t f r o m h o r i z o n t a l t o v e r t i c a l .
I
[Attach the Lens and Roll Film Holder to the body.]
1.Rotate the Shutter Selector Ring so that the white dot on it is aligned with the white square just below.
2. Pull out the Dark Slide.
(You can test operation of the camera even if the Roll Film Holder is not attached.)
3.Set the R-M Lever to the "M" (multiple exposure) position.
4. Set the Shutter Speed Dial to any speed from Bto 1/400 second, but do not use "AEF" or "RBL."
5. Adjust the focus using the Focusing Knobs on either side.
6. Press the Shutter Release Button.
7. Push the Cocking Lever all the way down to prepare for the next shot.
(Since this camera does not employ aquick return system,
the Mirror left raised. Set the Shutter and Mirror.)
■A f t e r y o u c o m p l e t e t e s t s h o t a b o v e , r e t u r n t h e R - M L e v e r t o i t s n o r m a l p o s i t i o n
(the white square position).
<Coming Soon>
61 ^ ^10

Contents Custom setting the Bulb Exposure
To take photographs with an exposure of more than one minute, we recommend using
the time exposure mode, which consumes very little from the battery. However, this shot
must be made with the Time Exposure Lever and small blurs may occur in the photo¬
graph. This setting is effective in preventing these blurs.
For proper use of the camera
Introduction
Names of Each Parts
Camera operation test
Taking photographs
Long Exposures
Mirror Lock-up Operation
How to stop
mirror lock-up operation
Distance Scale/Depth-of-Field
Flash Photography
Using aTripod
Close-up Photography
Multiple Exposures
Infrared Photography
Attaching aLens with
Shutter Released or Mirror Raised ... 54
Attaching the Strap
Removing the Strap
Interchanging the Focusing Screen ...56
LED Monitor Lamps in Finder
Electronic Warning Sounds...
Troubleshooting
Custom setting the Bulb Exposure.... 60
Camera Pack System
Accessory System
When using accessories for RZ67PRO ... 65
Using RB Series Lenses and Accessories... 66
144-66
245
3-8 46
9-10
47-48
Before taking photographs
Preparing to shoot
Loading the Battery
Battery Check
Number of shots that can be mode ... 15
Batteries Care
S h u t t e r R e l e a s e B u t t o n
Attaching and Removing Lenses .... 17—20
The Shutter Speed Dial
Removing/Attaching
the Waist-Level Finder.
Using the Waist-Level Finder.... 24—25
Interchanging the Magnifier
T o a t t a c h o r r e m o v e
the Roll Film Holder
Using the Release Button Collar.... 30
T h e R - M L e v e r
49 c - m E l
^.
12-31 50 ■/
13 50 Bulb exposure custom setting LED
(shared for reading the battery condition)
14 51-52
53
5315
16
21-22 55
55
23
57
26 58
59
27-29
61
31 62-64
Taking photographs....
Loading the Film Holder
Advancing the Film
Focusing and Locking the Focusing Knob... 38
The Revolving Back
Taking Photographs
Unloading Exposed Film
Removing apartially exposed roll of film ... 43
32-43
33-35
36-37 Mamiya RZ67 PRO IID Specifications.... 67—68
Common Sense Camera Care and Practice .... 69
The Importance of Proper Maintenance .... 70 1. Remove the Roll Film Holder from the body. Set the Shutter Speed Dial to "B". Slide
the R-M Lever to the normal position (□), Set the Shutter Release Selector Ring to
normal position.
39-40
41
42
2. Keep the Shutter Release Button pressed for at least 10 seconds. The orange LED in
the Viewfinder will blink and then light steadily, releasing the 60 second flash timer.
★If you want to cancel the bulb exposure custom setting, perform the steps above
or remove the battery from the camera.
★When the bulb exposure mode is selected, the camera consumes energy from
the battery during the exposure.
11 60

Troubleshooting
ip
Uniquely designed to prevent errors, the RZ67 PRO IID incorporates numer¬
ous safety features, so if you can not release the shutter, or remove alens or
holder, it is most likely due to user error rather than acamera malfunction.
Should something appear to go wrong, be sure to check the following points.
W h e n t h e s h u t t e r c a n n o t b e r e l e a s e d
1. Has the film been completely advanced to the first frame?
Have all the exposures already been made (10 with 120, 20 with 220)?
2. Has the Cocking Lever been advanced as far as it will go?
3 . H a s t h e D a r k S l i d e b e e n r e m o v e d ?
4. Have you locked the Shutter Release Button and forgotten?
5. Is there abattery in the Battery Chamber? is the battery still good?
6. Is the "T" lever of the lens on "N"?
7. Is the camera speed dial on RBL and aRZ lens is on camera?
8. Is the camera speed dial on AEF and the AE Finder and aRZ lens is not attached?
9. Have you used the Mirror Lock-up mode and red ring on the collar is still visible after
removing the cable release?
Before taking photographs;
Preparing to shoot
In the case of examples 1-3, an orange lamp will illuminate in the viewfinder if an error
has been made. This chapter describes how to insert abattery
and how to attach and remove the Lens
and the Roll Film Holder.
W h e n t h e l e n s c a n n o t b e r e m o v e d
Have you pressed the Cocking Lever completely forward?
W h e n t h e F i l m H o l d e r c a n n o t b e r e m o v e d
Have you inserted the Dark Slide into the holder?
59

LoadingtheBattery(Thecamerawillnotoperateunlessbatteryisloaded.) Electronic Warning Sounds
1. With your fingernail, slide the Battery Cham¬
ber Cover, on the bottom of the camera body, as
indicated by the arrows in the illustration. Open
the Battery Cover. The camera requires a6V al¬
kaline, silver oxide or lithium battery.
It is agood idea to wipe the battery terminals
before insertion to assure proper contact.
Observe polarity.
When pressing the Shutter Release Button,
i f a n e l e c t r o n i c a l a r m i s h e a r d
(The Dark Slide is pulled out.) (if film is loaded)
During mirror up
operation
T h e S h u t t e r c a n n o t
be released since the
Shutter Speed Dial is
set to RBL.
Th e S h ut t er ca n not
be released since the
Shutter Speed Dial is
set to AEF.
2. 0position is marked in battery cavity. Insert
the eside first at asteep angle and then push
entire battery into place, making sure that the lift
ribbon Owraps around battery. Close cover by
pushing it down.
Approximately 55 seconds
after pressing the Shutter
Release Button, the electronic
alarm will sound for 5seconds.The AEF is set only when
t h e A E P r i s m
viewfinder is used.
★Check whether the
Waist Level
viewfinder is
attached.
★Check whether the
L e n s f o r R B i s
attached.
This position is used
when aMamiya RB
l e n s i s u s e d .
★Check whether the
R Z l e n s i s u s e d .
Take aphotograph
within 60 seconds.
See page 47.
Adjust the Shutter Speed
Dial for the Lens you are
using.
★Be particularly careful not to let the lift ribbon cover the 0terminal.
★This camera cannot be operated without abattery. Be sure to insert abattery
before operating the camera.
★The camera requires a4SR44 silver oxide, 4LR44 alkaline manganese or
2CR1/3 lithium battery.
>r
The battery
capacity is low.
R B l e n s - R B L
R Z l e n s - - B t o 1 / 4 0 0
Adjust the Shutter Speed
D i a l f o r t h e v i e w fi n d e r
you are using. When the red monitor lamp
blinks and an electronic
alarm is heard, the Shutter
cannot be released.
To check the battery
capacity, keep pressing
the button approx.
20 seconds.
Bulb Exposure
Keep pressing the Shutter
Relea s e B utton. After 55
se c o nd s t he e l e ct r on i c a la r m
will sound for 5seconds and
the S hutter w ill be clo sed.
AE prism viewfinder-- AEF
Waist level viewfinder,
Prism viewfinder type 2-- -B to 1/400
Tyr
Custom setting the
bulb exposure.
When you want to take aphoto with an exposure
longer than 60 seconds, select T(time). Replace the battery.
See page 60 See page 45
●When aLens is not attached to the body: When the Shutter Speed Dial is setting is other than RBL,
and if the Shutter Release Button is pressed, the alarm will be heard,
●if the camera sounds an electronic alarm in conditions other than those above, contact our service center.
13 58

LED Monitor Lamps in Finder Battery Check
By looking at the LED in the Viewfinder on the body, you can see the remaining battery
capacity. Attach the Roll Film Holder to the body and leave the Dark Slide inserted.
^When using the Prism Viewfinder, the positions of the indicator lights are reversed left to right.
Align the white □on the Selector Lock Lever ©
on the body with the white Oon the Shutter Re¬
lease Selector ©so that the shutter is locked, to
avoid accidental shutter release. Press the Shut¬
ter Release Button halfway down and the LED in
the Viewfinder will light to show the battery level.
Lit green Lit red Lit orange
●The Cocking Lever
is not advanced
or advanced
incompletely.
●The Roll Film Holder
is not completely
wound up.
●The Dark Slide
i s n o t w i t h d r a w n .
●The camera battery
is good.
Strobe charge
complete lamp
^Battery capacity check
The battery capacity can be read by
watching the LED in the Viewfinder
(lit steadily or blinking, and the alarm
sound):
Lit steadily- Battery full
Blinking -Battery is running low.
Obtain anew battery to
replace this one.
P u l l t h e D a r k S l i d e o u t .
The monitor lamp
will go OFF.
When recharging using
acombination of a
Metz Strobe (applied to
SCA300/3000 system)
and an SCA395
Ad a pt e r i s co m ple t e,
this lamp will be lit.
Press down the Cocking
Lever until it stops.
Th e mon ito r la m p
will go OFF.
Blinking and „ ,
soundsanalarm-B^«eryISextremelylow.
Replace with anew battery right
away. In this condition, you can¬
not release the Shutter.
(This mark only appear s when the Viewfind er
screen is atype AMatte or atype A4 Checker.)
B l i n k s o r
is lit orange
B l i n k s r e d
●The battery is low.
★Get anew battery
C u s t o m s e t t h e
bulb exposure.
See page 60.
Wh en th e mo n it o r la mp
blinks and an electronic
alarm is heard,
t h e S h u t t e r c a n n o t b e
released.
Replace the battery
immediately.
57 ●14

Interchanging the Focusing Screen
Removing the Focusing ScreenNumber of shots that can be mode(under our test conditions)
At nomal temperture (20°C)(68T) After removing the Waist-Level Finder, lift the
Viewfinder Screen Release knob oon the cam¬
era body with your fingers and then lift and re¬
move the screen.
Silver oxide button cell battery (4SR44) Approx. 2600 shots
Approx. 1300 shots
Alkali battery (4LR44)
Approx. 3300 shots
Lithium battery (2CR1/3)
★RZ67PROIID body with ZHOmm f/2.8W, AE Prism Finder FE701 and Winder RZ Modei 2.
B a t t e r i e s C a r e
1.The sealed, new battery which is sup¬
plied with this camera may have been
subject to storage conditions which have
redu c e d i t s s ervic e l i f e . Th e r efor e i t i s
desirable to replace it with afresh bat¬
tery as soon as possible.
5. Be sure to match the poles of the battery with
those shown in the diagram in the chamber. H o w t o a t t a c h t h e V i e w fi n d e r S c r e e n
1. While holding the outside of the Viewfinder
Screen, put protrusion @on the Viewfinder
Screen into the Viewfinder Screen securing
bracket (left) ©.
6. Always keep batteries out of the reach
o f c h i l d r e n a n d n e v e r t h r o w u s e d b a t t e r ¬
ies into afire or expose to excessive heat.
2. Carefully wipe the battery contacts before
inserting into the chamber. Failure to do so
may result in poor electrical contact and
consequent malfunctioning of the camera.
7. When going on trips be sure to carry spare batteries
to ensure that the camera will function. Also, as bat¬
teries tend to temporarily malfunction at temperatures
below freezing, when photographing in extremely
cold climates, carry the External Battery Case.
3. Always remove battery when camera is
not used for awhile. Always carry spare
batteries. 8. When you carry spare batteries, leave them
in the original factory packaging. If they are
"unpackaged", be sure to wrap them care¬
fully in order to prevent them touching each
other or any metal objects which can cause
t h e m t o s h o r t c i r c u i t a n d b e c o m e u s e l e s s .
4. Battery life differs, depending on type,
age, storage condition, ambient tempera¬
ture, frequency of use etc.
2. Press the Viewfinder Screen down gently onto
the body and fit protrusion ©on the Viewfinder
Screen onto the viewfinder Screen securing
bracket (right) @.
★When you remove the viewfinder Screen, do not touch the metal horizontal/
v e r t i c a l f o r m a t v i e w fi n d e r m a r k o r m i r r o r .
★The viewfinder Screen is made of acrylic resin. Its surface is soft and it can
easily be damaged, so be careful when handling it. Don't put fingerprints or dirt
on it.
15 56

Attaching the Strap ●Removing the Strap S h u t t e r R e i e a s e B u t t o n
■«. S” »J i - v -
Attaching the Strap The Shutter Release Button uses atwo-step sys¬
tem. At the 1st step of being pressed down, the
LED in the Viewfinder lights. When the button is
pressed further, the 2nd step, the Shutter will be
released. After pressing the Shutter Release but¬
ton halfway down, press it the rest of the way down
to release the Shutter and take apicture.
When the Shutter Release Button is pressed half¬
way down, the camera will measure light level of
the scene in the AE Prism Finder FE701.
Hold the metal clamp of the strap so that the key¬
hole shaped opening faces the Carrying Strap
Lug on the camera body. Gently fit the upper part
of the key-hole opening over the lug. Next, gen¬
try push the bottom of the metal clamp upwards
and it will lock in place with aclick.
If the clamp is attached to the Hot-Shoe side of
the camera upside-down, it will be difficult to re¬
move, so be careful to attach the clamp right-
side-up.
n n
Normal position
n n
Half-press Release position
Removing the Strap ★When the R-M Lever is in the Rposition, press the Shutter Release Button half¬
way down and the R-M Lever will return to the normal (□) position.
Reach behind the strap and while gently squeez¬
ing the top of the protruding front plate (leaf
spring), slide the clamp downward and off the
lug.
55 16

Attaching and Removing Lenses Attaching aLens with Shutter Released or Mirror Raised
When alens is removed from the camera body, the mirror is set (lowered) and the lens
shutter cocked. Conversely, when attaching alens, the same conditions should prevail
(mirror set and shutter cocked). However, should alens be attached with either the
mirror raised or shutter released, or both, the camera can be reset by following the
procedures below.
Before attaching the Lens
Remove the Front Cap from the body and the
Front and Rear Lens Caps.
Turn the Front Cap on the body counter-clock¬
wise to remove the Cap.
Mirror condition Shutter blade condition Operation
©Remove the Roll Film Holder.
^Set the Shutter Speed Dial to
o t h e r t h a n " R B L . "
© P r e s s t h e S h u t t e r R e l e a s e
Button.
©Depress the Cocking Lever.
©Set the Shutter Speed Dial within
the range of "B" to "1/400," that is,
no t "R BL " or " AE L. "
1Closed
Lift the Front Lens Cap at the positions shown on
the left to remove it.
Lowered
2Open or Closed
Remove the Rear Lens Cap by turning the Bayonet
Ring Oclockwise until it stops.
©Remove the Roll Film Holder.
©Depress the Cocking Lever.
Raised
L e n s s h u t t e r r e l e a s e t e s t
T o r e l e a s e t h e s h u t t e r o n a l e n s w h i c h h a s b e e n
removed from the camera body, rotate the shut¬
ter cocking pins ©clockwise as far as they will
go, while depressing the shutter lock pin ©.
★CAUTION:
When attaching/removing the lens, be sure
n o t t o r e s t t h e c a m e r a o n i t s b a c k u n l e s s
either aroll film holder or the back protec¬
tive cover is attached. This is necessary to
p r e v e n t d a m a g e t o i t s v a r i o u s s p r i n g
loaded function pins.
17 54

Multiple Exposures ●Infrared Photography
Before attaching alens to the camera body, the mirror in the body must be set in the
down position and the shutter of the lens cocked.
Multiple Exposures
1. Set the R-M Lever to 'M' (multiple exposure).
T h e l e v e r c a n b e m o v e d t o ' M ' e i t h e r b e f o r e o r
after releasing the shutter.
2. Press the Cocking Lever as far as it will go in
o r d e r t o c o c k t h e s h u t t e r a n d s e t t h e m i r r o r . T h e
fi l m w i l l n o t a d v a n c e a t t h i s t i m e . T h e s h u t t e r c a n
now be released, creating adouble exposure.
This procedure can be repeated as often as de¬
sired to create as many exposures as necessary.
Setting the Mirror
Make sure the mirror is set (lowered). If the mir¬
ror is in the up position, lower it by pushing the
Cocking Lever as far as it will go toward the front
of the camera body.
When photographing the same subject two or more times
though, exposure compensation is necessary. The same is
true with different subjects that are all evenly illuminated. With subjects of different brightness, the darker
one is normally photographed first. However, it is not within the scope of this operating manual to teach
multiple exposure technique, as many excellent books dealing with this subject are already available.
★CAUTION:
Unlike the "R" lever, the "M" lever does not return automatically to its normal posi¬
tion. Therefore you must do it manually. If fou forget, the film is not transported and
not only are subsequent exposures wasted, but the planned multiple exposure also. Cocking the Lens Shutter
If the lens shutter is not cocked, firmly rotate the
Shutter Cocking Pins Oas far as they will go to
the red dot ©.
Infrared Photography
RZ lenses need no focusing mount because of the bellows feature. Normally, lenses
with focusing mounts have asecondary index for infrared film. Therefore, if you want to
do critical infrared photography, you should focus as usual and before exposures move
the focus slightly towards the camera body, as per table below. There is amillimeter
scale on top of the focus scale.
RZ67 PRO IID Infrared Correction Table
Shows required adjustment at infinity
Extension of the bellows (mm)Lens
F i s h - e y e Z 3 7 m m f / 4 . 5 W
Z 5 0 m m f / 4 . 5 W
M 6 5 m m f / 4 L - A
^ M 7 5 m m f / 3 . 5 L
S h i f t Z 7 5 m m f / 4 . 5 W
Z 9 0 m m f / 3 . 5 W
Z 1 1 0 m m f / 2 . 8 W
Z 1 2 7 m m f / 3 . 5
M a c r o M l 4 0 m m f / 4 . 5 M / L - A
Z 1 5 0 m m f / 3 . 5 W
Z 1 8 0 m m f / 4 . 5 W - N
Z 2 1 0 m m f / 4 . 5 A P O / L
Z 2 5 0 m m f / 4 . 5 W
Z 2 5 0 m m f / 4 . 5 A P O / L
Z 3 5 0 m m f / 5 . 6 A P O / L
^ Z 3 6 0 m m f / 6 W
Z 5 0 0 m m f / 6 A P O / L
Z 5 0 0 m m f / 8 W
Z o o m Z 1 0 0 - 2 0 0 m m f / 5 . 2 W
0.4
0.4
0.24 ★Moving the Shutter Cocking Pins only as far as the green dot will result in in¬
complete shutter cocking. Be sure to rotate them as far as the red dot ©.
★Whenever alens is removed from the camera body, it is already cocked.
0.27
0.6
0.4
0.3
0.4
0.23
0.4
0.7
0.1
0.6
0.1
0.1
1.0
0
1.0
W:1.2T:0.4
1853 Discontinued production

Attaching the Lens After focusing the lens, read the exposure compensation factor on the scale. The scale
is divided into three zones of light, medium, and dark shades. As indicated by the table
at the base of the scale, the light zone represents an exposure factor of zero (no com¬
pensation is necessary), the medium shaded zone indicates +0.5 (a 1/2 stop increase in
exposure is required), while the dark zone denotes afactor of +^ (a full stop increase in
exposure is necessary).
To find the exposure factor, first locate the figure on the Focal Length Scale for the lens
in use. Next, move along the scale, in the same column, until you reach the Distance
Graduation. The shading of the zone (light, medium, dark) which touches the Distance
Graduation indicates the correct exposure factor. For example, when the 110mm lens is
focused as shown in the illustration, the correct exposure factor is +1.
The scale curve for each lens has awhite Omark which coincides with the right-hand
lens indication. So, use the mark to find the corresponding scale curve for each lens.
With afactor of +1, open the aperture by afull-stop. For example, assume that ahand¬
held exposure meter indicates anormal exposure reading of f/16 at 1/60 sec., for an
exposure compensation of +1, set the lens to either f/16 at 1/30 sec. or f/11 at 1/60 sec.
When using aMamiya through-the-lens (TTL) Exposure Meter Finder, such as the
RZ AE Prism Finder, it corrects automatically for close-up photography.
1. With the front of the lens facing you, rotate
the Bayonet Ring counterclockwise as far as it
will go (the white dot Oon the Bayonet Ring will
be aligned with the central index ©on the lens
mount).
2. Seat the lens on the camera body with the red
index line Qon the lens mount facing the red
alignment dot @of the camera body. Next, ro¬
tate the Bayonet Ring of the lens firmly in aclock¬
wise direction,securing the lens to the camera
body. ★For optimum sharpness at the corners when using the 50 mm and 65mm wide-
angle lenses at distances closer than 1meter, use as small an aperture as pos¬
sible.
★The bellows extension in millimeters appears on the top of the Focal Length
Scale. These figures are used to determine the required exposure compensa¬
tion factor when using extension tubes.
★For areas covered with the bellows fully extended, see the instructions for all
interchangeable lenses.
Removing the Lens
If you try to rotate the Bayonet Ring counterclockwise without first depressing the Cock¬
ing Lever of the camera body, the movement of the ring will be blocked, making it impos¬
sible to remove the lens. This safety feature assures that the mirror must always be
lowered whenever the lens is removed, thereby assisting the Light Baffle in shielding the
film from light.
1. Push the Cocking Lever of the camera body
completely down, which will set the mirror and
c o c k t h e l e n s s h u t t e r .
19 52
Other manuals for RZ67
4
Table of contents
Other Mamiya Digital Camera manuals
Mamiya
Mamiya DM System User manual
Mamiya
Mamiya 645DF User manual
Mamiya
Mamiya 645 User manual

Mamiya
Mamiya ZD User manual
Mamiya
Mamiya 645 AFD II User manual
Mamiya
Mamiya ZD User manual

Mamiya
Mamiya 645DF User manual

Mamiya
Mamiya M645 Super User manual
Mamiya
Mamiya 645 AFD III User manual

Mamiya
Mamiya 645 AF User manual

Mamiya
Mamiya 645 AFD III User manual
Mamiya
Mamiya RZ67 User manual
Mamiya
Mamiya 6 User manual
Mamiya
Mamiya 7 User manual

Mamiya
Mamiya M645 Super User manual
Mamiya
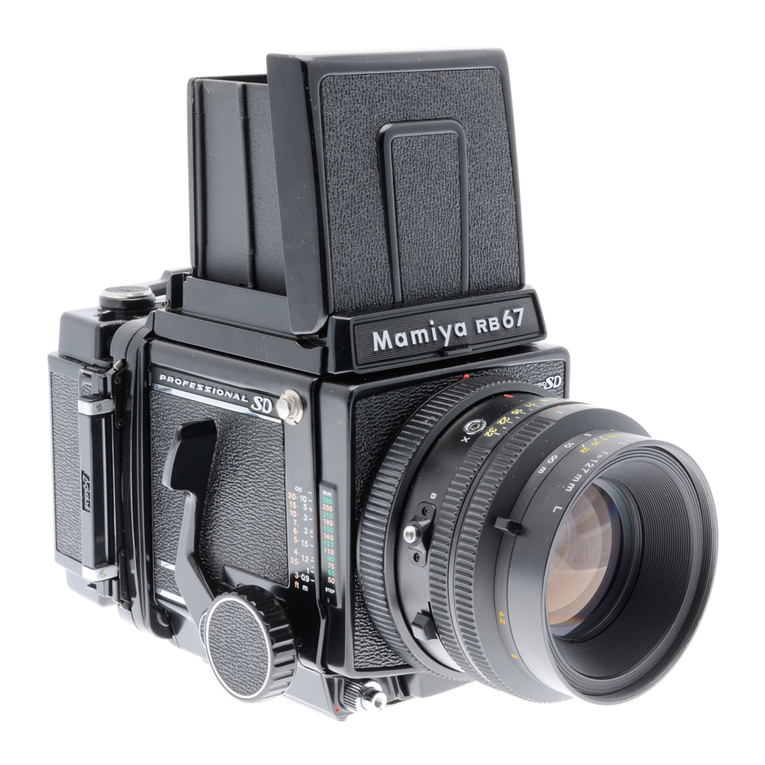
Mamiya RB67 Pro SD User manual
Mamiya
Mamiya 645 SV Pack Assembly instructions
Mamiya
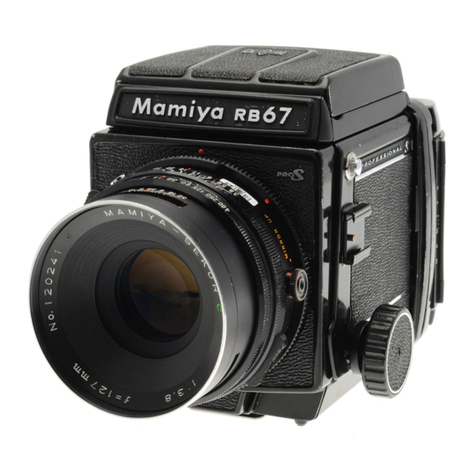
Mamiya RB67 Pro-S User manual

Mamiya
Mamiya 645DFplus User manual
Mamiya
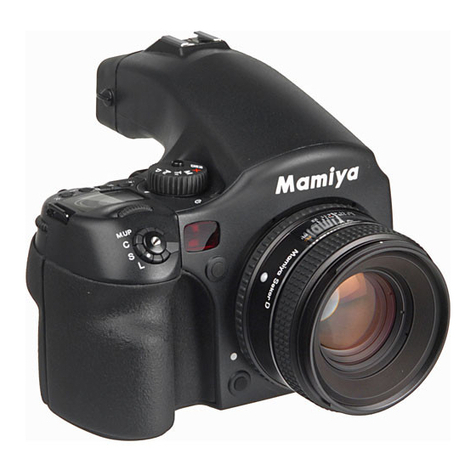
Mamiya 645 AFD III User manual

