Mamiya M645 Super User manual

lnstructions
www.orphancameras.com

The
Mamiya
M645
is
a
newlydeveloped
6
x4.Scm
SLR which is a result
of Mamiya's
technology
and experience as a leading manufacturer
of
professionaf
cameras.The M645
is designed
to
introducethe world of large-negativequality
to
camerauserswho are accustomed
to the easy
handling
andcompactness
of35mm
SLR's.
Every care has been taken to assurethat your
Mamiya M645 will provide you with years of
trouble-free
service.
However,
to avoid
possible
mishandling,
be sure to carefullyread this in-
struction
manual
before
using
your
new
camera.
This camera is designed for use with
eithersilveroxide
oralkalinebatteries.
Although both types offer adequate
performance, silver oxide batteries
lastmuch longer.
IMPORTANT: When using the PD
Prism Finder,make it a point
to use
silvet oxide batterieswhen available
(in this instance, battery life is short-
ened if
alkalinebatteries are used).
i*tq"..le*:t" - :.i;.::*i1"'.brlasr'L-!r.. ',g8fis*aiiiint.
www.orphancameras.com

SpecialFeatures.... .......................
3
Specifications
.............. ..................
5
Namesand Functions
of Parts ......................
7
Testing
to See if the Camera Functions
Properly ........17
Interchanging
Lenses ................
18
Focusing
Screens ......................
19
Interchanging
Finders
fnserting
aBattery ......................22
Battery
Check ..........
23
LoadingtheFilm
lnsert......... ........
24
FilmLoading .......................
25
Shutter
Speed Dial ...........
ApertureRing/Stop-down
Operation .........
Focusing
Shutter
Release
and FilmTransport
Mechanism
Unloading
Film
The Neck Strap
Holdingthe Camera
Usingthe
AEPrism
Finder ..............
35
UsingthePDPrism
Finder
S................. ........42
Usingthe
CdS
PrismFinder ....
46
Usingthe Waist-Level
Finder
S
MirrorLock-up
Depth-of-Field
Multiple-Exposures
InfraredPhotography
Tripod
Socket ................................
58
TimeExposures .....
58
Interchanging
the
FilmAdvance
Knob .,.....59
TheMamiya
Moving
Coil
Electronic
Shutter..................61
Trouble-Shooting
Precautions .....63
51
54
56
20
28
N
30
31
32
33
www.orphancameras.com

The MamiyaM645 is a 6x 4.5cmlarge-negative
SLRthat
is
bothextremely
versatile
andcompact.
I r large-Negative Quality
The 6 x
4.5cmlormatoffersapproximately
3 timesmore
area
than
the35mmformat.
Moreover,unlike
the6x
6cm
square
negative,
thereis little
waste
ofthenegativearea.
Forbeautiful
colorenlargements
everytime,
the6x
4.5cm
format
isthe
ideal
format.
3.hmpact Design
Despite
thelarge-negative
it produces,
theMamiya
M645
isdesigned
to handle
aseasilyasa35mmSLR.
lts
com-
pact
sizeandlightweight
are perfectly
suited
for theac-
tionphotographer.
lt fits so well into one'shandsthat
it
becomesanextensionof hisreflexes.
tr
€. Mamiya's Moving Coil Elec'tronic Shutter
Mamiya
has
developed
arevolutionaryMovingCoil
Elec-
tronicallyControlledShutter
forthe
MamiyaM645.
Elec-
tricalconsumption
of this new shutter
is approximately
1/10that of previous
electronic
shutters.
Furthermore,
consumption
remains
constant
regardlessof the
shutter
speedbeing
used.
ln addition
to accuracy,
long
battery
life
is
assured
bythis
new
shutter.
rlr Large, Bright Viewfinder
It becomes easy to catch the peak of action when looking
through the large, bright vieMinder. Because of the
Mamiya M645's automatic diaphragm and quick-return
mirror,
theviewfindernevergrows dim. lt is always
bright,
ready for the next photograph.
5. InterchangeableFinders
o Lighhreight,
dual-function
Waist-LevelFinder
S
Acompactandlightweight
finderwhich
opens
and
closes
with
a singletouch,the
Waist-LevelFinder
S isidealfor
copying,close-ups,low and high anglepictures,
and
workingin
dim
light.
Additionally,itisinstantlyconvertible
to aneye-level
sports
finderwhichaccuratelyshows
the
fields
for
the80,110,150,
and
210mmlenses,
allowingone
toeasilyfollow
the
quickest
action.
o Prism
Finder
The PrismFinder
is well-suited
for action
photography.
Whether
the
verticalorhorizontalformat
isutilized,
focus-
ing
and
following
action
isaseasyas
ona35mmSLR.
o AE(Automatic
Exposure)Prism
Flnder
TheAE Prism
Findercombines
an electronic
shuttercontrol
mechanismanda TTL-typeCdSexposure
meter
to provide
aperture-priority,
fully
automaticexposure.
,..'.*;lgflil
www.orphancameras.com

o PD Prism Finder
ThePD Prism
Finder
employs
silicon
cells
for
full-aperture,
center-weighted readings.
lt is your assurancethatevery
negative
will be properly
exposed.
. CdS Prism Finder with built-in meter
Accurate through-the-lens exposure measurement is
possible
with
the CdS Prism
Finderwhich
couptesto the
aperture of the lens and indicates the proper shutter
speedto set on the camera.
tr
O' Flatness of the Film Plane
Developedthrough
Mamiya'slong
experience
as
amanu-
facturer
ot120/220roll-film
cameras,the
Roll-Film
Inserts
fortheMamiya
M645keepthe
film
perfectly
flatfor
edge-
to-edge
sharpness.Inserts
are availablefor 120
or 22O
roll-lilm.
,f r Multi-Coated
Lenses
Mamiya-Sekorlenses
have
achieved
world-renown
as
pro-
fessional lenses of exceptional contrast,
high resolution,
cleardefinition,
andexcellent
colorbalance.
Allthelenses
for the Mamiya M645,
from wide-angle
to telephoto,
have
been multi-coatedto maintain
their highstandard
of per-
formance even under adverse lighting.
8. UnlimitedScope
A full range of accessories are availablefor the Mamiya
M645 to assistthe photographer
in capturing
virtually
any
type of image. Accessories include hand grips, inter-
changeable
focusing
screens,
and auto extension
rings
complete
withmeter
coupling.
o Multiple-Erposure Provision
Merely lowering the multiple-exposurelever allows the
photographer to take as many multiple-exposures
as he
wishes.During multiple-exposures,the exposurecounter
does notmove.
o Mirror Lock-Up
The Mamiya M645 is designed to have minimal
mirror
shock; nevertheless,
when it is necessary
to completely
eliminatevibrations,
all
you haveto do is lock the mirror
in
the up position.
To do so,simplylower
the mirror
lock-
up lever. Mirror lock-up provision
makes close-up and
telephoto photography possible even at slow shutter
soeeds.
o Two Shutter Release Buttons
The Mamiya M645 is equipped with two ideally located
shutter release buttons, so that regardlessof how you
hold the camera,
there is alwaysa release
buttonat your
finger
tips.
-:r'llJtul.$.ii;i;
www.orphancameras.com

o Camera Body
Camera
Type:
6x
4.5cmelectronic
focal-planeshutterSLR.
FilmType:
120roll-film
for15
exposures,
220roll-film
for 30exposures
RollFilm
Insert:
fnterchangeable,
twotypesavailable
for12O
and
22O
size
rollfilms.Actualnegativesize56
x 41.smm.
Standard
Lenses:
Mamiya-SekorC (multi-coated)
80mm
f/1.9,automatic
diaPhragm,
with
metercoupler,
67mmfiltersize
Mamiya-Sekor
C (multi-coated)
80mm
l/2.8,
automaticdiaphragm,
withmeter
coupler,58mm
filter
size
LensMount:
MamiyaM645
bayonet
mount
Shutter:
B,
8-11500
sec.
MovingCoilElectronicFocal-PlaneShutter,
FP
and
X
(1/60
sec.)synchronization,
Shutter
releaselockprovision
BatteryType:
One6V
silver-oxide
battery4SR44
or6Valkaline
battery4LR44
FocusingMethod:
Each
Mamiya-Sekorlensis equipped
with
its
own
helicoid
focusing
mount
Focusing Screen:
Microprismcenterspot
(standard
focusingscreen),
surroundingarea
is
matte,withFresnel
lens,focus-
ingscreen
interchangeable,94Toof
the
picture
area
visible
Mirror:
Instantreturn,withmirrorlock-up
provision
FilmTransport:
Filmtransportby a single
turnof the crank-equipped
film advance
knob.Provision
to prevent
double
ex-
posure.
ExposureCounler:
Progressive type, automatic reset, automatic
changeover
withinsertiono1120/220
roll-film
inserts
BatleryCheck:
Depressing
B.C.
button
illuminates
green
L.E.D.if
batterycondition
issatisfactory.
Multiple-Exposure:
Lowering
multiple-exposurelevermakes
multiple-
exposures
possible;
exposure
counter
does not
move
duringmultiple-exposures.
O Interchangeable Finders
PrismFinder:
Theimageinthe
Prism
Finder
is
right-sideup,
lat-
erally
correct,
and
moves
in the correct
direction;
magnificationof
0.74X
withthe
standard
lens
atin-
finity,
built-on
hot-shoe;comes
with
eyecup.
AEPrism
Finder:
Aperture-priority,
automatic
exposure
prism
finderwith
h;;,,'".,,,;:.,,;*.r;drl ,;*i*;--.. ,.+.;u ,r*iis
www.orphancameras.com

built-inelectronic
shutter
controlmechanism
andCdS
" exposuremeter.Through-the-lens,center-weighted,full-
aperturemetering
with
shutter
speed
intheviewfinder.
Meter
couplingrange
isEV2.85
-EV17
(t/1.9,1/2
sec.
-
t/16,1/5OO
sec.)
withf/1.9lens
andASA10Ofilm.With
the
f/2.8
lens,
themeter
coupling
range
isEV4-EV1g
(t/2.9,
1/2
sec.
- t/22,1/500
sec.)usingASA10O
film.
Camera
battery
servesas
power
source.
Other
features
same
as
for
Prism
Finder.
PD
Prism
Finder
S:
PrismFinder
with built-insilicon
cell,through-the-
lens, full-aperture, center-weighted metering; 7
LED's
visiblein the viewfinder
for corrector com-
pensated exposure;with '100
ASA and f/1.9 lens,
meter coupling range of EV -'1.1S
- +18 (f/1.9,
8 sec.
- t/22,1/500 sec.);
with
f/2.8tens,
EV
0- 1g
(t/2.8,8
sec.
- t/22, 1/500 sec.);
camera
body bat-
teryserves
aspower source;
otherfeatures
same
as
Prism
Finder.
CdS Prism Finder:
Prism Finder
with CdS through-the-lens
full-aper-
ture, center-weightedmetering,zero method with
indicator needle; couples to aperture and shutter
speed manually
set;
power source,one 1.5V
silver
oxide battery SR44 or alkaline battery LR44;with
100ASA and f/1.9lens, meter coupling range of
EV 2.85
- 17
(t/1.9,
1/2 sec.
- t/16, 1/500
sec.
);
with f/2.8 lens,EV 4 - 18 (l/2.8,
1/2 sec.
- t/22,
1/500 sec.),
other
features
same
as Prism
Finder.
Waist-Level Finder S:
Opens
and
closeswith
a singletouch;
magnification
of 1.3X(w/standard
lens at infinity);
diopter correc-
tion lenses
interchangeable
with
standardmagnifier;
built-
in sportsfinder shows field for standardlens
and
acceptsa mask
for
110,150,
and
2'1Omm
lenses,
allfieldsshowingapproximately80o/o
of the picture-
taking
area.
Dimensions and Weight:
(width,
height,
depth,w/80mm f/1.9
tens)
(w/Waist-Level
Finder
S) (w/1.9
tens) (w/2.8
tens)
3-29/32"
x3-15/16"
x6-9/16" 54.7
oz 48.9o2
(99.3
"100 x166.5mm) (15509) (13859)
(w/Prism
Finder)
3-29/32"
x4-27/32"
"6-9/16" 61.6
oz
(99.3x
122.7
x
166.5mm) (17459]r
(w/AE
PrismFinder)
3-29/32"
x4-29/32"x6-9/16" 66.1o2
(99.3
x 124.7
x 166.5mm) (teZS
g;
(w/PD
PrismFinder
S)
3-29/32"
v
4-29/32"
" 6-9/16" 65.8oz
(99.3"
124.7
" 166.5mm) (18659)
(w/CdS
PrismFinder)
3-29/32"
x4-29/32"
,6-9/16" 66.5oz 60.7oz
(99.3
' 124,7
x
166.5mm) (18859) fi72j9\
Depth
w/80mm
f/2.8
lens;6-1/16"
(154mm)
55.7
oz
(1
5B0s)
60.3o2
(1710s)
60.0
oz
(1700s)
..:*i :,;;j;\:::it.t#).
www.orphancameras.com

Names
andFunctions
of Parts
(1
)
Focusing
screen
Five different types are
available.
Focusing
screen
lug
Mounting
guidepinlor
finder
Fits
intothefinderopening.
Alignment
dot
Alignment
reference
point
formounting
lens.
Shutterreleasebutton
(lront)
Built-insafety lock, locks
release
button
iffilm
hasnot
been advanced.
Equipped
withcable
release
socket.
Shutterreleaselock
ring
Turn
lock
rihg
and
align
with
red dot to simultaneously
lock both shutter release
buttons.
To unlock, align
withwhite
dot.
Batterycheck lamp
lf the green batterycheck
batterycheck button
on the
pressed,
batterycondition
is
lamp
glows
whenthe
opposite
side is de-
good.
Flashsyncterminals
Withsafetycover,
onlythe
coverof the syncterminal
being
used
isremoved.
Neck
straplug
Shutterspeed
alignment
mark
Shutter
speeddial
Do notset dial
to theO
position
unlessusing
the
PD
orAE
Prism
Finder.
Lens
release
button
Pushin
and
simultaneously
turn
the lens
counterclock-
wise
toremove.
Mirror
Never
touch
the surface
of
the
mirror.
7
www.orphancameras.com
www.orphancameras.com

Back cover latch
While pushing
in on the
memo
clip,simultaneously
move
the backcoverlatch
in
the
direction
ofthe
arrow
toopen
camera
back.
Back
cover
When
closing,
apply
pres-
surefirmly
and
evenlyinthe
area
of
the
back
cover
latch.
Memo
clip
Holdsthe
film
box
topasa
reminder.
Exposure
counter
window
Automatic
changeover
upon
insertionof 120
or 22Qtilm
insert.Goesup to 15with
120
film
andup to 30 with
220tilm.
Battery
checkbutton
When depressed, the
battery
check lamp on the
opposite side illuminates.
Usedto
check
the
condition
ofthebattery.
Shutter
release
button
(upper)
Mirrorlock-up
lever
Push backward to lock
mirrorin
the
upposition.
Filmadvance
knob
One completeturn cocks
shutter
and
advances
film.
Film
advancecrank
Pull
out
to use.
M
ultiple-exposure
lever
Move
themultiple-exposure
lever
to the"multi"
position
formultiple-exposures
or
to
release the shutterwhen
there is no film in the
camera.
I
www.orphancameras.com

Names
andFunctions
ofParts
(2)
Battery
chambercover
latch
Pull
the latch toward the lens
to open the battery
chamber.
Battery
chamber
cover
Insert
a battery
into
the
battery
chamber.
Tripodsocket
1/4inch
tripod
socket.
To con-
vertto a 3/8 inch socket,
first
remove
the small
screw in the
base of the socket. Next,re-
move
theinner
socket
by turn-
ing counterclockwisewith a
coin.
9
www.orphancameras.com
www.orphancameras.com

A.M.
Lever
Automatic
diaphragm
operation
when
"A"
appears
in
thewindow.
Diaphragm
stopped down to
preselected
aperture
when
"M"
appears
in
window.
Focusing
ring
Distance
scale
Depth-of-field
scale
Alignment
dot
Align
with
matching
alignment
dot on camera
bodyfor rapid
lens
mounting.
Aperture
ring
Exposure
meter
coupler
Couples
the
aperture
ring
toany
prism
finder
with
built-in
meter.
10
www.orphancameras.com

Harnes
and,
Fundiotts,of Parts
t3)
Roll-Film
Insert
(120
and 220roll-lilminserts
areavailable)
Start
Mark
After
aligning
the start
markon
thefilm'sleader
paper
withthis
mark,the
roll-film
insertis
ready
lor insertion
intothe camera.
Release
latch
After
squeezing
inon
both
sides
of release latch, the roll-film
insert can be Pulled out of
camera.
Spool
clip
PulloutandlowersPool
cliP
to
insert
or remove
filmsPools.
Leader
paper
guidemarks
Indicates
the direction
leadet
paper
isto follow.
Film spoolstud
Placefilm spoolon film spool
stud so thatthe blackside of
theleader
paper
facesup.
Take-up
spoolstud
Attach
empty spool to take-up
spool
stud
andinsertthe tipof
theleader
paper
intothespool
slot.
Film
type
inder
(120
or 2201
Insert
roll-filminsertintocamera
with
thefilm
typeindexupright.
lf the filmtype ihdex
is upside
down,
roll-filminsertwillnotfit
into
thecamera.
11
www.orphancameras.com
www.orphancameras.com

Prism
Finder
Eyecup
Attachby sliding into the
grooves
ofthe
eyepiece.
Diopter
correction
lens
retainer
ring
Remove
by unscrewing
in
a counterclockwise
direc-
tion. After inserting cor-
rection
lens,
replace
retain-
er
ring.
Hot-sho€ (with
safety
cover)
Automatically
fires
cordless
flash
units
when
the shutter
release
button
is depress-
ed.
Eyepiece
Accessories
such as eye-
cup, magnifier,
and angle
finder
can
be attached.
Finder
release
button
Turn
clockwise
untilit
stops,
push
in,
andthefinder
can
be lifted off the camera
body.
12
www.orphancameras.com

Names
and Functions
of Parts
(4)
AEPrism
Finder
(Detailed
Instructionson pp.35-41) Power
switch
dial
Afterattachingthefinderto
the
body
and
settingthe
camera's
shutterspeed dial to the O
mark,turn the powerswitch
dial to ON to activate the
exposure
meter.
AElockbutton
Usedto
adjust
the
exposure
to
a part of a scene or for
intentional
under- or over-
exposure.
5OO-1OOO
adjust-
mentscrew
Turnthisscrewto the
leftwhenthe
maximum
shutter speed of the
camera
is1/50O
sec.
ASAwindow
ASA
dial
Pull
outand
then
turn.
Couples
to the exposure
meter
coupleron
the
aper-
turering.
HOt-sho€ (with
safetycover)
Automatically
fires
cordless
flash
units
when the shutter
release
button
isdepressed.
Eyepiece
Accepts accessoriessuch as
eyecup,
magnifier,
andangle
find-
er.
Eyecup
Attach
bysliding
into
thegrooves
of
the
eyepiece.
Ape4grering
couplrng
ptn
Diopter
correction
lens
retainer
ring
Remove
byunscrewing
in
acoun-
ter
clockwisedirection.
Afterinsert-
ing
correction
lens,replaceretain-
er
nng.
Safetybutton
Press
the
finderrelease
button
while holding in the safety
button,andthe finder
canbe
lifted
off
thecamerabody.
13
Finderreleasebutton
www.orphancameras.com
www.orphancameras.com

PDPrismFinderS
(Detailed
Instructions
on pp.
a7-a5l
Aperture
ringcoupling
pin
Couples
tothe
exposure
meter
coupler
onthe
aperture
ring.
Hot-shoe
(with
safety
cover)
Automatically
firescordf
ess
flash
units
when
the shutter
re
lease
button
isdepressed.
Eyepiece
Meter
switch
Pushing
inon this
switchwhen
the finder is attached to the
camera
will turnon the meter
anda LEDinthefinderwill
light
up.
Evenif
you
release
pressure
f
rom the meter switch, the
meter
willremainon
for
approxi-
mately 15 seconds and then
automatically
turn off to con-
serveelectricity.
Shutter
speed
dial
ASA
window
ASA
dial
Pull
out
and
then
turn.
Finderrelease
button
Turn clockwise until it stops,
push
in,
and
the findercan be
lifted
otfthecamerabody.
Accepts
eyecup,
finder.
Eyecup
Attach
bysliding
into
thegroov-
esoftheeyepiece.
Diopter
correction
lens
retainer
ring
Remove by unscrewing
in a
counterclockwise direction.
Afterinserting
correction lens,
replace
retainer
ring.
accessoriessuch as
magnifier,
and angle
14
www.orphancameras.com

CdS
Prism
Finder
(Detailedinstructions
on pp.,16-5O)
Aperturering
coupling
pin
Couples
to theexposure
meter coupler on the
aperture
ring.
Hot-shoe (with
safety
cover)
Automatically
fires cordless
flashunits
when
the shutter
re-
leasebutton
isdepressed.
Eyepiece
"#,..,,
cover
with a coin and
into
the
chamber.
Shutter Speed Dial
Besure
to manually
setthe
shutter speed dial ol the
camerabody to the speed
indicated
by
this
dial.
Powerswitch
Set
toOFF
whenthe
meter is not being
used.
ASAdial
Pull
outand
then
turn.
ASAwindow
Finderreleasebutton
Turn clockwise until it stops,
push
in,
andthe findercanbe
lifted
off
thecamerabody.
Accepts
eyecup,
finder.
Eyecup
Attach
by
sliding
into
the
groov-
es
of
the
eyepiece.
Diopter
correction
lens
retainer
ring
Removeby unscrewing
in a
counterclockwise direction.
Afterinsertingcorrection
lens,
replace
retainer
ring.
accessoriessuch as
magnifier,
and angle
Batterychamber
Remove the cover
insert
a1.5V
battery
15
www.orphancameras.com

Waist-Level Finder S
(ror
detaited
instructions,
see
pp
s1-sg)
Auxiliary
mask
for
110,
150,
and
21Omm
lenses
Not necessarywith stan-
dard
lens.
Alignment
dot
for
changing
magnifier
To remove
magnifier,
twist90'
counterclockwise
and lift out.
The magnifier
is interchange-
able
with
5 types
of magnifiers
with
diopter
corrections.
Finder
release
button
Turn clockwise until it stops,
push
in,
andthe finder
can be
lifted
offthecamera
body.
Sportsfindereyepiece
Retractedwhennot
used.
Sports
finder
wire-frame
forstandardlens
Retracted
when
not
used
Finder
hood
opening
flange
Pull
up
to
open
finder.
Magnifier
release
Push
in
to raise
the
magnif
ier.
www.orphancameras.com

Testingto See if the Camera Functions Properly
To release
the shutter
when there isno film inthe camera,
proceed as
follows.
(For
detailedinstructionson particular
points,
referto the page number shown
in parentheses.)
1. fnsert a battery into the camera (p.221
2.Set
the multiple-exposure
leverto "MULTl" (p.57)
(lfyou have just purchased the camera and the vinyltuOeis still
on the take-up
spool,
there is no need to move the multiple-exposure
lever.)
3.Set the shutter speed dial to any shutterspeed other than the O red mark
(p.28)
4.Turnthe film advance knob until it stops.
5.
Alignthe shutter
releaselock ring
withthe white dot and release
the shutter
(p.gt)
When ready to load the camera with lilm, returnthe multiple-exposure lever to
its
normal
position.
lfthisis not
done,
thefilm
willnotadvance.
ll the shutter is released without a battery in the camera, the mirror will lock in
the up position.
To returnthe mirrorto its
normalposition,
depress the battery
check button
(18)
as far as itwill go.
ll the shutter is released with the shutter speed dial set to the red O position,
themirrorwilllock inthe up position.
To lowerthe mirror,
turnthe shutter
speed
dial in either direction (B
or1/500sec.).
At times it may be necessary to rotate the film advance knob two full turns to
cock the shutterwhen an empty take-up spool (without
itsoriginal
vinyl
tube)is
in the camera.
2
3
4
5
17
www.orphancameras.com

o Removing
the BodyCap
While
depressing
the lens
release
but-
ton (12),
turn body cap counterclock-
wise untilthe red dots are aligned and
lift
out.
O Attaching Lenses
While
aligning
the two alignment
dots
(31
& 4),
insertlens into camera body
Then
twist
lens
clockwise
until
it
clicks
andlocks
into
place.
o Removing
Lenses
While
depressing
the lens
release
but-
ton(12),graspthe part of the lens bar-
rel
that
has
the depth-of-fietd
scate
(30)
and alignment
dot (31),
and twist the
lens counterclockwise until it stops.
Then lift
out.
18
www.orphancameras.com
Other manuals for M645 Super
4
Other Mamiya Digital Camera manuals

Mamiya
Mamiya M645 Super User manual
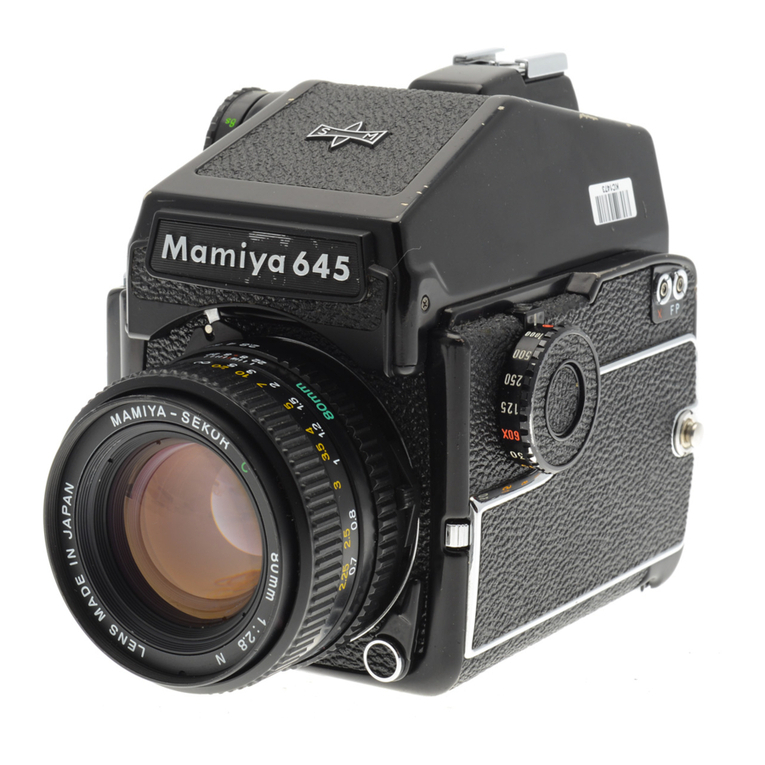
Mamiya
Mamiya M645 1000S User manual
Mamiya
Mamiya 645 AFD II User manual
Mamiya
Mamiya PRO 645 User manual
Mamiya
Mamiya RZ67 User manual
Mamiya
Mamiya RB67 Pro S Operating instructions
Mamiya
Mamiya 7 II User manual
Mamiya
Mamiya C330 User manual
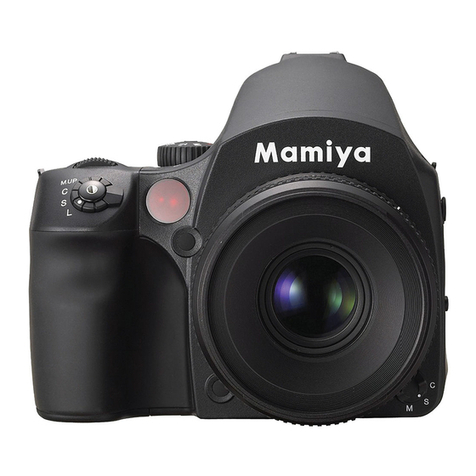
Mamiya
Mamiya 645DF User manual

Mamiya
Mamiya 645DF User manual

Mamiya
Mamiya ZD User manual
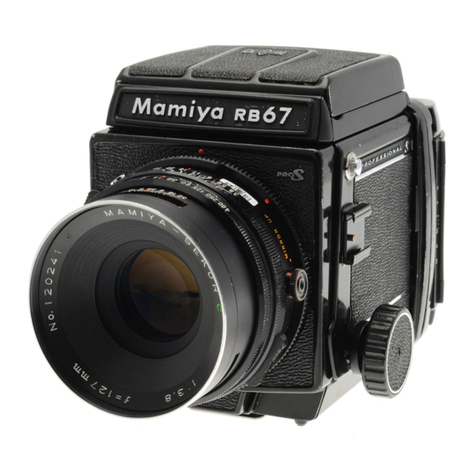
Mamiya
Mamiya RB67 Pro-S User manual

Mamiya
Mamiya RB67 Pro S User manual
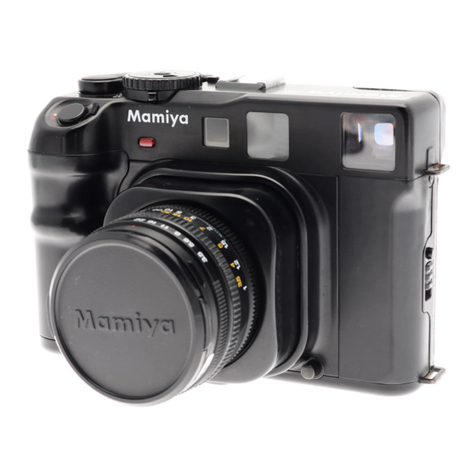
Mamiya
Mamiya 6 User manual
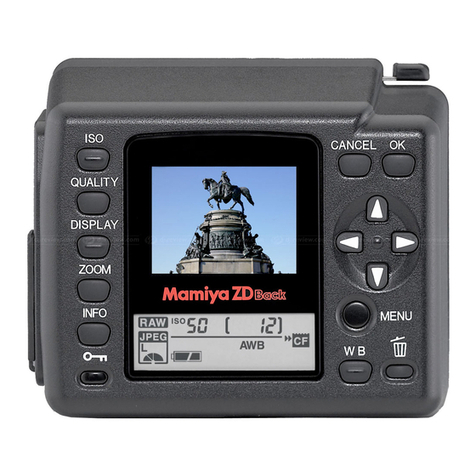
Mamiya
Mamiya ZD Back User manual
Mamiya
Mamiya 645 AFD III User manual
Mamiya
Mamiya ZD User manual

Mamiya
Mamiya M645 Super User manual
Mamiya
Mamiya C3 User manual
Mamiya
Mamiya 6MF User manual


