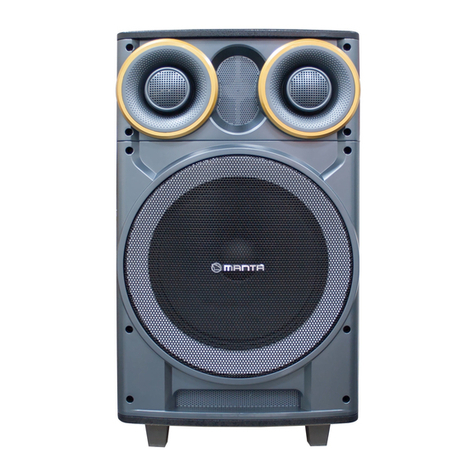
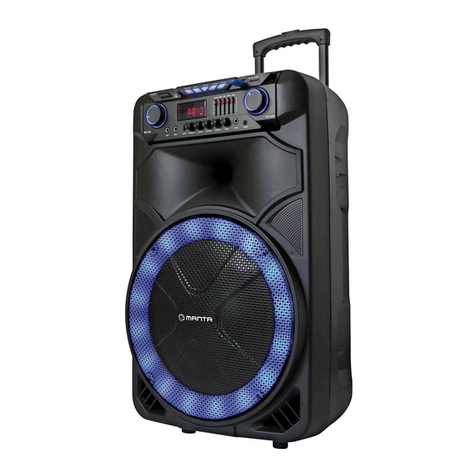
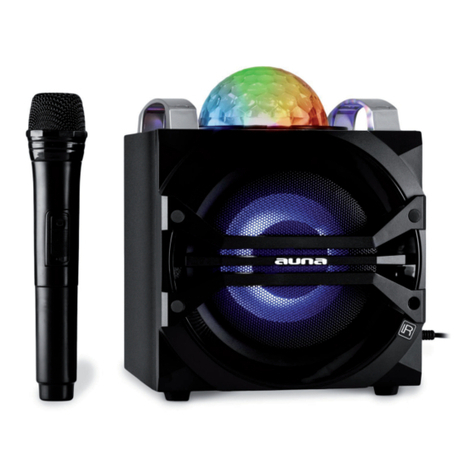
Manta SPK5033 User manual

INSTRUKCJA OBSŁUGI / USER’S MANUAL /
MANUAL DE USUARIO / MANUAL DE USUÁRIO /
NAVODILA ZA UPORABO
Karaoke Power Audio
SPK5033


PL – SPK5033
1
WAŻNIEJSZE ŚRODKI BEZPIECZEŃSTWA
PROFESJONALNY SYSTEM GŁOŚNIKÓW AKTYWNYCH
Przed podłączeniem systemu prosimy o uważne przeczytanie niniejszej instrukcji. Dziękujemy
za zakup systemu głośników aktywnych Manta. Przed przystąpieniem do użytkowania
montażu prosimy o uważne przeczytanie instrukcji.
INSTRUKCJA BEZPIECZEŃSTWA
1. Przeczytaj niniejszą Instrukcję Obsługi przed przystąpieniem do podłączenia bądź
uźytkowania urządzenia.
2. Dbaj o stan instrukcji. Przestrzegaj wszystkich ostrzeżeń. Postępuj zgodnie ze wszystkimi
wskazaniami.
3. Zachowaj instrukcję na przyszłość.
4. Urządzenie nie powinno być narażone na kapanie i chlapanie, należy unikać stawiania
na nim naczyń zawierających płyny, na przykład wazonów. Używaj jedynie w suchych
miejscach.
5. Źródła otwartego ognia, takie jak świece, nie mogą być stawiane na urządzeniu.
6. Należy dopilnować, aby dzieci nie bawiły się urządzeniem.
7. Nie można utrudniać wentylacji przez zasłanianie otworów wentylacyjnych.
8. Upewnij się, że urządzenie jest podłączone do gniazdka o parametrach: AC 220-240V 50Hz.
Użycie wyższego napięcia może doprowadzić do niewłaściwej pracy urządzenia lu pożaru.
Wyłącz urządzenie przed podłączeniem go od sieci, w celu całkowitego wyłączenia go.
9. Nie podłączaj/odłączaj kabla zasilającego do/od gniazda mokrymi dłońmi.
10. Jeśli wtyczka nie pasuje do twojego gniazda, nie wciskaj jej na siłę.
11. Używaj części zapasowych wskazanych przez preducenta.
12. Zamontuj urzctdzenie zgodnie z instrukcjami producenta.
13. Umiesć urzctdzenie w przewiewnym miejscu. Rozstaw system na ptaskiej, twardej i stabilnej
powierzchni. Nie narazaj go na dziatanie temperatur powyzej 40°C. Zadbaj o zachowanie
przynajmniej 30 cm wolnej przestrzeni ad tylnej i górnej częsci urządzenia, oraz 5 cm
z kazdej strony.
14. Naciskaj przyciski urzctdzenia delikatnie. Naciskanie ich zbyt mocno maze uszkodzić
urządzenie.
15. Utylizuj zuzyte baterie w sposób bezpieczny dla srodowiska.
16. Przed przesuwaniem lub czyszczeniem, zawsze upewnij sip, ze urzctdzenie jest odtctczone
ad sieci elektrycznej. Czyść wyłącznie na sucho.
17. Odłącz urządzenie od sieci w czasie burzy alba, gdy nie bpdzie uzywane przez dfuzszy czas.
18. Niniejsze urządzenie nie posiada elementów podlegających konserwacji przez

PL – SPK5033
2
uzytkownika. Nie podejmuj sip naprawy urządzenia. Jedynie wykwalikowany personel
może dokonywać napraw. Zabierz produkt do wybranego punktu serwisowego urzctdzeri
elektrycznych w celu dokonania przeglqdu i naprawy.
19. NIGDY nie pozwćI nikomu, w szczegćInosci - dzieciom, wktadać czegokolwiek do
dziur, gniazdek i wszelkich innych otworów w obudowie urządzenia, poniewaz grozi to
smiertelnym porazeniem elektrycznym.
20. Nie zawieszaj produktu na scianie lub sucie.
21. Nie stawiaj urzqdzenia w poblizu telewizorćw, gtosnikćw i innych urzqdzeri generujących
silne pole magnetyczne
22. Nie pozostawiaj urzctdzenie bez nadzoru, kiedy jest uzywane.
UWAGA: ABY CATKOWICIE ODŁĄCZYĆ SYSTEM, JESLI NIE BĘDZIE UŻYWANY
PRZEZ DŁUZSZY CZAS, WYJMIJ WTYCZKĘ Z KONTAKTU.
DEFINICJE SYMBOLI
NIEBEZPIECZENSTWO - Oznacza wystqpienie ryzykownej sytuacji, która moze
doprowadzic do smierci lub powaznych obrazen. Ten symbol pojawia sią tylko
w skrajnych przypadkach.
OSTRZEŻENIE - Oznacza potencjalnie ryzykownq sytuacją, ktćra moze doprowadzić
do smierci lub powaznych obrazen.
UWAGA - Oznacza potencjalnie ryzykowną sytuacją, ktćra moze doprowadzić do
lekkich/umiarkowanych obrazen lub uszkodzić produkt/mienie. Ostrzega równiez
przed niebezpiecznymi dziataniami.
Blyskawica zakończona strzalką w trójkącie rćwnobocznym, ma za zadanie ostrzec
uzytkownika o izolowanych elementach we wnęlrzu urządzenia, pod napięciem
wystarczająco wysokim, by stanowic ryzyko porazenia elektrycznego dla ludzi.

PL – SPK5033
3
DZIĘKUJEMY ZA ZAKUP NASZEGO GŁOŚNIKA. PROSIMY O DOKŁADNIE
ZAPOZNANIE SIĘ Z INSTRUKCJĄ PRZED UŻYCIEM.
WAŻNIEJSZE ŚRODKI BEZPIECZEŃSTWA
Przed użyciem urządzenia należy przeczytać uważnie wszystkie instrukcje dotyczące
bezpieczeństwa i użytkowania. Należy zastosować się do zawartych w nich zaleceń i zachować
instrukcję w bezpiecznym miejscu, na wypadek konieczności odniesienia się do jej treści
w przyszłości.
1. Należy upewnić się, że kabel urządzenia znajduje się z dala od miejsc, w których mógłby
zostać nadepnięty. Aby uniknąć uszkodzenia go, na przewodzie zasilającym nie należy
stawiać żadnych ciężkich przedmiotów. Przed wyciągnięciem wtyczki z gniazdka należy
pewnie ją chwycić; nie należy pociągać za kabel w celu wyciągnięcia wtyczki. Należy unikać
używania przedłużaczy.
2. Wentylacja: Urządzenie powinno stać w dobrze wentylowanym miejscu, tak aby z każdej
strony miało przynajmniej 10 cm wolnej przestrzeni. Nie wolno przykrywać urządzenia
żadnymi tkaninami czy kocami. Nie wolno stawiać go na łóżku, kanapie czy dywanie, gdyż
takie powierzchnie utrudniają poprawną wentylację urządzenia.
3. Zdejmowanie obudowy: NIE WOLNO samodzielnie zdejmować obudowy urządzenia.
Wewnątrz nie ma żadnych istotnych z punktu widzenia użytkownika części. Naprawę
urządzenia należy powierzyć upoważnionemu serwisowi.
4. Jeśli z urządzenia zacznie wydobywać się dym lub dochodzić z jego strony nieprzyjemny
zapach, należy natychmiast odłączyć je od zasilania. W takim przypadku, urządzenie należy
dostarczyć do sklepu, w którym zostało zakupione, skąd zostanie przekazane do serwisu.
CECHY
⹅Funkcja Bluetooth
⹅Wbudowane podświetlenie LED. Aby uzyskać pełną moc oświetlenia, poziom głośności
powinien być ustawiony na minimum 70%
⹅Funkcja TWS
⹅Odtwarzanie plików Mp3 z karty SD / dysku USB / zewnętrznego urządzenia audio.
⹅Radio FM
⹅Wejście na mikrofon
⹅Wyjście AUX
⹅Pilot
⹅Wbudowany akumulator

PL – SPK5033
4
PODŁĄCZANIE
1. Ten zestaw zasilany jest prądem o AC 110V-240V, 50/ć0Hz
2. Zasilanie AC: baterię ładuje się podłączając ją do źródła zasilania AC. Podczas ładowania,
lampka na akumulatorze świeci na czerwono; zmieni kolor na zielony, gdy ładowanie
zostanie ukończone.
3. Gdy akumulator zostanie naładowany, należy odłączyć go od źródła zasilania AC
4. Funkcje przycisków można dopasować zgodnie z preferencjami użytkownika.
POŁĄCZENIE TWS
KROK 1 Naciśnij i przytrzymaj przycisk Mode na obu głośnikach, dopóki nie wejdą
w tryb Bluetooth. Na ekranie wyświetlony zostanie napis“BLUE”.
KROK 2 Gdy oba głośniki są w trybie Bluetooth, naciśnij i przytrzymaj przez 3 sekundy
przycisk TWS. Usłyszysz sygnał dźwiękowy, a na ekranie wyświetlony zostanie napis
„bt/btst”. Następnym razem gdy jednocześnie przełączysz oba głośniki w tryb
Bluetooth, połączą się one automatycznie.
KROK 3 Przełącz ustawienia Bluetooth na „ON” w swoim urządzeniu, a następnie
wybierz urządzenie i sparuj. Ciesz się dźwiękiem TWS (True Wireless Stereo) z telefonu
poprzez Bluetooth!
INSTRUKCJA BLUETOOTH
Należy zmienić tryb na „BLUE”; lampka wskaźnika bluetooth zacznie migać, a z głośnika
dobiegnie dźwięk. Należy upewnić się, że została włączona funkcja Bluetooth w urządzeniu.
Należy wyszukać dostępne połączenia Bluetooth, znaleźć model urządzenia i sparować je.
AKUMULATOR I ŁADOWANIE
1. Akumulator potrzebuje maksymalnie 5 godzin do osiągnięcia stanu pełnego naładowania.
Ładowanie rozpoczyna się automatycznie po podłączeniu kabla zasilającego.
2. Niski poziom naładowania akumulatora może powodować zakłócenia dźwięku lub
całkowicie uniemożliwić odtwarzane – należy wówczas go naładować.
3. Aby wydłużyć żywotność akumulatora, należy ładować go natychmiast po rozładowaniu.
Jeśli urządzenie nie będzie używane przez dłuższy czas, akumulator będzie się stopniowo
rozładowywał. Zaleca się w pełni ładować akumulator przynajmniej raz na 30 dni.
4. Po zakończeniu użytkowania należy wyłączyć urządzenie, by przedłużyć czas pracy
akumulatora.

PL – SPK5033
5
PILOT
Tryb oczekiwania;
USB/SD/LINIOWE/BLUETOOTH (Wejście audio)
Poprzedni utwór/stacja FM
Odtwarzanie/wstrzymywanie/wyszukiwanie stacji FM
Następny utwór/stacja FM;
Powtarzanie;
Zatrzymywanie
Zwiększanie poziomu głośności
Zmniejszanie poziomu głośności
Wyciszanie
Korektor
Przyciski numeryczne

PL – SPK5033
6
FUNKCJE PANELU
1. OŚWIELTENIE LED WŁĄCZNIK/WYŁĄCZNIK OŚWIETLENIA LED
2. WEJŚCIE USB / SD
3. ZASILANIE WŁĄCZNIK/WYŁĄCZNIK ZASILANIA
4. GŁ. MIKROFONU DOPASOWANIE POZIOMU GŁOŚNOŚCI MIKROFONU
TONY WYSOKIE DOPASOWANIE TONÓW WYSOKICH
TONY NISKIE DOPASOWANIE TONÓW NISKICH
GŁOSNOŚĆ DOPASOWANIE OGÓLNEGO POZIOMU GŁOŚNOŚCI
5. NASTĘPNY
6. SKANUJ : ODTWARZANIE/WSTRZYMYWANIE; TWS ON/OFF
AUTOMATYCZNE WYSZUKIWANIE STACJI FM
7. POPRZEDNI
8. POWTÓRZ
9. NAGRYWANIE: NALEŻY PODŁĄCZYĆ PAMIĘĆ USB/SD I NACISNĄĆ TEN PRZYCISK,
ŻEBY ROZPOCZĄĆ NAGRYWANIE; NALEŻY NACISNĄĆ GO PONOWNIE, ABY ZATRZYMAĆ
I ODTWORZYĆ.
10. TRYB WYBÓR TRYBU
11.PRI MIKROFONU: PRIORYTET MIKROFONU
12.WEJŚCIE AUX
13.WEJŚCIE DC 9V: GNIAZDO ŁADOWANIA DC 9V
14.WSKAŹNIK ŁADOWANIA AKUMULATORA
15.WEJŚCIE MIKROFONU: WEJŚCIE DLA MIKROFONU PRZEWODOWEGO
POWER
115 14
678910
15
14
13 12 2 3
3

EN – SPK5033
7
READ ALL INSTRUCTIONS BEFORE USE
Always follow basic safety precautions when using this Bluetooth speaker system with
Microphone, especially when children are present.
SAFETY INSTRUCTIONS
1. Read this Instruction Manual before you attempt to connect or operate the appliance.
2. Keep these instructions in good condition. Heed all warnings. Follow all instructions.
3. Save this Instruction Manual for future reference.
4. The apparatus shall not be exposed to dripping or splashing and no objects lled with
liquids, such as vases, shall be placed on the product. Dry location use only.
5. No naked ame source, such as candles, should be placed on the product.
6. Children should be supervised to ensure that they do not play with the appliance.
7. Ventilation should not be impeded by covering the ventilation openings.
8. Ensure that the unit is plugged into an AC 220-240V 50Hz power outlet. Using higher
voltage may cause the unit to malfunction or even re catching. Turn o the unit before
unplugging it from power source to completely switch it o.
9. Do not plug/ unplug the power plug into/from an electrical outlet with wet hands.
10. lf the power plug does not t into your outlet, do not force the plug into an electrical socket
if it does not t.
11. Use replacement parts, which are specied by the manufacturer.
12. lnstall the unit in accordance with the manufacturer’s instructions.
13. Place the unit where there is good ventilation. Place the system on a at, hard and stable
surface. Do not expose to temperatures above 40°C. Allow at least 30 cm clearance from the
rear and the top of the unit and 5 cm from each side.
14. Press the buttons of the unit gently. Pressing them too hard can damage the unit.
15. Dispose of used batteries in an environmental-responsible manner.
16. Always ensure that the product is unplugged from the electrical outlet before moving or
cleaning. Clean it with dry cloth only.
17. Unplug the product during lightning, storms or when it will not be used for long periods
of time.
18. This product has no user-serviceable parts. Do not attempt to repair this product yourself.
Only qualied service personnel should perform servicing. Take the product to the
electronics repair shop of your choice for inspection and repair.
19. NEVER let anyone, especially children, push anything into holes, slots or any other openings
in the unit’s casing as this could result in a fatal electric shock.
20. Don’t mount this product on a wall or ceiling.
21. Do not place the unit nearTVs, speakers and other objects that generate strong magnetic
EN – SPK5033
8
elds.
22. Do not leave the unit unattended when it is in use.
NOTE: TO DISCONNECT THE SYSTEM COMPLETELY IF IT NOT TO BE USED FOR
A LONG TIME, REMOVE THE AC POWER PLUG FROM THE WALL OUTLET.
Attention: This set applies to AC 220V 50Hz power supply. Please ensure that the power
supply of your home or venue you wish to use the unit has the same power supply as that
stipulated above.
SYMBOL DEFINITIONS
DANGER- Indicates an imminently hazardous situation, which, if not avoided, will
result in death or serious injury. This symbol appears only in the most extreme
situations.
WARNING - Indicates a potentially hazardous situation which could result in death
or serious injury.
CAUTION- Indicates a potentially hazardous situation, which, if not avoided, may
result in minor/moderate injury or producUproperty/damage. It also warns against
unsafe practices
The lightning ash with arrowhead symbol, within an A_ equilateral triangle is
intended to alert the user to the presence of insulated ‚dangerous voltage’ within
the product’s enclosure that may be of sucient magnitude to constitute a risk of
electric shock.
WARNING: TO REDUCE THE RISK OF ELECTRIC - SHOCK DO NOT REMOVE COVER
(ORBACK),NOUSERSERVICEABLEPARTSINSIDEREFERSERVICINGTOQUALIFIED
SERVICE PERSONNEL

EN – SPK5033
9
THANK YOU FOR PURCHASING OUR SPEAKER PLEASE READ THE MANUAL
CAREFULLY BEFORE OPERATING.
IMPORTANT SAFETY MEASURES
Before using this machine, please read all the safety and operating instruąions. Please adhere
to all the instruąions herein, and save this information in a safe place for future use.
1. Please ensure the power cord for this unit is out of the path of foot trac. Do not place
heavy objeąs on the power cord as it will cause damage to the cord. Always rmly grasp
the plug and pull the plug from the power supply, never yank the cable in order to pull out
the plug. Avoid the use of an extension cable.
2. Ventilation: This unit should be placed in a well ventilated space where it has no less than
10cm ventilation space on either side of it. Do not cover the unit with a cloth or blanket.
Do not put it on a bed, sofa, or carpet as this will stie the ventilation of the unit.
3. Casing Dismantling: DO NOT dismantle the casing. There are no usable parts inside the
unit. Make use of a service center in order to have your unit repaired.
4. Should the unit emit any smell or smoke, immediately turn o the power supply. Take the
unit to the service center from which you bought it for repairs.
FEATURES
⹅Bluetooth Funąion
⹅TWS Funąion
⹅Plays Mp3 les stored in SD card/USB drive/external audio device.
⹅FM radio
⹅Microphone input
⹅Aux input
⹅Remote control
⹅Built-in rechargeable battery

EN – SPK5033
10
CONNEĄING
1. This set applies to AC 110V-240V, 50/ć0Hz
2. AC power: battery can be charged when conneąed to AC power. Red light on battery is
charging, it will change to green once battery complete charge.
3. Internal battery will be charged even device switch o when plugged in to AC power
4. Adjust funąion keys to your personal audio preference.
TWS CONNEĄION
STEP 1 Push the Mode Button on both speakers until speakers are in Bluetooth Mode.
Screen will display the word “BLUE”.
STEP 2 When both speakers are in Bluetooth mode, push and hold the TWS button
for 3 seconds. You will hear a beep & screen display“bt/btst”. Next time you put both
speakers in Bluetooth mode at the same time, speakers will conneą automatically.
STEP 3 On your device, turn your Bluetooth settings“ON”, you will then seleą the unit
and pair. Enjoy TWS (True Wireless Stereo) sound from your phone via Bluetooth!
BLUETOOTH INSTRUCTION
Change the mode into„BLUE”, the bluetooth sign light twinkles, and speaker will give an alarm.
Ensure you enable the Bluetooth function on your Bluetooth device. Search for Bluetooth
connection until you nd device model and pair.
BATTERY & CHARGING
1. The units takes approximately 5 hours to fully charge. It will automatically begin charging
once the power cord is connected.
2. If the battery power is low may caused sound distortion or stop play, pls charging the
battery on time.
3. To maximize the battery’s lifespan, please charging the battery immediately. When the
unit is not used for prolonged periods of time, the battery will gradually lose its power. It
is recommended to fully charge the battery at least every 30days.
4. To saving battery, please power o once stop using.

EN – SPK5033
11
REMOTE CONTROL
Standby
USB/SD/LINE/BLUETOOTH (Audio input)
Prev/FM CH-
Play/pause/FM tuner
Next/FM CH+
Repeat
Stop
Volume up
Volume down
Mute
Equalizer
Number

EN – SPK5033
12
PANEL FUNCTION
1. LED LIGHT: LED LIGHT ON/OFF
2. USB INPUT / SD
3. POWER: POWER ON/OFF
4. MIC VOL: MICROPHONE VOLUME ADJUST
TREBLE: TREBLE ADJUST
BASS: BASS ADJUST
VOLUME: MASTER VOLUME CONTROL
5. NEXT
6. SCAN PLAY/PAUSE; FM STATION AUTO SEARCHING, TWS ON/OFF
7. PREVIOUS
8. REPEAT
9. RECORDING: INSERT USB/SD CARD PRESSTHIS BUTTON FOR RECORDING, PRESS AGAIN
TO STOP AND PLAY.
10. MODE MODE SELECT
11.MIC PRI: MICROPHONE PRIORITY
12.AUX INPUT
13.DC9V IN: DC 9V CHARGING INPUT
14.BATTERY CHARGE INDICATING LIGHT
15.MIC IN: WIRED MICROPHONE INPUT
POWER
115 14
678910
15
14
13 12 2 3
3

ES – SPK5033
13
GRACIAS POR COMPRAR NUESTRO ALTAVOZ. POR FAVOR, LEA ATENTAMENTE
ESTE MANUAL, ANTES DE USAR EL DISPOSITIVO.
IMPORTANTES MEDIDAS DE SEGURIDAD
Antes de usar el dispositivo, leer atentamente las recomendaciones de seguridad y uso.
Proceder según las instrucciones y recomendaciones recogidas en el manual y guardarlo para
uso futuro.
1. Asegurarse que el cable de alimentación está colocado de tal forma, que sea imposible
pisarlo. No colocar objetos pesados sobre el cable de alimentación, para evitar daños. Para
desenchufar, coger rmemente el conector y sacar del enchufe; no tirar del cable. Evitar el
uso de prolongadores.
2. Ventilación: Colocar el dispositivo en un lugar bien ventilado, a una distancia de al
menos 10 cm de otros objetos. No cubrir con telas o mantas. No dejar sobre la cama, sofá
o alfombra, para no obstaculizar los oricios de ventilación.
3. Desmontaje de carcasa: QUEDA PROHIBIDO desmontar la carcasa. Dentro de la carcasa,
no hay elementos que puedan ser utilizados. Si fuese necesario, reparar solamente en un
taller autorizado.
4. Si sale humo u olor extraño del dispositivo, desconectar inmediatamente la corriente.
En tal caso, entregar el dispositivo al lugar de venta, para su posterior envío a un taller
autorizado.
CARACTERÍSTICAS
⹅Función Bluetooth
⹅Función TWS
⹅Reproducción de archivos Mp3 desde tarjeta SD / memoria USB / dispositivo exterior
de audio.
⹅Radio FM
⹅Entrada de micrófono
⹅Salida AUX
⹅Mando a distancia
⹅Batería incorporada

ES – SPK5033
14
CONEXIÓN
1. Este kit está alimentado con corriente AC 110V-240V, 50/ć0Hz
2. Alimentación AC: La batería se carga, después de conectarla a una fuente de AC. Durante
la carga, el indicador de la batería brillará con luz roja y cambiará a color verde, después
nalizar la carga.
3. Una vez cargada completamente la batería, desconectarla de la fuente de suministro AC
4. Las funciones de botones se pueden congurar según preferencias del usuario.
CONEXIÓN TWS
PASO 1 Mantenga presionado el botón Mode en ambos altavoces hasta que ingresen
al modo Bluetooth. En la pantallam se mostrará„BLUE”.
PASO 2 Cuando ambos altavoces estén en modo Bluetooth, presione y mantenga
presionado el botón TWS durante 3 segundos. Escuchará un pitido y la pantalla
mostrará„bt/btst”. La próxima vez que cambie ambos altavoces al modo Bluetooth al
mismo tiempo, se conectarán automáticamente.
PASO 3 Cambie la conguración de Bluetooth a „ON” en su dispositivo, luego
seleccione el dispositivo y emparéjelo. ¡Disfrute del sonidoTWS (True Wireless Stereo)
desde su teléfono a través de Bluetooth!
MANUAL DE BLUETOOTH
Activar el modo „BLUE”, el indicador de Bluetooth empieza a parpadear, el altavoz emite
un sonido. Asegurarse que la función Bluetooth está activada en dispositivo audio. Buscar
conexiones Bluetooth disponibles, encontrar el modelo del altavoz en la lista y parear.
BATERÍA Y RECARGA
1. La batería debe cargarse durante unas 5 horas, hasta alcanzar el nivel completo de carga.
La carga se inicia automáticamente, después de conectar el cable de alimentación.
2. Un bajo nivel de carga de la batería puede alterar el nivel de sonido, crear interferencias e
imposibilitar la reproducción, en tal caso, el usuario debe recargarla.
3. Para prolongar la vida útil de la batería, cargar la batería, inmediatamente después de que
se descargue. Si el dispositivo no se utiliza durante un periodo de tiempo prolongado, la
batería se descargará progresivamente. La batería debe cargarse regularmente, al menos
una vez cada 30 días.
4. Desconectar el dispositivo después de usar, para prolongar la vida útil de la batería.

ES – SPK5033
15
MANDO A DISTANCIA
Modo de espera
USB/SD/LINE/BLUETOOTH (Entrada audio)
Anterior / Canal FM -
Reproducir / Pausa / Sintonizador FM
Siguiente / Canal FM +
Repetir
Stop
Aumentar volumen de sonido
Reducir volumen de sonido
Silenciar
Ecualizador
Números

ES – SPK5033
16
FUNCIONES DEL PANEL
1. ALUMBRADO LED INTERRUPTOR DE ALUMBRADO LED
2. PUERTO USB / SD
3. ALIMENTACIÓN INTERRUPTOR DE ALIMENTACIÓN
4. VOL. MICRÓFONO AJUSTE DE VOLUMEN DEL MICRÓFONO
TONOS ALTOS AJUSTE DE TONOS ALTOS
TONOS BAJOS AJUSTE DE TONOS BAJOS
VOLUMEN AJUSTE DE VOLUMEN GENERAL
5. SIGUIENTE
6. ESCANEAR : REPRODUCIR/PAUSAR, TWS ON/OFF
BÚSQUEDA AUTOMÁTICA DE EMISORAS DE RADIO FM
7. ANTERIOR
8. REPETIR
9. GRABACIÓN; CONECTAR LA MEMORIA EXTERNA USB/SD Y PULSAR ESTE BOTÓN, PARA
INICIAR GRABACIÓN; VOLVER A PULSAR, PARA DETENER Y REPRODUCIR GRABACIÓN.
10. MODO ELEGIR MODO
11.PRI MICRÓFONO: PRIORIDAD DEL MICRÓFONO
12.ENTRADA AUX
13.ENTRADA DC 9V: ENCHUFE DE RECARGA DC 9V
14.INDICADOR DE CARGA DE BATERÍA
15.ENTRADA DE MICRÓFONO: ENTRADA DE MICRÓFONO INALÁMBRICO
POWER
115 14
678910
15
14
13 12 2 3
3

PT – SPK5033
17
OBRIGADOS POR TER COMPRADO O NOSSO ALTIFALANTE. ANTES DE UTILIZAR,
LEIA COM ATENÇÃO ESTE MANUAL.
PRECAUÇÕES MAIS IMPORTANTES
Antes de utilizar o aparelho por primeira vez, leia com atenção todas as instruções relativas
à segurança e utilização. Respeite estas instruções e guarde o manual num local seguro para
futuras consultas.
1. Certique-se de que o cabo do aparelho se encontra afastado de locais onde esteja
exposto a pisoteio. Para evitar danos, não coloque nenhum objeto pesado no cabo de
alimentação. Antes de retirar a cha da tomada, segure-a rmemente; não puxe o cabo
para retirar a cha. Evite a utilização de extensões.
2. Ventilação: O aparelho deve colocar-se num local bem ventilado de modo que tenha
pelo menos 10 cm do espaço livre por cada lado. Não cobra o aparelho com tecidos ou
cobertores. Não o coloque na cama, sofá o tapete, pois tais superfícies obstaculizam uma
ventilação correta do aparelho.
3. Remoção da carcaça: NÃO É PERMITIDO remover a carcaça do aparelho. No interior, não
há partes importantes desde o ponto de vista do utilizador. A reparação do aparelho deve
ser encarregada a um serviço autorizado.
4. Se se emitir um fumo ou um cheiro desagradável do aparelho, desconecte-o da
alimentação imediatamente. Neste caso, o aparelho deve ser entregue na loja onde foi
comprado e, posteriormente, será enviado para o serviço.
CARACTERÍSTICAS
⹅Função Bluetooth
⹅Função TWS
⹅Reprodução de cheiros Mp3 do cartão SD / USB / dispositivo áudio externo.
⹅Rádio FM
⹅Entrada para microfone
⹅Saída AUX
⹅Controlo remoto
⹅Acumulador incorporado

PT – SPK5033
18
CONEXÃO
1. O conjunto é alimentado com corrente AC 110V-240V, 50/ć0Hz
2. Alimentação AC: o acumulador é carregado conectando-o com a fonte de alimentação
AC. Durante o carregamento, a luz no acumulador acende em vermelho; a cor alterará
para verde, uma vez terminado o carregamento.
3. Quando o acumulador for carregado, desconecte-o da fonte de alimentação AC.
4. As funções dos botões podem ser ajustadas segundo as preferências do utilizador.
CONEXÃO TWS
PASSO 1 Pressione e segure o botão Mode nos dois alto- falantes até que entrem no
modo Bluetooth.„BLUE”será exibido no ecrã.
PASSO 2 Quando os dois alto-falantes estiverem no modo Bluetooth, mantenha
pressionado o botão TWS por 3 segundos. Ouvirá um som e o ecrã exibirá „bt/btst”.
Na próxima vez que alternar os dois alto-falantes para o modo Bluetooth, serão
conectados automaticamente.
PASSO 3 Altere as congurações de Bluetooth para„ON”no seu dispositivo, selecione
o dispositivo e emparelhe-o. Desfrute do som TWS (True Wireless Stereo) do seu
telefone via Bluetooth!
INSTRUÇÕES DO BLUETOOTH
Altere o modo para“BLUE”; a luz do indicador do bluetooth começará a piscar e do altifalante
emitir-se-á o som. Certique-se de que a função Bluetooth foi habilitada no aparelho.
Encontre as conexões do Bluetooth disponíveis, encontre o modelo de aparelho e efetue um
emparelhamento.
ACUMULADOR E CARREGAMENTO
1. O acumulador necessita cerca de 5w horas para se carregar por completo. O carregamento
começa automaticamente após a conexão do cabo de alimentação.
2. Um nível baixo do acumulador pode produzir interferências de áudio ou impedir
a reprodução – será necessário carregá-lo.
3. Para estender a vida útil do acumulador, carregue-o diretamente após o descarregamento.
Se o aparelho não for utilizado durante mais tempo, o acumulador descarregar-se-á
progressivamente. É recomendável carregar o acumulador por completo uma vez por 30
dias.
4. Após a utilização do acumulador, desligue o aparelho para estender o tempo de
funcionamento do acumulador.
Table of contents
Languages:
Other Manta Karaoke System manuals
Popular Karaoke System manuals by other brands

The Singing Machine
The Singing Machine SMG-903 instruction manual

Acesonic
Acesonic KOD-1000 user manual

Pure Acoustics
Pure Acoustics MCP-30 manual

Giochi Preziosi
Giochi Preziosi CANTA TU instruction manual

iDance
iDance MEGABOX500 manual

The Singing Machine
The Singing Machine STVG-999 instruction manual