Marantz PM7000N User manual

Accessories 6
Inserting the batteries 7
Operating range of the remote control unit 7
Features 8
High quality sound 8
High performance 9
Part names and functions 11
Front panel 11
Rear panel 14
Remote control unit 17
Connections
Connecting speakers 24
Connecting the speaker cables 24
Connecting the subwoofer 25
Connecting speakers 26
Connecting a playback device 27
Connecting a recording device 28
Connecting to a device with digital audio output connectors 29
Connecting a USB memory device to the USB port 31
Connecting to a home network (LAN) 32
Wired LAN 32
Wireless LAN 33
Connecting devices with remote control connectors 34
Performing operations by RC on this unit without visual contact 34
Remotely connecting Marantz audio devices 34
Connecting the power cord 35
Contents Connections Playback Settings Tips Appendix
2
Front panel Rear panel
Remote control
unit
Index

Playback
Basic operation 37
Turning the power on 37
Switching the power to standby 37
Selecting the input source 38
Adjusting the volume 38
Turning off the sound temporarily (Muting) 38
Listening to Internet Radio 39
Listening to Internet Radio 40
Playing back files stored on PC or NAS 41
Playing back files stored on PC or NAS 42
Playing a USB memory device 44
Playing files stored on USB memory devices 45
Listening to music on a Bluetooth device 47
Listening to music on a Bluetooth device 48
Pairing with other Bluetooth devices 49
Reconnecting to this unit from a Bluetooth device 50
Getting the HEOS App 51
HEOS Account 52
Playing from streaming music services 53
Listening to the same music in multiple rooms 56
Playing digital input 60
AirPlay function 62
Playing songs from your iPhone, iPod touch or iPad 63
Playing iTunes music with this unit 63
Play a song from your iPhone, iPod touch or iPad on multiple
synced devices (AirPlay 2) 64
Spotify Connect function 65
Playing Spotify music with this unit 65
Convenience functions 66
Adding to HEOS Favorites 66
Playing back HEOS Favorites 67
Deleting a HEOS Favorites 67
Adjusting the tone 68
Playback in source direct mode 68
Switching the display’s brightness 69
Using the sleep timer 69
Recording 70
Contents Connections Playback Settings Tips Appendix
3
Front panel Rear panel
Remote control
unit
Index

Settings
Menu map 71
Menu operation 76
Inputting characters 77
Using the number buttons 77
Using the cursor buttons 78
Audio 79
Volume Limit 79
Subwoofer - Low Pass Filter 79
General 80
TV Input 80
IR Control 81
Language 81
Auto-Standby 81
Usage Data 82
Firmware 82
Information 85
Reset 85
Network 86
Network Information 86
Network & USB-A 86
Wi-Fi 86
Bluetooth 86
Network Control 87
Friendly Name 87
Connection 88
Settings 91
Diagnostics 92
HEOS Account 93
You have not signed in 93
You have already signed in 93
Contents Connections Playback Settings Tips Appendix
4
Front panel Rear panel
Remote control
unit
Index

Tips
Tips 95
Troubleshooting 97
Power does not turn on / Power is turned off 98
Operations cannot be performed through the remote control unit 99
Display on this unit shows nothing 99
No sound comes out 100
Sound is interrupted or noise occurs 101
Desired sound does not come out 103
AirPlay cannot be played back 104
USB memory devices cannot be played back 105
File names on the USB memory device are not displayed properly 106
Bluetooth cannot be played back 106
The Internet radio cannot be played back 107
Music files on PC or NAS cannot be played back (Music server) 108
Various online services cannot be played 109
Cannot connect to a wireless LAN network 109
Audio from digital devices cannot be played back (Coaxial/
Optical) 111
The input source switches to “Optical 1”, “Optical 2” or “Coaxial” 111
Update/upgrade error messages 112
Resetting network settings 113
Appendix
Playing back a USB memory devices 114
D/A converter 115
Playing back a Bluetooth device 116
Playing back files stored on a PC and NAS 117
Playing back Internet Radio 118
Last function memory 118
Explanation of terms 119
Trademark information 123
Specifications 124
Index 128
License 130
Contents Connections Playback Settings Tips Appendix
5
Front panel Rear panel
Remote control
unit
Index

Thank you for purchasing this Marantz product.
To ensure proper operation, please read this owner’s manual carefully before using the product.
After reading this manual, be sure to keep it for future reference.
Accessories
Check that the following parts are supplied with the product.
.
Quick Start Guide Safety Instructions Notes on radio Warranty (for USA/for CANADA)
Power cord Remote control unit
(RC004PM)
R03/AAA batteries External antennas for
Bluetooth/wireless
connectivity
Contents Connections Playback Settings Tips Appendix
6
Front panel Rear panel
Remote control
unit
Index

Inserting the batteries
1Remove the rear lid in the direction of the arrow and
remove it.
.
2Insert two batteries correctly into the battery
compartment as indicated.
.
Batteries
3Put the rear lid back on.
NOTE
0To prevent damage or leakage of battery fluid:
0Do not use a new battery together with an old one.
0Do not use two different types of batteries.
0Remove the batteries from the remote control unit if it will not be in use for long
periods.
0If the battery fluid should leak, carefully wipe the fluid off the inside of the battery
compartment and insert new batteries.
Operating range of the remote control
unit
Point the remote control unit at the remote sensor when operating it.
.
Approx. 23 ft/7 m
30° 30°
Contents Connections Playback Settings Tips Appendix
7
Front panel Rear panel
Remote control
unit
Index

Features
High quality sound
0All-discrete current feedback amplifier
Marantz’s proprietary current feedback circuit using discrete
components is adopted in the power amplifier. The high-speed amplifier
uses technology developed for the higher-grade amplifiers.
0HDAM®SA3
This unit contains the HDAM®SA3 developed for the higher-grade
amplifiers. HDAM®SA3 is used in the current feedback power amplifier
circuits of this unit.
0Improved instantaneous current supply
It’s well known that amplifiers with the same specifications can have
different sound quality. The secret to Marantz’s high quality is thought to
be the performance of the speaker driver. The power amplifier of this
unit is capable of delivering an instantaneous current of over 32 A,
providing powerful speaker performance.
0Short power line layout
A short power line layout that integrates the power circuit and the output
level of the power amplifier is used to improve instantaneous current
supply.
This layout uses the minimum necessary lines with a large current,
arranged symmetrically on the left and right.
0Newly developed phono equalizer circuit
A new phono equalizer circuit developed for the PM7000N is used in
the phono equalizer amplifier for the MM cartridge.
0Double shielded toroidal transformer
This unit features a toroidal transformer that produces less vibration and
magnetic leakage flux compared to conventional power transformers.
0Large-capacitance block electrolytic capacitor
The power circuit of the power amplifier contains a new high-capacity
15000 μF condenser developed with concepts used in the higher-grade
amplifiers.
Contents Connections Playback Settings Tips Appendix
8
Front panel Rear panel
Remote control
unit
Index

0Support for High Quality Audio playback via USB and networks
This unit supports the playback of high resolution audio formats such as
DSD (2.8/5.6 MHz) and WAV/FLAC/Apple Lossless Audio Codec
(ALAC) files up to 192 kHz/24 bits.
0Peripheral circuitry off function minimizes audio output signal
interference
In order to minimize noise from peripheral circuitry that could interfere
with the audio signal, this unit is equipped with a function to turn off the
network and USB memory playback, Wi-Fi and Bluetooth circuit, as well
as a function to turn off the display.
High performance
0Tone control function
This unit has a tone control function for adjustment of bass (low
frequency) and treble (high frequency) sound to produce your preferred
tone. (v p. 68)
0Supports a variety of devices with digital inputs
Equipped with two optical digital inputs and one coaxial digital input to
connect televisions and other devices with digital inputs. This unit also
has an automatic playback function. When a device connected to this
unit by digital connection is turned on, this unit automatically turns on
and plays audio from the device.
0Can be operated with the remote control of your TV
By learning the infrared signal of the remote control of your TV, you can
operate this unit with the remote control of the TV. (v p. 81)
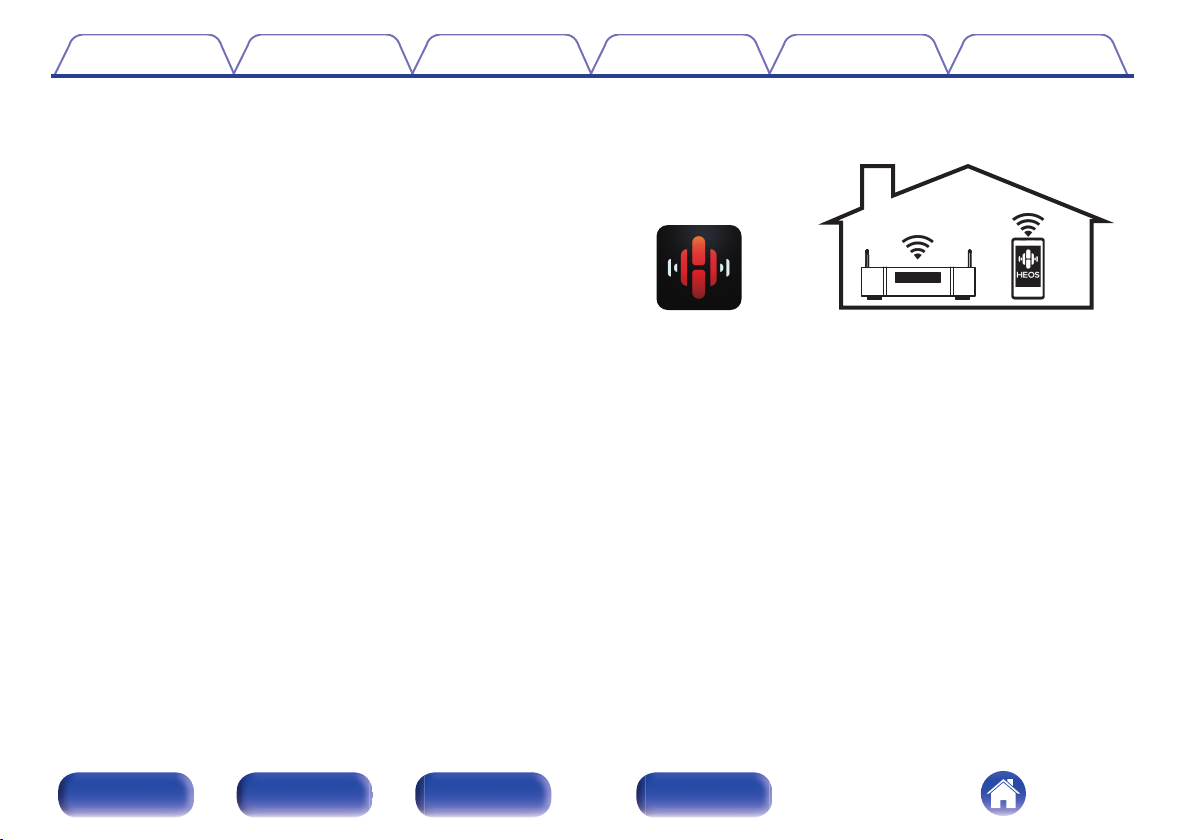
0The device is equipped with a AirPlay® function in addition to
network functions such as Internet radio etc.
You can enjoy a wide variety of content, including listening to Internet
Radio, playing audio files stored on your PC. This unit also supports
Apple AirPlay which lets you stream your music library from an iPhone®,
iPad®, iPod touch® or iTunes®.
Contents Connections Playback Settings Tips Appendix
9
Front panel Rear panel
Remote control
unit
Index

0Supports AirPlay 2® wireless audio
Sync multiple AirPlay 2 compatible devices/speakers for simultaneous
playback.
This unit supports AirPlay 2 and requires iOS 11.4 or later.
0Wireless connection with Bluetooth devices can be carried out
easily
You can enjoy music simply by connecting wirelessly with your
smartphone, tablet, PC, etc.
0Support for Gapless playback
Playback with no gap between music files.
(for WAV/FLAC/Apple Lossless/DSD only)
0Compatible with the HEOS Appz for performing basic operations
of the unit with an iPad, iPhone or Android™ devices (Google,
Amazon Kindle Fire)
zDownload the appropriate HEOS App for your iOS or Android devices. This unit
needs to be connected to the same LAN or Wi-Fi (wireless LAN) network that
the iPad, iPhone or Android devices are connected to.
0HEOS provides streaming music from your favorite online music
sources
.
HEOS wireless multi-room sound system that enables you to enjoy your
favorite music anywhere and everywhere around your home. By utilizing
your existing home network and the HEOS App (available for iOS,
Android and Amazon devices), you can explore, browse, and play
music from your own music library or from many online streaming music
services.
When multiple HEOS devices are connected to the same network,
HEOS devices can be grouped to play back the same music on all
devices simultaneously, or different music can be played on each
separate HEOS device.
0OLED (Organic Light Emitting Diode) display that can display 3
lines
0Equipped with auto standby mode function that reduces power
consumption
Contents Connections Playback Settings Tips Appendix
10
Front panel Rear panel
Remote control
unit
Index

.
eyt
qw iru
APower operation button (X)
This turns the power on/off (standby). (v p. 37)
BPower indicator
Lights as follows according to unit status:
0Not lit:
0When powered on
0Red:
0During normal standby (When “Auto-Play” is set to
“Off” (v p. 80))
0Orange:
0When “Auto-Play” is set to “On” (v p. 80)
0When “Network Control” is set to “On” (v p. 87)
CINPUT SELECTOR knob
This switches input sources. (v p. 38)
DDISPLAY OFF indicator
This indicator lights up when the display is off.
(v p. 69)
EDisplay
This displays various pieces of information.
FCursor buttons (uio p)
These select items.
GPlayback/Pause/ENTER button (1/3/ENTER)
Plays back and pauses tracks, and enters the selected content.
HVOLUME knob
Adjusts the volume. (v p. 38)
Contents Connections Playback Settings Tips Appendix
12
Front panel Rear panel
Remote control
unit
Index

.
Q
0
Q
1
Q
2
Q
3
Q
4
Q
5
o
IHeadphones jack (PHONES)
Used to connect headphones.
When the headphones are plugged into this jack, audio will no longer
be output from the speaker connectors or the PRE OUT connector.
NOTE
0To prevent hearing loss, do not raise the volume level excessively when using
headphones.
JSOURCE DIRECT button/indicator
This turns source direct mode on/off. (v p. 68)
KBASS control knob
This setting adjusts the volume level for the bass. (v p. 68)
LTREBLE control knob
This setting adjusts the volume level for the treble. (v p. 68)
MBALANCE control knob
This adjusts the balance of the volume output from the left and right
speakers. (v p. 68)
NBACK button
Returns to the previous item.
ORemote control sensor
This receives signals from the remote control unit. (v p. 7)
0a, b and c can be adjusted when 0 is off (Source direct mode is off).
Contents Connections Playback Settings Tips Appendix
13
Front panel Rear panel
Remote control
unit
Index

Rear panel
.
COAXIAL
COAXIAL
OPTICAL
OPTICAL
DIGITALAUDIOIN
DIGITALAUDIOIN
AUDIOIN
AUDIOIN
CD
CD
AUX
AUX
RECORDER
RECORDER
PHONO
PHONO
SIGNAL
SIGNAL
GND
GND
ACIN
ACIN
AUDIOOUT
AUDIOOUT
PREOUT
PREOUT
RECORDER
RECORDER
SUBWOOFER
SUBWOOFER
oi
q qrewtyu
Q0
For details, see the next page.
Contents Connections Playback Settings Tips Appendix
14
Front panel Rear panel
Remote control
unit
Index

.
COAXIAL
COAXIAL
OPTICAL
OPTICAL
DIGITALAUDIO IN
DIGITALAUDIO IN
AUDIO IN
AUDIO IN
CD
CD
AUX
AUX
RECORDER
RECORDER
PHONO
PHONO
SIGNAL
SIGNAL
GND
GND
AC IN
AC IN
AUDIO OUT
AUDIO OUT
PRE OUT
PRE OUT
RECORDER
RECORDER
SUBWOOFER
SUBWOOFER
qqrewt
ABluetooth/wireless LAN antenna connectors
Used to connect the included external antennas for Bluetooth/wireless
connectivity when connecting to a network via wireless LAN, or when
connecting to a handheld device via Bluetooth. (v p. 33)
APlace the external antennas for Bluetooth/wireless connectivity
evenly over the screw terminal of rear.
BTurn clockwise until the antennas is fully connected.
CRotate the antenna upwards for best reception.
.
COAXIAL
COAXIAL
OPTICAL
OPTICAL
DIGITALAUDIOIN
DIGITALAUDIOIN
AUDIOIN
AUDIOIN
CD
CD
AUX
AUX
RECORDER
RECORDER
PHONO
PHONO
SIGNAL
SIGNAL
GND
GND
ACIN
ACIN
AUDIOOUT
AUDIOOUT
PREOUT
PREOUT
RECORDER
RECORDER
SUBWOOFER
SUBWOOFER
qwe
BDIGITAL AUDIO IN connectors
0Used to connect devices equipped with digital audio output
connectors. (v p. 29)
0This is used to connect USB storages (such as USB memory
devices). (v p. 31)
CNETWORK connector
Used to connect to a LAN cable when connecting to a wired LAN
network. (v p. 32)
DSIGNAL GND terminal
Used to connect a ground wire for the turntable. (v p. 27)
ESpeaker terminals (SPEAKERS)
Used to connect speakers. (v p. 24)
Contents Connections Playback Settings Tips Appendix
15
Front panel Rear panel
Remote control
unit
Index

.
COAXIAL
COAXIAL
OPTICAL
OPTICAL
DIGITALAUDIO IN
DIGITALAUDIO IN
AUDIO IN
AUDIO IN
CD
CD
AUX
AUX
RECORDER
RECORDER
PHONO
PHONO
SIGNAL
SIGNAL
GND
GND
AC IN
AC IN
AUDIO OUT
AUDIO OUT
PRE OUT
PRE OUT
RECORDER
RECORDER
SUBWOOFER
SUBWOOFER
oi
yu
Q0
FREMOTE CONTROL connectors
Used to connect to a Marantz audio device that is compatible with the
remote control function. (v p. 34)
GAC inlet (AC IN)
Used to connect the power cord. (v p. 35)
HAUDIO IN connectors
Used to connect devices equipped with analog audio output
connectors.
0“Connecting a playback device” (v p. 27)
0“Connecting a recording device” (v p. 28)
IAUDIO OUT connectors
Used to connect the input connector of a recorder. (v p. 28)
JPRE OUT connector
Used to connect a subwoofer with a built-in amplifier. (v p. 25)
Contents Connections Playback Settings Tips Appendix
16
Front panel Rear panel
Remote control
unit
Index

Remote control unit
w
q
r
t
y
u
e
ARemote control signal transmitter
This transmits signals from the remote control unit. (v p. 7)
BInput source select buttons
These select the input source. (v p. 38)
CSystem buttons
These perform playback related operations.
DInput source select button (INPUT)
This switches input sources. (v p. 38)
ESOURCE DIRECT button
This turns source direct mode on/off. (v p. 68)
FInformation button (INFO)
This switches the track information shown in the display during
playback.
GQUEUE button
This displays the queue.
0“Listening to Internet Radio” (v p. 39)
0“Playing back files stored on PC or NAS” (v p. 41)
0“Playing a USB memory device” (v p. 44)
Contents Connections Playback Settings Tips Appendix
17
Front panel Rear panel
Remote control
unit
Index

Q0
o
Q1
Q2
Q3
i
HENTER button
This determines the selection.
ICursor buttons (uio p)
These select items.
JBACK button
Returns to the previous item.
KNumber/letter buttons (0 – 9, +10)
These enter letters or numbers into the unit. (v p. 77)
LDIMMER button
Adjust the display brightness of this unit. (v p. 69)
MRANDOM button (P)
Switches the random playback.
Contents Connections Playback Settings Tips Appendix
18
Front panel Rear panel
Remote control
unit
Index

Q5
Q4
Q7
Q6
NPower operation button (AMP X)
This turns the power on/off (standby). (v p. 37)
ORemote mode select button
(REMOTE MODE AMP)
Switches the remote control operating mode to this unit.
PFAVORITES ADD / CALL buttons
This allows you to register content to “HEOS Favorites” and call
registered content.
0“Adding toHEOS Favorites” (v p. 66)
0“Playing backHEOS Favorites” (v p. 67)
QVOLUME buttons (df)
Adjusts the volume. (v p. 38)
Contents Connections Playback Settings Tips Appendix
19
Front panel Rear panel
Remote control
unit
Index

Q9
Q8
W0
W1
W2
W3
ROPTION button
0This displays the option menu on the display.
0An option menu is not displayed for some input sources.
SMUTE button (:)
This mutes the output audio. (v p. 38)
TSETUP button
The setting menu is displayed on the display. (v p. 76)
UCLEAR button
This cancels the settings.
VSLEEP button
This sets the sleep timer. (v p. 69)
WREPEAT button (L)
Switches the repeat playback.
Contents Connections Playback Settings Tips Appendix
20
Front panel Rear panel
Remote control
unit
Index
Other manuals for PM7000N
1
Table of contents
Other Marantz Amplifier manuals

Marantz
Marantz PM-14S1 User manual

Marantz
Marantz ZC4001 User manual

Marantz
Marantz PM5003 Quick start guide

Marantz
Marantz PM-KI-PEARL User manual

Marantz
Marantz SC-7S1 User manual

Marantz
Marantz PM4000 User manual

Marantz
Marantz PM-17SA User manual

Marantz
Marantz PM8006 User manual

Marantz
Marantz PM8200 User manual

Marantz
Marantz 250 User manual

Marantz
Marantz PM6006 User manual

Marantz
Marantz PM-12 SE User manual

Marantz
Marantz PM-11S2 User manual

Marantz
Marantz PM6006 User manual

Marantz
Marantz PM-65AV User manual

Marantz
Marantz PM-75 User manual

Marantz
Marantz 240 User manual

Marantz
Marantz 1300DC User manual

Marantz
Marantz PM5004 User manual

Marantz
Marantz 1180DC User manual