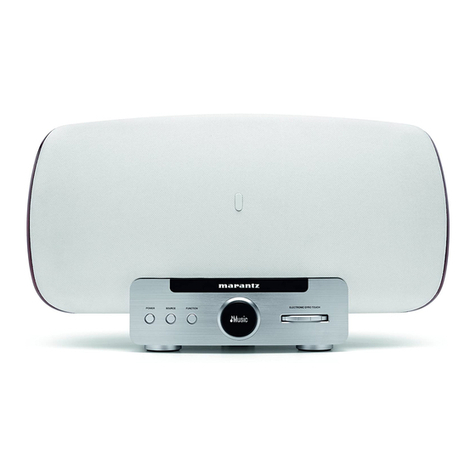
Marantz IS201 User manual

Model IS201 User Guide
Universal Dock
IS201E表1表3表406.4.275:08PMページ3

2
ENGLISH
FEATURES
PACKAGE CONTENTS
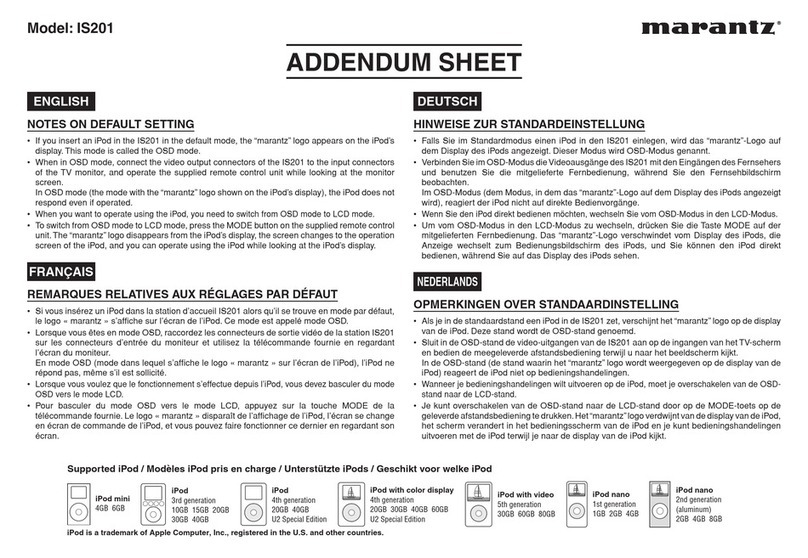
SUPPORTED iPod
¶IS201 Dock Connector....................1 pce
¶RC201IS Remote Controller ...........1 pce
¶AC adapter......................................1 pce
¶AC plug adapters (3 types)
• for UK...........................................1 pce
• for Europe ....................................1 pce
• for U.S.A./Japan...........................1 pce
¶iPod adapters
•
Type A (attached to the dock connector
with shipment)
..............................1 pce
•Type B..........................................1 pce
•Type C .........................................1 pce
•Type D .........................................1 pce
¶S-Video cable .................................1 pce
¶RCA audio pin cable .......................1 pce
¶Remote cable..................................1 pce
¶Wall setting screws .........................2 pcs
¶Instruction manual ..........................1 pce
¶Warranties
•For Japan.....................................1 pce
•For Canada ..................................1 pce
•For U.S.A. ....................................1 pce
¶Registration card for Europe...........1 pce
Make sure you have the following items:
•iPod Video (5th Generation)
•iPod nano
•iPod (U2 Edition)
•iPod mini
•iPod Photo (4th Generation)
•4th Generation iPod with Click Wheel
•3rd Generation iPod with Touch Wheel
Note
•Before using the dock connector,
update your iPod with the latest
software, available from the Apple
Website.
With this dock connector, you can connect your iPod with Marantz products or mini system
components.
•Easily attach and detach your iPod
•Two types of set-up available (desktop type and on wall type)
•With your iPod docked, you can control your iPod with the supplied remote controller
•Play the stereo sound on your iPod with the dock connector’s AUDIO OUT L/R jacks
connected to your audio amp
•You can watch the play list, artist names, song titles, image data, photo data and
slideshows stored on your iPod on a TV connected to the dock connector
•Charge your iPod battery
IS201E01Eng06.4.274:49PMページ2
UPPER SIDE
PART NAMES
qDock connector
Connects to your iPod’s dock connector.
wiPod slot
Insert the appropriate type of adapter to
put your iPod.
•Be sure to use the appropriate adapter
(
☞
p.9)
eRed indicator
Lights up when connected to AC power
source and blinks when receiving IR
signal from the remote controller.
rBlue indicator
Lights up when the dock connector is
connected to your iPod.
tRemote IR Receiver
When using this IR receiver make sure
this area in unobstructed.
y
Remote control INT./EXT. switch
Remote control switching. See page 13
for more information.
•Set it to INT. when remote control
cable is not connected.
q
e
r
w
t
w
e
r
q
t
REAR SIDE
y
3
ENGLISH
Desktop type
On Wall type
IS201E01Eng06.4.274:49PMページ3

4
ENGLISH
z x c vbnm
CONNECTOR PART
zAUDIO OUT L/R jacks
Connect to your AV amp’s/receiver’s
audio input jack.
xS-VIDEO OUT jack
Connect to your AV amp’s/TV monitor’s
video input jack.
!2
!3
q
e
w
r
t
y
u
i
!4
!1
!5
o
!0
qPOWER button
Turns power on and off your iPod.
wMODE button
Switches IS201’s mode setting
(OSD/LCD). (
☞
p.14)
e
SORT button (in OSD mode only)
Sorting of Song/Artist/Album stored on
your iPod in sequence, not operative in
LCD mode.
rALBUM 34button
(in LCD mode only)
Selects the next and previous album on
the iPod.
tPLAY LIST 34button
(in LCD mode only)
Selects the next and previous play list on
the iPod.
cREMOTE jack
Connect to your Marantz product with
remote control jack (RC-5).
vRS-232C jack
Used to connect to an external control
system.
bFLASHER IN jack
Used to control equipment with key pad,
etc.
nAC adapter connect jack
Connect the supplied AC adapter.
mMagnet rubber
Attach the connector part temporally on
metallic surface of wall, etc.
Be careful fixation may not be secured
enough depending on the condition of
attached surface.
REMOTE CONTROLLER (RC201IS)
IS201E01Eng06.4.274:49PMページ4

Please make sure the below instructions
are followed when operating your remote
controller.
•Do not spill water or any other liquid on
your remote controller.
•Do not drop, apply excessive impact on
your remote controller.
•Do not leave your remote controller in a
place such as;
- At high humidity/temperature
(near heater, bathroom)
- At extremely low temperature
- Dusty
7Before using your remote
controller
Note that your remote controller is provided
with lithium battery and can be operative
after removing insulation sheet.
5
ENGLISH
yREPEAT button
Sets the iPod’s Repeat function to:
One, All, Off.
uSHUFFLE button
Sets the iPod’s Shuffle function to:
Songs, Albums, Off.
i38 (PLAY/PAUSE) button
Same function as iPod’s click wheel 38.
o¢(SKIP) button
Presses the button once to select the
next contents.
!0 4(BACK SKIP) button
Presses the button once to restart the
current iPod contents, press it twice in a
row to select the previous contents.
!1 MENU button
Same functions as the iPod’s click
wheel menu.
!2 SELECT button
Same functions as the iPod’s click
wheel select button.
!3 34 button
Same functions as the iPod’s click wheel
counterclockwise(3) and clockwise (4).
•Except for the iPod’s volume control.
!4 INPUT button
Switches the input of connected your
Marantz amp/receiver (some models
are not operative).
!5 VOLUME +-button
Please to adjust the volume control of
your marantz amplifier / AV receiver.
OPERATION OF
REMOTE CONTROLLER
insulation
sheet
IS201E01Eng06.4.274:49PMページ5

CONNECTION
CONNECTING TO OUTLET
1. Fit the appropriate AC plug adapter to the AC adaptor as shown below.
2. Connect the AC adapter to the IS201’s
DC IN jack.
7
ENGLISH
•For UK •For Europe •For U.S.A./Japan
3. Plug the AC adapter into a suitable wall
outlet.
IS201E01Eng06.4.274:49PMページ7
Note: Australian AC connection supplied for Australian version

8
ENGLISH
WALL SETTING
•Please note that supplied wall setting
screws are used for wooden wall.
•Make sure that screws are firmly
secured to the wall (poll).
•Make sure that there is no electric
wiring or piping inside the wall.
Note
•Do not mount the dock connector on
plaster board, ALC (autoclaved
lightweight concrete), concrete block or
plywood less than 10mm thick as the
intensity is insufficient (If the dock
connector falls from the wall, it may
cause an injury).
1. Disconnect the adapter.
2. Remove the cover.
3. Install the supplied screws in the dock
connector and fasten it on the wall.
4. Attach the cover.
5. Connect the adapter
Notes
•Be sure that the cover is attached or
removed in the direction of arrow shown
on the side.
•
Do not leave the cover and adapter
removed while using the dock connector
as it may cause a malfunction.
Cover
Adapter
Screws
Cover
Wall
Wall
Wall
Adapter
IS201E01Eng06.4.274:49PMページ8

9
ENGLISH
PUTTING YOUR iPod IN IS201 DOCK CONNECTOR
1. Make sure that IS201 Dock Connector is plugged into a
wall outlet.
2. Depending on the type of iPod, insert the applicable iPod
adapter into the dock connector slot, as shown below.
•There are four types of iPod adapters; Types A, B, C & D.
Be sure to insert one of the supplied iPod adapters.
•Do not insert wrong iPod adapter as it may cause a
malfunction.
7iPod Adapters (“A”, “B”, “C” are indicated on the rear side)
• Type A • Type B • Type C • Type D
(inserted in the dock
connector with shipment)
7iPods & their supporting iPod Adapters:
¶iPod Video (5th Generation)
¶iPod nano
30GB 60GB
Type B+D Type C+D
1GB / 2GB / 4GB
Type A
(In case of type B+D)
Type B Type C
Type D Type D
IS201E01Eng06.4.274:49PMページ9

10
ENGLISH
¶iPod (3rd Generation)
¶iPod Photo (4th Generation)
¶iPod (4th Generation)
¶iPod (U2 Edition)
¶iPod mini
20GB 60GB
Type B Type C
4GB / New 4GB / 6GB
Type B
30GB 40GB / 60GB
Type B Type C
20GB 40GB
Type B Type C
10GB / 15GB / 20GB 30GB / 40GB
Type B Type C
IS201E01Eng06.4.274:49PMページ10

3. Fit your iPod dock connector port securely onto the dock connector.
When you insert your iPod, the dock connector’s blue power indicator will light up.
Notes
•Marantz bears no responsibility whatsoever for any loss or damage to data on your
iPod that may occur when the iPod is used connected to the dock connector.
•Be sure to use the correct adapter for your type of iPod. If the wrong adapter is used, it
may not operate correctly even if the blue power indicator lights up.
•If your iPod is inserted into the IS201 with the power off, or if you plugged the AC
adapter into a wall outlet with your iPod inserted in the IS201, it may take some time for
your iPod power to switch on and become operable.
•To prevent dock connector damage, don’t twist your iPod when inserting or removing it.
•
Be careful not to knock over the iPod when inserted to prevent dock connector damage.
•Don’t use with any other iPod accessories, such as FM transmitters and microphones,
because they may cause a malfunction.
11
ENGLISH
Blue power indicator
lights up
IS201E01Eng06.4.274:49PMページ11

12
ENGLISH
HOOKING UP THE DOCK CONNECTOR
7Connecting to AV receiver
7Connecting to Amp, Monitor
MUTEMUTE
RECORDERRECORDER
2211
AUX/DVDAUX/DVDTUNERTUNERPHONOPHONO CDCD
STANDBYSTANDBY
SPEAKERSSPEAKERS
OFFOFF
ONON
INTEGRATED AMPLIFIER PM7001INTEGRATED AMPLIFIER PM7001
TREBLETREBLE BALANCEBALANCE
POWER ON/OFFPOWER ON/OFF
PHONESPHONES
BASSBASS
RECORDER2RECORDER2
INPUT SELECTORINPUT SELECTOR
RRLL
VOLUMEVOLUME
++
--
++
--
1 21 2
2 12 1
RECORDERRECORDER
TUNERTUNER
PHONOPHONO
MAXMAXMINMIN
11SOURCE DIRECTSOURCE DIRECT
22
COPYCOPY
OFFOFF
REC SELECTORREC SELECTOR
CDCD
AUX/DVDAUX/DVD
ONON
OFFOFF
S-VIDEO
IN
SURROUND
AV SURROUND RECEIVER SR4600
DOWN
UP
VOLUME
INPUT SELECTOR
POWER ON/OFF PHONES
STANDBY
MUTE
7.1CH INPUT
S. SPEAKER B
ATT
PURE
SETUP
DIRECT
SIMPLE
AUTO
HT-EQ
MENU
ENTER
DISPLAY
MEMORY
CLEAR
T-MODE
EXIT
BAND
MODE
DISP MULTI AUTO TUNED ST V
—
OFF NIGHT PEAK ANALOG
DIGITAL
ATT
SLEEP SURR
AUTO DIRECT DISC6.1 MTX6.1 EQ
DIGITAL
SURROUND
PCM
L
C
R
SL S SR
LFE
To Analog Audio output
(red) (white) To S-video
output
Audio cable
To audio input
terminals on
AV receiver
Right
speaker
Left
speaker TV Monitor
To Analog Audio output
(red) (white)
Audio cable
Right speakerLeft speaker
TV Monitor
To audio input
terminals on
amplifier
IS201E01Eng06.4.274:49PMページ12

ENGLISH
7Connecting to Marantz product’s remote control jack (RC-5)
•When the dock connector is used without connecting any other Marantz product’s
remote control jack, set the switch to “INT”.
•By connecting the dock connector’s remote jack to the remote jack on other Marantz
product, the dock connector can act as a remote control signal receiver for the other
Marantz product. In order to do this, set the dock connector’s switch to “INT.”, and set
the remote jack on the connected Marantz product to “EXT.”.
•If IR remote of other Marantz product is used instead of the dock
connector’s remote, set the switch to “EXT.”dock connector.
SPEAKER SYSTEMS : MINIMUM 6 OHMS
FRONT CENTER SURROUND SURROUND BACK
M. SPEAKER B
MULTI
OUT
TV
TV
DVD
DVD
C
IN OUT
S-VIDEO
S-VIDEO
DVD
DVD
DSS/VCR2
C
RS-232C
RS-232C
RC
RC
MULTI
MULTI
IN
IN
OUT
OUT
DSS/VCR2
DSS/VCR2
IN
IN
OUT
OUT
OUT
OUT
VCR1
VCR1
VCR1
VCR1
L
L
SBR
SBL
OUT
PRE
SLL
SRR
DSS/VCR2
DSS/VCR2
DVD
DVD
TV
TV
R
R
IN
IN
RSW
RC-5
RC-5
IN
IN
SR
AUDIO
AUDIO
7.1CH
IN
OUT
OUT
IN
IN
LSL
SBR
SBL
CD
CD
IN
IN
OUT
OUT SW
OOUT
CDR/M
DCDR/MD
TAPE
TAPE
OUT
OUT
IN
IN
IIN OUT
VIDEO
VIDEO
MONITOR
MONITOR VCR1
TV
TV OUT
(AUX2)
MONITOR
DIGITAL IN
DIGITAL IN
DIGITAL OUT
DIGITAL OUT
3
3
1
1
OPT.
OPT.
2
2
4
4
COAX.
COAX.
RL LRRL
SWITCHED UNSWITCHED
1A 120W MAX 1A 120W MAX
MODEL NO. ZR6001
FM
FM
(
(
75
75
Ω
Ω
)
)
ANTENNA
ANTENNA
GND
GND
AM
AM
COMPONEN
TCOMPONENT VIDEO
C
C
B
B
/
/
P
P
B
B
C
C
R
R
/
/
P
P
R
R
C
R
/
P
R
C
R
/
P
R
C
B
/
P
B
C
C
BB
/
P
B
INPUT-1
INPUT-1
Y
YY
MONITOR OUT
IN
PINPUT-2
Y
Y
O
UOUT
AC OUTLETS
120V 60Hz
AC IN
IR EMITTER OUT
R
1
L
234
AUX PLC OUTPUT
IN
FLASHER
ININ
OUTOUT
IS201E01Eng06.4.274:49PMページ13

ENGLISH
SETTING
MODE SETTING
You can operate your iPod with this dock
connector in two modes, OSD mode and
LCD mode, and mode selection can be
available by pressing MODE button.
Note
•Note that in case of removing AC
adapter or blackout occurrence after
mode setting, the dock connector is set
to OSD mode(default setting).
7OSD Mode
(On Screen Display Mode)
Only remote controller can control your
iPod. “marantz”is shown on your iPod’s
display. The connected TV’s screen shows
the Control Menu to control your iPod.
Notes
•Depending on the type of iPod, some
settings are not supported. In this case,
please update your iPod to the latest
firmware.
•
The Control Menu supports only English.
If the set language is non-English, “#”
may be displayed on the screen.
•The LCD mode is used to playback
video contents or photograph data.
•Leaving the iPod’s Control Menu
displayed on an LCD or plasma TV for a
long period of time may result in
afterimages on the screen. To prevent
that, press the remote controller’s
ALBUM 3button for two seconds or
more to turn off the OSD menu when it
does not need to be displayed. The
menu will display again when
PLAY/PAUSE or other operation
buttons are pressed.
7LCD Mode
•Operation can be available by both your
iPod and the remote controller.
•Your iPod’s LCD (liquid crystal) displays
normally.
•The iPod’s Control Menu is not
displayed on the connected TV screen.
VIDEO OUTPUT MODE
SWITCH
Press MODE button for more than three
seconds, then control display’s output
mode is switched to PAL/NTSC. The
default mode is set to NTSC.
Notes
•Note that in case of removing AC
adapter or blackout occurrence after
video mode setting, it is set to NTSC
mode(default setting).
•Set your iPod’s TV signal and TV out on
your iPod.
MODE
button
ALBUM3
button
IS201E01Eng06.4.274:49PMページ14

49.0
(1 15/16)
102.0
(4 1/16)
1300.0
(51)
84.0
(3 3/8)
54.0
(2 3/16)
34.0
(1 5/16)
95.0
(3 3/4)
DIMENSIONS
Unit: mm (inch)
IS201E表1表3表406.4.275:08PMページ1
Other manuals for IS201
4
Table of contents
Other Marantz Docking Station manuals

Marantz
Marantz Consolette MS7000 User manual

Marantz
Marantz Consolette User manual

Marantz
Marantz IS301 User manual

Marantz
Marantz Consolete User manual

Marantz
Marantz IS301 User manual

Marantz
Marantz IS201 Owner's manual

Marantz
Marantz IS201 User manual

Marantz
Marantz IS201 User manual

Marantz
Marantz IS201 Installation and operating instructions