manuals.online logo
Brands
  1. Home
  2. •
  3. Brands
  4. •
  5. Marathon
  6. •
  7. Clock
  8. •
  9. Marathon CL030045 Installation instructions

Marathon CL030045 Installation instructions

MAIN FEATURES
DISPLAY
E.g. display for Washington
E.g. world time display for Sydney
MAIN FEATURES
DISPLAY
E.g. display for Washington
E.g. world time display for Sydney
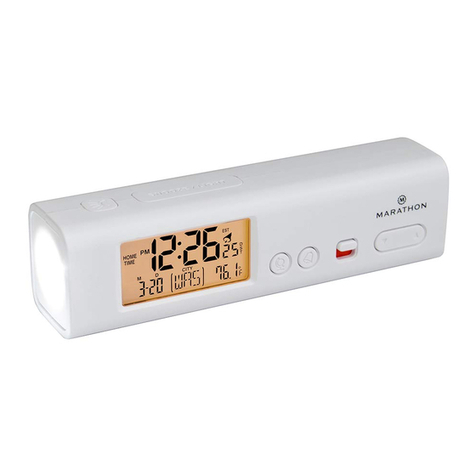
MARATHON COMPACT ATOMIC
WORLD
CLOCK
WITH LED
EMERGENCY LIGHT
USERS’
INSTRUCTION
Thank you for your purchase of this delicate Radio Atomic Controlled
Clock.
Utmost care has gone into the design and manufacture of your clock.
Please
read the instruction carefully and keep the manual well for future
reference.
1. MAIN
FEATURES
1. TORCH
button
2. SNOOZE / LIGHT
button
3. LCD
display
4. DISPLAY
button
5. ALARM
button
6. ALARM ON/OFF slide
switch
7. UP & DOWN
button
8. LOCK slide
switch
9. RC ON/ RC OFF / RC OFF+DST slide
switch
10. WAVE
button
11. RESET
button
12. CLOCK
button
13. Battery
compartment
14. LED
flashlight
Display
D1=Normal time
mode
1.
Time
2. Date (or alarm
time)
3. Day of the
week
4.
Temperature
5.
DST
6. Signal strength
indicator
7. Time
zone
2. GETTING
STARTED
●Remove the battery
door.
●Insert two new AAA size batteries as per the polarity information marked
on
the battery
compartment.
●Replace the battery
door.
●Once the battery is installed, the normal segments of the LCD will be
shown
before entering the radio controlled time reception
mode.
●The RC clock will automatically start scanning for the radio controlled
time
signal in 8
seconds.
Note:
If no display appears on the LCD after inserting the battery, press the “RESET” button
by
using a metal wire. In some cases, you may not receive the signal immediately. Due to
the
atmospheric disturbance, the best reception often occurs during
nighttime.
3. RECEPTION OF ATOMIC RADIO
SIGNAL
●The unit must receive the Atomic Radio Signal to automatically set
the
time, date and
weekday.
●The unit automatically starts the Atomic signal search after changing of
new
fresh batteries, as indicated by the flashing "signal tower"
icon
●Everyday at 2:00 am, the unit automatically carries out the
synchronization
procedure with the Atomic signal to correct any deviations to the exact
time.
f the attempt is not successful, the "signal tower" icon will disappear from
the
display, and the unit will automatically attempt another synchronization
at
3:00 am. This procedure is repeated automatically again at 4:00 am if
necessary.
●Each synchronization process will take between 3 to 16 minutes, depending
on
the signal strength received. If no signal is detected, the unit will
automatically
exit the process in 6
minutes.
●Once the unit is synchronized successfully to the Atomic signal,
the
"signal tower" icon will be turned on until 2:00 am of following
day.
●The unit also conducts periodic checking of Atomic radio signals at 8:00
am,2:00
pm, and 8:00 pm. Any successful attempts at these hours will lead to
the
continuous on of "signal tower" until 2:00 am of following
day.
●To manually start the Atomic signal reception, press the "WAVE" button.
User
may also cancel the process by holding the WAVE
button.
4. SETTING TIME
ZONE
Your clock is designed to display time for different time zones. Please refer to
the
Manual Clock setting to set your desired time zone in following
order.
PST:
Pacific
MST:
Mountain
CST:
Central
EST:
Eastern
AST:
Alaska
NST:
Newfoundland
Note:
After selecting the time zone, the "signal tower" icon will be turned off as the unit is no
longer
synchronized to Atomic radio signal. User may press the WAVE button (inside
battery
compartment) to re-start the synchronization process, or let the clock automatically carries
out
the synchronization procedures daily starting at 2:00
am.
5. SIGNAL STRENGTH
INDICATOR
The signal indicator displays signal strength in 4 levels. Wave segment
flashing
means time signals are being received. The signal quality could be
classified
into 4
types:
If the RC clock receives signal successfully, a sync-time symbol “ ” will
appear
on the LCD. The unit has already received the time signal. Otherwise the
signal
strength symbol will disappear from the
LCD.
6. MANUAL CLOCK
SETTING
Inside the manual clock setting, user may manually set the clock in
following
manner
1. Time zone
setting
2. Calendar setting (Year, Month,
Date)
3. Time setting (12/24 Hr, Hour, Minute,
Second)
4. Language selection for Day of week (GB, FR, DE, ES,
IT)
5. Daylight Saving Time AUTO/OFF
setting
1. In normal mode, press and hold “CLOCK” button for 2 seconds until the
time
zone
flashes.
2. Press “UP” or “DOWN” button to set the desired
time
3. Press “CLOCK” button again until the Year digit flashes and
press
“UP”/ “DOWN” button to adjust its
value.
4. Repeat the above operations to set the time and calendar in this
sequence:
Time zone > Year >
D&M
or M&S> Month > Date > 12/24 Hour format
>
Hour > Minute > Second > Language (GB/FR/DE/ES/IT) > DST
AUTO/OFF.
Note:
The clock will automatically exit the clock setting mode after 30
seconds
without pressing any
button.
7. HOW TO SET HOME CITY AND
TIME
For WWVB radio controlled atomic clock, the default Home City is set
to
WASHINGTON (WAS). If you want to set the time to be another city, please
set
the home city as
follows:
1. In normal time mode, press “DISPLAY” button to check current home city
.
2. Press and hold “DISPLAY” button for 2 seconds to enter home city setting
mode.
3. Press “DOWN”/“UP” button to set home city. Press “DOWN”/“UP” button
without
releasing to speed up
setting.
MAIN FEATURES
DISPLAY
E.g. display for Washington
E.g. world time display for Sydney
E.g. display for Washington
9. TIME ZONE & DST CHART FOR 62 CITIES
E.g. world time display for Sydney
4. Press “DISPLAY” button to save and exit the setting. The time will automatically
adjusted according to the new Home City you selected.
5. Or you can re-set the time and date as described in the above section.
8. DAYLIGHT SAVING TIME (DST)
●The National Institute of Standards and Technology and WWVB encode a
special DST code in the WWVB transmission for Daylight Saving Time.
●The unit will automatically advance the time by one hours in the spring
and back an hour in the fall, provided the DST function is not turned off.
●DST function is set to AUTO by default. Please refer to Manual Clock setting
session for details
You can check the time for 62 cities in the world.
1. Press “DISPLAY” button until the world time indicator “ ” appears.
2. Press “DOWN”/“UP” button to check the world city and time.
3. Press “DISPLAY” button to return back to normal display.
10. SETTING THE ALARM
1. In normal mode, press and hold “ALARM” button for 2 seconds until the
Hour digit flashes.
2. Press “DOWN”/“UP” button to adjust the value of the flashing digit. Press
“DOWN”/“UP” button without releasing to speed up setting.
3. Press “ALARM” button until Minute digit flashes, and press “DOWN”/“UP”
button to adjust its value.
4. Press “ALARM” button to save and exit setting.
Using Alarm & Snooze Function
1. Set the desired alarm as described in the above section.
2. Slide the “ALARM ON/OFF” slide switch to ON position to turn on the alarm
function, with the alarm icon “ ” displayed.
3. When the clock reaches the alarm time, alarm sound will start. Where, it can
be stopped by the operation:
a. auto-stop after 1 minute alarming if without any operation, and the clock will
re-alarm at the alarm time by the next day.
b. or press “SNOOZE/LIGHT” button to stop the current alarm and enter
snooze with the bell icon keep flashing.
c. slide the “ALARM ON/OFF” slide switch to OFF position to turn off the alarm
function.
Note:
Once the snooze function is turned on, the alarm will sound 4 times in 5-minute
intervals.
11. TEMPERATURE DISPLAY
The temperature is displayed in °F by default. User may hold the "WAVE" button
for 3 seconds to switch between °F and °C readings.
Note:
When the temperature is below -40°C (-40°F) or higher than 70°C (158°F), the
temperature displays “Lo” or “Hi” icon respectively.
12. BATTERY REPLACEMENT
When the LCD becomes dim, it indicates that the battery power is not enough.
You should replace with 2 AAA size batteries at once.
Note:
1. If the clock is not used for a long time, please take off the batteries.
2. Attention! Batteries should not be exposed to excessive heat such as sunshine,
fire or the like. Please dispose of used unit or batteries in an ecologically safe
manner.
13. SUGGESTION AND TROUBLESHOOTING
Please make sure you read the instructions before operating this delicate
clock. We have developed this sophisticated instrument for the best
reception performance. However, the signal from the US Atomic Clock
transmitter in Colorado may be weakened or affected by various causes over
its transmission range before reaching your unit. We advise you to note the
followings:
●If the unit has trouble receiving the signal, try a different location, ideally
near a window.
●Always place the unit away from interfering sources such as TV set, computer, etc.
●Avoid placing the unit on or next to metal plates.
●Closed areas such as airport, basement, tower block, or factory are not
recommended.
●Do not start reception in moving vehicles such as cars or trains.
●Electrical storms between you and Colorado may interfere with the WWVB signal.
MAIN FEATURES
DISPLAY
E.g. display for Washington
E.g. world time display for Sydney
E.g. display for Washington
9. TIME ZONE & DST CHART FOR 62 CITIES
E.g. world time display for Sydney
4. Press “DISPLAY” button to save and exit the setting. The time will automatically
adjusted according to the new Home City you selected.
5. Or you can re-set the time and date as described in the above section.
8. DAYLIGHT SAVING TIME (DST)
●The National Institute of Standards and Technology and WWVB encode a
special DST code in the WWVB transmission for Daylight Saving Time.
●The unit will automatically advance the time by one hours in the spring
and back an hour in the fall, provided the DST function is not turned off.
●DST function is set to AUTO by default. Please refer to Manual Clock setting
session for details
You can check the time for 62 cities in the world.
1. Press “DISPLAY” button until the world time indicator “ ” appears.
2. Press “DOWN”/“UP” button to check the world city and time.
3. Press “DISPLAY” button to return back to normal display.
10. SETTING THE ALARM
1. In normal mode, press and hold “ALARM” button for 2 seconds until the
Hour digit flashes.
2. Press “DOWN”/“UP” button to adjust the value of the flashing digit. Press
“DOWN”/“UP” button without releasing to speed up setting.
3. Press “ALARM” button until Minute digit flashes, and press “DOWN”/“UP”
button to adjust its value.
4. Press “ALARM” button to save and exit setting.
Using Alarm & Snooze Function
1. Set the desired alarm as described in the above section.
2. Slide the “ALARM ON/OFF” slide switch to ON position to turn on the alarm
function, with the alarm icon “ ” displayed.
3. When the clock reaches the alarm time, alarm sound will start. Where, it can
be stopped by the operation:
a. auto-stop after 1 minute alarming if without any operation, and the clock will
re-alarm at the alarm time by the next day.
b. or press “SNOOZE/LIGHT” button to stop the current alarm and enter
snooze with the bell icon keep flashing.
c. slide the “ALARM ON/OFF” slide switch to OFF position to turn off the alarm
function.
Note:
Once the snooze function is turned on, the alarm will sound 4 times in 5-minute
intervals.
11. TEMPERATURE DISPLAY
The temperature is displayed in °F by default. User may hold the "WAVE" button
for 3 seconds to switch between °F and °C readings.
Note:
When the temperature is below -40°C (-40°F) or higher than 70°C (158°F), the
temperature displays “Lo” or “Hi” icon respectively.
12. BATTERY REPLACEMENT
When the LCD becomes dim, it indicates that the battery power is not enough.
You should replace with 2 AAA size batteries at once.
Note:
1. If the clock is not used for a long time, please take off the batteries.
2. Attention! Batteries should not be exposed to excessive heat such as sunshine,
fire or the like. Please dispose of used unit or batteries in an ecologically safe
manner.
13. SUGGESTION AND TROUBLESHOOTING
Please make sure you read the instructions before operating this delicate
clock. We have developed this sophisticated instrument for the best
reception performance. However, the signal from the US Atomic Clock
transmitter in Colorado may be weakened or affected by various causes over
its transmission range before reaching your unit. We advise you to note the
followings:
●If the unit has trouble receiving the signal, try a different location, ideally
near a window.
●Always place the unit away from interfering sources such as TV set, computer, etc.
●Avoid placing the unit on or next to metal plates.
●Closed areas such as airport, basement, tower block, or factory are not
recommended.
●Do not start reception in moving vehicles such as cars or trains.
●Electrical storms between you and Colorado may interfere with the WWVB signal.
4. Press “DISPLAY” button to save and exit the setting. The time will
automatically
adjusted according to the new Home City you
selected.
5. Or you can re-set the time and date as described in the above
section.
E.g. display for
Washington
8. DAYLIGHT SAVING TIME
(DST)
●The National Institute of Standards and Technology and WWVB encode
a
special DST code in the WWVB transmission for Daylight Saving
Time.
●The unit will automatically advance the time by one hours in the
spring
and back an hour in the fall, provided the DST function is not turned
off.
●DST function is set to AUTO by default. Please refer to Manual Clock
setting
session for
details
9. TIME ZONE & DST CHART FOR 62
CITIES
You can check the time for 62 cities in the
world.
1. Press “DISPLAY” button until the world time indicator “ ”
appears.
2. Press “DOWN”/“UP” button to check the world city and
time.
3. Press “DISPLAY” button to return back to normal
display.
E.g. world time display for
Sydney
11. TEMPERATURE
DISPLAY
The temperature is displayed in °F by default. User may hold the "WAVE"
button
for 3 seconds to switch between °F and °C
readings.
Note:
When the temperature is below -40°C (-40°F) or higher than 70°C (158°F),
the
temperature displays “Lo” or “Hi” icon
respectively.
12. BATTERY
REPLACEMENT
When the LCD becomes dim, it indicates that the battery power is not
enough.
You should replace with 2 AAA size batteries at
once.
Note:
1. If the clock is not used for a long time, please take off the
batteries.
2. Attention! Batteries should not be exposed to excessive heat such as
sunshine,
fire or the like. Please dispose of used unit or batteries in an ecologically
safe
manner.
13. SUGGESTION AND
TROUBLESHOOTING
Please make sure you read the instructions before operating this
delicate
clock. We have developed this sophisticated instrument for the
best
reception performance. However, the signal from the US Atomic
Clock
transmitter in Colorado may be weakened or affected by various causes
over
its transmission range before reaching your unit. We advise you to note
the
followings:
●If the unit has trouble receiving the signal, try a different location,
ideally
near a
window.
●Always place the unit away from interfering sources such as TV set, computer,
etc.
●Avoid placing the unit on or next to metal
plates.
●Closed areas such as airport, basement, tower block, or factory are
not
recommended.
●Do not start reception in moving vehicles such as cars or
trains.
●Electrical storms between you and Colorado may interfere with the Atomic
signal.
10. SETTING THE
ALARM
1. In normal mode, press and hold “ALARM” button for 2 seconds until
the
Hour digit
flashes.
2. Press “DOWN”/“UP” button to adjust the value of the flashing digit.
Press
“DOWN”/“UP” button without releasing to speed up
setting.
3. Press “ALARM” button until Minute digit flashes, and press
“DOWN”/“UP”
button to adjust its
value.
4. Press “ALARM” button to save and exit
setting.
Using Alarm & Snooze
Function
1. Set the desired alarm as described in the above
section.
2. Slide the “ALARM ON/OFF” slide switch to ON position to turn on the
alarm
function, with the alarm icon “ ”
displayed.
3. When the clock reaches the alarm time, alarm sound will start. Where, it
can
be stopped by the
operation:
a. auto-stop after 1 minute alarming if without any operation, and the clock
will
re-alarm at the alarm time by the next
day.
b. or press “SNOOZE/LIGHT” button to stop the current alarm and
enter
snooze with the bell icon keep
flashing.
c. slide the “ALARM ON/OFF” slide switch to OFF position to turn off the
alarm
function.
Note:
Once the snooze function is turned on, the alarm will sound 4 times in
5-minute
intervals.
E.g. display for Washington
9. TIME ZONE & DST CHART FOR 62 CITIES
E.g. world time display for Sydney
4. Press “DISPLAY” button to save and exit the setting. The time will automatically
adjusted according to the new Home City you selected.
5. Or you can re-set the time and date as described in the above section.
8. DAYLIGHT SAVING TIME (DST)
●The National Institute of Standards and Technology and WWVB encode a
special DST code in the WWVB transmission for Daylight Saving Time.
●The unit will automatically advance the time by one hours in the spring
and back an hour in the fall, provided the DST function is not turned off.
●DST function is set to AUTO by default. Please refer to Manual Clock setting
session for details
You can check the time for 62 cities in the world.
1. Press “DISPLAY” button until the world time indicator “ ” appears.
2. Press “DOWN”/“UP” button to check the world city and time.
3. Press “DISPLAY” button to return back to normal display.
10. SETTING THE ALARM
1. In normal mode, press and hold “ALARM” button for 2 seconds until the
Hour digit flashes.
2. Press “DOWN”/“UP” button to adjust the value of the flashing digit. Press
“DOWN”/“UP” button without releasing to speed up setting.
3. Press “ALARM” button until Minute digit flashes, and press “DOWN”/“UP”
button to adjust its value.
4. Press “ALARM” button to save and exit setting.
Using Alarm & Snooze Function
1. Set the desired alarm as described in the above section.
2. Slide the “ALARM ON/OFF” slide switch to ON position to turn on the alarm
function, with the alarm icon “ ” displayed.
3. When the clock reaches the alarm time, alarm sound will start. Where, it can
be stopped by the operation:
a. auto-stop after 1 minute alarming if without any operation, and the clock will
re-alarm at the alarm time by the next day.
b. or press “SNOOZE/LIGHT” button to stop the current alarm and enter
snooze with the bell icon keep flashing.
c. slide the “ALARM ON/OFF” slide switch to OFF position to turn off the alarm
function.
Note:
Once the snooze function is turned on, the alarm will sound 4 times in 5-minute
intervals.
11. TEMPERATURE DISPLAY
The temperature is displayed in °F by default. User may hold the "WAVE" button
for 3 seconds to switch between °F and °C readings.
Note:
When the temperature is below -40°C (-40°F) or higher than 70°C (158°F), the
temperature displays “Lo” or “Hi” icon respectively.
12. BATTERY REPLACEMENT
When the LCD becomes dim, it indicates that the battery power is not enough.
You should replace with 2 AAA size batteries at once.
Note:
1. If the clock is not used for a long time, please take off the batteries.
2. Attention! Batteries should not be exposed to excessive heat such as sunshine,
fire or the like. Please dispose of used unit or batteries in an ecologically safe
manner.
13. SUGGESTION AND TROUBLESHOOTING
Please make sure you read the instructions before operating this delicate
clock. We have developed this sophisticated instrument for the best
reception performance. However, the signal from the US Atomic Clock
transmitter in Colorado may be weakened or affected by various causes over
its transmission range before reaching your unit. We advise you to note the
followings:
●If the unit has trouble receiving the signal, try a different location, ideally
near a window.
●Always place the unit away from interfering sources such as TV set, computer, etc.
●Avoid placing the unit on or next to metal plates.
●Closed areas such as airport, basement, tower block, or factory are not
recommended.
●Do not start reception in moving vehicles such as cars or trains.
●Electrical storms between you and Colorado may interfere with the WWVB signal.
World Clock Manual English_French_A3_v2_10.28.15.indd 1 2015-11-02 3:32 PM
MAIN FEATURES
DISPLAY
E.g. display for Washington
E.g. world time display for Sydney
MAIN FEATURES
DISPLAY
E.g. display for Washington
E.g. world time display for Sydney
MARATHON COMPACT ATOMIC
WORLD
CLOCK
WITH LED
EMERGENCY LIGHT
USERS’
INSTRUCTION
Thank you for your purchase of this delicate Radio Atomic Controlled
Clock.
Utmost care has gone into the design and manufacture of your clock.
Please
read the instruction carefully and keep the manual well for future
reference.
1. MAIN
FEATURES
1. TORCH
button
2. SNOOZE / LIGHT
button
3. LCD
display
4. DISPLAY
button
5. ALARM
button
6. ALARM ON/OFF slide
switch
7. UP & DOWN
button
8. LOCK slide
switch
9. RC ON/ RC OFF / RC OFF+DST slide
switch
10. WAVE
button
11. RESET
button
12. CLOCK
button
13. Battery
compartment
14. LED
flashlight
Display
D1=Normal time
mode
1.
Time
2. Date (or alarm
time)
3. Day of the
week
4.
Temperature
5.
DST
6. Signal strength
indicator
7. Time
zone
2. GETTING
STARTED
●Remove the battery
door.
●Insert two new AAA size batteries as per the polarity information marked
on
the battery
compartment.
●Replace the battery
door.
●Once the battery is installed, the normal segments of the LCD will be
shown
before entering the radio controlled time reception
mode.
●The RC clock will automatically start scanning for the radio controlled
time
signal in 8
seconds.
Note:
If no display appears on the LCD after inserting the battery, press the “RESET” button
by
using a metal wire. In some cases, you may not receive the signal immediately. Due to
the
atmospheric disturbance, the best reception often occurs during
nighttime.
3. RECEPTION OF ATOMIC RADIO
SIGNAL
●The unit must receive the Atomic Radio Signal to automatically set
the
time, date and
weekday.
●The unit automatically starts the Atomic signal search after changing of
new
fresh batteries, as indicated by the flashing "signal tower"
icon
●Everyday at 2:00 am, the unit automatically carries out the
synchronization
procedure with the Atomic signal to correct any deviations to the exact
time.
f the attempt is not successful, the "signal tower" icon will disappear from
the
display, and the unit will automatically attempt another synchronization
at
3:00 am. This procedure is repeated automatically again at 4:00 am if
necessary.
●Each synchronization process will take between 3 to 16 minutes, depending
on
the signal strength received. If no signal is detected, the unit will
automatically
exit the process in 6
minutes.
●Once the unit is synchronized successfully to the Atomic signal,
the
"signal tower" icon will be turned on until 2:00 am of following
day.
●The unit also conducts periodic checking of Atomic radio signals at 8:00
am,2:00
pm, and 8:00 pm. Any successful attempts at these hours will lead to
the
continuous on of "signal tower" until 2:00 am of following
day.
●To manually start the Atomic signal reception, press the "WAVE" button.
User
may also cancel the process by holding the WAVE
button.
4. SETTING TIME
ZONE
Your clock is designed to display time for different time zones. Please refer to
the
Manual Clock setting to set your desired time zone in following
order.
PST:
Pacific
MST:
Mountain
CST:
Central
EST:
Eastern
AST:
Alaska
NST:
Newfoundland
Note:
After selecting the time zone, the "signal tower" icon will be turned off as the unit is no
longer
synchronized to Atomic radio signal. User may press the WAVE button (inside
battery
compartment) to re-start the synchronization process, or let the clock automatically carries
out
the synchronization procedures daily starting at 2:00
am.
5. SIGNAL STRENGTH
INDICATOR
The signal indicator displays signal strength in 4 levels. Wave segment
flashing
means time signals are being received. The signal quality could be
classified
into 4
types:
If the RC clock receives signal successfully, a sync-time symbol “ ” will
appear
on the LCD. The unit has already received the time signal. Otherwise the
signal
strength symbol will disappear from the
LCD.
6. MANUAL CLOCK
SETTING
Inside the manual clock setting, user may manually set the clock in
following
manner
1. Time zone
setting
2. Calendar setting (Year, Month,
Date)
3. Time setting (12/24 Hr, Hour, Minute,
Second)
4. Language selection for Day of week (GB, FR, DE, ES,
IT)
5. Daylight Saving Time AUTO/OFF
setting
1. In normal mode, press and hold “CLOCK” button for 2 seconds until the
time
zone
flashes.
2. Press “UP” or “DOWN” button to set the desired
time
3. Press “CLOCK” button again until the Year digit flashes and
press
“UP”/ “DOWN” button to adjust its
value.
4. Repeat the above operations to set the time and calendar in this
sequence:
Time zone > Year >
D&M
or M&S> Month > Date > 12/24 Hour format
>
Hour > Minute > Second > Language (GB/FR/DE/ES/IT) > DST
AUTO/OFF.
Note:
The clock will automatically exit the clock setting mode after 30
seconds
without pressing any
button.
7. HOW TO SET HOME CITY AND
TIME
For WWVB radio controlled atomic clock, the default Home City is set
to
WASHINGTON (WAS). If you want to set the time to be another city, please
set
the home city as
follows:
1. In normal time mode, press “DISPLAY” button to check current home city
.
2. Press and hold “DISPLAY” button for 2 seconds to enter home city setting
mode.
3. Press “DOWN”/“UP” button to set home city. Press “DOWN”/“UP” button
without
releasing to speed up
setting.
MAIN FEATURES
DISPLAY
E.g. display for Washington
E.g. world time display for Sydney
E.g. display for Washington
9. TIME ZONE & DST CHART FOR 62 CITIES
E.g. world time display for Sydney
4. Press “DISPLAY” button to save and exit the setting. The time will automatically
adjusted according to the new Home City you selected.
5. Or you can re-set the time and date as described in the above section.
8. DAYLIGHT SAVING TIME (DST)
●The National Institute of Standards and Technology and WWVB encode a
special DST code in the WWVB transmission for Daylight Saving Time.
●The unit will automatically advance the time by one hours in the spring
and back an hour in the fall, provided the DST function is not turned off.
●DST function is set to AUTO by default. Please refer to Manual Clock setting
session for details
You can check the time for 62 cities in the world.
1. Press “DISPLAY” button until the world time indicator “ ” appears.
2. Press “DOWN”/“UP” button to check the world city and time.
3. Press “DISPLAY” button to return back to normal display.
10. SETTING THE ALARM
1. In normal mode, press and hold “ALARM” button for 2 seconds until the
Hour digit flashes.
2. Press “DOWN”/“UP” button to adjust the value of the flashing digit. Press
“DOWN”/“UP” button without releasing to speed up setting.
3. Press “ALARM” button until Minute digit flashes, and press “DOWN”/“UP”
button to adjust its value.
4. Press “ALARM” button to save and exit setting.
Using Alarm & Snooze Function
1. Set the desired alarm as described in the above section.
2. Slide the “ALARM ON/OFF” slide switch to ON position to turn on the alarm
function, with the alarm icon “ ” displayed.
3. When the clock reaches the alarm time, alarm sound will start. Where, it can
be stopped by the operation:
a. auto-stop after 1 minute alarming if without any operation, and the clock will
re-alarm at the alarm time by the next day.
b. or press “SNOOZE/LIGHT” button to stop the current alarm and enter
snooze with the bell icon keep flashing.
c. slide the “ALARM ON/OFF” slide switch to OFF position to turn off the alarm
function.
Note:
Once the snooze function is turned on, the alarm will sound 4 times in 5-minute
intervals.
11. TEMPERATURE DISPLAY
The temperature is displayed in °F by default. User may hold the "WAVE" button
for 3 seconds to switch between °F and °C readings.
Note:
When the temperature is below -40°C (-40°F) or higher than 70°C (158°F), the
temperature displays “Lo” or “Hi” icon respectively.
12. BATTERY REPLACEMENT
When the LCD becomes dim, it indicates that the battery power is not enough.
You should replace with 2 AAA size batteries at once.
Note:
1. If the clock is not used for a long time, please take off the batteries.
2. Attention! Batteries should not be exposed to excessive heat such as sunshine,
fire or the like. Please dispose of used unit or batteries in an ecologically safe
manner.
13. SUGGESTION AND TROUBLESHOOTING
Please make sure you read the instructions before operating this delicate
clock. We have developed this sophisticated instrument for the best
reception performance. However, the signal from the US Atomic Clock
transmitter in Colorado may be weakened or affected by various causes over
its transmission range before reaching your unit. We advise you to note the
followings:
●If the unit has trouble receiving the signal, try a different location, ideally
near a window.
●Always place the unit away from interfering sources such as TV set, computer, etc.
●Avoid placing the unit on or next to metal plates.
●Closed areas such as airport, basement, tower block, or factory are not
recommended.
●Do not start reception in moving vehicles such as cars or trains.
●Electrical storms between you and Colorado may interfere with the WWVB signal.
4. Press “DISPLAY” button to save and exit the setting. The time will
automatically
adjusted according to the new Home City you
selected.
5. Or you can re-set the time and date as described in the above
section.
E.g. display for
Washington
8. DAYLIGHT SAVING TIME
(DST)
●The National Institute of Standards and Technology and WWVB encode
a
special DST code in the WWVB transmission for Daylight Saving
Time.
●The unit will automatically advance the time by one hours in the
spring
and back an hour in the fall, provided the DST function is not turned
off.
●DST function is set to AUTO by default. Please refer to Manual Clock
setting
session for
details
9. TIME ZONE & DST CHART FOR 62
CITIES
You can check the time for 62 cities in the
world.
1. Press “DISPLAY” button until the world time indicator “ ”
appears.
2. Press “DOWN”/“UP” button to check the world city and
time.
3. Press “DISPLAY” button to return back to normal
display.
E.g. world time display for
Sydney
11. TEMPERATURE
DISPLAY
The temperature is displayed in °F by default. User may hold the "WAVE"
button
for 3 seconds to switch between °F and °C
readings.
Note:
When the temperature is below -40°C (-40°F) or higher than 70°C (158°F),
the
temperature displays “Lo” or “Hi” icon
respectively.
12. BATTERY
REPLACEMENT
When the LCD becomes dim, it indicates that the battery power is not
enough.
You should replace with 2 AAA size batteries at
once.
Note:
1. If the clock is not used for a long time, please take off the
batteries.
2. Attention! Batteries should not be exposed to excessive heat such as
sunshine,
fire or the like. Please dispose of used unit or batteries in an ecologically
safe
manner.
13. SUGGESTION AND
TROUBLESHOOTING
Please make sure you read the instructions before operating this
delicate
clock. We have developed this sophisticated instrument for the
best
reception performance. However, the signal from the US Atomic
Clock
transmitter in Colorado may be weakened or affected by various causes
over
its transmission range before reaching your unit. We advise you to note
the
followings:
●If the unit has trouble receiving the signal, try a different location,
ideally
near a
window.
●Always place the unit away from interfering sources such as TV set, computer,
etc.
●Avoid placing the unit on or next to metal
plates.
●Closed areas such as airport, basement, tower block, or factory are
not
recommended.
●Do not start reception in moving vehicles such as cars or
trains.
●Electrical storms between you and Colorado may interfere with the Atomic
signal.
10. SETTING THE
ALARM
1. In normal mode, press and hold “ALARM” button for 2 seconds until
the
Hour digit
flashes.
2. Press “DOWN”/“UP” button to adjust the value of the flashing digit.
Press
“DOWN”/“UP” button without releasing to speed up
setting.
3. Press “ALARM” button until Minute digit flashes, and press
“DOWN”/“UP”
button to adjust its
value.
4. Press “ALARM” button to save and exit
setting.
Using Alarm & Snooze
Function
1. Set the desired alarm as described in the above
section.
2. Slide the “ALARM ON/OFF” slide switch to ON position to turn on the
alarm
function, with the alarm icon “ ”
displayed.
3. When the clock reaches the alarm time, alarm sound will start. Where, it
can
be stopped by the
operation:
a. auto-stop after 1 minute alarming if without any operation, and the clock
will
re-alarm at the alarm time by the next
day.
b. or press “SNOOZE/LIGHT” button to stop the current alarm and
enter
snooze with the bell icon keep
flashing.
c. slide the “ALARM ON/OFF” slide switch to OFF position to turn off the
alarm
function.
Note:
Once the snooze function is turned on, the alarm will sound 4 times in
5-minute
intervals.
MARATHON COMPACT ATOMIC
WORLD
CLOCK
WITH LED
EMERGENCY LIGHT
USERS’
INSTRUCTION
Thank you for your purchase of this delicate Radio Atomic Controlled
Clock.
Utmost care has gone into the design and manufacture of your clock.
Please
read the instruction carefully and keep the manual well for future
reference.
1. MAIN
FEATURES
1. TORCH
button
2. SNOOZE / LIGHT
button
3. LCD
display
4. DISPLAY
button
5. ALARM
button
6. ALARM ON/OFF slide
switch
7. UP & DOWN
button
8. LOCK slide
switch
9. RC ON/ RC OFF / RC OFF+DST slide
switch
10. WAVE
button
11. RESET
button
12. CLOCK
button
13. Battery
compartment
14. LED
flashlight
Display
D1=Normal time
mode
1.
Time
2. Date (or alarm
time)
3. Day of the
week
4.
Temperature
5.
DST
6. Signal strength
indicator
7. Time
zone
2. GETTING
STARTED
●Remove the battery
door.
●Insert two new AAA size batteries as per the polarity information marked
on
the battery
compartment.
●Replace the battery
door.
●Once the battery is installed, the normal segments of the LCD will be
shown
before entering the radio controlled time reception
mode.
●The RC clock will automatically start scanning for the radio controlled
time
signal in 8
seconds.
Note:
If no display appears on the LCD after inserting the battery, press the “RESET” button
by
using a metal wire. In some cases, you may not receive the signal immediately. Due to
the
atmospheric disturbance, the best reception often occurs during
nighttime.
3. RECEPTION OF ATOMIC RADIO
SIGNAL
●The unit must receive the Atomic Radio Signal to automatically set
the
time, date and
weekday.
●The unit automatically starts the Atomic signal search after changing of
new
fresh batteries, as indicated by the flashing "signal tower"
icon
●Everyday at 2:00 am, the unit automatically carries out the
synchronization
procedure with the Atomic signal to correct any deviations to the exact
time.
f the attempt is not successful, the "signal tower" icon will disappear from
the
display, and the unit will automatically attempt another synchronization
at
3:00 am. This procedure is repeated automatically again at 4:00 am if
necessary.
●Each synchronization process will take between 3 to 16 minutes, depending
on
the signal strength received. If no signal is detected, the unit will
automatically
exit the process in 6
minutes.
●Once the unit is synchronized successfully to the Atomic signal,
the
"signal tower" icon will be turned on until 2:00 am of following
day.
●The unit also conducts periodic checking of Atomic radio signals at 8:00
am,2:00
pm, and 8:00 pm. Any successful attempts at these hours will lead to
the
continuous on of "signal tower" until 2:00 am of following
day.
●To manually start the Atomic signal reception, press the "WAVE" button.
User
may also cancel the process by holding the WAVE
button.
4. SETTING TIME
ZONE
Your clock is designed to display time for different time zones. Please refer to
the
Manual Clock setting to set your desired time zone in following
order.
PST:
Pacific
MST:
Mountain
CST:
Central
EST:
Eastern
AST:
Alaska
NST:
Newfoundland
Note:
After selecting the time zone, the "signal tower" icon will be turned off as the unit is no
longer
synchronized to Atomic radio signal. User may press the WAVE button (inside
battery
compartment) to re-start the synchronization process, or let the clock automatically carries
out
the synchronization procedures daily starting at 2:00
am.
5. SIGNAL STRENGTH
INDICATOR
The signal indicator displays signal strength in 4 levels. Wave segment
flashing
means time signals are being received. The signal quality could be
classified
into 4
types:
If the RC clock receives signal successfully, a sync-time symbol “ ” will
appear
on the LCD. The unit has already received the time signal. Otherwise the
signal
strength symbol will disappear from the
LCD.
6. MANUAL CLOCK
SETTING
Inside the manual clock setting, user may manually set the clock in
following
manner
1. Time zone
setting
2. Calendar setting (Year, Month,
Date)
3. Time setting (12/24 Hr, Hour, Minute,
Second)
4. Language selection for Day of week (GB, FR, DE, ES,
IT)
5. Daylight Saving Time AUTO/OFF
setting
1. In normal mode, press and hold “CLOCK” button for 2 seconds until the
time
zone
flashes.
2. Press “UP” or “DOWN” button to set the desired
time
3. Press “CLOCK” button again until the Year digit flashes and
press
“UP”/ “DOWN” button to adjust its
value.
4. Repeat the above operations to set the time and calendar in this
sequence:
Time zone > Year >
D&M
or M&S> Month > Date > 12/24 Hour format
>
Hour > Minute > Second > Language (GB/FR/DE/ES/IT) > DST
AUTO/OFF.
Note:
The clock will automatically exit the clock setting mode after 30
seconds
without pressing any
button.
7. HOW TO SET HOME CITY AND
TIME
For WWVB radio controlled atomic clock, the default Home City is set
to
WASHINGTON (WAS). If you want to set the time to be another city, please
set
the home city as
follows:
1. In normal time mode, press “DISPLAY” button to check current home city
.
2. Press and hold “DISPLAY” button for 2 seconds to enter home city setting
mode.
3. Press “DOWN”/“UP” button to set home city. Press “DOWN”/“UP” button
without
releasing to speed up
setting.
E.g. display for Washington
9. TIME ZONE & DST CHART FOR 62 CITIES
E.g. world time display for Sydney
4. Press “DISPLAY” button to save and exit the setting. The time will automatically
adjusted according to the new Home City you selected.
5. Or you can re-set the time and date as described in the above section.
8. DAYLIGHT SAVING TIME (DST)
●The National Institute of Standards and Technology and WWVB encode a
special DST code in the WWVB transmission for Daylight Saving Time.
●The unit will automatically advance the time by one hours in the spring
and back an hour in the fall, provided the DST function is not turned off.
●DST function is set to AUTO by default. Please refer to Manual Clock setting
session for details
You can check the time for 62 cities in the world.
1. Press “DISPLAY” button until the world time indicator “ ” appears.
2. Press “DOWN”/“UP” button to check the world city and time.
3. Press “DISPLAY” button to return back to normal display.
10. SETTING THE ALARM
1. In normal mode, press and hold “ALARM” button for 2 seconds until the
Hour digit flashes.
2. Press “DOWN”/“UP” button to adjust the value of the flashing digit. Press
“DOWN”/“UP” button without releasing to speed up setting.
3. Press “ALARM” button until Minute digit flashes, and press “DOWN”/“UP”
button to adjust its value.
4. Press “ALARM” button to save and exit setting.
Using Alarm & Snooze Function
1. Set the desired alarm as described in the above section.
2. Slide the “ALARM ON/OFF” slide switch to ON position to turn on the alarm
function, with the alarm icon “ ” displayed.
3. When the clock reaches the alarm time, alarm sound will start. Where, it can
be stopped by the operation:
a. auto-stop after 1 minute alarming if without any operation, and the clock will
re-alarm at the alarm time by the next day.
b. or press “SNOOZE/LIGHT” button to stop the current alarm and enter
snooze with the bell icon keep flashing.
c. slide the “ALARM ON/OFF” slide switch to OFF position to turn off the alarm
function.
Note:
Once the snooze function is turned on, the alarm will sound 4 times in 5-minute
intervals.
11. TEMPERATURE DISPLAY
The temperature is displayed in °F by default. User may hold the "WAVE" button
for 3 seconds to switch between °F and °C readings.
Note:
When the temperature is below -40°C (-40°F) or higher than 70°C (158°F), the
temperature displays “Lo” or “Hi” icon respectively.
12. BATTERY REPLACEMENT
When the LCD becomes dim, it indicates that the battery power is not enough.
You should replace with 2 AAA size batteries at once.
Note:
1. If the clock is not used for a long time, please take off the batteries.
2. Attention! Batteries should not be exposed to excessive heat such as sunshine,
fire or the like. Please dispose of used unit or batteries in an ecologically safe
manner.
13. SUGGESTION AND TROUBLESHOOTING
Please make sure you read the instructions before operating this delicate
clock. We have developed this sophisticated instrument for the best
reception performance. However, the signal from the US Atomic Clock
transmitter in Colorado may be weakened or affected by various causes over
its transmission range before reaching your unit. We advise you to note the
followings:
●If the unit has trouble receiving the signal, try a different location, ideally
near a window.
●Always place the unit away from interfering sources such as TV set, computer, etc.
●Avoid placing the unit on or next to metal plates.
●Closed areas such as airport, basement, tower block, or factory are not
recommended.
●Do not start reception in moving vehicles such as cars or trains.
●Electrical storms between you and Colorado may interfere with the WWVB signal.
MAIN FEATURES
DISPLAY
E.g. display for Washington
E.g. world time display for Sydney
E.g. display for Washington
9. TIME ZONE & DST CHART FOR 62 CITIES
E.g. world time display for Sydney
4. Press “DISPLAY” button to save and exit the setting. The time will automatically
adjusted according to the new Home City you selected.
5. Or you can re-set the time and date as described in the above section.
8. DAYLIGHT SAVING TIME (DST)
●The National Institute of Standards and Technology and WWVB encode a
special DST code in the WWVB transmission for Daylight Saving Time.
●The unit will automatically advance the time by one hours in the spring
and back an hour in the fall, provided the DST function is not turned off.
●DST function is set to AUTO by default. Please refer to Manual Clock setting
session for details
You can check the time for 62 cities in the world.
1. Press “DISPLAY” button until the world time indicator “ ” appears.
2. Press “DOWN”/“UP” button to check the world city and time.
3. Press “DISPLAY” button to return back to normal display.
10. SETTING THE ALARM
1. In normal mode, press and hold “ALARM” button for 2 seconds until the
Hour digit flashes.
2. Press “DOWN”/“UP” button to adjust the value of the flashing digit. Press
“DOWN”/“UP” button without releasing to speed up setting.
3. Press “ALARM” button until Minute digit flashes, and press “DOWN”/“UP”
button to adjust its value.
4. Press “ALARM” button to save and exit setting.
Using Alarm & Snooze Function
1. Set the desired alarm as described in the above section.
2. Slide the “ALARM ON/OFF” slide switch to ON position to turn on the alarm
function, with the alarm icon “ ” displayed.
3. When the clock reaches the alarm time, alarm sound will start. Where, it can
be stopped by the operation:
a. auto-stop after 1 minute alarming if without any operation, and the clock will
re-alarm at the alarm time by the next day.
b. or press “SNOOZE/LIGHT” button to stop the current alarm and enter
snooze with the bell icon keep flashing.
c. slide the “ALARM ON/OFF” slide switch to OFF position to turn off the alarm
function.
Note:
Once the snooze function is turned on, the alarm will sound 4 times in 5-minute
intervals.
11. TEMPERATURE DISPLAY
The temperature is displayed in °F by default. User may hold the "WAVE" button
for 3 seconds to switch between °F and °C readings.
Note:
When the temperature is below -40°C (-40°F) or higher than 70°C (158°F), the
temperature displays “Lo” or “Hi” icon respectively.
12. BATTERY REPLACEMENT
When the LCD becomes dim, it indicates that the battery power is not enough.
You should replace with 2 AAA size batteries at once.
Note:
1. If the clock is not used for a long time, please take off the batteries.
2. Attention! Batteries should not be exposed to excessive heat such as sunshine,
fire or the like. Please dispose of used unit or batteries in an ecologically safe
manner.
13. SUGGESTION AND TROUBLESHOOTING
Please make sure you read the instructions before operating this delicate
clock. We have developed this sophisticated instrument for the best
reception performance. However, the signal from the US Atomic Clock
transmitter in Colorado may be weakened or affected by various causes over
its transmission range before reaching your unit. We advise you to note the
followings:
●If the unit has trouble receiving the signal, try a different location, ideally
near a window.
●Always place the unit away from interfering sources such as TV set, computer, etc.
●Avoid placing the unit on or next to metal plates.
●Closed areas such as airport, basement, tower block, or factory are not
recommended.
●Do not start reception in moving vehicles such as cars or trains.
●Electrical storms between you and Colorado may interfere with the WWVB signal.
E.g. display for Washington
9. TIME ZONE & DST CHART FOR 62 CITIES
E.g. world time display for Sydney
4. Press “DISPLAY” button to save and exit the setting. The time will automatically
adjusted according to the new Home City you selected.
5. Or you can re-set the time and date as described in the above section.
8. DAYLIGHT SAVING TIME (DST)
●The National Institute of Standards and Technology and WWVB encode a
special DST code in the WWVB transmission for Daylight Saving Time.
●The unit will automatically advance the time by one hours in the spring
and back an hour in the fall, provided the DST function is not turned off.
●DST function is set to AUTO by default. Please refer to Manual Clock setting
session for details
You can check the time for 62 cities in the world.
1. Press “DISPLAY” button until the world time indicator “ ” appears.
2. Press “DOWN”/“UP” button to check the world city and time.
3. Press “DISPLAY” button to return back to normal display.
10. SETTING THE ALARM
1. In normal mode, press and hold “ALARM” button for 2 seconds until the
Hour digit flashes.
2. Press “DOWN”/“UP” button to adjust the value of the flashing digit. Press
“DOWN”/“UP” button without releasing to speed up setting.
3. Press “ALARM” button until Minute digit flashes, and press “DOWN”/“UP”
button to adjust its value.
4. Press “ALARM” button to save and exit setting.
Using Alarm & Snooze Function
1. Set the desired alarm as described in the above section.
2. Slide the “ALARM ON/OFF” slide switch to ON position to turn on the alarm
function, with the alarm icon “ ” displayed.
3. When the clock reaches the alarm time, alarm sound will start. Where, it can
be stopped by the operation:
a. auto-stop after 1 minute alarming if without any operation, and the clock will
re-alarm at the alarm time by the next day.
b. or press “SNOOZE/LIGHT” button to stop the current alarm and enter
snooze with the bell icon keep flashing.
c. slide the “ALARM ON/OFF” slide switch to OFF position to turn off the alarm
function.
Note:
Once the snooze function is turned on, the alarm will sound 4 times in 5-minute
intervals.
11. TEMPERATURE DISPLAY
The temperature is displayed in °F by default. User may hold the "WAVE" button
for 3 seconds to switch between °F and °C readings.
Note:
When the temperature is below -40°C (-40°F) or higher than 70°C (158°F), the
temperature displays “Lo” or “Hi” icon respectively.
12. BATTERY REPLACEMENT
When the LCD becomes dim, it indicates that the battery power is not enough.
You should replace with 2 AAA size batteries at once.
Note:
1. If the clock is not used for a long time, please take off the batteries.
2. Attention! Batteries should not be exposed to excessive heat such as sunshine,
fire or the like. Please dispose of used unit or batteries in an ecologically safe
manner.
13. SUGGESTION AND TROUBLESHOOTING
Please make sure you read the instructions before operating this delicate
clock. We have developed this sophisticated instrument for the best
reception performance. However, the signal from the US Atomic Clock
transmitter in Colorado may be weakened or affected by various causes over
its transmission range before reaching your unit. We advise you to note the
followings:
●If the unit has trouble receiving the signal, try a different location, ideally
near a window.
●Always place the unit away from interfering sources such as TV set, computer, etc.
●Avoid placing the unit on or next to metal plates.
●Closed areas such as airport, basement, tower block, or factory are not
recommended.
●Do not start reception in moving vehicles such as cars or trains.
●Electrical storms between you and Colorado may interfere with the WWVB signal.
World Clock Manual English_French_A3_v2_10.28.15.indd 2 2015-11-02 3:32 PM
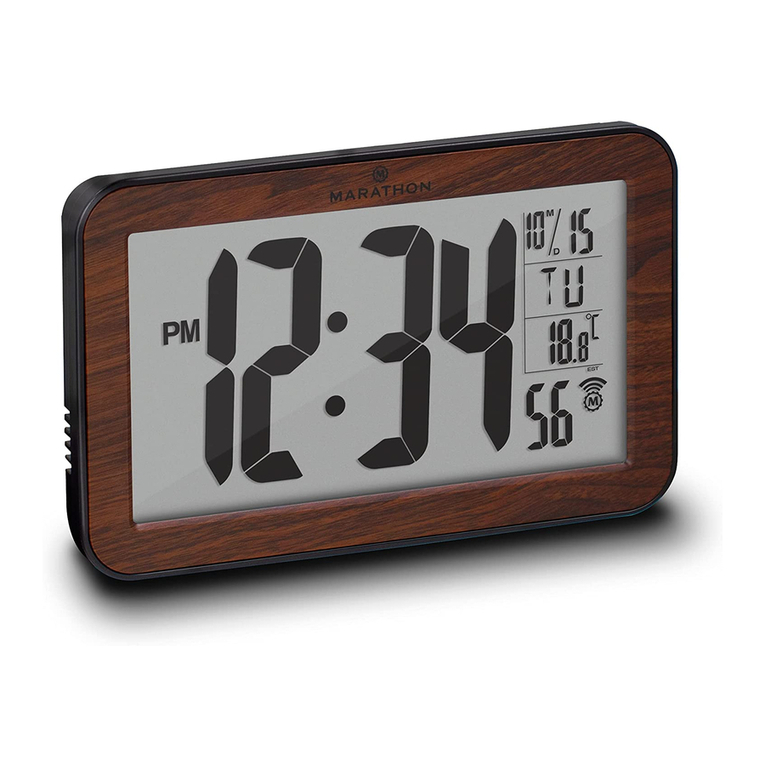
Other Marathon Clock manuals

Marathon Basics 64 User manual

Marathon

Marathon Basics 64 User manual

Marathon CL030055 Series User manual

Marathon

Marathon CL030055 Series User manual

Marathon CL030045 User manual

Marathon

Marathon CL030045 User manual

Marathon CL030061-FD Series User manual

Marathon

Marathon CL030061-FD Series User manual

Marathon CL030066 Series User manual

Marathon

Marathon CL030066 Series User manual

Marathon CL030027-FD-NA User manual

Marathon

Marathon CL030027-FD-NA User manual

Marathon Slim Jumbo Atomic User manual

Marathon

Marathon Slim Jumbo Atomic User manual

Marathon CL030055BK User manual

Marathon

Marathon CL030055BK User manual

Marathon CL030068 Series User manual

Marathon

Marathon CL030068 Series User manual

Marathon CL030033WD User manual

Marathon

Marathon CL030033WD User manual

Marathon Ultrawide User manual

Marathon

Marathon Ultrawide User manual

Marathon HOTEL COLLECTION User manual

Marathon

Marathon HOTEL COLLECTION User manual

Marathon Night Owl 86 User manual

Marathon

Marathon Night Owl 86 User manual

Marathon CL030056 Series User manual

Marathon

Marathon CL030056 Series User manual

Marathon CL030027 User manual

Marathon

Marathon CL030027 User manual

Marathon CL030057 User manual

Marathon

Marathon CL030057 User manual

Marathon CL030056SV User manual

Marathon

Marathon CL030056SV User manual

Marathon CL030089-BK-00 User manual

Marathon

Marathon CL030089-BK-00 User manual

Marathon CL030060 User manual

Marathon

Marathon CL030060 User manual

Marathon CL030050 User manual

Marathon

Marathon CL030050 User manual

Marathon Jumbo User manual

Marathon

Marathon Jumbo User manual

Popular Clock manuals by other brands

Oregon Scientific Silverstone FAP-101 user guide

Oregon Scientific

Oregon Scientific Silverstone FAP-101 user guide

La Crosse Technology WT-8008U manual

La Crosse Technology

La Crosse Technology WT-8008U manual

Midcontinent MD93H Installation manual and operating instructions

Midcontinent

Midcontinent MD93H Installation manual and operating instructions

TFA 98.1005 manual

TFA

TFA 98.1005 manual

Simplex 6310-9221A quick start guide

Simplex

Simplex 6310-9221A quick start guide

Oregon Scientific PRYSMA G manual

Oregon Scientific

Oregon Scientific PRYSMA G manual

TFA ICON instruction manual

TFA

TFA ICON instruction manual

Muji dual digital clock for travel user manual

Muji

Muji dual digital clock for travel user manual

La Crosse Technology 616-1410B Setup guide

La Crosse Technology

La Crosse Technology 616-1410B Setup guide

ACU-RITE 00754 user guide

ACU-RITE

ACU-RITE 00754 user guide

V-tech KidiMagic Parents' guide

V-tech

V-tech KidiMagic Parents' guide

La Crosse 513-1919 Faq

La Crosse

La Crosse 513-1919 Faq

Basic XL BXL-WC10 manual

Basic XL

Basic XL BXL-WC10 manual

DF ROBOT IV-18 operation instruction

DF ROBOT

DF ROBOT IV-18 operation instruction

Electronics International Inc Super Clock SC-5 Quick reference guide

Electronics International Inc

Electronics International Inc Super Clock SC-5 Quick reference guide

GIGA-TMS TR4020 user manual

GIGA-TMS

GIGA-TMS TR4020 user manual

La Crosse BBB86088 Faqs

La Crosse

La Crosse BBB86088 Faqs

V-tech Frozen II Magic Colour Clock Parents' guide

V-tech

V-tech Frozen II Magic Colour Clock Parents' guide

manuals.online logo
manuals.online logoBrands
  • About & Mission
  • Contact us
  • Privacy Policy
  • Terms and Conditions

Copyright 2025 Manuals.Online. All Rights Reserved.