WARNINGS
FLOODING WARNING:
FLOODING DURIN BREWING- This machine MUST be positioned on a
counter with a drainage facility. The machine can be operated without a
basket or urn/receptacle in place which will cause water to spray/flow
directly onto the counter. All potential operators should be fully trained in
its correct use. The machine should always be set in the "Lock Mode" if it
is left unsupervised to prevent incorrect use.
PLUMBING- The hose supplied with this unit is non-toxic food quality tested
to 190psi. However, a hose is not a permanent connection. It is, therefore,
advisable to switch off the machine'and close the stopcock valve when the
machine is not in use, e.g. overnight, weekends etc. All plumbing should be
done by a qualified service engineer.
SCALDING- Beware of accidentally operating the water drawoff tap and
brewing buttons, especially when cleaning the front of the boiler. ALL users
of this machine should be trained and should be aware that the machine
dispenses very hot beverages/water.
ELECTRICAL- This appliance must be earthed!
A 5.6kW machine should be installed by a qualified electrician.
The utmost care has been taken in the manufacture and testing of this unit.
Failure to install, maintain and or operate this boiler according to the
manufacturer's instructions may result in conditions that can cause injury or
damage to property. If in any doubt about the serviceability of the machine
always contact the manufacturer or your supplier for advice.
SERVICE IMAINTENANCE -The utmost care has been taken in the
manufacture and testing of this unit. Failure to install, maintain and or
operate this boiler according to the manufacturer's instructions may result in
conditions that can cause injury or damage to property. If in any doubt about
the serviceability of the boiler always contact the manufacturer or your
supplier for advice.
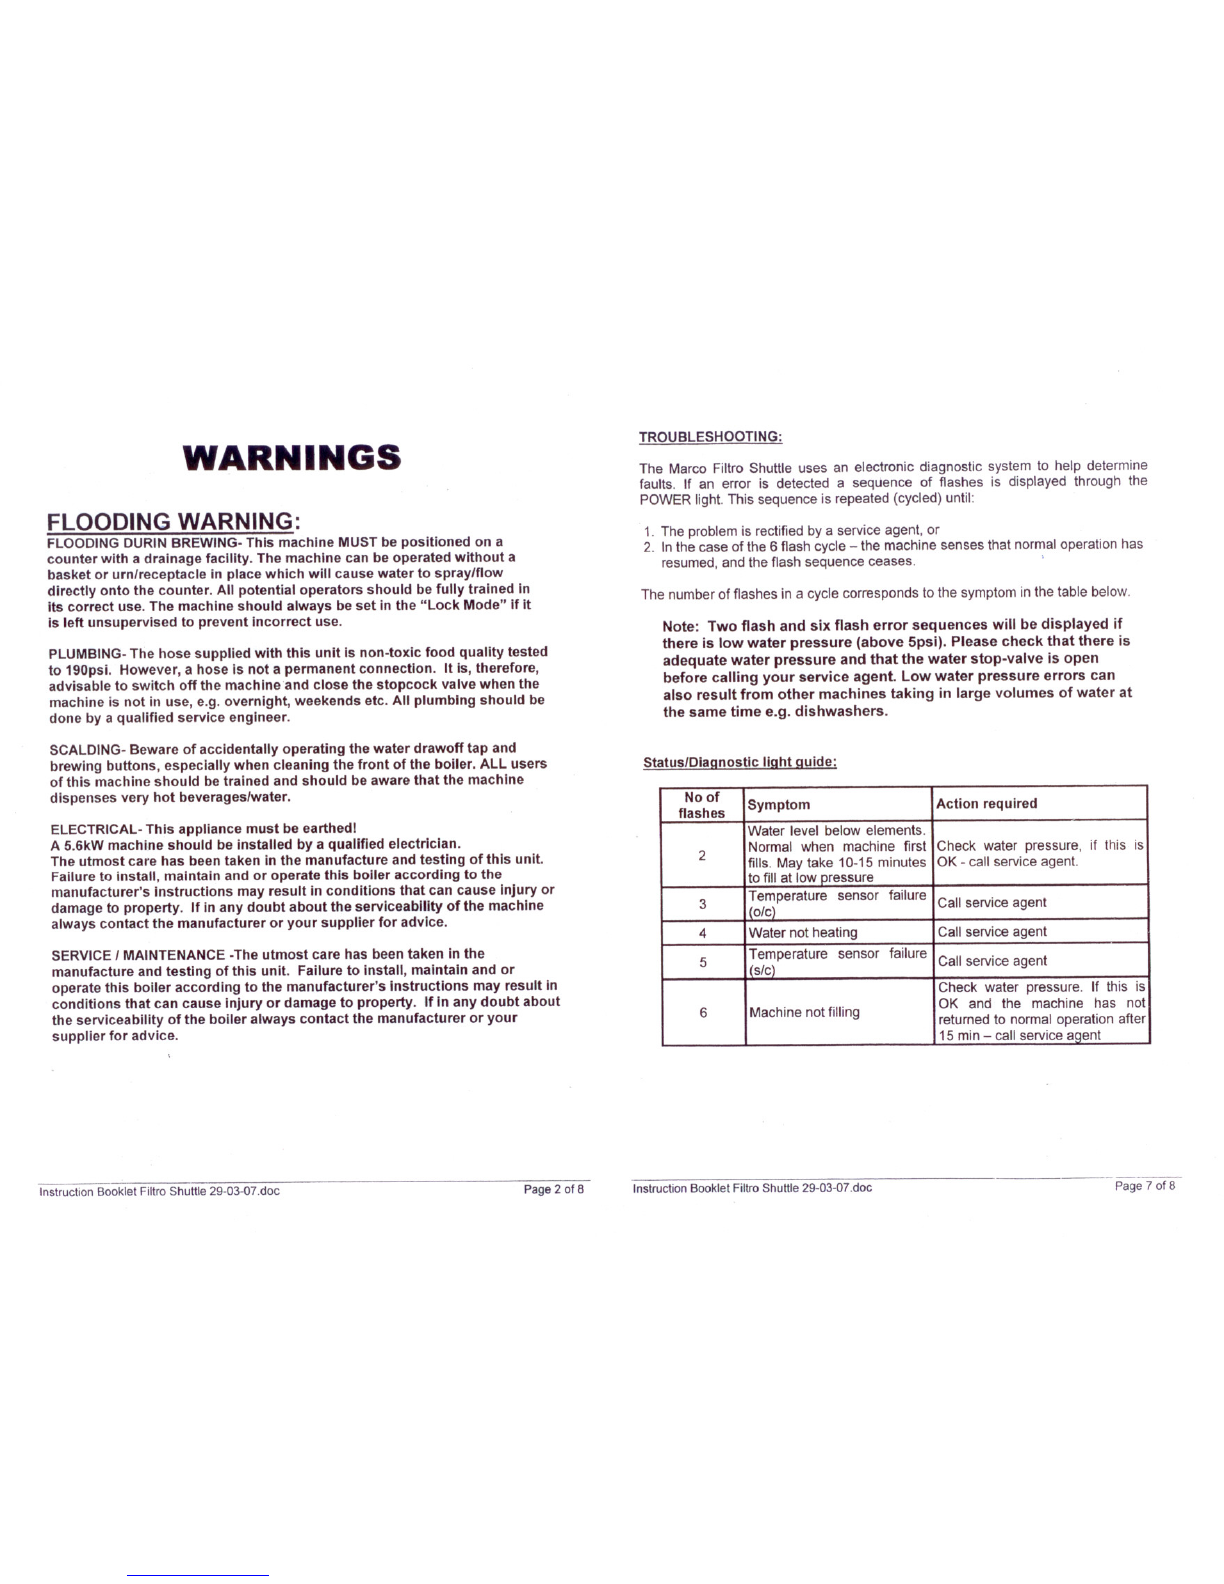
TROUBLESHOOTING:
The Marco Filtro Shuttle uses an electronic diagnostic system to help determine
faults. If an error is detected a sequence of flashes is displayed through the
POWER light. This sequence is repeated (cycled) until:
1. The problem is rectified by a service agent, or
2. In the case of the 6 flash cycle - the machine senses that normal operation has
resumed, and the flash sequence ceases. '
The number of flashes in a cycle corresponds to the symptom in the table below.
Note: Two flash and six flash error sequences will be displayed if
there is low water pressure (above 5psi). Please check that there is
adequate water pressure and that the water stop-valve is open
before calling your service agent. Low water pressure errors can
also result from other machines taking in large volumes of water at
the same time e.g. dishwashers.
Status/Dia~:mostic Ii~ht ~uide:
No of Symptom Action required
flashes Water level below elements.
2
Normal when machine first
Check water pressure, if this is
fills. May take 10-15 minutes OK - call service agent.
to fill at low pressure 3
Temperature sensor failure
Call service agent
'ole) 4
Water not heating Call service agent
5
Temperature sensor failure
Call service agent
(sic) Check water pressure. If this is
6
Machine not filling OK and the machine has not
returned to normal operation after
15 min - call service aaent
Instruction Booklet Filtro Shuttle 29-03-07.doc Page 2 of 8 ---------------------------------- -----
Instruction Booklet Filtro Shuttle 29-03-07.doc Page 7 of 8