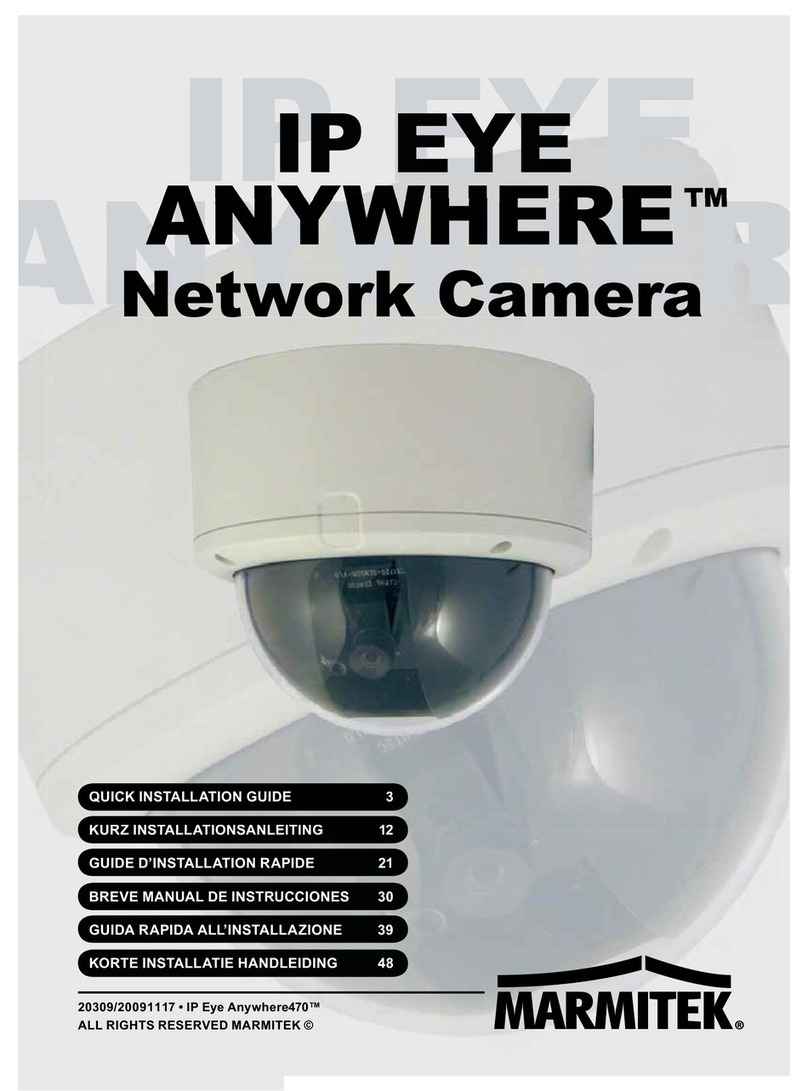
Marmitek IP EYE ANYWHERE - QUICK User manual

IP EYE
A
NYWHER
E
IP EYE
ANYWHERE™
Network Camera
20239/20080117 • IP Eye Anywhere™
ALL RIGHTS RESERVED MARMITEK ©
QUICK INSTALLATION GUIDE 3
KURZ INSTALLATIONSANLEITING 11
GUIDE D’INSTALLATION RAPIDE 19
BREVE MANUAL DE INSTRUCCIONES 27
GUIDA RAPIDA ALL’INSTALLAZIONE 35
KORTE INSTALLATIE HANDLEIDING 43

2© MARMITEK

ENGLISH
3IP EYE ANYWHERE™
SAFETY WARNINGS
• To prevent short circuits, this product should only be used inside and only in dry spaces.
Do not expose the components to rain or moisture. Do not use the product close to a
bath, swimming pool etc.
• Do not expose the components of your systems to extremely high temperatures or bright
light sources.
• In case of improper usage or if you have altered and repaired the product yourself, all
guarantees expire. Marmitek does not accept responsibility in the case of improper usage
of the product or when the product is used for purposes other than specified. Marmitek
does not accept responsibility for additional damage other than covered by the legal
product responsibility.
• This product is not a toy. Keep out of reach of children.
• Do not open the product: the device may contain live parts. The product should only be
repaired or serviced by a qualified expert.
• Only connect the adapter to the mains after checking whether the mains voltage is
the same as the values on the identification tags. Never connect an adapter when it is
damaged. In that case, contact your supplier.
1 GETTING STARTED
Package Contents
Check the items contained in the package carefully. You should have the following items.
Once any item contained is damaged or missing, contact the local authorized dealer.
✔One Marmitek IP Eye AnywhereTM IP Camera with built-in web server
✔One Power Adapter
✔One External Antenna (for wireless model)
✔One Wall/ceiling bracket
✔One RJ45 network cable
✔One Installation CD-ROM with Ultra View software package and user manual (English)
✔One Quick Installation manual
System Requirement
■ Networking
LAN: 10Base-T Ethernet or 100Base-TX Fast Ethernet
WLAN: IEEE 802.11b/g (for wireless model)
■ Accessing the Camera using Web Browser
Platform: Microsoft® Windows® 2000/XP/Vista/7
CPU: Intel Pentium III 800MHz or above
RAM: 512MB
Resolution: 800x600 or above
User Interface: Microsoft® Internet Explorer 6.0 or above
Mozilla Firefox 2.00 or above
Apple Safari 2 or above

4© MARMITEK
■ UltraView software
Platform: Microsoft® Windows® 2000/XP/Vista/7
CPU: Intel Pentium III 800MHz or above and 512MB RAM
for 1 camera connected
CPU: Intel Pentium 4 3.4 GHz or above and 2GB RAM
for 9 ~16 camera connected
Resolution: 1024x768 or above
2 SETTING UP THE CAMERA
Installing the Camera Stand
The camera comes with a camera stand, which uses a swivel ball screw head to lock to the
camera’s screw hole. When the camera stand is attached, you can place the camera anywhere by
mounting the camera through the three screw holes located in the base of the camera stand.
The Camera Stand
Connecting the IP Eye AnywhereTM Camera to LAN
Use the provided Ethernet cable to connect the camera to
your local area network (LAN).
When you connect the AC power adapter, the camera is
powered on automatically. You can verify the power status
from the Power LED on the front panel of the camera.
Once connected, the Link LED starts flashing green light
and the camera is on standby and ready for use now.
Connecting the Ethernet cable

ENGLISH
5IP EYE ANYWHERE™
Connecting the Camera to WLAN
If you use a wireless network in your
application environment, you need to
attach the included external antenna to the
camera.
When the camera is powered on, the
camera will automatically search any access
point with “default” SSID.
NOTE If the camera cannot connect to your wireless network, you need to install the camera
in LAN and proceed with WLAN settings.
3 ACCESSING THE CAMERA
Using IPFinder
1. Insert the Installation CD-ROM into your computer’s CD-ROM drive to initiate the
Auto-Run program.
2. Click the IPFinder item to launch the utility. The control panel will appear as below.
3. Once you get the IP address of the camera, launch the Web browser or UltraView to
access your camera.
TIP The Installation CD-ROM provides a setup program that allows you to install IPFinder
on your computer. To install IPFinder, click Install Software then select IPFinder on
the Auto-Run screen.
Connecting the
External Antenna
Display the connected camera(s).
Double click to link the Camera.
Click Search to find the IP address of
the connected camera(s).
Click Change IP to modify the IP
address of the selected camera.
Click Exit to close the utility.

6© MARMITEK
Accessing to the Camera
1. Open the Web browser on your computer (for example, Microsoft Internet Explorer in
this guide)
2. Type the default IP address (192.168.0.30) or the IP address found by IPFinder in the
Address bar, and then press [Enter].
3. When the login window appears, enter the default User name (admin) and
password (admin) and press OK to access to the main screen of the camera’s Web
Configuration.
4. Right click and select Install Active X Control.
5. Click Install.
6. Click Setup and then Smart Wizard to set up your camera quickly. The Smart Wizard
will guide you through the necessary settings with detailed instructions on each step.
Enter the User name and Password.
Enter the IP address of the camera here.

ENGLISH
7IP EYE ANYWHERE™
4 TIPS
- For more information, please refer to the Advanced Installation Guide on the provided
Installation CD-ROM.
- For details of operating UltraView, please refer to the Software User Guide on the provided
Installation CD-ROM.
- If you have any problem on the product(s), please contact your local authorized dealer.
TECHNICAL DATA
See page 8 and 9
ATTENTION
This appliance is designed to be used in all EU and EFTA countries.
Attention: The use of this product may be restricted in the following countries:
• Belgium: 2.4 GHz Frequency. The use of this frequency may be restricted in some areas. See
http://www.bipt.be for current information.
• France: 2.4 GHz Frequency. The use of channels other than: 10, 11, 12, 13 (2457, 2462,
2467, and 2472 MHz) may be restricted in some areas. See l’Autorité de Régulation des
Télécommunications (http://www.art-telecom.fr) for current information.
Environmental Information for Customers in the European Union
European Directive 2002/96/EC requires that the equipment bearing this symbol on the product and/or its
packaging must not be disposed of with unsorted municipal waste. The symbol indicates that this product
should be disposed of separately from regular household waste streams. It is your responsibility to dispose
of this and other electric and electronic equipment via designated collection facilities appointed by the government or
local authorities. Correct disposal and recycling will help prevent potential negative consequences to the environment
and human health. For more detailed information about the disposal of your old equipment, please contact your local
authorities, waste disposal service, or the shop where you purchased the product.

8© MARMITEK
Technical Data (1) IP Eye Anywhere 10 IP Eye Anywhere 11 IP Eye Anywhere 20 IP Eye Anywhere 21
Image Sensor
Image Sensor
Resolution
Ligh Minimum Illumination
Lens
Aperture (F/No.)
Focus Length
View Angle (Diagonal)
Image Processing
Compression
Auto Exposure Control
Auto White Balance
Auto Gain control
Light Frequency
Image Resolution and Frame rate
Multi-profile
System
Network Processor
System ROM
System RAM
Power
Power Consumption
Environment Operation:
Audio
Audio in
Sensitivity:
Freq Response:
Audio Codec
Communication
Ethernet
NALsseleriWg/b11.208ANNALsseleriWg/b11.208ANsseleriW
Supported Protocols
LED and Button
Power LED
Link/act. LED
Reset button
Others
annetnAelopiDlanretxEANannetnAelopiDlanretxEANannetnA
USB Port
USB dismount button
1/4” Color CMOS Sensor
640 x 480, 320 x 240, 160 x 120
0.5 LUX
8.26.2
mm5.4mm6.4
60 degree
gnimaertslaudGEPJM/4GEPMGEPJM
Yes
Yes
Yes
50Hz, 60Hz or Outdoor
VGA (640 x 480 ) : 30 fps, QVGA ( 320 x 240 ) : 30 fps, QQVGA ( 160 x 120) : 30 fps
ylsuoenatlumisseliforp3AN
ARM9 base
hsalFRONetyBM8hsalFRONetyBM4
MARDSetyBM23MARDSetyBM61
Storage: Temp: -15 ~ 60 Humidity: 0% ~ 90% non-condensing
enohporciMlanoitcerid-inmOlanretnIAN
DC5V, 230VAC 50 Hz
.xamsttaw8.xamsttaw6
Operation: Temp: 0 ~ 45 Humidity: 20% ~ 85% non-condensing
Bd3-/+Bd84-AN
zH00061~05AN
RMA/MCPAN
One RJ45 port; IEEE 802.3u compliant
10/100 Mbps Fast Ethernet with Auto-MDIX
TCP/IP, UDP, ICMP,DHCP,NTP,DNS, TCP/IP, UDP, ICMP,DHCP,NTP,DNS,DDNS,SMTP,FTP,
Orange Colour
Green Colour
Push and Release button will be Reboot. Push and hold over 5 sec will be Factory reset
NA One Type A receptacle Connector USB 1.1 Host port (Power
distribution: 500mA Max.)
e
civedBSUtnuomsideblliwces4revodlohdnahsuPAN
DDNS,SMTP,FTP,HTTP, PPPoE, UPnP HTTP, Samba, PPPoE, UPnP, RTP, RTSP, RTCP

ENGLISH
9IP EYE ANYWHERE™
Technical Data (2) IP Eye Anywhere 10 IP Eye Anywhere 11 IP Eye Anywhere 20 IP Eye Anywhere 21
Feature
Image setting
Upside down and Mirror
Digital Zoom
Frame rate setting
Compression Ratio Setting
3GPP support
IP Setting
Email
Time Management
Event Management
FTP Upload
Motion detection
IP Filter
System Management
Device Configuration
User Administration
2APW,)PIKT(APW,tib821/46PEWAN2APW,)PIKT(APW,tib821/46PEWANytiruceSsseleriW
System log
LED control
Smart Setup Wizard
Reset Function
Browser
API
Software
Supported OS
Application Software
IPFinder
Minimum system requirements
General
hardware
Operating system
network
.g/b11.208EEEI.g/b11.208EEEIsseleriW
Camera
Processor
Memory
Screen Resolution
Web browser
Application Software
Processor
Screen Resolution
Brightness, Sharpness, Saturation
Yes
3x
Yes (1-25fps,Auto)
5 levels setting : Lowest, Low, Normal, High, Highest
seYoN
Static IP Address, DHCP, PPPoE
Support SMTP mail, Scheduling, Two destination email account
Manual Time Setting, Time Server and NTP Support
Events Triggered by Motion detection or according to schedule, Image Upload/Send over email, FTP
Recording Video file to PC, Network Storage, USB Flash Disk
Scheduling
2 scalable windows
Yes
Web Based Administration, Application Software
Backup/Restore to/from Configuration file
Password protected and 3 levels of Authorization
Guest User just have View video function only. Guest User just have View video and listen Audio function only.
General User have all authority in Live view page
Administrator have View video and All configuration setting.(default: admin/admin)
MA
RDSnierots)xam(smeti001AN
Normal / Off
Quick Installation setup step by step
System reboot button. Reset all configuration to factory default values button.
Internet Explore 6.0 above, Firefox (MJPEG mode only), Safari (MJPEG mode only)
For developing application software
Windows 2000/ XP/Vista/7
View channel:16 CHs, Record, Playback, Motion detect, Backup/Restore to/from Configuration file
Audio support
BM
215BM821
Auto search IP Address of Camera in LAN
CD ROM drive
Microsoft® Windows® 2000/XP/Vista/7
10Base-T Ethernet or 100Base-TX Fast Ethernet
1024x768 or above
NA
800x600 or above
Microsoft® Internet Explorer 6.0 or above, Apple Safari 2 or above, Mozilla Firefox 2.00 or above
1 camera connected: IntelPentium III 800MHz; 512MB RAM
2 ~ 4 cameras connected: Intel Pentium 4 1.3GHz; 512MB RAM
5 ~ 8 cameras connected: Intel Pentium 4 2.4GHz; 1GB RAM
9 ~ 16 cameras connected: Intel Pentium 4 3.4GHz; 2GB RAM
1 camera connected: IntelPentium III 800MHz; 512MB RAM
2 ~ 4 cameras connected: Intel Pentium 4 1.3GHz; 512MB RAM
5 ~ 8 cameras connected: Intel Pentium 4 2.4GHz; 1GB RAM
9 ~ 16 cameras connected: Intel Pentium 4 3.4GHz; 2GB RAM
evobarozHM008IIImuitnePletnIevobarozHM053IIImuitnePletnI

10 © MARMITEK

DEUTSCH
11IP EYE ANYWHERE™
SICHERHEITSHINWEISE
• Um Kurzschluss vorzubeugen, dieses Produkt bitte ausschließlich innerhalb des Hauses
und nur in trockenen Räumen nutzen. Setzen Sie die Komponenten nicht Regen oder
Feuchtigkeit aus. Nicht neben oder nahe eines Bades, Schwimmbades usw. verwenden.
• Setzen Sie die Komponente Ihres Systems nicht extrem hohen Temperaturen oder starken
Lichtquellen aus.
• Bei einer zweckwidrigen Verwendung, selbst angebrachten Veränderungen oder selbst
ausgeführten Reparaturen verfallen alle Garantiebestimmungen. Marmitek übernimmt
bei einer falschen Verwendung des Produkts oder bei einer anderen Verwendung des
Produktes als für den vorgesehenen Zweck keinerlei Produkthaftung. Marmitek übernimmt
für Folgeschäden keine andere Haftung als die gesetzliche Produkthaftung.
• Dieses Produkt ist kein Spielzeug. Außer Reichweite von Kindern halten.
• Das Produkt niemals öffnen: Das Gerät kann Teile enthalten, worauf lebensgefährliche
Stromspannung steht. Überlassen Sie Reparaturen oder Wartung nur Fachleuten.
• Schließen Sie den Netzadapter erst dann an das Stromnetz an, nachdem Sie überprüft
haben, obdieNetzspannung mitdem aufdem Typenschild angegeben Wert übereinstimmt.
Schließen Sie niemals einen Netzadapter an, wenn diese beschädigt sind. In diesem Fall
nehmen Sie Kontakt mit Ihrem Lieferanten auf.
1 INBETRIEBNAHME
Lieferumfang
Prüfen Sie sorgfältig den Inhalt der Packung. Die folgenden Artikel sollten mitgeliefert sein. Falls
irgendein Artikel fehlt oder beschädigt ist, wenden Sie sich bitte umgehend an Ihren Händler.
✔Eine Marmitek IP Eye AnywhereTM-Netzwerkkamera
✔Ein Netzteil
✔Eine externe Antenne (für das Drahtlos-Modell)
✔Ein Kamerafuß
✔Ein Ethernet-Kabel (RJ-45)
✔Eine Installations-CD-ROM (English)
✔Eine Installations-Kurzanleitung
Systemanforderungen
■ Netzwerkverbindung
LAN: 10 Base-T Ethernet oder 100 Base-TX Fast Ethernet
WLAN: IEEE 802.11b/g (für das Drahtlos-Modell)
■ Zugriff auf die Kamera über einen Webbrowser
Plattform: Microsoft® Windows® 2000/XP/Vista/7
CPU: Intel Pentium III 800 MHz oder besser
RAM: 512 MB
Auflösung: 800 x 600 oder höher
Benutzerschnittstelle: Microsoft® Internet Explorer 5.0 oder aktueller

12 © MARMITEK
■ UltraView software
Platform: Microsoft® Windows® 2000/XP/Vista/7
CPU: Intel Pentium III 800MHz oder besser und 512MB RAM für 1
angeschlossene Kamera
CPU: Intel Pentium 4 3.4 GHz oder besser und 2GB RAM für 9 ~16
angeschlossene Kameras
Auflösung: 1024x768 oder besser
2 EINRICHTEN DER KAMERA
Installieren des Kamerafußes
Die Kamera wird mit einem Kamerafuß mit drehbarer Kugellagerung geliefert, die in
das Schraubgewinde der Kamera eingeschraubt werden kann. Nach dem Anbringen des
Kamerafußes können Sie die Kamera überall aufstellen, indem Sie die drei Schraublöcher am
Boden des Kamerafußes zur Befestigung verwenden.
Der Kamerafuß
Verbinden der IP Eye AnywhereTM Kamera mit einem
LAN
Verwenden Sie das beigelegte Ethernet-Kabel, um die
Kamera mit Ihrem lokalen Netzwerk (LAN) zu verbinden.
Sobald das Netzteil angeschlossen ist, wird die Kamera
sofort mit Strom versorgt. Sie können über die Betriebs-
LED an der Frontseite der Kamera den Betriebszustand des
Gerätes überprüfen.
Sobald die Stromversorgungsverbindung besteht, blinkt die
Link-LED grün. Die Kamera ist sofort betriebsbereit.
Hier Ethernet-Kabel anschließen

DEUTSCH
13IP EYE ANYWHERE™
Verbinden der Kamera mit einem
WLAN
Wenn Sie ein drahtloses Netzwerk
nutzen, müssen Sie die beigelegte externe
Antenne an der Kamera anbringen.
Sobald die Kamera mit Strom versorgt
wird, sucht das Gerät automatisch
nach einem Zugriffspunkt mit der SSID
„default”.
HINWEIS Falls die Verbindung der Kamera mit Ihrem drahtlosen Netzwerk fehlschlägt, müssen
Sie die Kamera mit einem LAN verbinden und die WLAN-Einstellungen darüber vornehmen.
3 ZUGREIFEN AUF DIE KAMERA
Verwenden des IP Finder
1. Legen Sie die Installations-CD-ROM in Ihr optisches Laufwerk ein. Die Software
startet automatisch.
2. Klicken Sie auf das Objekt IP Finder, um das Dienstprogramm zu starten. Die
nachstehend abgebildete Bedienoberfläche öffnet sich.
3. Nachdem Sie die IP-Adresse der Kamera erhalten haben, starten Sie bitte Ihren
Webbrowser oder Ultra View, um auf die Kamera zuzugreifen.
Tipp Die Installations-CD-ROM enthält ein Einrichtungsprogramm, mit dem Sie IP
Finder auf Ihrem Computer installieren können. Klicken Sie auf Install Software
[Software installieren], wählen Sie dann IP Finder im geöffneten Fenster, um IP
Finder zu installieren.
Anschließen der
externen Antenne
Zeigt verbundene Kameras
Auf Search [Suchen] klicken, um
die IP-Adresse(n) der verbundenen
Kamera(s) zu finden.
Auf Change IP [IP ändern] klicken,
um die IP-Adresse der ausgewählten
Kamera zu ändern.
Auf Exit [Beenden] klicken, um das
Dienstprogramm zu schließen.

14 © MARMITEK
So greifen Sie auf die Kamera zu
1. Öffnen Sie Ihren Webbrowser auf Ihrem Computer (in dieser Anleitung wird der
Microsoft Internet Explorer benutzt).
2. Geben Sie die Standard-IP-Adresse (192.168.0.30) oder die über IP Finder gefundene
IP-Adresse in das Adressfeld ein, drücken dann die Eingabetaste.
3. Wenn das Anmeldungsfenster erscheint, geben Sie bitte den Standardbenutzernamen
(admin) und das Standardkennwort (admin) ein. Klicken Sie anschließend auf OK, um
die Hauptseite der Kamera-Webkonfiguration zu öffnen.
4. Klicken Sie auf die rechte Maustaste und wählen Sie Active X Control aus.
5. Klicken Sie auf Install (Installieren).
6. Klicken Sie auf Setup [Einstellen] und dann auf Smart Wizard [Intelligenter
Assistent], um Ihre Kamera schnell einzustellen. Der Assistent führt Sie mit detaillierten
Erläuterungen durch die notwendigen Schritte.
Benutzernamen und Kennwort eingeben.
IP-Adresse der Kamera hier eingeben.

DEUTSCH
15IP EYE ANYWHERE™
4 TIPPS
Lesen Sie bitte die Erweiterte Installationsanleitung auf der beigelegten Installations-CD-
ROM für weitere Informationen.
Lesen Sie bitte die Software-Bedienungsanleitung auf der beigelegten Installations-CD-
ROM für Details zur Bedienung des Programms Ultra View.
Falls Probleme mit dem Produkt auftreten sollten, wenden Sie sich bitte an Ihren Händler.
TECHNISCHEN DATEN
Siehe Seite 16 und 17
ACHTUNG
Dieses Gerät ist für den Gebrauch in allen EU und EFTA Ländern gedacht.
Achtung: In nachfolgenden Ländern ist die Verwendung dieses Produktes begrenzt:
• Belgien: 2.4 GHz Frequenzband. Die Nutzung dieses Frequenzbandes ist begrenzt und
hängt von den verschiedenen Regionen ab. Schauen Sie unter http://www.bipt.be für
aktuelle Informationen.
• Frankreich: 2.4 GHz Frequenzband. Die Nutzung anderer Kanäle als: 10, 11, 12, 13 (2457,
2462, 2467, und 2472 MHz) kann eingeschränkt sein, dies ist departementabhängig. Schauen
Sie unter l ‘Autorité de Régulation des Télécommunications (http://www.art-telecom.fr) für
aktuelle Informationen.
Umweltinformation für Kunden innerhalb der Europäischen Union
Die Europäische Richtlinie 2002/96/EC verlangt, dass technische Ausrüstung, die direkt am Gerät und/oder an
der Verpackung mit diesem Symbol versehen ist nicht zusammen mit unsortiertem Gemeindeabfall entsorgt
werden darf. Das Symbol weist darauf hin, dass das Produkt von regulärem Haushaltmüll getrennt entsorgt
werden sollte. Es liegt in Ihrer Verantwortung, dieses Gerät und andere elektrische und elektronische Geräte über die
dafür zuständigen und von der Regierung oder örtlichen Behörden dazu bestimmten Sammelstellen zu entsorgen.
Ordnungsgemäßes Entsorgen und Recyceln trägt dazu bei, potentielle negative Folgen für Umwelt und die menschliche
Gesundheit zu vermeiden. Wenn Sie weitere Informationen zur Entsorgung Ihrer Altgeräte benötigen, wenden Sie sich
bitte an die örtlichen Behörden oder städtischen Entsorgungsdienste oder an den Händler, bei dem Sie das Produkt
erworben haben.

16 © MARMITEK
Technische Daten (1) IP Eye Anywhere 10 IP Eye Anywhere 11 IP Eye Anywhere 20 IP Eye Anywhere 21
Bildsensor
Bildsensor
Auflösung
Mindestlichtstärke
Objektiv
Blende (F/No.)
Fokuslänge
Gesichtswinkel (diagonal)
Bildbearbeitung
Kompression
Automatische Belichtungskontrole
Automatische Weißbalance
Automatische Stärkeregelung
Lichtfrequenz
Bildauflösung und Bildfolge
Multi-Profil
System
Netzwerkprozesor
System ROM
System RAM
Leistung
Verbrauch
Umgebung:
Audio
Audio in
Empfindlichkeit:
Freq Response:
Audio Codec
Kommunikation
Ethernet
NALsolthardg/b11.208dneffertuzthcinNALsolthardg/b11.208dneffertuzthcinsoltharD
Unterstützte Protokolle
LED und Taste
Energie LED
Link/Aktivität LED
Reset-Taste
Übriges
ennetnalopiDenretxEdneffertuzthcinennetnalopiDenretxEdneffertuzthcinennetnA
USB Port
USB Demontagetaste
1/4” Farbbild CMOS Sensor
640 x 480, 320 x 240, 160 x 120
0,5 LUX
8,26,2
mm5,4mm6,4
60 Grad
gnimaertSlauDGEPJM/4GEPMGEPJM
Ja
Ja
Ja
50Hz, 60Hz oder Outdoor
VGA (640 x 480 ) : 30 fps, QVGA ( 320 x 240 ) : 30 fps, QQVGA ( 160 x 120) : 30 fps
gitiezhcielgeliforP3dneffertuzthcin
Basiert auf ARM9
hsalFRONetyBM8hsalFRONetyBM4
MARDSetyBM23MARDSetyBM61
DC5V, 230VAC 50 Hz
.xamsttaW8.xamsttaW6
Betriebstemperatur: 0 ~ 45, Luftfeuchtigkeit: 20% ~ 85% nicht kondensierend
Lageremperatur: -15 ~ 60, Luftfeuchigkeit 0% ~ 90% nicht kondensierend
noforkiMselanoitkeridinmoenretnIdneffertuzthcin
Bd3-/+Bd84-dneffertuzthcin
zH00061~05dneffertuzthcin
RMA/MCPdneffertuzthcin
Ein RJ45 Port; kompatibel mit IEEE 802.3u
10/100 Mbps Fast Ethernet mit Auto-MDIX
TCP/IP, UDP, ICMP,DHCP,NTP,DNS, TCP/IP, UDP, ICMP,DHCP,NTP,DNS,DDNS,SMTP,FTP,
DDNS,SMTP,FTP,HTTP, PPPoE, UPnP HTTP, Samba, PPPoE, UPnP, RTP, RTSP, RTCP
Orange
Grün
Taste drücken und loslassen für neustart. 5 Sekunden festhalten um zu den Fabrikseinstellungen zurückzukehren.
nicht zutreffend Eine Typ A Steckdose USB 1.1 Host Port (Verteilernetz: 500mA Max.)
nicht zutreffend Drücken und 4 Sekunden festhalten für Dismount USB Komponenten

DEUTSCH
17IP EYE ANYWHERE™
Technische Daten (2) IP Eye Anywhere 10 IP Eye Anywhere 11 IP Eye Anywhere 20 IP Eye Anywhere 21
Ausstattung
Bildeinstellung
Umgekehrt und Spiegelbild
Digitalzoom
Bildfolgeeinstellung
Kompressionsrate Einstellung
3GPP Support
IP Einstellung
E-mail
Zeitmanagement
Event Management
FTP Upload
Bewegungsmeldung
IP Filter
Systemmanagement
Konfiguration von Komponenten
Anwenderverwaltung
Absicherung drahtlos nicht zutreffend WEP 64/128 bit, WPA (TKIP), WPA2 nicht zutreffend WEP 64/128 bit, WPA (TKIP), WPA2
System Log
LED Kontrolle
Smart Setup Wizard
Reset-Funktion
Browser
API
Software
Supported OS
Anwendersoftware
IPFinder
Mindest-Systemanforderungen
Allgemein
Hardware
Plattform
Netzwerk
.g/b11.208EEEI.g/b11.208EEEIsoltharD
Kamera
Prozessor
Speicher
Bildschirmauflösung
Webbrowser
Anwendersoftware
Prozessor
Bildschirmauflösung
Helle, Schärfe, Sättigung
Ja
3x
Ja (1-25fps, Auto)
5 Einstellungsebenen: niedrigst, niedrig, normal, hoch, höchst
aJnieN
Statische IP Adresse, DHCP, PPPoE
Unterstützt SMTP Mail, Planung, e-Mail Account mit zwei Bestemmungen
Manuelle Zeiteinstellung, Zeitserver und NTP Support
Events getriggert durch Bewegungsdetektion oder nach Schema, Bild uploaden/über e-Mail, FTP versenden
nicht zutreffend Registrierung Videodatei zum PC, Netzwerkspeicher, USB Flash Disk
Planung
2 adaptierbare Fenster
Ja
Webbasierte Verwaltung, Anwendersoftware
Backup/wiederherstellen zur/von der Konfigurationsdatei
Durch Kennwort geschützt und 3 Autorisationsebenen
Gastanwender verfügen lediglich über die Funktion Video
betrachten
Gastanwender verfügen lediglich über die Funktion Video
betrachten und Audio hören
Allgemeine Anwender sind alle autorisiert bis Live View Page
Verwalter hat Video betrachten und Alle Konfigurations-Einst. Fabrikeinst.:Verwalt/Verwalt)
MARDSnirehciepS).xam(smetI001dneffertuzthcin
Normal / Aus
Kurze Installationseinstellung Schritt für Schritt
Taste, um alle Einstellungen in die Fabrikeinstellung zurückzusetzen
Internet Explorer 6.0 oder höher, Firefox (nur MJPEG Modus), Safari (nur MJPEG Modus)
Zur Entwicklung von Anwendersoftware
Windows 2000/ XP/Vista/7
Kanal: 16 CHs, Registrieren, Playback, Bewegungsmeldung, Backup/wiederherstellen zur/von der Konfigurationsdatei
Audio Support
Sucht automatisch IP Adresse der Kamera in LAN
CD ROM Drive
Microsoft® Windows® 2000/XP/Vista/7
10Base-T Ethernet or 100Base-TX Fast Ethernet
reh
öhredozHM0083muitnePletnIrehöhredozHM0533muitnePletnI
BM215BM821
1024x768 oder höher
800x600 oder höher
Microsoft® Internet Explorer 6.0 oder höher, Apple Safari 2 oder höher, Mozilla Firefox 2.00 oder höher
1 angeschlossene Kamera: Intel Pentium III 800MHz; 512MB RAM
2 ~ 4 angeschlossene Kameras : Intel Pentium 4 1.3GHz; 512MB RAM
5 ~ 8 angeschlossene Kameras : Intel Pentium 4 2.4GHz; 1GB RAM
9 ~ 16 angeschlossene Kameras : Intel Pentium 4 3.4GHz; 2GB RAM
1 angeschlossene Kamera: Intel Pentium III 800MHz; 512MB RAM
2 ~ 4 angeschlossene Kameras : Intel Pentium 4 1.3GHz; 512MB RAM
5 ~ 8 angeschlossene Kameras : Intel Pentium 4 2.4GHz; 1GB RAM
9 ~ 16 angeschlossene Kameras : Intel Pentium 4 3.4GHz; 2GB RAM

18 © MARMITEK

FRANÇAIS
19IP EYE ANYWHERE™
AVERTISSEMENTS DE SECURITE
• Afin d’éviter un court-circuit, ce produit ne doit être utilisé qu’à l’intérieur, et uniquement
dans des endroits secs. Ne pas exposer les composants à la pluie ou à l’humidité. Ne pas
utiliser à côté de ou près d’une baignoire, une piscine, etc.
• Ne pas exposer les composants de votre système à des températures extrêmement élevées
ou à des sources de lumières trop fortes.
• Toute utilisation impropre, toute modification ou réparation effectuée vous-même
annule la garantie. Marmitek n’accepte aucune responsabilité dans le cas d’une utilisation
impropre du produit ou d’une utilisation autre que celle pour laquelle le produit est
destiné. Marmitek n’accepte aucune responsabilité pour dommage conséquent, autre que
la responsabilité civile du fait des produits.
• Ce produit n’est pas un jouet et doit être rangé hors de la portée des enfants.
• Ne jamais ouvrir le produit : Les appareils peuvent comprendre des composants dont la
tension est mortelle. Les réparations ou l’entretien ne doivent être effectués que par des
personnes compétentes.
• Brancher l’adaptateur secteur sur le réseau électrique seulement après avoir vérifié que
la tension d’alimentation correspond à la valeur indiquée sur les plaques d’identification.
Ne jamais brancher un adaptateur secteur lorsque celui-ci est endommagé. Dans ce cas,
veuillez contacter votre fournisseur.
1 DÉMARRAGE
Contenu de l’emballage
Vérifiez avec attention les éléments contenus dans l’emballage. Vous devez avoir ce qui suit.
Si un des éléments est manquant ou endommagé, contactez votre revendeur local agréé.
✔Une caméra réseau Marmitek IP Eye AnywhereTM.
✔Un adaptateur d’alimentation DC.
✔Une antenne externe (pour le modèle sans fil).
✔Un support caméra.
✔Un câble Ethernet (de type RJ-45).
✔Un CD-ROM d’installation (Anglais).
✔Un Guide d’installation rapide.
Configuration système requise
■ Mise en réseau
LAN: Ethernet 10Base-T ou Fast Ethernet 100Base-TX.
WLAN: IEEE 802.11b/g (pour le modèle sans fil).
■ Accéder à la caméra à l’aide d’un navigateur Web
Plate-forme: Microsoft® Windows® 2000/XP/Vista/7
CPU: Intel Pentium III 800MHz ou supérieur
RAM: 512MB
Résolution: 800x600 ou supérieure
Interface utilisateur: Microsoft® Internet Explorer 5.0 ou supérieur

20 © MARMITEK
■ UltraView software
Plate-forme: Microsoft® Windows® 2000/XP/Vista/7
CPU: Intel Pentium III 800MHz ou supérieur et 512MB RAM for 1 caméra
connectée
CPU: Intel Pentium 4 3.4 GHz ou supérieur et 2GB RAM for 9 ~16 caméra
connectée
Résolution: 1024x768 ou supérieure
2 CONFIGURER LA CAMÉRA
Installer le support de la caméra
La caméra est livrée avec son support, qui utilise une tête vissée pivotante sur bille qui se
verrouille sur le trou fileté de la caméra. Lorsque le support de la caméra est fixé, vous pouvez
placer la caméra n’importe où en montant la caméra via les trois trous de vis situés à l’embase
du support de caméra.
Le support de caméra
Connecter l’IP Eye AnywhereTM caméra au réseau
local (LAN)
Utilisez le câble Ethernet fourni pour brancher la caméra à
votre réseau local (LAN).
Lorsque vous branchez l’adaptateur d’alimentation ac,
la caméra est alimentée automatiquement. Vous pouvez
vérifier l’état d’alimentation via la DEL d’alimentation qui se
trouve sur la face avant de la caméra.
Une fois branchée, la DEL Link (Lien) commence à clignoter
en vert et la caméra se met en veille prête à l’emploi.
Connexion du câble Ethernet
Table of contents
Languages:
Other Marmitek Security Camera manuals

Marmitek
Marmitek MEGACAM4 User manual

Marmitek
Marmitek SD Memory CAM2 User manual

Marmitek
Marmitek IP EYE ANYWHERE 470 - ADVANCED User manual

Marmitek
Marmitek IP RoboCam541 Setup guide

Marmitek
Marmitek IP EYE ANYWHERE 470 - ADVANCED User manual

Marmitek
Marmitek MEGACAM1 User manual

Marmitek
Marmitek IP EYE ANYWHERE 21 - SOFTWARE ULTRAVIEW Setup guide

Marmitek
Marmitek Gigacam none User manual

Marmitek
Marmitek IP EYE ANYWHERE 10 - ADVANCED User manual