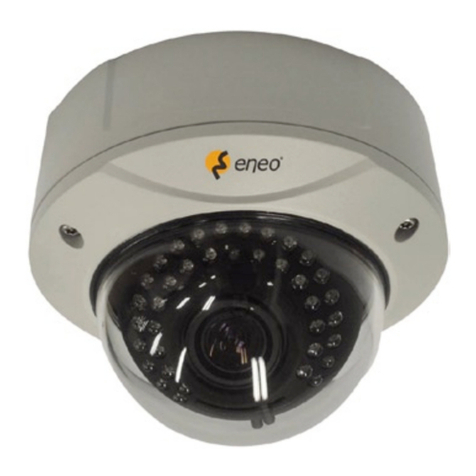
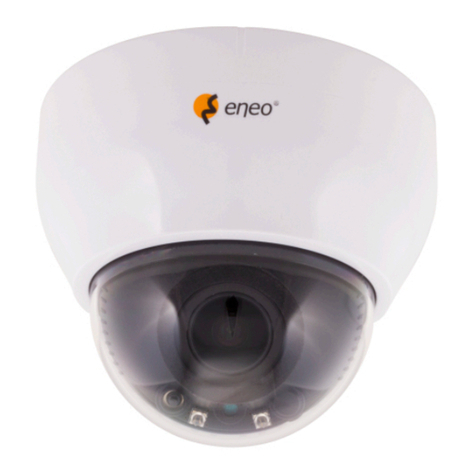
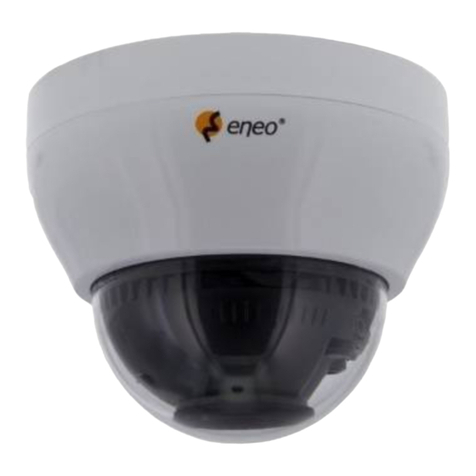
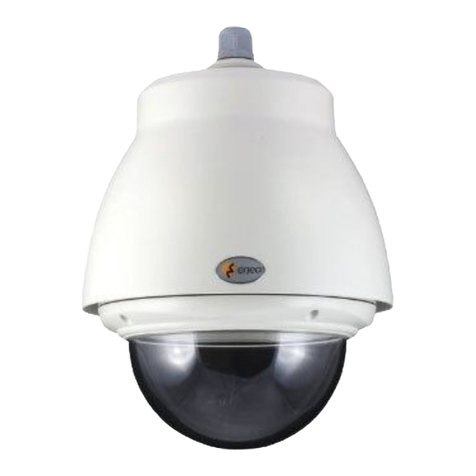
Eneo IPD-52F0028MAA User manual

EN
User Manual
1/2.8” Network Dome, Fixed,
1920x1080, Day&Night, DOL-WDR,
2.8mm, Infrared, IP66
IPD-52F0028MAA


CAUTION: TO REDUCE THE RISK OF ELECTRIC SHOCK,
DO NOT REMOVE COVER (OR BACK).
NO USER SERVICEABLE PARTS INSIDE.
REFER SERVICING TO QUALIFIED SERVICE PERSONNEL.
To prevent electric shocks and risk of fire hazards, do NOT use other than
specific power source.
Warning :
This equipment has been tested and found to comply with the limits for a Class
A digital device, pursuant to part 15 of the FCC Rules. These limits are designed
to provide reasonable protection against harmful interference when the equipment
is operated in a commercial environment. This equipment generates, uses, and
can radiate radio frequency energy and, if not installed and used in accordance with
the instruction manual, may cause harmful interference to radio communications.
Operation of this equipment in a residential area is likely to cause harmful
interference in which case the user will be required to correct the interference at
his own expense.
Caution :
Any changes or modifications in construction of this device which are not expressly
approved by the party responsible for compliance could void the user's authority
to operate the equipment.
Mains power quality should be that of a typical commercial environment. If the user
of the model requires continued operation during power mains interruptions, it is
recommended that the model be powered from an uninterruptible power supply
(UPS) or a battery.
The symbol is intended to alert the user to the presence of important
operating and maintenance(servicing) instructions in the literature
accompanying the unit.
The symbol is intended to alert the user to the presence of uninsulated
"dangerous voltage" within the product's enclosure that may be of
sufficient magnitude to constitute a risk of electric shock to persons.
Safety Precaution
03
MEGA-PIXEL NETWORK CAMERA

Safety Precaution
04
MEGA-PIXEL NETWORK CAMERA
NOTICE
• The image used in this instruction manual are processed to help comprehension
and may differ from actual video of the camera.
• Avoid installing areas where has shock or vibration which results in the problems.
• Pay attention to safety when laying the connection cable and observe that the cable
is not subjected to heavy loads, kinks or damage and no moisture can get in.
• Never open the device such as boards or lens.
The warranty becomes void if repairs are undertaken by unauthorized persons.
• Maintenance and repair have to be carried out only by authorized service centers.
• Use only a mild detergent to clean the housing body.
• The camera should never be operated beyond the technical specifications.
This can lead to destruction.
• The camera should never be operated in water.

Contents
05
MEGA-PIXEL NETWORK CAMERA
Safety Precaution . . . . . . . . . . . . . . . . . . . . 03~04p
Contents . . . . . . . . . . . . . . . . . . . . . . . . . . . . . . . 05p
Features . . . . . . . . . . . . . . . . . . . . . . . . . . . . . . . 06p
Composition . . . . . . . . . . . . . . . . . . . . . . . . . . . 07p
Dimensions . . . . . . . . . . . . . . . . . . . . . . . . . . . . 07p
Part Names . . . . . . . . . . . . . . . . . . . . . . . . . . . . 08p
Installation Instructions . . . . . . . . . . . . . . . . 09~10p
Operating Instructions . . . . . . . . . . . . . . . . . 13~16p
. . . . . . . . . . . . . . . . . . . . . . . . . 11~12p
Specifications
2-1. Information
2-2. Video & Image
2-3. Event
2-4. System
1. LIVE VIEW
2. SETUP
Full Menu Setup . . . . . . . . . . . . . . . . . . . . . 17~60p
........................................................ 17p
............................................... 19p
......................................... 19p
Troubleshooting . . . . . . . . . . . . . . . . . . . . . 60~61p
.............................................................. 19p
........................................................ 34p
...................................................... 46p
3. 4 EYES PRINCIPLE ................................. 57~59p

Features
06
MEGA-PIXEL NETWORK CAMERA
• Full-HD 2.16Mega Pixel, NETWORK CAMERA, 1920x1080(30/25p)
• The best low light performance with SONY’s STARVIS sensor
• ONVIF Conformance
• ONVIF Event Mapping
• Zero configuration
• Cross Web Browsing (IE, Edge, Safari, Firefox, Chrome)
• Adaptive web resizing depending on layout & resolution of
display device by RESPONSIVE WEB
• Increased usability for all PC, tablet and mobile
• Simultaneously H.264, H.264+ (Smart Stream),
H.265, H.265+ (Smart Stream), MJPEG (Multi streaming)
• f= 2.8mm, Fixed lens
• True Day&Night by ICR
• DOL HDR (Digital Overlap High Dynamic Range)
• D-WDR (Digital Wide Dynamic Range)
• Improved noise figure with the enhanced 3DNR
• LDC(Lens Distortion Compensation)
• Smart Video Stream, ROI(Region of Interest)
- Enables to process video data smartly according
to users demand.
- Lowering overall bandwidth and reduce the storage burden
• Privacy Mask, Motion Detection, HLC/ BLC,
Digital Zoom(~x8), Mirror/Flip, Contrast, Brightness, Hue,
Saturation, Sharpness
• Circuit protection against faulty connection in power polarity
• PoE(IEEE Std. 802.3af), DC12V
• Built-in 4pcs High power SMD LEDs
• Cooling Fan & Optimized Heat sink System

Composition
07
Dimensions
MEGA-PIXEL NETWORK CAMERA
(unit : mm)
Ø136
117
31
Ø67
Mounting Screw:
4 x 35mm (3pcs)
Plastic Anchor:
6 x 30mm (3pcs)
Dome Camera
Mounting Template
Operating Instruction
120º
120º
120º
SCREW HOLE Ø5
RTD-210414A

Part Names
08
MEGA-PIXEL NETWORK CAMERA
Body
Ring Cover
Cover
Base
Power/Ethernet Cable
: pressing for 5~8 secondsresets
all parameters to original
factory settings.
IP Reset (Default)

Installation Instructions
09
MEGA-PIXEL NETWORK CAMERA
• Extreme care should be taken NOT to scratch the window surface while
the camera installing or adjusting.
• Care should be taken the cable is NOT to be damaged, kinked or exposed in
the hazardous area.
• Do not expose the camera directly to a strong light source such as the sun or
spot light.
CAUTION
1. Drill three holes for mounting on the ceiling or wall.
2. Place the camera base at the pre-drilled installation position and fix it by using
mounting screws.
3. Route the power & ethernet cable to the connecting place.
4. Adjust the camera’s viewing angle (Pan, Tilt, Rotation)
5. Assemble the camera body, ring cover and cover.
Mounting Screw
(4x35mm)
Plastic Anchor
(6x30mm)

Installation Instructions
10
MEGA-PIXEL NETWORK CAMERA
Installation and commissioning Instructions
• Make sure the power is removed before the installation.
• After all connections are finished properly, follow the order for applying power.
a) Plug the network cable into RJ-45 Ethernet Port.
If PoE is the unique power, there will be no need to connect Power jack.
b) When DC12V Local power is necessary, connect the low voltage
(DC12V) first, then plug the DC adapter to DC outlets to avoid an
improper reset from power jitter and a damage from the surge voltage when
no load.
Power Supply Connections
Camera can work with either DC12V or PoE(IEEE Std. 802.3af).
Primary and secondary grounds are completely isolated to avoid the possible
ground loop problems.
► When PoE and Local DC power are connected at the same time,
Local power has priority.

ITEM
Imaging Sensor
Effective Pixels
Sensitivity
Scanning mode
Video Compression
Video Frame Rate
H.264, H.264+ (Smart Stream), H.265, H.265+ (Smart Stream), MJPEG
Video Resolution
FTP Uploading MJPEG Still Image
Login Authority Administrator, Operator, Guest
Video Streaming
Power Source
Housing
NETWORK SPECIFICATION
TBD
Progressive Scan
S/N Ratio
Lens
LED
Dimension
50dB
Up to 30fps@1920x1080p
Shutter Speed
Control
Gain Control
f=2.8mm, Fixed lens
4pcs High power SMD LEDs
Automatic: Min. 1/25,000 sec ~ Max. 1/25 sec
Manual: Min. 1/25,000 sec ~ Max. 1/25 sec
Auto White Balance
mode
Automatic, Outdoor, Light bulb, Fluorescent light, Clear sky,
Shade, Manual
Automatic: ~ Max. 69dB / Manual: ~ Max. 69dB
1/2.8" Sony 2.16 Mega pixel RGB STARVIS CMOS Sensor
1945(H) x 1097(V) approx. 2.13M pixels
136mm(Ø)x117mm(H) / About 730g
1920x1080, 1280x720,1024x576, 768x432, 704x392, 640x360, 384x216
Specifications
11
MEGA-PIXEL NETWORK CAMERA
PoE(IEEE Std. 802.3af ), DC12V
Circuit protection against faulty connection in power polarity.
Aluminum Cast, Cooling Fan & Optimized Heat sink System
Installation Temp.
Operating Temp.
-20ºC ~ +50 ºC (Humidity : 20%RH ~ 80%RH, Non-condensing)
-50ºC ~ +50 ºC (Humidity : 20%RH ~ 80%RH, Non-condensing)
Functions
Privacy Mask, Motion Detection, HLC/ BLC, Digital Zoom(~x8)
Mirror/Flip, Contrast, Brightness, Hue, Saturation, Sharpness,
LDC (Lens Distortion Correction)
Day & Night mode
Automatic, Day, Night, External
DNR
2D-NR, 3D-NR
HDR
DOL HDR (Digital Overlap High Dynamic Range)
NTSC PAL
Simultaneously H.264, H.264+ (Smart Stream),
H.265, H.265+ (Smart Stream), MJPEG (Multi streaming)
Independent Frame Rate and Bandwidth Control, VBR/CBR

Specifications
12
MEGA-PIXEL NETWORK CAMERA
Synchronize Computer/NTP Server, Manual
Network Time Sync.
Protocol
Restart, Reset, Factory Default
Software Reset
Backup, Restore
Auto Recovery
Using Web Browser
Remote Upgrade
Built-In Web, ONVIF Compatible 3rd Party VMS
Client Software
API, ONVIF Profile S/T Compliant
Not Available
Not Available
SDK Support
SD memory card
Audio & Alarm
(*) Design and specifications are subject to change for product improvements without prior notice.
TCP/IP, UDP, IPv4/v6, HTTP, HTTPS, FTP, UPnP, RTP, RTSP, RTCP,
DHCP, ARP, Zeroconf, Bonjour, SNMP
Security
Multi User Authority, IP Filtering, HTTPS, Video Stream, Export/Import

Operating Instructions
13
MEGA-PIXEL NETWORK CAMERA
Setup Menu table
Category Menu
Configuration
LIVE VIEW
Player Control
Video Stream
Protocol
Display (Window Fit, Full Screen, Custom)
Stream1, Stream2, Stream3
HTTPS, HTTP, TCP, UDP
Pause, Snapshot
SETUP
Information
Video & Image
Source
General, System Information, Open source Information
Stream1/2/3
Image Basic Brightness, Contrast, Saturation, Hue,
Sharpness, Enable flip image, Enable
mirror image
Enable text OSD, Enable date&time OSD
OSD
AE
Mode, R Gain, G Gain, B Gain
AWB
Mode, Slow shutter, Luminance compensation,
Auto Iris, Auto Flickerless, Shutter,
Max. Shutter, Gain, Max. Gain
Smart
Video Stream
ROI(Region Of Interest), Dynamic GOP
Privacy Mask
Digital Zoom
Mode
Mode, Rotation
WDR(Mode, Level), DWDR(Mode, Level)
BLC(Mode, Level), HLC(Mode, Level)
3DNR(Mode, Level)
Day&Night
WDR
BLC
DNR
LDC
VerticalView
Color, Name
Level
Mode, Switching time, Threshold (D->N),
Threshold (N->D), Threshold(Current)

Operating Instructions
14
MEGA-PIXEL NETWORK CAMERA
SETUP
System User, HTTPS, IP Filter, ONVIF, Video Stream,
Export/Import
Language
Current Time, New Time, Time Zone, Date & Time
Display
TCP/IP, DDNS, RTP, UPnP, Zeroconf, Bonjour
Security
Date & Time
Network
English, Deutsch, Français, 한국어
Maintain (Restart, Reset, Default), Upgrade,
Setup Export, Setup Import
Logs (Database Capacity, Search Condition, Log
List), Log Sever, Report
Maintenance
Logs & Report
Event
E-Mail, FTP, Video Boost, Notification Server
Actions
Triggers
Rules
Event Processing, ONVIF Mapping
Motion, Tamper, System, Manual, Network,
Timer, Day/Night
LOG OUT
Approval #1/2
4 EYES PRINCIPLE

Network Menu Control
15 - 16
MEGA-PIXEL NETWORK CAMERA
Quick Network Setup
■ Log in the web viewer
Default user name: admin
Default password: admin
XXX-XXXXXXXXXX
1. After the camera is connected to the network, start ‘eneo Site Manager’ tool.
(downloadable from www.eneo-security.com).
2. You will get a list of cameras connected to the local network.
Highlight your camera in the list and open a context menu with a click of the
right mouse button.
3. Select the „Set IP Address [dhcp / static]“ option to open a window for setting
the cameras IP properties. When you are done click the „OK“ button to update
the camera settings.
4. By default the camera is set to DHCP. If there is no DHCP server present in the
network the camera will fall back to a default IP address after a while.
In this scenario please only add one camera at a time to the network to avoid
conflicts due to identical IP addresses.
The network camera‘s default IP address is: 192.168.1.10.
5. Right clicking the device name in the eneo Scan Device tool will bring up the
context menu. Use the ‘Open Device Web Site’ option to access the camera.
6. The web viewer login page will open up in your default web browser.
In case of Microsoft Internet Explorer install Active-X named VIDEOR E. Hartig
GmbH according to the instruction at the bottom of the browser.
7. Use the default user name and password to log in.

Full Menu Setup
17
MEGA-PIXEL NETWORK CAMERA
1. LIVE VIEW
Enter the live view menu on the Web Viewer.
■Web Viewer description
■Player Control
1 2
①Pause : Pauses the live view.
② Snapshot : Captures the image in .jpg format with
the current stream resolution.
A) Menu button : Click the button to show or hide the setup menu bar.
B) Model name : Show a camera model name connected.
C) Select Language : Set the web viewer language English, Deutsch or French.
D) Main setup menu bar : Set the camera or network functions.
E) Camera monitoring window: Display the currently connected camera view or function.
F)
Log out and exit the web viewer
XXX-XXXXXXXXX
A B
D
E
C
F

Full Menu Setup
18
MEGA-PIXEL NETWORK CAMERA
■Video Stream
■Protocol
Selects the video source stream to display the live view only.
Selects the network protocol out of HTTPS, HTTP, TCP or UDP.
③Window Fit : Resizes the live view display to fit
along with the display window size.
④Full Screen: Resizes the live view display to fit
to the monitor resolution. ESC key returns to the
previous view.
⑤Custom : Selects the live view display scale,
0%~200%, by the control bar.
100% is original size.
■Display
3
4
5
5

Full Menu Setup
19
MEGA-PIXEL NETWORK CAMERA
2-1. Information
Enter the setup menu on the Web Viewer.
2. SETUP
2-2. Video & Image
2-2-1. Source
• SIGNAL : Set NTSC/PAL mode depending on TV system. Generally set to NTSC in
60Hz area and PAL in 50Hz area for the electrical power system of your country.
Changes will restart the camera.
Smart Stream
XXXXxXXXX@XXfps
XXXX
XXX-XXXXXXXXXX
XX
X.X.X.XXX
Shows the overall information about the system such as Model name, MAC address,
IP address, Zeroconf, IP address, Hardware version, Firmware version, Server time,
Running time, CPU
usage, Inbound/Outbound Bandwidth and Open source list.

Full Menu Setup
20
MEGA-PIXEL NETWORK CAMERA
2-2-2. Stream
XXXXxXXXX
4000
● Stream1, 2, 3
> COMPRESSION : H.265(+) and H.264(+) are available in all stream but MJPEG is
available in Stream 3 only.
•
H.265+, H.264+ : Enables to process video data smartly according to users demand and
lowering overallbandwidth, and reduce the storage burden.
If H.265+ or H.264+ is selected, Smart Video Stream and Dynamic GOP are switched
ON automatically.
Accordingly, ROI(Region of Interest) and Dynamic GOP should be set in Smart Video Stream
menu to use H.265+ and H.264+.
> RESOLUTION : Each stream can have its individual resolution selected from its list.
> FRAME RATE : Each stream can have its individual frame rate in fps selected from
its list.

Full Menu Setup
21
MEGA-PIXEL NETWORK CAMERA
> BITRATE Quality : Enables to set the quality.
> BITRATE : Indicates the transmission speed through the network and defines the overall
picture quality along with the image resolution, frame rate, GOP size and the compression
codec for H.265, H.264. A high value provides the higher image quality but the total
sum of bitrates for the streams has to be considered in calculating the network duty.
> BITRATE CONTROL : Selects how to manage the bitrate.
• VBR (Variable Bit Rate):
Provides the higher image quality with the optimal variable bitrate for the scene
which has more moving elements in the image. It is not recommended when network
is in heavy duty.
• CBR (Constant Bitrate) :
Tends to keep the bitrate steady at the assigned bitrate within a very small variation.
It is useful when the network is in very heavy use.
> GOP SIZE: GOP (Group of Picture) defines the number of Intra-coded pictures (I frame)
& Predictive-coded pictures(P frame) in H.264. I frame is a complete image while P frame
is the predictive image data which can lower the image data dramatically between frames.
GOP SIZE stands for the number of P frames between I frames. Too small GOP SIZE
(too frequent I frames) can degrade the picture quality because the codec compresses
the data strongly to maintain the bitrate. On the contrary, a little bigger GOP SIZE can
improve the picture quality with the better quality for P frames if the network is in good
condition. Too big GOP SIZE can make the longer black out or the broken image if the
network quality is not good enough.
Table of contents
Other Eneo Security Camera manuals

Eneo
Eneo IPB-62M2712M5A User manual

Eneo
Eneo IPB-62M2713MAA User manual

Eneo
Eneo VK-1321/PIR User manual

Eneo
Eneo IPB-73M2812M0A User manual

Eneo
Eneo ICB-68M3611M0A User manual

Eneo
Eneo IPD-78M3611M5A User manual

Eneo
Eneo IPP-88A0030MIA User manual

Eneo
Eneo HDD-2080Z03IR D User manual

Eneo
Eneo DOME-S1 User manual

Eneo
Eneo IED-62F0036M0A User manual

Eneo
Eneo EDCH/143E/C User manual

Eneo
Eneo VKC-13130F2810IR User manual

Eneo
Eneo VKCD-1332SM/3.8 User manual

Eneo
Eneo IN Series Installation instructions

Eneo
Eneo ICB-65M2713M5A User manual

Eneo
Eneo APD-7SV2812MVA User manual

Eneo
Eneo VK-1322 User manual

Eneo
Eneo MPP-62A0020M0A User manual

Eneo
Eneo TVD-2080Z03IR User manual

Eneo
Eneo VKC-1381/IR-3.6 User manual