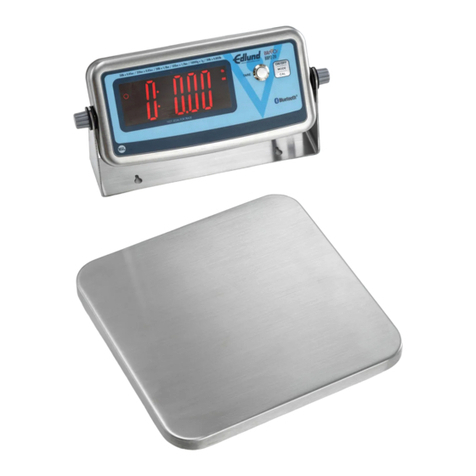
marsden B-400 User manual

Version 1.002/19
USER
MANUAL
B-400
Please take time to read these
instructions before starting
to use the scale

Contents
Product Specification 3
Safety Instructions 4
Package Contents 5
Keypad & Display 5
Mains Power/ attery Power 6
Operation 7
Troubleshooting 9
Error Messages 10
Page 2

Product Specification
Model B-400
Capacity/Division 6kg x 1g; 15kg x 2g; 30kg x 5g
Display esolution 1/6,000; 1/7,500
Weight of Scale 3.7kg
Units of Measure Kg/g
Dimensions Platter: 252mm x 255mm
Overall size: 285mm 255mm x 90mm
Function Keys ON/OFF, TA E/ZE O, UNIT, HOLD
Display
35mm LCD digital display with green and
red backlight, 5 digit 6 segment, 25mm
character height
Power Supply 4x AA batteries or 15V 300mA adaptor
Operating Temperature 0 to +40˚C
IP rating 67
Warranty 1 year
Please note: Marsden’s policy is one of continuous development and therefore
we reserve the right to change product specification without notice.
Disposal
In conformance with the European Directive 2012/19/EU on Waste Electrical and Electronic Equipment
(WEEE , this device may not be disposed of with domestic waste. This also applies to countries outside
the EU, according to their specific requirements.
Please dispose of this product in accordance with local regulations at the collecting point specified for
electrical and electronic equipment. For more detailed information about recycling this product, please
contact the local distributor from which you purchased this device.
Page 3

Safety Instructions
efore putting this scale into use, please read with care the information given in this user
manual, which contains important instructions for proper installation, use and maintenance
of the device.
Marsden/the manufacturer shall not be liable for damages arising from failure to heed the
following instructions:
•When using electrical components under increased safety requirements, always
comply with appropriate regulations.
•Inappropriate installation/use will render the warranty null and void.
•Ensure the voltage marked on the power supply unit matches your mains supply.
•Observe the permissible ambient temperatures for use.
•The device meets the requirements for electromagnetic capability. Do not exceed
the maximum values specified in the applicable standards.
•Do not allow liquids or foreign objects to enter the inner workings of the scale.
•Do not drop loads on the scale or leave heavy loads on the scale for extended
periods of time. This may damage the loadcells.
•Do not place the scale upside down on the pan.
•Do not open the scale. Never attempt to make repairs yourself. Any attempts to
open or repair the scale by anyone other than authorised personnel will render the
warranty null and void.
•Always disconnect the device from the power supply before installing, servicing or
performing maintenance.
•Check the power cable for damage at regular intervals. If it is damaged, immediately
disconnect the device from the power supply.
If you have any problems, contact Marsden/your local dealer/your service partner.
Cleaning
•Please do not use corrosive liquids to clean the scale.
•Clean with a damp cloth and mild soap or similar agents if necessary.
•Always disconnect the scale from the mains power supply before cleaning.
Maintenance
•The scale does not require any routine maintenance. However, we recommend
checking the scale’s accuracy at regular intervals. If any inaccuracies occur, please
contact your local dealer or service partner.
•You can book an accuracy check with the Marsden Service team on 01709 364296.
Page 4

Package Contents
-400 stainless steel scale
AC power adaptor
User manual
Keypad & Display
ICON
Description
Stability display
Negative sign
→
0
←
Zero setting activated
NET
Display net weight
Hold
Display
H
old
function
Condition of battery
Power supply connected
Steady green light represents the battery is fully charged.
LED Indications
LED status
Description
LED on
Power adapter connected
No LED
Power adapter not connected
Keypad Description
KEY
DESCRIPTION
FUNCTION
ON/OFF witch
witch the scale on or off
Unit witch /
Change the weighing units to alternate units of
measurement (not available on this model. kg
only for OIML type)
Hold / Target /
OK
elect Hold of weight
function
etting target weight in check weighing mode
Tare / Backlight
/ ▲
Tar
e off unwanted weight
Display backlight
Page 5

Mains Power
Connect the plug of the AC adaptor to the AC jack on the bottom of the scale as shown in
the illustration below. Connect the AC Adaptor to the AC mains supply.The power outlet
should be close to the scale and easily accessible.
Battery Power
The scale will automatically switch to battery operation if there is a power failure or the
power cord is removed to provide uninterrupted scale operation.
Note: When low battery is displayed, the scale will shut off after 30 seconds.
CAUTION:
Risk of explosion can occur if replaced with the wrong type or connected improperly.
Do not disassemble, repair or otherwise manipulate the battery socket.
Obey the local laws and regulations on disposing the battery.
Page 6

Operation
Turning cale On/Off
To turn the scale on, press the ON/OFFbutton. cale will display and will then
enter active weighing mode.
To turn the scale off, press the ON/OFF button.
Zero Operation& etting
With the scale switched on and nothing on the scale, the display should show zero.
If there is nothing on the pan and the display is not zero, press TARE/BACKLI HT button to
set zero.
Checkweighing Mode
This mode sets low and high weight limits for portion control processes.
Enter checkw
e
ighing mode
Press and hold HOLD/TAR ET button to enter checkweighing mode.
Setting target weight values
LOWER LIMIT
ETTING
The first digit is displayed flashing.
A triangle appears next toUnder.
The LCD has no backlight.
Repeatedly press TARE/BACKLI HT until
the desired number appears.
Press UNIT to accept and move to the next
digit.
Repeat until all the digits are correct.
And press HOLD/TAR ET to confirm the
setting of lower limit and enter high limit
setting.
HIGH LIMIT
ETTING
The first digit is displayed flashing.
A triangle indicator will appears next to
Over and the LCD light up in red.
Repeatedly press TARE/BACKLI HT until
the desired number appears. Press UNIT to
accept and move to the next digit.
Repeat until all the digits are correct.
Press HOLD/TAR ET to confirm setting.
Ready for Checkweighing
If required, place an empty container on the pan and press TARE/BACKLI HT.
Return to Weighing
mode
Press and hold HOLD/TAR ET button to return weighing mode.
Page 7

Checkweighing Annunciators
The OVER, ACCEPT, and UNDER annunciators are to the right of the display and the
features as below.
WITHIN TAR ET
RAN E
The LCD
will
light up in green and a
triangle appears next to Accept, and you
will hear two short beeps.
UNDER TAR ET
RAN E
The LCD light
is
off and a triangle appears
next to Under and there will be no beep.
OVER TAR ET
RAN E
The LCD
will
light up in red and a triangle
appears next to Over, and you will hear
continuous short beeps.
If the display shows Err, this means weight
exceeds overload limit.
SETTIN S
Backlight etting
Press and holdTARE/BACKLI HTfor two seconds to turn ON the backlight manually.
Press and holdTARE/BACKLI HTfor two seconds to turn OFF the backlight manually.
Tare etting
Place an empty container on the scale and press TARE/BACKLI HT.The display will show a
net value of “0”and triangle will appear next to NET.
To clear the Tare value, press TARE/BACKLI HTwith the pan empty.
Auto off etting
Press and hold UNITfor six seconds, or until the display will showsSet.
The display will then show A_OFF. PressTARE/BACKLI HTto switch the Auto off setting off.
Press UNITto scroll through Auto off delay period. electing one of these options turns the
Auto off delay on. PressTARE/BACKLI HTonce andUNIT twice to confirm the setting. The
display should showEnd.PressTARE/BACKLI HTto return to weighing mode.
Buzzer etting
Press and hold UNITfor six seconds, or until the display will showsSet.
The display will then show A_OFF. Press UNITand the display will showbUrr.
PressTARE/BACKLI HTto enter this setting, and then press UNIT to toggle this setting
on/off.
Press TARE/BACKLI HTto exit the setting andUNITto confirm.The display should showEnd.
PressTARE/BACKLI HTto return to weighing mode.
Page 8

Troubles ooting
SYMPTOM
POSSIBLE CAUSE
SOLUTION
cale will not turn on
Battery
discharged
Check the battery or
adaptor
Power c
able
not plugged in
properly
Check power c
able
connection and plugged in
properly into the power
outlet.
Other failure
Have the scale serviced by
Marsden or an authorised
service partner.
Poor accuracy
Unstable
environment/surface
Move the scale to
a
suitable
location.
Improper calibration
Perform calibration.
If the above solutions do not solve your issue,please contact your authorisedMarsden
service agent for further assistance or Marsden Technical upport on 01709 364296.
Page 9

Error Messages
ERROR MESSAGE DESCRIPTION REMEDY
Low battery indication
Connect the power and recharge
the battery.
Counting
value is higher than the
high limit value
The scale has detected a failure
with loadcell or wiring. Have the
scale serviced by Marsden or an
authorised servicepartner.
Counting value is lower higher than
the low limit value
The scale has detected a prob
lem
with loadcell or wiring. Have the
scale serviced by Marsden or an
authorised servicepartner.
Zero val
u
e is too high when power
on
Empty load plate before power up.
Recalibrate the scale.
Zero val
u
e is too low when power on
Check if scale is
placed correctly.
Recalibrate the scale.
Zero value is too low
Increase the load.
If this problem
remains unresolved, contact
Marsden or an authorised
servicepartner.
Page 10


Tel: 01709 364296 / 0800 169 2775
Fax: 01709 364293
E-mail: sales@marsdengroup.co.uk
Manufacturing and Distribution:
Unit 7, Centurion Business Park,
Coggin Mill Way,
otherham,
S60 1FB
Head Office:
Unit 1, Genesis Business Park,
Sheffield oad,
otherham
S60 1DX
www.marsden-weighing.co.uk
CD-IN-00196 REV001
Table of contents
Other marsden Scale manuals

marsden
marsden M-110 User manual

marsden
marsden PB-1200-I-400-APP User manual

marsden
marsden B-200 User manual

marsden
marsden BAS-200 User manual

marsden
marsden M-160 User manual

marsden
marsden V-22 User manual

marsden
marsden V-23 User manual

marsden
marsden M-650 User manual

marsden
marsden MS2300 User manual

marsden
marsden M-210 User manual

marsden
marsden VT-250 User manual

marsden
marsden M-620 User manual

marsden
marsden M-925 User manual

marsden
marsden MS-150 User manual

marsden
marsden V-100 User manual

marsden
marsden MPPS-250 User manual

marsden
marsden V-20 User manual

marsden
marsden M-600 User manual

marsden
marsden VS 250E User manual

marsden
marsden MHS-2500I User manual