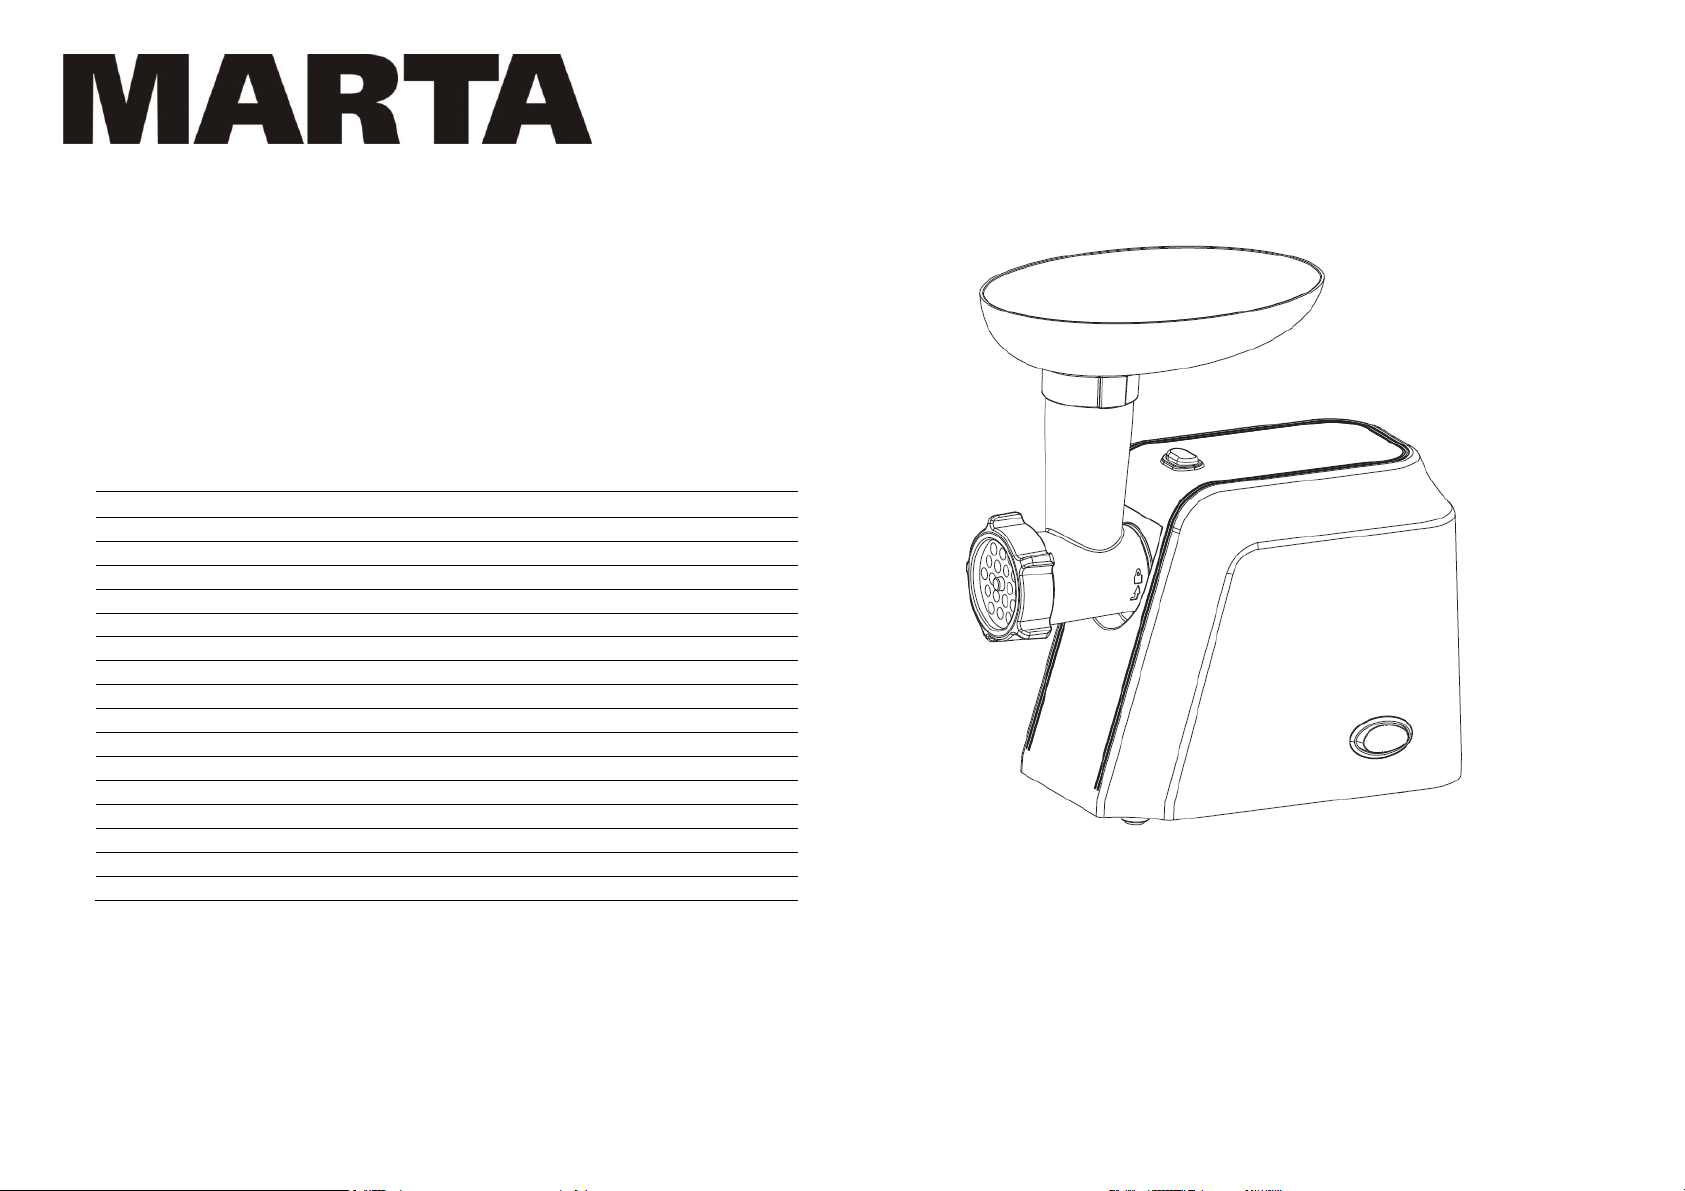
Marta MT-2083 User manual

MEAT GRINDER MT-2083
User manual
ҧққ
RUS
4
GBR
User manual
8
UKR
11
KAZ
ұққ
13
BLR
14
DEU
Bedienungsanleitung
16
ITA
Manuale d`uso
18
ESP
Manual de instrucciones
19
FRA
21
PRT
22
EST
Kasutusjuhend
24
LTU
Naudojimo instukcija
26
LVA
s istrukcij
27
FIN
29
ISR
תוארוה הלעפה
30
POL
32
UZB
33

2
RUS
.
GBR Real set of the appliance could be different from listed in the User manual. Check once buy.
DEU in dieser Bedienungsanleitung angegebenen
ITA trollare
attentamente la completezza alla consegna del prodotto dal venditore.
KAZ ұңқ ғ ұққ ғ қү.
ғ ұқ ң.
LTU
priimd
PRT A integridade efectiva do produto pode variar de que consta neste manual. Verifique cuidadosamente a
UKR
FIN
FRA
EST
BLR
ESP resente. Compruebe
LVA
UZB Ushbu tovarning amaldagi majmuasi uchbu qo'llanmada ko'rsatilganidan farq qilishi mumkin. Tovar sotuvchi
tomonidan berilayotgan vaqtda majmuaning to'liqligini diqqat bilan tekshiring.
POL trukcji.
zestaw przy odbiorze towaru od sprzedawcy.
RUS
1.
R) / (O) /
(ON)
3. -
4.
5.
6.
7.
8.
9.
10.
11
GBR Parts list
1. Motor unit
2. Reverse (R) /OFF button (O) /ON
button
3. Grinder head locking button
4. Grinder head inlet
5. Food pusher
6. Food tray
7. Removable grinder head body
8. Feeder screw
9. Cutting blade
10. Cutting plates
11. Fixing ring
Cutting plates:
5mm for cooking cutlets
7mm for chopping
BLR
)/
3-
4
5
6
7
8
9
10
11
UKR
) /
3-
4
5
6
7
8
9.
10
11
KAZ
1. Моторлы блок
2. Реверс (R) / өшіру (O)
функциясын қосу түймешігі /
Өшіру түймешігі (ON)
3. Алынбалы блоктың бекіткіш-
түймешігі
4. Алынбалы блоктың бекіткіш
саңылауы
5. Итергіш
6. Жүктеу ұяшығы
7. Ет тартқыштың алынбалы
блогы
8. Шнек
9. Пышақ
10. Фарш жасауға арналған

3
-
-
-
-
торлар
11. Бекіткіш сақина
Торлар:
5 мм - котлетті масса
7 мм – ірілей турау
DEU Komplettierung
-Taste (O) /
Ein-Taste (ON)
3
4
5. Stopfer
6
7
8. Schnecke
9. Messer
10
des Hackfleisches
11. Lochscheibenhalterung
Lochscheiben:
5 mm
7 mm Hackfleischmasse
ITA Componenti
1. Motore
2. Pulsante di inversione di marcia
(reverce) (R) / arresto (O) / Pulsante di
marcia (ON)
3. Pulsante di fissaggio di blocco
rimovibile
4. Foro di fissaggio di blocco rimovibile
5. Pestello
6. Tramoggia di carico
7. Blocco rimovibile di tritacarne
8. Elica di trasporto
9. Coltello
10. Piastre forate per tritare la carne
11. Ghiera
Piastre:
5 mm macinazione per polpette
7 mm macinazione grossa
ESP Lista de equipo
1. Bloque de motor
reverso (R) /
) / Pulsador de la
3
desmontable
4
desmontable
5. Empujador
6. Bandeja de carga
7. Bloque desmontable de la picadora
8.Tornillo
9. Cuchillo
10. Rej
picada
11
Rejas:
5 mm masa de croquetas
7 mm repique con pedazos grandes
FRA Lot de livraison
1. Bloc moteur
2. Interrupteur de la mise en marche du
) / Bouton de mise
en marche (ON)
3. Bouton-fixateur du bloc connectable
4. Orifice pour la fixation du bloc
connectable
5. Poussoir
6. Plateau de remplissage
7. Bloc connectable du hachoir
8. Vis
9. Couteau
10. Grilles
11. Bague de fermeture
Grille:
5 mm hachage moyen
7 mm gros hachage
PRT Conjunto complete
1. Unidade de motor
reverso (R) / de desliga (O) /
liga (ON)
3-
4. Furo para montagem de unidade
5. Empurrador
6. Bandeja de carregamento
7
8. Parafuso
9. Faca
10. Grades para preparar carne picada
11. Anel fixador
Grades:
5 mm recheio para costeleta
7 mm picado
EST Komplektis
1. Mootoriplokk
2. Reversfunktsiooni sisse- (R) /
/
3. Eemaldavata ploki klahv-fiksaator
4. Ava eemaldatava ploki kinnitamiseks
5
6. Laadimisrenn
7. Hakklihamasina eemaldatav plokk
8. Segur
9. Nuga
10
11
5 mm - kotletimass
7 mm -
LTU
1. Variklio skyrelis
/ Jungiklis (ON)
3. Mygtukas nuimamo skyrelio
fiksatorius
4. Nuimamo skyrelio tvirtinimo anga
5
6
7lis
8.Sraigtas
9. Peilis
10
11
5 mm
7 mm stambus malimas
LVA
1.
2.
/
poga (ON)
3. s
4.
5. Stampa
6
7.
8. Gliemezis
9. Nazis
10.
11
:
5 mm kotletu masa
7 mm ar lieliem at
FIN Kokoonpano:
1. Moottoriosa
- painike (O) / -
painike (ON)
3. Irrotettavan osan lukituspainike
4. Aukko irrotettavan osan kiinnitykseen
5
6
7. Lihamyllyn irrotettava osa
8. Kierukka
9
10
11. Lukitusrengas
5 mm - lihapullamassa
7 mm karkea jauheliha
הליבח ISR
1עונמ תדיחי .
(O) יוביכ/(R) 2 לש הלעפה ןצחל .
ךופיה היצקנופ
(ON) הלעפה ןצחל
3ףלשנ קולב לש העיבק תסמת ןצחל .
4ל החיתפ .ףלשנ קולב לש קוזח
5ףחוד .
6הניעט שגמ .
7הנחטמה לש ףלשנ קולב .
8חדקמ .
9ןיכס .
10ץוצק רשב לש הנכהל תותשר .
11הליענ תעבט .
:תותשר
5 מ״מ- תוציצק לקשמ
7 מ״מ- לודג ץוצק

4
POL Opis
1. Blok silnikowy
(R) / w) / Przycisk
3. Przycisk - ustalacza bloku
zdejmowanego
4
zdejmowanego
5. Popychacz
6. Korytko zasypowe
7. Blok zdejmowany maszynki do
mielenia
8
9
10. Sitka do przygotowania farszu
11
Sitka:
5 mm - masa na kotlety
7 mm - grube siekanie
UZB Shamlash
1. Motor bloki
2. Revers (R) / o'chirish (O)
funksiyalarini yoqish tugmasi / Yoqish
(ON) tugmasi
3. Olinuvchi blokning qotiruvchi tugmasi
4. Olinuvchi blokni mahkamlash uchun
tirqish
5. Surgich
6. Yuklash lotogi
7. Go'shtqiymalagichning olinuvchi bloki
8.Shnek
9. Pichoq
10. Qiyma tayyorlash uchun panjaralar
11. Mahkamlovchi halqa
Panjaralar:
5 mm - kotlet massasi
7 mm - yirik kesish
.

5
- 0
1. -
2. .
3. .
4.
.
5. .6).

6
1.
2.
3.
4. ON/O/R ON.
5.
6. ON/O/R O,
1. ON/O/R O ,
R 5-
2.
5
.

7
).
-
).
40℃
x x
220 240
2
2000
2,3 2,7
270 215 230
(,
, 4----
MARTA TRADE INC
c/o Commonwealth Trust Limited, P.O. Box 3321, Road Town, Tortola, United Kingdom,
:
Cosmos Far View International Limited
Room 701, 16 apt, Lane 165, Rainbow North Street, Ningbo, China

8
-2334
-
ENG USER MANUAL
IMPORTANT SAFETY INSTRUCTIONS
Please read this instruction manual carefully before use and keep in a safe place for future reference.
This appliance is not intended for use by persons (including children) with reduced physical, sensory or mental capabilities, or lack of experience and knowledge, unless they have been given supervision
or instruction concerning use of appliance by a person responsible for their safety. Children should be supervised to ensure that they do not play with the appliance.
Before the first connecting of the appliance check that voltage indicated on the rating label corresponds to the mains voltage in your home.
Home use only. Do not use for industrial purposes.
Do not use the meat grinder for any other purposes than those described in this instruction manual.
After transportation of storage at low temperatures allow the appliance to stay at room temperature for at least 2 hours before use.
Do not disassemble the appliance when it is plugged to the power supply. Always unplug the meat grinder from the power supply when not in use and before cleaning.
To protect against the risk of electric shock, DO NOT IMMERSE THE APPLIANCE IN WATER OR IN ANY OTHER LIQUIDS.
Do not place the appliance on soft, unstable surface or cover it with a cloth while in operation as it may cause overheating or breakdown.
Keep away from children.
Do not leave the meat grinder switched on when you do not use it.
Do not use other attachments than those supplied.
Do not overload the appliance.
Keep the cord away from sharp edges and hot surfaces.
Do not place the appliance near gas or electric oven or store at heated surface.
The blades are very sharp, so handle them with care.
Do not push products into the appliance by fingers while it is in use.
the appliance and disassemble it to remove remaining food.
Do not carry the unit by the food tray or head. Be sure to hold the housing with both hands.
Do not operate after malfunction or damage of cord.
Do not grind hard food, such as bones, nuts, ginger or other products with hard fiber.
Do not operate for more than 5 minutes at one time. Turn off switch and let it rest for at least 10 minutes to cool down the motor, otherwise the motor may be damaged.
If in case of overloading the overheat protection system is activated, switch off the appliance by pressing the ON/O/R button to O position, unplug it, and let the appliance cool down about 60 minutes, and
then continue operation.
Do not attempt to repair, adjust or replace parts in the meat grinder. Repair the malfunctioning appliance in the nearest service center.
The grinder head may rotate slightly during the use, but it is normal.
Do not over tighten the fixing ring to stop the movement. It may cause damage.
Removable metal parts (screw, cutting knife, cutting plates) can be oxidized after use. It is normal.
BEFORE FIRST USE
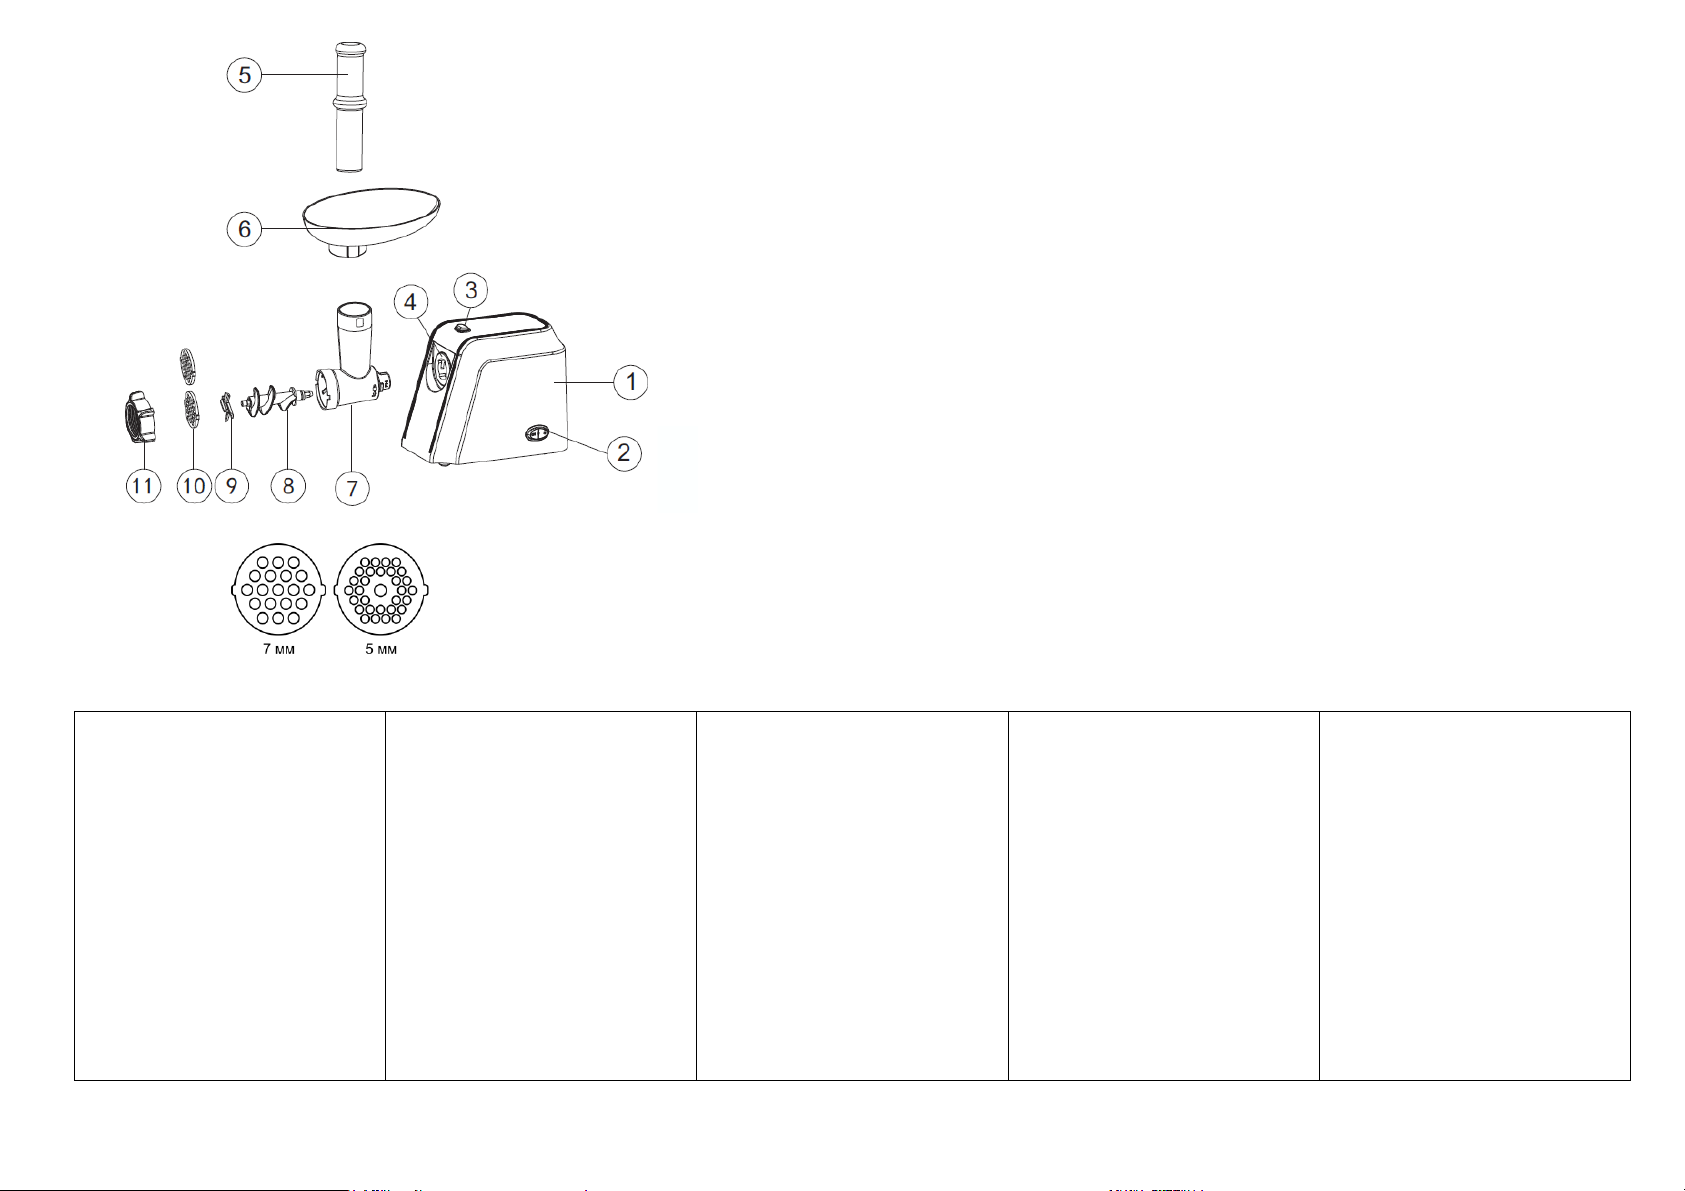
Unpack your appliance. Remove all packing materials.
Check if all parts are in a set and not damaged.

9
Do not immerse motor unit into water.
Dry thoroughly before use.
USING THE APPLIANCE
ASSEMBLING
1. Press the locking button, hold the head and insert into the inlet. When inserting please make sure that head must be slanted as per arrow indicated (fig.1), then move the head anticlockwise so the
head will be fastened tightly. (fig.2)
2. Place the feeder screw into the head, long end first, and turn to feed the screw slightly until it is set into the motor housing. (fig.3)
3. Place the cutting blade onto the feeder screw shaft with the blade facing the front as illustrated (fig.4). If it is not fitted properly, meat will not be grinded.
4. Place the desired cutting plate next to the cutting blade, fitting into the slot. (fig.5)
5. Support or press the center of the cutting plate with one hand then screw the fixing ring tight with another hand (fig.6). Do not over tighten. Place the food tray on the head and fix it into position (fig.7).
Locate the unit on a firm place. The air passage at the bottom and the side of the motor housing should be kept free and not blocked.
MINCING
1. Prepare the meat to be minced. Remove any bones and gristle. Never use frozen meat!
2. Cut the meat into pieces so that they easily fit the grinder head.
3. Place a bowl for minced meat under the grinder head.
4. Plug the unit in and switch ON/O/R button to ON position.
5. Put the meat in the tray; use the pusher to gently push the meat into the grinder head body. Never push the meat down with your fingers.
6. After you finish operating the unit, switch ON/O/R button to O position, unplug it.
REVERSE FUNCTION
If the meat gets stuck in the feeder screw during operation, use the reverse function to release the jam.
1. Switch off the unit by switch the ON/O/R button to O position, wait until the motor stops completely. Then switch and hold down the switch ON/O/R button to R positon for 5-10 seconds.
2. The feed screw starts rotating in the opposite direction and push out jammed food.
3. If this does not help, unplug the unit from the outlet, dissemble and clean it.

10
RECIPES
Cutlets
Ingredients:
Beef fillet 400 g
Pork fillet 400 g
White bread 100 g
Onion 100 g
Milk 100 ml
Bread crumbs
Olive oil
Chop beef, pork fillet and onions. Soak white bread in water for 10 minutes and squeeze. Assemble a meat grinder according to user manual and
set 5 mm disc. Mince meat with the meat grinder, onion and bread with the meat grinder, add salt, spices and milk. Mix thoroughly. Make 1.5 cm
thick cutlets of minced meat and roll them in bread crumbs. Fry the cutlets with olive oil until they are golden brown. Then cook them till ready in an
oven.
Beefsteak
Ingredients:
Beef fillet 600 g
Onion 100 g
Egg 50 g / 1 pc
Milk 100 ml
Salt, spices
Olive oil
Chop beef and onions. Assemble a meat grinder according to user manual and set 7 mm disc. Mince beef and onions with the meat grinder. Add
egg, milk, salt and spices into ground beef and mix thoroughly. Make 1 cm thick beefsteaks. Fry the beefsteaks with olive oil until they are golden
brown. Then cook them till ready in an oven. Serve with butter and fried egg.
Chicken balls
Ingredients:
Chicken fillet 600 g
Onion 100 g
Butter 50 g
Salt, spices
Chop chicken fillet. Dice onions finely and fry with butter till golden brown. Assemble a meat grinder according to user manual and set 5 mm disc.
Mince chicken fillet and fried onions with the meat grinder 2 times. Add salt, spices and mix thoroughly. Make 12-15 g meat balls of minced meat.
You may deep freeze the meat balls or cook them. You could serve meat balls as a main course if boil them for 15 minutes in salted water, or
could add them to soup or ragout.
CLEANING AND MAINTENANCE
Switch off the appliance and make sure that the motor has stopped completely.
Unplug the appliance.
Disassemble by reversing the assembling steps (fig.8).
Press locking button and turn the whole grinder head in the direction of the arrow.
Remove the pusher and tray (fig.9).
Clean all the attachments and parts right after use.
Do not immerse motor unit, plug and power cord in water or keep in running water.
Wipe the motor unit with a damp cloth.
Wash all the parts that have come in contact with meat in warm soapy water.
Do not use abrasives, chlorine containing substances or organic solvents.
The metal parts of the meat grinder are not to be washed in the dishwasher!
Do not wash all metal parts with hot water which temperature above 40℃. Because it will accelerate metal parts oxidation.
After washing please use dry cloth to wipe the metal parts.
Wipe all the cutting parts (cutting knife, cutting plates) with vegetable oil.

11
If the meat grinder won't be used for a long time, please wipe all the metal parts by vegetable oil-wet dishcloth.
CAUTION: The blades are sharp and therefore dangerous. Handle with care.
STORAGE
Switch off and unplug the appliance; let it entirely cool.
Complete all requirements of Chapter CLEANING AND MAINTENANCE.
Keep the appliance in a dry cool place.
SPECIFICATION
Power supply
Mincing speed
Maximum
power
Net / Gross weight
Gift box dimension (L x W x H)
220 240 V, 50 Hz
up to 2 kg/min
2000W
2,3 kg / 2,7 kg
270 mm mm 230 mm
WARRANTY DOES NOT APPLY TO CONSUMABLES (FILTERS, CERAMIC AND NON-STICK COATING, RUBBER SEALS, ETC.)
Production date is available in the serial number located on the identification sticker on the gift box and/or on sticker on the device. The serial number consists of 13 characters, the 4th and 5th characters
indicate the month, the 6th and 7th indicate the year of device production.
Producer may change the complete set, appearance, country of manufacture, warranty and technical characteristics of the model without notice. Please check when purchasing device.
Production branch:
Cosmos Far View International Limited
Room 701, 16 apt, Lane 165, Rainbow North Street, Ningbo, China
Made in China
UKR

12
-
- 5 0
-
℃
220 240
2000
2,

13
----
Cosmos Far View International Limited
Room 701, 16 apt, Lane 165, Rainbow North Street, Ningbo, China
KAZ ПАЙДАЛАНУ БОЙЫНША НҦСҚАУЛЫҚ
ҚАУІПСІЗДІК ШАРАЛАРЫ
Аспапты қолданар алдында пайдалану бойынша нұсқаулықты мұқият оқып, оны ары қарай анықтама үшін сақтап қойыңыз.
Бұл аспап физикалық және психикалық шектеулері бар, бұл аспаппен жұмыс тәжірибесі жоқ адамдардың қолдануына арналмаған. Мұндай жағдайларда
пайдаланушыға оның қауіпсіздігі үшін жауап беретін адам алдын ала нұсқау беруі тиіс.
Аспапты алғаш қолданар алдында Сіздің ет тартқышыңыздың техникалық сипаттамаларының кестесінде көрсетілген электр қоректенуі Сіздің жергілікті
желіңіздегі электр қоректендіруге сәйкес келетінін тексеріңіз.
Тек тұрмыстық мақсаттарда ғана қолдану керек. Аспап өнеркәсіптік пайдалануға арналмаған.
Аспапты тек осы нұсқаулықта сипатталғандай қолданған жөн.
Егер бұйым біраз уақыт 0ºC-ден төмен температурада болса, қосар алдында оны кем дегенде 2 сағат бөлме жағдайында ұстау қажет.
Құрылғыны желіге қосылып тұрғанда ашуға болмайды. Аспаптың айналмалы бөліктеріне тимеңіз! Аспапты Сіз қолданбасаңыз да, сонымен қатар тазалар
алдында қоректендіру желісінен үнемі өшіріп тұрыңыз.
Электр тоғына ұрынбау үшін аспапты суға немесе басқа сұйықтықтарға батырмаңыз.
Аспапты жұмсақ бетке орнатпаңыз, жұмыс кезінде үстіне мата немесе басқа материалдар жаппаңыз. Бұл желдетуді қиындатып, аспаптың сынуына әкеліп
соқтыруы мүмкін.
Балалардың аспапты қолдануына рұқсат етпеңіз.
Қосулы аспапты қараусыз қалдырмаңыз.
Осы аспаптың жинағына кірмейтін керек-жарақтарды қолданбаңыз.
Аспапқа азық-түлік қоймаңыз.
Қоректендіру бауының үшкір шеттер мен ыстық беттерге тимегенін қадағалаңыз.
Аспапты ыстық газ немесе электр плитаға немесе жылу көздерінің қасына қоймаңыз.
Пышақпен абай болыңыз – ол өте өткір.
Ауызға азық-түлікті саусақпен итермеңіз, ол үшін итергіш қолданыңыз.
Егер азық-түлік жүктеу аузында тұрып қалса, аппаратты өшіріп, жүздердің толық тоқтағанын күтіңіз де, оны желіден ажыратып, тұрып қалған заттарды
шығару үшін ашыңыз.
Тасымалдау барысында аппаратты жүктеу ұяшығынан немесе жүктеу аузынан ұстамаңыз. Аппаратты екі қолмен корпусынан ұстаңыз.
Электр бауы зақымдалған аспапты қолданбаңыз.
Ет тартқышта қатты азық-түлікті үгітпеңіз (сүйек, зімбір, жаңғақтар және т.б.)
Ҥздіксіз жҧмыстың кеңес берілген ең көп уақыты – кем дегенде 5 минут міндетті ҥзіліспен 10 минуттан асырмай.
Егер қозғалтқышты қызудан қорғау жүйесі іске қосылса, аспап толық суығанша оны қоспаңыз.
Аспапты өздігіңізден жөндеуге тырыспаңыз. Аспап жұмысында ақаулар анықталған жағдайда жақын жердегі сервистік орталыққа жолығыңыз.
Аспапты қолдану барысында ет тартқыштың блогында кішігірім люфт болады, бұл ақау болып табылмайды.
Қозғалысты тоқтату үшін бекіткіш сақинаны қатты бұрамаңыз, бұл оның сынуына әкеліп соқтыруы мүмкін.
Ет тартқыштың алынбалы металл бөлшектері (шнек, торлар, пышақ) қолданған соң тотығуы мүмкін. Бұл қалыпты жағдайда және ақау болып табылмайды.

14
АЛҒАШ ҚОЛДАНАР АЛДЫНДА
Аспапты ашып, барлық жапсырмаларды алып тастаңыз.
Аспаптың барлық құрамдастарының барын және зақымдардың жоғын тексеріңіз.
Аспапты «Тазалау және күту» тарауына сәйкес тазартыңыз. Моторлық блокты суға салмаңыз.
Жинар алдында аспаптың барлық бөліктері кебуі тиіс.
ТАЗАЛАУ ЖӘНЕ КҤТУ
Ет тартқышты өшіріп, қозғалтқыштың толық тоқтағанына көз жеткізіңіз.
Аспапты электр желісінен ажыратыңыз.
Жинаудың кері тәртібінде ашыңыз.
Алынбалы блоктың бекіткіш-түймешігін басып, ет тартқыштың блогын сағат тілімен бұрып, моторлы блоктан ажыратыңыз.
Ет тартқыштың барлық бөлшектерін пайдаланған соң бірден тазартыңыз.
Моторлы блок, электр қоректендіру бауы мен ашаны суға батырмаңыз. Моторлы блокты дымқыл матамен сүртіңіз.
Ет тартқыштың азық-түлікке тиген барлық бөлшектерін жуу құралымен жылы суға жуыңыз.
Тазалау үшін абразивті және хлорлы заттар немесе органикалық еріткіштер қолданбаңыз.
Аспаптың металл бөліктерін (торлар, пышақ, шнек, бекіткіш бұранда, алынбалы блок) ыдыс жуғыш мәшинеде жумаңыз!
Ет тартқыштың металл бөліктерін жуу үшін 40℃-ден жоғары температуралы ыстық су қолданбаңыз, өйткені бұл олардың тотығуын тездетеді.
Жуған соң металл бөліктерді құрғақ матамен сүртіңіз.
Таза және кептірілген пышақ пен торларды өсімдік майына шыланған матамен сүртіңіз.
Егер ет тартқыш ұзақ уақыт қолданылмаса, оның барлық металл бөліктерін өсімдік майына шыланған матамен сүртіңіз.
НАЗАР АУДАРЫҢЫЗ: Аспаптың кескіш жүздері өте өткір және қауіпті. Жүздерді орнатқанда, алғанда және жуғанда абай болыңыз.
ТЕХНИКАЛЫҚ СИПАТТАМАЛАРЫ
Электр қоректену
Максималды қуат
Нетто / брутто салмағы
Қорап өлшемдері (Ҧх Ех Б)
220 –240 Вольт, 50 Герц
2000 Ватт
2,
КЕПІЛДІК ШЫҒЫН МАТЕРИАЛДАРЫНА (СҤЗГІЛЕР, КЕРАМИКАЛЫҚ ЖӘНЕ КҤЮГЕ ҚАРСЫ ЖАБЫНДЫЛАР, РЕЗИНА НЫҒЫЗДАУЫШТАР МЕН
БАСҚАЛАР) ТАРАЛМАЙДЫ.
Аспап жасалу күнін бұйым қорабындағы сәйкестендіру стикерінде және/немесе бұйымның өзіндегі стикерде табуға болады. Сериялық нөмір 13 белгіден тұрады,
4-ші және 5-ші белгі аспаптың жасалу айын, 6-шы және 7-ші белгі жылын білдіреді.
Өндіруші аспаптың дизайны мен техникалық сипаттамаларын алдын ала ескетпей өзгерту құқығын өзінде қалдырады.
Өндіруші зауыт:
Cosmos Far View International Limited
Room 701, 16 apt, Lane 165, Rainbow North Street, Ningbo, China
Қытайда жасалған

15
5 0 .
.
-.

16
,
----
Cosmos Far View International Limited
Room 701, 16 apt, Lane 165, Rainbow North Street, Ningbo, China
DEU BEDIENUNGSANLEITUNG
SICHERHEITSHINWEISE
nntnisnahme im Weiteren gut auf.
ihre Sicherheit verantwortliche Person beaufsichtigt und angeleitet.
Vor der ersten Verwendung dehen Daten angegeben ist, mit den Nennwerten ihres lokalen
tens 2 Stunden lang vor dem Einschalten zu halten.
t verwendet
wird, sowie vor der Reinigung.
-
Seien Sie vorsichtig bei der Handhabung mit dem Kreuzmesser, da es sehr scharf ist.
en Stopfer.
220 240
2000
2,
27

17
es auseinander, um die steckengebliebenen Nahrungsmittel zu entfernen.
abel nicht.
Die empfohlene D Minuten mit obligatorischer Pause von mindestens 10 Minuten.
en Kundendienst.
Abnehmbare Metallteile des Fleischwolfes (Schnecke, L
VOR DER ERSTEN VERWENDUNG
REINIGUNG UND PFLEGE
Schalten Sie
Ziehen Sie den Netzstecker aus der Steckdose aus.
mgekehrter Reihenfolge.
.
Reinigen Sie alle Teile des Fleischwolfes sofort nach der Verwendung.
chmittel.
Verwenden Sie nie Scheuermittel, chlorhaltige Stoffe ode
Nie Metallteile (Lochscheiben, Messer, Schnecke, Haltemutter,
℃
Wischen Sie alle Metallteile nach der Reinigung mit einem trockenen Tuch ab.
Wischen Sie saubere und trockene Messer und Lochscheiben mit einem mit Pflanze
WARNUNG: Die Klingen des Messers sind sehr scharf und stellen eine Gefahr dar. Seien Sie beim Ein- und Ausbau, sowie bei der Reinigung der Klingen vorsichtig.
TECHNISCHE CHARAKTERISTIKEN
Zeichen, 4. und 5. Zeichen bezeichnen den Monat, 6. und 7. Zeichen - Herste
zum Zeitpunkt des Warenempfangs.
Hersteller:
Cosmos Far View International Limited
Room 701, 16 apt, Lane 165, Rainbow North Street, Ningbo, China
Strom
Netto- / Bruttogewicht
220 240 V, 50 Hz
2000 W
2,3 kg / 2,7 kg
270 mm mm 230 mm

18
Hergestellt in China
ITA MANUALE D`USO
MISURE DI SICUREZZA
Prima di utilizzare la macchina leggete attentamente il m
tente deve
essere preventivamente preparato dalla persona rispondente per la tecnica di sicurezza.
a nella targhetta tecnica sia conforme alla corrente elettrica della vostra rete locale.
Qualora la macchina per alcun tempo fosse tenuta alla temperatura inferiore a 0 0
rotanti della macchina! Scollegate sempre la macchina dalla rete di alimentazione elettrica,
qualora non fosse utilizzata o prima della pulizia.
Per evitare la eventuale folgorazione non immergete la macchina in acqua o altri liguidi.
Non mettete la macch
Non permettete ai bambini di utilizzare la macchina.
Non lasciate la macchina senza il controllo.
Non utilizzate i dettagli che non fanno parte della componentistica della presente macchina.
Non stracaricate la macchina con i prodotti.
Controllate che il filo di alimentazione non sia in contatto con i bordi taglienti o superficie caldi.
Non mettete la macchina sul fornello caldo a gas o quello elettrico, ossia vicino ai fonti di calore.
Non spingete gli alimentari nella bocca della macchina con le dita, utilizzate il pestello.
ltelli, slacciate la macchina dalla linea elettrica e smontatela per estrarre i prodotti
incastrati .
Allo spostamento pparecchio.
Non utilizzate la macchina con il filo elettrico difettato.
Non macinate in macchina i prodotti duri (ossa, zenzero, noci ecc.)
Il tempo suggeribile di funzionamento ininterrotto della macchina obbilgatorio non inferiore a 10 minuti.
Non tentate di riparare la macchina da soli. Alla presenza dei guasti di funzionamento rivolgetevi al centro di assitenza.
on viene ritenuto un difetto.
Le parti metalliche smontabili della tritacarne (elica di trasporto, piastre, coltello) possono rimanere oss
Togliete la confezione della macchina e tutte le etichette.
Controllate la presenza di tutti i componenti della macchina e la mancanza dei difetti.
Prima di assemblaggio tutti i componenti della macchina devono essere assolutamente asciutti.

19
PULIZIA E MANUTENZIONE
Arrestate la tritacarne e controllate che il motore sia definitivamente fermo.
Slacciate la macchina dalla rete elettrica.
Effettuate lo smontaggio in ordine contrario ad assemblaggio.
Premete il pulsante di fissaggio della parte smontabile, girate il corpo di tritacarne in senso orario e staccate dal blocco di motore.
Non immergete il motore, spina, cavo elettrico in acqua. Passate il blocco di motore con il panno umido.
Sciacquate in acqua tiepida con i detersivo tutti i dettagli della tritacarne in contatto con i prodotti.
Non utilizzate per pulizia le sostanze abrasive o contenenti il cloro, ossia i solubili organici.
Non pulite i dettagli metallici (piastre, coltello, elica di carico, ghiera, blocco rimovibile) della macchina in lavastoviglie.
0
Dopo il lavaggio passate col panno asciutto le parti metalliche.
Passate col panno impregnato di olio di girasoli il coltello e le piastre asciutte e pulite.
Nel caso di mancato utilizzo della tritacarne a lungo, passate tutte le parti metalliche della stessa col panno impregnato di olio di girasoli
ATTENZIONE: ggio e pulizia dei coltelli.
CARATTERISTICHE TECNICHE
LA GARANZIA NON VALE PER I MATERIALI DI CONSUMO (FILTRI, RIVESTIMENTI CERAMICI ED ANTIADERENTI, GUARNIZIONI IN GOMMA ED ALTRI).
La data di fab
Il produttore si riserva il diritto di apportare modifiche ai componenti, aspetto esterno, paese di origine, periodo di garanzia e caratteristiche tecniche del prodotto a propria discrezione e senza preavviso.
Controllare le caratteristiche al momento di ricevimento del prodotto.
Fabbricante:
Cosmos Far View International Limited
Room 701, 16 apt, Lane 165, Rainbow North Street, Ningbo, China
Fatto in Cina
ESP MANUAL DE INSTRUCCIONES
MEDIDAS DE SEGURIDAD
ente manual de instrucciones.
No se permite desmontar el dispos toque las piezas giratorias del dispositivo! Siempre desconecte el dispositivo de la red, si no lo utiliza, y antes de limpliarlo.
s.
Tensione d`alimentazione
Potenza massima
Peso netto / brutto
Gift box dimension (L x W x H)
220 240 V, 50 Hz
2000 W
2,3 kg / 2,7 kg
270 mm mm 230 mm

20
No instale el dispositivo en una superficie blanda, no le cubra mientras funciona con tela o con otros materiales. Esto dific
No deje el aparato conectado sin vigilancia.
No utilice accesorios que no forman parte de este juego.
No sobrecargue el dispositivo con los alimentos.
No coloque el dispositivo en l
Tenga cuidado al manejar el cuchillo
trapados.
del dispositivo.
minutos con un descanso obligatorio de no menos de 10 minutos.
No intente reparar el dispositivo. Si detecta problemas en el funcionamiento del dispositiv
to.
No gire de una manera fuerte el anillo de bloqueo para parar el movimi
rmal y no es un mal funcionamiento.
ANTES DEL PRIMER USO
Desembale el dispositivo y elimine todas las etiquetas.
Antes del montaje, todas las parte
LIMPIEZA Y MANTENIMIENTO
Realice el desmontaje en el orden inverso al montaje.
bloque de motor.
No sumerja el bloque de motor,
No utilice para la limpieza los productos a
vavajillas!
s de 40℃
Si la picadora no se ut
ADVERTENCIA: as hojas.
Other manuals for MT-2083
1
Table of contents
Languages:
Other Marta Meat Grinder manuals

Marta
Marta MT-MG2018C User manual

Marta
Marta MT-2084 User manual

Marta
Marta MT-MG2019B User manual

Marta
Marta MT-MG2028D User manual

Marta
Marta MT-MG2016E User manual

Marta
Marta MT-MG2028A User manual

Marta
Marta MT-MG2027B User manual

Marta
Marta MT-MG2028B User manual

Marta
Marta MT-MG2017B User manual

Marta
Marta MT-MG2027A User manual

Marta
Marta MT-2084 User manual

Marta
Marta MT-2083 User manual

Marta
Marta MT-MG2026D User manual

Marta
Marta MT-MG2016A User manual

Marta
Marta MT-MG2016C User manual

Marta
Marta MT-MG2018D User manual

Marta
Marta MT-MG2026A User manual

Marta
Marta MT-MG2028C User manual

Marta
Marta MT-MG2016D User manual

Marta
Marta MT-MG2018B User manual