PB8
9
EENCUADERNADORA
ELIMINACIÓN
ELIMINACIÓN DE LOS RESIDUOS DE LA MÁ-
QUINA:
Elimine los residuos de la máquina
al final de su vida útil respetando
siempre las normas medioambienta-
les. No tire partes de la máquina ni
el embalaje junto con la basura do-
méstica.
ACCESSORIO ESPECIAL
Denominación N° de pedido
XXXXX xxxxx
Inicación: En el caso de pedidos ulteriores de accesorios especiales y de piezas de re-
puesto, rogamos se dirija a nuestro representante oficial.
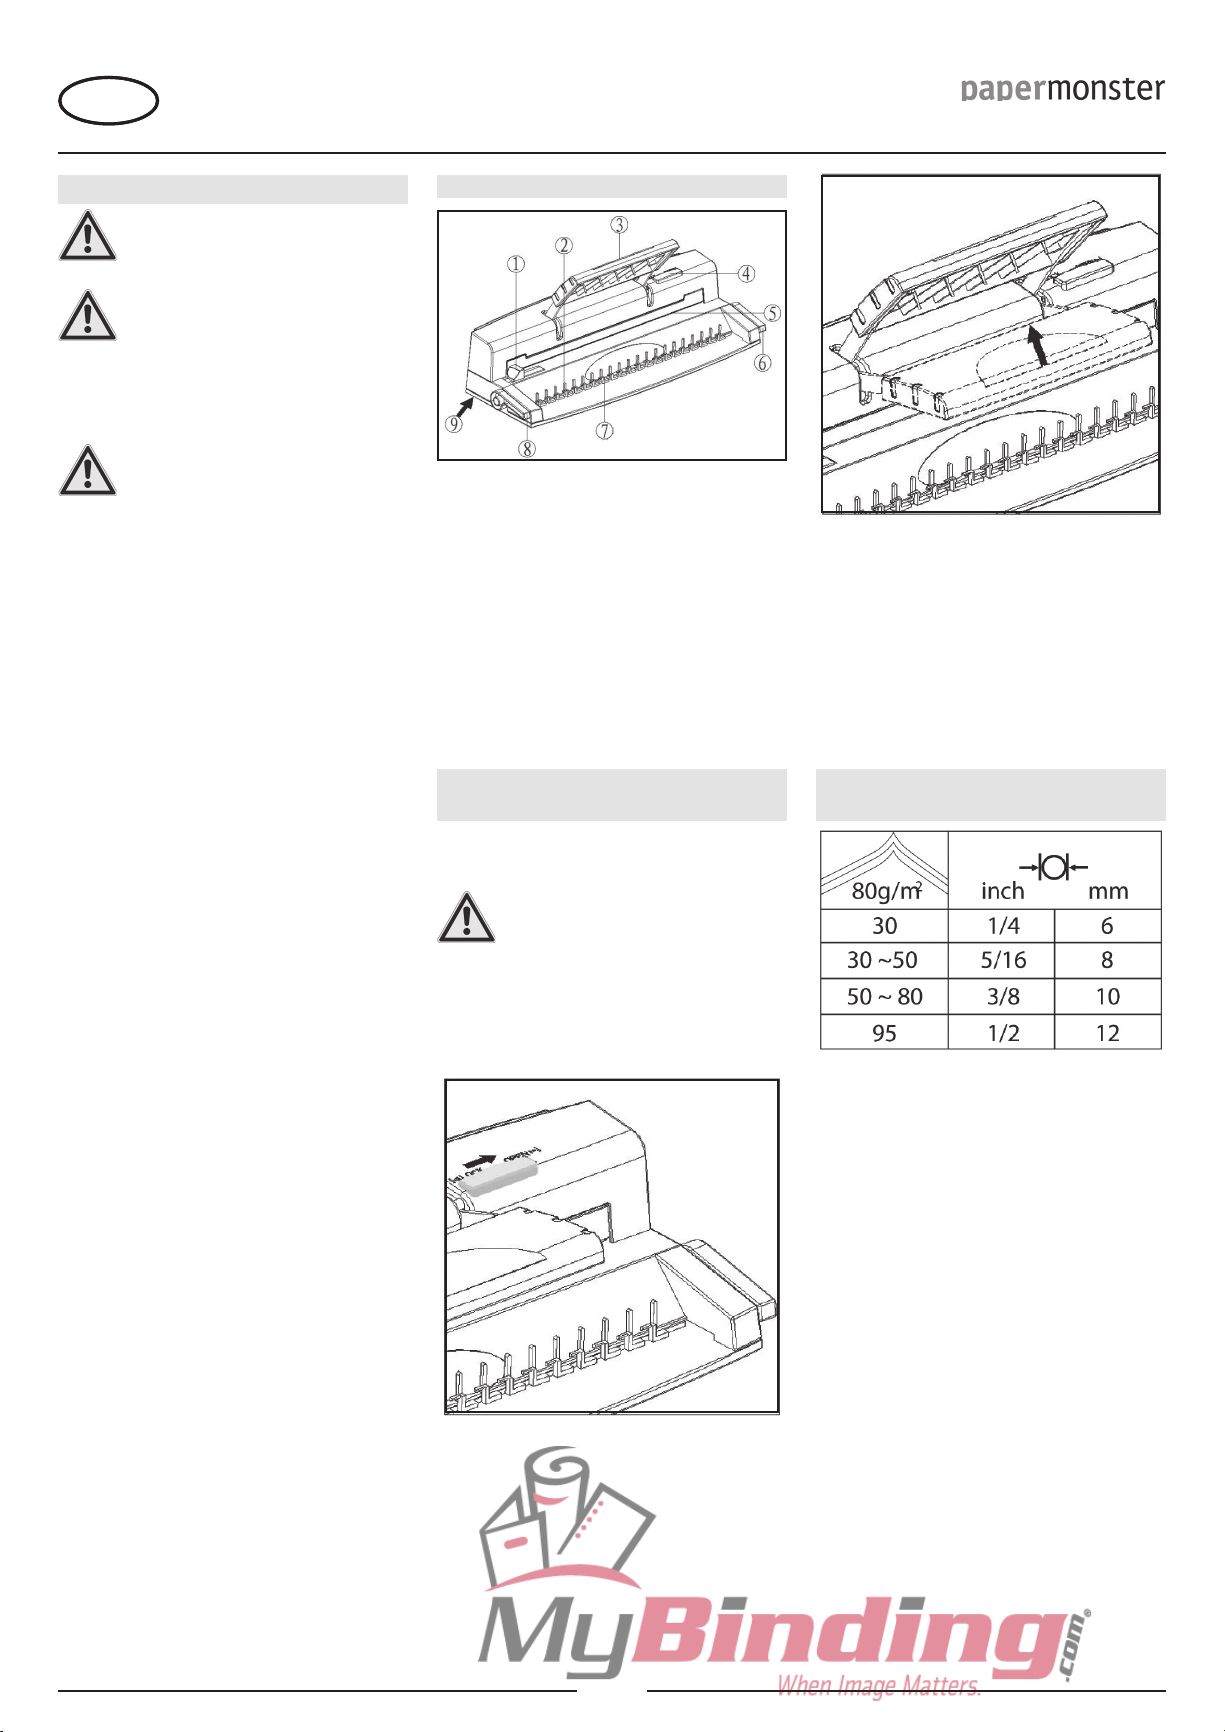
CARACTERISTICAS TECNICAS
Fig. 5
Fig. 6
Fig. 7
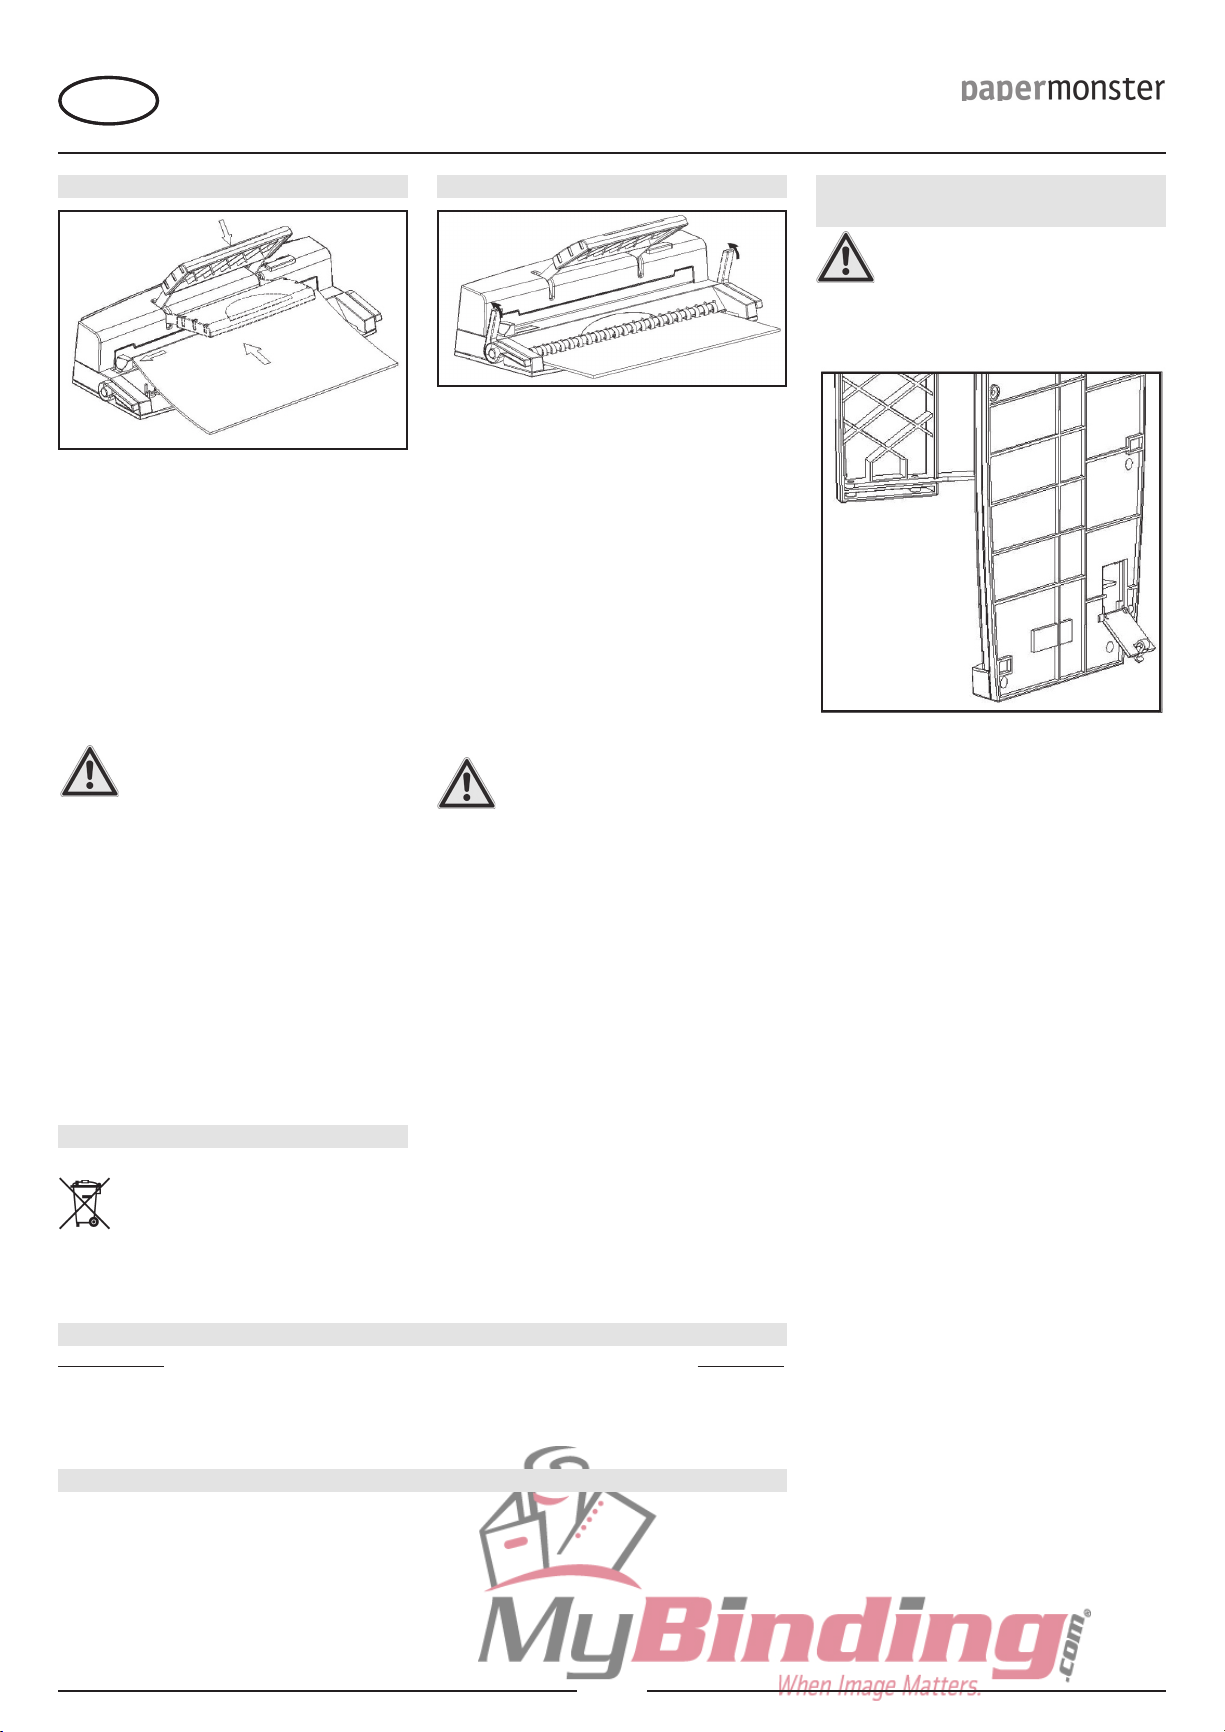
PERFORACIÓN
Ajuste el formato de papel que se va a usar
desplazando la guía lateral (ver figura 5).
Coloque el número requerido de hojas de pa-
pel/documento en la muesca de perforación;
preste una atención especial a alinear el bor-
de del papel contra la guía lateral.
Hecho esto, presione hacia abajo la placa de
perforación.
Levante la placa de perforación a la posición
original, retire el documento perforado.
¡AVISO!
Capacidad máx. de perforación es
de 6 hojas (papel de 80 gsm) por
cada operación.
-
-
-
-
ENCUADERNACIÓN
Coloque el canutillo de plástico en el lado
posterior del „soporte para canutillos de plás-
tico“ con el lado que se ha de abrir situado en
la posición más alta.
Deslícelo por el soporte para canutillos de
plástico horizontal.
Abra completamente el canutillo empujando
simultáneamente ambas palancas de encua-
dernación hacia atrás.
Coloque la pila perforada de hojas de papel
sobre el canutillo de encuadernación abierto;
cerciórese de que todas las púas del canutillo
de plástico han atravesado por completo los
orificios en el papel.
Comience con la cubierta anterior, por último,
en la cubierta posterior.
Retire el documento encuadernado.
Nota:
Empuje/tire siempre de la palanca
de perforación (izquierda/derecha)
en conjunto, en otro caso, se po-
drá dañar el equipo.
-
-
-
-
-
-
LIMPIEZA DE RESIDUOS
¡AVISO!
Asegúrese de limpiar frecuente-
mente la bandeja de residuos.
La sobrecarga con fragmentos
de residuos podría causar una
perforación deficiente y dañar la
máquina.
Levante el equipo durante la limpieza de la
bandeja de residuos como se muestra en la
figura 7.
Abra la tapa y vacíe los fragmentos de resi-
duos en la bolsa de basura, a continuación,
cierre la tapa.
-
-
Estilo de encuadernación: canutillo de plástico 21 anillas A4
Capacidad máx. de perforación: 8 hojas (80 g) por “marcha”, 1 hoja clara de PVC
180 micrones
Capacidad máx. de encuadernación: alambre de 12 mm, aprox. 120 pp x 80 gsm
Profundidad agujero de perforación: fija
Peso neto: 1,8 kg
Dimensiones: 360 x 155 x 85 mm