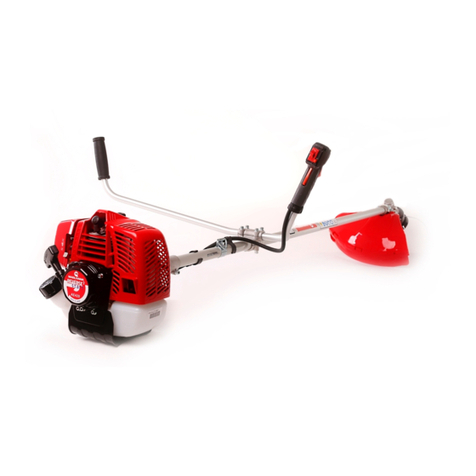
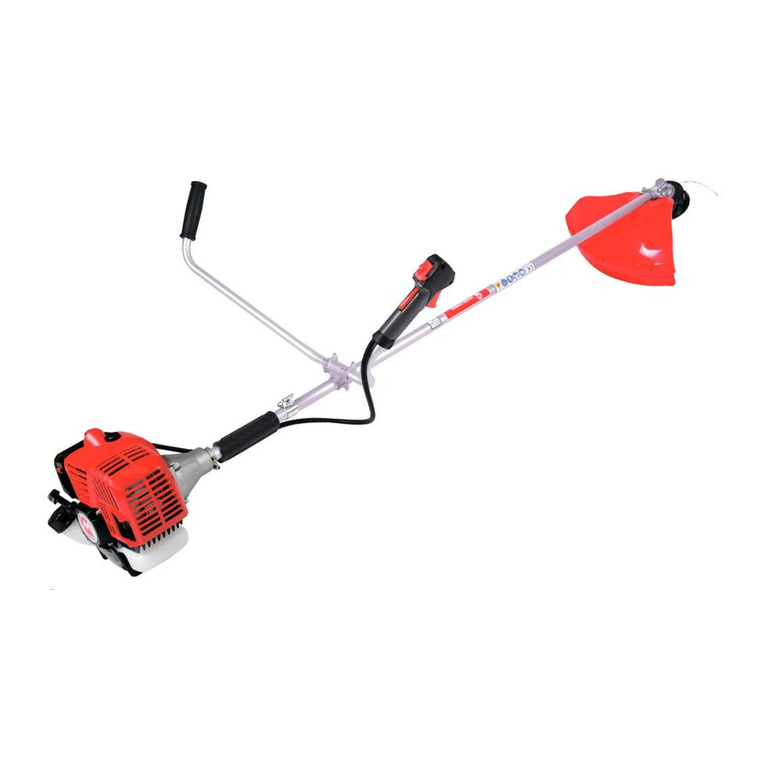
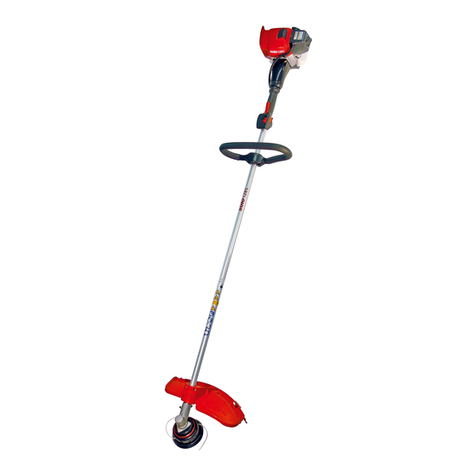
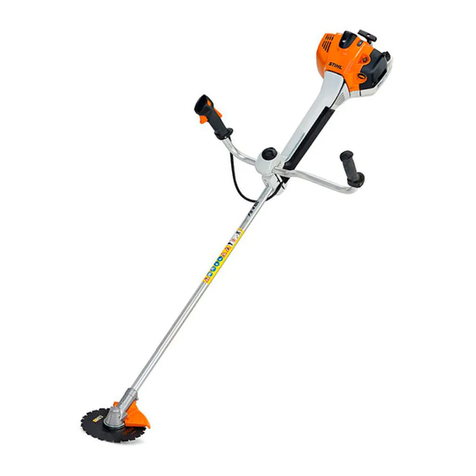
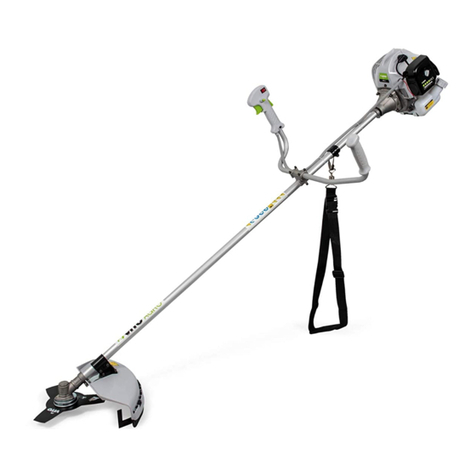
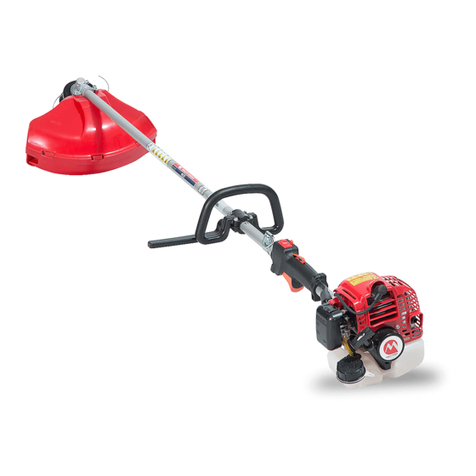
Maruyama MBS329 Owner's manual

―US-0 ―
Brushcutter
Cortadora
MBS329
English: Page US-1~7
Espanol: Página ES-1~7

―US-1 ―
1.Read and understand this Instruction Manual before
using the this product. Be thoroughly familiar with the
proper use of the Brushcutter.
2.Never allow children to operate the Brushcutter. it is not a
toy. Never allow adults to operate the unit without first
reading the Instruction Manual.
3.Become familiar with the controls and know how to
stop the engine quickly.
4.ALWAYS WEAR SAFETY GLASSES or other
suitable eye protection, and hearing protection.
5.Keep the area of operation clear of all persons,
particularly small children and pets.
6.Never operate the Brushcutter when you are fatigued.
Never operate without proper guards or other
protective safety devices in place.
7.Dress properly; do not wear loose clothing or jewelry.
They can be caught in moving parts. Always wear
substantial footwear, long pants, and long sleeved
shirt.
8.Gasoline is highly flammable; handle it carefully. Fill
the fuel tank with the correct mixture of gasoline and
oil before trying to start the engine.
A. Use an approved fuel container for storing the
gasoline/oil mixture.
B. Do not fill the tank when the engine is hot or running.
C. Do not smoke while handling gasoline.
D. Fill the fuel tank outdoors and up to about 10mm
from the top of the tank, not the top of the filler neck.
E. Wipe any spilled gasoline before starting the
engine.
9.Always be sure of your footing; keep a firm hold of
the handles with both hands, and walk, never run.
10.Use the right tool for the job. Do not use the
Brushcutter for any job that is not recommended
by the manufacturer.
11.Keep all fasteners tight to be sure the Brushcutter
is in safe working condition. Follow the mainte-
nance instructions provided on page US-6 to US-7
of this manual.
12.Do not put hands or feet near or under the
rotating/ moving parts. Keep clear at all times.
13.If the Brushcutter should start to vibrate
abnormally, stop the engine and check
immediately for the cause. Vibration is generally
a warning of trouble.
14.Do not trim too close to the ground in order to
avoid hitting small stones or other debris. Avoid
using the Brushcutter near rocks, gravel, stones
and similar matter.
15.Use the Brushcutter only in daylight or good
artificial light.
16.Shut off the engine and be certain the attached
tool has completely stopped rotating/moving
before inverting the machine.
Model MBS329
Overall length (mm) 2710
Overall width (mm) 345
Dimensions
Overall height (mm) 465
Dry weight (kg / lbs) 9,6/ 21,2
Gear Spiral bevel gear
Deduction ratio 1:1,46
Model AE320
Type Air cooled. 2-cycle, 1-cylinder
Engine Displacement (cc) 31,8
Fuel Tank Capacity (liter / qts.) 1,0
Carburetor Diaphragm Type
Ignition Soild State
Spark plug NGK BPM6Y
Spark plug gap (mm / in.) 0,6 – 0,7 / 0,024 – 0,028
Engine
Fuel Mixture
USE ONLY NON
-
LEADED REGULAR GASOLINE.
2
-
CYCLE OIL MIX 25:1 RATIO MUST BE APPROVED
FOR AIR
-
COOLED ENGINES.
SPECIFICATIONS
SAFETY INSTRUCTIONS

―US-2 ―
PRODUCT DISCRIPTION
ASSEMBLY INSTRUCTIONS
(1) Flexible shaft
1) Flexible shaft and straight shaft
Remove bolt with hex. wrench, insert outer fitting
(with O-ring ) into joint pipe and fasten bolt.
2) Flexible shaft and engine
Insert outer fitting into clutch case with pulling up pin.
Be sure pin returns to original position by spring and
outer fitting never comes off from clutch case.
(2) Throttle lever, throttle wire, lead wire
1) Throttle lever side
- take a drive shaft tube through a loop of lead wire.
The lead wire is connected to upper side of throttle
lever.
- take two terminals of lead wire through the hole of
grip. Take a wire end that shaped drum through the
hole of grip.
- connect the wire end to the hole of lower side of
throttle lever. Hold the drive shaft tube between upper
and lower side of throttle lever.
- tighten two screws and two square nuts.
2) Engine side
- Let throttle wire and lead wire through plastic tube.
- Insert the throttle wire through the wire adjuster
sleeve on the carburetor bracket. Make sure the end
of the throttle wire housing is seated positively in the
sleeve.
- Position the slotted fitting on the carburetor so the
recessed hole for the lug is away from the wire
adjuster sleeve.
- Rotate the carburetor throttle cam and slip the throttle
wire through the slot in the slotted fitting, making sure
the wire lug drops into the recessed hole.
- Operate the throttle trigger a few times to make sure
that it works correctly.
- Connect the lead wire to the engine-side terminal.
Pin
Inner shaft
Oute
r
fitting
Clutch axis
Clutch case
O-ring
Joint pipe
Bolt
Oute
r
1. Gearcase
2. Drive Shaft Assembly
3. Model Name
4. Loop Handle
5. Throttle Trigger and Stop Switch
6. Shaft Grip
7. Flexible Shaft
8. Throttle Cable and Stop Switch Wires
9. Clutch Drum Housing
10. Engine
11. Frame
12. Pad
13. Air Filter
14. Fuel Tank
15. Brushcutter Blade
1
2
3
4
5
6
7
9
8
10
11 12
13
14
15
Lead wires Lock nut
Carbureto
r
bracket
Throttle wire housing
Throttle wire
Slotted fitting
Wire lug
Recessed hole
Wire adjuster sleeve
Screw
Grip
Upper side of
throttle lever
Lower side of
throttle lever
Driveshaft tube
Throttle wire end
Square nut
Lead wire

―US-3 ―
1-2mm Play
3) Wire harness
Bind the throttle cable and the flexible shaft with two
bands.
(3) Adjustment of throttle cable
• Throttle cable should be paralleled to flexible
shaft. In case of twisting, they should be restored
by parallel.
• Throttle cable should be adjusted under the
bended flexible shaft as shown.
1) Adjust the cable adjuster sleeve so the stop on the
carburetor throttle cam just contacts the throttle stop
and the cable position keep 1-2mm play between
cable lug and slotted fittings when the throttle trigger
is fully depressed.
2) When the throttle cable is adjusted correctly, tighten
the lock-nut.
(4) Loop handle
1) Place the rubber sleeve around the shaft.
2) Place the loop handle and the bracket over the
rubber sleeve.
3) Install the four screws with stay and nuts as shown.
Tighten the screws evenly.
(5)Blade Guard
Attach the blade guard to the gearcase with the two M6×30
screws as shown on Fig. 1.
(6) Guard Extension
1) Insert the square nut into guard extension as
shown on Fig. 2.
Throttle cable
Flexible Shaft
Band
Th
rott
l
e
C
a
bl
e
Fl
ex
ibl
e
Sh
a
f
t
Loop Handle
Bracket
Screws (4)
Rubber sleeve
Nuts (4)
Sta
y
Square nu
t
Guard extension
Fig.2
Blade Guard
M6×30 Screw(2)
Gearcase
Fig.1

―US-4 ―
2) Attach the String Cutoff Blade to guard extension
using M5×20 Screw, locking with square nut (on Fig.2)
as shown on Fig. 3 .
3) Enter the guide in the slot of Blade Guard on Fig. 4.
Make sure place the three hooks into the position on
the guard as shown on Fig. 5.
(7) Blade
1) Install the brushcutter blade onto the boss adapter,
then install the clamping washer, stabilizer and blade
bolt.
2) Align the hole in the boss adapter with the guide slot
in the gearcase.
3) Insert theφ3,5mm pin into the hole in the boss
adapter and the guide slot in the gearcase to lock the
attaching shaft.
4) Tighten the blade bolt.
Note: The blade bolt has LEFT-HAND thread.
BEFORE OPERATION
FUEL : MIXING GASOLINE AND OIL
The two-cycle engines used in the Brushcutter requires a mixture of GASOLINE and OIL for lubrication of bearings
and other moving parts. The proper fuel mixture ratio is 25:1, which is 40cc of oil mixed with one liter of gasoline.
NOTE: Gasoline and oil must be premixed in a clean gasoline container, Never mix gasoline and oil indoors or in the
Brushcutter fuel tank. Always use fresh gasoline.
WARNING!!-NEVER USE GASOHOL OR ALCOHOL BLENDED FUELS IN MARUYAMA ENGINES.
Before filling the Brushcutter fuel tank, clean around the fuel tank cap so dirt and debris does not enter the fuel tank.
Always shake the fuel container before filling the tank. Remove the fuel cap, then fill the fuel tank to within about
10mm from the top of the tank. Avoid filling the fuel tank filler neck. Install the cap securely onto the fuel tank.
Holding Tool
(φ3,5mm Pin)
Blade Bolt
Stabilizer
Brushcutter
Blade
Boss
Adapter
Gearcase
A
ttaching
Shaft
Washer
Le
f
t-hand
thread
Fig.5
Hook
Hook
Blade Guard
Guard extension
Fig.4
Guide
Fig.3
String Cutoff
Blade
M5×20
Screw

―US-5 ―
PERATING INSTRUCTIONS
STARTING AND STOPPING
COLD STARTING PROCEDURE
The carburetor on this engine contain a choke system. To properly start a
“cold” engine, perform the following procedure.
1. Turn the choke lever to the Close position. Pomp the primer bulb at the
bottom of the carburetor until fuel can be seen flowing through the fuel
return line to the fuel tank. Flowing fuel should be almost clear, not
foamy or full of bubbles.
2. With the stop switch “ON” , and the throttle trigger positioned at FAST
-IDLE position, pull the starter cord. After the engine is started, turn the
choke lever to the Open position. Then squeeze and release the throttle
trigger to allow it to return to the idle position.
If the engine stops running before you turn the choke lever to the open
position : Go ahead and open the choke, pull the starter grip with the
throttle trigger positioned at FAST-IDLE position.
HOT RESTART
1. Turn the choke lever to the open position, and set the stop switch to the
“ON” position.
2. Leave the throttle trigger in the idle position and pull the starter grip.
3. If the engine fails to start after three to four pulls, follow the instructions
in the Cold Starting Procedure section above. If the engine fails to start
after you follow the above procedures, contact an authorized
MARUYAMA dealer.
ENGINE OPERATION
After starting, allow the engine to a few minutes to warm it up before using.
NOTE: DO NOT have the engine under any load during this warm up
period. By squeezing the throttle trigger, increase the engine RPM to the
speed required for operation before placing the Brushcutter under load.
ALWAYS reduce the engine speed to idle when it is not under a load.
Do not operate the engine at high RPM’s with no load.
TO STOP THE ENGINE
1. Release the throttle trigger.
2. Slide the stop switch to the “STOP” position.
CARBURETOR ADJUSTMENT
This Brushcutter is equipped with non-adjustable fuel mixture carburetor.
The engine idle speed is the only adjustment for the operator.
When the throttle trigger is released, the engine should return to an idle
speed between 2700 and 3300 r/min, or just below the clutch
engagement speed, The Attached Tool must not rotate/move and the
engine should not stall (stop running) at engine idle speed.
To adjust the engine idle speed, rotate the idle speed adjustment screw
on the carburetor.
If idle speed adjustment is necessary, and after adjustment the Attached Tool rotates or the engine stalls,
stop using the Brushcutter immediately!
Contact your local authorized MARUYAMA dealer for assistance and servicing.
Primer Bulb Fuel Return
Line
Starter grip
Choke leve
r
STOP(OFF)
S
top
switch START(ON)
Fast-idle
start
position
Idl
e pos
i
t
i
on
Fast-idle start
lock

―US-6 ―
OPERATING THE BRUSHCUTTER
OPERATING POSITION
1. Set kanpsack belt as shown illustration.
2. When set it yourback, adjust length of belts to fit pads comfortably.
3. The Brushcutter should be on the operator’s right side.
4. The operator’s right hand should be holding the shaft grip, with his fingers on the throttle trigger.
5. The left hand should be holding the Loop handle with the fingers and thumb fully enclosed around the grip.
Reposition the Loop handle up or down the drive shaft if necessary for a comfortable position.
OPERATING UNIT
MARUYAMA Brushcutter are designed and tested to cut nearly all grasses,
thick weeds and brush. As you continue to use the equipment, many tasks will
become easier.
CAUTION-Read the SAFETY INSTRUCTIONS concerning the proper use of
the brushcutter on page(US-1).
CAUTION-Observe all warnings that appear on the Brushcutter.
CAUTION-Use only the correct blade approved for the task and the machine.
CAUTION-Always make certain the blade is installed to rotate in the proper
direction and that all holding and fastening parts are correctly secured.
CAUTION-Remove the holding tool (ɔ3.5mm pin) before operating the equipment!
CAUTION-Do not continue to use a blade that is dull, damaged, or that vibrates
during use. Whenever a cutting blade becomes clogged with debris,
immediately stop the machine and clean the blade.
CAUTION-When cutting heavy blush or small trees, use the proper method to
avoid dangerous “KICK- BACK” (see sketch).
REGULAR MAINTENANCE
AIR FILTER
The filter should be cleaned each time the Brushcutter is used. (or
more often with extreme conditions.) Remove the filter cover and take
out the element. Wash the element in kerosene or warm detergent,
then squeeze it dry. Apply oil (#30 wt.) to foam, removing all excess
oil. Assemble and reinstall air filter on carburetor.
Pad
Pad
Kna
p
sack belt Ring
Rubber band
Sta
y

―US-7 ―
SPARK PLUG
The spark plug should be removed from the engine and checked after
each 25 hours of operation. The tips can be cleaned with a stiff brush.
Adjust the gap to 0.6-0.7 mm. Replace the spark plug if it is oil-fouled
or damaged, the average spark plug life is approximately 100 hours.
COOLING FINS
Free passage of air through the cylinder cooling fins is required to
prevent poor engine performance and shortened engine life.
Regularly check and clean all debris from the cooling fins by removing
the engine cover.
FUEL FILTER
The fuel filter is attached to the fuel pick-up tube inside the fuel tank.
After each 25 hours of use, it should be checked for dirt or damage,
and replaced if necessary. A wire, etc., with a hooked end aid in
removing the filter from the tank. Avoid damaging the fuel line.
LUBRICATION
The gearcase should be checked for lubrication after each 30 hours
of use. Remove the cutting attachment and the boss adapter. Clean
any dirt and debris from the area between the boss adapter and the
gearcase. Remove the grease plug from the side of the gearcase.
While rotating the attaching shaft, inject lithium-base bearing lube
(P/N 211337) through the plug hole until the gearcase is full.
Re-install the gearcase plug.
GENERAL CLEANING AND TIGHTENING
The Brushcutter will provide maximum performance for many, many hours if it is maintained properly.
Good maintenance includes regular checking of all fasteners for correct tightness and cleaning the entire machine.
STORAGE
For long-term storage of the Brushcutter, perform all regular
maintenance procedures and needed repairs. Empty the fuel tank.
Start the engine and allow it to run at idle speed until it stops. Remove
the spark plug and squirt a very small amount of oil into the cylinder.
Pull the starter cord once and bring the piston to the top of the cylinder.
Re-install the spark plug. Store the Brushcutter in a dry place away
from excessive heat, sparks or open flame.
Attaching Shaf
t
Grease Plug
Plug Hole
Boss Ada
p
te
r
Gearcase
Bearing Lube
(P/N.211337)

―ES-1 ―
1. Lea y entienda este Manual de Instrucciones antes de usar
este producto. Familiarícese a fondo con el uso adecuado
de este equipo.
2. Nunca permita que los niños operen la Cortadora. Este no
es un juguete. Nunca permita que adultos operen la unidad
sin antes haber leído el Manual de Instrucciones.
3 Familiarícese con los controles de la máquina y aprenda
la forma de interrumpir su operación rápidamente.
4. SIEMPRE USE GAFAS DE SEGURIDAD o cualquier otra
protección apropiada para los ojos y emplee también
protección apropiada para los oídos.
5. No permita el acceso de gente o animales al área de
trabajo, especialmente de niños o mascotas.
6. Nunca opere la unidad cuando se sienta cansado o
fatigado. Nunca opere la máquina sin sus debidos
resguardos o elementos de protección o seguridad,
correctamente instalados.
7. Vístase en forma apropiada para el trabajo, sin ropa o
adornos sueltos. Estos pueden enredarse en los
elementos móviles de la máquina. Siempre use calzado
fuerte, pantalones largos y camisas de manga larga.
8. La gasolina es altamente inflamable y, por lo tanto,
manéjela con cuidado. Llene el tanque de combustible
con la mezcla indicada de gasolina y aceite, antes de
tratar de encender el motor.
A. Use un recipiente apropiado para gasolina para guardar la
mezcla de gasolina y aceite.
B. No llene el tanque cuando el motor esté operando o esté
caliente.
C. No fume cuando esté manejando gasolina.
D. Llene el tanque de combustible al aire libre y hasta un
nivel de unos 10 mm. del borde del tanque - no del borde
del cuello de llenado
E. Limpie cualquier cantidad de gasolina que se haya derra-
mado, antes de encender el motor.
9. Párese siempre en forma estable y segura, agarre firme-
mente, con ambas manos, los mangos y manubrios y
camine, nunca corra.
10. Use siempre la herramienta apropiada para el trabajo que
va a realizar. No use la cortadora de uso múltiple para
trabajos que el fabricante no recomienda.
11. Mantenga todos los elementos de sujeción en su lugar y
debidamente ajustados y verifique que la unidad está en
condiciones de operar en forma segura. Siga las inst-
rucciones de mantenimiento, empezando en las páginas
ES-6 y ES-7 de este Manual.
12. No acerque las manos o los pies a las piezas móviles.
Manténgase fuera del alcance de estas piezas en todo
momento.
13. Si se presentan problemas de marcha o de excesiva
vibración, detenga el motor inmediatamente e inspeccione
la unidad para localizar la causa. La vibración
generalmente indica que hay problemas mecánicos.
14. No corte demasiado cerca de la superficie del suelo para
evitar que la cuchilla golpee guijarros u otros desperdicios.
Evite usar la cortadora de maleza en zonas de roca, grava,
piedra y materiales similares.
15. Use la cortadora de uso múltiple únicamente de día o con
buena luz artificial.
16. Apague el motor y cerciórese de que el accesorio
instalado ha dejado de girar completamente antes de
invertir la máquina.
Modelo MBS329
Largo Total (mm) 2710
Ancho Total (mm) 345
Dimensiones
Altura Total (mm) 465
Peso (kg / lbs) 9,6/ 21,2
Engranaje Engranaje de bisel en espiral
Relación de reducción 1:1,46
Modelo AE320
Tipo Enfriado por Aire, de 2 ciclos, de un cilindro
Desplazamiento del Pistón (cm3) 31,8
Capacidad del tanque de combustible (/ qts.) 1,0
Carburador Tipo diafragma
Sistema de encendido Sistema de estado sólido
Bujía de encendido NGK BPM6Y
Luz entre electrodos (mm / in.) 0,6 – 0,7 / 0,024 – 0,028
Motor
ILa gasolina para engrasar la proporción
USE UNICAMENTE GASOLINA REGULAR SIN
PLOMO.MEZCLA 25:1 DE ACIEITE PARA MOTOR 2 CICLOS.
DEBE SER APROBADO PARA MOTOR ENFRIADO POR AIRE.
ESPECIFICACIONES
INSTRUCCIONES DE SEGURIDAD
―ES-2 ―
DESCRIPCION DEL PRODUCTO
INSTRUCCIONES PARA EL ARMADO
(1) Eje Recto
1) Eje Flexible y Eje Recto
Con una llave para tuercas hexagonales, remueva el perno,
introduzca el accesorio externo (con el anillo en O) en el tubo
de junta y apriete el perno.
2) Eje Flexible y Motor
Introduzca el accesorio externo en la caja de embrague,
mientras hala hacia afuera el perno de la caja de embrague.
Asegúrese de que el perno vuelve a su posición original,
presionado por el resorte, y que el accesorio externo queda
fijo y seguro en la caja de embrague.
(2) Palanca del regulador, alambre del regulador y alambre
de entrada.
1) Del lado de la palanca del regulador.
- Pase el tubo del eje de impulsión a través de un lazo
del alambre de entrada. El alambre de entrada está
conectado a la parte superior de la palanca del
regulador.
- Pase 2 terminales del cable de entrada a través del
agujero del mango. Pase un extremo del alambre
conformado como tambor a través del agujero del
mango.
- Conecte el extremo del cable al agujero en el lado
inferior de la palanca del regulador. Mantenga el tubo
del eje de impulsión entre el lado superior y el lado
inferior de la palanca del regulador.
- Apriete los dos tornillos y las dos tuercas cuadradas.
2) Lado del motor
Pase el alambre del regulador y el alambre de entrada
a través del tubo plástico.
- Inserte el alambre del regulador a través de la manga
del alambre de ajuste, en el soporte de carburador.
Verifique que el extremo del cierre del cable del
regulador queda asentado firmemente en la manga.
- Coloque el accesorio ranurado, sobre el carburador,
de manera que el agujero rebajado para la lengüeta
quede alejado de la manga del alambre de ajuste.
- Gire la leva del regulador del carburador y pase el cable del
regulador por la ranura del accesorio ranurado asegurándose
que la lengüeta de alambre encaja en el agujero rebajado.
- Opere el gatillo del regulador varias veces para asegurarse
que trabaja correctamente.
- Conecte el cable de entrada al terminal al costado del motor.
Pin
Sirga
Tubo
flexible
Carcasa del
Tambor
del embrague
Eje
embrague
Tubo
exterior
Junta
A
cople
Tornillo
1. Gaja de Engranajes
2. Montaje del eje
3. Modelo
4. Manillar circular
5. Disparadora del Acelerador e
Interruotor de Parada
6. Agurre de eje
7. Eje Flexible
8. Cables del Acelerador e Interruptor
de Parada
9. Carcasa del Embrague
10. Motor
11. Marco
12. Almohadilla
13. Filtro del Aire
14. Dipósito de Combustible
15. Cuchilla de Corte
Cable de
entrada
Tornillo
M
ango
Tubo
Extremo
del cable
Tuercas
Cable
El lado Superior de
Palanca del regulador
El más bajo lado de
Palanca del re
g
ulado
r
Tuercas
Soporte
Cable
Abertura de
ajuste
Muesca
Agujero
Funda de ajuste del Cable
Cierre del cable
del regulador
1
2
3
4
5
6
7
9
8
10
11 12
13
14
15

―ES-3 ―
3) Arnés de Alambres
Ate el cable del regulador y el eje flexible con dos
bandas
de amarre.
(3) Ajuste del cable del regulador.
• El cable del regulador debe mantenerse paralelo
al eje flexible. En caso de que se tuerza, debe
volverse
a su posición paralela.
• El cable del regulador debe ajustarse bajo el eje
flexible combado, como se ilustra.
1) Ajuste la manga del cable de ajuste de manera que
el tope en la leva del carburador apenas toque el tope
del regulador y coloque el cable con holgura de uno o
dos mm entre la lengüeta del cable y los accesorios
ranurados, cuando el gatillo del regulador está
deprimido totalmente.
2) Cuando el cable del regulador quede ajustado
correctamente, aprieta la tuerca de cierre.
(4) Manija de aro
1) Coloque la manga de caucho al rededor del eje.
2) Ponga la manija de aro y la abrazadera sobre la
manga de caucho.
3) Instale los cuatro tornillos con sus tuercas y el estay.
Apriete los tornillos en forma pareja.
(5) Protector de la Cuchilla
Fije el protector de la cuchilla a la caja del equipo rotor
con dos tornillos M6 x 30 como se indica en la ilustración fig 1.
(6) Extensión del protector
1) Coloque la tuerca cuadrada en la extensión del protector.
Ver Fig.2
El
C
a
bl
e
d
e
l
regu
l
a
d
or
E
j
e
fl
ex
ibl
e
Holgura
de 1-2 mm
M
an
ij
a
d
e aro
Abrazadera
T
orn
ill
os
(4)
Manga de
caucho
T
uercas
(4)
Estay
El cable del regulador
Eje flexible
Bandas
Protector de
la Cuchilla
Tornillo M6 x 30 (dos)
Caja del
Equipo Rotor
Fig.1
Fig. 2
Extensión protector
Tuerca
cuadrada

―ES-4 ―
2) Coloque la cuchilla que limita la longitud del nylon
utilizando el tornillo de 5x20 bloqueado con la tuerca
cuadrada. Ver Fig. 2 y Fig. 3.
3) Coloque la guía del protector en los agujeros como se
muestra en la fig 4. Asegurándose que las ganchos
Fig. 5 entran en la posición correcta.
(7) Cuchilla
1) Instale la cuchilla de la cortadora de maleza en el
adaptador de caja, luego instale la arandela de
agarre, el estabilizador de la cuchilla y el perno de la
cuchilla.
2) Alinee el agujero en el adaptador de caja con la
ranura de guía de la caja de engranajes.
3) Introduzca el perno deφ3,5 mm en el agujero del
adaptador de caja y en la ranura de guía en la caja de
engranajes para fijar el eje ranurado.
4) Apriete el perno de la cuchilla.
Nota: La cabeza de la cortadora tiene rosca de giro
a la izquierda.
ANTES DE OPERAR LA MAQUINA
COMBUSTIBLE: LA MEZCLA DE GASOLINA Y ACEITE
Los motores de dos ciclos que se usan en la Cortadora requieren como combustible una mezcla de GASOLINA y ACEITE para la
lubricación de cojinetes y otros elementos móviles. Las proporciones correctas de esta mezcla son 25 : 1 que corresponden a 40 cc. de
aceite en un litro de gasolina.
NOTA : Siempre mezcle por anticipado la gasolina y el aceite en un recipiente limpio, aprobado para gasolina. Nunca mezcle la gasolina y
el aceite en un recinto interior o utilizando, para hacer la mezcla, el tanque de la máquina. Use siempre gasolina fresca.
¡¡ADVERTENCIA!! NUNCA USE EN MOTORES MARUYAMA GASOHOL O COMBUSTIBLES MEZCLADOS CON ALCOHOL.
Antes de llenar el tanque de combustible, limpie alrededor de la tapa del tanque para evitar que mugre o desechos entren al tanque
cuando se encuentra destapado. Cierre el recipiente y agítelo por un momento para mezclar bien el aceite y la gasolina antes de llenar el
Herramienta de
sujeción
(perno deφ3,5mm)
Perno de la cuchilla
Estabilizador
Cuchilla
de la
cortadora
A
daptador
de caja
Caja de engranajes
A
randela
Rosca hacia
la izquierda
Eje
ranurado
Fig.5
Gancho
Fig. 4
Extensión protector
Gancho
Protector de la Cuchilla
Guía
Fig.3
Cuchilla
T
ornillo
M5×20

―ES-5 ―
tanque de la máquina. Remueva la tapa y luego llene el tanque hasta unos 10 mm. del borde. Evite llenar el cuello de la boca del tanque y
vuelva a colocar la tapa en forma segura.
INSTRUCCIONES DE OPERACION
ENCENDIDO Y APAGADO DEL MOTOR
ENCENDIDO DEL MOTOR EN FRIO
El carburador de este motor está equipado con un sistema de estrangulación.
Para encender o arrancar adecuadamente un motor "frío", realice las siguientes
operaciones:
1. Presione y suelte el bulbo cebador de combustible, localizado en el fondo del
carburador, hasta ver que el combustible fluye a través de la manguera de
retorno de combustible, de regreso al tanque de combustible. (El combustible
que fluye debe ser casi transparente, sin espuma y no lleno de burbujas).
2. Coloque el interruptor de parada del motor en posición "ON" (Encendido) y el gatillo
del regulador en la posición de arranque en MARCHA RAPIDA EN VACIO, luego,
tire de la manija del arranque. Una vez que el motor arranca, mueva la palanca
del estrangulador hasta la posición "Open" abierta. Luego oprima y suelte el gatillo
del regulador, para permitir que regrese a la posición de marcha en vacío.
Si el motor se apaga antes de que usted mueva la palanca del estrangulador
a la posición abierta: Continúe la operación y abra el estrangulador. Tire de la
cuerda de arranque, con el gatillo del regulador colocado en la posición de arranque
en MARCHA RAPIDA EN VACIO.
ENCENDIDO EN CALIENTE
Para arrancar un motor que ya se ha calentado (rearranque en caliente):
1. Mueva la palanca del estrangulador hasta la posición abierta y mueva el
interruptor de parada a la posición "ON" (Encendido).
2. Deje el gatillo del regulador en posición de marcha en vacío y tire de la cuerda de
arranque.
3. Si el motor no arranca después de tres o cuatro intentos, siga las
instrucciones para "Arranque en Frío", de la sección anterior.
Si el motor no arranca después de realizar los procedimientos anteriores, póngase
en contacto con un concesionario autorizado de MARUYAMA.
OPERACION DEL MOTOR
Una vez que el motor arranca, déjelo operar por algunos minutos para que
se caliente, antes de usar la unidad.
NOTA: NO imponga ninguna carga al motor durante este período de
calentamiento. Oprimiendo el gatillo del regulador, aumente las revoluciones
por minuto del motor hasta la velocidad requerida para su operación, antes
de poner a trabajar la máquina. SIEMPRE reduzca la velocidad del motor a
marcha en vacío cuando la máquina no esté sujeta a ninguna carga. No opere
el motor a altas velocidades sin carga alguna.
PARADA DEL MOTOR
1. Suelte el gatillo del regulador.
2. Mueva el interruptor de parada hasta la posición de Parada (OFF).
AJUSTE DE LA VELOCIDAD DE LA MARCHA EN VACIO
La Cortadora está equipada con un carburador de mezcla de combustible,
que no es ajustable.
La velocidad de marcha en vacío es el único ajuste que puede hacer el operador.
Cuando el gatillo del regulador se suelta, el motor debe volver a la velocidad de
marcha en vacío que es de 2700 a 3300 revoluciones por minuto o sea la velocidad
justamente menor a la necesaria para que el embrague enganche. La herramienta
puesta en la máquina no debe girar o moverse y el motor no debe apagarse a la
velocidad de marcha al vacío. Para ajustar la velocidad de la marcha al vacío gire el
tornillo de ajuste de velocidad en el carburador.
¡Si es necesario ajustar la velocidad, y el ajuste se ha hecho, y a pesar de
ello, la herramienta gira o se mueve, o el motor se apaga, deje de usar la unidad inmediatamente!
Póngase en contacto con el distribuidor autorizado de MARUYAMA para que dé servicio a la unidad.
Bulbo cebador
Tubo de Retorno
de Combustible
Tornillo de Ajute de velocidad
de marcha en vacio
Hale para
Arrancar
Paranca del
Estrangulador
PARADA
(OFF)
Interruptor de parada
ARRANQUE
(ON)
Posición de
Rápido-Punto
Muerto
Posición de
punto muerto
Retén de
Rápido-Punto
Muerto

―ES-6 ―
INSTRUCCIONES DE LA CORTADORA DE MALEZA
POSICIÓN DE OPERACIÓN
1. Coloque las cnturón de mochila como se muestra en la ilustración.
2. Cuando se coloque el morral en la espalda, ajuste la longitud de las correas para que las almohadillas le queden cómodas.
3. La Cortadora debe operarse a la derecha del operador.
4. La mano derecha del operador debe sostener el mango en el eje, con el dedo en el gatillo del regulador.
5. La mano izquierda debe sostener el Manillar circular, con la mano cerrada completamente alrededor del mango. Gradue el Manillar
circular hacia arriba o hacia abajo a lo largo del eje de función según sea necesario para una posición cómoda.
OPERACION DE LA UNIDAD
Las Brushcutter de MARUYAMA han sido diseñadas y probadas en el corte
de casi cualquier tipo de pasto, maleza gruesa y vegetación tupida.
A medida que usted continúa usando el equipo muchas de las tareas se le
harán más fáciles.
PRECAUCION-Lea las INSTRUCCIONES DE SEGURIDAD en cuanto al
uso apropiado de la cortadora de maleza que se encuentran en la página(ES-1).
PRECAUCION-Observe todas la precauciones que aparecen en la Brushcutter.
PRECAUCION-Use el tipo el tipo de cuchilla apropiada para la máquina y
aprobado para realizar la tarea a realizar.
PRECAUCION-Siempre verifique que la cuchilla se ha instalado para girar
en la dirección apropiada y que todos los elementos de fijación e instalación
están correctamente colocados y asegurados.
PRECAUCION-Quite el elemento de inmovilización (perno de 3.5mm) antes
de operar el equipo!
PRECAUCION-No use una cuchilla sin filo, averiada o que produce vibración
al usarse. Cuando la cuchilla se atasca con desperdicios apague el motor
inmediatamente y limpie la cuchilla.
PRECAUCION-Cuando corte vegetación tupida o arbustos pequeños use
el método apropiado para evitar el peligroso “KICK BACK”
(que se ilustra en la figura).
MANTENIMIENTO REGULAR
FILTRO DE AIRE
El filtro de aire debe limpiarse cada vez que se ha usado la Cortadora (o
aún con más frecuencia en condiciones extremas). Remueva la cubierta
del filtro y saque el elemento. Lave el elemento en kerosén o con un
detergente en agua tibia. Y luego, séquelo, exprimiéndolo. Aplique
aceite (#30 wt.) al elemento de espuma y remueva el exceso de aceite.
Arme y vuelva a instalar el filtro de aire en el carburador.
Carburado
r
Elemento del filtro de aire
Cubierta del
filtro
Almohadilla
Correas del
morral
Almohadilla
Banda de
caucho
Esta
y
Anillo

―ES-7 ―
BUJIA
La bujía debe removerse del motor y revisarse después de 25 horas de
operación. Limpie los electrodos con un cepillo fuerte. Ajuste la distancia
o luz entre electrodos a unos 0.6 a 0.7 mm. (vea la ilustración).
Reemplace la bujía si está averiada o dañada por el aceite. La vida útil
de una bujía es de aproximadamente 100 horas.
ALETAS DE ENFRIAMIENTO
El paso de aire a través de las aletas de enfriamiento del cilindro es
necesario para evitar un rendimiento pobre del motor y una reducción en
la vida útil de la máquina.
Con regularidad verifique y limpie todo desperdicio o suciedad acumulados
en las aletas de enfriamiento. Para hacerlo remueva la cubierta del motor.
FILTRO DE COMBUSTIBLE
El filtro de combustible se encuentra dentro del tanque de combustible,
en el extremo de la manguera que lleva el combustible al cilindro.
Después de cada 25 horas de operación, el filtro debe ser revisado para
detectar acumulaciones de residuos o daños y ser reemplazado si es
necesario. Use un gancho de alambre y cuidadosamente saque del tanque
el filtro de combustible.
LUBRICACION
La caja de engranajes deberá lubricarse después de cada período de 30
horas de uso. Retire el aditamento de corte y el adaptador de copa. Limpie
la mugre y desechos del área entre el adaptador de copa y la caja de engra
-najes. Retire el tapón de engrase del lado de la caja de engranajes. Gire el
eje, a la vez que inyecta un lubricante para rodamientos a base de litio
(P/N 211337) a través del hueco de engrase, hasta que llene la caja de engra
-najes. Reinstale el tapón de engrase.
LIMPIEZA GENERAL Y AJUSTE
La Cortadora proporcionará un desempeño ptimo por muchas, muchas
horas si se mantiene adecuadamente. El buen mantenimiento incluye
la verificación regular del ajuste correcto de todos los sujetadores y la
limpieza de toda la máquina.
ALMACENAMIENTO
Para almacenamiento de la cortadora de maleza por un tiempo
prolongado, siga todos los procedimientos regulares de mantenimiento y
haga todas las reparaciones que sean necesarias. Vacíe el tanque de
combustible. Encienda el motor y déjelo que funcione a marcha en vacío
hasta que se apague. Remueva la bujía y ponga una pequeña cantidad
de aceite en el cilindro. Halando la cuerda de arranque mueva el pistón
hasta que llegue a la posición mas cercana al agujero donde se coloca
la bujía. Vuelva a instalar la bujía. Guarde la Cortadora en un lugar seco,
alejado de fuentes de calor, chispas o llama abierta.
Electrodos De 0.6 a 0.7 mm
Cubierta del moto
r
Aletas de
enfriamiento
Aletas de
enfriamiento
Filtro de combustible
Eje Incorporado
Tapón de engrase
Agujero del tapón
Estrangulador
Adaptador Maestro
Caja del
equipo Rotor
Lubricante para Cojinetes
(P/N.211337)

―ES-8 ―
P/N 225273-04 US/ES 1207
Table of contents
Languages:
Other Maruyama Brush Cutter manuals

Maruyama
Maruyama BCF42HT Owner's manual

Maruyama
Maruyama BC3021H User manual

Maruyama
Maruyama MX22E Owner's manual

Maruyama
Maruyama B420H Owner's manual

Maruyama
Maruyama BC2259 Owner's manual

Maruyama
Maruyama BC3601RS Owner's manual

Maruyama
Maruyama BC2301RS Owner's manual

Maruyama
Maruyama B420H Owner's manual

Maruyama
Maruyama B43 Owner's manual

Maruyama
Maruyama BC230 Owner's manual