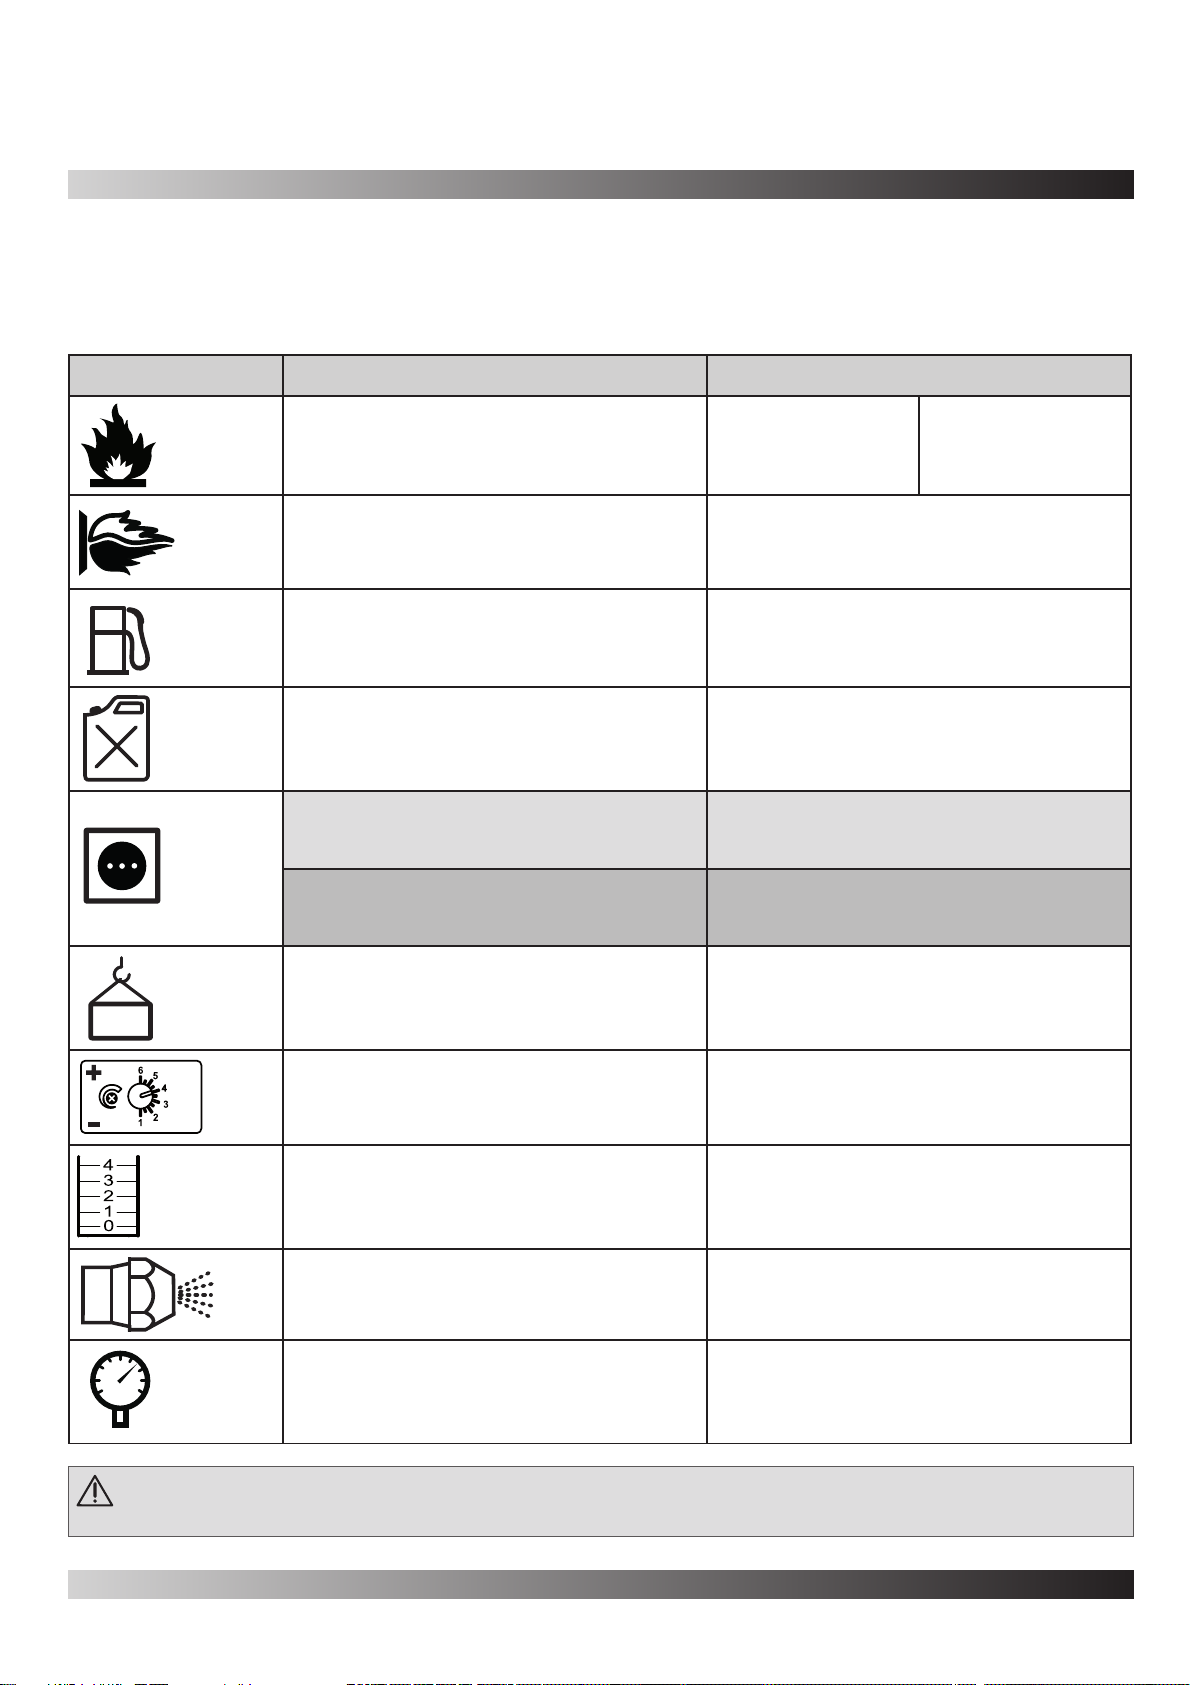
Master XL 9ER Manual

XL 9ER - XL 9SR
4117.399 Edition 19 Rev. 13
Dantherm S.p.A.
Via Gardesana 11, -37010-
Pastrengo (VR), Italy
Dantherm S.p.A.
Виа Гардесана 11, 37010
Пастренго (Верона), Италия
Dantherm Sp. z o.o.
ul. Magazynowa 5A,
62-023 Gądki, Poland
Dantherm Sp. z o.o.
ул. Магазинова, 5A,
62-023 Гадки, Польша
Dantherm LLC
ul. Transportnaya - 22 ownership 2,
142802, STUPINO, Moscow region, Russia
ООО «Дантерм»
Ул. Транспортная, владение 22/2,
142802, г.Ступино, Московская обл., РФ
Dantherm China LTD
Unit 2B, 512 Yunchuan Rd.,
Shanghai, 201906, China
Dantherm China LTD
Юньчуань роад, 512, строение 2В,
Шанхай, 201906, Китай
Dantherm SP S.A.
C/Calabozos, 6 Polígono Industrial, 28108
Alcobendas (Madrid) Spain
Dantherm SP S.A.
Ц/Калабозос, 6 Полигоно Индустриал,
28108 Алкобендас (Мадрит) Испания
USER AND MAINTENANCE BOOK
en
LIBRETTO USO E MANUTENZIONE
it
BEDIENUNGS- UND WARTUNGSANLEITUNG
de
MANUAL DE INSTRUCCIONES PARA EL USO Y MANTENIMIENTO
es
MANUEL D’UTILISATION ET DE MAINTENANCE
fr
HANDLEIDING VOOR GEBRUIK EN ONDERHOUD
nl
VEJLEDNING OM BRUG OG VEDLIGEHOLDELSE
da
INSTRUKCJA OBSŁUGI I KONSERWACJI
pl
LIETOŠANAS UN TEHNISKĀS APKOPES GRĀMATIŅA
lv
KASUTUS- JA HOOLDUSJUHEND
et
PŘÍRUČKA PRO POUŽITÍ A ÚDRŽBU
cs
HASZNÁLATI ÉS KARBANTARTÁSI KÉZIKÖNYV
hu
LIVRET DE UTILIZARE ŞI ÎNTREŢINERE
ro
НАРЪЧНИК ЗА ИЗПОЛЗВАНЕ И ПОДДРЪЖКА
bg
РУКОВОДСТВО ПО ЭКСПЛУАТАЦИИ И ТЕХНИЧЕСКОМУ ОБСЛУЖИВАНИЮ
ru
KÄYTTÖ- JA HUOLTO-OHJE
HEFTE FOR BRUK OG VEDLIKEHOLD
no
ПАЙДАЛАНУ ЖӘНЕ ТЕХНИКАЛЫҚ ҚЫЗМЕТ КӨРСЕТУ ЖЕТЕКШІЛІГІ
kk

TECHNICAL DATA - DATI TECNICI - TECHNISCHE DATEN - CARACTERÍSTICAS
TÉCNICAS - DONNÉES TECHNIQUES - TECHNISCHE GEGEVENS SPECIFIKATIONER -
DANE TECHNICZNE - TECHNICKÉ PARAMETRY - ТЕХНИЧЕСКИЕ ХАРАКТЕРИСТИКИ
- TEKNISET TIEDOT - TEKNISKE DATA - ТЕХНИКАЛЫҚ КӨРСЕТКІШТЕР КЕСТЕСІ
MODEL XL 9ER XL 9SR
43 kW-кВт
37.000 kcal/h-ккал/ч
146.900 Btu/h-БТЕ/ч
29 kW-кВт
25.000 kcal/h-ккал/ч
99.300 Btu/h-БТЕ/ч
43 kW-кВт
37.000 kcal/h-ккал/ч
146.900 Btu/h-БТЕ/ч
3,37 kg/h-кг/ч P1 2,3 kg/h-кг/ч
P2 3,37 kg/h-кг/ч
DIESEL-KEROSENE
дизель-керосин
DIESEL-KEROSENE
дизель-керосин
60 l-л 60 l-л
~220-240 V-В (-15%÷10%) 50-60 Hz-Гц
0,6 A
~220-240 V-В (-15%÷10%) 50-60 Hz-Гц
0,7 A
~110-120 V-В (-15%÷10%) 50-60 Hz-Гц
1,2 A
~110-120 V-В (-15%÷10%) 50-60 Hz-Гц
1,4 A
69 kg-кг 69 kg-кг
4 - 4,5 4 - 4,5
4 4
0,85 GpH 60°H DANFOSS 0,60 GpH 60°H DANFOSS
10 bar-бар 10 bar-бар / 18 bar-бар
IMPORTANT: In order to have a correct function you must use an electrical generator in class G3 or more (frequency variation ±1%,
tension variation ±2%). The maximum power of electrical generator must be three time the nominal power of device that you must connect.

►en - IMPORTANT: Be sure to read and understand this operating manual before assembling, the set up and function-
ing or the maintenance of this heater. The misuse of this heater can cause serious injuries. Conserve this manual
for future reference.
►it - IMPORTANTE: Leggere e comprendere questo manuale operativo prima di eettuare l’assemblaggio, la messa
in funzione o la manutenzione di questo riscaldatore. L’uso errato del riscaldatore può causare lesioni gravi. Con-
servare questo manuale a titolo di futuro riferimento.
►de - WICHTIG: Lesen und verstehen Sie dieses Handbuch vor der Montage, der Inbetriebnahme oder der Wartung
dieses Heizgerätes. Falscher Gebrauch des Heizgerätes kann zu schweren Schäden führen. Bewahren Sie dieses
Handbuch für zukünftiges Nachschlagen auf.
►es - IMPORTANTE: Leer atentamente este manual de Uso y Mantenimiento, antes de utilizar por primera vez este
equipo, prestando mucha atención a todas las recomendaciones indicadas. El uso inadecuado del calentador,
puede causar daños graves a personas, animales o cosas. Conservar este manual en lugar seguro y siempre a
disposición para futuras consultas.
►fr - IMPORTANT: Lire attentivement et comprendre ce manuel avant d’eecteur l’assemblage, la mise en marche ou
l’entretien du réchaueur. Le mauvais usage de celui-ci peut provoquer de graves lésions. Conserver ce manuel
comme futur objet de référence.
►nl - BELANGRIJK: Bestudeer deze handleiding alvorens het apparaat in elkaar te zetten, in gebruik te nemen, of
van een onderhoudsbeurt te voorzien. Verkeerd gebruik van de verwarming kan ernstig letsel tot gevolg hebben.
Bewaar deze handleiding voor verdere naslag.
►da - VIGTIGT: Denne manuale bør læses og forstås før monteringen, ibrugtagningen eller vedligeholdelsen af dette
varmeapparat udføres. Et ukorrekt brug af varmeapparatet kan medføre alvorlige personlige skader. Opbevar denne
manuale for yderligere henvisninger.
►pl - WAŻNE: Przed przystąpieniem do montażu, ustawiania i eksploatacji lub konserwacji promiennikowej
nagrzewnicy powietrza należy przeczytać i zrozumieć informacje zamieszczone w niniejszej instrukcji obsługi.
Niewłaściwe użytkowanie nagrzewnicy może skutkować poważnymi obrażeniami ciała. Instrukcję należy zachować
do wykorzystania w przyszłości.
►lv - SVARÎGI: Uzmanîgi izlasiet visas instrukcijas pirms sâksiet iekârtas ekspluatâciju vai tehnisko apkopi.
Ěeneratora nepareiza lietođana var izraisît nopietnus miesas bojâjumus: tâdus kâ apdegumi ugunsgrçka vai sprâd-
ziena gadîjumâ, elektriskais đoks, nosmakšana no tvana gâzes.
►et - OLULINE TEAVE: Enne soojendi paigaldamist, käivitamist või hooldamist lugege kogu käesolev kasutusjuhend
hoolikalt läbi. Soojendi ebaõige kasutamine võib tekitada tõsiseid kehavigastusi. Hoidke kasutusjuhend alles.
►cs - DŮLEŽITÉ UPOZORNĚNÍ: Než přistoupíte k montáži, nastavení a používání či údržbě naftového infračerveného
topidla, pečlivě si přečtěte informace uvedené v tomto návodu k obsluze. Nesprávné používání topidla může mít za
následek vážná zranění. Návod pečlivě uschovejte pro pozdější použití.
►hu - FONTOS: A hősugárzó összeszerelése, beállítása, működtetése vagy karbantartása előtt gyelmesen olvassa
el és értse meg az alábbi használati utasításban leírt információkat. A hősugárzó helytelen használata komoly testi
sérüléseket okozhat. A használati utasítást tartsa meg későbbi használatra is.
►ro - IMPORTANT: Înainte de a trece la montarea, setarea, punerea în funcţiune sau orice altă operaţie legată de con-
servarea încălzitorului, trebuie să citiţi cu atenţie şi să înţelegeţi bine prezenta instrucţiune. Utilizarea neadecvată a
încălzitorului poate duce la accidente şi răniri. Instrucţiunile trebuie păstrate pentru a utilizate în viitor.
►bg - ВАЖНО: Преди започване на работа на инфрачервения въздушен отоплител или на каквито и да било
действия свързани с поддръжката му, внимателно трябва да се прочете тази инструкция за експлоа-
тация. Неправилната експлоатация на инфрачервения отоплител може да доведе до сериозни наранява-
ния, в резултат на изгаряне, пожар, експлозия, токов удар или отравяне с въглероден окис.
►ru - ВАЖНО: Перед началом монтажа, установки и эксплуатации или техобслуживания инфракрасного
нагревателя воздуха следует ознакомиться и соблюдать указания, содержащиеся в данной инструкции
по обслуживанию. Неправильная эксплуатация нагревателя может стать причиной серьезных телесных
повреждений. Инструкцию следует сохранить для использования в будущем.
► - TÄRKEÄÄ: Lue ja ymmärrä tässä käyttöoppaassa annetut ohjeet ennen tämän generaattorin kokoamista,
käyttöönottoa tai huoltoa. Generaattorin väärä käyttö vai aiheuttaa vakavia henkilövahinkoja. Säilytä tätä käyttöohjet-
ta tulevaa tarvetta varten.
►no - VIKTIG: Les og forstå denne manualen før du utfører montering, igangsetting eller vedlikehold av dette var-
meapparatet. Feil bruk av varmeapparatet kan føre til alvorlige skader. Ta vare på denne manualen for fremtidig
bruk.
►kk - МАҢЫЗДЫ: Инфрақызыл ауа жылытқышты жөндеу, орнату және пайдалану алдында немесе оған
қызмет көрсетуалдында қызмет көрсету бойынша осы жетекшілікте келтірілген шарттарды оқып,
оларды орындау керек. Жылытқышты дұрыс пайдаланбау ауыр дене жарақаттарының себепшісі болуы
мүмкін. Жетекшілікті болашақта жүгіну үшін сақтаған жөн.

NOTE:_____________________________________________________________________
____________________________________________________________________________
____________________________________________________________________________
____________________________________________________________________________
____________________________________________________________________________
____________________________________________________________________________
____________________________________________________________________________
____________________________________________________________________________
____________________________________________________________________________
____________________________________________________________________________
____________________________________________________________________________
____________________________________________________________________________
____________________________________________________________________________
____________________________________________________________________________
____________________________________________________________________________
____________________________________________________________________________
____________________________________________________________________________
____________________________________________________________________________
____________________________________________________________________________
____________________________________________________________________________
____________________________________________________________________________
____________________________________________________________________________
____________________________________________________________________________
____________________________________________________________________________
____________________________________________________________________________
____________________________________________________________________________
____________________________________________________________________________
____________________________________________________________________________
____________________________________________________________________________
____________________________________________________________________________
____________________________________________________________________________
____________________________________________________________________________
____________________________________________________________________________
____________________________________________________________________________
____________________________________________________________________________

INDEX
1. PRODUCT PRESENTATION
1. UNPACKING
2. SAFETY INFORMATION
3. PRODUCT IDENTIFICATION
4. COMBUSTIBLE
4. THEORY OF OPERATION
4. OPERATING INSTRUCTION
4. SAFETY DEVICE
4. MOVING AND TRANSPORTATION
5. PREVENTATIVE MAINTENANCE SCHEDULE
6. ACCESSORIES
7. FAULTS AND THEIR LIKELY CAUSES
PRODUCT PRESENTATION
XL 9 is a generator of heat by radiation. Radiation technology
is based on the same physical principle behind the warmth of
sunlight. The sun heats bodies without a ow of warm air but
by waves of radiation. The radiation method is becoming highly
popular among professional clients because of the countless
advantages it oers. XL 9 was designed on the basis of this
physical principle and has become irreplaceable in environ-
ments which require a constant, even source of heat for warmth,
defrosting and drying. In addition, its extremely low noise level
makes it suitable for working without having to put up with the
noise that other types of heater normally produce. The genera-
tor has rubber wheels for ease of movement and it can also
be raised and set at dierent heights by means of eyebolts. Its
extended autonomy and automatic thermostat function grant the
operator maximum freedom of use. The external fuel-tank indi-
cator provides an easy check on whether fuel needs topping up.
The SR model has a dual power device that enables a more ef-
cient use of the machine under dierent conditions and during
the various seasons of the year.
UNPACKING AND PACKAGING
UNPACKING
• Remove the supports used to pack the appliance (Fig. 1).
• Open top side of the box.
• Remove the cardboard from the top.
• Remove the supports that hold the generator to the pallet (Fig.
2).
• Delicately lower the heater o the pallet.
• Dispose of the material used to pack the generator according
to the current government regulations in your area.
• Check the machine for eventual damages incurred during
transportation, if the machine appears damaged immediately
inform the store where you purchased it.
ON PACKAGING AND STORING
If the generator needs to be placed in storage, or if it has suered
major damage in transport, or needs to be repaired:
• Check for damage, in particular of a nature which could cause
loss of fuel. In this case, empty the tank of the remaining fuel.
• For storage, place the generator on the same pallet from which
it was unpacked and, for return, on any suitable EPA-branded
euro-pallet.
• Firmly anchor the generator to the pallet (Fig. 2).
• Whenever possible, slide the cardboard packing from the
top down over the pallet and anchor it rmly using suitable
materials (Fig. 1).
• Store the machine in a suitable, dry place and do not stack
more than two. Despatch the generator preferably as shown
Fig. 1 or at least as shown in Fig. 2.
Figur 1 - Packaging
Figur 2 - On pallett
1
en

SAFETY INFORMATION
WARNING
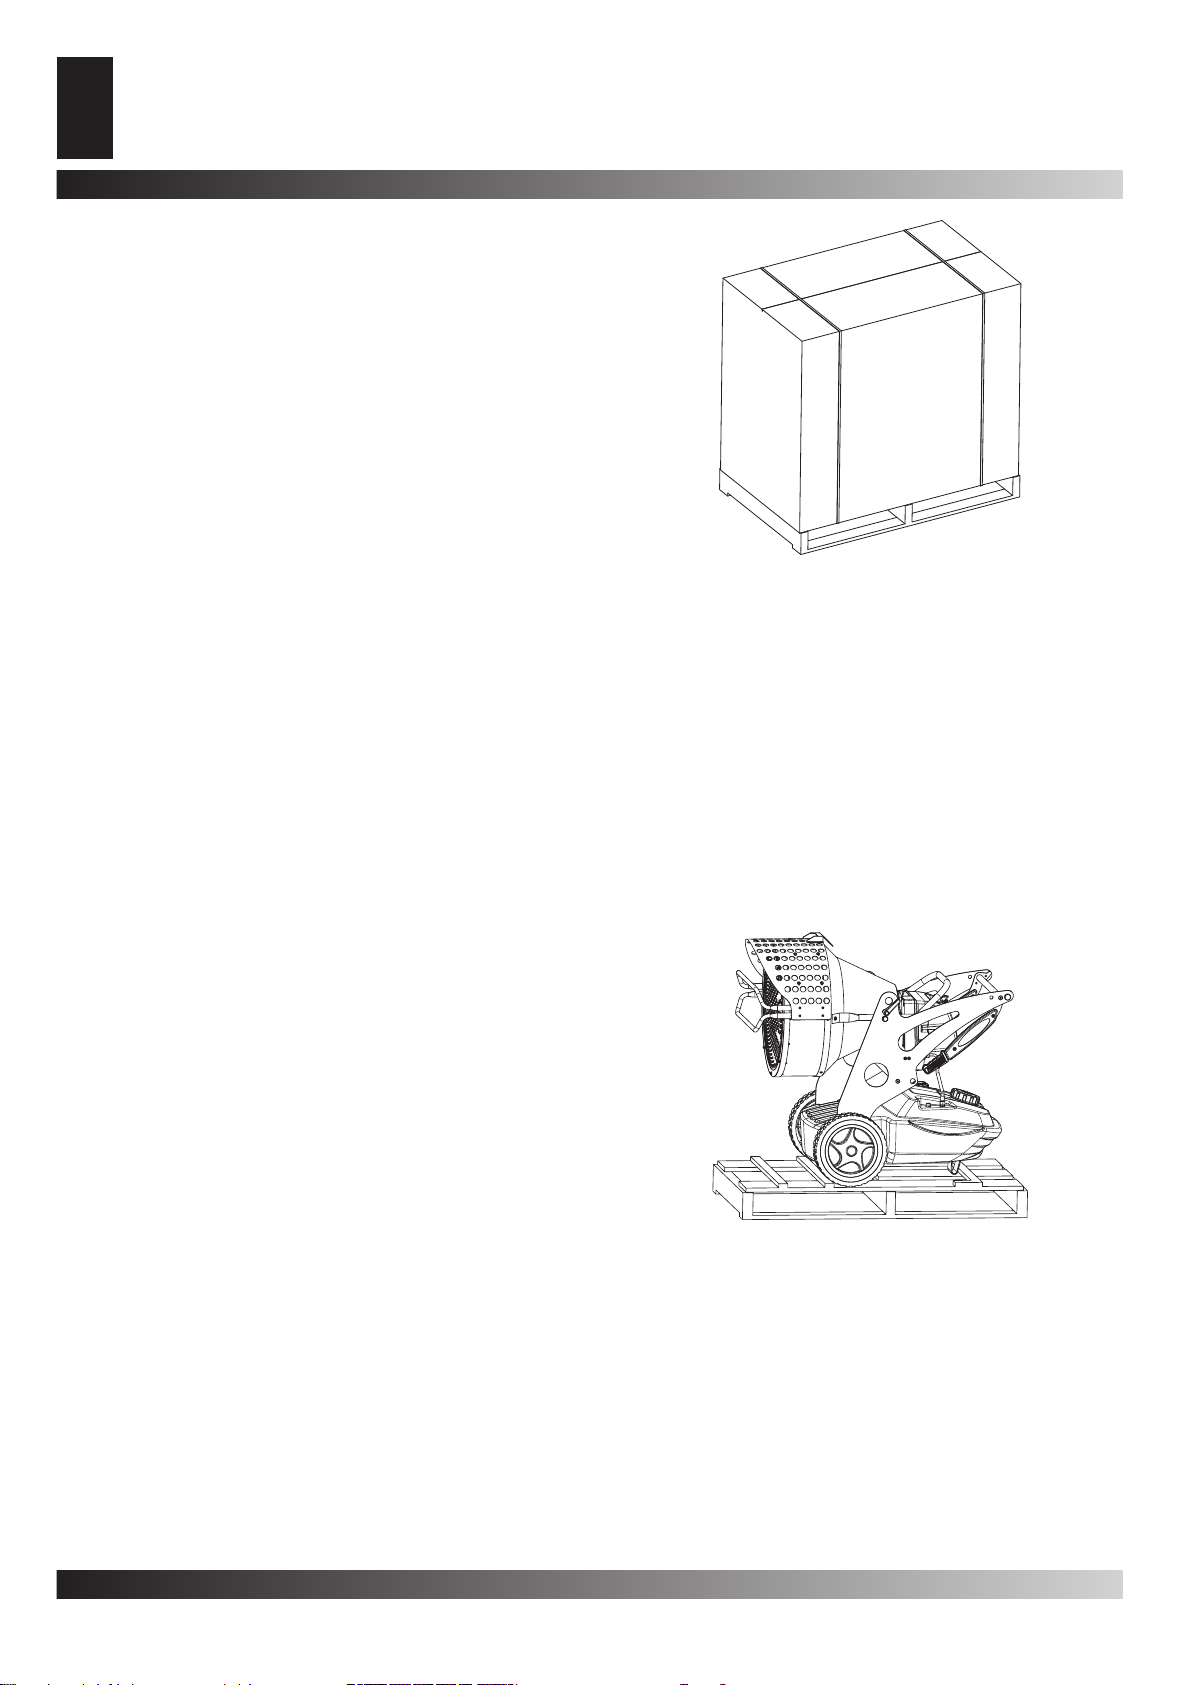
IMPORTANT: This air heater has been designed for
mobile and temporary professional applications. It has
not been designed for domestic use nor for thermal com-
fort of human.
IMPORTANT: Read this entire manual carefully before op-
erating or eectuating any maintenance procedures on
this generator. The misuse of the generator can cause
serious of fatal injuries due to burns, res, explosions,
electrical shock or asphyxiation from carbon monoxide.
DANGER: Carbon monoxide asphyxiation can be fatal.
Carbon Monoxide Asphyxiation - The rst symptoms of car-
bon monoxide asphyxiation are similar to that of the u, head-
aches, dizziness and/or nausea. These symptoms could be
caused by the malfunctioning of the generator. In this case go
outside immediately. Have the generator repaired. Then you
may start it again. Some people are more aected by the eects
of carbon monoxide than others, especially pregnant women,
those who suer from heart or lung disease or anaemic people;
also those who have consumed alcoholic beverages, and those
who are at high altitudes. Be sure to read and understand all of
the warnings. Conserve this manual for future reference: it will
provide you with instructions to operate your generator safely
and correctly.
• Use only kerosene or diesel to diminish the risk of re or explo-
sion. Never use gasoline, naphtha, paint thinners, alcohol or
other highly ammable combustants.
• Filling the tank:
a) The personnel charged with lling the tank should be qualied
and completely familiar with the factory instructions and
the current governmental regulations regarding the secure
provision of generators.
b) Use only the type of fuel expressly specied on the
identication plate located on the generator.
c) Before lling the tank, extinguish all of the ames, including
the pilot light and wait for the generator to cool down.
d) While lling the tank inspect all of the fuel lines and their
junctions to check for fuel losses. Any losses must be
repaired before starting the generator again.
e) Under no circumstances should you conserve a quantity of
combustible superior to that which is necessary to maintain in
function the heater for one day in the same building or nearby
the heater. The fuel storage cisterns should be located in a
separate building.
f) All of the fuel tanks should be located a minimum safety
distance from the heater, (like current government regulation),
as well as oxyhydrogen blowpipe/ torches, welding equipment
and similar ignition sources (with the exception of the fuel
tank incorporated in the generator).
g) The fuel should be stored in areas where the ooring will
not soak up any fuel spills or any drips of fuel line, the ame
underneath that could cause a re.
h) All fuel storage must be eectuated in compliance with the
current government regulations.
• Never use the generator in rooms where gasoline, paint thin-
ner, or other highly ammable materials are located.
• While the heater is in use follow all of the local ordinances and
current government regulations.
• Heaters used close to large pieces of fabric, curtains or oth-
er similar materials must be situated at a safe distance from
these objects. The minimum safety distance is that which is
advised by the current regulations in the your country. It is also
advisable to use reproof materials for coverings. Such ma-
terials should be fastened in a safe manner, so as to avoid
their catching re and prevent interference with the generator
caused by wind.
• Use only well ventilated areas. Predispose an opening or at
least an air exchange system that meets the current govern-
mental regulations in your area so that fresh air will be pro-
vided.
• Supply the generator with the proper voltage and frequency as
specied on the identication plate.
• Use only extension cords with three wires correctly connected
to a grounded plug.
• The minimum safety distance is the distance required by the
current governmental regulations in your area.
• Place the generator in a position so that when it is hot or in
function it will be on a stable and level surface, so that you
avoid starting a re
• When you move or store the generator, maintain it in a level
position in order to avoid fuel loss.
• Keep children and animals away from the generator.
• Disconnect the generator when it is not in use.
• When it is controlled by another device (like a thermostat or a
timer), the heater could turn itself on at any time.
• Never place the generator in inhabited rooms.
• Never obstruct the aspiration or dissipation vents.
• When the heater is hot, connected to the power supply or in
function it should never be moved, handled, or relled and no
maintenance should be performed on it.
• Smoke that is produced from the rst combustion is due to the
evaporation of organic materials (ceramic) present in the com-
bustion tank and anticorrosion oil present on the surface of the
burner. After a few minutes the smoke will stop.
• The environmental operating temperature is -30°C +40°C.
2
en

PRODUCT IDENTIFICATION
A. Combustion chamber, B. Hole for raising generator, C. Fuel
lter or pre-heated lter (optional), D. Fuel supply, E. Fuel Re-
turn, F. Fuel tank cap, G. Foot or wheel (optional), H. Fuel level
indicator, I. Block of the group combustion, L. Radiant deector,
M. Fuel drain plug, N. Fuel tank, O. Handle to move the genera-
tor, P. Hinge block, Q. Burner, R. Inclination regulator
A.
B.
C.
D.
E.
F.
G.
H.
I.
R. Q.
P.
O.
N.
M.
L.
Figur 3
Figur 4
A.
B.
C.
D. E.
G.
H.
F.
R.
I. D. L. M. N1. O1.
Q.
T.
S.
P.
U1.
U2.
U1.
N2.
N2.
O2.
Figur 5 - Function controls
Figur 6 - Components burner
A. Air vent regulator, B. Lighted ON/OFF button, C. ON/OFF
switch depending on power option (XL 9SR), D. RESET But-
ton, E. Power indicator, F. Burner coer, G. Thermostat plug, H.
Screw for burner block, I. Post-ventilation device, L. Flame con-
trol device, M. Transformer, N1. Pressure regulator (XL 9ER) of
the pump, N2. Pressure regulator (XL 9SR) of the pump, O1.
(XL 9ER) fuel pump, O2. (XL 9SR) fuel pump, P. Condenser, Q.
Motor, R. Burner tube, S. Combustion head regulator , T. Photo-
resistance, U1. Electrovalve 1° ame step (XL 9ER-SR), U2.
Electrovalve 2° ame step (XL 9SR)
3
en

COMBUSTIBLE
WARNING: The generator runs ONLY on kerosene or die-
sel fuel.
The use of impure combustible can cause:
• Blockage of the combustible lter and nozzle.
• Formation of carbonaceous deposits on the electrodes.
At low temperatures use non-toxic antifreeze.
THEORY OF OPERATION
The ventilation needed for proper combustion is produced by a
fan inside the burner. The air exits the burner sleeve and mixes
with the fuel which is nebulised by a high-pressure nozzle. The
fuel is aspirated from the fuel tank by a rotary pump which forces
it at high pressure up to the nozzle for nebulisation.
OPERATING INSTRUCTIONS
WARNING: Before putting the generator in function, and
therefore before connecting it to the electrical system,
you must check to see if the electrical systems technical
characteristics correspond to those on the identication
plate of the generator.
STARTING THE GENERATOR
1. Follow all of the safety information.
2. Fill the tank with diesel fuel or kerosene.
3. Close the fuel cap.
4. Plug the alimentation cord into a grounded wall plug with
the same tension as the one written on the generator’s
identication plate.
STARTING WITHOUT A THERMOSTAT
• XL 9ER
Set the switch (B Fig. 5) to the ON position (I). It begins the
period of pre-ventilation and after approximately 10 seconds
ones the combustion has beginning.
• XL 9SR
WARNING: Before starting the generator to make sure
that the button (C Fig. 5) is in position .
Set the switch (B Fig. 5) to the ON position (I). It begins the pe-
riod of pre-ventilation and after approximately 10 second ones
the combustion has beginning.
For having the maximum potentiality portare set the switch (C
Fig. 5) to the position.
STARTING WITH A THERMOSTAT
Regulate the thermostat or the control device (for example a
timer), if connected, so that it will allow the generator to function.
WARNING: The generator can ONLY function automatically
when the control device, for example a Thermostat or
a Timer, is connected to the generator. To connect the
control device to the machine consult the paragraph
entitled “ELECTRIC DIAGRAM”.
Before starting the machine or after the fuel line has been
completely emptied, the fuel ow to the nozzle should be
insucient to cause the intervention of the security device which
controls the ame (see the “SAFETY DEVICE” paragraph)
that stops the generator. In this case, after having waited
approximately one minute, push the Reset button (D Fig. 5 and
6) and start the machine.
If the machine isn’t working you should rst control the following:
1. Make sure that the fuel tank (N Fig. 4) still contains fuel.
2. Press the Restart button (D Fig. 5 and 6).
If the generator still isn’t functioning consult the “FAULTS AND
THEIR LIKELY CAUSES” paragraph to identify the cause.
WARNING: Before the second ignition (machine extin-
guished and adequately cold) to assure the blocking of
the screws that block the anterior deector (L Fig. 4).
WARNING: The electric power that feeds the generator
must be grounded and have a dierential magnetic-
thermal switch. The generator’s electric cord must be
attached to a plug equipped with a section switch.
TURNING THE GENERATOR OFF
Turn the switch (B Fig. 5) to the OFF position (O) or turn the ther-
mostat or control device (Timer) o if there is one connected.
The ame will go out and the ventilation will continue until it has
nished its post-ventilation cycle (cooling down).
WARNING: Before unplugging the alimentation cord from
the wall, wait until the post-ventilation cycle is complete-
ly nished (it will take approximately 3 minutes to cool
down).
SAFETY DEVICE
The generator is equipped with a safety device (L Fig. 6), which
controls the ame. If one or more anomalies occur when the
generator is functioning, the device will block the burner and the
RESET button (D Fig. 5 or 6) will light up.
The generator also has a post-ventilation device which enables
optimal, automatic cooling of the combustion chamber for some
3 minutes.
Before turning the generator on again you must identify and
eliminate the cause that blocked the machine.
MOVING AND TRANSPORTATION
NOTICE: Before raising or moving the machine ensure
that the fuel tank caps (F and H Fig. 3) are rmly closed.
TRANSPORT
The generator is easy to move and it may be xed in a raised
position thanks to its special eye-bolt mechanism (B Fig. 3 or
Fig. 7). This enables it to be set in the most suitable position for
heating, defrosting and drying.
Figur 7 - Hooks in order to raise
4
en

MOVEMENT
Before picking up or moving the machine you must check to in-
sure that the tank caps (G Fig. 3) are tightly shut. The generator
may be supplied with a rotating wheel. In this case, if the oor-
ing allows it you may push the generator like a cart. In the case
the machine does not have rotating wheels it is necessary to
unblock the hinge (P Fig. 4) located on one of the lateral struts of
the generator. Lower the handle from its “resting position” (Fig.
8) Turn the handle to the “Transportation Position” (Fig. 9). Lift
the generator and position it so that it is resting on the two an-
terior wheels.
WARNING: Before moving the machine you must: turn
the machine o by following the indications provided in
paragraph “TURNING OFF THE GENERATOR”; unplug
the electrical source by pulling the plug out of the wall
and waiting for the generator to cool down.
PREVENTATIVE MAINTENANCE
SCHEDULE
WARNING: Before beginning any maintenance operation
you must: turn o the machine following the instructions
in the “TURNING OFF THE GENERATOR” paragraph; un-
plug the electrical alimentation by unplugging the cord
from the wall plug and waiting for the generator to cool
down.
The instructions in this paragraph regarding the time between
service checks depend a lot on the cleanliness of the fuel and
the type of environment the generator is used in - the times giv-
en are for well-ventilated environments with little dust and con-
sidering the use of clean fuel.
Every 50 hours of operation you must:
• Dismantle the on-line cartridge (see “CLEANING THE FUEL
FILTER”) extract and clean the cartridge.
Every 200 hours of operation you must:
• Dismantle the pump lter (see “CLEANING THE PUMP FIL-
TER) extract and clean it.
Every 300 hours of operation you must:
• Dismantle the burner and clean inside the burner’s tube, the
ame disk and the electrodes regulating, if necessary the dis-
tance (see “CLEANING OF THE BURNER”).
CLEANING THE FUEL FILTER
• Unscrew the plastic cup and extract the ltering element
(cartridge).
• Clean it well with kerosene.
• Insert the lter element back into its place and screw the cup
back into the main body of the combustion lter.
CLEANING THE PUMP FILTER
• Dismantle the burner coer (F Fig. 5), to identify the pump of
the burner (O Fig. 6).
• Unscrew the nut (A Fig. 11) that blocking the ltering element
to the pump.
• Extract the ltering element (C Fig. 11) outside its place.
• Clean it well with kerosene.
• Insert the ltering element back into its place and screw the
nut to the pump.
Figur 8 - Position close handles
Figur 9 - Position open handles
A.
B.
C.
D.
A. O-rings,
B. Plastic cup,
C. Filtering
element,
D. Body of IN/
OUT of the fuel
Figur 10 - Filter
A.
B.
C.
D.
A.
B.
C.
D.
A. Nut for
blocking the
pump lter,
B. Single elec-
trovalve for
XL 9ER doble
electrovalve
for XL 9SR,
C. Filter,
D. Pump
Figur 11 - Pomp of burner
5
en

C.
H.
D.
4 mm
4 mm
6-7 mm
E.
F.
G.
22 mm
Figur 13 - Disassembly group diskame-electrodes
Figur 14 - Distances electrodes nozzle
A. Burner tube, B. Screw of the burner tube, C. Screw of the
group diskame-electrodes, D. Flame disk, E. Electrodes, F.
Tube, G. Nozzle, H. Screw
ROTATING WHEEL WITH BRAKES
PRE-HEATING FILTER
WARNING: Before beginning any maintenance operation
you must: stop the machine according to the instructions
provided in the paragraph “TURNING OFF THE GENERA-
TOR”; disinsert the electrical supply by unplugging it and
waiting for the generator to cool down.
A. C.
B.
Figur 12 - Disassembly shell-burner
CONNECTING THE CONTROL DEVICE
ACCESSORIES
THERMOSTAT
CLEANING THE BURNER
• Remove the screw (H Fig. 5) that blocks the burner (A Fig. 3)
in the combustion chamber.
• Extract the burner from the combustion chamber (Fig. 3).
• Remove the three screws (B Fig. 12) that hold the burner tube
(A Fig. 12).
• Dismantle the tube.
• Remove the screw (C Fig. 13) that holds the group diskame-
electrodes and pull out the nozzle holder (F Fig. 14).
• Clean the ame disk (D Fig. 14) and the electrodes (E Fig. 14).
• Unscrew the nozzle (G Fig. 14) from the nozzle holder (F Fig.
14) clean it and if necessary replace it.
• Mount the nozzle (G Fig. 14) in its holder.
• Remount the group diskame-electrodes placing it at a correct
distance as the illustration (Fig. 14) shows.
6
en

FAULTS AND THEIR LIKELY CAUSES
WARNING: Before beginning any maintenance operation you must: stop the machine according to the instructions pro-
vided in the paragraph “TURNING OFF THE GENERATOR”; disinsert the electrical supply by unplugging it and waiting for
the generator to cool down.
SYMPTOMS POSSIBLE CAUSE SOLUTION
The machine stops with
ame.
RESET button (D Fig. 5 o
6) on
1. Photo-resistance circuit is broken or the Pho-
to-resistance is dirty with smoke residue
2. Dirty fuel lter
3. Flame Control device Circuit is broken
4. Flame disk or tube (Fig. 12, 13, 14) dirty
1. Clean or replace the Photo-resistance
2. Remove lter and clean it
3. Replace the ame control the circuit
4. Dismantle and clean it
The machine stops, spray-
ing fuel without verifying the
ame. RESET button (D Fig.
5 o 6) on
1. The electrical system is not compatible
2. Ignition Transformer (M Fig. 6) disconnected or
broken
3. Ignition Transformer wires short circuit to
ground
4. The electrodes are not at the proper distance
5. The electrodes short circuit to ground because
they are dirty or the insulation is damaged
1. Verify the entire circuit
2. Replace it
3. Replace it
4. Reposition them at the correct distance (see
Fig. 14)
5. Clean them or, if necessary replace them
The machine doesn’t spray
fuel and stops.
RESET button (D Fig. 5 o
6) on
1. Photo-electric cell sees a strong source of light
2. The power supply is missing a phase to the
motor
3. Fuel is not arriving to the pump
4. No fuel in the tank
5. Nozzle clogged
1. Place the machine so that the light source
does not directly face the front deector
2. Control the electric system
3. Control the fuel supply lines (D Fig. 3)
4. Resupply the fuel tank
5. Dismantle and clean or replace it
The burner doesn’t start 1. The control device (Thermostat or Timer) is on
2. Short circuit in Photo-resistance (T Fig. 6)
3. Power loss due to: disconnected switch (4) or
disconnected main switch due to power loss in
the line
4. The installation of the control device (Thermo-
stat or Timer) is not correct
5. Break inside the ame control device
6. Fuse inside the burner bonnet
1. Raise the value or control the Timer settings
2. Replace it
3. Turn o the electric system and then turn o
the switches or wait for the power supply to
return
4. Control the installation following the descrip-
tion in the “CONNECTING THE CONTROL
DEVICE” paragraph
5. Replace it
6. Open the burner coer (F Fig. 5) and replace
it
Flame is not well conrmed
with an unpleasant odour,
black smoke or ames com-
ing out of the anterior deec-
tor
1. Low pulverisation pressure
2. Insucient combustible air
3. Nozzle clogged because it is dirty or old
4. Water in the fuel. Poor quality fuel
5. The tank is running out of fuel
1. Reestablish the correct value
2. Increase the combustible air
3. Clean or replace the nozzle
4. Drain the fuel from the appropriate drain plug
(M Fig. 4)
5. Resupply the tank
7
en

XL 9ER
ELECTRIC DIAGRAM - SCHEMA ELETTRICO - SCHALTPLAN - ESQUEMA ELECTRICO
- SCHÉMA ÉLECTRIQUE - BEDRADINGSSCHEMA ELEKTRISK SKEMA - SCHEMAT
POŁĄCZEŃ ELEKTRYCZNYCH - SCHEMAT POŁĄCZEŃ ELEKTRYCZNYCH -
ЭЛEKTPOCXEMA - SÄHKÖKAAVIOT - KOPLINGSSKJEMA - ЭЛЕКТРЛІ СҮЛБЕЛЕР
L1 Phase - Fase - Fase - Fase - Phase - Faza - Fáze - Предохранитель
- Vaihe - Fase B1 Photo-resistance - Fotoresistenza - Fotowiderstand - Fotocélula - Photo-résistance
- Fotoresistentie - Modstand med fotocelle - fotorezystor - Fotoelektrický odpor -
Фото-сопротивления - Valovastus - Fotomotstand
NNeutral - Neutro - Neutral - Neutro - Nulleiter - przewód zerowy - Nulo-
vý vodič - Нейтральный - Neutraali - Nøytral MV Motor fan - Motore ventola - Brennermotor - Motor ventilador - silnik wentyl-
atora - Motor ventilátoru - Двигатель вентилятора - Moottorin tuuletin - Vifte
TA Thermostat ambient - Termostato ambiente - Umgebungsthermostat
- Termostato ambiente - Thermostat ambient - Thermostaat - Om-
givende termostat - Termostat reagujący na temperaturę otoczenia
- Termostat okolí - Термостат окружающего - Huonetermostaatti -
Romtermostat
TR Ignition transformer - Trasformatore d’accensione - Zündungstransforma-
tor - Trasformador de encendido -Transformateur - transformator zapłonu
- Zapalovací transformátor - Трансформатор зажигания - Sytytys muuntaja
- Tenning transformator
SV1 ON/OFF light - Interruttore ON/OFF - ON/OFF-Schalter - Interuptor
ON/OFF - Interrupteur ON/OFF - AAn/UITknop - ON/OFF afbryder
- Wyłącznik - mo - Spínač ZAPNUTO/VYPNUTO - ВКЛ/ВЫКЛ свет -
Kytkin ON/OFF - ON/OFF-bryter
Y1 Electric valve - Elettrovalvola - Elektroventil - Electroválvula - Electrovanne
- Magnetventil - elektrozawór - Elektrický ventil - Электрический клапан -
Sähköventtiili - Magnetventil
H1 Operate lamp - Spia di rete - Funktionsleuchte - Piloto stan-bay -
Voyant tension - Lichtnetcontrolelampje - Spændingslampe - kontrolka
zasilania - Kontrolka provozu - Эксплуатация лампы - Verkkovirran
valo - Strømindikator
X1B/S
Power connector - Connettore alimentazione - Stromzufuhr - Conexión
para alimentación eléctrica - connecteur alimentation - Lichtnetconnector
- Forvarmningslter - złączka doprowadzania zasilania - Napájecí konektor -
Pазъем питания - Virtaliitin - Strømkonnektor
A1 Control equipment - Apparecchiatura controllo amma - Steuergerät
- Centralita de control - Appareillage contrôle amme - Vlamcontroleap-
paratuur - Apparat til ammekontrol - urządzenie sterujące - Ovládací
zařízení - Контрольно-измерительные приборы - Liekin tarkkailulaite
- Utstyr for ammekontroll
F. P. Pre-heating lter - Filtro pre-riscaldo - Beheizungslter - Filtro pre-calentador
de combustible - Filtre de préchauage - Voorverwarmingslter - Filtr
wstępnie podgrzewający paliwo - Filtr s předehříváním paliva - Подогрев
фильтра - Esilämmityssuodatin - Forvarmingslter
1b
1
1a
1b
1
1a
33 2
1
1b
1
1a
33 2
1

XL 9SR
L1 Phase - Fase - Fase - Fase - Phase - Faza - Fáze -
Предохранитель - Vaihe - Fase B1 Photo-resistance - Fotoresistenza - Fotowiderstand - Fotocélula - Photorésis-
tance - Fotoresistentie - Modstand med fotocelle - fotorezystor - Fotoelektrický
odpor - Фото-сопротивления - Valovastus - Fotomotstand
NNeutral - Neutro - Neutral - Neutro - Nulleiter - przewód zerowy -
Nulový vodič - Нейтральный - Neutraali - Nøytral MV Motor fan - Motore ventola - Brennermotor - Motor ventilador - Moteur - silnik
wentylatora - Motor ventilátoru - Двигатель вентилятора - Moottorin tuuletin
- Vifte
TA Thermostat ambient - Termostato ambiente - Umgebungsthermo-
stat - Termostato ambiente - Thermostat ambient - Thermostaat
- Omgivende termostat - termostat reagujący na temperaturę
otoczenia - Termostat okolí - Термостат окружающего - Huoneter-
mostaatti - Romtermostat
TR Ignition transformer - Trasformatore d’accensione - Zündungstransformator -
Trasformatore de incendio -Transformateur - transformator zapłonu - Zapalo-
vací transformátor- Трансформатор зажигания - Sytytys muuntaja - Tenning
transformator
SV1 ON/OFF light - Interruttore ON/OFF - ON/OFF-Schalter - Interuptor
ON-OFF - Interrupteur ON/OFF - AAn/UITknop - ON/OFF afbryder
- wyłącznik - Spínač ZAPNUTO/VYPNUTO - ВКЛ / ВЫКЛ свет -
Kytkin ON/OFF - ON/OFF bryter
Y1 1st Stage Electricvalve - Elettrovalvola 1° stadio - Elektroventil 1° Stufe - Elec-
troválvula 1° Etapa - Electrovanne 1° Allure - Magnetventil første trin - elektro-
zawór - Elektrický ventil 1° - 1° й этап электрический клапан - Sähköventtiili
1° vaihe - Magnetventil 1° trinn
H1 Operate lamp - Spia di rete - Funktionsleuchte - Piloto stan-bay
- Voyant tension - Lichtnetcontrolelampje - Spændingslampe -
kontrolka zasilania - Kontrolka provozu - Эксплуатация лампы
- Verkkovirran valo - Strømindikator
Y2 2nd Stage Electricvalve - Elettrovalvola 2° stadio - Elektroventil 2° Stufe -
Electroválvula 2° Etapa - Electrovanne 2° Allure - Magnetventil andet trin
- elektrozawór 2° - Elektrický ventil 2° - 2° й этап электрический клапан -
Sähköventtiili 2° vaihe - Magnetventil 2° trinn
A1 Control equipment - Apparecchiatura controllo amma - Steuergerät -
Centralita de control - Appareillage contrôle amme - Vlamcontroleap-
paratuur - Apparat til ammekontrol - Urządzenie sterujące - Ovládací
zařízení - Контрольно-измерительные приборы - Liekin tarkkailulai-
te - Utstyr for ammekontroll
X1B/S
Power connector - Connettore alimentazione - Stromzufuhr - Conexión para
alimentación eléctrica - connecteur alimentation - Lichtnetconnector - złączka
doprowadzania zasilania - Napájecí konektor - Pазъем питания - Virtaliitin -
Strømkonnektor
SV2 Lighted ON/OFF button second potentiality - Interruttore ON/OFF
seconda potenzialità - ON/OFF Schalter mit Leuchte zweite Potentia-
lität - Interruptor de la segunda potencialidad ON/OFF - Interrupteur
lumineux ON/OFF deuxième potentialité - AAn/UITknop - wyłącznik
l/ll - Sekundární podsvícený spínač ZAPNUTO/VYPNUTO -
Освещенные кнопки ВКЛ/ВЫКЛ второй потенциальность
Valaistu ON / OFF-painike toinen potentiaalisuus - Kytkin ON/OFF
painike toinen potentiaalisuus - ON/OFF bryter for full eekt
F.P. Pre-heating lter - Filtro pre-riscaldo - Beheizungslter - Filtro pre-calentador
de combustible - Filtre de préchauage - Voorverwarmingslter - Forvarm-
ningslter - ltr wstępnie podgrzewający paliwo - Filtr s předehříváním paliva
- Подогрев фильтра - Esilämmityssuodatin - Forvarmingslter
ELECTRIC DIAGRAM - SCHEMA ELETTRICO - SCHALTPLAN - ESQUEMA ELECTRICO
- SCHÉMA ÉLECTRIQUE - BEDRADINGSSCHEMA ELEKTRISK SKEMA - SCHEMAT
POŁĄCZEŃ ELEKTRYCZNYCH - SCHEMAT POŁĄCZEŃ ELEKTRYCZNYCH -
ЭЛEKTPOCXEMA - SÄHKÖKAAVIOT - KOPLINGSSKJEMA - ЭЛЕКТРЛІ СҮЛБЕЛЕР
1b
1
1a
1b
1
1a
33 2
1
1b
1
1a
33 2
1

CE CONFORMITY CERTIFICATE
CE CONFORMITY CERTIFICATE - DICHIARAZIONE DI CONFORMITÀ CE - EG-KONFORMITÄT-
SERKLÄRUNG - DECLARACIÓN DE CONFORMIDAD CE - DECLARATION DE CONFORMITE
CE - EG-CONFORMITEITVERKLARING - DECLARAÇÃO DE CONFORMIDADE CE - EU-OVE-
RENSSTEMMELSESERKLÆRING - EY-VAATIMUSTENMUKAISUUSVAKUUTUS - CE-SAMSVAR-
SERKLÆRING - EG-FÖRSÄKRAN OM ÖVERENSSTÄMMELSE - DEKLARACJA ZGODNOŚCI WE
- ДЕКЛАРАЦИЯ О СООТВЕТСТВИИ СЕ - PROHLÁŠENÍ O SHODĚ CE - EK MEGFELELŐSÉGI
NYILATKOZAT - IZJAVA O SKLADNOSTI IN OZNAKA CE - CE UYGUNLUK BEYANI - IZJAVA CE
O SUKLADNOSTI - ES ATITIKTIES DEKLARACIJA - EK ATBILSTĪBAS - DEKLARĀCIJA - EÜ VA-
STAVUSDEKLARATSIOON - DECLARAŢIE DE CONFORMITATE CE - PREHLÁSENIE O ZHODE
CE - ДЕКЛАРАЦИЯ ЗА СЪВМЕСТИМОСТ СЕ - ДЕКЛАРАЦІЯ ВІДПОВІДНОСТІ CE - IZJAVA CE
O PRIKLADNOSTI ΔΗΛΩΣΗ ΣΥΜΜΟΡΦΩΣΗΣ CE - CE 符合性声明
DANTHERM S.p.A. Via Gardesana 11, -37010- Pastrengo (VR), ITALY
Product: - Prodotto: - Produkt: - Producto: - Produit: - Product: - Produto: - Produkt: - Tuote: - Produkt: - Produkt: -
Produkt: - Изделие: - Výrobek: - Termék: - Izdelek: - Ürün: - Proizvod: - Gaminys: - Ierīce: - Toode: - Produsul: - Výro-
bok: - Продукт: - Виріб: - Proizvod: - Προϊόν: - 产品:
XL 9ER - XL 9SR
We declare that it is compliant with: - Si dichiara che è conforme a: - Es wird als konform mit den folgenden Normen
erklärt: - Se declara que está en conformidad con: - Nous déclarons sa conformité à: - Hierbij wordt verklaard dat het
product conform is met: - Declara-se que está em conformidade com: - Vi erklærer at produktet er i overensstemmel-
se med: - Vakuutetaan olevan yhdenmukainen: - Man erklærer at apparatet er i overensstemmelse med: - Härmed
intygas det att produkten är förenlig med följande: - Oświadcza się, że jest zgodny z: - Заявляем о соответствии
требованиям: - Prohlašuje se, že je v souladu s: - Kijelentjük, hogy a termék megfelel az alábbiaknak: - Izpolnjuje
zahteve: - Aşağıdaki standartlara uygun olduğunu beyan ederiz: - Izjavljuje se da je u skladu s: - Pareiškiame, kad
atitinka: - Tiek deklarēts, ka atbilst: - Käesolevaga deklareeritakse, et toode vastab: - Declarăm că este conform
următoarelor: - Prehlasuje sa, že je v súlade s: - Декларира се че отговаря на: - Відповідає вимогам: - Izjavljuje se
da je u skladu s: - Δηλώνουμε ότι είναι σύμφωνο με: - 兹证明符合:
2014/30/EU, 2014/35/EU
EN 62233:2008, EN 61000-3-2:2014, EN 61000-3-3:2013, EN 55014-1:2006/
A2:2011, EN 55014-2:2015, EN 60335-1:2012/A11:2014, EN 60335-2-102:2016
Pastrengo, 2019
Stefano Verani (Member of the Board)

NOTE:_____________________________________________________________________
____________________________________________________________________________
____________________________________________________________________________
____________________________________________________________________________
____________________________________________________________________________
____________________________________________________________________________
____________________________________________________________________________
____________________________________________________________________________
____________________________________________________________________________
____________________________________________________________________________
____________________________________________________________________________
____________________________________________________________________________
____________________________________________________________________________
____________________________________________________________________________
____________________________________________________________________________
____________________________________________________________________________
____________________________________________________________________________
____________________________________________________________________________
____________________________________________________________________________
____________________________________________________________________________
____________________________________________________________________________
____________________________________________________________________________
____________________________________________________________________________
____________________________________________________________________________
____________________________________________________________________________
____________________________________________________________________________
____________________________________________________________________________
____________________________________________________________________________
____________________________________________________________________________
____________________________________________________________________________
____________________________________________________________________________
____________________________________________________________________________
____________________________________________________________________________
____________________________________________________________________________
____________________________________________________________________________

►en - DISPOSAL OF THE PRODUCT
-This product has been designed and manufactured with top-quality materials and components, which can be re-cycled and re-used.
-When a crossed-wheely bin symbol is attached to the product, it means that the product is protected by the, 2012/19/UE European
Directive.
-Please obtain information regarding the local dierentiated collection system for electrical and electronic products.
-Respect local Standards in force and do not dispose of old products as normal domestic waste. Correct disposal of the product helps
to prevent possible negative consequences for health, the environment and mankind.
►it - SMALTIMENTO DEL PRODOTTO
-Questo prodotto è stato progettato e fabbricato con materiali e componenti di alta qualità, che possono essere riciclati e riutilizzati.
-Quando ad un prodotto è attaccato il simbolo del bidone con le ruote segnato da una croce, signica che il prodotto è tutelato dalla
Direttiva Europea 2012/19/UE.
-Si prega di informarsi in merito al sistema locale di raccolta dierenziata per i prodotti elettrici ed elettronici.
-Rispettare le norme locali in vigore e non smaltire i prodotti vecchi nei normali riuti domestici. Il corretto smaltimento del prodotto
aiuta ad evitare possibili conseguenze negative per la salute dell’ambiente e dell’uomo.
►de - ENTSORGUNG DES PRODUKTS
-Dieses Produkt wurde unter Verwendung von Qualitätsmaterialien und -bauteilen entwickelt und hergestellt, die recycelt und wieder
verwendet werden können.
-Ist ein Produkt gekennzeichnet durch die Mülltonne mit Rädern und einem Kreuz, wird hier angezeigt, dass dieses Produkt durch die
europäische Direktive 2012/19/UE überwacht ist.
-Es wird gebeten, sich über die vor Ort bestehende Mülltrennung bezüglich elektrischer und elektronischer Produkte zu informieren.
-Die vor Ort geltenden Vorschriften zur Müllentsorgung müssen eingehalten werden und alte Produkte dürfen nicht zusammen mit
dem Hausmüll entsorgt werden. Die ordnungsgemäße Entsorgung des Produkts hilft mögliche negative Folgen für Gesundheit und
Umwelt zu vermeiden.
►es - ELIMINACIÓN DEL PRODUCTO
-Este producto ha sido diseñado y fabricado con materiales y componentes de alta calidad que se pueden reciclar y reutilizar.
-Cuando en el producto se encuentra el símbolo del contenedor con las ruedas tachado con una cruz, signica que el producto está
tutelado por la Directiva europea 2012/19/UE.
-Se ruega informarse acerca del sistema local de recogida selectiva para los productos eléctricos y electrónicos.
-Respete las normas locales vigentes y no elimine los productos viejos junto con los residuos domésticos normales. La eliminación
correcta del producto ayuda a evitar posibles consecuencias negativas para la salud del ambiente y del hombre.
►fr - SE DÉBARRASSER DE VOTRE PRODUIT USAGÉ
-Ce produit a été conçu et fabriqué avec des matériaux et des composants de haute qualité, qui peuvent être recyclés et utilisés de
nouveau.
-Lorsque le symbole d’une poubelle à roue barrée est appliqué à un produit, cela signie que le produit est couvert par la Directive
Européenne 2012/19/UE.
-Veuillez vous informer du système local de séparation des déchets électriques et électroniques.
-Veuillez agir selon les règles locale set ne pas jeter vos produits usagés avec les déchets domestiques usuels. Jeter correctement
votre produit usagé aidera à prévenir les conséquences négatives potentielles contre l’environnement et la santé humaine.
►nl - VERWIJDERING VAN HET PRODUCT
-Dit product werd ontworpen en gemaakt met hoogwaardige materialen en componenten, die gerecycleerd en herbruikt kunnen
worden.
-Wanneer op een product het symbool van de afvalbak op wielen met een kruis erdoor is aangebracht, betekent dit dat het product
valt onder de Europese Richtlijn 2012/19/UE.
-Gelieve inlichtingen in te winnen betreende het plaatselijke systeem voor gedierentieerde inzameling van elektrische en
elektronische toestellen.
-Respecteer de plaatselijke normen die van kracht zijn, en verwijder de oude toestellen niet als gewoon huishoudelijk afval. Een
correcte verwijdering van het product helpt om mogelijke negatieve gevolgen voor de gezondheid van mens en milieu te voorkomen.
►pt - ELIMINAÇÃO DO PRODUTO
-Este produto foi projetado e fabricado com materiais e componentes de alta qualidade que podem ser reciclados e reutilizados.
-Quando for axado em um produto o símbolo do bidão com rodas marcado com uma cruz, signica que o produto é protegido pela
Diretiva Europeia 2012/19/UE.
-Solicitamos informar-se sobre o sistema local de recolha diferenciada para os produtos elétricos e eletrónicos.
-Respeitar as normas locais em vigor e não eliminar os produtos antigos como normais detritos domésticos. A correta eliminação do
produto ajuda a evitar possíveis consequências negativas para a saúde do ambiente e do homem.
Other manuals for XL 9ER
2
This manual suits for next models
1
Table of contents
Other Master Heater manuals

Master
Master B-100EKD Manual

Master
Master MH-600T-KFA Training manual

Master
Master MH-60V-GFA-A Training manual

Master
Master BLP 11 Manual

Master
Master HALL 1500 User manual

Master
Master WA 29 A

Master
Master B 2 PTC Manual

Master
Master MH-221A-120 Training manual

Master
Master MH-80V-LPC Manual

Master
Master GREEN 310S Manual
Popular Heater manuals by other brands

DeLonghi
DeLonghi TRRS0920C quick start guide

Austria Email
Austria Email EBH-KDW Operating and mounting instructions

Schuller
Schuller 768191 Assembling instructions

Frico
Frico PAEC5000-NA Series Original instructions

HELLER
HELLER HCFHU2000 user manual

EUROM
EUROM Safe-t-Fanheater 2000 LCD instruction manual