Model no. 043-1394-4 | Contact us: 1-855-803-9313
76
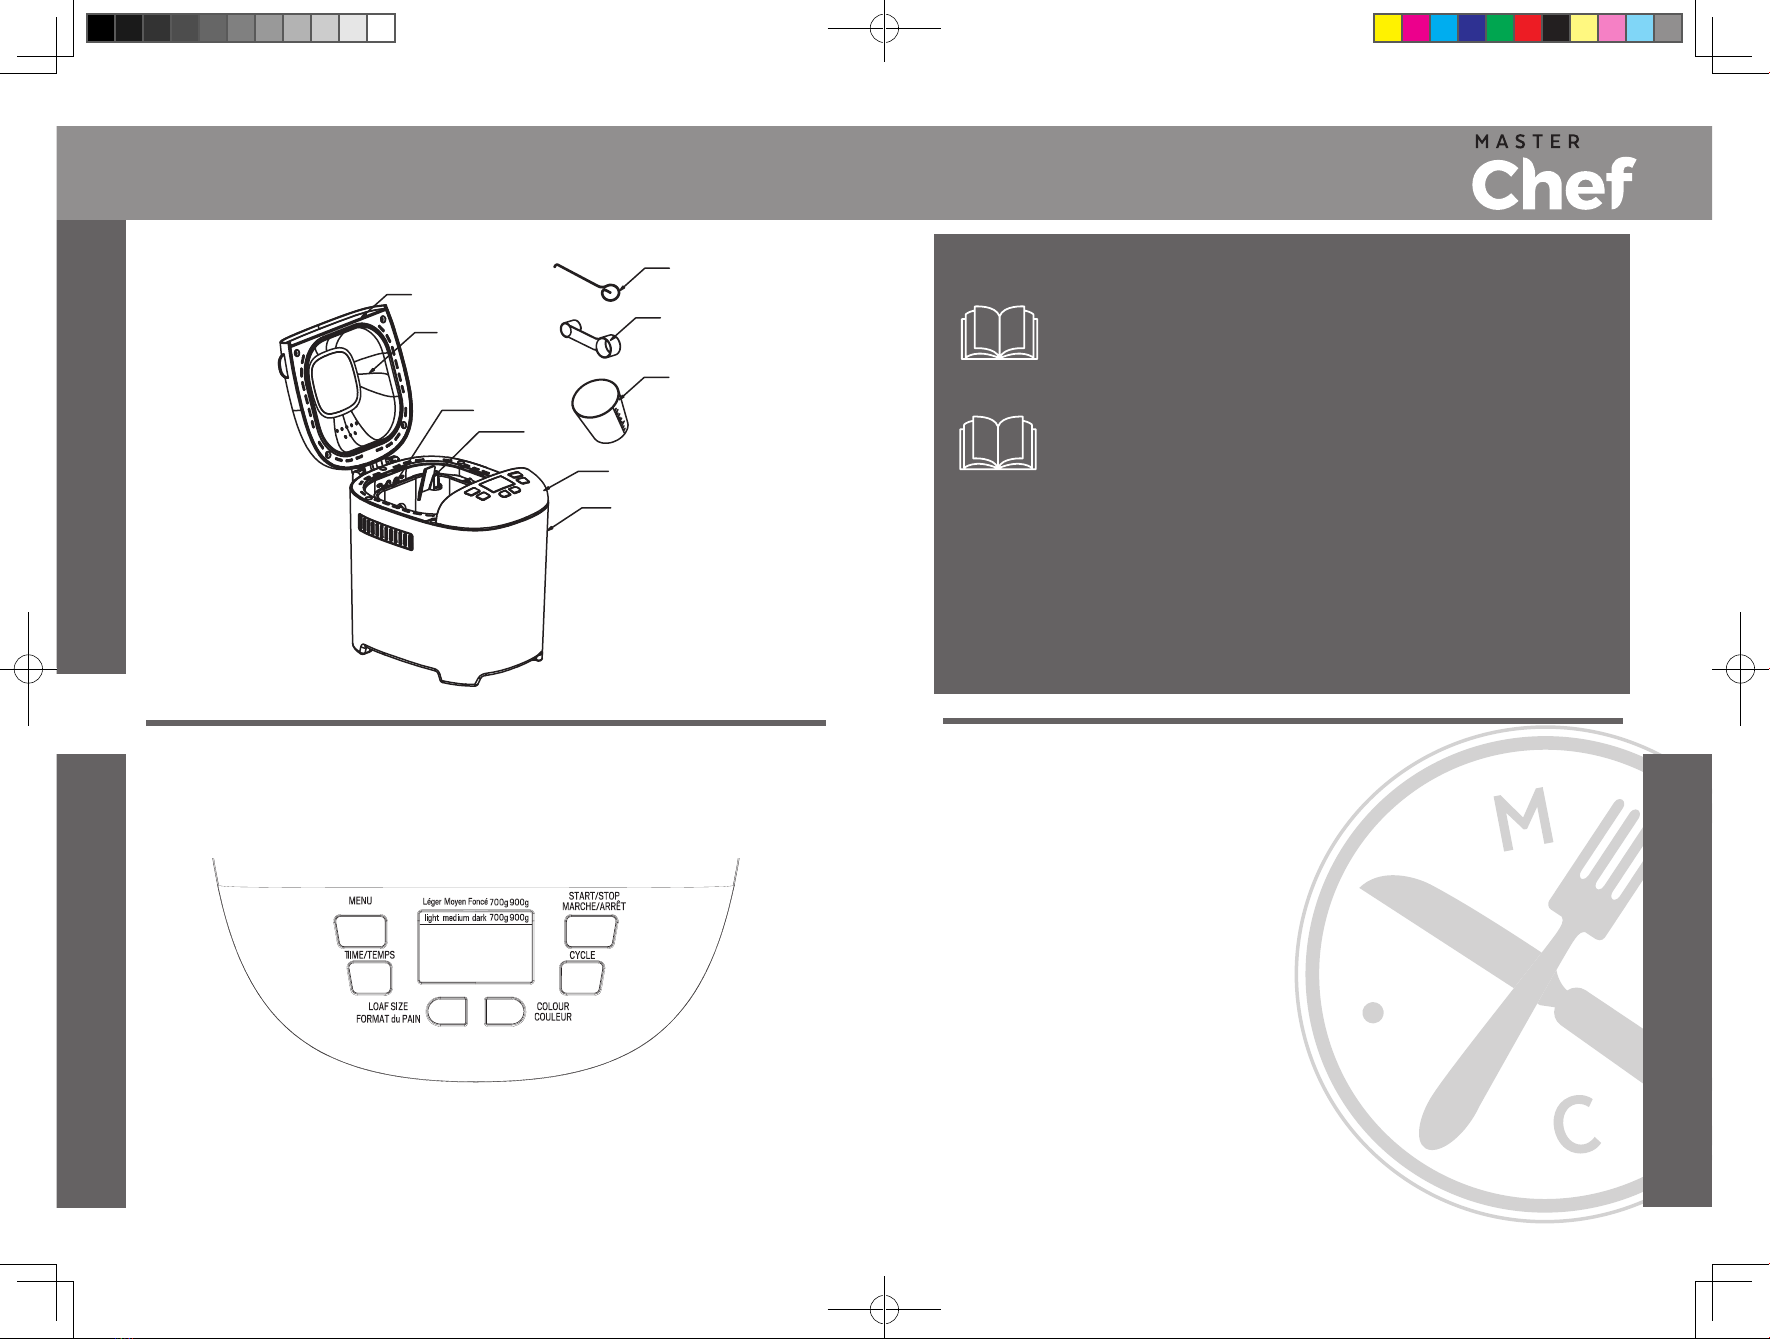
Using Your Bread Maker
MENU
The MENU button is used to select dierent programs. Each repeated press of the button will cycle
through the 15 program options:
1. Basic: knead, rise and bake normal bread. You may also add ingredients to increase flavour.
2. French: knead, rise and bake with a longer rise time. The bread baked with this option will usually
have a crisp crust and light texture.
3.Whole wheat: knead, rise and bake whole wheat bread. It is not advised to use the delay function as
this can produce poor results.
4. Quick: knead, rise and bake loaf in time less than Basic bread. The bread baked with this setting is
usually smaller with a dense texture.
5. Sweet: knead, rise and bake sweet bread. You may also add ingredients to add flavour.
6. Gluten free: knead, rise and bake gluten-free bread. You may also add ingredients to add flavour.
7. Dough: knead and rise, but without baking. Remove the dough and use for making bread rolls, pizza,
steamed bread, etc.
8. Kneading: knead dough.
9. Cake: knead, rise and bake. Rise with soda or baking powder.
10. Sandwich: knead, rise and bake sandwich bread. Bakes a light-textured bread with a thinner crust.
11. Speciality: on this setting the loaf size can not be adjusted—it uses the default loaf size of 900g.
The speciality setting is used for bread types that require less time. The bread baked with this setting
is smaller with a dense texture.
12. Jam: boil jams or marmalades. Fruit or vegetables must be chopped before putting them into the
bread pan.
13. Yogurt: make yogurt.
14. Bake: only bakes; does not knead or rise. Also used to increase the baking time on selected
settings.
15. Homemade: on this setting the loaf size can not be adjusted—it uses the default loaf size of
900 g. This program allows you to take over full control of the baking process. You can adjust the
times for knead, rise, bake, and keep warm. The time range for each section of the program is
Knead 1: 6–14 minutes; Rise 1: 20–60 minutes; Knead 2: 5–20 minutes;
Rise 2: 5–40 minutes; Rise 3: 0–60 minutes; Bake: 0–80 minutes;
Keep warm: 0–60 minutes.
COLOUR
This button selects a LIGHT, MEDIUM or DARK colour for the crust. This button is not applicable for
the programs Dough and Jam.
LOAF
Press this button to select the loaf size of the bread. Please note the total operation time may vary
with the dierent loaf size. This button is not applicable for the programs Quick, Dough, Jam, Cake and
Bake.
TIME
This appliance is equipped with a delay function. Use the TIME button to set the time at which you
wish the baking program to finish. Please note the delay time includes the baking time of program.
First select the program, loaf size and degree of browning, then press TIME to increase the delay
time in 10 minute increments. The maximum delay is 13 hours.
Example: It is now 8:30 p.m. You would like your bread to be ready the next morning at 7 o’clock, i.e.
in 10 hours and 30 minutes. Select your preferred MENU, COLOUR, and LOAF settings then press
TIME until 10:30 appears on the LCD. Press the STOP/START button to activate the program with
the included delay time. The colon in the time display will flash, and the time display will count down
to show the remaining time. You will get fresh bread at 7:00 in the morning. If you don’t want to take
out the bread immediately, the keep warm function will run for 1 hour.
KEEP WARM
Bread is automatically kept warm for 60 minutes after baking. If you would like to take the bread out,
switch the program o with the START/STOP button.
MEMORY
If the power supply is interrupted during the course of bread making but reconnects within 10
minutes, the program currently running will resume without pressing START/STOP button. If the
break time exceeds 10 minutes the bread maker must be restarted, but if the dough is no further
than the kneading phase when the power supply is interrupted, press the START/STOP button to
continue the program from the beginning.
ENVIRONMENT
The machine may work well in a wide range of temperatures, but there could be a dierence in
loaf size between a very warm room and a very cold room. We recommend a room temperature of
between 15ºC (60ºF) and 34ºC (93ºF).
DISPLAY WARNINGS
1. If the display shows “HHH” (accompanied by 5 beep sounds) after pressing the START/STOP
button to start a program, the temperature inside is too high. Stop sound by pressing the START/
STOP button, open the lid, and let the machine cool down for 10 to 20 minutes.
Using Your Bread Maker
NOTE:
1. This button is not applicable for the programs: Kneading, Jam, Yogurt and Bake.
2. For time-delayed baking, do not use any easily-perishable ingredients such as
eggs, fresh milk, fruits, onions, etc.
V810-F1170001_ BM1349-UL_英文版说明书.indd 6-7 2017/7/7 11:05:32