mastro FME0001 User manual

MODELLO / MO DE L:
MACCHINARIO / E Q UI P ME N T:
B IR IDUT TOR I
DO UB L E -HUB UNIV E R S A L -MA C HINE S
FME0002FME0001 &

02
P ag. 03 ....
P age 03 ....
P ag. 04 ....
P age 04 ....
P ag. 05 ....
P age 06 .. ..
P ag. 07 . ...
P age 08 .. ..
P ag. 09 . ...
P age 10 .. ..
P ag. 11 ....
P age 12 .. ..
P ag. 11 ....
P age 12 .. ..
P ag. 13 . ...
P age 13 .. ..
P ag. 14 . ...
P age 14 .. ..
P ag. 15 . ...
P age 15 .. ..
P ag. 16 . ...
P age 16 .. ..
P ag. 17 . ...
P age 17 .. ..
P ag. 18 . ...
P age 18 .. ..
C AR AT TE R IS T IC HE T E C NIC HE
T E C HNIC AL C HAR AC T E R IS T IC S
INDIVIDUAZIONE DE I C OMP ONE NT I
DE TAILS LOC AT ION
INS TAL L AZIONE
INS TALLATION
FUNZIONAME NTO
WOR K ING
P UL IZIA E MA NUT E NZIONE - DAT I DI TAR G A
C LE ANLINE S S AND MAINT E NANC E - DATA-PLATE
G UAS T I E MAL F UNZIO NAME NT I
B R E AK DOW NS AND MALF UNC T IO NS
DE MOL IZIONE DE L MAC C HINAR IO
DE MO LIT IO N OF T HE E Q UIP ME NT
S C HE MA E L E T T R IC O E DI C OL L E G AME NT O
E LE C TR IC DIAG R AM AND C ONNE C TION
C AMB IO DI T E NS IO NE E S E NS O DI R OTAZIONE
C HANG ING T HE V OLTAG E AND T HE R OTAT IO N
VIS TA E S P L OS A
E XP LO DE D VIE W
UT E NS IL I AP P L IC AB IL I
AVAIL AB L E UT E NS IL S
QUE L L O C HE P R ODUC IAMO
W HAT W E DO P R O DUC E
DIC HIAR AZIONE DI C ONFOR MITA’
DE C LAR ATIO N O F C ONF OR MIT Y
INDIC E G E NE R AL E
TA B L E O F C O NT E N T S

03 16
STRUTTURA ESTERNA:
COVERING STRUCTURE:
SPALLETTE:
SHOULDERS:
BASAMENTO:
BASE:
MOTORE:
MOTOR:
INNESTO PRESA DIRETTA:
DIRECT-SIDE CLUTCH:
INNESTO PRESA RIDOTTA:
REDUCED-SIDE CLUTCH:
RIDUZIONE:
REDUCTION:
POTENZA MOTORE:
ELECTRIC POWER:
COMANDI:
CONTROLS:
SELETTORE DI VELOCITA’:
SPEED-SELECTOR:
PESO NETTO:
NET WEIGHT:
LIVELLO PRESSIONE ACUSTICA:
ACOUSTIC PRESSION LEVEL:
CARATTERISTICHE TECNICHE
TECHNICAL CHARACTERISTICS
INOX (AISI 430)
Stainless/steel (AISI 430)
Alluminio pressofuso
Die-casting aluminium
Alluminio pressofuso
Die-casting aluminium
Ventilato, con termico salvamotore
Ventilated, with thermal protection
1400 giri/min. ca. (1400/700 sul 2 vel.)
1400 rpm abt. (1400/700 on the 2 speeds)
180 giri/min. ca. (180/90 sul 2 vel.)
180 rpm abt. (180/90 on the 2 speeds)
Ingranaggi lavoranti in bagno d’olio
Gears working in oil bath
BIR1 = 760W
BIR2 = 1140W
BIR3 = 2280W
Pulsanti IP55 funzionanti a 24V
Push-buttons IP55 working at 24V
Solo sui modelli a 2 velocità
Only on the 2 speeds models
BIR1-1V= Kg.24 - BIR1-2V= Kg.29
BIR2-1V= Kg.27 - BIR2-2V= Kg.29
BIR3-1V= Kg.32 - BIR3-2V= Kg.37
Inferiore a 70 dB (A)
Lower than 70 dB (A)
UTENSILI APPLICABILI
AVAILABLE UTENSILS
TRITACARNE
MINCER
PORZIONATRICE
HAMBURGERS-FORMER
PASSATUTTO
STRAINER
TAGLIACUBETTATRICE
DICING & CUTTING
SBATTIUOVA
PLANETARY MIXER
IMPASTATRICE
DOUGH-KNEADER
TIRASFOGLIA
DOUGH-ROLLER
TAGLIAPASTA
DOUGH-CUTTER
TAGLIASEPPIE
CUTTLE-FISH CUTTER
STACCIATRICE MESCOL.
MASHER & MIXER
GRATTUGIA
GRATER
TRITAGHIACCIO
ICE-CRUSHER
SPREMIAGRUMI
CITRUS-JUICER
AFFILACOLTELLI
KNIVES-SHARPENER
MACINACAFFE’
COFFEE-MILL

15 04
VISTA ESPLOSA
EXPLODED VIEW
INDIVIDUAZIONE DEI COMPONENTI
DETAILS LOCATION
LAMIERA DI COPERTURA
COVERING SHEET
PULSANTI “ON/OFF”
“ON/OFF”PUSH BUTTONS
PIEDINI ANTISDRUCCIOLO
ANTISKID FEET
INNESTO PRESA RIDOTTA
REDUCED SIDE CLUTCH
POMOLO BASAMENTO GIREVOLE
TURNING-BASE KNOB
SPALLETTA
SHOULDER
INNESTO PRESA RIDOTTA
REDUCED SIDE CLUTCH

05 14
INSTALLAZIONE CAMBIO DI TENSIONE E ROTAZIONE
CHANGING THE VOLTAGE AND ROTATION
RICEVIMENTO DEL MACCHINARIO:
Dopo aver tolto l'imballo, assicurarsi dell'integritàdel macchinario; non utilizzare
apparecchi danneggiati dal trasporto! In caso di dubbio rivolgersi al fonitore.
CONTROLLI PRELIMINARI:
Prima di collegare il motore èimportante assicurarsi che i dati contenuti nella targa
(solitamente applicata sulla cassetta della centralina elettrica) corrispondano a quelli
della rete di distribuzione elettrica del Vostro esercizio (cfr. pag.09).
La sicurezza elettrica del macchinario oggetto del presente "manuale per I'utilizzatore"
ègarantita solo quando lo stesso èaccuratamente collegato ad un efficace impianto
di messa a terra (come previsto dalle vigenti norme di sicurezza elettrica).
Il costruttore declina ogni responsabilitàper eventuali danni causati dalla mancanza
di messa a terra dell'impianto elettrico. Per una corretta installazione occorre preve-
dere un interruttore omnipolare con distanza di apertura dei contatti di almeno 3
mm.. Se sono presenti dei fusibili, il valore consigliato èdi 10 A.
Sul cavo di alimentazione del macchinario andràinstallata, da personale professio-
nalmente qualificato, una spina compatibile con il tipo di presa esistente sull'impian-
to di distribuzione elettrica principale. E' fatto divieto l'utilizzo di adattatori elettrici,
prese multiple e/o prolunghe. Nei modelli con motore trifase non èprevisto l'utilizzo
del neutro.
RACCOMANDAZIONI:
Questa apparecchiatura deve essere destinata solo all'uso per cui èstata espressa-
mente concepita, e cioèper l’abbinamento a speciali Utensili per la lavorazione del
cibo. Ogni altro utilizzo, in particolare l’abbinamento con Utensili costruiti da altre
ditte, èda considerarsi improprio e quindi pericoloso. L'apparecchiatura deve esse-
re utilizzata solo da personale addestrato all'uso della stessa.
L'installazione deve essere effettuata seguendo le presenti istruzioni e solo da
personale professionalmente qualificato.
Il Biriduttore puòessere appoggiato su un tavolo o fissato sull'apposito carrello
(che èindispensabile per l'utilizzo degli Utensili Sbattiuova da 23 o 30 Lt. e degli
Utensili Stacciatrici/Mescolatrici da 23 o 50 Lt.)
Se viene appoggiato su un tavolo, la superficie deve essere accuratamente pulita
per permettere ai piedini antisdrucciolo di aderire alla stessa.
Il Biriduttore puòinoltre ruotare sulla propria base per permettere l'utilizzo dei vari
Utensili in diverse posizioni. Per far ruotare il Biriduttore èsufficiente allentare il
pomello, ruotare il gruppo motore fino al raggiungimento della posizione desiderata
e ribloccare il pomello.
ATTENZIONE: Prima di procedere a qualsiasi intervento straordinario al normale
funzionamento del macchinario oggetto del presente "manuale dell'utilizzatore", si
raccomanda di scollegare la spina di alimentazione dello stesso dalla rete di distri-
buzione elettrica principale.
l modelli trifase vengono solitamente forniti collegati a 380V (se non diversamente
richiesto). Per modificare la tensione in 220V (sempre trifase), procedere come da
figura, assicurandosi che i fili che portano tensione alla basetta siano collegati allo
"0" ed al morsetto con la tensione desiderata.
IL CAMBIO DI TENSIONE SI PUO’FARE SOLO NEI MODELLI A 1 VELOCITA’
Per invertire il senso di rotazione del motore èsufficiente invertire due dei tre fili
della presa di alimentazione elettrica, lasciando invariata la posizione del filo di massa
(giallo/verde).
WARNING: Before proceeding to any operation extraordinary to the normal working
of the equipment subject of the present "user manual", it is recommended to
disconnect the electric feeding-plug of the same from the main electric net.
The three-phase models are usually supplied connected at 380V (if not different
required). To change the voltage into 220V (always three-phase), proceed as showed
hereinbefore, making sure that the wires that lead the tension to the base are
connected to "0" and to the terminaI with the desired tension.
YOU CAN CHANGE THE VOLTAGE ONLY ON THE 1 SPEED MODEL
To change the sense of rotation of the motor it is sufficient to invert two of the three
wires of th electrical-feeding plug, leaving unchanged the position of the ground-wire
(yellow/green).
S
R
T
M
220V
SR T
380V
M

13 06
SCHEMA ELETTRICO E DI COLLEGAMENTO
ELECTRIC DIAGRAM AND CONNECTION
INSTALLATION
ATTENZIONE: Prima di procedere a qualsiasi intervento straordinario al normale
funzionamento del macchinario oggetto del presente "manuale dell'utilizzatore", si
raccomanda di scollegare la spina di alimentazione dello stesso dalla rete di distri-
buzione elettrica principale.
WARNING: Before proceeding to any operation extraordinary to the normal working
of the equipment subject of the present "user manual", it is recommended to
disconnect the electric feeding-plug of the same from the main electric net.
RECEIVEMENT OF THE EQUIPMENT:
After having removed the packaging, ascertain Yourself of the integrity of the
equipment; do not use damaged equipments! In case of doubt contact the supplier of
the equipment.
PRELIMINARY CHECKS:
Before connecting the motor it is important to make sure that the data contained in the
motor data-plate (usually applied onto the PCB case) corresponds to those of the
main electric net of Your establishment (chk. page 10).
The electric safety of the equipment subject of the present "user manual" is guaranteed
only when the same is carefully connected to an effective grounding-system (as
foreseen in the electric-safety-standards in force).
The manufacturer declines each responsability for probable demages caused from
the want of the grounding-connection of the electric-plant. For a correct installation it
must be foreseen an omnipolar switch (of which contacts the opening distance must
be at least 3 mm.). If there is any fuse, the suggested value is 10A.
Onto the feeding wire of the equipment it must be installed, from personnel
professionally qualified, a plug compatible with the socket of the main electric net of
Your establishment. It is forbidden using electric-adapters, multiple-sockets and/or
extension-sockets. For the three-phase motors it is not foreseen the neutral.
ADVICES:
This equipment is destined only to the use for which it has been expressly conceived,
and precisely to link special Utensils for the food preparation. Each other use,
particulary the linking of Utensils manufactored from other firms, has to be considered
improper and then dangerous.
This equipment must only be used from personnel trained to use the same.
The installation must be carried out following the present instructions and only
from personnel professionally qualified.
The Universal-machine can be leaned on a table or fixed to its proper trolley (that is
compulsory when using the Planetary-Mixer Utensils 23 or 30 Lt. and the
Masher&Mixer Utensils 23 or 50 Lt.)
If leaned on a table, clean the surface so to allow the antiskid feet to adhere to the
same.
The Universal-Machine can rotate on its base to allow using the Utensils in different
positions. To rotate the Universal-Machine, simply unscrew the turning-base knob and
rotate the motor-group until reaching the desired position; than block the knob.

FUNZIONAMENTO BREAKDOWNS AND MALFUNCTIONS
FUNZIONAMENTO:
Questa apparecchiatura deve essere destinata solo all'uso per cui èstata espressa-
mente concepita, e cioèper I'abbinamento a speciali Utensili per la lavorazione del
cibo. Ogni altro utilizzo, in particolare I'abbinamento con Utensili costruiti da altre
ditte, èda considerarsi improprio e quindi pericoloso.
L'apparecchiatura deve essere utilizzata solo da personale addestrato all'uso della
stessa. Collegare la spina di alimentazione della macchina all'impianto di distribu-
zione elettrica principale.
Premere il pulsante di avvio "I" (verde) ed assicurarsi che il senso di rotazione sia lo
stesso indicato dalla freccia adesiva posta vicino all'innesto degli utensili. In partico-
lare, guardando frontalmente l'innesto a bassa velocità(dove èpresente il tappo per
il cambio olio del riduttore) l'albero motore dovràgirare in senso antiorario. Nel caso
in cui l'albero motore girasse al contrario: consuItare il capitolo "CAMBIO DI TEN-
SIONE E SENSO DI ROTAZIONE" (pag.14).
Per arrestare il motore premere il pulsante di stop "O" (rosso).
Nel caso in cui il motore non dovesse funzionare correttamente, consultare il capito-
lo "GUASTI E FUNZIONAMENTO ANORMALE" (Pag.11).
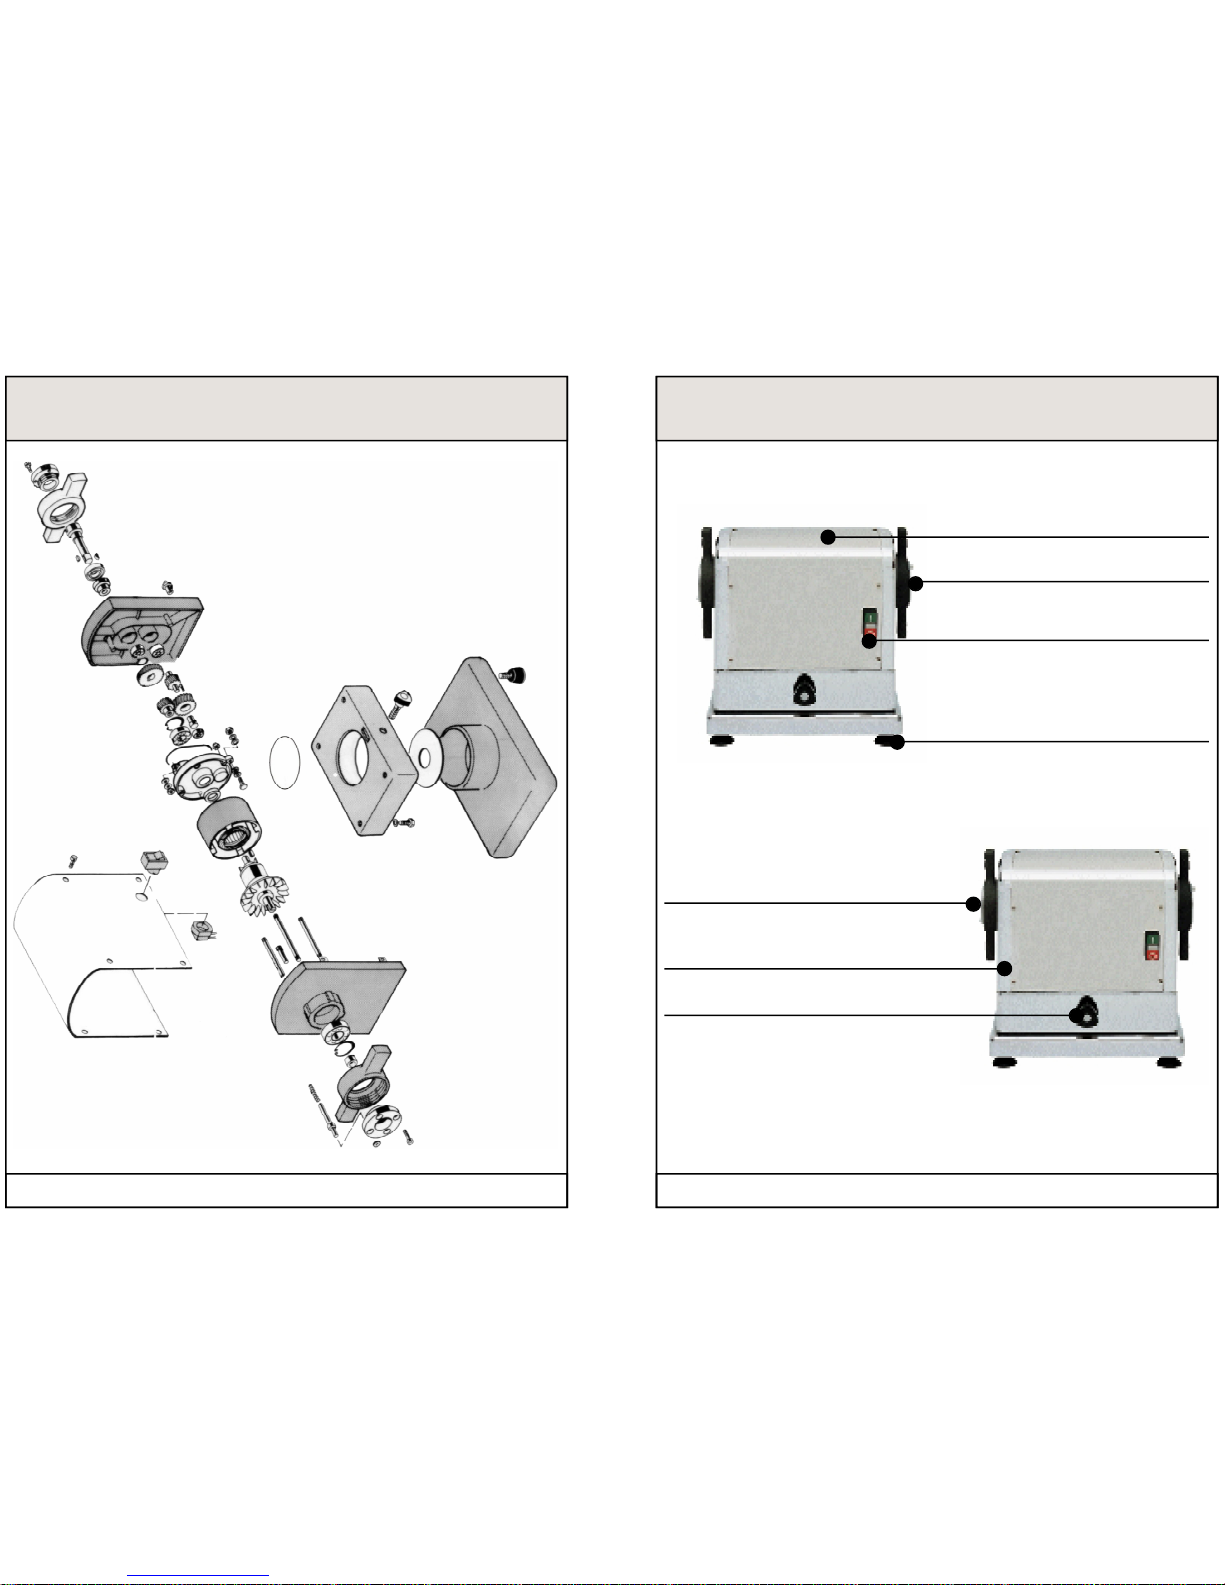
Il Biriduttore èdotato di due innesti con velocitàdifferenti: la presa diretta che gira a
1'400 giri/min. e la presa ridotta che gira a 180 giri/min.
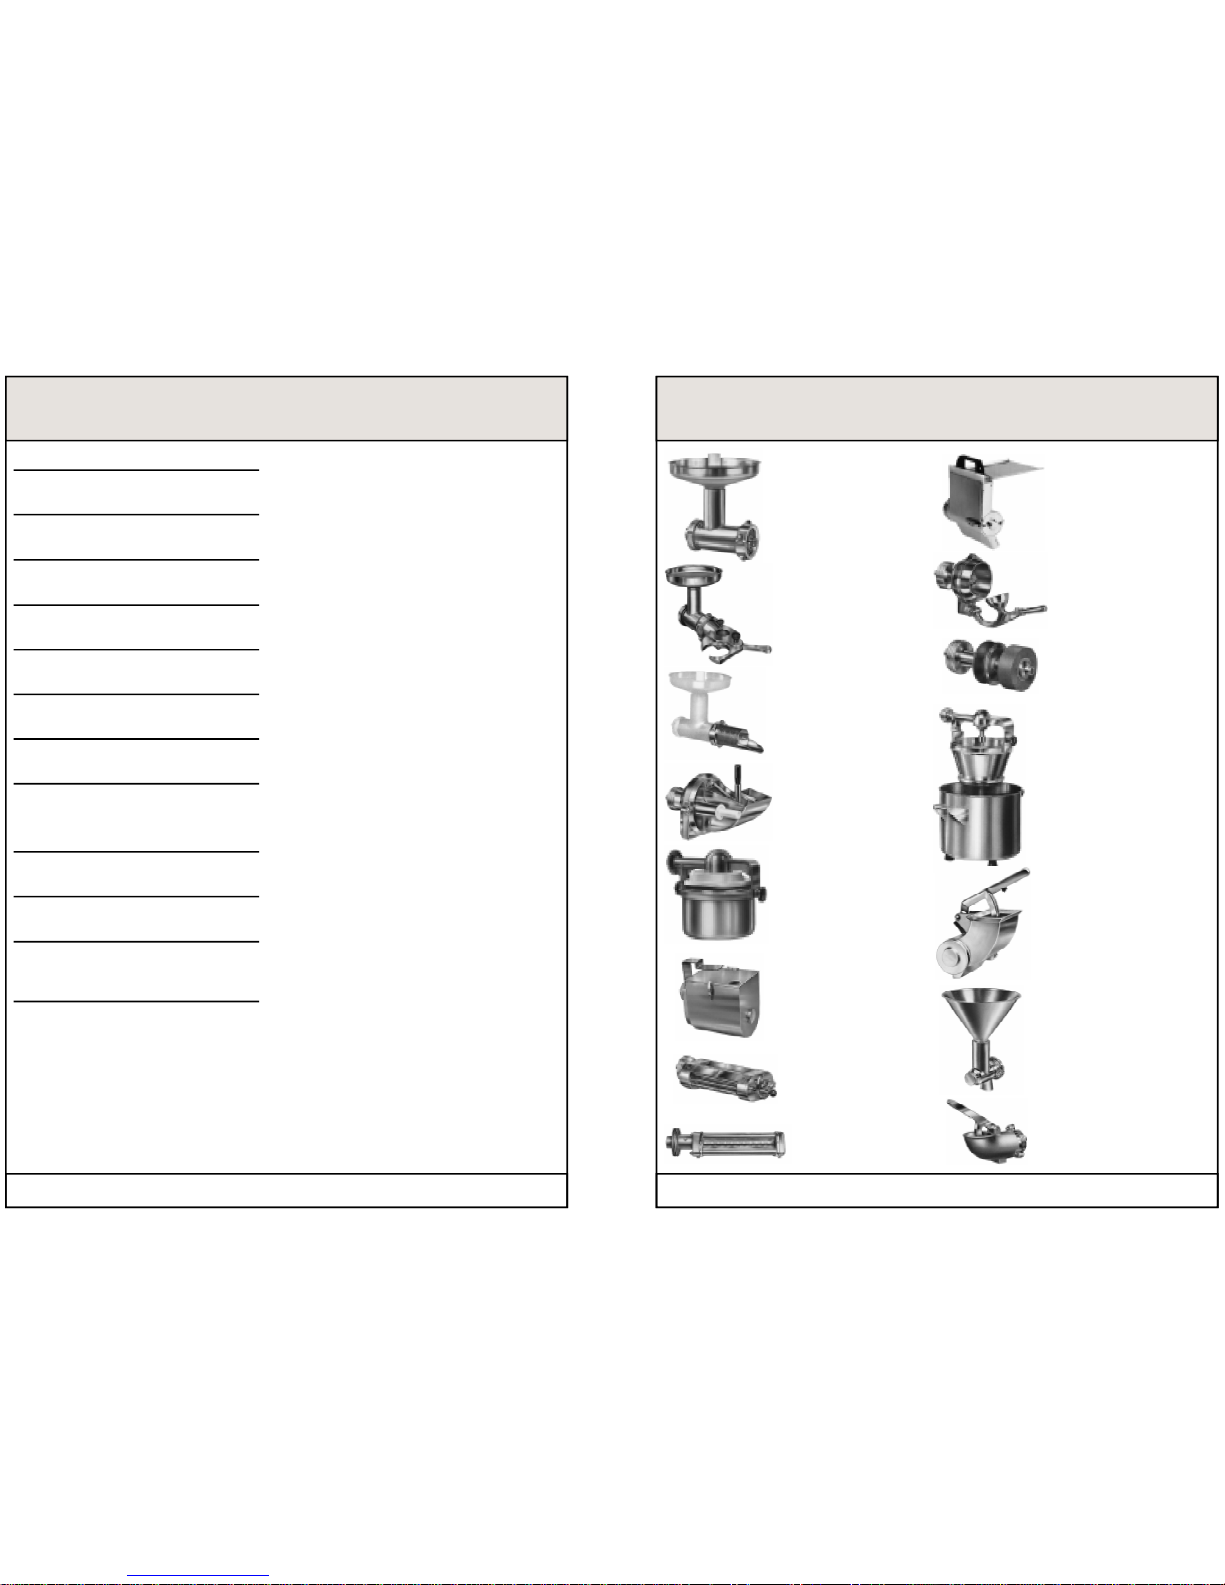
L'innesto in presa diretta èpredisposto unicamente per il fissaggio degli Utensili
Grattugia, Macinacaffèe Tritaghiaccio. Tutti gli altri Utensili si montano sull'innesto
in presa ridotta. Il fissaggio degli Utensili all'innesto viene effettuato mediante l'ap-
posito volantino filettato che deve essere ruotato manualmente (senza I'ausilio di
utensili, martelli o pestacarne).
Fissare gli Utensili a motore spento ("OFF").
Nei modelli a 2 velocitàsi seleziona la velocitàdesiderata solo a motore fermo ("OFF")
e per mezzo dell'apposita manopola. Se la velocitàselezionata èla 2^, la rotazione
sarà1'400 giri/min. in presa diretta e 180 giri/min. in presa ridotta. Se invece si
seleziona la 1^ velocità, la rotazione sui due innesti saràdimezzata e quindi scende-
ràa 700 giri/min. in presa diretta e 90 giri/min. in presa ridotta.
La 1^ velocitàviene utilizzata unicamente quando si lavora con l'Utensile Sbattiuova
da 23 o 30 Lt. perchèil prodotto lavorato, amalgamandosi, diventa sempre piùcom-
patto ed ha bisogno di essere lavorato piùlentamente. Per tutti gli altri Utensili è
consigliabile lavorare con la 2^ velocitàche permette una maggiore produttività.
07 12
IF THE MOTOR DOES NOT OPERATE CORRECTLY, IT COULD BE THAT:
1) The feeding-plug is not well-taped into the socket of the main electric net.
-Retap the electric feeding-plug properly.
2) The main switch is "OFF".
-Turn it "ON".
3) One (or more) fuses of the main switch are broken.
-Check the fuses of the main switch.
4) The pressing-lever of the Grater Utensil is lifted up.
-Pull down the lever.
5) In the Utensil in use it has been introduced something that cause an effort
higher than in the normal working conditions.
-Disconnect the Universal-machine from the main electric line and remove the product
that causes the effort.
6) The thermal-protection has intervented in cause of an overload of work.
-Hold on few minutes that the motor gets colder.
WARNING: If, after having verified the previous points, the malfunction persists,
contact the Customer Servicing Center that will be indicated to You from the Supplier
of the equipment in Your possession.
WARNING: Nobody has the right to disassemble the equipment looking for demages;
the penalty is the immediate expiration of the guarantee.
To alienate the equipment subject of the present "user manual”, it is
recommended to respect the following advices:
* DISCONNECT THE EQUIPMENT FROM THE MAIN ELECTRIC NET.
* CUT THE ELECTRIC-FEEDING WIRE OF THE SAME.
* DO NOT LEAVE SCRAPS IN FORBIDDEN AREAS.
* ENTRUST THE DESTRUCTION TO SPECIALIZED FIRMS, AUTHORIZED TO
SWALLOW THE MATERIALS/COMPONENTS OF THE EQUIPMENT.
DEMOLITION ON THE EQUIPMENT

11 08
WORKINGGUASTI E MALFUNZIONAMENTI
SE IL MOTORE NON SI AZIONA, LE CAUSE POTREBBERO ESSERE:
1) La spina di alimentazione non èinserita correttamente nella presa della rete
di distribuzione elettrica principale.
-Reinserire la spina correttamente.
2) L'interruttore generale non èinserito "ON".
-Inserire l'interruttore generale su "ON".
3) Uno o piùfusibili dell'interruttore generale sono interrotti.
-Controllare i fusibili dell'interruttore generale.
4) Sul Biriduttore èmontato l’Utensile Grattugia e la leva premente non èab-
bassata, quindi il microinterruttore di sicurezza non dàil consenso per l’avvio.
-Abbassare la leva premente e riprovare.
5) Nell’Utensile in uso èstato introdotto del materiale che provoca uno sforzo
superiore alle normali condizioni di lavorazione.
-Scollegare il Biriduttore dall’alimentazione elettrica, smontare l’Utensile in uso ed
estrarre manualmente il prodotto che ha causato il blocco.
6) E' intervenuto il termico salvamotore a causa di un sovraccarico di lavoro.
-Attendere qualche minuto che il motore si raffreddi.
ATTENZIONE: Se dopo aver verificato i precedenti punti il malfunzionamento persi-
ste, contattare il Centro Assistenza che Vi saràsegnalato dal fornitore del macchi-
nario in Vostro possesso.
ATTENZIONE: Nessuna persona non autorizzata deve accedere all'apparecchiatu-
ra alla ricerca di guasti, pena la scadenza immediata della garanzia.
Per alienare il macchinario oggetto del presente "manuale dell'utilizzatore", si
raccomanda di rispettare le seguenti avvertenze:
* SCOLLEGARE IL MACCHINARIO DALL'IMPIANTO DI DISTRIBUZIONE ELETTRI-
CA PRINCIPALE.
* TAGLIARE IL CAVO DIALIMENTAZIONE ELETTRICA
* NON ABBANDONARE I ROTTAMI IN ZONE VIETATE.
* AFFIDARE LA DEMOLIZIONE A DITTE AUTORIZZATE ALLO SMALTIMENTO DEI
MATERIALI COMPONENTI IL PREDETTO MACCHINARIO.
WORKING:
This equipment is only destined to the use for which it has been expressly conceived,
and precisely to link special Utensils for the food preparation. Each other use,
particularly the linking of Utensils manufactured from other Firms, has to be considered
improper and then dangerous.
This equipment must only be used from personnel trained to use the same.
Connect the feeding-plug to the socket of the main electric net.
Press the start push-button "I" (green) and ascertain Yourself that the rotation sense
of the motor-shaft is the same as indicated by the adhesive-arrow placed nearby the
reduced-side clutch (Iooking the reduced-side clutch, the motor-shaft must turn
counterclockwise).
If the motor-shaft turns the wrong way, please consult chapter "CHANGlNG THE
VOLTAGE AND THE ROTATION" (Page 14).
To stop the motor press the stop push-button "O" (red).
If the motor does not operate correctly, please consult chapter "BREAKDOWNS AND
MALFUNCTIONS" (Page 12).
The Double-Hub Universal-Machine is provided with two clutches with different
speeds: the direct-side clutch that turns at 1'400 rpm. and the reduced-side clutch
that turns at 180 rpm.
The direct-side clutch is only predisposed to link the Grater Utensil, the Coffee-mill
Utensil and the Ice-crusher Utensil. AlI other Utensils have to be linked to the reduced-
side clutch. The fixing of the Utensils is obtained by means of the special locking-
handle-wheel that must be tight manually, without using any utensil (hammers, etc.).
Fix the Utensils only when the motor is off-working.
On the two-speeds models the rotation speed can be halved: if the selected speed
is the 2nd, the rotation will be 1'400 rpm on the direct-side cluutch and 180 rpm on
the reduced-side clutch. If the selected speed is the 1st, the rotation will be 700 rpm
on the direct-side clutch and 90 rpm on the reduced-side clutch.
The 1st speed is only used with the Planetary-Mixer Utensil 23 or 30 Lt. because the
product, while worked, gets more compact and it needs to be worked slowliest. For
alI other Utensils it is suggested to work with the 2nd speed that is more productive.
DEMOLIZIONE DEL MACCHINARIO

DAT I DI TAR G A MO T O R DATA -P L AT E
09 10
Prima di procedere a qualsiasi operazione di pulizia o manutenzione, si raccoman-
da di scollegare la spina di alimentazione dall'impianto di distribuzione elettrica prin-
cipale.
Per la pulizia esterna della macchina èsufficiente utilizzare uno strofinaccio inumi-
dito con acqua: mai usare solventi o prodotti abrasivi.
AT T E N ZIO N E : non lavare il Biriduttore con getti d'acqua diretti e ad alta pressione.
E’buona norma sostituire l’olio del riduttore di velocitàogni sei mesi di funziona-
mento. Per questa operazione èsufficiente svitare il tappo dell’olio (spalletta lato
riduzione) con una chiave da 17mm. ed inclinare la macchina in avanti per for fuoriu-
scire l’olio esausto; quindi, dopo aver posizionato la macchina in verticale (con il
foro dell’olio rivolto verso l’alto), introdurre 200gr. di olio ISO VG 460 e riavvitare il
tappo.
L'utilizzo di ricambi non originali puòcompromettere seriamente il buon funziona-
mento dell'apparecchiatura ed èquindi da ritenersi improprio e pericoloso.
Il costruttore declina qualsiasi responsabilitàderivante dall'utilizzo di particolari o
ricambi non originali.
V - Hz - ~W
B efore proceeding a ny cleanlines s or ma intenance operation, it is recommended to
dis c onne ct the e le c tric fe e ding-plug from the ma in ele c tric ne t.
To c lea n the externa l s tructure of the U nive rs a l-ma chine it is s ufficient us ing a mois ten
dus ter: do not us e s olvents or a bras ive s .
W A R N I N G : do not cle an the U nivers a l-ma chine with dire ct (a nd/or high-pres s ure)
wa ter-s pouts .
It is s ugge s ted to s obs titute the oil of the s pee d-re duc er e ac h s ix months of working.
F or this operation it is s ufficie nt to uns crew the oil-tap (reduced-s ide s houlder)with a
s pa nner 17 mm. a nd inc line the e quipme nt s o to le t the worn oil c omes out; tha n,
a fter having pos itioned the equipment vertica lly (with the oil-hole ups ide) , introduce
200 gr. of oil I S O V G 46 0 a nd res c re w the oil-ta p.
T he us e of non genuine s pare-pa rts c ould s erious ely compromis e the functionnality
of the equipme nt a nd it ha s to be cons ide re d imprope r a nd the n da nge rous .
T he manufa cturer declines each res pons ability for probable dema ges ca us ed from
the us e of non genuine s pare- parts .
P UL IZIA E MANUT E NZIONE C L E A NL INE S S A ND MA INT E NA NC E
MODE L L O
C OL L E G AME NT O E L E T TR IC O
P O T E NZA MO T O R E
C ODIC E
NOME DE L L A MAC C HINA
V - Hz - ~W
MODE L
E LE C T R IC C ONNE C T ION
MO T OR P O W E R
C ODE
NAME OF T HE E QUIP ME NT
This manual suits for next models
1
Table of contents
Other mastro Kitchen Appliance manuals