Matrox Extio Series User manual

www.matrox.com/graphics
Graphics Solutions for Professionals
User Guide
10970-301-0110
2007.03.07
matrox
Extio Series
Extio F1220 • Extio F1400 • Extio F1420
ENGLISH

2 Matrox Extio Series – User Guide
Overview
Thank you for purchasing a Matrox Extio product. This product is a complete remote graphics
solution that supports up to 2 or 4 computer monitors at a time. As a remote graphics solution, it
separates the CPU and hard disks of your system from the computer peripherals – monitors,
keyboard, mouse, and audio hardware.
Hardware supplied
Hardware required (sold separately)
Software available (for Windows 2000, Windows XP, Windows Server
2003, Windows XP Professional x64, and Windows Vista)
!
Matrox PowerDesk-SE –
to use your Matrox product
!
Audio drivers
– to use the audio hardware on your Matrox product
!
Other software –
see the CD-ROM
Readme
file
Matrox Extio remote graphics unit
(Extio F1420 shown) 4 DVI-to-HD15 adapters
(Extio F1400/F1420 only) Power supply*
* Multiple power cables are provided for international support.
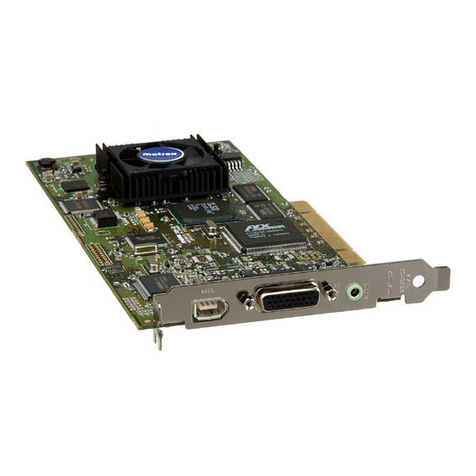
Matrox PCI or PCIe interface card
(PCI card shown) Dual LC optical cable
(50 µm/125 µm or 62.5 µm/125 µm)

4 Matrox Extio Series – User Guide
Hardware installation
This section describes how to install a Matrox interface card in your host computer. If your Matrox
interface card is already installed in your computer, skip to “Connection setup”, page 7. For
information specific to your computer, like how to remove its cover, see your system manual.
1Open your computer and
remove your existing graphics
card *
If a graphics card
isn’t
already installed in
your computer, skip to step 2.
a
Using
Add/Remove Programs
in the
Windows
Control Panel
, remove any
currently installed display drivers.
Restart your computer for the changes
to take effect.
After your computer restarts, you’re
prompted to install drivers for the new
graphics hardware detected. Click
Cancel
.
b
Turn off your computer and all peripherals such as your monitor or printer.
c
Open the computer and remove your existing graphics card. (If graphics hardware is
built into the motherboard of your computer, you may need to disable it manually after
your Matrox card is installed. For more information, see your system manual.)
WAR NING:
To avoid personal injury and to prevent damage to your computer or Matrox
hardware, turn off your computer, unplug it, and then wait for it to cool before you install
your Matrox product and touch any of the internal parts of your computer.
While your computer is turned off but still plugged in, some electrical current is supplied
to the motherboard. This current may prevent newly installed hardware from working
properly.
Also, static electricity can severely damage electronic parts. Before touching any electronic
parts, drain static electricity from your body (for example, by touching the metal frame of
your computer). When handling a card, carefully hold it by its edges and avoid touching its
circuitry.
* With multi-display mode, you may be able to use your existing graphics card. For Windows 2000/XP, see Windows 2000/XP
online help under “Install additional monitors”.
Matrox Extio Series – User Guide 5
2Choose an expansion slot for
your interface card
Most computers have different types of
expansion slots. Choose a PCI or PCI
Express (PCIe) ×1 slot, depending on the
type of Matrox card you have. If you have a
PCI card, your card supports both 64-bit
and 32-bit PCI slots. Your system manual
should identify the location of each type of
expansion slot in your computer.
3Insert your Matrox interface
card
a
Position your Matrox card over the
expansion slot you’ve chosen.
b
Push the card in firmly and evenly until
it’s fully seated in the slot.
c
Secure the bracket of your Matrox card
to the computer frame.
(64-bit)
(Back of computer)
(32-bit)
PCI
Express
slots
AGP slot
(×16)
(×1)
PCI
slots
Note:
If you’re using a PCI card in a 64-bit PCI slot, your choice of PCI slot may affect your
card or system performance. For more information, see your computer manual.
WAR NING:
Inserting your Matrox card
into the wrong type of slot could damage
your card, your computer, or both.
If you’re using a PCI interface card in a
64-bit PCI expansion slot, your card uses
only the part of your expansion slot closest
to the back of the computer.
PCI card
32-bit 64-bit
PCI Express card
×16
×1 ×4 ×8

6 Matrox Extio Series – User Guide
Your Matrox card is now installed.
Before restarting your computer
, first connect your Extio unit to
your computer, then connect your monitors and your peripherals to your unit (see “Connection
setup”, page 7).
After connecting
, restart your computer and install your Matrox software (see
“Software setup”, page 11).
WAR NING:
If your computer doesn’t restart after your Matrox card is installed, turn off
your computer to avoid damaging electronic parts. For troubleshooting information, see
page 13.

Matrox Extio Series – User Guide 7
Connection setup
This section describes how to connect monitors and other peripherals to your Matrox Extio unit.
Connection overview
Audio cables (stereo)
USB cables
Power cable
Monitor connectors
(4 DVI for Extio F1400/F1420,
2 DVI + 2 HD-15 for Extio F1220) USB cables
Optical cables
Audio cable
(stereo or SPDIF)
FireWire cables
(Extio F1220/F1420)

8 Matrox Extio Series – User Guide
Step-by-step connection setup
1Connect your unit to your
interface card
To connect your Extio unit to your interface
card, you need a dual LC optical cable (sold
separately).
Connect one end of your optical cable to the
optical connector of your interface card.
Connect the other end of your cable to the
optical connector on your unit. Make sure
your connectors are properly connected.
2Connect your monitors
Extio F1400/F1420
–
Connect your
monitors to the monitor connectors at the
back of your Extio unit.
If your monitors have DVI connectors,
connect them directly to the monitor
connectors at the back of your unit.
If your monitors have HD-15 connectors,
use DVI-to-HD15 adapters to connect your
monitors to the monitor connectors at the
back of your unit.
WAR NING:
Because the body of your Extio unit is used to disperse heat, it may become
warm to the touch. Make sure your unit is located in a well ventilated area and nothing is
blocking its ventilation holes.
Note:
The maximum length of optical
cable supported by your Matrox product is
250 meters/750 feet. For more
information, see “Product information”,
page 30.
Optical cable
Cable A
Cable B
Cable B
Cable A
Monitor
connector (DVI)
Monitor connector
(HD-15)
DVI-to-HD15
adapter

Matrox Extio Series – User Guide 9
Extio F1220
– Connect your monitors to the
monitor connectors at the back of your
Extio unit.
If your monitors have DVI connectors,
connect them directly to the DVI monitor
connectors (
A
) at the back of your unit.
If your monitors have HD-15 connectors,
connect them directly to the HD-15 monitor
connectors (
B
) at the back of your unit.
3Connect the power supply
Attach one end of the power supply cable
provided with your Matrox product to the
power connector on your Matrox product.
Plug the power supply cord into an electrical
outlet.
4Connect your input devices
(optional)
To use a keyboard or mouse, simply connect
a USB mouse or keyboard to one of the USB
connectors on your unit. There are 2 USB
connectors at the back of the unit and 4 at
the front.
Note
: While a monitor is connected to a
DVI connector on your unit, the
corresponding HD-15 connector is
disabled.
Monitor connector
(HD-15)
Monitor
connector (DVI)
Power supply
cable
USB connectors
Note:
Your USB keyboard and mouse are unavailable until Windows starts.

10 Matrox Extio Series – User Guide
5Connect your FireWire devices
(optional)
Extio F1220/F1420
– To use a FireWire
device, simply connect it to one of the 2
FireWire connectors at the front of the unit.
6Connect your audio devices
(optional)
Your unit has 2 input and 2 output audio
connectors. The 2 input connectors are
Line
in
()and
Microphone
().The2
output audio connectors are
Headphones
()and
Line out
( ). All audio
connectors support stereo jack connectors.
The
Line out
connector also supports
SPDIF
(Sony/Philips Digital Interface Format) mini-
plug optical connectors.
To connect an audio device to your unit:
a
Plug one end of your audio cable into the audio connector on your unit.
b
Plug the other end of the cable in your audio device. For information on the type of
connector supported by your audio device, see its documentation.
Your Matrox product is now installed. Restart your computer, and install your Matrox software (see
“Software setup”, page 11).
FireWire connectors
Audio connector
(SPDIF/Stereo)

Matrox Extio Series – User Guide 11
Software setup
This section describes how to install Matrox software for
Windows
2000
,
Windows Server 2003
,
Windows XP
,
Windows XP Professional
x64
, and
Windows Vista
.
You may need administrator rights to install certain software. For
more information, see Windows documentation or contact your
system administrator.
1Install hardware drivers
Windows detects the hardware in your Matrox Extio unit as soon as the connection between
the interface card and the unit is established. Depending on the version of your Matrox
product, the drivers you need to install vary. If drivers for the hardware in your unit haven’t
been previously installed, Windows prompts you to install a driver for each component.
Follow the on-screen instructions. (The Matrox 32-bit and 64-bit display drivers are in the
Win2kXP
and
WinXP64
folders of your Matrox installation CD-ROM.)
2Install optional software
After your computer has restarted, insert (or reinsert) the Matrox installation CD-ROM in
your CD-ROM drive – the CD-ROM installation program automatically starts.
*
This
program shows you a list of items you can install and information you can access. Follow the
on-screen instructions.
Note:
This guide has references that are specific to the Matrox installation CD-ROM. If your Matrox
product wasn’t packaged by Matrox (for example, if it was included with your computer), your
product may not include this CD-ROM.
If you don’t have this CD-ROM, certain references in this guide may not reflect the software you
have. For more information, see other software documentation provided by your system vendor.
Note: Windows XP SP2 (Service Pack 2)
– Windows may install a Matrox display driver
unsupported by your product when the hardware in your unit is detected. If you aren’t
prompted to install a display driver,
DON’T RESTART
your system. Manually install the
display driver on your Matrox installation CD-ROM before you restart.
* If Windows doesn’t automatically start the setup program, you can start it manually from the root folder of the CD-ROM.

12 Matrox Extio Series – User Guide
3Set up your display software
Use Matrox PowerDesk software to change certain display settings or access Matrox features.
To access PowerDesk, click its icon ( ) on your Windows taskbar. To see the PowerDesk
icon in Windows XP/Vista, you may need to click the
Show hidden icons
button ( ) on
your Windows taskbar. For more information on how to use Matrox PowerDesk, see the
online help.
Windows Server 2003
– To be able to use PowerDesk Multi-Display Setup with your Matrox
product, you need to enable hardware acceleration on all the displays supported by your
Matrox product. If hardware acceleration isn’t enabled on a display, PowerDesk may not
work properly.
To enable hardware acceleration, right-click your Windows desktop background, then click
Properties
"
Settings
"
Advanced
"
Troubleshoot
. Set the
Hardware Acceleration
slider to
Full
.
4Configure your audio settings
If you’ve installed an audio driver for your Matrox product, make sure the audio hardware in
your unit is enabled.
a
Open the Windows
Audio
property sheet:
Windows 2000
– Click
Start
"
Settings
"
Control Panel
"
Multimedia
or
Sounds and
Multimedia
(double-click)
"
Audio
.
Windows XP
– Click
Start
"
Settings
*
"
Control Panel
"
Sounds, Speech, and Audio
Devices
*
"
Sounds and Audio Devices
"
Audio
. (* Depending on your configuration of
Windows, this part of the step may not be necessary.)
Windows Vista
– Click
Start
"
Settings
*
"
Control Panel
"
Hardware and Sound
*
"
Sound
. (* Depending on your configuration of Windows, this part of the step may not
be necessary.)
b
Windows 2000/XP
– Under
Sound playback
and
Sound recording
, select
Matrox Audio
Device
as the default device. Make sure
Use only default devices
is enabled.
Windows Vista
– In the
Playback
property sheet, select
Speakers (Matrox Audio Device)
,
then click
Set Default
. This also enables
Digital Output (Matrox Audio Device)
.
In the
Recording
property sheet, select the
Matrox Audio Device
you want to use, then
click
Set Default
.
c
Cli ck
OK
.
Note:
If audio hardware is built into the motherboard of your computer, you may need to
disable it manually before you can use the audio hardware in your Matrox Extio unit.

Matrox Extio Series – User Guide 13
Troubleshooting
Basic procedures
This section explains basic procedures that are referred to by some troubleshooting items in this
guide.
Restarting in VGA mode
Windows 2000/XP/Vista
– What follows is information on how to restart your computer in
VGA
mode
.
1
Click
Start
"
Shut Down
"
Restart
"
OK
* to restart your computer. (* Depending on
your version and configuration of Windows, this part of the step may not be necessary.)
If your primary monitor is unusable, see your system manual for information on how to
restart your computer using a hardware control.
2
Before
Windows starts, press [F8] for the Windows startup menu to appear.
3
Select “VGA mode” (or “Low resolution mode”), then press [Enter].
Graphics – Main troubleshooting
This section addresses possible problems that could prevent you from using your computer.
Problem Computer doesn’t restart after Matrox card is installed
1
Cause
Your Matrox card may not be properly installed.
1
Solution
Make sure your Matrox card is properly installed. Specifically, make sure the card is firmly
inserted in its expansion slot and that all connections to it are firmly in place. For more
information, see “Hardware installation”, page 4.
2
Cause
There may be unsupported graphics hardware in your computer.
1
Solution
If an unsupported graphics card is plugged into an expansion slot, remove it.
Note:
If your system stops responding while it’s in VGA mode, select “Safe mode”
instead.

14 Matrox Extio Series – User Guide
2
Solution
If graphics hardware is built into your computer motherboard, your system may not have
automatically disabled it when you inserted your Matrox card. Check your system manual for
instructions on how to disable your computer built-in graphics hardware.
3
Cause
The problem may be specific to the motherboard in your computer.
1
Solution
There may be a software update available for your motherboard. To find out what
motherboard model your computer is using, see your system manual. For more information,
contact the manufacturer of your motherboard or computer. Many motherboard or
computer manufacturers have software updates available on their Web site.
4
Cause
Your Extio unit may not be properly connected to the interface card.
1
Solution
Interface card –
While your computer is
turned on, make sure both the transmission
(
TX
) and reception (
RX
) indicator lights on
the bracket of your interface card are green.
If the reception indicator is red and you have
separate optical cables, switch the cables in
the optical connector of your Matrox
product. For more information, see
“Connect your unit to your interface card”,
page 8.
If the transmission indicator is red, your optical connector may be loose. Make sure your
optical connector is firmly in place by pushing it into its housing. If the light doesn’t change
to green, contact your Matrox representative.
2
Solution
Unit –
While your unit is turned on, make
sure the reception indicator light is off. This
indicator light is inside your unit next to the
optical connector. If the indicator light is on
(red) and you have separate optical cables,
switch the cables in the optical connector of
your Matrox product. For more
information, see “Connect your unit to your
interface card”, page 8.
5
Cause
Your optical cable may be defective.
1
Solution
Change your optical cable.
Reception indicator light
Optical connector
Transmission indicator light
Reception indicator light
Optical connector

Matrox Extio Series – User Guide 15
Problem Wrong color balance, screen image off-center, or no picture at all
1
Cause
Windows XP Service Pack 2
– Windows Service Pack 2 has installed a version of the Matrox
display driver that doesn’t support your Matrox product.
1
Solution
You need to install a display driver that supports your Matrox product. To reinstall the display
driver, you first need to restart your computer in VGA mode (see “Restarting in VGA mode”,
page 13). While in VGA mode, install the Matrox display driver on the installation CD-ROM
provided with your product. If no CD was provided with your product, see the Matrox
Technical Support Web site (www.matrox.com/graphics/support/drivers) to download a
display driver.
2
Cause
Your unit or your host computer may be turned off.
1
Solution
Make sure the power supply is properly connected to your unit. Make sure both your unit
and your host computer are turned on.
3
Cause
Your interface card may not have been detected. Also, your computer may have re-enabled
your built-in graphics hardware.
1
Solution
To disable your built-in graphics card and re-enable your interface card:
1
Connect a monitor to the graphics connector at the back of your monitor.
2
Disable your built-in graphics hardware.
Windows 2000/XP
–
a
Click
Start
"
Settings
*
"
Control Panel
"
Performance and Maintenance
*
"
System
(double-click*)
"
Hardware
"
Device Manager
. (* Depending on your
version and configuration of Windows, this part of the step may not be necessary.)
b
Double-click the
Graphics Adapter
list item to expand it, then double-click the
name of your built-in graphics hardware.
c
Under
Device usage
, select
Do not use this device (disable)
.
d
Click
OK
to accept the changes, then close the Device Manager dialog box.
Windows Vista
–
a
Click
Start
"
Settings
*
"
Control Panel
"
Hardware and Sound
*
"
Device
Manager
"
Continue
*. (* Depending on your version and configuration of
Windows, this part of the step may not be necessary.)
b
Double-click the
Graphics Adapter
list item to expand it, then double-click the
name of your built-in graphics hardware.
c
Click
Driver
"
Disable
"
Yes
.
d
Click
OK
, then close the Device Manager dialog box.

16 Matrox Extio Series – User Guide
3
Shut down and unplug your computer. Disconnect all other peripherals from your
computer for at least 1 minute, then restart your computer.
4
Cause
Your monitor may not be properly connected.
1
Solution
Make sure your monitor is properly connected to the connector on your unit (see “Connect
your monitors”, page 8).
2
Solution
Make sure the monitor power cable is firmly in place.
3
Solution
Make sure the connection to the back of the monitor is firmly in place.
5
Cause
If your monitor supports multiple input sources (analog/digital), it may be configured to use
the wrong source.
1
Solution
Make sure your monitor is using the correct input source. For more information on selecting
the input source for your monitor, see your monitor documentation.
2
Solution
Change your connection setup to use a different input source. For more information, see
“Connect your monitors”, page 8.
Problem After the startup screen, or after display settings are changed, the
screen image is garbled or unusable
(blank screen, rolling or overlapping screen images)
1
Cause
Analog monitors only –
The Matrox display driver may be trying to use settings your
monitor doesn’t support. This can happen if the display resolution was changed to one your
monitor doesn’t support or if the monitor connected to your computer was changed without
changing the display or monitor settings in the software.
1
Solution
Make sure your monitor supports the display mode currently in use. After installing your
Matrox product, your system is usually using the preferred display mode for your monitor or
a display mode of 800 × 600 at 60 Hz.
WARN ING :
If incorrect software monitor settings are applied,
some
monitors can be
permanently damaged. For more information, see your monitor manual.
Note:
In multi-display mode, all the monitors connected to your unit use the samemonitor
settings. While using Windows display controls, all monitors use the settings of the main
monitor (the monitor connected to connector
#1
of your Matrox product). While using
advanced Matrox display controls, the monitor settings for your monitors are determined
by Matrox PowerDesk. Make sure you’re using monitor settings supported by your
monitors.

Matrox Extio Series – User Guide 17
2
Solution
If none of your displays are available, reinstall your Matrox display drivers. For more
information on reinstalling your display driver, see the following solution.
2
Cause
Files on your system may have been deleted or corrupted.
1
Solution
Remove, then reinstall Matrox software:
Windows 2000/XP/Vista –
1
If your primary display is currently unusable, restart your computer in VGA mode (see
“Restarting in VGA mode”, page 13).
2
To remove Matrox software:
Windows 2000/XP
–
a
Click
Start
"
Settings
*
"
Control Panel
"
Add/Remove Programs
(double-click*)
Matrox Driver
"
Change/Remove
"
Yes
. (* Depending on your version and
configuration of Windows, this part of the step may not be necessary.)
b
Click
No
if you’re asked to restart your computer.
c
Click
Matrox PowerDesk-SE
"
Change/Remove
"
Yes
.
Windows Vista
–
a
Click
Start
"
Settings
*
"
Control Panel
"
Programs
*
"
Program and Features
"
Matrox Driver
"
Uninstall
"
Yes
. (* Depending on your version and configuration
of Windows, this part of the step may not be necessary.)
b
Click
No
if you’re asked to restart your computer.
c
Click
Matrox PowerDesk-SE
"
Uninstall/Change
"
Yes
.
3
Restart your computer.
4
After removing Matrox software, install the latest display driver for your Matrox product.
You may also need to reinstall other Matrox software.
Note:
Before removing software, make sure you have all the necessary files to reinstall
software that may still be needed. Also, make sure the display driver you reinstall supports
all
Matrox products in your computer.
Note:
Windows 2000/XP/Vista –
You may need administrator rights to remove certain
software. For more information, see Windows documentation.

18 Matrox Extio Series – User Guide
Graphics – Extra troubleshooting
The following are extra troubleshooting items related to your graphics hardware.
Problem Can’t use Windows, Windows reports a configuration error, and/or
can’t install or uninstall display driver
1
Cause
The problem may be specific to the motherboard in your computer.
1
Solution
There may be a software update available for your motherboard. To find out what
motherboard model your computer is using, see your system manual. For more information,
contact the maker of your motherboard or computer. Many motherboard or computer
manufacturers have software updates available on their Web site.
2
Cause
Files on your system may have been deleted or corrupted.
1
Solution
Remove, then reinstall Matrox software. For more information, see page 17.
Problem Monitor settings aren’t automatically detected
1
Cause
Your monitor may not be Plug-and-Play. Most new monitors are Plug-and-Play but many
older ones aren’t. Software can’t automatically detect settings for monitors that aren’t Plug-
and-Play.
1
Solution
Restart your computer. If your monitor is a Plug-and-Play (DDC) monitor, it should be
automatically detected by the software.
Problem Built-in network hardware doesn’t work after interface card is
installed
1
Cause
The installation of an interface card may have caused your computer to reallocate system
resources.
1
Solution
Try reinstalling your network drivers.
Note:
Windows 2000/XP/Vista
– You may need administrator rights to install certain
software. For more information, see Windows documentation.
WAR NING:
If incorrect software monitor settings are used, your display may become
unusable and
some
monitors can be permanently damaged. For more information, see
your monitor manual.

Matrox Extio Series – User Guide 19
2
Solution
Try moving your Matrox interface card to another PCI (or PCIe depending on your product)
slot in your computer. For instructions on how to safely install your Matrox card, see
“Hardware installation”, page 4.
Problem Using multiple displays under Windows 2000/XP/Vista, program
doesn’t work with your Matrox product
1
Cause
Your Matrox product may not be controlling your primary display. The graphics hardware
that controls your primary display is the one that first displays information when you restart
your computer.
A program that doesn’t recognize multiple displays may not work with your Matrox product
unless it’s controlling your primary display.
Your computer BIOS (Basic Input/Output System) and the slot type (AGP, PCI, or PCIe – see
“Choose an expansion slot for your interface card”, page 5) of each graphics card and of your
interface card help determine which graphics hardware controls your primary display.
1
Solution
If you’re having problems with a program that can be moved on your Windows desktop, run
this program on your primary display. Make sure the program window doesn’t overlap any
other display. If the program doesn’t work with the graphics hardware controlling your
primary display, or you want your Matrox product to control your primary display, see the
other solutions.
2
Solution
Change the configuration of your computer BIOS so that the slot type of your interface card
has priority for controlling the primary display. For information on how to change your
computer BIOS settings, see your system manual.
If your computer BIOS doesn’t let you select which slot type has priority for becoming the
primary display, a BIOS update may be available to let you do this. (The BIOS of most
computers can be updated with software.) For a possible BIOS update for your computer,
contact your system vendor.
3
Solution
If there’s a graphics controller built into the motherboard of your computer, by changing
your computer BIOS settings, you may be able to change which device controls your primary
display. For more information, see your system manual.
4
Solution
If you don’t need to use the graphics card that’s controlling your primary display, remove it
from your computer. If your primary display is controlled by the motherboard of your
computer, see your system manual for information on how to disable this graphics controller.
2
Cause
The program you’re using may not work properly with systems using more than one display
at a time.

20 Matrox Extio Series – User Guide
1
Solution
An update may be available for the program you’re using. This update may fix problems this
program has with multi-display systems. For more information, contact the software
distributor for the program you’re using.
Problem Not all graphics hardware in the computer is fully supported
(Software doesn’t work with a certain graphics card, or another
graphics card doesn’t work at all)
1
Cause
If you’re using graphics hardware other than the graphics hardware in your Matrox Extio
product, your display driver may not support both the graphics hardware in your Matrox
product and the one in your computer.
Under Windows 2000/XP/Vista, you can use different display drivers for different products.
Software that depends on a specific display driver feature may not work if your graphics
hardware is using different display drivers.
1
Solution
If a graphics card isn’t supported, you may need to remove it. If there’s graphics hardware
built into the motherboard of your computer that’s not supported by your software, see your
system manual for information on how to disable this graphics hardware.
2
Cause
Windows 2000/XP/Vista –
If the Windows method for display driver installation was used
(instead of running the setup program included with your Matrox display driver), the driver
may not be installed for all the Matrox products it supports.
1
Solution
Run the setup program included with the Matrox display driver. The setup program
automatically installs the display driver for each Matrox product it supports.
Problem In multi-display mode, displays aren’t numbered consecutively
1
Cause
If you’re using graphics hardware other than the graphics
hardware in your Matrox Extio product, the display numbering
may not be consecutive for the displays of your Matrox product.
Display numbering depends on your graphics hardware and the BIOS settings of your
computer.
1
Solution
Windows 2000/XP/Vista –
Move the displays in Windows.
1
Windows 2000/XP –
Right-click your Windows desktop background, then click
Properties
"
Settings
.
Note:
If your Matrox product was provided by the manufacturer of your computer, check
the Web site of that manufacturer for the latest display driver. A display driver provided by
the manufacturer of your computer is more likely to be tested with your computer model.
This manual suits for next models
3
Table of contents
Other Matrox Computer Hardware manuals

Matrox
Matrox TripleHead2Go Analog Edition User manual

Matrox
Matrox RT.X2 User manual

Matrox
Matrox ATC RG-200DL User manual

Matrox
Matrox RT.X2 User manual

Matrox
Matrox MXO2 Mini User manual

Matrox
Matrox Solios eV-CL Assembly Instructions

Matrox
Matrox RT.X100 Xtreme User manual

Matrox
Matrox Meteor-II User manual

Matrox
Matrox Mojito MAX User manual

Matrox
Matrox Rainbow Runner Operation manual