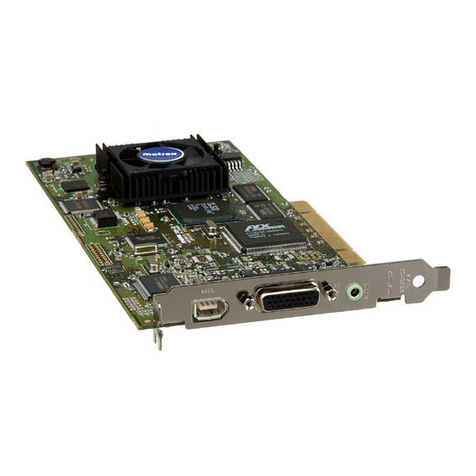
Matrox DigiSuite User manual

DigiSuite
Installation Manual
June 20, 1997
10477-MT-0100

Matrox®, DigiSuite®, and Movie-2®are registered trademarks of Matrox Electronic Systems Ltd.
DigiMix™, DigiMotion™, DigiSDK™, DigiTools™, DigiUtils™, DigiVid™, and Marvel Millennium™ are
trademarks of Matrox Electronic Systems Ltd.
MGA™ and MGA Millennium™ are trademarks of Matrox Graphics Inc.
3D Studio MAX™ is a trademark of Autodesk, Inc.
Acrobat®Reader Copyright© 1987-1996 Adobe SystemsIncorporated.Allrights reserved.Adobe and
AcrobataretrademarksofAdobeSystemsIncorporated,whichmayberegisteredincertainjurisdictions.
Adobe Premiere™ is a trademark of Adobe Systems Incorporated.
DigiLinx™ is a trademark of Miranda Technologies Inc.
Genie™ is a trademark of Pinnacle Systems Inc.
Inscriber®is a registered trademark of Image North Technologies Inc.
Inscriber/CGSupreme™andVideoClipboardforDigiMix™aretrademarksofImageNorthTechnologies
Inc.
Intel®and Pentium®are registered trademarks of Intel Corporation.
Microsoft®and Windows NT®are registered trademarks of Microsoft Corporation.
ActiveMovie and Video for Windows™ are trademarks of Microsoft Corporation.
Ulead MediaStudio™ is a trademark of Ulead Systems, Ltd.
All other nationally and internationally recognized trademarks and tradenames are hereby
acknowledged.
© Copyright Matrox Electronic Systems Ltd., 1997. All rights reserved.
Disclaimer: Matrox Electronic Systems Ltd. reserves the right to make changes in specifications at any
time and without notice. The information provided by this document is believed to be accurate and
reliable. However, no responsibility is assumed by Matrox Electronic Systems Ltd. for its use; nor for
any infringements of patents or other rights of third parties resulting from its use. No license is granted
under any patents or patent rights of Matrox Electronic Systems Ltd.
Matrox Electronic Systems Ltd.
1055 St. Regis Blvd., Dorval, Quebec, Canada H9P 2T4
Tel: (514) 685-2630 Fax: (514) 685-2853 World Wide Web:
www.matrox.com

i
License, Warranty, and Service
Matrox Software License Agreement for Single-user Products
PLEASE READ CAREFULLY: By installing the software, you indicate your acceptance of these terms. If
you do not accept the product under these terms, please return the package unopened.
This Matrox software, any included sample images and other files (the “Software”), is copyrighted by Matrox
Electronic Systems Ltd. All rights are reserved. The purchaser is granted a license to use the Software only,
subject to the following restrictions and limitations.
1. The license is to the original purchaser only, and is not transferrable without written permission of Matrox.
2. TheoriginalpurchasermayusetheSoftwareonasinglecomputerownedorleasedbytheoriginalpurchaser.
He or she may not use the Software on more than a single machine, even if he or she owns or leases more
than one machine, without written consent of Matrox.
3. The original purchaser maymake back-up copies of the Software for hisor her ownuse only, subject to the
use limitations of this license.
4. The original purchaser may not engage in, nor permit third parties to engage in, any of the following:
a. Providing or disclosing the Software to third parties.
b. Providing use of the Software in a computer service business, network, time-sharing, multiple CPU, or
multi-user arrangement to users who are not individually licensed by Matrox.
c. Making alterations or copies of any kind in the Software (except as specifically permitted above).
d. Attempting to disassemble, decompile, or reverse-engineer the Software in any way.
e. Granting sublicenses, leases, or other rights in the Software to others.
f. Making copies, or verbal or media translations of the user’s guide.
g. Making telecommunication data transmissions of the Software.
Matrox reserves the right to terminate this license if there is a violation of its terms or default by the original
purchaser. Upon termination, for any reason,all copiesof theSoftware mustbe immediately returned to Matrox,
and the original purchaser shall be liable to Matrox for any and all damages suffered as a result of the violation
or default.
Limited Software Warranty
Matrox warrants to you that, for a period of ninety (90) days normal use from your date of purchase, that:
1. The media on which the Software is furnished and the documentation are not defective;
2. The Software is properly recorded upon the provided media;
3. The documentation is substantially complete and contains all the information Matrox deems necessary to
use the Software;
4. The Software functions substantially as described in the documentation.
Matrox’s entire liability and your exclusive remedy shall be the replacement of the Software or documentation
not meeting these warranties, which is returned to Matrox or an authorized dealer, together with a copy of your
paid receipt.The above is the only warranty of any kind, either express or implied, including,but not limited to
theimplied warranties of merchantability and fitness fora particular usethatis made by Matrox on this Licensed
Software. In no event shall Matrox be liable to you or to any third party for consequential, special, indirect, or
incidental damages that you may incur as a result of using the Licensed Software, including, but not limited to,
loss of data, or information of any kind that you may experience.

ii
License, Warranty, and Service
End-user Registration
Before using your Matrox DigiSuite product, please take a moment to fill in the information on the enclosed
End-user Registration Form,and fax or mail a copy to Matrox as soon aspossible. The information youprovide
will assist Matrox to quickly diagnose and correct any problem that might arise when using the product. Only
registered end users are entitled to technical support.
Please fax the Registration form to Matrox at (514) 685-2853, or mail it to:
Matrox Video Products Group
Matrox Electronic Systems Ltd.
DigiSuite End-User Technical Support
1055 St. Regis Blvd.
Dorval, Quebec
Canada H9P 2T4
Hardware Warranty
Matrox DigiSuite hardware products are warranted against factory defects for a period of one (1) year from the
date of purchase. Matrox will repair or replace, at the choice of Matrox, products which prove to be defective
duringthewarrantyperiod,providedthat theyarereturnedtoMatroxElectronicSystems,Ltd.Nootherwarranty
is expressed or implied. Matrox is not responsible for consequential damages.
Matrox shall not be liable under this warranty for (i) the goods that the buyer alleges are defective and have
been repaired or altered by someone other than Matrox designated personnel or an authorized representative,
unless such repair or alteration was affected pursuant to prior written approval from Matrox Electronic Systems,
Ltd., or (ii) where the buyer fails to notify Matrox Electronic Systems, Ltd. of any alleged defects within the
period of warranty, or (iii) where the buyer fails to return the defective items to Matrox Electronic Systems, Ltd.
freight prepaid, or (iv) where equipment has been altered or damaged in such a way that Matrox Electronic
Systems, Ltd. reasonably determines to affect the performance or reliability, or where the equipment has been
subject to misuse, neglect, or accident.
This warranty is in lieu of any other warranty, whether expressed, implied or statutory, including but not limited
to any warranty for design, merchantability or fitness for a particular purpose, and any warranty arising from a
course of dealing, usage, trade practice, proposal, specifications, or sample. Matrox Electronic Systems, Ltd.
neither assumes nor authorizes any person to assume for it any other liability.
Procedure for Returning Goods
Noreturnedgoods,forservice or otherwise, will be acceptedwithout prior authorization from Matrox Electronic
Systems, Ltd. To obtain return authorization contactMatrox Video Products Group DigiSuite TechnicalSupport
(see page 65). Once approved, Matrox will contact you with yourReturned Merchandise Authorization (RMA)
number. Matrox cannot be responsible for units returned without an RMA number. Matrox will advise you of
the shipping address. The packaging must indicate the RMA number on the outside. It is strongly recommended
that a copy of the original packing slip which states the serial number of the items you’re returning be included
with the returned merchandise. This will speed up processing.
Each individual, returned unit or group of units MUST have an RMA number issued by Matrox. Matrox must
authorize the number of units grouped under one RMA number. Any units received without prior approval by
Matrox will be returned to you freight collect.
The Customer will incur the cost ofconsolidatedfreight(one wayonly) forWarranty unitsfrom the Customer’s
location to the location designated by Matrox. Once repaired,Matrox will incur the cost of consolidated freight
for warranty units to the Customer’s location.
iii
Table of Contents
Table of Contents
Chapter 1
Introducing DigiSuite ............................................................................ 1
DigiSuite – digital audio/video building blocks ................................... 2
DigiSuite hardware components........................................................3
DigiMix.........................................................................................3
DigiMotion.................................................................................... 3
DigiVid ......................................................................................... 3
Marvel Millennium........................................................................3
Movie-2 bus .................................................................................3
Third-party hardware components .....................................................3
DigiLinx........................................................................................ 3
Genie ...........................................................................................3
DigiSuite system requirements ..........................................................4
DigiSuite documentation....................................................................4
An overall installation manual ......................................................4
Individual installation reference manuals ..................................... 4
A software guide .......................................................................... 4
Important, last-minute information................................................ 5
PDF documents on CD-ROM.......................................................5
About this manual..............................................................................5
Style conventions.........................................................................6
Chapter 2
Installing the DigiSuite Hardware......................................................... 7
Important! – special installation instructions.......................................8
Multiple card sets.........................................................................8
Adding or removing hardware......................................................8
Installation overview ..........................................................................8
Before you begin................................................................................9
Avoid costly damage....................................................................9
Make sure your computer is compatible..................................... 10
Choose the best installation position ............................................... 10
Identify your expansion slots............................................................ 11

iv
Table of Contents
Use the PCI retainer brackets.......................................................... 12
Install non-DigiSuite cards first!....................................................... 12
Determine your DigiSuite card set order.......................................... 13
Single card sets......................................................................... 13
Two card sets sharing a single Movie-2 bus .............................. 13
Single card sets......................................................................... 14
Two card sets sharing a single Movie-2 bus .............................. 18
Take care of your Movie-2 bus—Important!..................................... 20
Install your DigiSuite cards.............................................................. 21
Configure your system BIOS settings.............................................. 23
Chapter 3
Installing the DigiSuite Software........................................................ 25
What does DigiUtils Setup install?................................................... 26
Before you begin ............................................................................. 27
Check for compatible versions of Windows NT.......................... 27
Check amount of free disk space............................................... 27
Set Administration permission level ........................................... 27
Connect your VTR for device control ......................................... 28
Running DigiUtils Setup................................................................... 28
Step-by-step installation instructions.......................................... 28
Installing the DigiSuite VFW drivers in Windows NT........................ 29
Windows NT 4.0 installation....................................................... 29
Windows NT 3.51 installation..................................................... 29
Installing Video Clipboard for DigiMix.............................................. 30
Installing the Marvel Millennium drivers........................................... 31
Running Marvel Millennium Setup.............................................. 31
Uninstalling DigiUtils........................................................................ 32
Changing your DigiSuite hardware .................................................. 32
Chapter 4
Configuring Your DigiSuite Cards and VTR Settings ....................... 33
Using the DigiSuite Configuration program...................................... 34
Making permanent or temporary settings................................... 35
Changing default proc amp or audio gain settings..................... 35
Selecting your genlock source......................................................... 36
Genlock options for DigiMix ....................................................... 36

v
Table of Contents
Genlock options for DigiLinx ...................................................... 37
Genlock options for DigiVid........................................................ 37
Configuring DigiMix.......................................................................... 38
Configuring the video input signal.............................................. 38
Configuring the video and key output signals............................. 40
Displaying DigiMix information................................................... 42
Configuring DigiLinx......................................................................... 43
Configuring Input 3..................................................................... 43
Configuring the output signals.................................................... 44
Displaying DigiLinx information.................................................. 45
Configuring DigiMotion .................................................................... 46
Configuring the audio input pairs................................................ 46
Configuring the audio output pairs ............................................. 47
Selecting your A/V drive type..................................................... 48
Configuring your VTR settings......................................................... 49
Appendix A
Special Installation Instructions......................................................... 51
Special situations............................................................................. 52
What’s a card set?........................................................................... 52
How DigiSuite software looks at your system .................................. 53
Installing more than one card set in a system.................................. 53
Installing two card sets that share one Movie-2 bus................... 54
Changing an existing card set.......................................................... 54
If you have only one card set..................................................... 54
If you have more than one card set............................................ 55
Removing an entire card set............................................................ 55
Appendix B
Ensuring Adequate Ventilation for Your DigiSuite Cards ................ 57
Possible heat buildup problems....................................................... 58
Recommendations........................................................................... 58
Appendix C
DigiSuite Glossary............................................................................... 61

Chapter1
Introducing DigiSuite
This chapter presents an overview of Matrox DigiSuite
and explains the contents of this manual.

2
Chapter 1: Introducing DigiSuite
DigiSuite – digital audio/video building blocks
Matrox DigiSuite provides a solid foundation of digital video hardware
and software components. These can be combined to form various state-
of-the-art audio/video systems such as nonlinear editing suites, digital
mediapost-productionworkstations,livevideoswitchers,mediaservers,
and digital animation recorders.
Key features
DigiSuiteoffersyoutheadvantageofcutting-edgeperformancewithkey
features such as the following:
q
True ITU-R 601, D1 video quality with 10-bit processing.
q
NTSC and PAL.
q
The high performance of a PCI bus system.
q
Cost-effective, highly integrated, modular design.
q
Open-architecture, Movie-2 bus expandability.
q
Microsoft ActiveMovie software interface.
q
Matrox ActiveMovie extensions.
q
Matrox engineering support.
The Movie-2 bus
By using an over-the-top expansion bus for high-speed, audio/videodata
transfer, DigiSuite systems free up the host system bus for other tasks,
thus offering you much more power.
Because of DigiSuite’s modular design, your Matrox dealer can design
a system tailored to your specific needs.
Movie-2 bus for high-speed, audio/video data transfer between cards
Host bus (PCI, EISA, ISA...) for regular system data transfer
Card
#1
Card
#3
Card
#2

3
DigiSuite hardware components
Matrox is constantly developing new and powerful additions to the
DigiSuite line. The following are some of the core DigiSuite
components:
DigiMix
Video/graphics mixer with powerful 2D effects capabilities.
DigiMotion
Hybrid component featuring two Motion-JPEG codec modules, a digital
audio mixer, and an onboard Fast-20 Ultra-Wide SCSI controller.
DigiVid
Multichannel analog video input/output and Quad RS-422 ISA-bus
controller.
Marvel Millennium
Video-in-a-window console display.
Movie-2 bus
Over-the-top, digital audio/video expansion bus.
Third-party hardware components
In addition to our own DigiSuite components, leading video equipment
vendors are offering powerful DigiSuite components such as the
following:
DigiLinx
Multichannel serial digital (SDI) input/output by Miranda Technologies
Inc.
Genie
Digital video 3D effects card by Pinnacle Systems Inc.

4
Chapter 1: Introducing DigiSuite
DigiSuite system requirements
Note Thefollowingrecommendationsprovide goodperformance when
using DigiSuite hardware and software in most situations. Since some
software packages may have additional or different requirements, you
should always consult the software company and/or your Matrox dealer.
DigiSuite components require a computer with the following minimum
computer system configuration:
q
An Intel Pentium CPU, 166 MHz or higher.
q
64 MB or more of physical RAM.
q
Windows NT operating system:
– version 4.0 (Service Pack 2 is recommended), or
– version 3.51 with Service Pack 5.
DigiSuite documentation
Since our DigiSuite audio/video products are modular, we've provided
modular documentation as well.
An overall installation manual
The DigiSuite Installation Manual provides necessary information for
installing all the individual components to assemble a state-of-the-art
audio/video system tailored to your specific needs.
Individual installation reference manuals
Eachindividualcardhasitsowninstallationreferencemanualcontaining
important information specific to its installation, configuration and
troubleshooting.
A software guide
The Getting the Most from DigiSuitemanualexplains howto use the free
software included with DigiSuite so that you can take full advantage of
your system’s powerful features.

5
About this manual
Important, last-minute information
Any important information that wasn’t available for inclusion in the
manual at print time is provided to you in one or more of the following
ways:
q
The readme.1st file in the DigiUtils/Docs directory on the DigiSuite
CD-ROM.
q
Other essential information provided in a readme file installed with
the software in the Matrox DigiSuite Utilities folder.
q
Printed Release Notes packaged with the manuals (if required).
PDF documents on CD-ROM
The DigiSuite manuals are also available as Portable Document Format
(PDF) files in the DigiUtils/Docs directory on the DigiSuite CD-ROM.
You can view these documents using Adobe Acrobat Reader version 3.0
or later. To install the Acrobat Reader, run Windows NT Explorer or File
Manager,go to the AcrobatReader directory on the DigiSuite CD-ROM,
then double-click the ar32e30.exe file.
About this manual
This manual contains instructions for DigiSuite hardware and software
installation and configuration.
q
Chapter 1, “Introducing DigiSuite,” presents an overview of Matrox
DigiSuite and explains the contents of this manual.
q
Chapter 2, “Installing the DigiSuite Hardware,” provides you with
instructions for installing the DigiSuite cards and related
Movie-2 bus connector.
q
Chapter 3, “Installing the DigiSuite Software,” explains how to install
the drivers required to use your cards, and optional software that’s
provided with DigiSuite.
q
Chapter 4, “Configuring Your DigiSuite Cards and VTR Settings,”
explains how to configure your DigiSuite cardstomeet specificinput
and output requirements, as well as configure your VTR for device
control with DigiTools.
q
AppendixA,“SpecialInstallationInstructions,” explains howtoinstall
multiple DigiSuite card sets or change your hardware installation by
adding or removing cards.

6
Chapter 1: Introducing DigiSuite
q
Appendix B, “Ensuring Adequate Ventilation for Your DigiSuite
Cards,” provides suggestions for improving the air flow in your
computer system and thus avoiding problems related to heat buildup.
q
Appendix C, “DigiSuite Glossary,” serves as a reference for the
terminology used in the various DigiSuite manuals.
q
Appendix D, “DigiSuite Technical Support,” lets you know how to
contact us for technical support.
Style conventions
The following style conventions are used in this manual:
q
The names of files, directory paths, and manuals appear in italics.
For example:
– The data is stored in the sample.wav file.
– The file is located in your C:\Windows\System directory.
– Please refer to your DigiSuite Installation Manual.
q
Menus and commands that you need to choose are displayed in the
form Menu | Command. For example, File | Save means click File
in the menu bar, then click Save in the menu that appears.
q
The names of keys are displayed in small capital bold letters, such
as the CTRL key.
q
Aplus(+)signisusedtoindicatecombinationsofkeysand/ormouse
operations. For example:
–CTRL+C means to hold down the CTRL key while pressing the C
key.
–SHIFT+click means to hold down the SHIFT key while you click
an item with the mouse.

Chapter2
Installing the DigiSuite Hardware
This chapter provides you with instructions for installing
the DigiSuite cards and related Movie-2 bus connector.

8
Chapter 2: Installing the DigiSuite Hardware
Important! – special installation instructions
This chapter gives you detailed instructions on installing your DigiSuite
hardware in your computer system. The next chapter explains software
installation procedures.
Important When installing multiple DigiSuite card sets or adding-
removing cards to your present DigiSuite system, there are specific steps
that must be carried out in the proper order. Because these combineboth
hardware and software installation procedures, you’ll find descriptions
of the proper installation sequence in Appendix A, “Special Installation
Instructions,” on page 51. You should read the information if your
situation fits one of the following categories.
Multiple card sets
It’s possible to install more than one DigiSuite card set in a single
computer system. A card set is considered to be one or more DigiSuite
cards recognized as a single functional unit by DigiSuite software. See
“Installing more than one card set in a system” on page 53.
Adding or removing hardware
If you already have DigiSuite cards installed in your system and are
addingorremovingcards,youmust carry outtheproceduresina specific
order. For detailed instructions, see “Changing an existing card set” on
page 54.
Installation overview
The following steps summarize the installation of DigiSuite cards and
the appropriate Movie-2 bus. This is simply to give you an overview.
Please do not attempt to install any of the components without reading
thedetailed instructions thatfollow.Failure todo so may result in broken
parts and/or system malfunctions. Do it right the first time!
1. Prepare your computer and cards for installation.
2. Open your computer and identify the expansion slots in which you'll
install your DigiSuite cards.
3. Carefully assemble the cards and Movie-2 bus connector as a unit
outside of your computer.
4. Insert the assembled unit in your computer.
5. Close your computer's cover, proceed to configure your system for
the new components, and install the software.

9
Before you begin
Before you begin
Read the following information carefully before attempting to install
DigiSuite cards in your computer system.
Avoid costly damage
Static electricity from your body can damage your DigiSuite cards or
your computer. Although you may not notice it, static electricity is
generated everytime you move. It’s often too small to cause a spark, but
it can still cause damage to sensitive electronic components or at least
reduce their lifespan.
Toavoiddamagetoyourcomputer,pleasereadthefollowingprecautions
before opening it:
q
Do not remove your DigiSuite cards from their antistatic bags until
you are ready to install them. Before removing the cards, place the
packages within easy reach of the area where you intend to perform
the installation.
q
Try to work in an area where the relative humidity is at least 50%.
q
Do not wear wool or polyester clothing. These fabrics tend to
generate more static electricity than cotton, which is best for this
kind of work.
q
Turn off the power switches on your computer and its peripherals.
q
Once you have opened your computer, drain static electricity from
your body by touching a gray metal part on your computer chassis
before you install or remove any parts of your system. If you have a
grounding wrist strap, use it while handling and installing any
components in your computer.
STATIC DISCHARGE
CAUTION

10
Chapter 2: Installing the DigiSuite Hardware
Make sure your computer is compatible
To make sure that your computer is compatible with the DigiSuite cards
you’ll be installing, refer to the Matrox DigiSuite Compatibility List.
To obtain this list, visit our Web site at:
http://www.matrox.com/video.
You can also call Matrox Video Products Group Sales at:
U.S. and Canada: 800-361-4093
Worldwide: (514) 685-2630 ext. 2636
Choose the best installation position
It's much easier to install DigiSuite components if you do so vertically
from above. For typical desktop systems, this is easy because access to
theexpansionslotsin such systems isfrom the top. If, however,youhave
a tower-type system, it's best to place the computer on its right side (as
viewed from the front). This provides you with vertical access to the
expansion slots, as illustrated in the following diagram:
Place tower on
its side
Install components
vertically
12

11
Identify your expansion slots
AllDigiSuitecardsareinstalledinyourcomputer’sexpansionslots.Most
PCI-bus computers currently manufactured have a combination of PCI
slots and, for example, ISA slots. Usually, the PCI slots are made with a
plastic of a contrasting color (generally white) and are shorter than the
ISA slots in your system.
While some computer motherboards have numbered slots, these do not
follow any standard industry convention. For example, one computer
may have 3 PCI slots and 4 ISA, whereas another may have 4 PCI slots
and 3 ISA slots, and so on.
With this in mind, we’ve developed a numbering scheme for identifying
each slot position. Since all PCI-based systems have two types of slots,
there is always one PCI slot bordering the other type (usually ISA). We
start counting outwards from this “border” in each direction for each
type.
In the following diagram, there are three PCI slots referred to as P1, P2,
and P3. There are also four ISA slots, I1 to I4.
It's important to note that the two “border slots”—those that are next to
the other type—are considered “shared” slots. As such, onlyone of the
two may be used at a time. For the sake of consistency, all DigiSuite
systems will use slot P1, the first PCI slot from the center. Thus, the first
ISA slot, I1, is unusable in DigiSuite systems.
In “Determine your DigiSuite card set order” on page 13, you’ll find
diagrams showing suggested card placement in your computer system.
Please pay careful attention to the slot positions recommended for each
card in the combination you'll be installing.
Slot I2
Slot I1 (unusable)
Slot I3
Slot I4
PCI Slots
ISA Slots
Slot P2
Slot P3
Slot P1
Back of computer

12
Chapter 2: Installing the DigiSuite Hardware
Use the PCI retainer brackets
Almost all computers contain cardguides at the front end of the computer
chassis. These help to stabilize cards. Since PCI cards are neither long
enough nor correctly centered to usethese guides, some of the PCI-based
DigiSuite cards are equipped with a PCI retainer bracket. The following
diagram depicts the retainer bracket’s use:
Install non-DigiSuite cards first!
It’s important to install any non-DigiSuite cards in your system before
installing your DigiSuitecards. Ifyoudon’t doso,yourDigiSuitesystem
may not work properly.
In addition, try to leave empty slots between your DigiSuite card sets
and non-DigiSuite cards if it’s possible. This will permit additional air
flow between cards. For more details, see Appendix B, “Ensuring
Adequate Ventilation for Your DigiSuite Cards,” on page 57.
DigiSuite card’s
module board
DigiSuite card’s
base board
ISA card guide
PCI retainer
bracket
Table of contents
Other Matrox Computer Hardware manuals

Matrox
Matrox RT.X100 Xtreme User manual

Matrox
Matrox Solios eV-CL Assembly Instructions

Matrox
Matrox Axio User manual

Matrox
Matrox Rainbow Runner Operation manual

Matrox
Matrox ATC RG-200DL User manual

Matrox
Matrox RadientPro CL Assembly Instructions

Matrox
Matrox Mojito MAX User manual

Matrox
Matrox VS4 User manual

Matrox
Matrox DigiSuite DigiMix Installation and operating manual

Matrox
Matrox Extio Series User manual