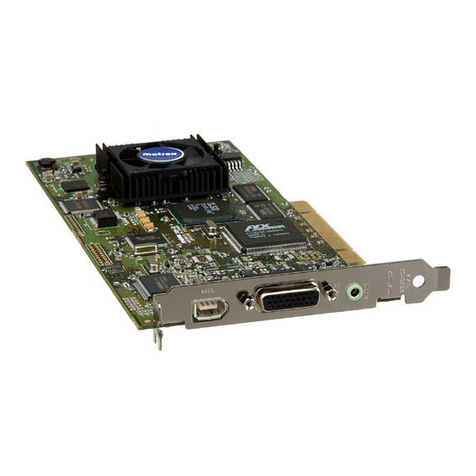
Matrox RT.X2 User manual

Matrox
RT.X2
Quick Installation Guide
March 11, 2008
v
Y10977-101-0350
USO RESTRITO

Trademarks • Marques déposées • Warenzeichen • Marchi registrati • Marcas registradas
Matrox Electronic Systems Ltd........................................ Matrox
®
, Mx.tools™, RT.X2™
Adobe Systems Inc.......................................................... Adobe
®
, After Effects
®
, Photoshop
®
, Premiere
®
Microsoft Corporation...................................................... Microsoft
®
, Windows
®
PCI-SIG ........................................................................... PCI-SIG®, PCI Express®
•
(English) All other nationally andinternationally recognized trademarksand tradenames are hereby acknowledged. •(Français) Toutes
les autres marques et tous les autres noms déposés reconnus nationalement ou internationalement sont également reconnus par les
présentes. •(Deutsch) Allesonstigennational undinternational bekannten Warenzeichen und Produktnamen werdenhiermit anerkannt.
•
(Italiano) Eventuali altri nomi di prodotto menzionati inquesto manuale sono dei proprietà di rispettivi produttori. •(Español) Por medio
delpresentesereconocentodaslasdemásmarcasynombrescomercialesreconocidosanivelnacionaleinternacional.
Copyright © 2008 Matrox Electronic Systems Ltd. •(English) All rights reserved. •(Français) Tous
droitsréservés.•(Deutsch)AlleRechtevorbehalten.•(Italiano)Tuttiidirittiriservati.•(Español)
Reservados todos los derechos.
Disclaimer
MatroxElectronicSystemsLtd.reservestherighttomakechangesinspecificationsatanytimeandwithoutnotice.Thein-
formation provided by this document isbelieved tobe accurate and reliable. However, no responsibilityis assumedbyMatrox Electronic
SystemsLtd.foritsuse;norforanyinfringementsofpatentsorotherrightsofthirdpartiesresultingfromitsuse.Nolicenseisgranted
under any patents or patent rights of Matrox Electronic Systems Ltd.
Unauthorized recording or use of broadcast television programming, video tape, or other copyrighted material may violate copyright laws.
Matrox ElectronicSystemsLtd.assumesnoresponsibilityfortheillegalduplication,use,orother actsthatinfringe ontherightsofcopyright
owners.
MatroxElectronicSystemsLtd.
1055St.RegisBlvd.,Dorval,Quebec,Canada H9P2T4
Tel: (514) 685-2630 Fax: (514) 685-2853 WorldWideWeb:www.matrox.com
USO RESTRITO

Contents
About this guide........................................................................................
1
Installing your Matrox RT.X2 card ...........................................................
1
Connecting your external devices.................................................. 2
Connecting your RT.X2 breakout box .................................................................................... 2
Connecting your DVI video monitor....................................................................................... 4
DV-1394 connections ........................................................................................................... 5
Installing your Matrox RT.X2 software........................................... 6
Registration and customer support................................................ 6
Contacting us ...................................................................................................................... 6
USO RESTRITO

ii
Your notes
Contents
USO RESTRITO

1
About thisguide
This guide provides brief installation instructions for installing your Matrox
RT.X2 hardware and software. It is intended to help you quickly set up your
Matrox RT.X2 system. For detailed installation instructions, please refer to your
Matrox RT.X2 Installation Manual.
¦
Note
Throughout the Matrox RT.X2 documentation, the term “RT.X2” refers
toRT.X2,RT.X2LE,andRT.X2SD,unlessindicatedotherwise.
Installing your Matrox RT.X2 card
Before installing your Matrox RT.X2 card, drain static electricity from your body
by touching a bare metal surface on your computer chassis. If you have a
grounding wrist strap, use it while handling and installing any components in
your computer.
To determine the particular slot in which you should install your RT.X2 card for
recommended systems and motherboards, see the Matrox Video Support site at
www.matrox.com/video/support.
°
ToinstallyourRT.X2card:
1
Turn off your computer, unplug it, and then remove its cover.
2
Remove the metal plate located at the back of the PCI Express slot you’ll be
using for your RT.X2 card. Save the screw for the mounting bracket.
3
Position your RT.X2 card over the chosen slot and push the card infirmly
and evenly until it is fully seated in the slot.
4
Using the fasten screw you removed in step 2, secure your RT.X2 card to the
computer frame.
5
Connect the male end of the internal power supply cable on your RT.X2 card
to a free power outlet of your computer’s internal power supply (not
applicable to RT.X2 LE or RT.X2 SD).
¡
Important
Makesurethatnootherdevicesaresharingthispoweroutlet.
6
Replace your computer’s cover.
About this guide
USO RESTRITO

2
7
Using the two small screws provided with your RT.X2 card, secure the
RT.X2 bracket to the computer frame as shown below. This step is crucial in
making your RT.X2 card FCC compliant.
Make sure the screw head
overlaps the computer frame
RT.X2 card
Computer frame
Thisconnectorisnotavailableon
RT.X2 LE or RT.X2 SD
Connecting your external devices
Before restarting your computer, you must connect your external devices such as
your Matrox RT.X2 breakout box, DVI monitor, VTRs, and DVcamcorder.
Connecting your RT.X2 breakout box
1
Connect the RT.X2 video cable from the back of the RT.X2 breakout box to
the VIDEO connector on your installed RT.X2 card. Tighten the thumb
screws until snug to ensure a stable connection.
²C
a
u
t
i
o
n
Use extra care when attaching the video cable as bent pins can
cause your Matrox RT.X2 system to not perform properly. Also, do not bend
the cable too sharply. Excessive bending or flexing can damage internal,
shielded wires.
2
Plug the blue and green audio connectors (labeled TO AUDIO CARD IN
and TO AUDIO CARD OUT) into the corresponding colored jacks on your
sound card. If your computer speakers are connected to your sound card,
unplug them from your sound card, then proceed to the next step.
3
To connect your computer speakers, simply plug the connector into the
RT.X2 socket labeled AUDIO.
4
Connect the 1394 cable from the back of the RT.X2 breakout box to the 1394
port on your computer.
The following illustration shows the TO AUDIO CARD IN cable connected to
the LINE IN of the sound card. However, you can also connect the cable to
another input of your sound card, for example, AUX IN. Regardless of the input
to which you’ve connected the TO AUDIO CARD IN cable, you must specify
your analog audio input when defining your capture settings in order to capture
analog audio. For information on defining your capture settings, see your Matrox
RT.X2 User Guide.
Connecting your external devices
USO RESTRITO

3
Connecting your external devices
Th
is
con
n
e
c
t
o
r
is
n
o
t
av
ailabl
e
on
R
T
.X
2
L
E
o
r
R
T
.
X
2
S
D
O
n
bo
ar
d
s
o
un
d
c
a
r
d
and
1394
TO
AUD
I
O
CAR
D
IN
TO
AUD
I
O
CAR
D
OU
T
R
T
.
X
2
ca
rd
br
ack
e
t
To
c
omp
ut
er
s
p
e
a
k
er
s
(c
ab
l
e
no
t
s
u
ppli
e
d
)
R
T
.
X
2
br
e
a
k
o
ut
bo
x
USO RESTRITO

4
Connecting your DVI video monitor
¦
Note
RT.X2LEandRT.X2SDdonothaveaDVIconnectorforconnectinga
DVI video monitor.
In order to preview the video output from your Matrox RT.X2 system, the Matrox
RT.X2 card has a DVI connector that’s used to connect a DVI monitor that
accepts digital input, such as a digital flat-panel LCDmonitor.
¡
Important
OnlyDVImonitorsthatacceptdigitalinputaresupported.In
ordertopreviewfull-resolutionHDVvideo,yourDVImonitormustsupport
adisplayresolutionofatleast1920×1200.
°
ToconnectaDVIvideomonitor:
1
Connect the DVI cable to your monitor following themanufacturer’s
instructions for your monitor. Some monitors may have the DVIcable
permanently attached to the back of the monitor.
2
Connect the other end of the DVI cable to the DVI connector onyour
installed RT.X2 card.
DVI video monitor
DVI cable
(not supplied)
RT.X2 card
bracket
Connecting your external devices
USO RESTRITO

5
DV-1394 connections
The following illustration shows how to connect your DV-1394 device toyour
Matrox RT.X2 system. For other typical connections, see your MatroxRT.X2
Installation Manual.
To RT.X2 card
DVI monitor
Computer speakers
To DVIconnector
on RT.X2 card
(not available on
RT.X2 LE/SD)
To AUDIO
connector on
RT.X2 card
Connecting your external devices
D
V
-
1394
d
e
vi
ce
USO RESTRITO

6
Installing your Matrox RT.X2 software
Once you’ve installed your Matrox RT.X2 hardware and properly connected your
devices, you can proceed with the software installation.
1
Turn on your computer.
2
Once Windows restarts, the “Found New Hardware Wizard” will appear for
each of your RT.X2 hardware components. Press
ESC
or click
Cancel
to
close the “Found New Hardware Wizard.”
¡
Important
Makesurethatyouclosethe“Found NewHardwareWizard”
eachtimeitappears.
3
Install Adobe Premiere Pro as explained in your Adobe documentation. You
must install Adobe Premiere Pro on an NTFS-formatted drive (usually your
system drive).
4
Install any programs for which a Matrox WYSIWYG plug-in issupported,
such as Adobe After Effects and Adobe Photoshop.
5
Insert your Matrox RT.X2 installation DVD in your DVD-ROM drive.
6
From the Matrox RT.X2 menu, choose
Install Matrox Mx.tools
and follow
the onscreen instructions.
For details on installing Matrox Mx.tools and other Matrox RT.X2 software,see
your Matrox RT.X2 Installation Manual.
Registration and customersupport
YoucanregisteryourMatroxRT.X2systemintheMatroxRT.X2Supportsection
ofourwebsiteatwww.matrox.com/video/support.Togodirectlytothe
registration page, choose
Start
>
All Programs
>
Matrox Mx.tools
>
Register Your Matrox RT.X Product
.
¡
Important
Onlyregisteredusersareentitledtocustomersupport,software
updates,accesstoouruserforums,andspecialpromotionaloffers.
Contactingus
Matrox is proud to offer worldwide customer support. Please use the Matrox
RT.X2 contact information for your area as provided on our website at
www.matrox.com/video/support.
Installing your Matrox RT.X2 software
USO RESTRITO

USO RESTRITO

www.matrox.com/video
Printed in Canada
USO RESTRITO
Other manuals for RT.X2
3
Table of contents
Other Matrox Computer Hardware manuals

Matrox
Matrox VS4 User manual

Matrox
Matrox RT.X100 Xtreme User manual

Matrox
Matrox Mojito MAX User manual

Matrox
Matrox Rainbow Runner Operation manual

Matrox
Matrox DigiSuite DigiMix Installation and operating manual

Matrox
Matrox RT.X2 User manual

Matrox
Matrox DigiSuite User manual

Matrox
Matrox M.Key/100 User manual

Matrox
Matrox TripleHead2Go Analog Edition User manual

Matrox
Matrox Solios eV-CL Assembly Instructions